

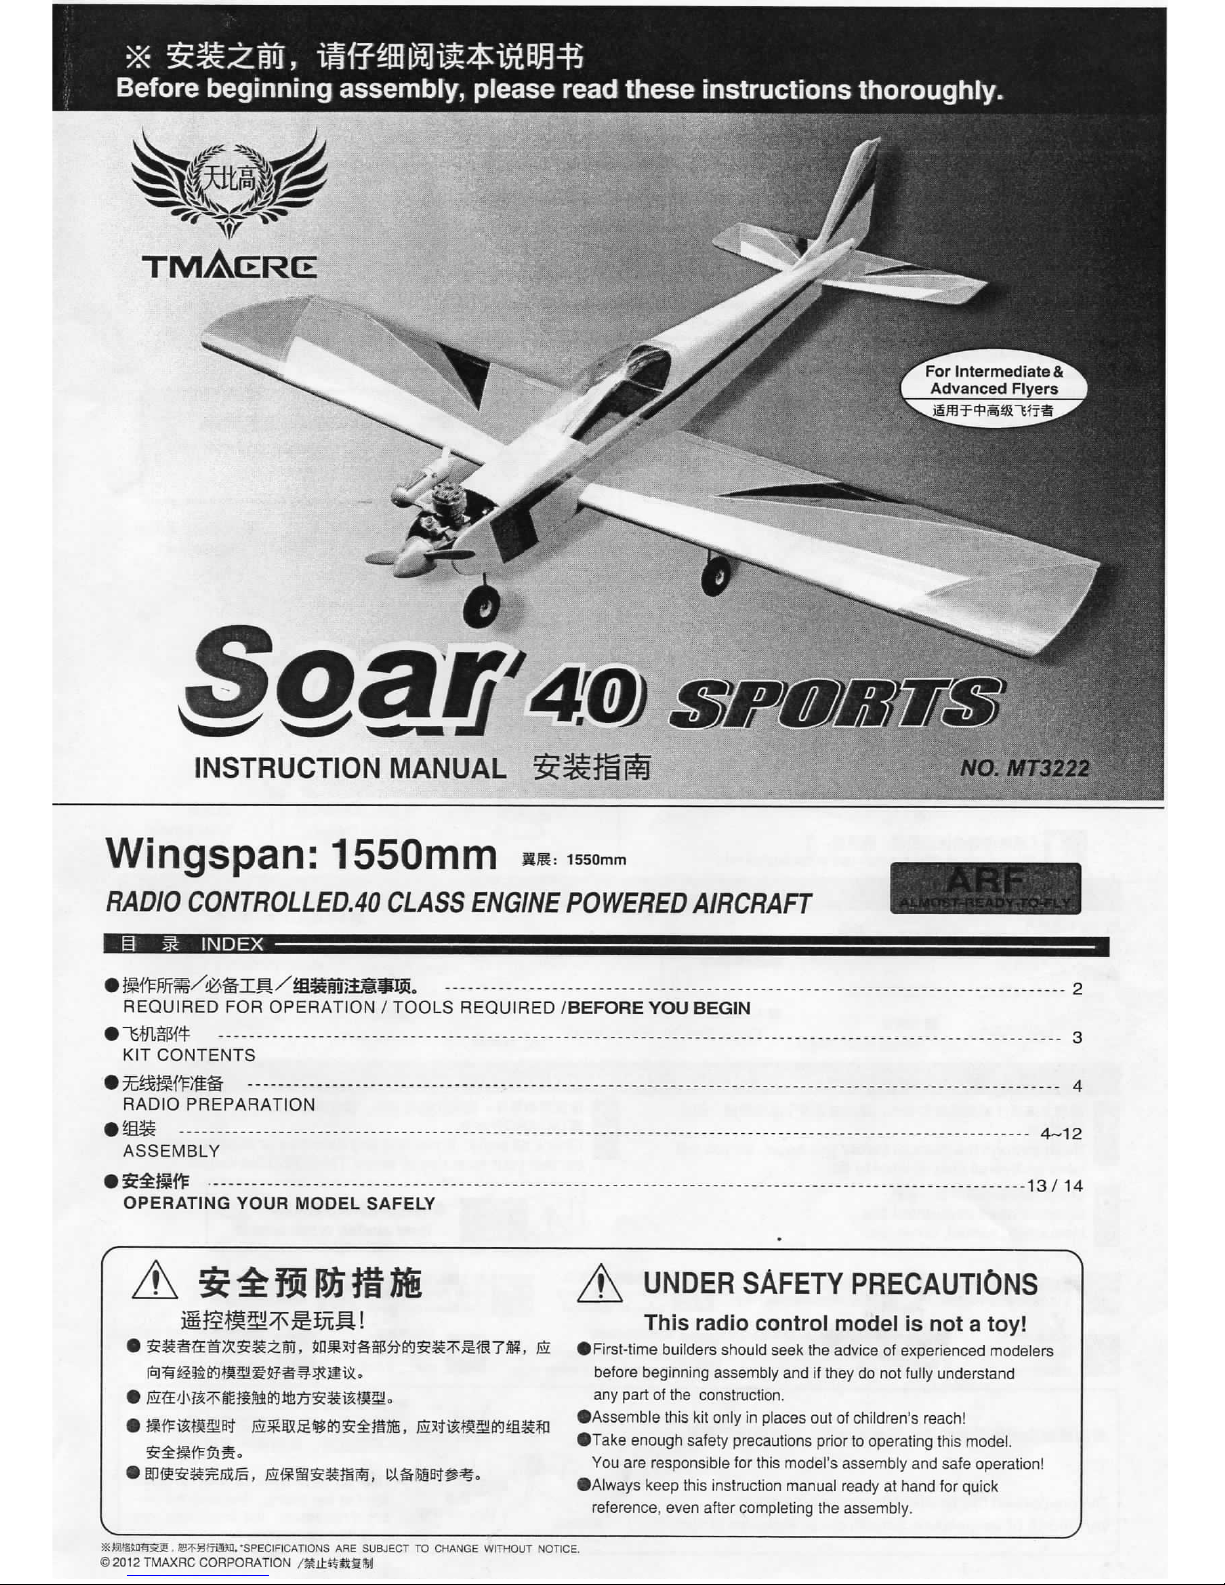
Tmax RC SOAR 40 SPORTS Instruction Manual
Before
beginning
assembly, please
read
these
instructions
thoroughly.
tmAcerg
303^40 SPORTS
INSTRUCTION
MANUAL £31
NO. MT3222
Wingspan:
1550mm
RADIO CONTROLLED AO CLASS ENGINE POWERED AIRCRAFT
HH
• wmm/toJM/mto&nL - 2
REQUIRED
FOR
OPERATION / TOOLS REQUIRED /BEFORE YOU
BEGIN
•
TSfllSBtt
- - 3
KIT
CONTENTS
mmmmm —- - 4
RADIO
PREPARATION
4-12
ASSEMBLY
•££ftft 13/14
OPERATING YOUR MODEL SAFELY
A UNDER SAFETY PRECAUTIONS
This
radio control model is not a toy!
• First-time builders should seek the advice of experienced modelers
before beginning assembly and if they do not fully understand
any
part of the construction.
•Assemble
this kit only in places out of children's reach!
•Take
enough safety precautions prior to operating this model.
You
are responsible for this model's
assembly
and safe operation!
•Always
keep this instruction manual ready at hand for quick
reference,
even after completing the assembly.
SKMS&Q'SSB , JS-t-^friifM.
"SPECIFICATIONS
ARE
SUBJECT
TO
CHANGE
WITHOUT
NOTICE.
©2012
TMAXRC CORPORATION
/^j±St*SSS'J
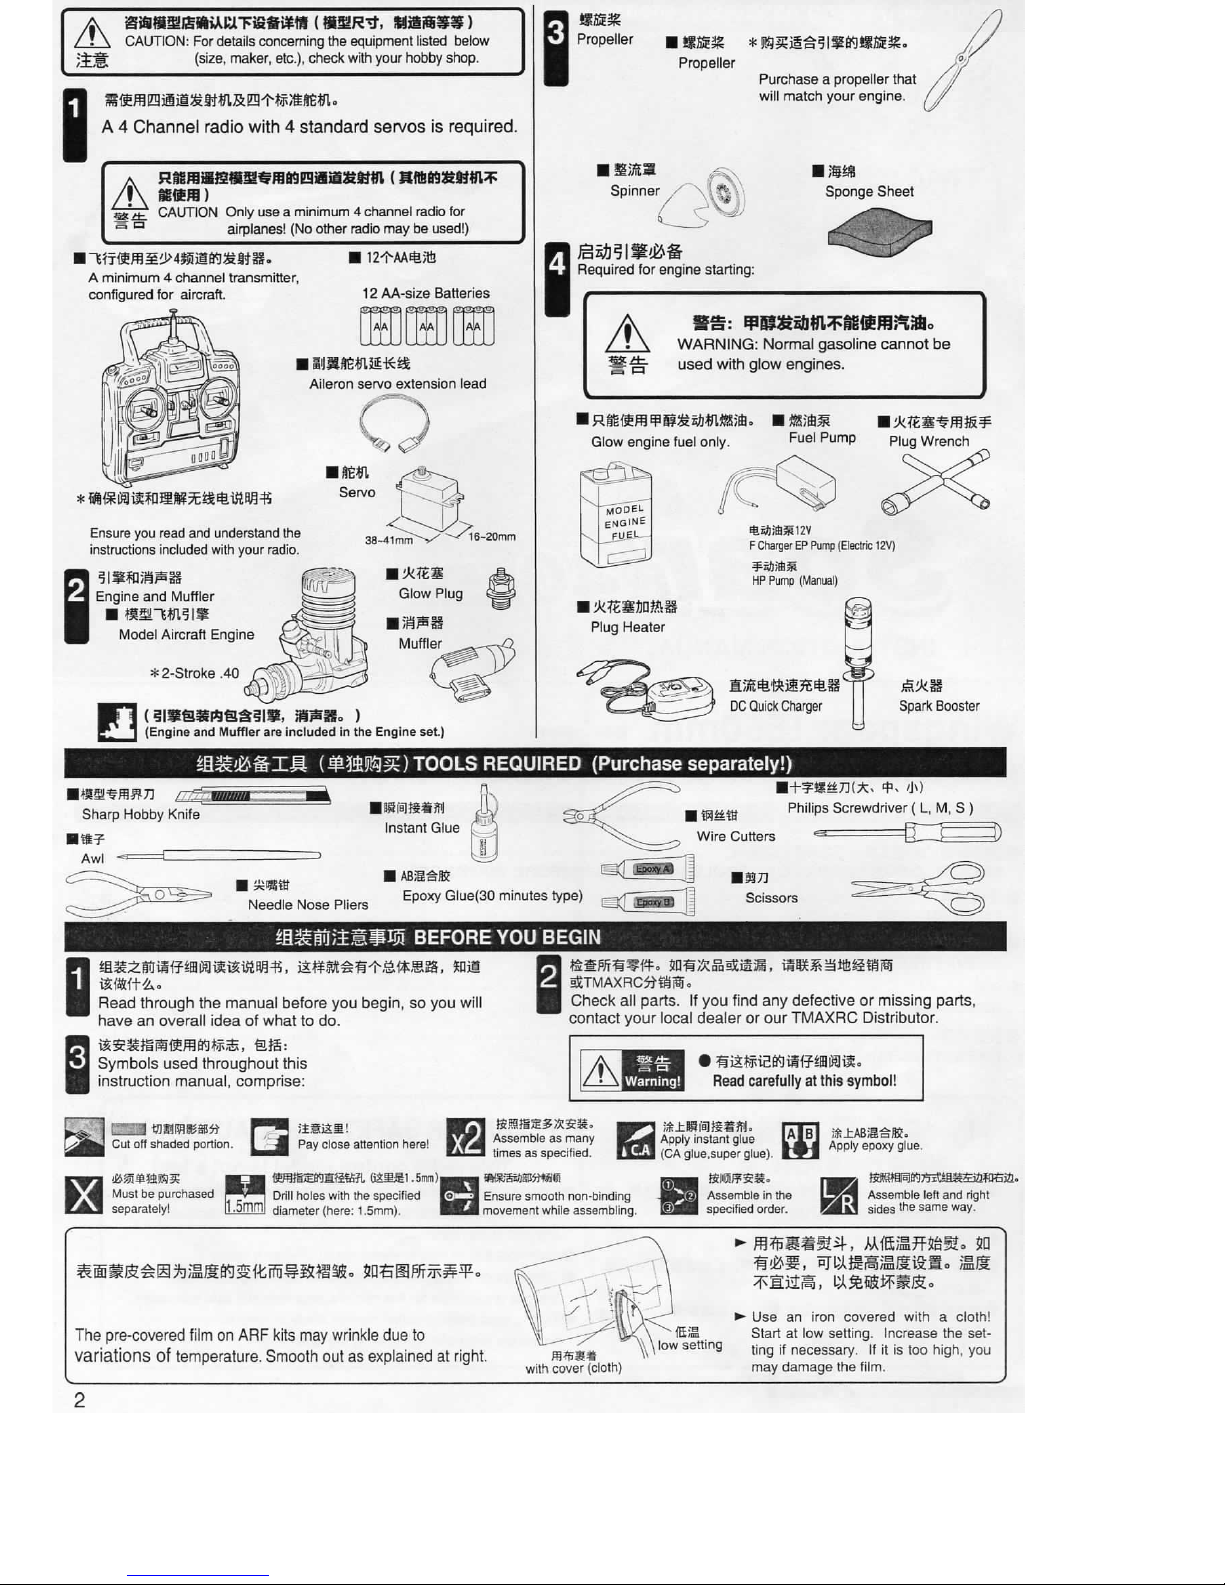
A
CAUTION:
For details concerning
the
equipment listed below
/£&
(s'ze-
maker>
etc.), check
with
your hobby shop.
I
A 4 Channel radio
with 4 standard servos
is
required.
MM)
- CAUTION Only use a minimum 4 channel radio
for
n airplanes! (No other radio may
be
used!)
A
minimum 4 channel transmitter,
configured
for
aircraft.
12^AA*}ft
12
AA-size
Batteries
AIA
Ft^FPl
ISiJJUK«lS-K»
Aileron servo extension lead
Ensure
you read and understand
the
instructions included
with
your radio.
Engine
and Muffler
Model
Aircraft Engine
E
* 2-Stroke
.40
(Engine and Muffler are included
in
the
Engine set.)
Propeller
I
Spinner
/
\lf|Y'
Required
for
engine starting:
imm%
*MSB$?im*ax,
Propeller
Purchase a propeller
that
will
match your engine.
Sponge
Sheet
WARNING:
Normal gasoline cannot be
§?rq used
with
glow engines.
Glow
engine fuel only.
Fuel
Pump
Plug
Wrench
f&srj;EB3s12V
F
Charger
EP
Pump (Electric 12V)
harass
HP
Pump (Manual)
Plug
Heater
L3
DC
Quick Charger
Spark
Booster
ii'iJfll
(^M^)
TOOLS
REQUIRED
(Purchase
separately!)
Sharp
Hobby Knife
It*?
Awl
I —
Needle
Nose Pliers
Read
through
the manual before you begin, so you
will
have an overall idea
of
what
to do.
Symbols used
throughout
this
instruction manual, comprise:
Instant
Glue
Epoxy
Glue(30 minutes type)
M
BEFORE YOU
BEGIN
2
Wire Cutters
Philips
Screwdriver
( L,
M,
S )
1157]
Scissors
femmmwft*
m^smat,
WRS^«iSffn
aStTMAXRC^fr^So
Check
all parts.
If
you
find
any defective or missing parts,
contact your local dealer or our
TMAXRC
Distributor.
=
a
Warning!
Read
carefully at
this
symbol!
Cut
off
shaded portion.
Pay
close attention here!
Assemble
as many
times as specified.
Must be purchased Drill holes
with
the specified
separately!
yjmmj
diameter (here:
1.5mm).
Ensure
smooth non-binding
movement while assembling.
Apply instant glue
(CA
glue,super glue).
Assemble
in the
specified order.
Apply epoxy glue.
Assemble
left
and
right
sides
'he same way.
The pre-covered
film
on
ARF
kits
may
wrinkle
due to
variations
of
temperature. Smooth out as explained at
right.
low setting
with
cover
(cloth)
m&m,
RrttaKaaiftH.
s/t
Use
an
iron covered
with a cloth!
Start
at
low
setting. Increase
the
set-
ting
if
necessary.
If it is
too
high,
you
may damage
the
film.
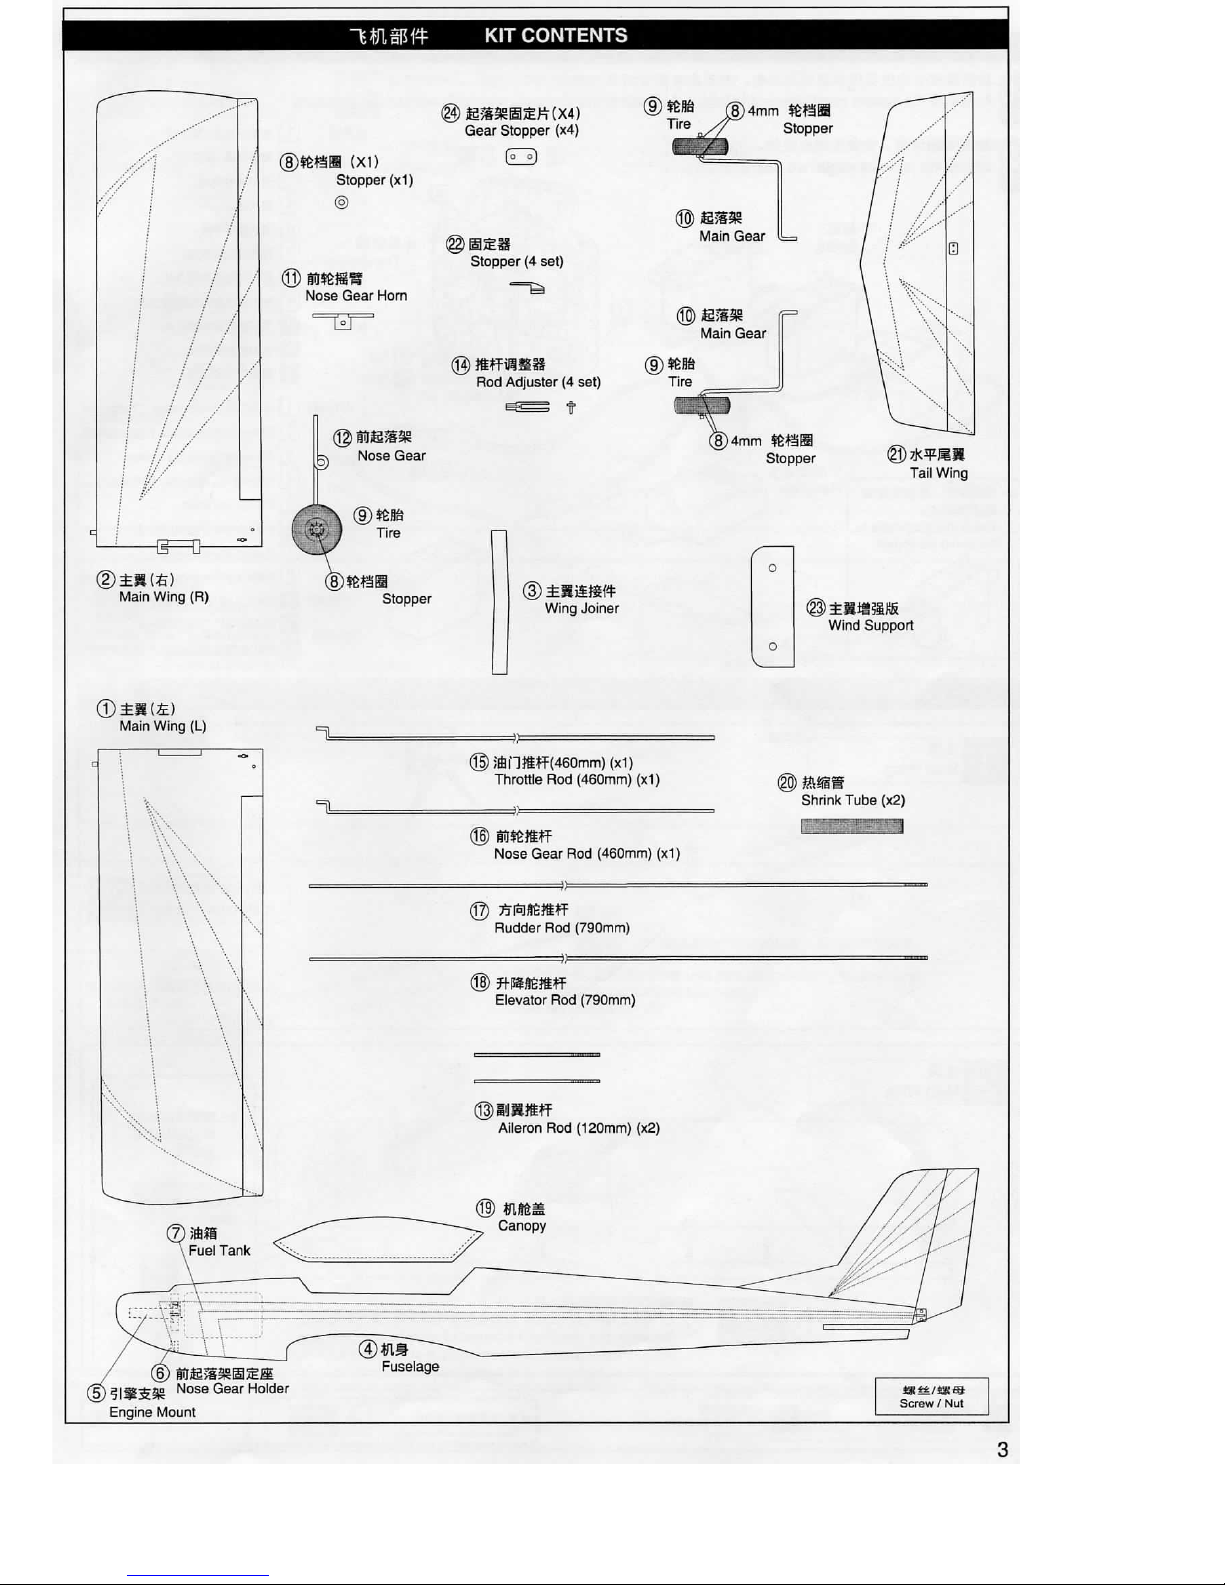
IflllW
KIT CONTENTS
(D±M(£)
Main
Wing
(L)
SbHJBff
(460mm) (x1)
Throttle Rod (460mm) (x1)
Nose
Gear
Rod (460mm) (x1J
Shrink Tube
(x2)
Rudder
Rod (790mm)
)) —
Elevator
Rod (790mm)
Aileron
Rod (120mm) (x2)
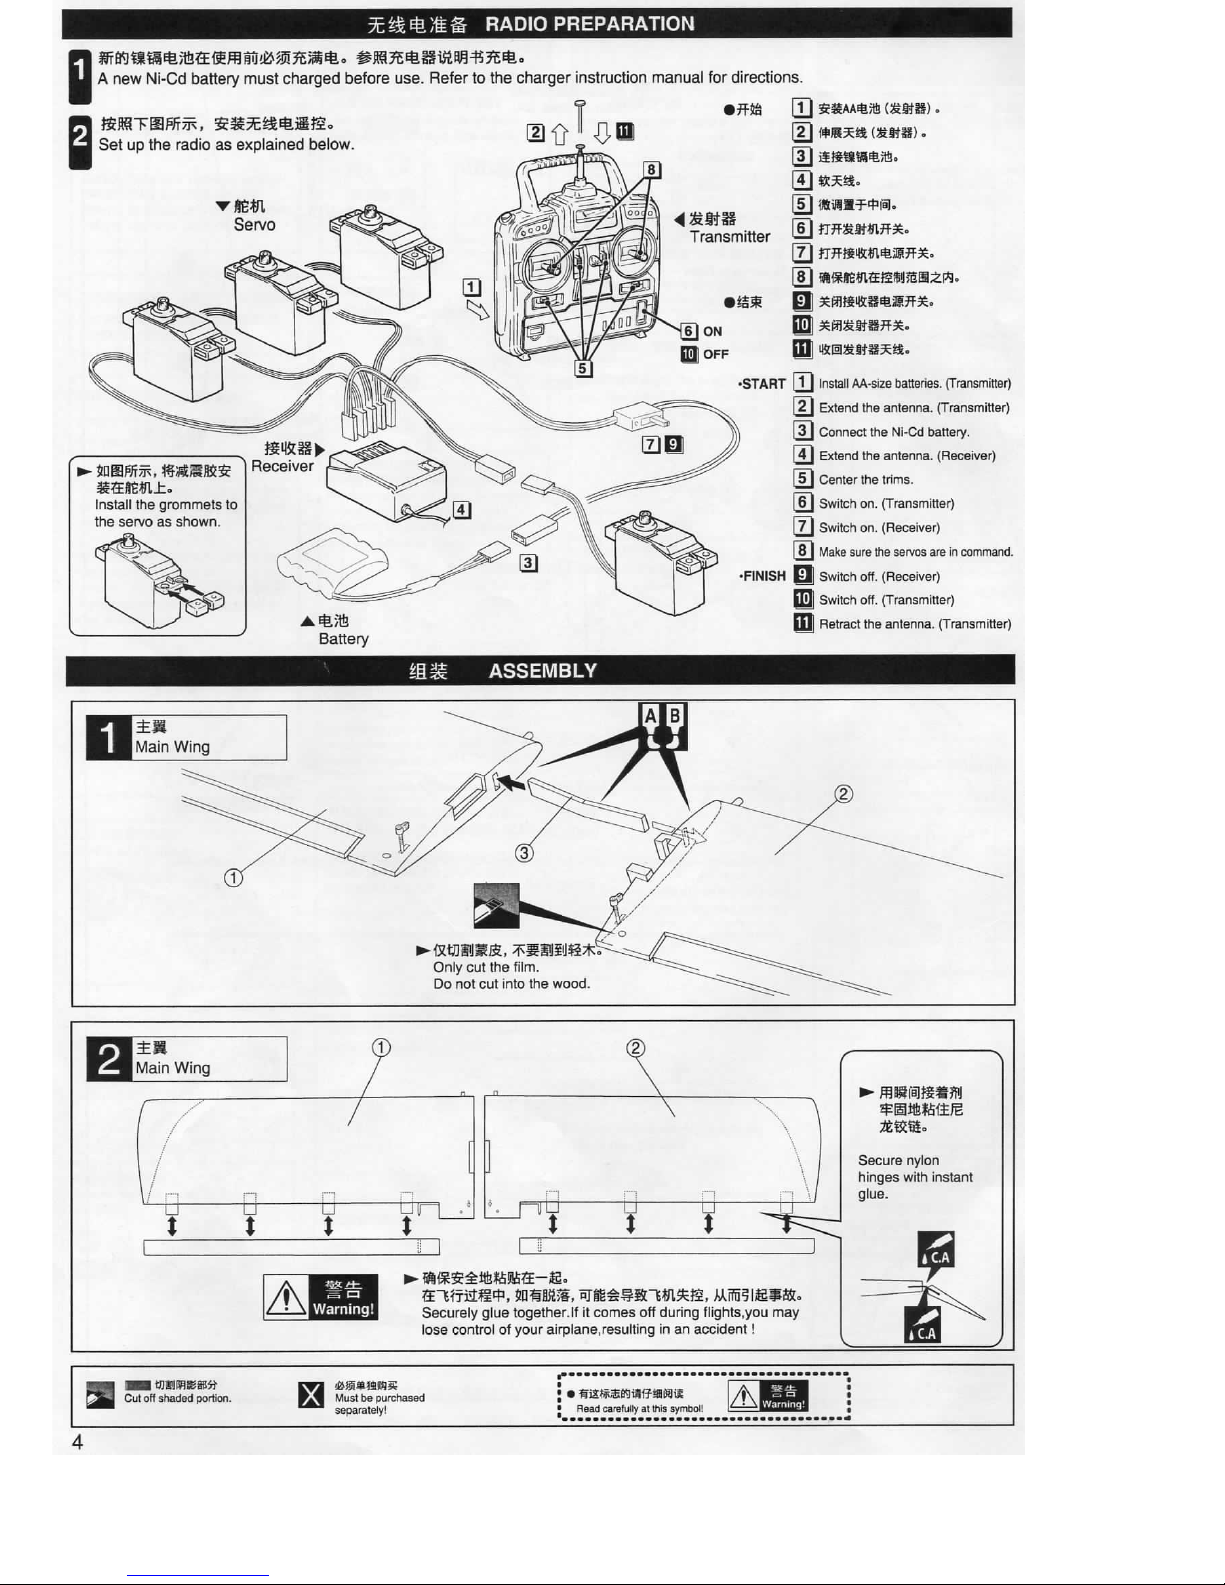
?c*£Ei;t§
RADIO
PREPARATION
A
new
Ni-Cd
battery must charged before use. Refer to the charger instruction manual for directions.
Set
up the radio as explained below.
Servo
[T)
$£AA«»
itmm.
[3]
[4] tt*».
[|]
isiia^f
ia]o
[6]
JTffiKIMW*.
[7] JTffSIWlifcaOT*.
Ed.
ED
«iii2satBxa.
START [jj Install
AA-size
batteries. (Transmitter)
[2l Extend the antenna. (Transmitter)
[31 Connect the
Ni-Cd
battery.
141 Extend the antenna. (Receiver)
[sl Center the trims.
[tH Switch on. (Transmitter)
[7] Switch on. (Receiver)
[81 Make sure the servos are in command.
FINISH
0j Switch off. (Receiver)
Ed! Switch off. (Transmitter)
•Q] Retract the antenna. (Transmitter)
ASSEMBLY
Only
cut the film.
Do
not cut
into
the wood.
Main
Wing
u u u
X
$ $
1 0 1
u
t
y
1
•
mmmmmm
Secure
nylon
hinges
with
instant
glue.
Warning!
Securely
glue together.lf it comes off during flights.you may
lose
control of your airplane,resulting in an accident!
Cut off
shaded
portion.
Must
be
purchased
separately!
Head
carefully
at
this
symbol!
4
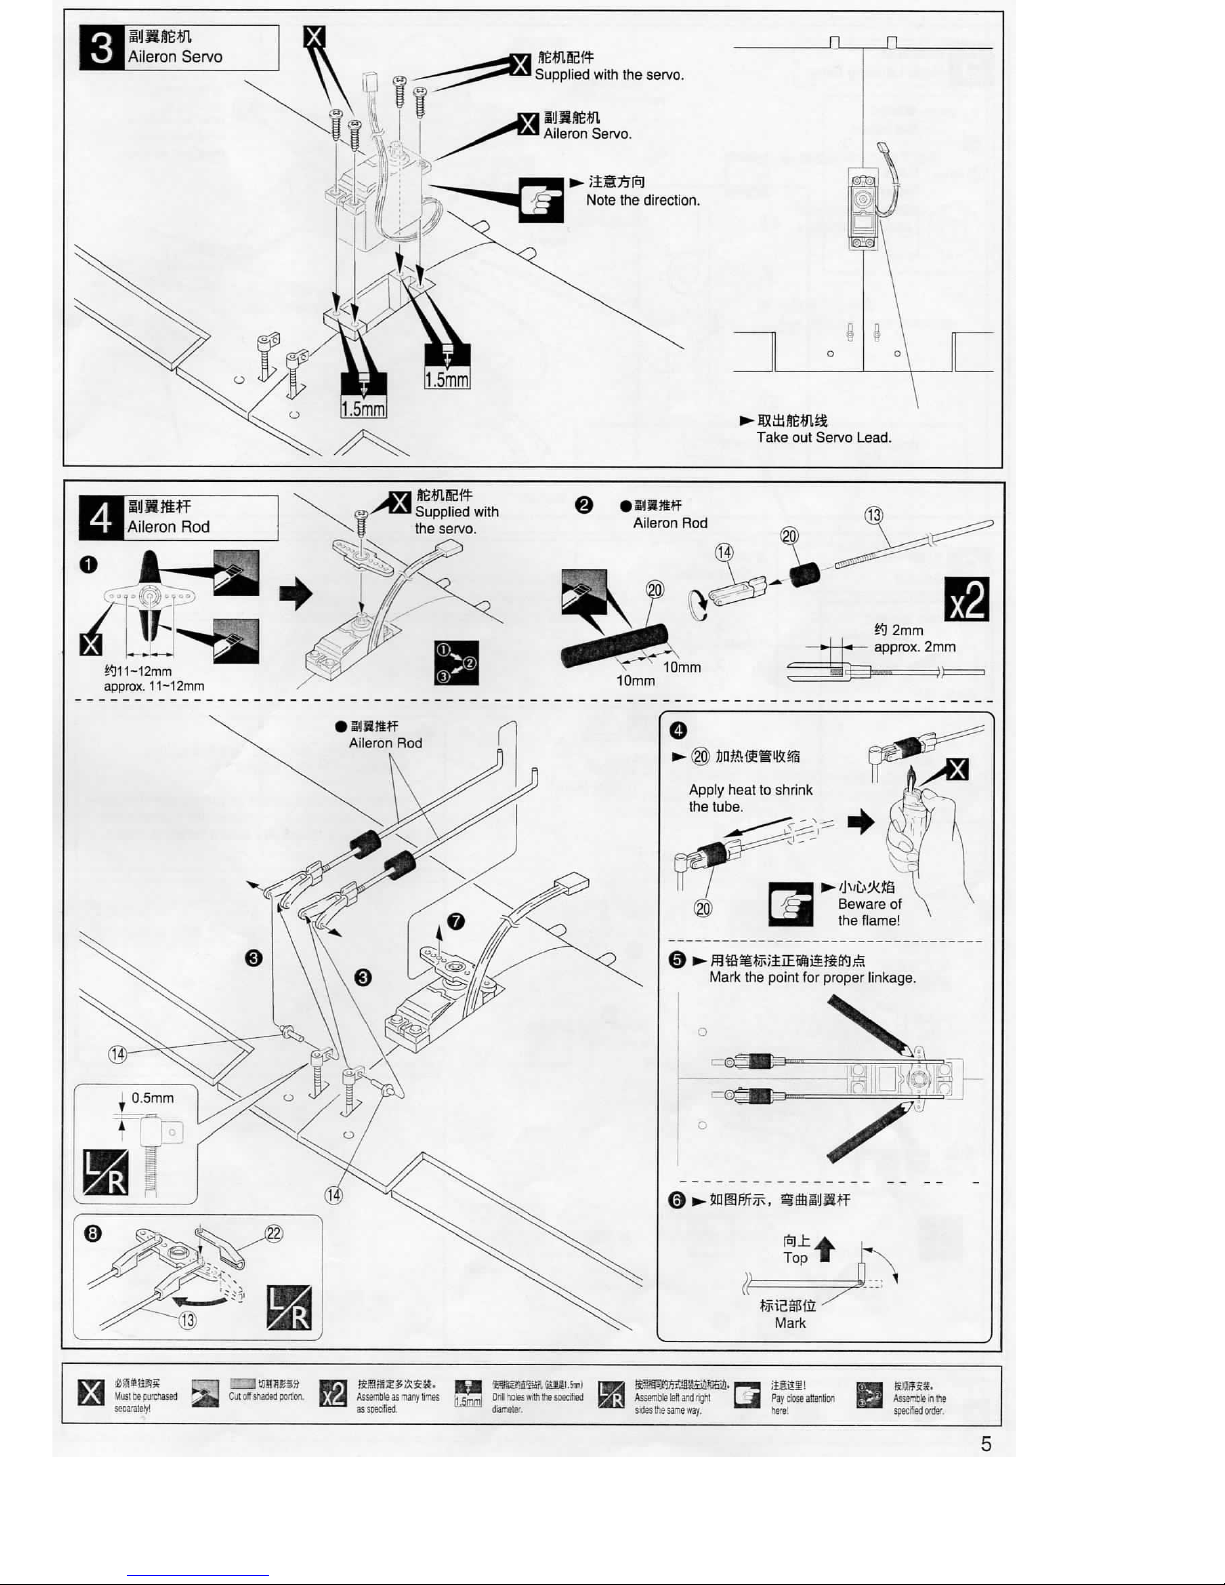
Supplied
with
the servo.
item
Aileron
Servo.
Note the direction.
Take
out
Servo
Lead.
Supplied
with
the servo.
Aileron
Rod
«J11-12mm
approx. 11-12mm
10mm
10mm
«J 2mm
— approx. 2mm
m »=
^ BE!
- (§) SP^®@TO
Apply
heat to shrink
the tube.
Beware
of ^
the flame!
Mark
the point for proper linkage.
01
no
Top
•
WSMtiL
Mark
m
Must
be
purchased
2
secarately!
~J
l_~}tJJafii;i53 B
Cut
off
shaded
portion.
g
fZA
Assemble
as
many
times
as
specilied.
H||
Matrass?,
SHUST.
n
Onll
holes
with
the
soecified
U
diameter.
pi
Assemble
left
and
right
1 M
sides
the
same
way.
asan
|
Pay
close
attention
I
here!
?*3
Assemble
in
the
specified
order.
5
 Loading...