

Page 1

PoE Digital Clock
* Installation and Operation Manual *
* For Clocks with Serial Numbers beginning with 'B' *
Page 2

Table of Contents
1 Introduction..........................................................................................................................................................1
2 Installation............................................................................................................................................................1
2.1 PoE Connection............................................................................................................................................1
2.2 Network........................................................................................................................................................1
2.3 Mounting......................................................................................................................................................1
2.3.1 Surface Mounting to Drywall...............................................................................................................1
2.3.2 Rack Mounting.....................................................................................................................................1
2.3.3 Dual Clock Mount Bracket...................................................................................................................2
3 Configuration.......................................................................................................................................................3
3.1 Web Page – Default password is “tmachine”...............................................................................................3
3.2 Network........................................................................................................................................................4
3.2.1 IPv4 and IPv6.......................................................................................................................................4
3.2.2 DNS......................................................................................................................................................4
3.2.3 Mask HTTP Access on Subnet.............................................................................................................4
3.2.4 Mask NTP Access on Subnet................................................................................................................4
3.3 Time Synchronization..................................................................................................................................5
3.3.1 SNTP Servers.......................................................................................................................................5
3.3.2 Time Zone.............................................................................................................................................5
3.3.3 Custom Time Zone...............................................................................................................................5
3.3.4 SNTP Resync Period............................................................................................................................5
3.3.5 Twelve Hour Time................................................................................................................................5
3.3.6 24-Hour Mode Leading Zero................................................................................................................6
3.4 Daylight Savings..........................................................................................................................................6
3.4.1 Daylight Savings (DST Options)..........................................................................................................6
3.4.2 Fixed Day.............................................................................................................................................6
3.4.3 Start/Stop Date......................................................................................................................................6
3.4.4 Hour Bias..............................................................................................................................................6
3.5 Clock Type and Date Mode..........................................................................................................................7
3.5.1 Use Calendar........................................................................................................................................7
3.5.2 Date Mode............................................................................................................................................7
3.5.3 Time......................................................................................................................................................7
3.5.4 Date.......................................................................................................................................................7
3.5.5 Date Offset............................................................................................................................................8
3.6 Count Up Timer............................................................................................................................................8
3.6.1 Use Count Up Timer.............................................................................................................................8
3.6.2 Display Mode.......................................................................................................................................8
3.6.3 Start/Pause/Reset Buttons.....................................................................................................................8
3.7 Count Down Timer.......................................................................................................................................8
3.7.1 Use Count Down Timer........................................................................................................................8
3.7.2 Display Mode.......................................................................................................................................8
3.7.3 Hours....................................................................................................................................................8
3.7.4 Minutes.................................................................................................................................................8
3.7.5 Seconds.................................................................................................................................................8
3.7.6 Tenths of Seconds.................................................................................................................................9
3.7.7 Activate Alarm Relay...........................................................................................................................9
3.7.8 Alarm Relay Duration...........................................................................................................................9
3.7.9 Start/Pause/Reset Buttons.....................................................................................................................9
3.8 Other.............................................................................................................................................................9
3.8.1 Unit Name............................................................................................................................................9
Page 3

3.8.2 Password...............................................................................................................................................9
3.8.3 Brightness.............................................................................................................................................9
3.9 Alarms........................................................................................................................................................10
4 External Connections and Interfaces..................................................................................................................11
4.1 External Connection...................................................................................................................................11
4.2 Push Button................................................................................................................................................11
4.2.1 Changing the Time Zone....................................................................................................................11
4.2.2 Scrolling the IP address......................................................................................................................11
4.2.3 Set Parameters to Default...................................................................................................................11
5 Troubleshooting.................................................................................................................................................12
5.1 Flashing Seconds........................................................................................................................................12
5.2 Lost Link....................................................................................................................................................12
5.3 Missed NTP Packet....................................................................................................................................12
5.4 Unable To Access Web Page......................................................................................................................12
Page 4
Installation & Operation Manual
1 Introduction
TimeMachines Precision Clocks (TMPCs) provide an accurate synchronized time source. TMPCs use Power over
Ethernet (PoE) and Simple Network Time Protocol (SNTP) to make installation and setup as clean and simple as
possible. Connecting the clock to a PoE enabled Local Area Network (LAN) Ethernet drop is all that needs to be done.
2 Installation
2.1 PoE Connection
TMPCs require connection to a PoE enabled LAN. There are two ways of going about this, one is to have a PoE switch
and the other is to have a PoE injector. PoE injectors are offered through TimeMachines as an accessory.
2.2 Network
Beyond connecting to a PoE enabled LAN, nothing else is required to get TMPCs up and running. IP, Netmask, Gateway,
and DNS addresses are all setup using Dynamic Hosting Configuration Protocol (DHCP) by default. Static addresses may
be assigned by accessing a configuration web page. The default time server is set to nist1-chi.ustiming.org but can be
changed using the configuration web page. These processes are described with further detail in the Configuration section.
2.3 Mounting
TMPCs may be surface mounted, rack mounted, or in a dual mount bracket (using two clocks).
Required tools: hammer, drill, 1/4” drill bit, screwdriver and pencil. Mounting options are optional.
2.3.1 Surface Mounting to Drywall
1. Mark the holes to be drilled based on the spacing of your specific clock. 12.5 inch centers for the 2.5 inch digit
clocks as well as the 4 inch by 4 clocks, and 16 inches for the 4 inch 6 digit clock.
2. With a 1/4” drill bit, drill through the two marks.
3. Insert an anchor into each of the 2 holes using a hammer.
4. Insert a screw into each anchor leaving a 1/16-1/8 inch gap between the head of the screw and the mounting
surface.
5. Connect the network cable to the back of the clock.
6. Place the keyhole slots on the back of the clock over the screws and secure it into place.
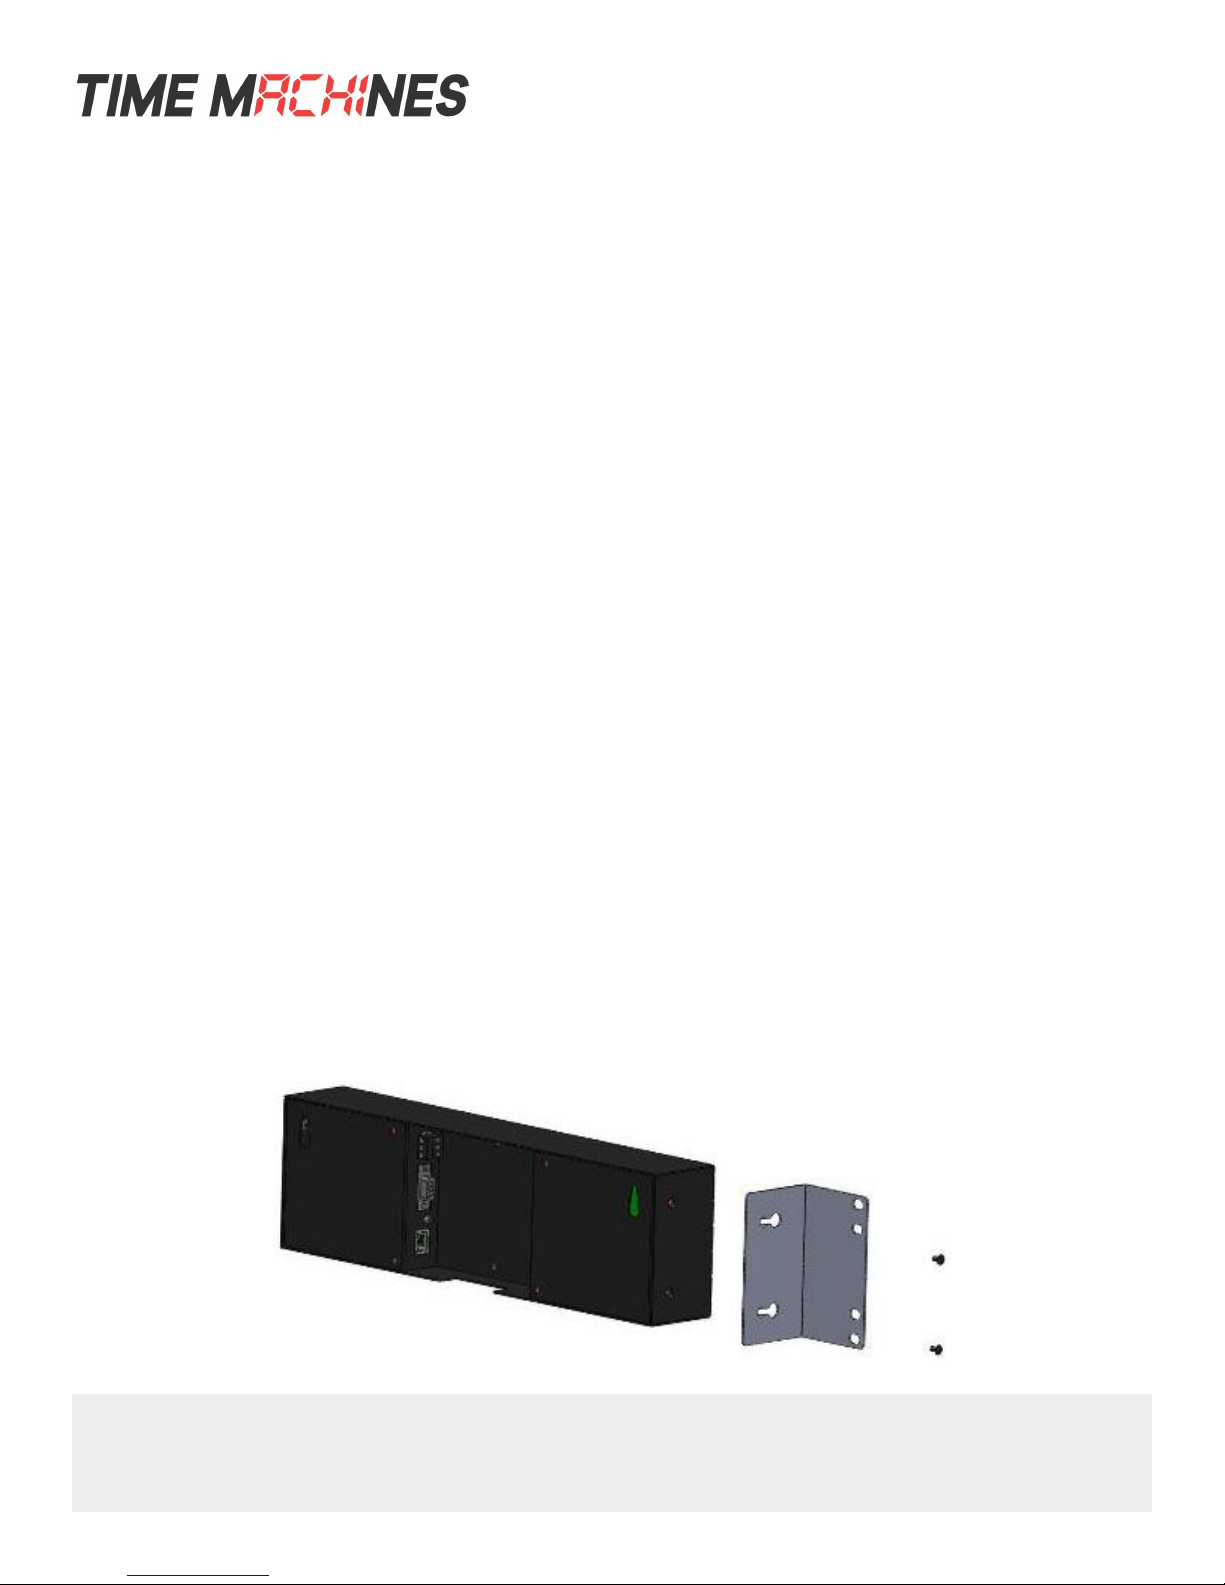
2.3.2 Rack Mounting
1. Attach an ear to each side of the clock.
2. Attach clock to rack.
TimeMachines Inc. | 300 South 68th St. Place, Suite 100 | Lincoln NE 68510
voice: 402.486.0511 | email: tmsales@timemachinescorp.com | web: timemachinescorp.com
[ 1 ]
Page 5
Installation & Operation Manual
ILLUSTRATION: Attaching Rack Mounting Ears
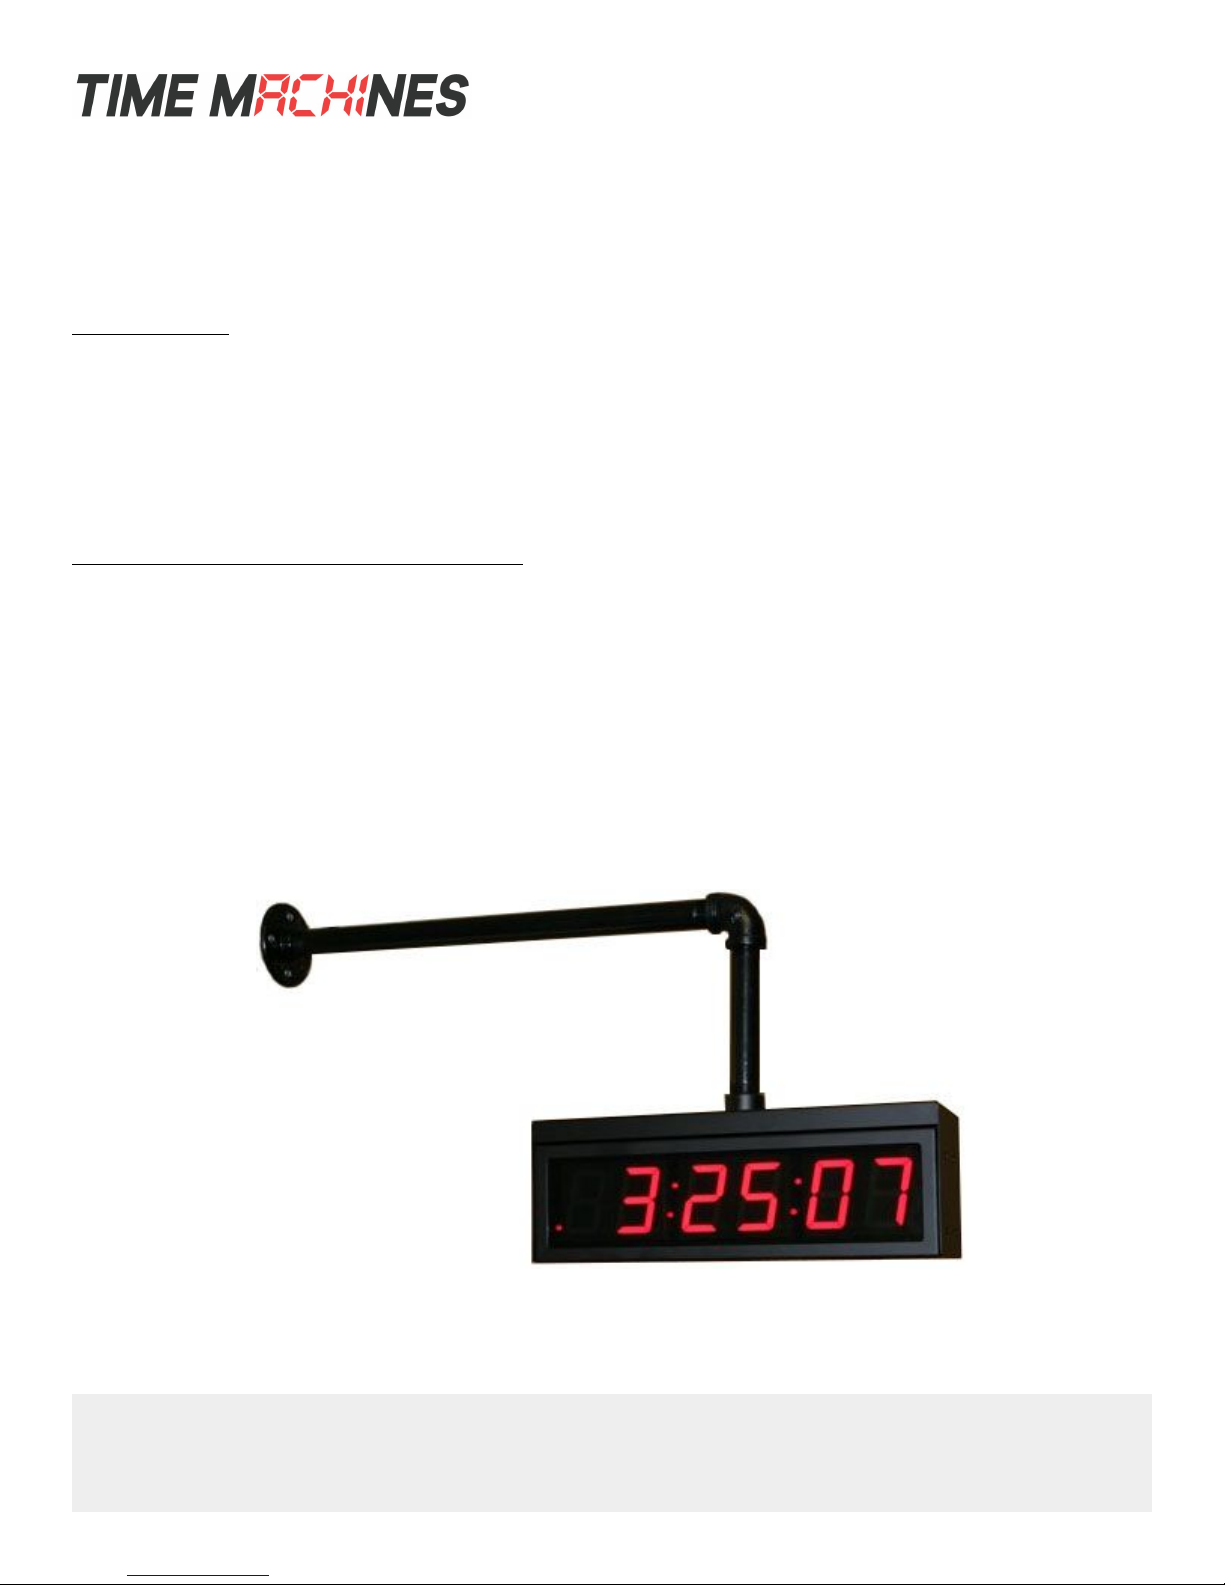
2.3.3 Dual Clock Mount Bracket
Materials Needed:
1. Two TimeMachines clocks of the same size
2. One Dual Mounting Bracket (760-265-000, 760-445-000 or 760-465-000)
3. 3/4” pipe, elbows, flange. Depending upon how you want to mount the clock determines what pipe lengths and
fittings you will need. The Dual Mounting Bracket accepts any 3/4” tubing with NPT (National Pipe Threads)
threads on the ends. This product is available through local hardware stores or large national chain stores.
4. Ethernet cables long enough to run from the PoE injector or PoE router/switch to the clock through the 3/4” pipe.
When threading the cables through the pipe it is recommended that you run both cables at the same time – one in
front of the other.
How to mount two clocks in the dual mount bracket:
1. Take two TimeMachines clocks and match where the notch is on the display cover – this is where the Ethernet
cables will enter into the clock displays. The Dual Mount Bracket can be placed on the bottom or on the top of the
clocks. If needed, the display can be inverted so that the cables can run through the bracket and down into the
backside of each clock.
2. At the ends of the clocks, leave the screws out about ¼” so that they can be inserted into the key holes on the
Dual Mount Bracket.
3. BEFORE you mount the clocks into the bracket, run two Ethernet cables through all pipes and fittings that will be
used to hang the clocks. Connect the cables to the clocks and then mount the clocks into the bracket.
4. Secure the bracket to the clocks by tightening the screws on the ends of the bracket into the clock.
5. Begin to tighten the pipe into the bracket. Start from the pipe/Dual Clock Bracket connection out to the
connections for the wall or ceiling.
6. Secure the entire fixture to the wall or ceiling.
7. Connect the Ethernet cables.
8. Power up the PoE injector.
TimeMachines Inc. | 300 South 68th St. Place, Suite 100 | Lincoln NE 68510
voice: 402.486.0511 | email: tmsales@timemachinescorp.com | web: timemachinescorp.com
ILLUSTRATION: Dual Rack Mount Setup
[ 2 ]
Page 6

Installation & Operation Manual
3 Configuration
3.1 Web Page – Default password is “tmachine”
All TMPC parameters are accessed on the configuration web page. The page can be accessed by pointing most any web
browser at the IP address of the TMPC. The initial IP address can be found by using the push button (double-click)
located on the back of the TMPC. After making changes to the configuration page the “Save Settings” button must be
pushed to submit form data. If the changes made do not take effect, the “Restart” button must be pushed to restart the
clock allowing changes to be applied.
TimeMachines Inc. | 300 South 68th St. Place, Suite 100 | Lincoln NE 68510
voice: 402.486.0511 | email: tmsales@timemachinescorp.com | web: timemachinescorp.com
[ 3 ]
Page 7

Installation & Operation Manual
3.2 Network
By default the network parameters are setup up using DHCP. In order to set static values, uncheck the DHCP check box
and enter new values in the address fields. If the values aren't changed the current addresses will be kept. The TMPC
must be restarted for these changes to take affect. Addresses in the Network section must be entered in Ipv4, dotted
quad, format.
3.2.1 IPv4 and IPv6
Both IPv4 and IPv6 are supported for static and DHCP setup. Set the parameters to match your network setup.
3.2.2 DNS
If using fullyqualified domain names for the time servers, then DNS entries must be included.
3.2.3 Mask HTTP Access on Subnet
Check this box to only allow setup of the TM1000A, through the web interface, from the local sunnet. This
provides a measure of security for the device from outside the subnet attack.
3.2.4 Mask NTP Access on Subnet
Check this box to only allow NTP access from the local subnet. Traffic originating from sources other than the
local subnet will be rejected.
TimeMachines Inc. | 300 South 68th St. Place, Suite 100 | Lincoln NE 68510
voice: 402.486.0511 | email: tmsales@timemachinescorp.com | web: timemachinescorp.com
[ 4 ]
Page 8

Installation & Operation Manual
3.3 Time Synchronization
NOTE* If any timezone settings are changed, the changes will not take effect until the next SNTP Resync Period.
3.3.1 SNTP Servers
The first entry (Primary SNTP Server) sets the address of the SNTP server, where where the TMPC gets its timing
information. In case the Primary SNTP Server is unreachable the TMPC will fall to the Backup SNTP Server. Both DNS
names (time.nist.gov) and IPv4 (192.43.244.18) formats are accepted.
3.3.2 DHCP Option 42 – NTP Server Setting
The TimeMachines display products support DHCP option 42 which allows the DHCP server to serve the IP address for
the device, as well as the IP address of time sources to be used by devices on the network. Up to two can be specified
for use by the TimeMachines displays. When a DHCP set NTP source is used, the web page will display “DHCP Set: IP
Address” in place of the stored configuration. It is possible to save these if the web page is updated which then in the
absence of a DHCP provided time server, would then attempt to be used as written and fail. Consult your DHCP server
documentation on how to add these settings.
3.3.3 Time Zone
Selecting the Time Zone sets the offset the clock will display from Greenwich Mean Time. All fields have a predetermined
offset except for CUSTOM.
3.3.4 Custom Time Zone
If CUSTOM is selected for the Time Zone then this field is editable. Set the desired custom offset by using the drop down
menus to select hours, minutes and (+/-).
3.3.5 SNTP Resync Period
The SNTP Resync Period entry sets the period between SNTP requests. Enter the number of hours and minutes
[ 5 ]
TimeMachines Inc. | 300 South 68th St. Place, Suite 100 | Lincoln NE 68510
voice: 402.486.0511 | email: tmsales@timemachinescorp.com | web: timemachinescorp.com
Page 9

Installation & Operation Manual
separated by a colon (Hours:Min). The default setting is 0 hours and 10 minutes and is the recommended update interval.
3.3.6 Twelve Hour Time
Select 12 or 24 hour time. When the box is checked the TMPC is in 12 hour mode, when the box is unchecked the TMPC
is in 24 hour mode. The default setting is 12 hour mode. In the 12 hour mode of operation AM hours will display a dot in
the upper left corner of the display. PM hours will display a dot in the lower left corner of the display. (In 24 hour mode
there will be no indication of AM or PM)
3.3.7 24-Hour Mode Leading Zero
When checked, and the clock is displaying 24 hour time, a leading zero will be added to times with single digit hours, such
as 00-09 hundred hours.
3.4 Daylight Savings
Daylight Savings Time (DST) varies greatly from one country to another and sometimes even within countries themselves.
As a result there are many parameters used to handle all of the various rules that are in use throughout the world. The
default setting uses the rule that is observed by the majority of the United States.
NOTE* If any DST settings are changed, the changes will not take effect until the next SNTP Resync Period.
3.4.1 Daylight Savings (DST Options)
The Daylight Saving Time Drop down, allows you to select AUTO, OFF, or CUSTOM. When AUTO is selected the clocks
use the default US Daylight Savings start and stop dates. If OFF is selected the clock does not adjust for Daylight Savings
Time. If CUSTOM is selected the user can specify a custom start date with a start time and stop date with a stop time. The
user can also adjust the bias of the offset.
NOTE* If a US Time Zone is selected then and DST setting of OFF is not allowed. If a DST setting of OFF is needed the
Time Zone should.
3.4.2 Fixed Day
The Fixed Day check box indicates whether or not DST occurs on a specific date. For example, if DST started on March
1st of every year, the Fixed Day box would need to be checked. The Fixed Day box is important in that it changes how the
Start and Stop parameters function. Based on the Fixed Day Check box certain drop down menus will be available for
editing.
3.4.3 Start/Stop Date
The Start and Stop Date parameters indicate when DST changes occur.
• The first drop down is only used on floating day start time (i.e. 2nd Sunday of the month). If fixed day is selected this
option is greyed out.
• The second drop down allows the user to select the day of the week you want DST to start or stop. This parameter is
also only available in a floating day scenario.
• The third drop down allows the user specify the month of the start or stop date. This field is always used.
• The last field is the date, this is only used when a fixed is used (i.e. June 4th).
3.4.4 Hour Bias
The Hour Bias parameter allows the user to input a custom hour and/or minute offset if a CUSTOM Daylight Saving Time
is chosen.
[ 6 ]
TimeMachines Inc. | 300 South 68th St. Place, Suite 100 | Lincoln NE 68510
voice: 402.486.0511 | email: tmsales@timemachinescorp.com | web: timemachinescorp.com
Page 10

Installation & Operation Manual
3.5 Clock Type and Date Mode
This section is for utilizing the Calendar feature of the clock. When in Calendar mode the clock will alternate between
displaying the current time for a selected duration, and the current (or offset) date for a selected duration.
3.5.1 Use Calendar
Check this box if the Calendar mode of the clock is desired. If unchecked, the following fields will be greyed out and the
clock will operate as a precision digital clock only.
3.5.2 Date Mode
This field is used to select the format in which the date is to be displayed.
3.5.3 Time
This field is used to select the amount of time, in seconds, that the current time is to be displayed on the clock.
3.5.4 Date
This field is used to select the amount of time, in seconds, that the date is to be displayed on the clock.
NOTE* If a constant display of the date is desired, the “Time” field can be set to 0 seconds, and the “Date” field can be set
to any value greater than 0.
[ 7 ]
TimeMachines Inc. | 300 South 68th St. Place, Suite 100 | Lincoln NE 68510
voice: 402.486.0511 | email: tmsales@timemachinescorp.com | web: timemachinescorp.com
Page 11

Installation & Operation Manual
3.5.5 Date Offset
This field is used to select a forward offset, in days, to the current date. If the “Date Offset” value is selected as 0, the
current date will be displayed.
3.6 Count Up Timer
This section describes utilizing the up counting timer feature of the clock.
3.6.1 Use Count Up Timer
Check this box to use the count up timer. If unchecked, the fields in this section will be grayed out and inaccessible. As
soon as this box is checked, the clock will switch to the up-counter mode showing the reset value of “00:00:00”.
3.6.2 Display Mode
This field is used to select the format in which the up counter is to be displayed. The two options are “MIN:SEC:tSEC” and
“HR:MIN:SEC”. These will show minutes, seconds and tenths of seconds or it will show hours, minutes and seconds
respectively.
3.6.3 Start/Pause/Reset Buttons
The Start button for this section will begin an up counting timer. As soon as it's clicked, the button will dynamically switch
to read “Pause” so that it now acts as a pause button for the running timer. Clicking this Pause button will switch it back to
read “Start”, and it will immediately stop the timer to display its current values. Selecting this button again will continue the
up counting timer from this paused state.
The Reset button is only selectable when the timer is paused. It will clear the current timer values back to “00:00:00” so
that it can be restarted from this point. The up counting timer is also automatically reset whenever it leaves timer mode
and goes back to a normal clock display.
3.7 Count Down Timer
This section describes utilizing the down counting timer feature of the clock.
3.7.1 Use Count Down Timer
Check this box to use the count down timer. If unchecked, the fields in this section will be grayed out and inaccessible. As
soon as this box is checked, the clock will switch to the down-counter mode showing the reset value of the current
“Countdown Start Time” parameters.
3.7.2 Display Mode
This field is used to select the format in which the up counter is to be displayed. The two options are “MIN:SEC:tSEC” and
“HR:MIN:SEC”. These will show minutes, seconds and tenths of seconds or it will show hours, minutes and seconds
respectively.
3.7.3 Hours
This field is used to select an hours start time for the count down timer. This will not be selectable when the countdown
timer is in MIN:SEC:tSEC mode. Selectable from 0 – 23.
3.7.4 Minutes
This field is used to select a minutes start time for the count down timer. Selectable from 0 – 59.
3.7.5 Seconds
This field is used to select a seconds start time for the count down timer. Selectable from 0 – 59.
TimeMachines Inc. | 300 South 68th St. Place, Suite 100 | Lincoln NE 68510
voice: 402.486.0511 | email: tmsales@timemachinescorp.com | web: timemachinescorp.com
[ 8 ]
Page 12

Installation & Operation Manual
3.7.6 Tenths of Seconds
This field is used to select a tenths of seconds start time for the count down timer. This will not be selectable when the
countdown timer is in HR:MIN:SEC mode. Selectable from 0 – 9.
3.7.7 Activate Alarm Relay
TSelect this box to allow the countdown timer to trigger an “alarm” when it reaches 00:00:00. This will flip the relay, which
feeds to the connector on the back (referencing section 4.1).
3.7.8 Alarm Relay Duration
This field is used to select the number of seconds a countdown “alarm” will last. This can only be changed when the
Activate Alarm Relay box is checked. Selectable from 1 – 59.
3.7.9 Start/Pause/Reset Buttons
The Start button for this section will begin a down counting timer. As soon as it's clicked, the button will dynamically switch
to read “Pause” so that it now acts as a pause button for the running timer. Clicking this Pause button will switch it back to
read “Start”, and it will immediately stop the timer to display its current values. Selecting this button again will continue the
down counting timer from this paused state.
The Reset button is only selectable when the timer is paused. It will clear the current timer values back to the displayed
Start Time parameters, so that it can be restarted from this point. The down counting timer is also automatically reset
whenever it leaves timer mode and goes back to a normal clock display.
3.8 Other
3.8.1 Unit Name
This can be any alpha numeric name up to 20 characters long.
3.8.2 Password
The password field displays the current password. To change it, enter a new password, push Set and Restart Clock.
TMPC passwords are limited to12 characters. The default password is “tmachine”.
3.8.3 Brightness
This parameter allow the user to control the brightness of the display. There are three settings that are selectable.
• DEFAULT, the brightest setting
• MEDIUM
• LOW, the lowest setting.
TimeMachines Inc. | 300 South 68th St. Place, Suite 100 | Lincoln NE 68510
voice: 402.486.0511 | email: tmsales@timemachinescorp.com | web: timemachinescorp.com
[ 9 ]
Page 13

3.9 Alarms
Installation & Operation Manual
The Alarm Configuration Page is access at the top of the web page by clicking the Alarm Settings button The Alarm
Settings allow for setting of up to 20 alarms with each alarm being configurable for time of day, using 24 hour time entry
mode, days of week to occur, and duration of the alarm..
TimeMachines Inc. | 300 South 68th St. Place, Suite 100 | Lincoln NE 68510
voice: 402.486.0511 | email: tmsales@timemachinescorp.com | web: timemachinescorp.com
[ 10 ]
Page 14

Installation & Operation Manual
4 External Connections and Interfaces
4.1 External Connection
External connection will require the user to make a connection from the clock's internal relay to an external system. The
TimeMachines Clock alarm closes an internal relay. The pinout of the connector is as follows:
ILLUSTRATION: Connector for Relay
Pin 1: Approximately +12V maximum current of 50mA
Pin 2: Relay Normally Open
Pin 3: Relay Common
Pin 4: Relay Normally Closed
Pin 5: Ground
Small, low power piezo buzzers or lights can be driven directly from the clocks power supply. For larger loads, an
intermediate relay is recommended.
*NOTE: This connector is not provided with purchase. If you are interested in information on obtaining this part contact
TimeMachines. (techsupport@timemachinescorp.com)
4.2 Push Button
4.2.1 Changing the Time Zone
Using the push button provides a quick way to set the time zone with
out having to access the configuration web page. With every push of the button the GMT offset decreases by 1. Since the
default offset is -6, pushing the button once would set the offset to -7. Once the negative offset reaches its limit (-11) the
next offset is the maximum positive offset (14).
4.2.2 Scrolling the IP address
The push button also provides a quick way to determine the IP address of the TMPC. A rapid double push of the button
will cause the IP address to scroll across the display.
4.2.3 Set Parameters to Default
One way to set all parameters to their factory default values is to hold the button on the back of the clock down when the
TimeMachines Inc. | 300 South 68th St. Place, Suite 100 | Lincoln NE 68510
voice: 402.486.0511 | email: tmsales@timemachinescorp.com | web: timemachinescorp.com
[ 11 ]
Page 15

Installation & Operation Manual
clock is powered up. If done successfully, three “8's” will scroll across the display before entering the usual start up
routine.
5 Troubleshooting
5.1 Flashing Seconds
There are two instances when the seconds (6 digit clock) and the AM/PM dots will flash to indicate a problem.
5.2 Lost Link
If the seconds and the AM/PM dots are flashing it is possible that the link was lost, check to make sure everything is
connected properly at both ends of the cable.
5.3 Missed NTP Packet
If an NTP packet was sent but a reply wasn't received the seconds and AM/PM dots will flash. This can happen every now
and then, the flashing will stop as soon as the TMPC completes a successful send and receive cycle. If the primary server
can no longer be reached the backup server will become the primary server. This is observable by looking at the
configuration web page, if the primary and backup servers display the same address(primary will be in IPv4 format) than
this scenario has occurred. If both servers fail the seconds and AM/PM dots will continue to flash until the issue is
resolved. Log into the configuration web page and set new SNTP servers.
5.4 Unable To Access Web Page
This can occur for many different reasons. Below are a few examples with ways to potentially fix.
-Make sure the PC being used is on the same subnet as the clock.
-There are a few antivirus programs that may prevent accessing or viewing information on the web page. To avoid this try
temporarily disabling before attempting to access the web page. Once you have made your changes re-enable security.
This will not affect the function of the clock only the web page access.
-Some of the lesser known web browsers may not be compatible with the TimeMachines web interface. Try using a
different browser such as Firefox or Chrome.
TimeMachines Inc. | 300 South 68th St. Place, Suite 100 | Lincoln NE 68510
voice: 402.486.0511 | email: tmsales@timemachinescorp.com | web: timemachinescorp.com
[ 12 ]
 Loading...