

Page 1
1
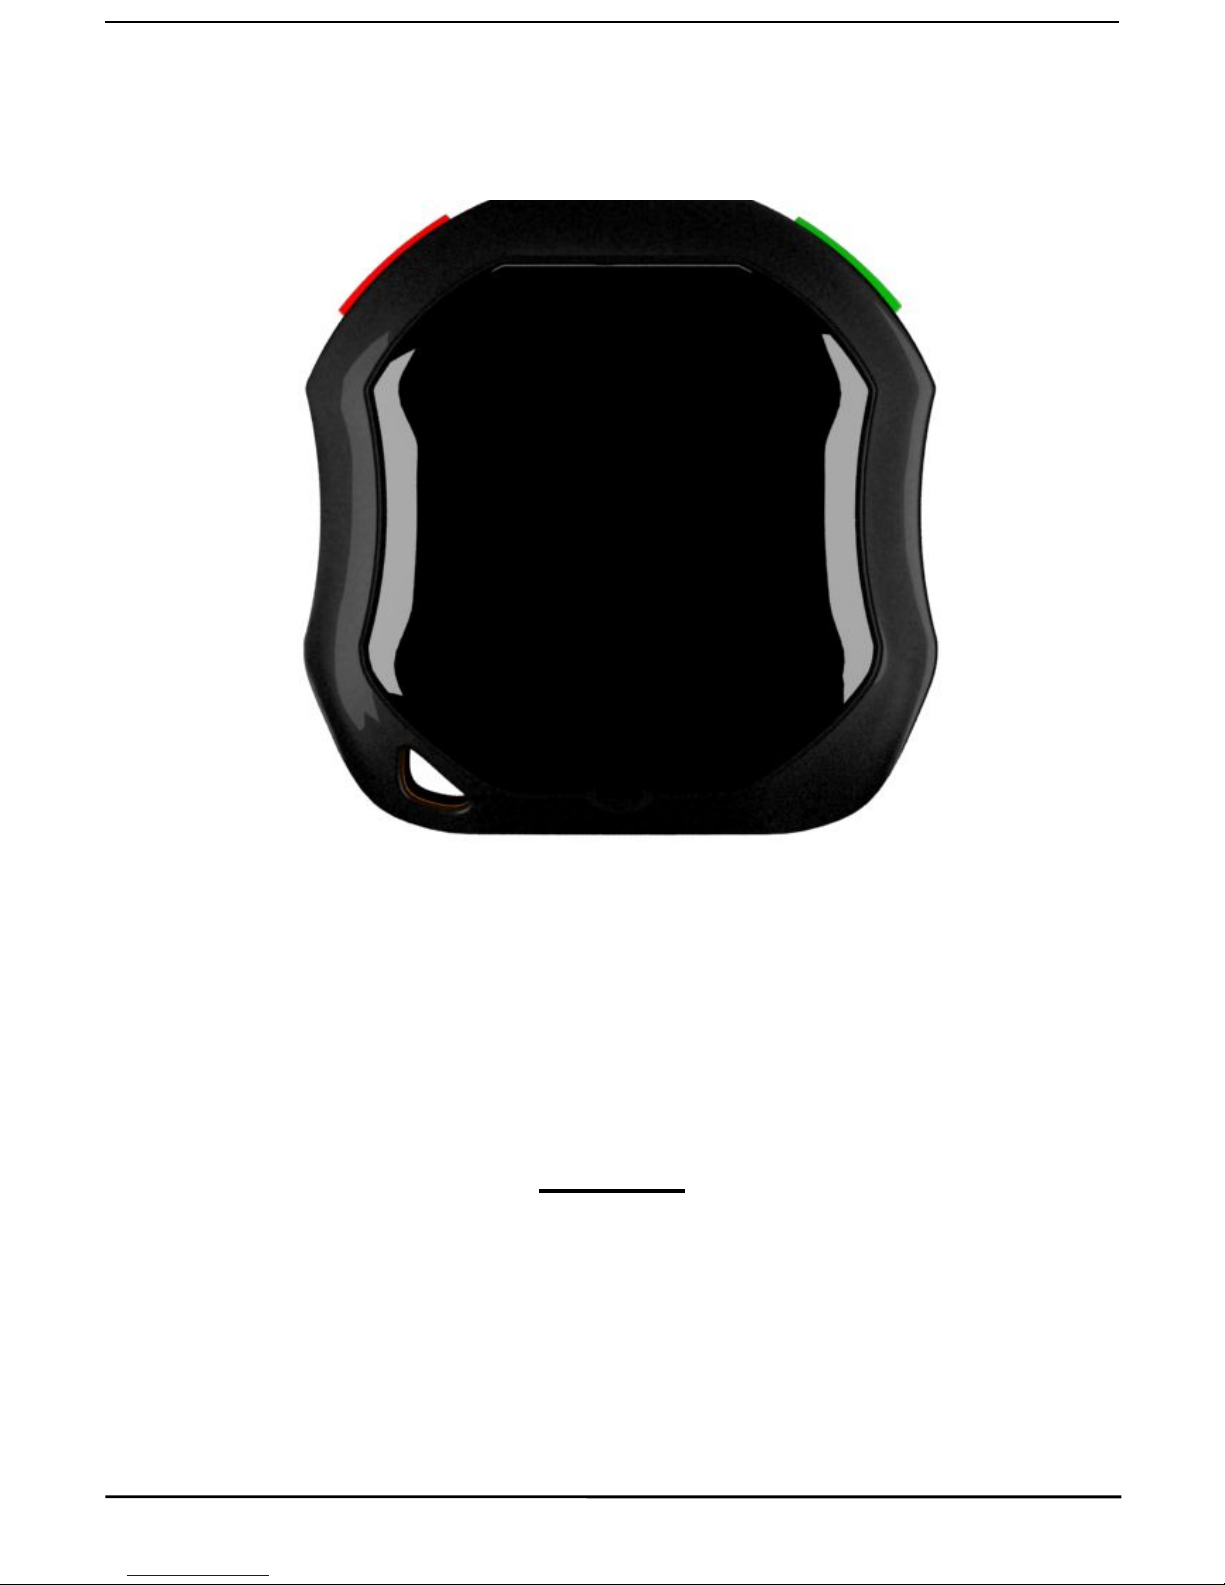
Waterproof Portable GPS Tracker
Preface
Thank you for purchasing the tracker. This manual shows how to operate the device smoothly and correctly.
Make sure to read this manual carefully before using this product. Please note that specification and
information are subject to changes without prior notice in this manual. Any change will be integrated in the
latest release. The manufacturer assumes no responsibility for any errors or omissions in this document.
Page 2
2
1. Summary
Working Based on existing GSM/GPRS network and GPS satellites, this product can locate and monitor any
remote targets by SMS or internet. The most advanced technology of GPS and AGPS dual positioning. The
waterproof level achieve IPX - 6.
2. Applications
Vehicle rental / Fleet management etc
Outdoor sports
Protect child / the elder/ the disabled / pet etc
Provide peace-of-mind for businessmen
Personnel Management
Criminals Tracking
3Hardware Description
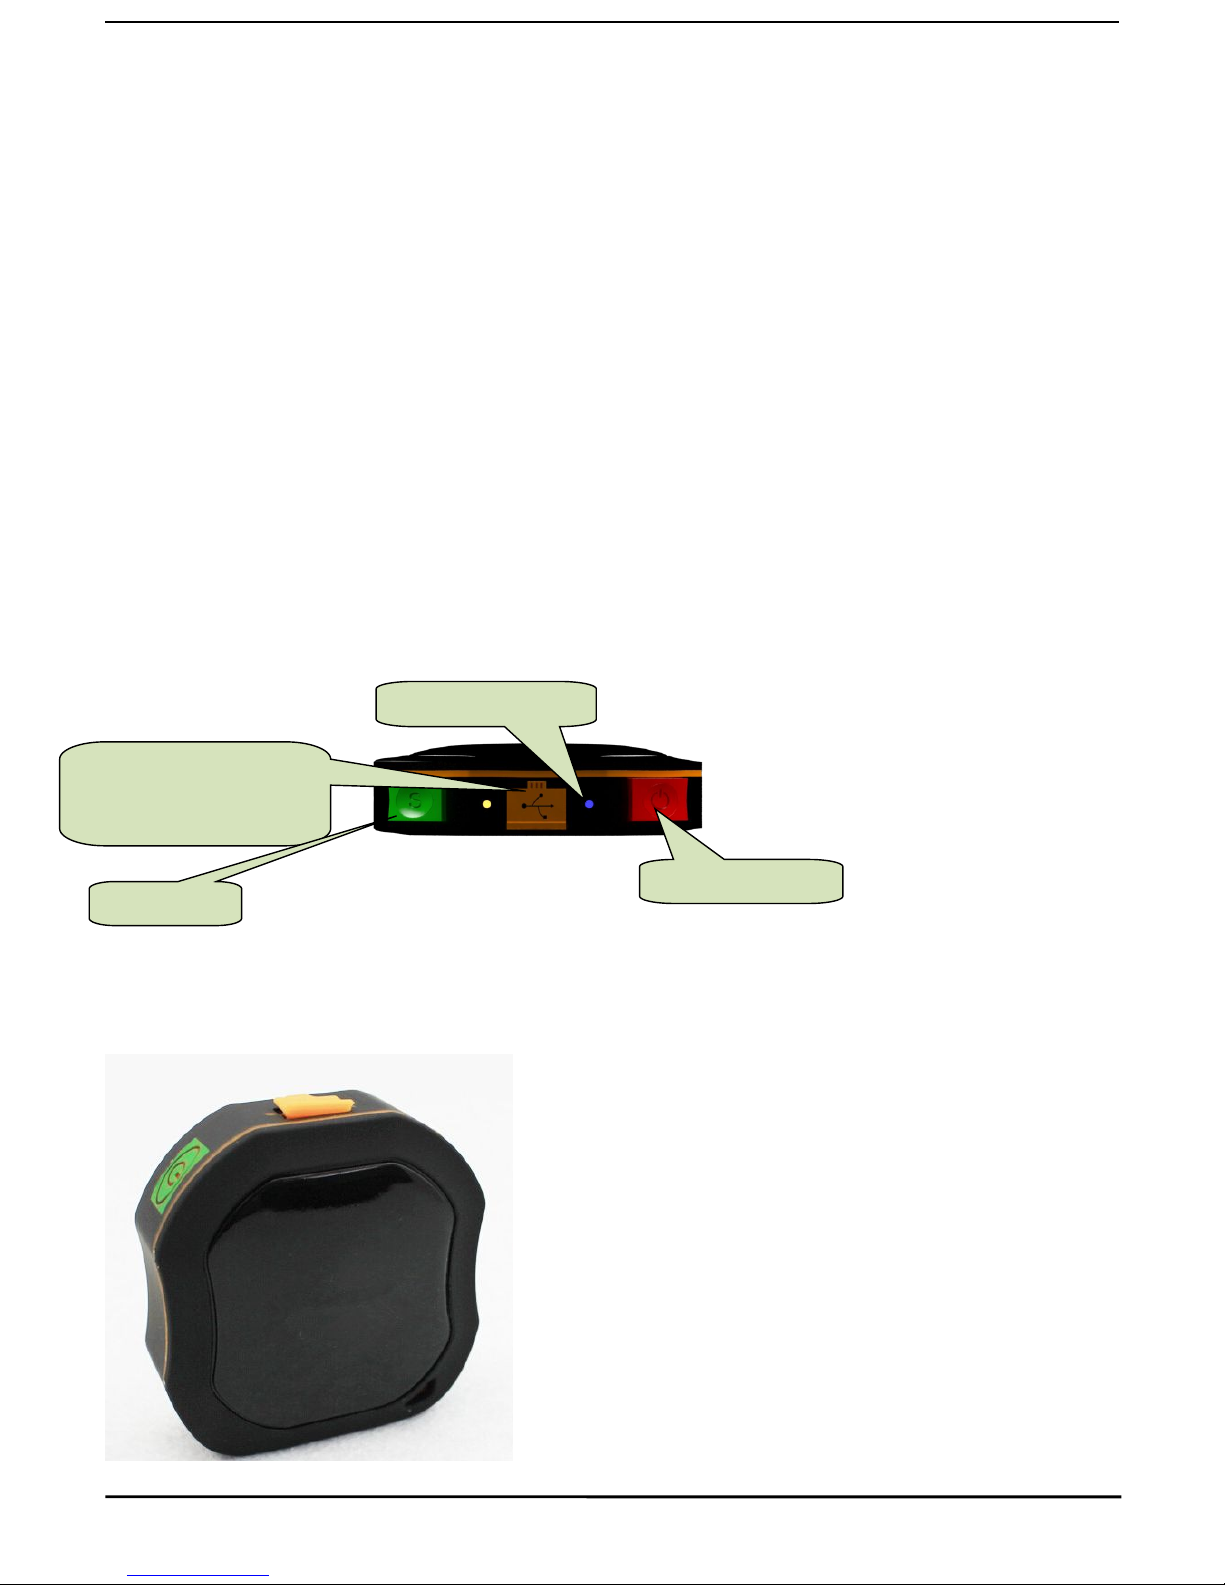
3.1 Side face
3.2Front face
ON /OFF Button
Indicator for signals.
You can update software,
charge battery from here.
SOS Button
Page 3

3
4.Specs.
Content
Specs.
Dim.
50mm x 50mm x 15mm
Weight
50g
Network
GSM/GPRS
Band
850/900/1800/1900Mhz
GPS chip
UBLOX
GPS sensitivity
-159dBm
GPS accuracy
5m
Time To First Fix
Cold status 35-80s
Warm status 35s
Hot status 1s
Wall charger
110-220V input
5V output
Battery
Chargeable changeable 3.7V 1000mAh Li-ion battery
Standby
240hours
Storage Temp.
-40°C to +85°C
Operation Temp.
-20°C to +55°C
Humidity
5%--95% non-condensing
Functions:
1. GPS and Location Based Service
Location Based service also named A-GPS, when tracker in underground or tunnel ,can get location by AGPS.
2. Real time tracking
Real time tracking it by cell phone and platform . Also can support get location every 5 seconds, and the GPS
accuracy is 5m .
3. Check the history of route on platform
Can check and replay within one year history of route of device ,by web monitor center
4.Monitoring and communication
Can hear the voice around the tracker by cell phone . Also support communication with the tracker by cell
phone (OEM)
5.SOS Alarm
SOS button ,when user have emergency , press the SOS button ,the tracker will send “help me “ SMS to all
authorized phone number and monitoring web platform.
6. Power Saving Mode
The device go into standby mode when there isn’t vibration for 3 minutes , it will go into working mode when
it feel vibration
7.Google map on mobile
Check the location with google map on mobile.
8. Geofence and movement alert
Set up a geo-fence for the unit to restrict its movements within a district ,unit will send a message to the
authorized numberwhen it breaches the district..
9.Low Battery Alarm
Page 4

4
5.Usage
Please charge 12hours at first use.
Insert SIM card in right way. Please put the unit outside and make sure the trademark side
facing up.
Confirm your SIM card have calling, send SMS, GPRS function.
Confirm your SIM card have enough balance (money).
Confirm your SIM card can show caller ID and don not use call forwarding function.
5.1 SIM card installation
Make sure that there is no call transfer and call display is on, and PIN code off. The SMS message must in Text
format, can’t be identified for PDU format.
5.1.1 Open the rear cover, remove the screws by screwdriver.
5.1.2 Forward push and open the metal piece, put the SIM card into the card slot, and press the metal piece to
its original position, push it backward.
5.2Battery and Charger
Do charge the battery to capacity in 8 -12 hours for first time. This unit adopts built-in Li-ion battery, and full
battery can standby 240 hours. After first use, the battery usually should be charged fully in 3-5 hours.
Cautions:
a: For it’s Li-ion battery, which contains harmful chemicals and may burst, please don’t bump, puncture it
violently and keep it off fire.
b: Please charge the battery in time to keep it working normally.
5.3Startup
Insert sim card
Turn on the unit outdoors by pressing the “on/off” button until the indicator is on.
Set admin number,APN and IP (details pls see below commands list)
In 10 or 40 seconds, the unit will begin to work and acquire the GSM signals as well as the GPS signals.
The indicator will keep flashing every 3 seconds when the unit has received the signals.
When this unit receives GPS signals normally, you can use it and do any setting as the instructions of this
manual.
green LED for GPRS working status
Status of indicator
Meaning
Slow flash (flash 1s after every 2s)
GSM / GPRS conversation start
Continuously in bright status
No GPRS signal
Green Led off
Device fault or dormant
Blue LED for GPS working status
Status of indicator
Meaning
Slow flash (flash 1s after every 2s)
GPS location successful
Continuously in bright status
Searching GPS signal
Blue led off
Device fault or dormant
Red LED for power charging status
Status of indicator
Meaning
Red led on all the time
Charging
red led off
Full battery or charged full
Page 5

5
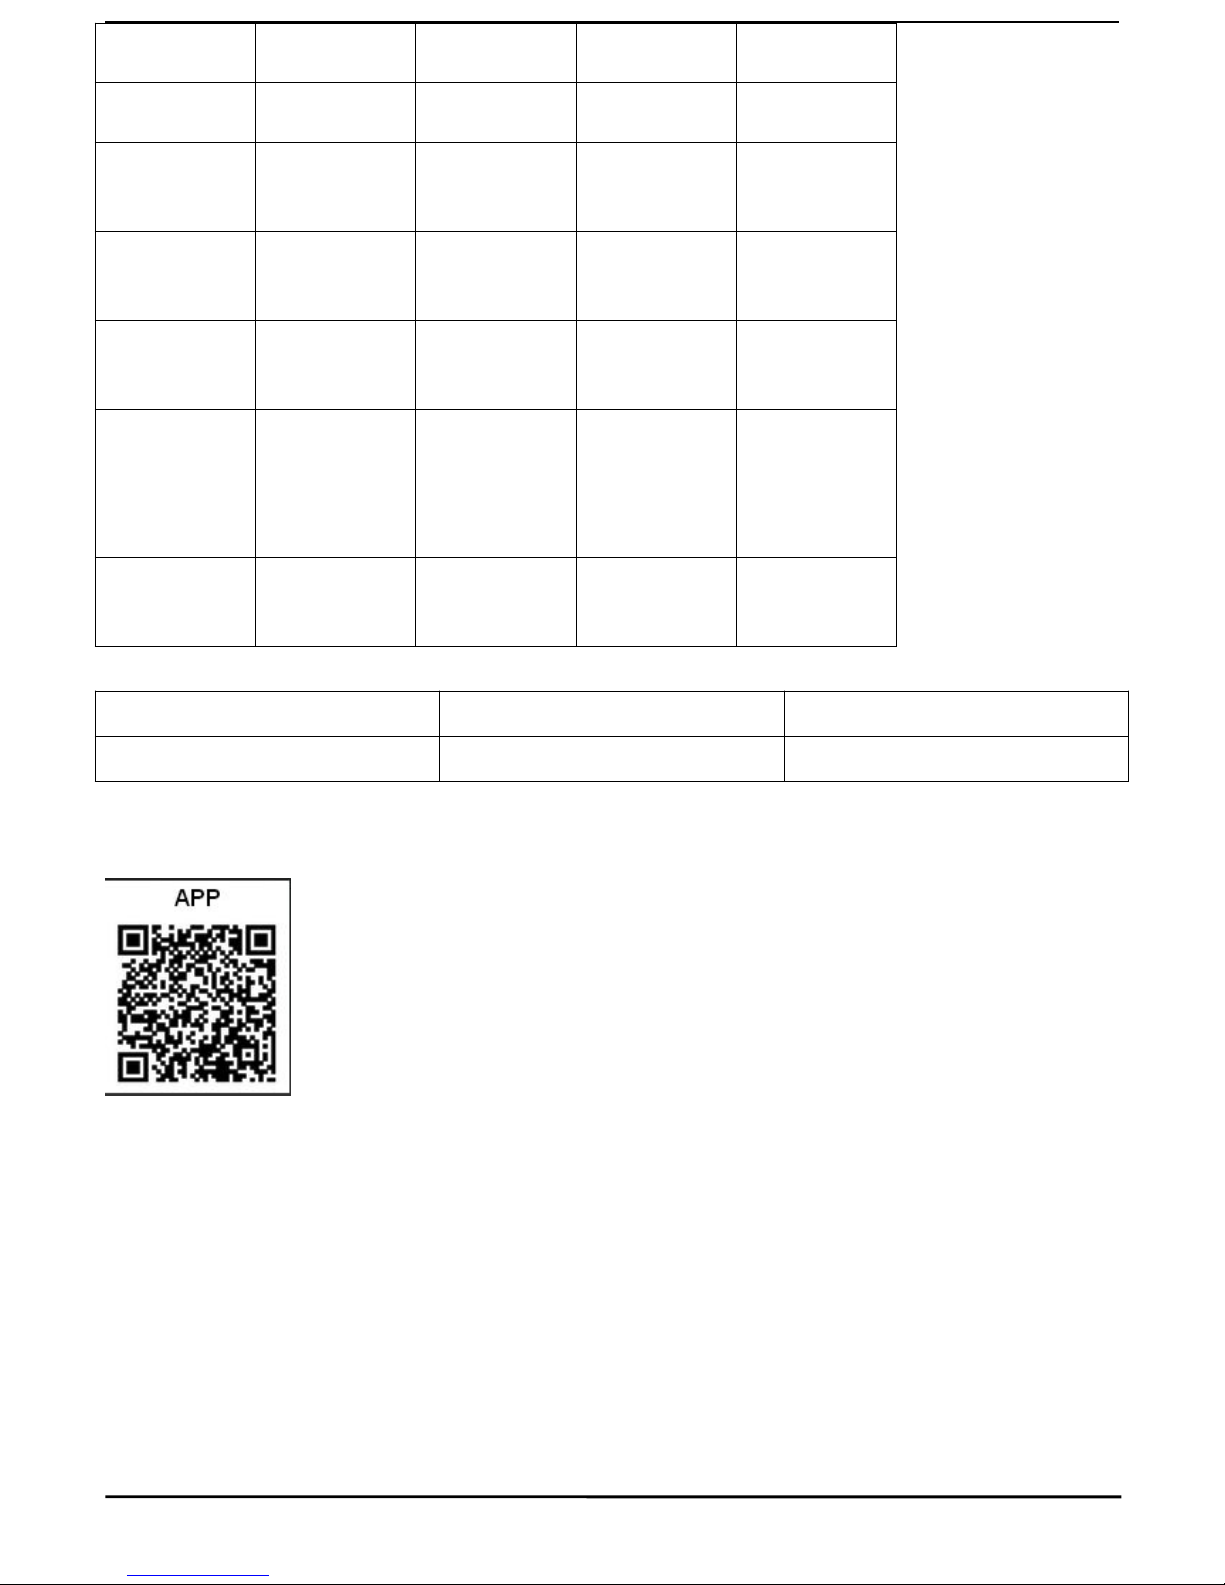
5.4 commands list(pls note 123456 is the default password)
Feature name
Active command
Reply
Cancel command
reply
Begin(blank
before set)
Begin123456
Begin ok
Admin number
Admin123456+s
pace+number
Admin ok
Noadmin123456
+space+number
Noadmin ok
Sos number
Sos123456+spac
e+number
Sos number ok
Nosos123456+sp
ace+number
Nosos number ok
Sossms
Sossms123456
Sossms ok
Nosossms123456
Nosossms ok
Soscall
Soscall123456
Soscall123456
ok
Nososcall123456
Nososcall ok
Password
Password123456
+space+new
Password ok
Sever ip&port
Adminip123456
+space+ip+space
+port
Adminip ok
APN
Apn123456+loca
l apn content
Apn ok
LBS
Addjz=1
Open LBS
Addjz=0
Close LBS
GPRS
Gprs123456
Gprs ok
Nogprs123456
Nogprs ok
Time Zone
Timezone123456
+space+8
Timezone ok
Timezone123456
+space+-8
Timezone ok
Language
Lag1
Switched to
english
Restore factory
setting
format
No reply
Upload
frequency(10-60
0s)
Upload123456+ti
me
Upload ok
Sleep working
mode
Sleep123456+sp
ace+time
Sleep time ok
Wake up by
sms,call,press
button
Shock working
mode
Sleep123456+sp
ace+shock
Sleep shock ok
Wake up by
shock,sms,call,pr
ess button
No sleep
working mode
Nosleep123456
Nosleep ok
Get location
Where or
G123456#
Google map link
One way
comunication
monitor
Monitor123456
In this mode,you
could hear the
voice around
units after call it
Shock alarm
Shock123456
Shock ok
Noshock123456
Noshock ok
Page 6
6
Shock call alarm
vibcall123456
Shock call alarm
ok
Shock sms alarm
vibsms123456
Shock sms alarm
ok
Move
alarm(distance:1
00-5000m)
Move123456+sp
ace+distance
Move ok
Nomove123456
Nomove ok
Overspeed
alarm(50-120km/
h)
Speed123456+sp
ace+largeest
speed
Speed ok
Nospeed123456
Nospeed ok
Set a geo-fence
(stockade)
stockade+123456
+space+long,lat;l
ong,lat
stockade ok
nostockade12345
6
Nostockade ok
Check setting of
device
Param1
Software
version,date,imei
,ip&port,apn,web
platform
Param2
Admin
number,sos
number,move
distance,speed,et
c
Status of device
status
Bat:4,gprs:1.gsm
:3,gsm:1,acc:0,oi
l:0,power:1,s:0
5.5 Web platform and sever ip&port
Website
Sever IP
Port
www.lkgps.net
101.1.16.228
7700
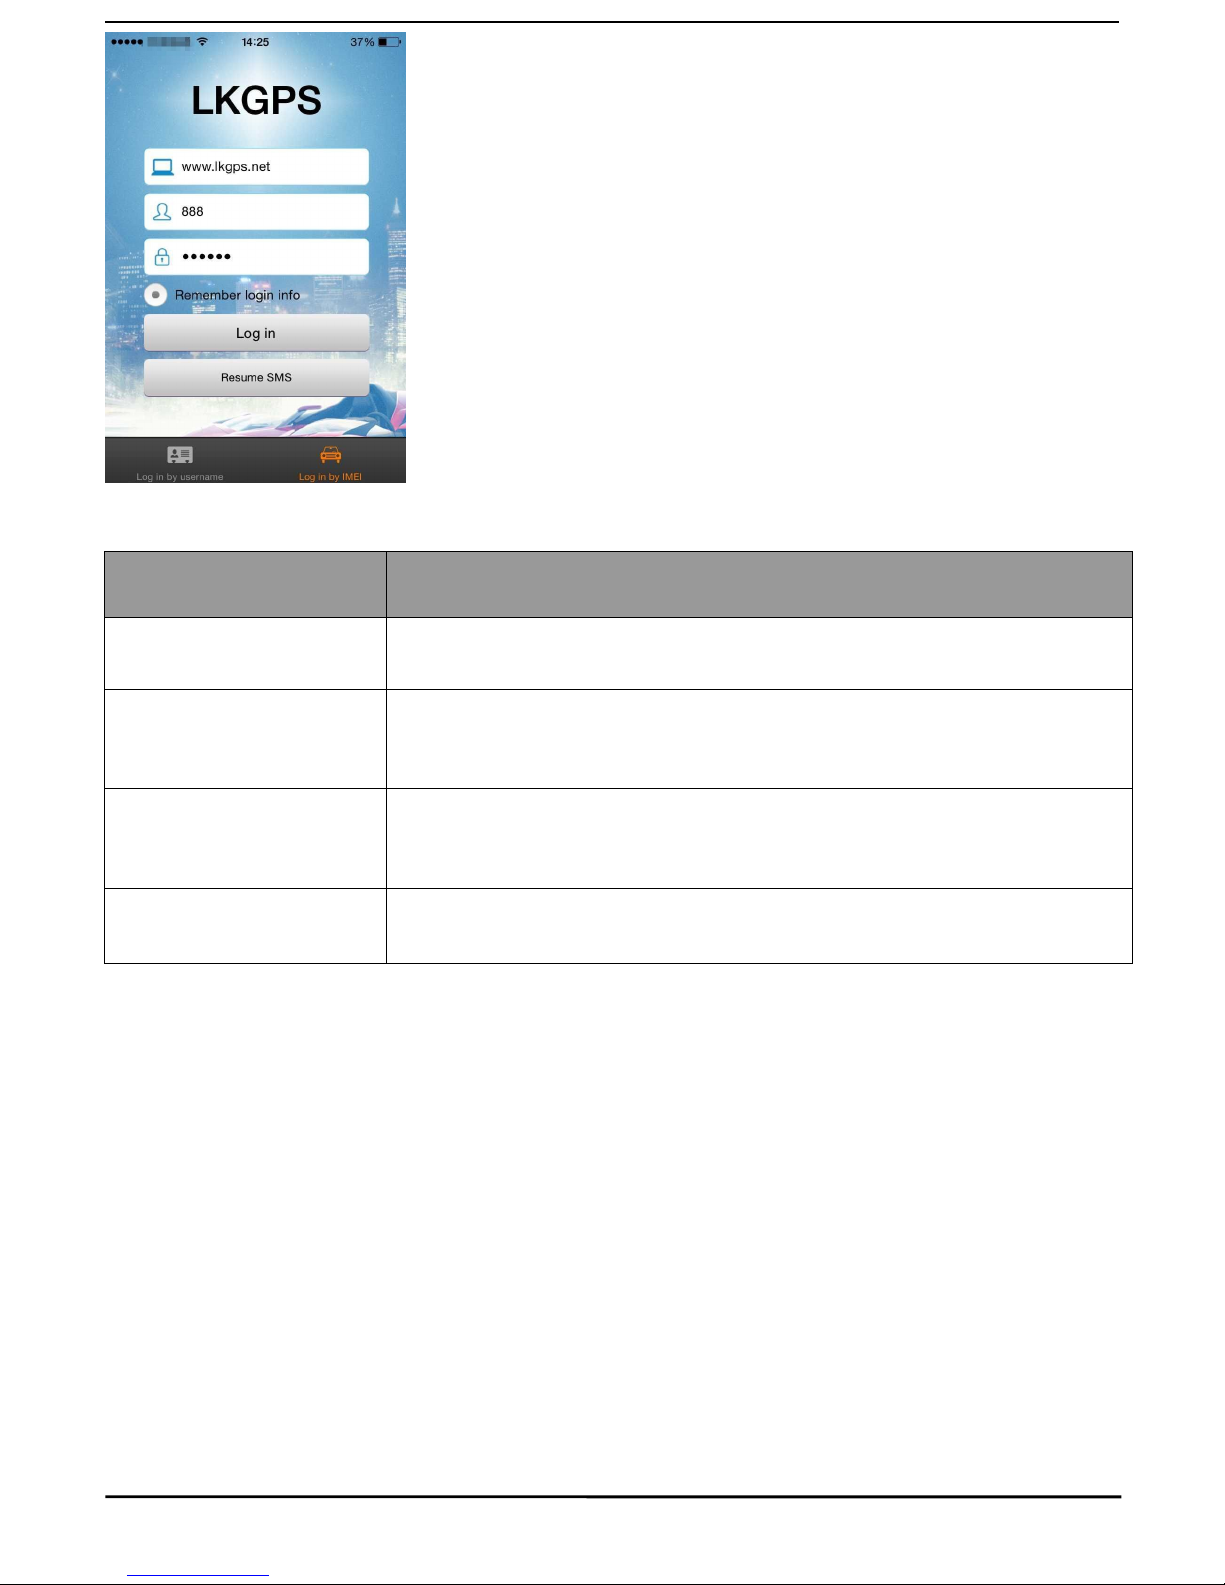
6. App download
6.1 android version: scan below QR code
6.2 ios version: search “LKGPS” in app store
Page 7
7
7. Faults & The solutions
Faults
Solution
Startup Fail
Check the battery and see if it is fully charged or
correctly installed.
Hang up Fail
In existence of an authorized number, an unauthorized
number dials up the unit. Please initialize the unit and re-set up
the authorized numbers.
Monitoring failure
Please check the authorization number is set to the correct time
No GSM Signal
Please make sure SIM Card is GSM Net and installed correctly; also call
display should be on; but no call transfer and PIN code off.
 Loading...