

Page 1
VERSION: 2012.12.12
SETUP GUIDE
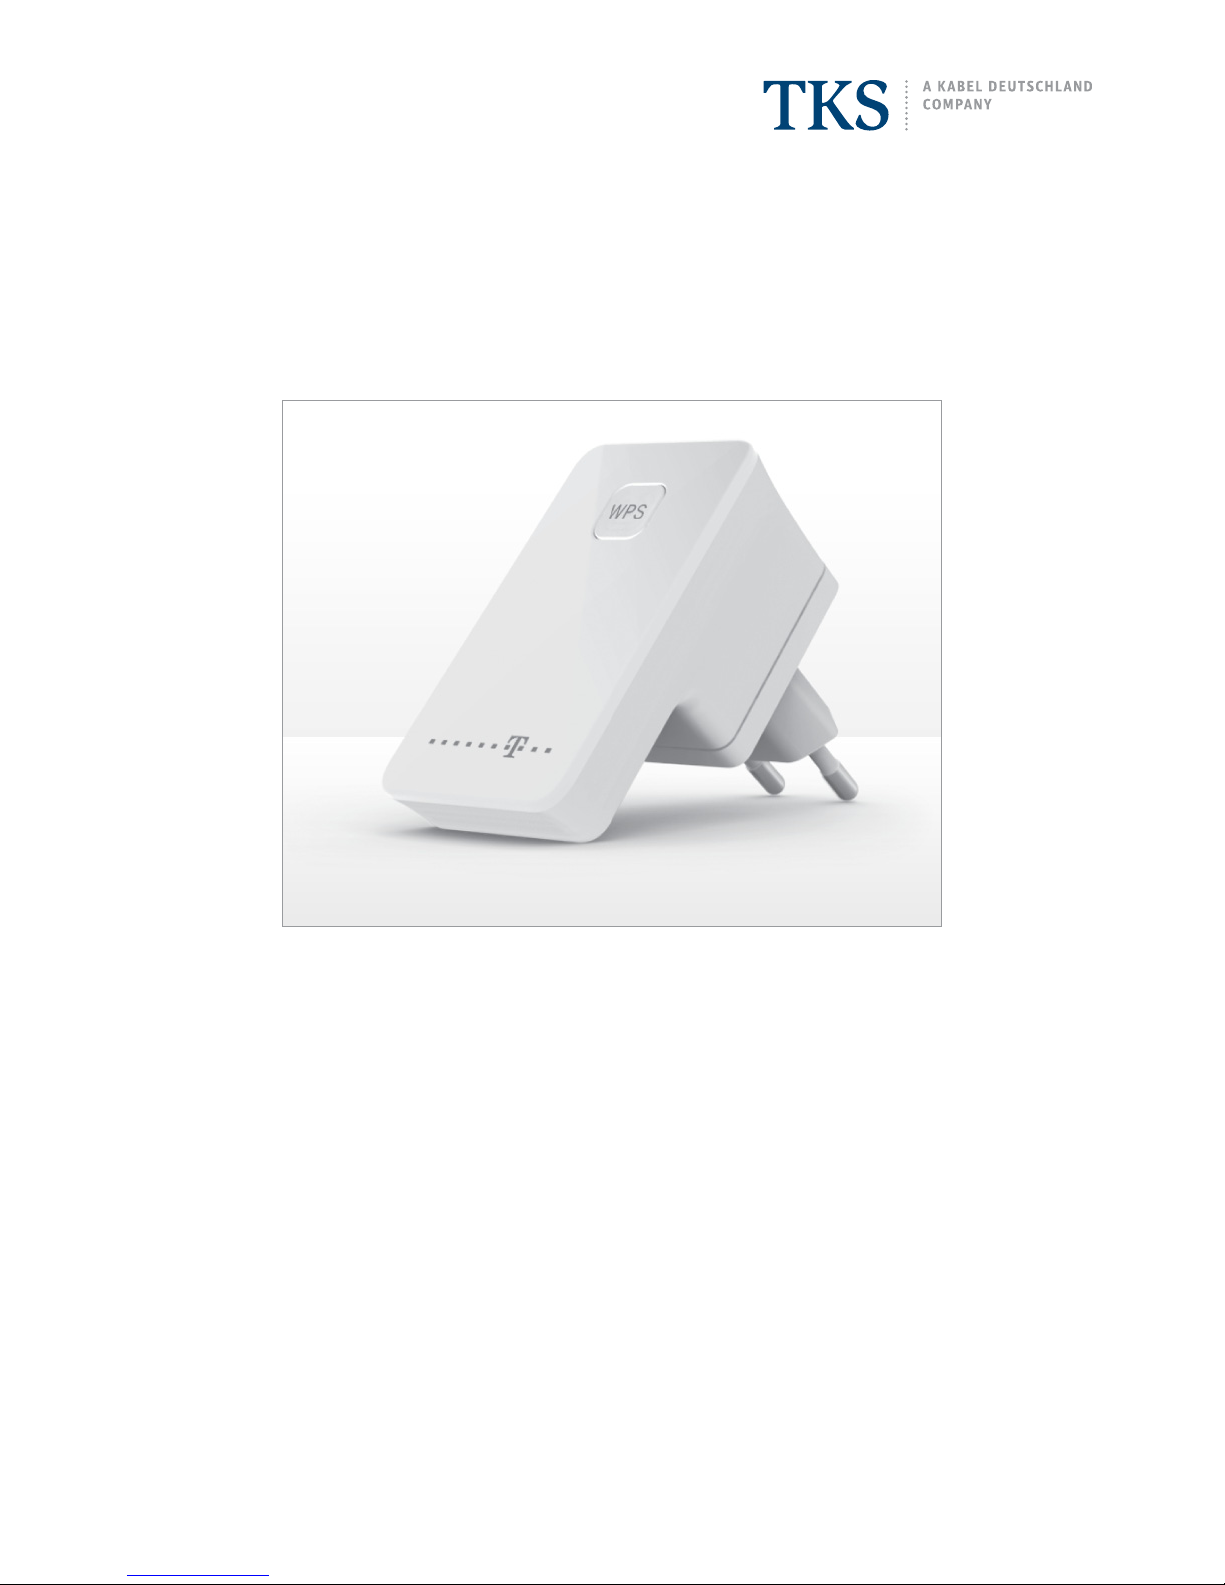
Speedport W 100 Repeater
Quick Reference
Using a repeater to extend the range of your wireless network.
• Connect the repeater to a power receptacle.
• Press the WPS buttons on the router and repeater to
initiate a connection.
• Relocate the repeater to a remote midway point.
• The repeater will automatically connect with the modem
and extend the overall broadcast range of your wireless
network.
Page 2
2
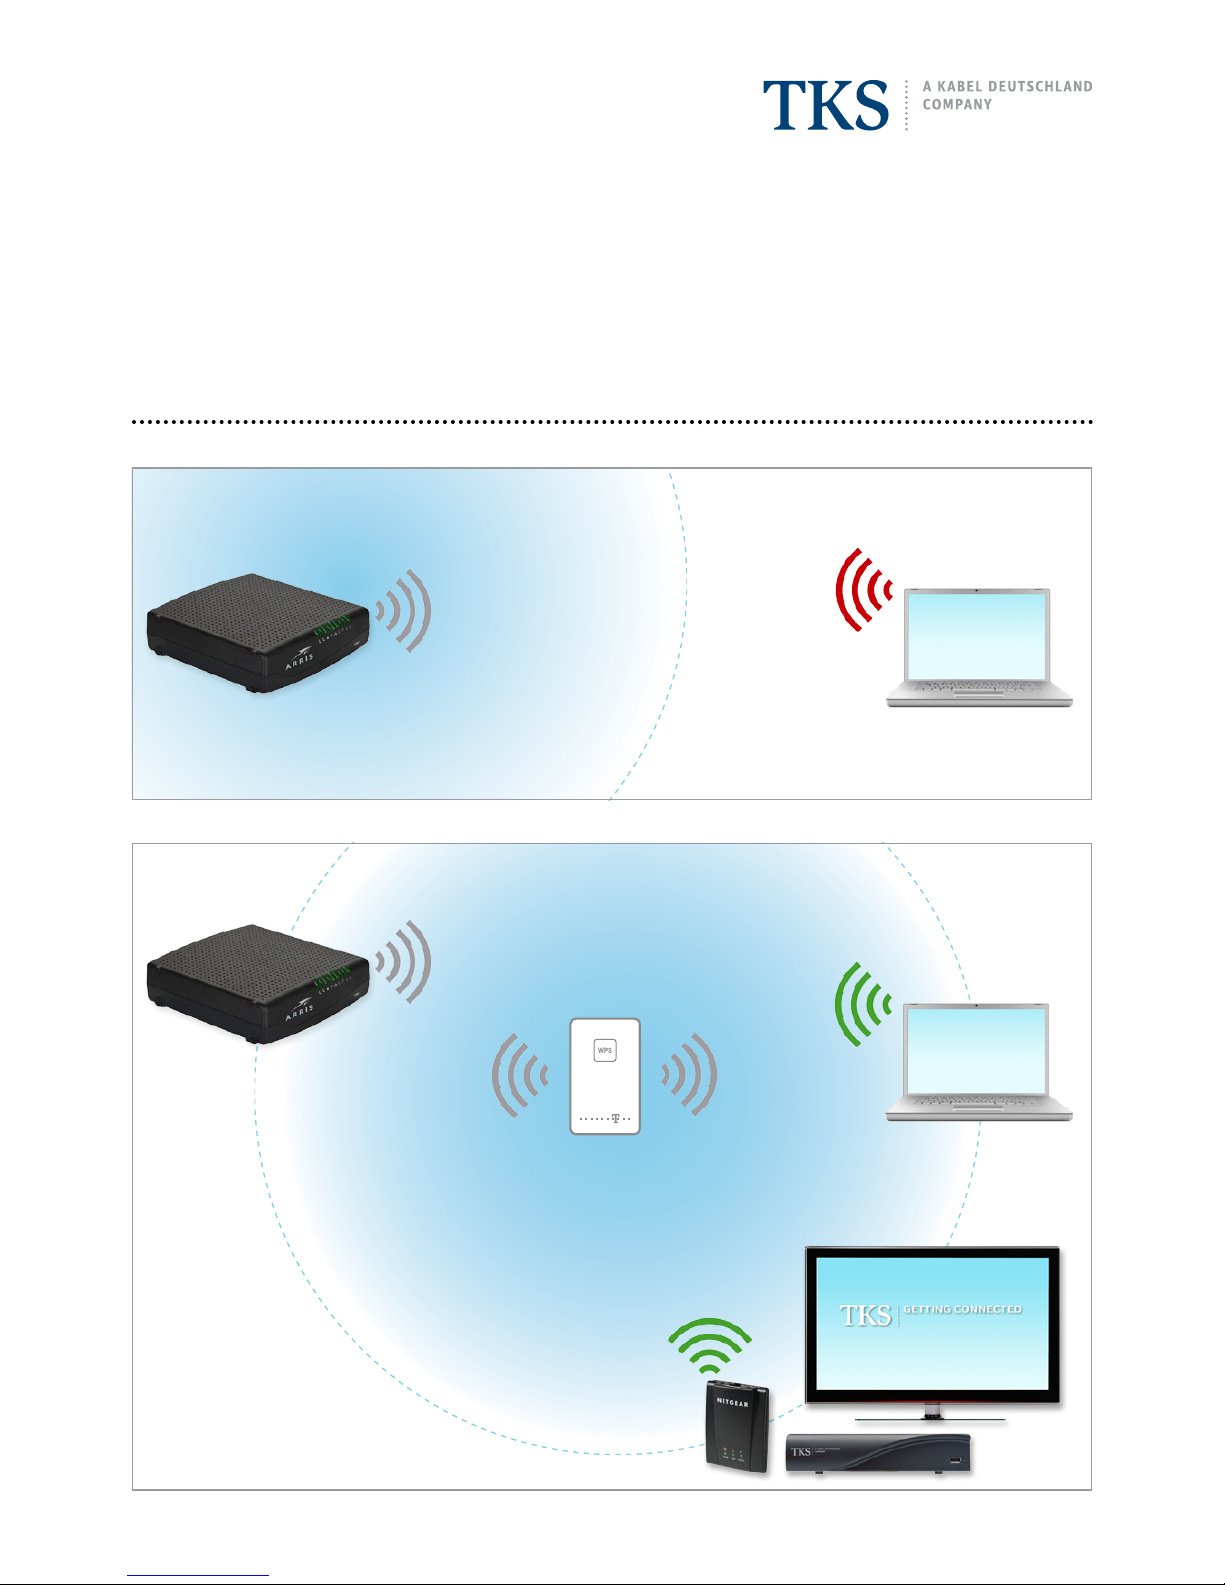
REPEATER EXTENDS Wi-Fi NETWORK
REPEATER
PROBLEM
Your WLAN router does not have
enough range or signal strength to
certain parts of your home.
SOLUTION
Use a WPS repeater to extend the
range of your existing wireless network.
REQUIREMENTS
• Speedport W 100 Repeater
• WPS-enabled WLAN router:
ARRIS WLAN cable modem
• Wi-Fi adapter for digiCABLE
SETUP GUIDE
Speedport W 100 Repeater
WIRELESS NETWORK - LIMITED RANGE
ARRIS Cable Modem
WPS-enabled Router
NO SIGNAL
OUT OF RANGE
FULL
RECEPTION
Page 3
3
SETUP GUIDE
Speedport W 100 Repeater
GETTING STARTED
• To use the Speedport W 100 Repeater, you must establish a wireless connection between the repeater and a WPS-enabled
WLAN router. WPS or a Wi-Fi protected setup is a secure wireless connection.
• Using the repeater, you will be able to connect other wireless devices that were previously either out of range, or that had a
very weak signal reception.
• The repeater only needs to be synchronized with your wireless network once, when restarted it will automatically connect
with the wireless network it was previously connected to.
• By placing the repeater in an area that still has sufficient signal strength, the repeater will then extend the broadcast range
of your wireless router. The maximum distance between router and repeater is approximately 150 meters in an environment
free of obstructions or signal interference.
• Using a Wi-Fi protected setup (WPS) makes it easy to utilize the integrated security features of your existing wireless network. If you have already configured a secure wireless connection on your computer, tablet, or mobile phone for example;
you will automatically be connected to your network via the repeater without having to reconfigure these devices, or reenter
the password.
• NOTE: The repeater is only compatible with WPS-enabled routers, it is not possible to use multiple repeaters.
REPEATER SETUP | STEP-BY-STEP
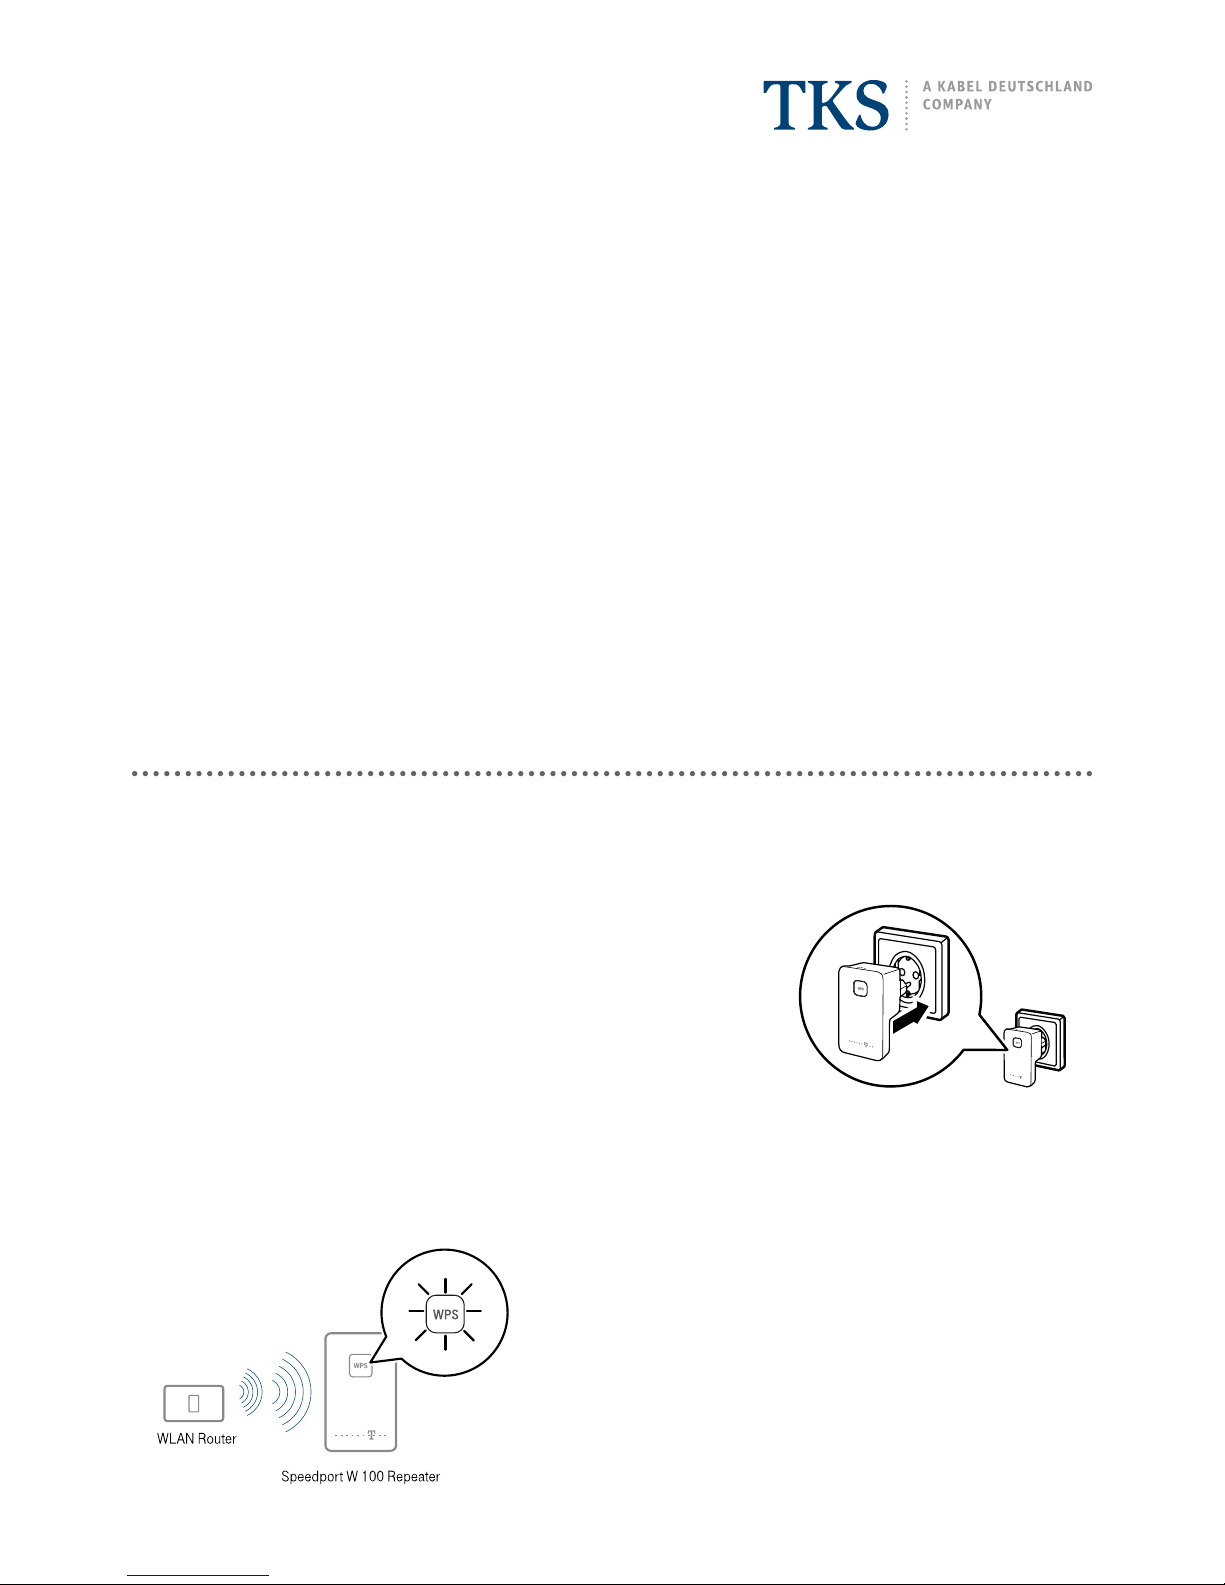
1. Plug the repeater into a power receptacle.
For the initial setup, plug the repeater into a suitable AC power receptacle near your
router and or computer.
When plugged in, the repeater’s control LED will start blinking white indicating that
the device is starting up. When the white LED is constantly on this indicates that the
device is ready to be synched to a WPS-enabled modem, but is not yet connected.
NOTE: After completing the initial configuration your settings will be saved and you
will be able to unplug the repeater and relocate it for optimal coverage.
2. Press the WPS buttons to synchronize.
In summery, you must first press the WPS button on your WPS-enabled router, then press the WPS button on the repeater.
NOTE: The ARRIS WTM 652 cable modem/router for example has a “virtual” WPS button which is accessed over its configuration software, please see the section titled “Where’s my WPS button?”.
The control LED will first begin to blink green indicating that the
connection is being established.
When the green LED stops blinking and is constantly on this indicates
that the wireless connection has been successfully established. This
can take between 20 and 120 seconds depending on the wireless signal
strength.
If the LED begins blinking red this indicates that the connection has
failed. This can happen if the repeater is too far away from the router
and is not receiving adequate signal strength, move the repeater closer.
Page 4
4
SETUP GUIDE
Speedport W 100 Repeater
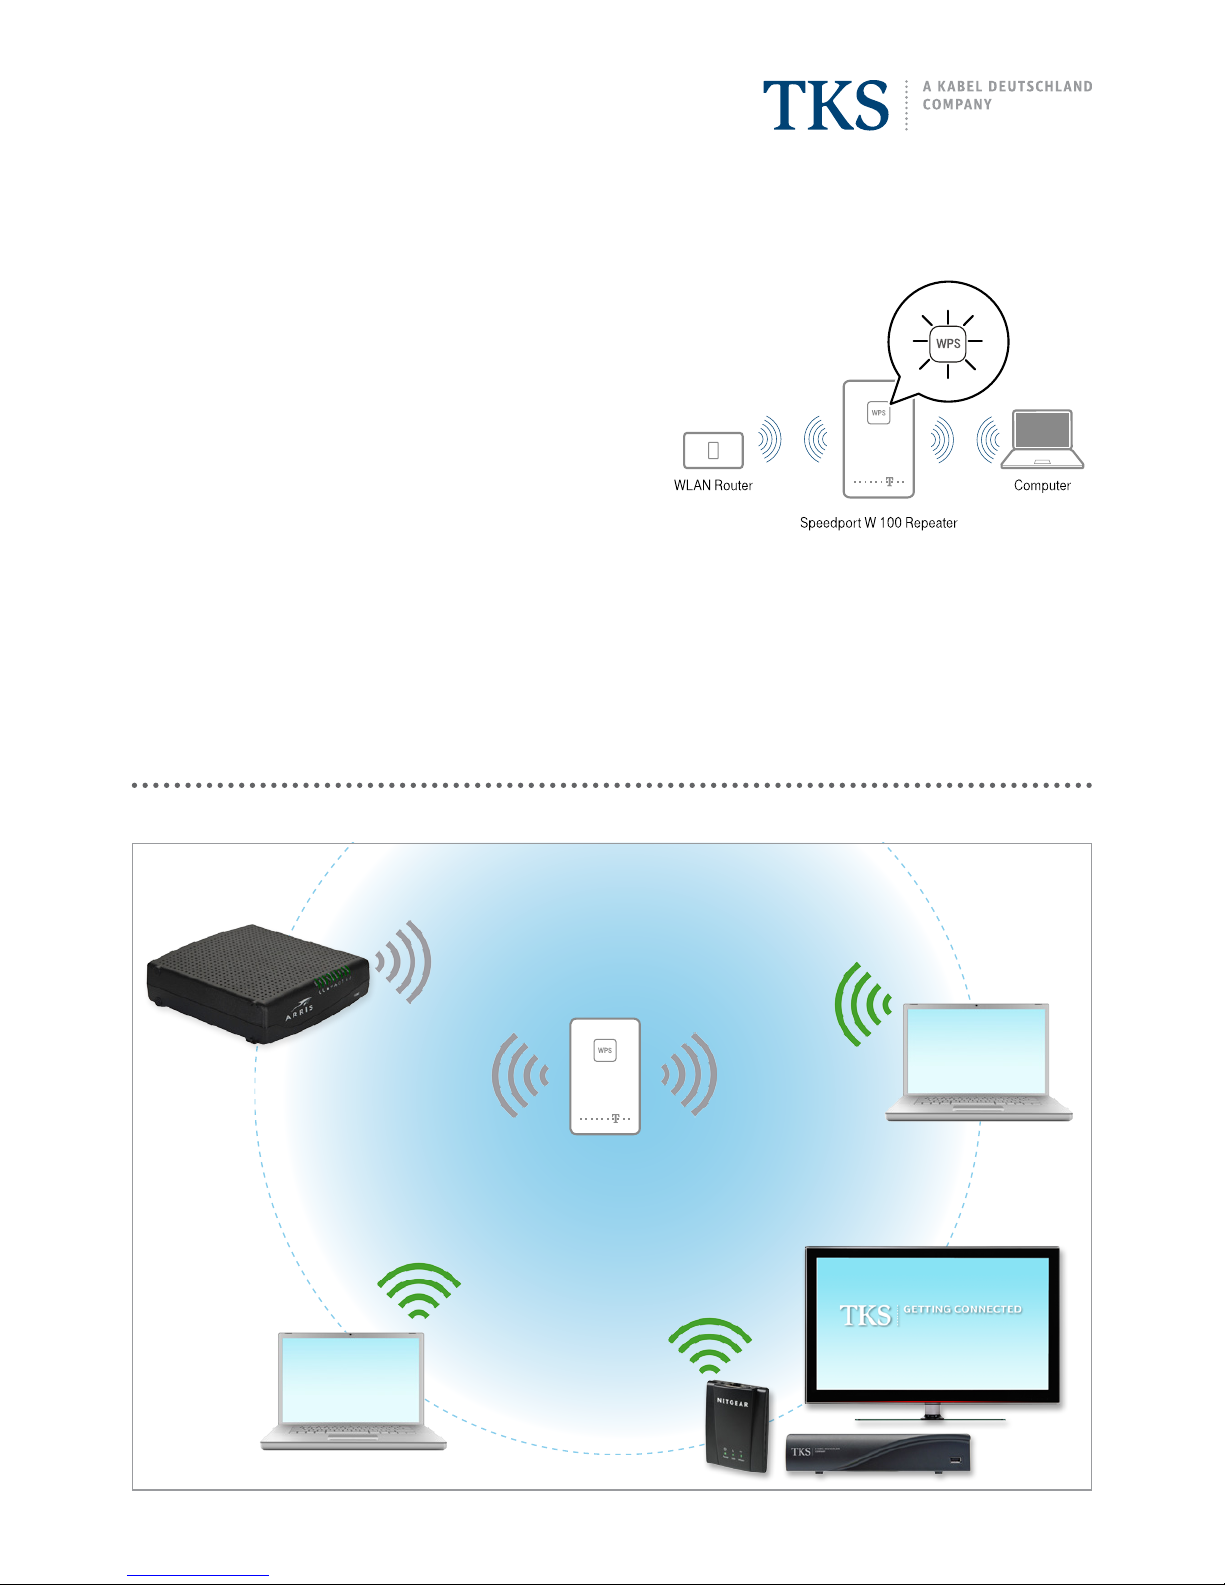
3. Place the repeater in a new location.
Now plug the repeater into a wall receptacle that is midway to the area
of low wireless coverage, for example in an adjoining hall or stairway.
The repeater must always be within range of your modem! For the best
results, do not place the repeater behind cabinets or furniture, or near
other electrical appliances that can cause signal interference.
When plugged in at its new location, the repeater will restart and automatically reconnect to your router, there’s no need to press the WPS
button again.
The LED indicator will once again first blink white, then remain constantly on, afterwards it will begin blinking green.
When the LED stops blinking and is constantly green, the wireless connection has been successfully reestablished. This can
take between 20 and 120 seconds depending on the wireless signal strength.
4. Setup completed!
You may connect wireless devices to your network in the same way you always have before, however now with extended range
as provided by the repeater. Your SSID, or network name, password and settings will all remain the same.
HOME WIRELESS NETWORK
REPEATER
Page 5
5
SETUP GUIDE
Speedport W 100 Repeater
ARRIS WTM652 | Virtual WPS Button
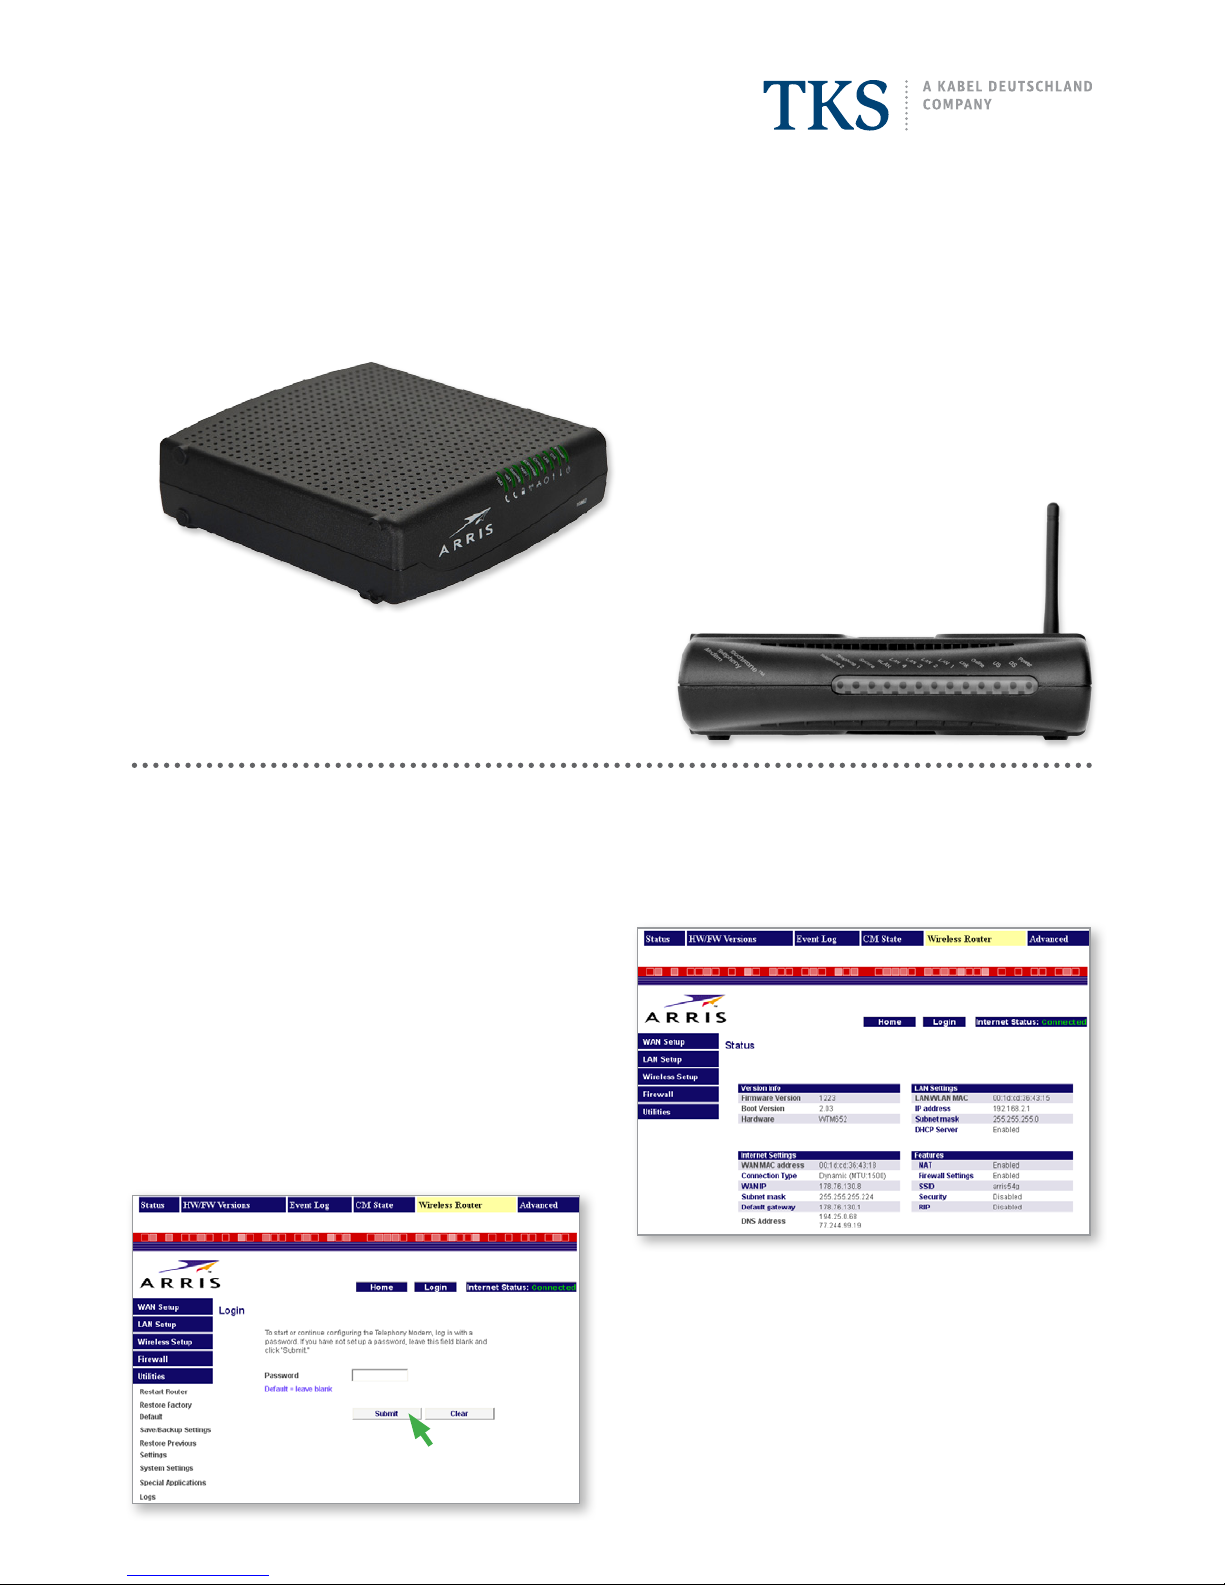
Many routers have a dedicated WPS button, while other devices such as the ARRIS cable modem/router have a “virtual” WPS
button which must be “pressed” onscreen via the device’s control panel software. These instructions will show you how to access the ARRIS WPS settings and get the button pressed.
I. Launch the ARRIS configuration menu.
On a computer that is connected to your ARRIS cable modem
network, launch your Internet browser.
Clear the current web address from the browser’s navigation
bar (e.g. www.google.com) and type in the address below, then
press the Enter key on your computer keyboard:
http://192.168.2.1
II. Login without a password.
Click on Login to proceed, by default there is no preexisting
password, therefore you may leave the field blank and simply
click on Submit.
I. ARRIS CONFIGURATION MENU
II. PASSWORD LOGIN
WHERE’S MY ROUTER’S WPS BUTTON?
ARRIS GT862 | dedicated WPS button
press the button located on the side panel
ARRIS WTM652 | virtual WPS button
see the instructions below
Page 6
6
SETUP GUIDE
Speedport W 100 Repeater
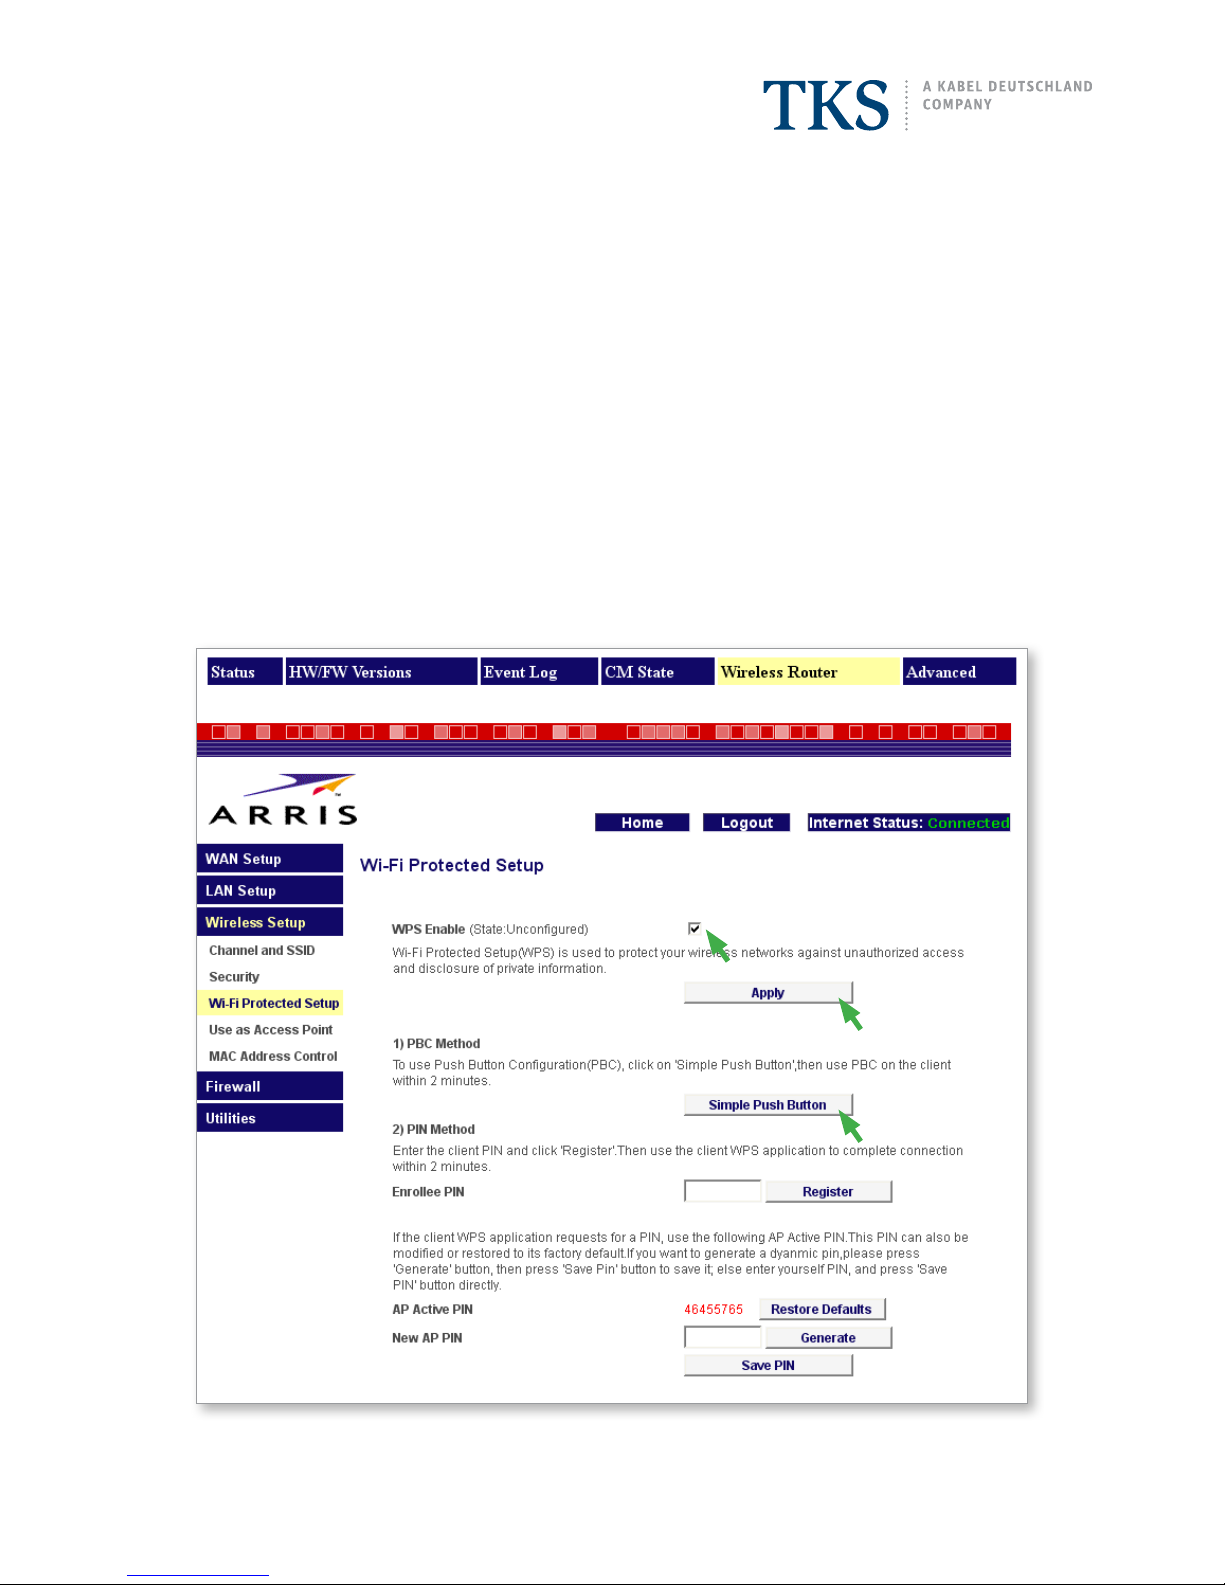
III. Press the WPS button!
To access the wireless settings, click on Wireless Setup on the navigation bar and then on Wi-Fi Protected Setup.
WPS Enable [checkmarked]
If this option is not activated, checkmark the box and then click Apply.
1) PCB Method
Click on Simple Push Button to initiate the router’s WPS connection.
Now press the repeater’s WPS button as per step 2. of the main instructions. The repeater’s LED will begin
blinking green, and then remain constantly green when the connection between the router and repeater
has been successfully established.
Return to step 3. of the main instructions to complete the setup of your repeater!
III. WI-FI PROTECTED SETUP
 Loading...