

Page 1
TJERNLUND PRODUCTS, INC.
1601 Ninth Street • White Bear Lake, MN 55110-6794
PHONE (800) 255-4208 • (651) 426-2993 • FAX (651) 426-9547
Visit our web site • www.tjernlund.com
COMMERCIAL PAI SERIES FAN PROVER REPLACEMENT KIT
NOTE: YOUR FAN PROVING SWITCH MAY NOT BE DEFECTIVE.
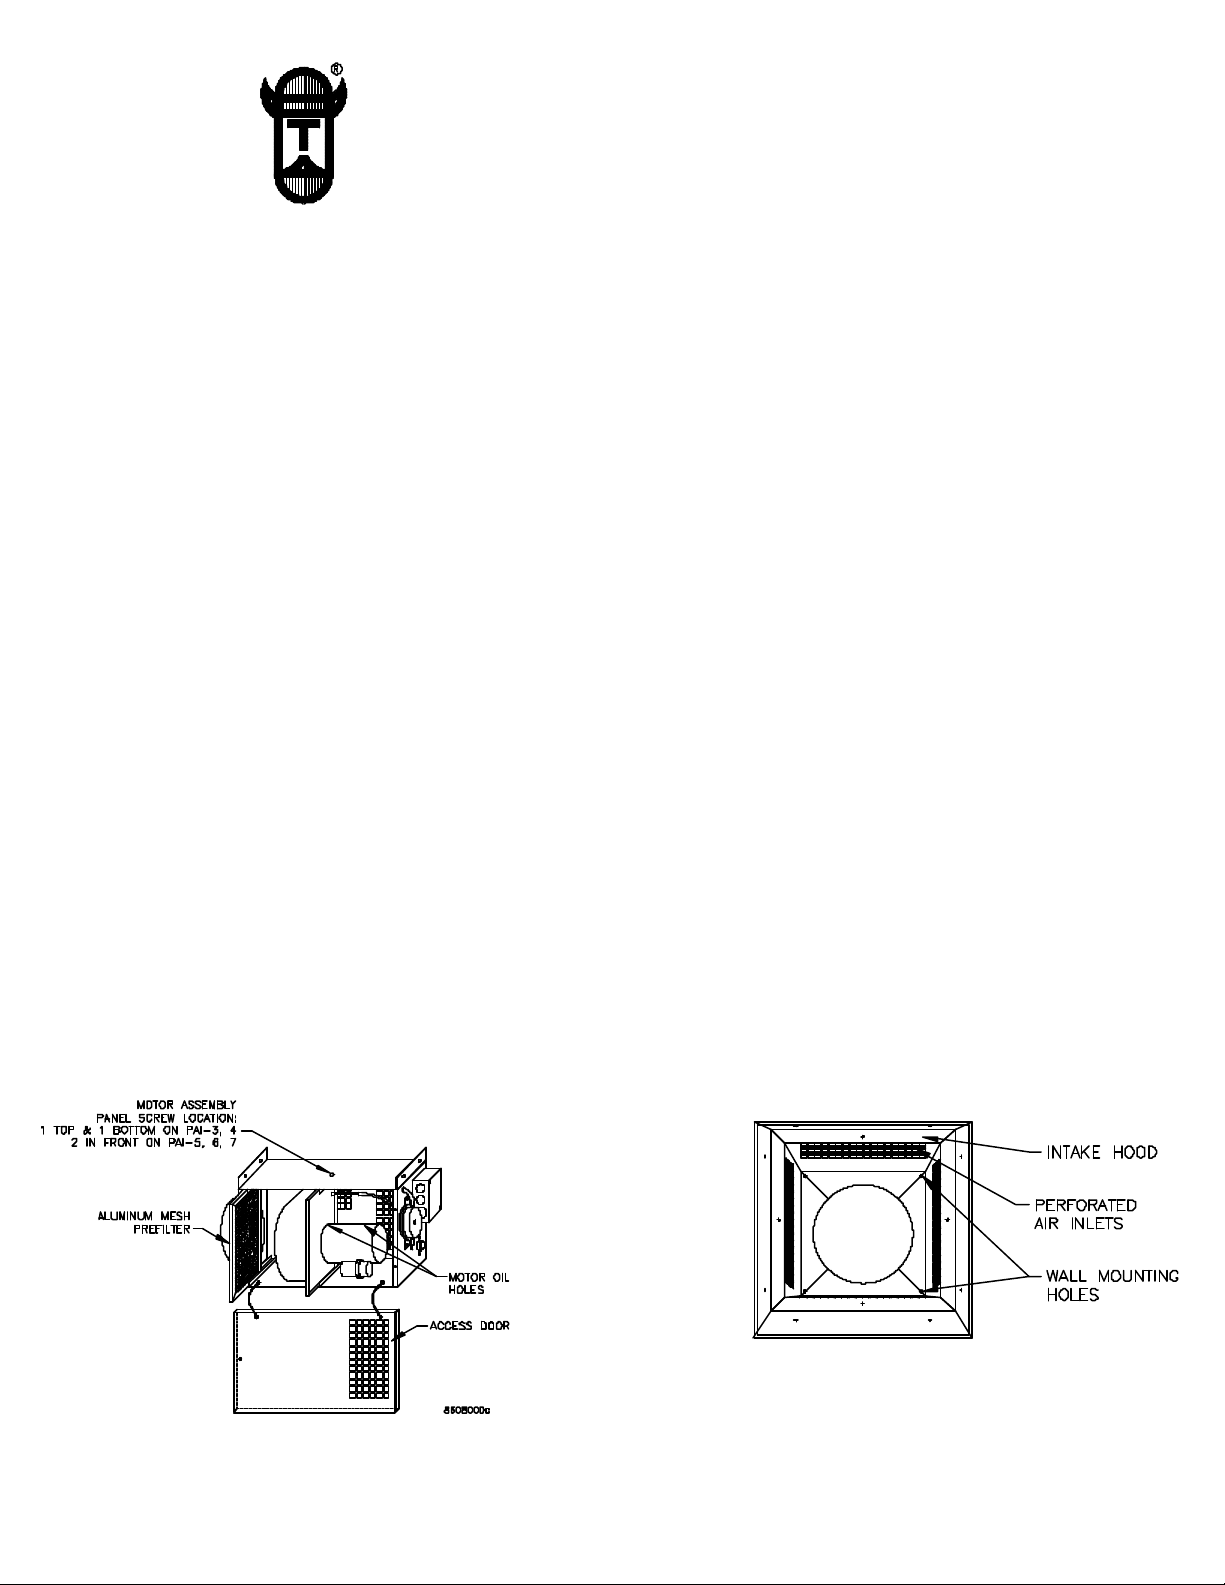
Before replacing Fan Proving Switch make sure IN-FORCER prefilter screen is cleaned of debris, (See Diagram A). If prefilter is
clogged, clean or replace it. Also verify that Intake Hood air inlets are not clogged. Remove Intake Hood cover plate and clean
air inlets if necessary, (See Diagram B). If cleaning was necessary, try operating IN-FORCER before replacing the Fan Proving
Switch. Also verify the Fan Prover Sensing tube does not have kinks in it and both ends are properly connected to Fan Prover
sensing probe and fan housing sensing tube. If Fan Proving Switch is still not making follow replacement procedure below.
WARNING: Disconnect power from IN-FORCERTMand equipment before installing Fan Proving Switch.
1. Remove wires connected to existing Fan Proving Switch terminals.
2. Carefully remove flexible tubing from old Fan Proving Switch sensing probe and remove switch.
3. Install new Fan Proving Switch with provided screws.
4. Replace flexible tubing on sensing probe of Fan Proving Switch. Make sure there are no kinks in Fan Prover
sensing tubing.
6. Connect wires to terminals on new Fan Proving Switch. Blue to Common; Yellow to Normally Open.
7. Reconnect power supply. Run IN-FORCER and heating equipment through several heating cycles to verify proper
operation.
For technical assistance contact Tjernlund’s Technical Customer Service at 1-800-255-4208; M-F 7:30 - 4:30 CST.
DIAGRAM A
DIAGRAM B
P/N 8504086 Copyright © 2000 Tjernlund Products, Inc. All rights reserved. R EV. A 01/00
 Loading...