

Page 1

TiVo® HD DVR
from DIRECTV
THR 22-100
Viewer’s Guide
Page 2
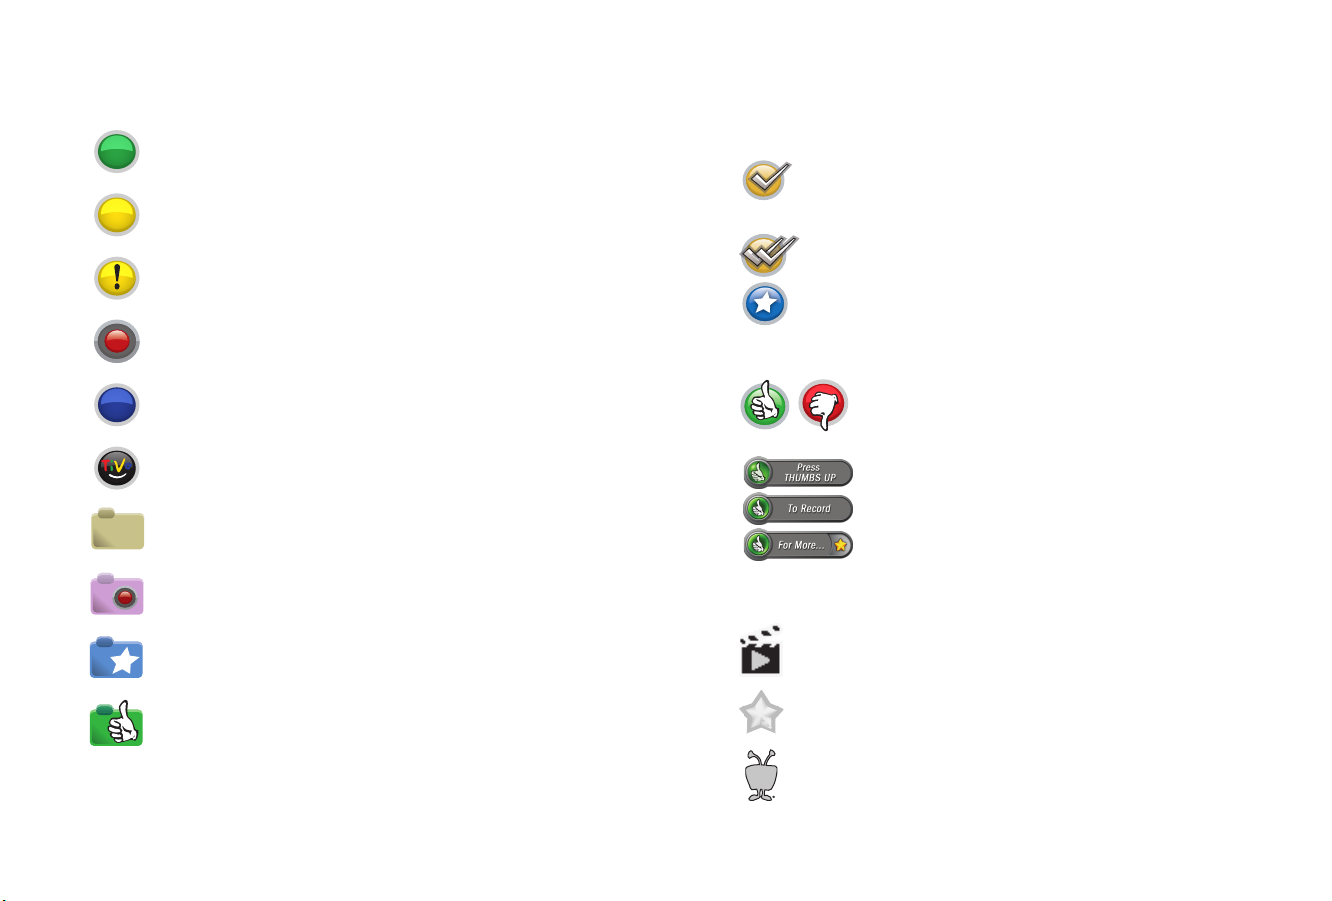
Glossary of Icons
Now Playing
This program will be saved until you delete it.
In less than one day, this program may be deleted to make room for other
recordings you have requested, but only if space is needed.
At any time, this program may be deleted to make room for other
programs you have requested.
This program is currently being recorded.
This program is currently being downloaded.
This program is a TiVo
space is available, and are the first to be deleted when space is needed.
This folder contains more than one episode of the same series.
This folder contains a program that is currently recording or transferring.
This folder contains one or more programs recorded by a WishList
search.
®
Suggestion. TiVo Suggestions are recorded only if
®
To Do List and View Upcoming Episodes
(These icons appear beside programs scheduled to be recorded.)
Program will be recorded as an individual recording (not part of a
Season Pass
®
recording or WishList® search). In other places,
indicates that an item has been selected.
Program will be recorded as part of a Season Pass recording.
Program will be recorded as part of a WishList search.
Live TV
These appear when you press THUMBS UP or THUMBS
®
TiVo Central
DOWN. You can rate a program with up to three Thumbs
®
Up™ or three Thumbs Down™.
®
Ipreview
icons appear when an option—such as
automatically scheduling an upcoming program or
watching an additional program segment—is available.
Press SELECT or THUMBS UP to choose the option.
®
and Showcases
Indicates a selection that has some special video content.
This folder contains all programs recorded as TiVo Suggestions.
Select to watch a special preview or visit a Showcase.
Indicates news or a special promotional offer from TiVo.
Page 3

Welcome
Page 4

This Viewer’s Guide describes features of the TiVo® service running on the TiVo HD DVR
from DIRECTV (model THR22-100).
ACTIVATION OF PROGRAMMING SUBJECT TO CREDIT APPROVAL.
PREPAYMENT MAY BE REQUIRED. CREDIT CARD REQUIRED (except in MA and
PA). Programming subject to change. DIRECTV Services not available outside the U.S.
DIRECTV Programming is available separately and independently of DIRECTV System
hardware. A valid programming subscription is required to operate DIRECTV System
hardware. Activate your DIRECTV Programming today at 1-800-531-5000.
DIRECTV and the Cyclone Design logo, nomad, GameSearch, DIRECTV CINEMA, and
DIRECTV Active are trademarks or registered trademarks of DIRECTV, Inc.
© 2012 TiVo Inc. Reproduction in whole or in part without written permission of TiVo Inc. is
prohibited. All rights reserved.
TiVo, the TiVo logo, TiVo Central, WishList, Season Pass, Swivel , TiVoToGo, the Jump
logo, the Instant Replay logo, the Thumbs Up logo, the Thumbs Down logo, and the sounds
used by the TiVo service are trademarks, service marks and/or registered trademarks of TiVo
Inc. or its subsidiaries worldwide. All rights reserved.
Manufactured under license from Dolby Laboratories. “Dolby” and the double-D symbol are
trademarks of Dolby Laboratories.
Android is a trademark of Google Inc.
BlackBerry is a registered trademark of Research in Motion Limited.
iPad and iPhone are registered trademarks of Apple Inc.
HDMI, the HDMI logo, and High Definition Multimedia Interface are trademarks or
registered trademarks of HDMI Licensing, LLC.
Palm, Pre, and Pixi are trademarks and/or registered trademarks of Palm, Inc.
Windows is a registered trademark of Microsoft Corporation in the United States and
other countries.
ii
Page 5

Important Safety Instructions
Your TiVo HD DVR from DIRECTV has been designed and
manufactured to stringent quality and safety standards. You should,
however, be aware of the following important precautions for safe
and optimal use of the equipment.
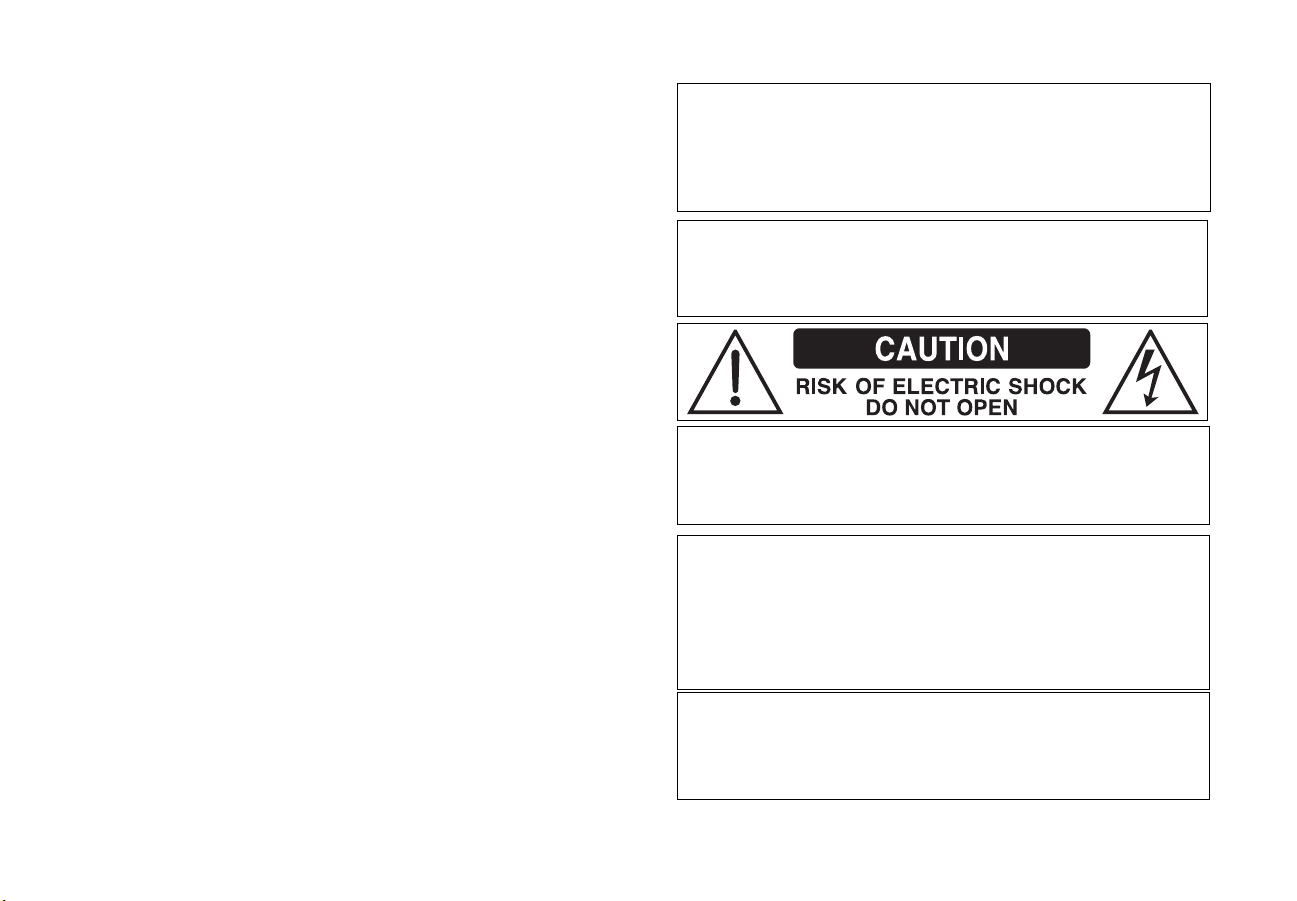
Meaning of symbols printed on the rear panel of the product:
This symbol indicates that danger ous voltage consisti ng a risk
of electric shock is present within this unit.
This symbol indicates that there are important operating and
maintenance instructions in the literature accompanying this
t.
uni
Important Safety Instructions
1) Read these instructions.
2) Keep these instructions.
3) Heed all warnings.
4) Follow all instructions.
5) Do not use this apparatus near water.
6) Clean only with dry cloth.
7) Do not block any ventilation openings
the manufacturer’s instructions.
. Install in accordance with
8) Do not install near any heat s
registers, stoves, or other apparatus (including amplifiers) that
produce heat.
9) Do not defeat the safety purpose of the polarized or groundinge plug. A polarized plug has two blades with one wider than the
typ
other. A grounding type plug has two blades and a third grounding
prong. The wide blade or the third prong are provided for your safety.
If the provided plug does not fit into your outlet, consult an
electrician for replacement of the obsolete outlet.
10) Protect the power cord from being walked on or pinched
particularly
they exit from the apparatus.
11) Only use attachments/accessories specified by
13) Unplug this apparatus during lightning storms or when unused for
g periods of time.
lon
14) Refer all servicing to qualified service personnel. Servicing is
required
power-supply cord or plug is damaged, liquid has been spilled or
objects have fallen into the apparatus, the apparatus has been exposed
to rain or moisture, does not operate normally, or has been dropped.
• Ensure proper ventilation — the vent slots on the DVR must be
left
at plugs, convenience receptacles, and the point where
when the apparatus has been damaged in any way, such as
uncovered to allow proper airflow to the unit. Blocking the
ources such as radiators, heat
the manufacturer.
iii
Page 6

airflow to the unit could impair performance or damage your
DVR and other components.
• Do not stack electronic components or other objects on top of th e
DVR. Also, do not stack the DVR on top of a “hot component”
such as an audio power amplifier.
• Protect your components from power surges by connecting all the
components before plugging any power cords into the wall outlet.
Use of a surge protector is also recommended.
• Don’t overload power outlets or extension cords, which can result
in the risk of fire or shock. It’s also important to use only the type
of power source indicated on the marking label or in this manual.
• Avoid audio hum or interference by inserting all cable plugs
firmly into their jacks. Also, place Audio/Video (A/V) cables to
the sides of the TV back panel rather than down the middle once
connected. Try not to coil any twin-lead cables and keep them
away from A/V cables as much as possible.
• Never insert objects of any kind into any openings in the DVR
(other than the DIRECTV
®
Access Card as detailed in this
manual).
• Place it on a flat, hard surface — do not operate the DVR on a
carpet or other padded surface.
• Always unplug your DVR before moving it.
• Always unplug the DVR, TV and other equipment before you
connect or disconnect any cables.
• The only way to disconnect the DVR from the power supply is to
remove the power cord. The DVR must therefore be installed next
to the power point which must be easily accessible.
• CAUTION: Electric Shock — never attempt to disassemble the
DVR yourself; always take it to a qualified service person when
repair is required. Opening or
removing covers may expose
dangerous voltage or other risks, and incorrect reassembly can
cause shock when the DVR is subsequently used. Attempted selfrepair may also void your warranty. Changes or modifications not
expressly approved by the party responsible for compliance (by
the warranty or by the manufacturer) could void the user’s
authority to operate the equipment.
• Do not drop your DVR and always move it with care.
• Have your DVR professionally serviced (do not attempt to service
it yourself).
• Any changes or modifications in construction of this device which
are not expressly approved by the party responsible for
compliance could void the user’s authority to operate the
equipment.
• If you move your DVR between locations at different
temperatures, allow it to reach room temperature before you apply
power to it.
• Do not pick up or otherwise move your DVR while it is connected
to the AC power supply. If you want to move your set-top box,
first disconnect it, then wait at least 30 seconds before continuing
iv
Page 7
• To reduce the risk of fire, use only No. 26 AWG or better
WARNING: To reduce the risk of fire or electric shock, do not
expose this product to rain or moisture. The apparatus shall not
be exposed to dripping or splashing and no objects filled with
liquids, such as vases, shall be placed on the apparatus.
CAUTION! To reduce the risk of electric shock, do not remove
cover (or back). No user-serviceable parts inside. Refer
servicing to qualified service personnel.
IMPORTANT: Be sure not to place your DVR near anything
WET or HOT! If this product is used at 240VAC, a suitable
attachment plug should be used.
CAUTION! Avoid moisture to reduce the risk of fire or electric
shock. The DVR should not be used near water (for example,
kitchen sink, bathtub, pool, damp basement). Also, never spill
liquid on the DVR, and do not place vases or other vessels
containing liquid on top of it.
TIP: We highly recommend plugging the DVR into a surge
protector to prevent damage from fluctuations in your power
supply.
telecommunications line cord.
• Batteries (for instance, in the TiVo remote control) should not be
exposed to excessive heat (such as from sunshine, fire, etc.).
For your information: The identification
underneath or on the back of your DVR.
The telecommunication network voltage used is the category number
3.
NOTE TO SATELLITE DISH INSTALLER
This reminder is provided to call your attention to articles 810 and
820 of the 2005 National Electrical Code. Refer to article 810, in
particular 810-1 and 810-15, for required grounding of the metal
structure of the dish antenna. Refer also to the 810-2 which, by
reference to article 820, requires that the satellite dish coaxial cable
shield be connected to the grounding system of the building as close
to the point of cable entry as practical.
sticker can be located
v
Page 8

Table of Contents
Important Safety Instructions . . . . . . . . . . . . . . . . . . . . . . . . . . . iii
Welcome to TiVo on DIRECTV
®
!. . . . . . . . . . . . . . . . . . . . . . .vii
Chapter 1: Quick Tours . . . . . . . . . . . . . . . . . . . . . . . . . . . .1
Tour One - The TiVo® menus. . . . . . . . . . . . . . . . . . . . . . . . . . . .2
Tour Two - Watching live TV . . . . . . . . . . . . . . . . . . . . . . . . . . .5
Tour Three - Recording live TV. . . . . . . . . . . . . . . . . . . . . . . . . .8
Tour Four - Searching by title . . . . . . . . . . . . . . . . . . . . . . . . . .10
Tour Five - DIRECTV
Tour Six - DIRECTV
®
on Demand . . . . . . . . . . . . . . . . . . . . .11
®
Pay Per View. . . . . . . . . . . . . . . . . . . . .13
Chapter 2: Finding shows . . . . . . . . . . . . . . . . . . . . . . . . .15
Using the program guide to find shows . . . . . . . . . . . . . . . . . . .16
Searching by title . . . . . . . . . . . . . . . . . . . . . . . . . . . . . . . . . . . .19
Using Swivel
Recording by time or channel. . . . . . . . . . . . . . . . . . . . . . . . . . .21
Season Pass
WishList
Recommended shows . . . . . . . . . . . . . . . . . . . . . . . . . . . . . . . . .26
Setting up a remote recording. . . . . . . . . . . . . . . . . . . . . . . . . . .28
Managing recordings . . . . . . . . . . . . . . . . . . . . . . . . . . . . . . . . .30
™
search. . . . . . . . . . . . . . . . . . . . . . . . . . . . . . . . .20
®
recordings. . . . . . . . . . . . . . . . . . . . . . . . . . . . . . .22
®
searches. . . . . . . . . . . . . . . . . . . . . . . . . . . . . . . . . . .23
Chapter 3: Watching shows. . . . . . . . . . . . . . . . . . . . . . . .33
Moving around with the status bar . . . . . . . . . . . . . . . . . . . . . . .34
Setting a show’s recording options. . . . . . . . . . . . . . . . . . . . . . .38
Customizing your video and audio. . . . . . . . . . . . . . . . . . . . . . .40
Parental Controls . . . . . . . . . . . . . . . . . . . . . . . . . . . . . . . . . . . .45
Interactive Channels . . . . . . . . . . . . . . . . . . . . . . . . . . . . . . . . . .54
Music, Photos, & Showcases . . . . . . . . . . . . . . . . . . . . . . . . . . .56
Chapter 5: Settings . . . . . . . . . . . . . . . . . . . . . . . . . . . . . . 61
Channel settings . . . . . . . . . . . . . . . . . . . . . . . . . . . . . . . . . . . . .62
Display settings. . . . . . . . . . . . . . . . . . . . . . . . . . . . . . . . . . . . . .64
Network and phone settings . . . . . . . . . . . . . . . . . . . . . . . . . . . .65
Remote control settings . . . . . . . . . . . . . . . . . . . . . . . . . . . . . . .68
Satellite & off-air antenna settings. . . . . . . . . . . . . . . . . . . . . . .70
Messages. . . . . . . . . . . . . . . . . . . . . . . . . . . . . . . . . . . . . . . . . . .71
Account & system information. . . . . . . . . . . . . . . . . . . . . . . . . .72
Restart or reset system . . . . . . . . . . . . . . . . . . . . . . . . . . . . . . . .73
Standby. . . . . . . . . . . . . . . . . . . . . . . . . . . . . . . . . . . . . . . . . . . .74
Chapter 6: Installation and Connections . . . . . . . . . . . . . 75
Professional installation . . . . . . . . . . . . . . . . . . . . . . . . . . . . . . .76
Connections (network and phone) . . . . . . . . . . . . . . . . . . . . . . .76
Connections for auxiliary equipment . . . . . . . . . . . . . . . . . . . . .79
Guided Setup and activation. . . . . . . . . . . . . . . . . . . . . . . . . . . .85
Chapter 7: Troubleshooting . . . . . . . . . . . . . . . . . . . . . . . 87
Chapter 8: Warranty and other information. . . . . . . . . . . 99
Appendix A: Front/Back Panels & Specifications . . . . . 121
Index . . . . . . . . . . . . . . . . . . . . . . . . . . . . . . . . . . . . . . . . 127
Chapter 4: More than just TV. . . . . . . . . . . . . . . . . . . . . . .49
DIRECTV on Demand . . . . . . . . . . . . . . . . . . . . . . . . . . . . . . . .50
vi
Page 9

Welcome to TiVo on DIRECTV®!
Welcome to the TiVo HD DVR from DIRECTV. Now that you’re
plugged in, it’s time to start enjoying your access to over 285
channels of TV programming that includes movies, sports, music,
and special events, plus an extensive Pay Per View selection and, if
you connect your DVR to the Internet, access to DIRECTV on
Demand, where you can download from a library of thousands of
shows via your home broadband service. This guide will take you
step by step through everything you need to know to get the most
out of the TiVo service on DIRECTV.
Note: DIRECTV on Demand service requires a receiver connected
to the Internet, TiVo service and any other applicable monthly
Advanced Receiver fees, DIRECTV CINEMA connection kit,
broadband Internet service with a connection speed of 750 Kbps or
higher (DSL or cable), a network router with an available Ethernet
port, a land-based phone line connection, and an available wall
outlet.
Getting started:
1. Using this guide. If you’re new to DVRs or just want to know the
essentials, simply read the Quick Tours in Chapter 1. If you want
more details, you’ll find them in the rest of this guide.
2. Getting connected. If a professional installed your DVR, you are
ready to start watching TV. If your DVR was not professionally
installed or you just added a surround sound system or other
equipment, please see “Installation and Connections” on
page 75.
Remember:
• The TiVo HD DVR from DIRECTV requires a monthly TiVo
Service Fee in addition to other applicable monthly Advanced
Receiver service fees.
• For more information on pricing and programming, please visit
directv.com
• DIRECTV hardware and programming are available separately.
• The TiVO HD DVR from DIRECTV is not compatible with
DIRECTV Whole-Home DVR service, TV Apps, Picture In
Graphics, 3D Programming, YouTube, DIRECTV nomad™,
GameSearch™, Spanish UI, DIRECTV2PC video streaming,
and select other DIRECTV features. Please visit directv.com
more information.
.
for
Basic terms
Before you start learning about all that your TiVo HD DVR from
DIRECTV can do, here are some terms you should know:
Live TV. If you’re watching a show as it’s being broadcast,
you’re watching live TV. You can pause live TV for up to 30
minutes. When you resume watching, you’re “behind” live TV.
vii
Page 10

(You can always get to live TV by pressing the Live TV button
on your remote).
Dual tuner. A tuner is a device found inside DVRs, TVs, satellite
boxes — anything designed to receive TV signals, including the
DVR. A tuner picks one channel to display; it “tunes” to that
channel. Your DVR is a “dual tuner” device, meaning that it has
two tuners inside and can record two shows at once. Pressing the
Live TV button while watching live TV will swap between your
two tuners, allowing you to watch what is on either tuner.
Service updates. From time to time, your DVR may receive
updates, including features not described in this guide. For the
latest how-to information, to find out what’s new, and to get
great tips and tricks, visit directv.com
.
viii
Page 11

Quick Tours
Tour One - The TiVo® menus 2
Tour Two - Watching live TV 5
Tour Three - Recording live TV 8
Tour Four - Searching by title 10
Tour Five - DIRECTV® on Demand 11
Tour Six - DIRECTV® Pay Per View 13
1
Page 12

Quick Tours
1
Icons to the left of the show’s title tell you the
recording’s current status. See the Glossary of Icons
on the inside front cover for details.
Tour One - The TiVo® menus
Your starting point — TiVo Central
TiVo Central is the starting point for just about everything you do with your TiVo HD DVR
from DIRECTV. From TiVo Central, you can see all the
shows and set up recordings, explore great video on demand choices, and more.
To get to TiVo Central from live TV or from any TiVo screen, just press the TiVo
your remote control.
®
shows you’ve recorded, find new
button on
Your Now Playing List
All the shows recorded by your DVR, including Pay Per View items and DIRECTV on Demand
downloads, appear in the Now Playing List.
Highlight any title in the Now Playing List (even a show that’s still recording) and press PLAY
ay the show from the beginning.
to pl
If your shows are grouped into folders (see “Grouping shows” below), highlight the group name
and press PLAY to play all of the shows in the group in sequence, beginning with the oldest.
To delete an individual show or a group, highlight the show or group name and press CLEAR.
Sorting shows
You can view the Now Playing List either alphabetically by title (from A to Z) or by date
recorded. To change how the list is sorted:
2
1. From
‘Now Playing List,’ choose a show, then press ENTER on your TiVo remote to see
‘Now Playing List Options.’
Page 13

2. Highlight ‘Sort’, then press the LEFT arrow to choose ‘Alphabetically.’ Select ‘View Now
Deleted shows go to the Recently
Deleted group, where they remain
until space is needed for new
recordings.
Playing List with these options.’ When you return to Now Playing List, shows are listed
alphabetically by title.
Note: You can bypass this screen and change these options in the Now Playing List using
your remote control. Press 1 to change sort order; press 2 to turn Groups on or off.
Grouping shows
When Groups are on, shows are organized into folders, and a number in parentheses to the right
of each folder shows how many shows it contains. Even if Groups are turned off, you’ll see the
Recently Deleted group at the bottom of the Now Playing List. To turn Groups on:
1. From ‘Now Playing List,’ press ENTER on your TiVo remote to see ‘Now Playing List
Options.’
2. Select Groups, then press the RIGHT arrow to choose ‘On.’ Then select ‘View Now Playing
List with these options.’ When you return to Now Playing List, you’ll see a group for:
• Each television series with more than one recorded episode.
®
• Each auto-recording WishList
• TiVo Suggestions (if you have auto-recording of TiVo Suggestions turned on).
search with a recorded show.
Quick Tours
1
A show’s title may appear in more than one group, even tho
the show. For example, you might have several episod
same titles in the HD Recordings group, which includes all shows recorded in HD. When you
delete a show in one group, the title also disappears from any other group.
When your shows are grouped, you can highlight the group name, and press PLAY to play all of
he shows in the group in sequence, beginning with the oldest.
t
ugh there is only one recording of
es of a show in that show’s group, and the
3
Page 14

Quick Tours
1
Available space
You can turn on a small bar at the top of the Now Playing List so you know how much space
you have available for new recordings on your DVR. To do this, just press the ENTER while
viewing the Now Playing List to see the Now Playing List Options screen. Then highlight
“Show available Space” and press the RIGHT arrow choose your display option.
Program Information
You can highlight any show in the Now Playing List and press SELECT to see the program
information screen, which offers these options:
• Play (or
• Keep until... By default, recordings are saved until s
always have the option to keep a show for as long as you want. Just select ‘Keep Until...’
and on the next screen, choose ‘Keep Until I Delete’ or specify that the show be kept until a
specific date you choose.
• Delet
• Explore this program Find details about the show, information about upcoming episodes and
cast members, and suggestions for other shows you might like.
• More Options View upcoming episodes or broadcasts of
Pass
4
Resume playing if you’re returning to a partially watched show).
pace is needed for new shows. But you
e Now (or Stop Recording if recording is in progress).
a show or movie, or get a Season
®
recording of a series.
Page 15

Tour Two - Watching live TV
Live
TV
When you’re watching a show as it’s broadcast, you’re watching live TV. Press LIVE TV/
SWAP
Using the guide
The program guide displays up to two weeks of TV programming at the touch of a button — the
GUIDE button on your TiVo remote. When you press SELECT on a show in progress, the
channel changes and the program guide disappears.
to go to live TV from any TiVo screen.
Quick Tours
1
If you press SELECT on an upcoming show, you’ll s
your recording or press LEFT to go back to the guide.
ee a screen with recording options. Set up
Moving around in time
1. First, press the PAUSE button. You can pause live TV for up to 30 minutes.
When you pause live TV, you see a
status bar showing a one-hour period.
The green segment shows the portion of the hour that has been saved by your DVR. The
white line marks your current point in time. When the white line is back in the green
segment, you’re “behind” live TV.
2. Press PLAY to continue watching the show. Next, press REWIND and the show
rewinds. Press REWIND a second time to rewind faster, and a third time to go at triple
speed. Press PLAY at any time to return to normal speed.
5
Page 16

Quick Tours
1
Some channels use a dash in the
channel number. Press to enter
a dash.
3. Press PAUSE again, and, with the show paused, press FORWARD to move a small
step forward. Press REWIND to move a small step back. Press PLAY to resume watching at
normal speed.
®
4. Press the INSTANT REPLAY
for when you miss a great sports play or a bit of dialog, or for when you fast forward too far.
5. Press INSTANT REPLAY again, then immediately press SLOW to see your own
slow-motion replay.
®
6. Press the ADVANCE
7. Press and hold the ADVANCE button and presto! You’re caught up to live TV.
8. Press and hold the INSTANT REPLAY
saved portion.
button. You’ll instantly move forward 30 seconds.
button. The show jumps back eight seconds — useful
®
button to skip back to the beginning of the
Changing channels
To move one channel at a time, press CHANNEL UP/DOWN on the remote.
To go to a specific channel, use the numbers on your remote control, then press ENTER. (If you
don’t press ENTER, the channel changes
the previous channel on the same tuner, press ENTER again.
automatically after a few seconds.) To jump back to
6
Tired of channel surfing? Press GUIDE to display the program guide. Highlight any show and
s SELECT. If the show is currently on, the channel changes. If the show is on later, you’ll
pres
see options to record it.
Local Channels
Your DIRECTV-provided local channels can be found from channel numbers 2 through 69. If
you live in one of the few places in the U.S. where DIRECTV does not provide local channels,
Page 17

you may use the DIRECTV AM21 Off-Air Tuner to receive them. Please refer to that manual
for information about those channels.
HD Channels
DIRECTV has a tremendous offering of HD channels and they are spread throughout the guide.
To find them, look for HD after the channel call sign in the channel column of the guide and
also look for HD after the show title in the guide. If you want to see only the HD version of a
channel in the guide see
“Duplicate HD/SD Channels” on page 63.
Quick Tours
1
7
Page 18

Quick Tours
1
Live
TV
Tour Three - Recording live TV
Watching and recording two shows at once
Your TiVo HD DVR from DIRECTV can record two different live TV channels at the same
time — one on each of its two tuners. Go ahead, try it:
1. First, press PA
2. Press LIVE TV/SWAP to swap to the other tuner.
3. Watch the show for a few moments, then press LIVE TV/SWAP again to swap back to
the first tuner. Notice that the first show you were watching is still paused. Press PLAY (or
PAUSE again) to continue watching the show.
USE to pause the live TV show you’re watching.
Live
TV
Recording the show you’re watching
You can always record the show you’re watching — just press RECORD while watching
either tuner — or on both tuners to record two
appears, select ‘Record this showing.’ Select ‘Season Pass & other options’ for more choices.
Recording the saved portion
Up to 30 minutes of the current channel’s broadcast is always being saved, even when you’re
not recording. When you change channels, the DVR clears the saved portion on the tuner you’re
watching and starts saving again on the new channel. So, if the saved portion is important to
you, either record the show or don’t change the channel.
To record the saved portion in addition to the rest of the show, choose ‘Record This Showing.’
shows at the same time. On the screen that
8
Page 19

Stopping a recording
You can stop any recording in either of two ways: select the title in your ‘Now Playing List,’
then select ‘Stop Recording’; or, press the RECORD button in live TV, then choose ‘Stop the
Current Recording.’
Quick Tours
1
9
Page 20

Quick Tours
1
Replace hyphens ( - ), slashes ( / ) and
periods ( . ) with spaces. Any other
marks, such as apostrophes ( ’ ),
asterisks ( * ) and ampersands ( & ) are
ignored. For example, use 6 OCLOCK NEWS to
search for the title “6 O’Clock News.”
If you have an iPad, the free
DIRECTV iPad app can also find and
schedule programs. (Note: Not all
iPad app features will work with your TiVo
HD DVR from DIRECTV. See “Mobile Apps”
on page 28 for more information.)
Tour Four - Searching by title
Know the title of a show you want to record? Finding it is easy.
1. From TiVo Central, select ‘Find Programs’, then ‘Search by Title.’
2. Use the letter grid to spell out the title. Use the arrow buttons to move around, then press
SELECT on each letter you want. (Skip “a,” “an,” or “the.”) As you select letters, an
alphabetical list of shows appears on the right. Keep selecting letters until you see your
show.
If you make a mistake, you can press CLEAR to erase everything, or REWIND to erase one
letter at a time. Insert a space by pressing FORWARD.
3. When you see your show, press the RIGHT arrow to move to the list. Then use the
UP/DOWN arrows to highlight your show, and press SELECT. The program information
screen shows your available options, like setting up a one-time recording or a Season Pass
recording.
All recorded shows appear in your Now Playing List, which you can access simply by pressing
the TiVo button on your remote control twice.
10
Page 21

Tour Five - DIRECTV® on Demand
Connect your TiVo HD DVR from DIRECTV to the Internet and stream thousands of movies
instantly to your TV. No matter what you're in the mood for, you'll find it on DIRECTV on
Demand. Choose from thousands of titles to stream instantly to your TV any time -- many with
Blu-ray quality picture (1080p) and many for free! Available titles include movies, music,
popular television shows, animation, cartoons and more.
Note: To enjoy the DIRECTV on Demand service, you need your DVR connected to the
Internet, TiVo service and any other applicable monthly Advanced Receiver fees, DIRECTV
CINEMA Connection Kit, broadband Internet service with a connection speed of 750 Kbps or
higher (DSL or cable), a network router with an available Ethernet port, a land-based phone line
connection, and an available wall outlet.
Note: Not all titles are available in 1080p. To view programs in 1080p, the following are
required: an HDMI cable connecting the receiver and the television, and a high-definition
1080p24 television. Not all models are compatible.
To get DIRECTV on Demand content:
1. Press the TiVo button on your remote control to go to TiVo Central. Then select ‘DIRECTV
on Demand.’
Quick Tours
1
2. Select one of the following:
• DIRECTV on Demand Home. View all On Demand titles (including TV, movies, music,
cartoons, and more).
• DIRECTV CINEMA
• DIRECTV Showcase On Demand. Learn more about all that DIRECTV has to offer.
™
. View all the movie titles available on DIRECTV on Demand.
11
Page 22

Quick Tours
1
3. On the left side of the screen, select a category, like “Top Picks” or “Kids & Family.”
4. Use the RIGHT arrow to move to the right side of the screen, and then select a subcategory,
if available.
5. SELECT the title you want to download.
6. On the information screen, select ‘Download this program.’
7. To watch your show, even if it’s still downloading, go to your Now Playing List. Select the
title, and then select ‘Buy & watch now.’
12
Page 23

Tour Six - DIRECTV® Pay Per View
You can also order your DIRECTV
Pay Per View events on the Internet
at directv.com or over the phone at
1-800-531-5000. Keep in mind, though,
there is an additional ordering fee for
purchases placed over the phone.
You don’t have to go out to see the best and biggest special events! Special sporting, comedy,
and concert events (and more!) are available 24 hours a day with DIRECTV Pay Per View.
You’ll find them listed in the program guide starting around channel 117.
Buying a show
You can record DIRECTV Pay Per View programs before you buy them, so you always have
them ready to watch when you’re ready. You’ll only be charged if you watch them.
As long as your DVR is connected to a land-based phone line or Ethernet connection, you can
use your remote to order.
1. To buy a show, tune to its PPV channel directly or highlight it in the program guide.
2. Press SELECT.
3. Select ‘Buy & watch now’ to watch the show now. Select ‘Record for later viewing’ to
record the show, then watch it later. Or, to find other available showings of a program, select
‘View upcoming showings.’
Canceling a show
Quick Tours
1
You can cancel your Pay Per View order for any reason as long as only the free preview section
of the show has been viewed. If the show has already been recorded, highlight the show in your
‘Now Playing List’ and press the CLEAR button to delete it. If the show is set to record in the
future, press the TiVo button to go to TiVo Central, then select ‘Find Programs’ > ‘To Do List.’
Highlight the show and press the CLEAR button to delete it.
13
Page 24

Quick Tours
1
14
Page 25

Finding shows
Using the program guide to find shows 16
Searching by title 19
Using Swivel™ search 20
Recording by time or channel 21
Season Pass® recordings 22
WishList® searches 23
Setting up a remote recording 28
Managing recordings 30
2
Page 26

Shows currently
airing
Upcoming shows on the
selected channel
Title, date, time, and rating Show description
Program listings
show descriptionTitle, date, time, and rating
Channels
Grid guide
TiVo Live Guide
2
Finding shows
Using the program guide to find shows
The program guide displays up to two weeks of TV programming at the touch of a button — the
GUIDE button on your TiVo remote. When you
channel changes and the program guide disappears.
If you press SELECT on an upcoming show, you’ll see a screen
your recording or press LEFT to go back to the guide.
Grid guide versus the TiVo® Live Guide
You can choose to display the guide as a grid or use the TiVo Live Guide. The grid guide,
shown in the first figure, displays show and programming information rows. The TiVo Live
Guide, shown in the second figure, displays currently airing shows on the left. When you
highlight a show title on the left, programs airing on that channel at other times appear on the
right.
press SELECT on a show in progress, the
with recording options. Set up
16
To choose which display you want to use, when you’re viewing the guide, press ENTER to
lay Guide Options and choose the view you want.
disp
Using the grid guide
The grid guide displays your channels in the left column, and each channel’s programming to
the right in half-hour increments.
To move around in the grid guide, highlight a show title.
• Press FORWARD
move it one screen backward.
to move the displayed time one screen ahead, or press REWIND to
Page 27

Finding shows
2
• Press ADVANCE
hours back.
to jump 24 hours ahead, or INSTANT REPLAY
®
to jump 24
®
Using the TiVo Live Guide
The TiVo Live Guide displays your channels in the left pane, and the selected channel’s
programming in the right pane.
To move around in the TiVo Live Guide, move the highlight to a channel in the left pane.
• Press FORWARD
REWIND
• Press ADVANCE
hours back.
to move it backward.
to move the displayed time ahead one half-hour at a time, or press
to jump 24 hours ahead, or INSTANT REPLAY
®
to jump 24
®
Setting filters on the guide
When you’re viewing the guide, press ENTER to display Guide Options. Set ‘Filtering’ to ‘On,’
then select ‘Choose Filter’ and choose category and sub-category filters.
When filtering is on, the guide shows only channels that have a show in the category you chose
n the next six hours. Shows that fit the category are highlighted; other titles are dimmed. To see
i
all channels again, set ‘Filtering’ to ‘Off.’
You can also use Guide Options to easily see what’s on
the day and time you’re interested in, and the guide will jump to it.
at a particular day and time. Just enter
Choosing channels for the guide
You can use the Guide Options screen to choose which channels to display in the guide.
All Display all channels, even channels you don’t receive.
17
Page 28

Finding shows
2
You Receive Display only the channels that are checked in the Channel List (recommended).
Favorites Display only the channels you rated as your favorites in the Channel List.
Finding more showings
For a comprehensive list of all upcoming showings of a program, including repeats, select the
show from the guide, then select ‘Season Pass and other options,’ and ‘View upcoming
episodes.’ You can use this list to choose the showing that is most convenient for you to record.
18
Page 29

Searching by title
Replace hyphens ( - ), slashes ( / ) and
periods ( . ) with spaces. Any other
marks, such as apostrophes ( ’ ),
asterisks ( * ) and ampersands ( & ) are
ignored. For example, use 6 OCLOCK NEWS
to search for the title “6 O’Clock News.”
If you have an iPad, the free
DIRECTV iPad app can also find and
schedule programs. (Note: Not all
iPad app features will work with your TiVo
HD DVR from DIRECTV. See “Mobile Apps”
on page 28 for more information.)
If you know the title of the show you want to record, finding it has never been easier.
om TiVo Central®, select ‘Find Programs’, then ‘Search by Title.’
1. Fr
2. Use the letter grid to spell out the title. Use the arrow buttons to move around, then press
SELECT on each letter you want. (Skip “a,” “an,” or “the.”) As you select letters, list of
matches appears on the right. The letters you’ve entered are highlighted. Keep selecting
letters until you see your show.
If you make a mistake, you can press CLEAR to erase everything, or REWIND to erase one
letter at a time. Insert a space by pressing FORWARD.
3. When you see your show, press the RIGHT arrow to move to the list. Then use the
UP/DOWN arrows to highlight your show, and press SELECT. The program information
screen shows your available options, like setting up a one-time recording or a Season Pass
recording.
Finding shows
®
2
19
Page 30

Finding shows
2
Using Swivel™ search
When you use Swivel Search, you can search by show title or actor’s name, and your search
results show broadcast, On Demand, and Pay Per View shows. To use Swivel Search, your
DVR must be broadband-connected.
1. To start searching, choose ‘Find Programs’ from TiVo Central, then select ‘Swivel Search.’
2. Enter the first few letters of a show title or actor’s name. A list of search results will appear.
3. Select a show title or actor’s name to see more details and schedule recordings.
• For a show, you can schedule a recording or a create a Season Pass recording from the
program details screen (see “Season Pass
upcoming episodes, explore details about the cast, or learn about other shows that might
interest you.
• For an actor, you can browse TV shows or movies featuring this actor, or create a
WishList search (see “WishList
®
searches” on page 23).
®
recordings” on page 22). You can also view
20
Page 31

Recording by time or channel
If you don’t remember the exact name of a show, but you know what time or channel it’s on, use
‘Record by Time or Channel.’ You’ll have three options:
Browse by time Browse shows on a specified day and time. You can filter the list to see only
shows in a particular category. For example, you can browse all movies airing on Saturday
night.
Browse by channel Browse through shows airing on a particular channel. You can start with all
channels, or just your favorites.
Set up manual recording Schedule a recording on a specific channel at a specific time.
Finding shows
2
21
Page 32

Finding shows
2
Season Pass® recordings
A Season Pass recording automatically records every episode of a series that airs on a certain
channel — even if the day or time changes! Just select a show from the guide or your search
results, and choose ‘Get a Season Pass.’
If the TiVo service finds any conflicts in scheduling upcoming episodes of the Season Pass
recording, you’ll be asked to choose whether you want to keep the previously scheduled
recording or record the new show instead.
Season Pass recording options
When you set up a Season Pass recording, you can choose how many episodes to keep and how
long to keep them using Recording Options. Choose ‘First run only’ if you want to skip the reruns.
You can change the options of an existing Season Pass recording by choosing ‘Season Pass
Manager,’ choosing the show whose options you want to modify, then ‘Chose recording
options.’
You can cancel the recording of any episode in a Season Pass recording by highlighting the title
in the To Do List and pressing CLEAR. You can delete the entire Season Pass recording or
change recording options using the Season Pass manager. See
about the To Do list and Season Pass manager.
page 30 for more information
22
Page 33

WishList® searches
Not all actor or director names may
be listed. To search for a name that
is not on the list, enter the name in
the format: LAST NAME, FIRST NAME. You
must match the spelling of the name
exactly, and you must use a comma
(available in the grid under the letter W).
A WishList search finds shows that match your search criteria on any channel you receive —
and it keeps on searching for as long as you keep the WishList search.
You can search for something specific by creating a WishList search with multiple criteria: for
instance, you might create a WishList search for actor John Smith, category Movies, and subcategory Action. This WishList search would find action movies starring John Smith.
You can even use WishList searches to find something very specific. For example, the Keyword
TORPEDOES with category Football would find Torpedoes football games, but not Torpedoes
baseball games.
Creating a WishList search
Creating a WishList search is simple:
1. From TiVo Central, choose ‘Find Programs,’ then ‘WishList Search,’ then ‘Create a
WishList Search.’
2. Next, start choosing criteria for your WishList search. You can choose any or all of the
following:
Finding shows
2
Keyword Search for shows with specific words in the show or episode title, description,
actor, director, year, or category.
Title Keyword Search for shows with specific words in the show or episode title.
Actor Search for shows with your favorite actor.
Director Search for shows by a specific director.
23
Page 34

Finding shows
2
Category Search for specific categories and sub-categories of shows (for example, action
movies or nature documentaries).
3. After entering your initial search criteria, you’ll return to the Create WishList Search screen.
Continue adding as many search criteria to your WishList search as you like. For instance,
you could create a WishList search like this:
• Keyword: Chocolate
• Category: Dessert
• Category: Baking
Your results would include only cooking shows about chocolate desserts.
4. The TiVo service automatically assigns a name to your WishList search. To assign a
different name, select ‘WishList Name.’
5. When you’re finished entering search criteria, select ‘Done creating this WishList search.’
After you’ve created the WishList search, you can do any of the following:
View upcoming episodes You’ll see a list of shows airing in the next two weeks or so that
match your WishList search criteria. You can choose to record individual shows from the
list.
Auto-record WishList programs Your DVR will automatically record any shows matching
your Wishlist search criteria until you modify or delete the WishList search.
Edit or delete Wishlist search You can change the WishList search — for example, to correct
a misspelling or to add a category to narrow the results — or cancel it.
24
Page 35

Using the Asterisk (*) in WishList searches
You can use the asterisk only at the
end of a keyword, not to omit letters
at the beginning or in the middle of a
word.
The more specific a WishList search
is, the better suited it is to auto-
recording. For example, a Category
WishList search for the category
Documentary would find every upcoming
documentary. You might not want to record
them all, but you could occasionally browse
the search results list and choose the ones
you do want to record.
To search for similar words in a Keyword or Title WishList search, use the asterisk (*) as a wild
card symbol that replaces the endings of words. For example, the keyword AIRP* would find
shows containing “airport,” “airplane,” or “airplanes.” To enter an asterisk, press the
SLOW
button on the remote.
Tips for entering keywords
• Use quotation marks to specify an exact phrase in a Keyword or Title Keyword WishList
search (to enter quotation marks, press PAUSE ).
• Replace hyphens ( - ), slashes ( / ) and periods ( . ) with spaces.
• Any other marks, such as apostrophes ( ’ ) and ampersands ( & ), are ignored. For example,
you would use the keyword phrase 6 OCLOCK NEWS to search for the title “6 O’Clock
News.”
• For dollar signs ( $ ) substitute the letter S.
Auto-recording a WishList search
You can set a WishList search to auto-record, and it will record every show it finds, on any
channel you receive.
Finding shows
2
Each auto-recording WishList search
in To Do List and the Season Pass manager. If you want to be sure that all matching shows are
recorded,
See page 31 for details.
give the auto-recording WishList search a high priority in the Season Pass manager.
and its upcoming recordings are marked with a star
25
Page 36

Finding shows
2
Recommended shows
With all the programming available to your TiVo HD DVR from DIRECTV, sometimes you
might want show recommendations. TiVo Suggestions are a result of the THUMBS UP
THUMBS DOWN
automatically record recom
ratings you give shows. Based on those ratings, TiVo Suggestions can
®
mended shows for you.
TiVo Suggestions
You can rate any show — whether it’s live, recorded, or listed in the program guide — by
pressing the THUMBS UP
show up to three Thumbs Up (great!)
or THUMBS DOWN button on your remote. You can give a
or three Thumbs Down (terrible!).
®
or
26
TiVo Suggestions uses these rati
you rate over time, the better TiVo Suggestions will get at finding interesting shows for you.
ngs to create a list of shows you might like. The more shows
Auto-recording TiVo Suggestions
When your DVR has available space, it automatically records TiVo Suggestions. But you don’t
ever need to worry about recorded Suggestions taking up space — here’s wh y:
• TiVo Suggestions never replace shows you record,
recorded.
• TiVo Suggestions are always the first shows deleted to make room for your recordings.
If you’d prefer not to record TiVo Suggestions au
Central choose ‘Messages & Settings,’ then ‘Settings,’ then ‘Recording,’ then ‘Auto-Record
Suggestions?’
or prevent your shows from being
tomatically, you can turn them off. From TiVo
Page 37

On the Auto-Record Suggestions screen, choose ‘No, don’t record TiVo Suggestions.’ You can
Any time you choose to record a
show, it automatically gets one
Thumbs Up.
still see the TiVo Suggestions list and choose to record individual shows.
Viewing the suggestions list
You can review a list of upcoming TiVo Suggestions by going to TiVo Central and choosing
‘Find Programs,’ then ‘TiVo Suggestions.’
The list is ranked, so shows you’re more likely to enjoy are near the top.
To record a show, highlight it and press either SELECT or RECORD on your remote. Or use
THUMBS UP or THUMBS DOWN to rate shows and improve future recommendations.
Watching TiVo Suggestions
Recorded suggestions appear in the TiVo Suggestions group inside the Now Playing List. You
can watch, save, or delete them just like any other shows.
Reviewing your thumb ratings
To display a list of all shows that you’ve rated, select ‘Find Programs,’ then ‘TiVo
Suggestions.’ Press ENTER to see the Review Thumbs screen. Then, highlight a show and use
the THUMBS UP and THUMBS DOWN buttons on your remote to change its rating.
Finding shows
2
27
Page 38

Finding shows
2
Setting up a remote recording
Have you ever forgotten to set a recording and wish you could do it remotely from work or
while on the go? Now you can, with DIRECTV’s DVR Scheduler. A brief description of the
process is provided below, but go to
From your computer
The first step is to register as a user on directv.com. Then go to directv.com/tvlistings to see an
on-line version of your program guide. Simply navigate through the guide to find the show you
want to record. Select the show, and then select “Record to Receiver.”
From your mobile phone
To schedule a recording from a mobile phone, use your phone’s Internet browser to go to
m.directv.com. Sign in with your directv.com user name and password. Search for a show title
or description. Pick your title from the search results and follow the step by step instructions to
set the recording.
Note: Remote connections may vary. In rare instances, scheduled recording(s) may not be
recognized.
directv.com/dvrscheduler for all the details.
28
Mobile Apps
DIRECTV's free DVR Scheduler Mobile App is available for the iPhone®, Android™, Palm®
Pre™, Palm
into the easiest, fastest, most convenient way to find any program and set your home DVR.
®
Pixi™, BlackBerry®smartphone, and Windows® Phone 7. Turn your smartphone
Page 39

If you have an iPad®, the free DIRECTV iPad app can do all this and more: it turns your iPad
into a remote control, gives instant access to your favorite channels, shows, and sports scores,
and lets you customize your home screen with the programming you watch most.
Go to directv.com/mobileapps for more information.
Finding shows
2
29
Page 40

Finding shows
2
In the To Do List, individual
recordings are marked with a single
check mark: .
Season Pass recordings and manual
repeating recordings are marked with a
double check mark: .
Auto-recording WishList searches are
marked with a star: .
Managing recordings
The To Do List shows all your scheduled recordings and lets you change recording options or
cancel recordings. The Season Pass manager prioritizes all your repeating recordings and lets
you manage conflicts and set options.
Using the To Do List
To view the To Do List, from TiVo Central choose ‘Find Programs,’ then ‘To Do List.’
You’ll see a list of all shows scheduled to record in the next two weeks or so. Press SELECT on
any show to see available options.
Canceling a Recording
To cancel a recording, just highlight the show title on the To Do List and press CLEAR.
Viewing recording history
Choose ‘View Recording History’ on the To Do List if you’re curious why a particular show or
episode was not recorded, why it’s not scheduled to record, or when it was deleted from your
Now Playing List. The Recording History is organized by date; use the UP/DOWN arrows to
browse the shows in the list. Select the show’s title for more information about it.
30
Page 41

Using the Season Pass manager
All Season Pass recordings and auto-recording WishList searches are listed in the Season Pass
manager in order of recording priority. (Season Pass
which you set them up: the first has highest priority, and so on). If more than two Season Pass
shows are scheduled to record at the same time, the show with the higher priority in the Season
Pass manager will record.
recordings are prioritized by the order in
Finding shows
2
To change the priority of a repeating recording,
then ‘Season Pass Manager.’ Use the UP/DOWN arrows to highlight a title, and press RIGHT
to highlight the arrows to the right of the title, then use the UP/DOWN arrows to move the
selected title up or down in the list.
Because your DVR has two tuners, recording conflicts should be minimized. Overlap protection
low) further reduces conflicts.
(see be
from TiVo Central choose ‘Find Programs,’
Editing a repeating recording
You can also use the Season Pass manager to view and change recording options, view
upcoming episodes, or cancel Season Pass recordings or auto-recording WishList searches.
Highlight the show title and press SELECT to view available options.
Recording with Overlap Protection
Being able to record two programs at the same time doesn’t eliminate all possible recording
TM
conflicts. The Overlap Protection
recording conflicts when they occur.
If Overlap Protection is turned off, when two shows on the same tuner overlap by a few minutes
r example, one show ends at 8:33, while the next show begins at 8:30), the lower priority
(fo
feature gives you additional options for dealing with
31
Page 42

Finding shows
2
recording is cancelled. But with Overlap Protection turned on, the DVR simply clips the lower
priority recording by just enough minutes to allow both programs to record.
Overlap Protection works by determining the priority of each show scheduled to record. For
repeating recordings, it uses the Season Pass manager to learn which programs have higher or
lower priorities (see
these individual recordings that you schedule receive the highest priority. The most recent
individual recording that you requested always has the highest priority. (TiVo Suggestions
always have the lowest priority.)
When scheduling new recordings, the DVR notifies you of any recording conflict and gives you
options for resolving it. If Overlap Protection is on, your options include clipping the lower
priority show.
Overlap Protection is a global setting, not a show-specific choice. To set your Overlap
Protection preference, from TiVo Central, choose ‘Messages & Settings,’ then ‘Settings,’ then
‘Recordings,’ then ‘Overlap Protection.’
page 31). One-time recordings are not listed on the Season Pass manager;
Extending live recordings
Live events (like sporting events and awards shows) often run past their scheduled end time.
When the Extend Live Recordings setting is turned on, the DVR will remind you to add extra
time when you set up a recording of a live event.
Extend Live Recordings is a global setting, not a show-specific choice. To set your Extend Live
Recording preference, from TiVo Central, choose ‘Messages & Settings,’ then ‘Settings,’ then
‘Recording,’ then ‘Extend Live Recordings.’
32
Page 43

Watching shows
Moving around with the status bar 34
Getting information with the channel banner 36
Setting a show’s recording options 38
Customizing your video and audio 40
Parental Controls 45
3
Page 44

Watching shows
3
This end is where you
catch up with live TV.
Tick marks are 15
minutes apart.
Live TV is paused.
Status bar for live TV
The white line and time indicate
where you are now.
Tick marks are 15 minutes apart.
The show is two hours long.
The REWIND button has
been pressed twice.
Status bar for a two-hour recording
Moving around with the status bar
In general, watching shows works the same wh ether you’re watching live TV, recordings,
DIRECTV on Demand programs, or Pay Per View programs. You can always press PLAY,
PAUSE, FORWARD, and REWIND to display a status bar and move around in the show.
• In live TV, the status bar represents one hour, and the white tick marks are 15 minutes apart.
• In recorded shows, DIRECTV on Demand, and Pay Per View, the bar shows the show’s
length. The tick marks are 15 minutes apart (further apart for a longer show).
34
Page 45

Automatically saving live TV
Press the CLEAR button to hide the
status bar, the program guide, the
channel banner, and anything else
that is not part of the show.
In live TV, the green segment of the status bar represents the part of the show automatically
saved by your DVR. The DVR automatically saves up to 30 minutes of live TV, so you can
rewind live TV for up to 30 minutes. Press RECORD to record the saved portion as well as the
rest of the
show.
Watching shows
3
Whenever you change channels, the saved portion of th
saving the show on the new channel. If you’re behind live TV and watching something you still
want to see, you should avoid changing the channel. But you can swap tuners by pressing the
LIVE TV/SWAP button without losing what’s been saved.
e old show is cleared, and DVR starts
35
Page 46

Watching shows
3
Getting information with the channel banner
The channel banner displays the show’s title, description, ratings, and other information. It
appears whenever you change the channel. To view
press INFO.
the channel banner while watching a show,
You can display the channel banner in three different
through the sizes of the channel banner. Press the LEFT arrow or CLEAR to hide it.
Icons in the large version of the channel banner are shortcuts to corres
UP/DOWN arrows in the large channel banner to highlight an icon, then press SELECT.
Record Record the show you’re watching. If a recording is in progress, the
icon is bright. Select this icon to stop the recording.
Tuner Swap See the channel and show title currently airing on the other
tuner. To swap to the other tuner, press SELECT.
Audio If this icon is bright, alternate audio tracks are present. Select the
icon for options. See page 43 for more on audio settings.
Dolby Digital audio If Dolby Digital audio icon is present, a Dolby Digital
audio track is available. If the icon is bright, alternate digital audio tracks
are also available. Select the icon for options. (The audio icon above will
not be present if the Dolby Digital audio icon is present.)
Parental Controls. If Parental Controls are off, the lock icon appears
unlocked and dim. If they are on, the icon is locked and bright. If they are
temporarily off, the icon is unlocked and bright.
sizes. Press the RIGHT arrow to cycle
ponding features. Use the
36
Page 47

Closed Caption Toggle closed captioning on or off.
Watching shows
3
37
Page 48

Watching shows
3
Setting a show’s recording options
Recording options let you customize each recording, so you always get the results you want.
You can set recording options when you first schedule a recording, or by selecting a show from
the To Do list or the Season Pass
1. On the show’s information screen, highlight either ‘Record this episode’ or ‘Get a Season
Pass.’ Press the RIGHT arrow to highlight ‘Options,’ and press SELECT.
2. On the Recording Options screen, use the UP/DOWN arrows to highlight an option, then the
RIGHT and LEFT arrows to change the setting.
3. When you’re done, press SELECT or highlight ‘Record show with these options.’
Recording Options include:
Keep At Most Set the maximum number of episodes to be saved. (This option is available only
for a repeating recording like a Season Pass recording.)
Record Skip reruns or watch them all? Choose from ‘Repeats & first run’, ‘First-run only’, or
‘All.’ (This option is available only for a repeating recording like a Season Pass recording.)
Keep Until Choose how long to keep a show (or each episode of a repeating recording). ‘Space
Needed’ is the default setting, or choose ‘Until I Delete,’ and TiVo
record something new.
®
manager. To view or change recording options:
®
won’t delete this episode to
Start Recording Start recording up to ten minutes before a show is scheduled to begin.
Stop Recording Set a recording to continue — for a few minutes or up to three hours — after it’s
scheduled to end. You can change this setting when you set up the recording, or while the
recording is in progress.
38
Page 49

The last two recording options — Start Recording and Stop Recording — are known as the
Overtime Scheduler
also useful for award shows, live events, or if the network tends to broadcast your favorite show
a little off its scheduled start time.
®
feature. These settings are especially helpful for sports fans, but they’re
Watching shows
3
39
Page 50

Watching shows
3
Customizing your video and audio
You can customize your DVR to display your shows exactly the way you like to watch them
using the choices available from
choose ‘Messages & Settings.’ The settings for Audio, Video, Displays, Channels, and
Recording all affect how you find and watch shows.
Video settings
From TiVo Central, choose ‘Messages & Settings,’ then ‘Settings,’ then ‘Video’ to customize
your DVR’s video settings.
TV aspect ratio
Aspect ratio refers to the proportions of your TV screen. A standard TV screen ratio is 4:3.
Widescreen TVs are 16:9. Select t
the Settings menu. To view Settings, from TiVo Central®,
he type of screen your TV has.
40
• Some TVs automatically change their display based on
definition or standard. If your 4:3 TV has this feature, you probably notice that it adds bars
to the top and bottom of an HD picture. If so, select ‘4:3 Smart Screen.’
• If your TV does not have this feature, you may notice that it squeezes an HD picture into the
4:3 shape. If so, select ‘4:3 Standard Screen.’ Check your TV’s manual for its capabilities.
the type of signal they receive: high-
Page 51

Video output formats
TV shows are broadcast in a variety of formats, and TV equipment receives and displays video
in a variety of formats. For any given show, the format in which a show is broadcast may or may
not match a format that your TV is capable of displaying.
The DVR receives video signals in any of the five broadcast formats (1080p, 1080i, 720p, 480p
and 480i). If you are using an HDMI cable to connect your DVR to your television, the DVR
will automatically set the optimal video output format for your TV.
The Video Output Formats screen allows you to set the video output format manually. Consult
your HDTV’s owner’s manual for the formats it supports, and then follow the on-screen
prompts to change your settings.
You might want to experiment with all the different video formats that your TV and the DVR
support. You may find that some formats are better suited to certain shows than others.
Watching shows
3
41
Page 52

Watching shows
3
In FULL mode, the picture is stretched to fill the TV
screen, which may result in some distortion. In the picture
shown here, notice that black bars appear at the top and
bottom of the screen, and the image look a bit squished.
Since the Aspect Correction is Full, you know that the
letterbox bars are included in the broadcast.
In PANEL mode, side bars are added to the picture to fill
the screen, preserving the broadcast aspect ratio. This is
useful if you’re watching a show broadcast in 4:3 on a
16:9 TV, or vice-versa. In the picture shown here, notice
that the image no longer look squished, but the picture
size is dramatically decreased.
In ZOOM mode, the picture is stretched without
distortion. The edges of the picture are cropped to fit
the TV screen. This mode is useful if you’re watching
a show broadcast with letterbox bars or side bars.
Zoom mode crops the letterbox bars out of the picture.
The picture shown here looks best in Zoom mode.
Aspect correction mode
Aspect correction is applied when the aspect ratio of the show you’re watching doesn’t match
the aspect ratio of your TV. Use the ZOOM
Correction Mode settings screen to choose from the following options:
button on the TiVo remote or the Aspect
42
Page 53

Letterbox color
Letterbox is used to fit a 16 x 9 show
on a 4 x 3 screen, and sidebars are
used to fit a 4 x 3 show on a 16 x 9
screen.
When selecting the Dolby Digital to
PCM setting, the audio signal will be
downmixed from Dolby Digital 5.1 to
2-channel PCM.
Choose which color the DVR should use when it adds letterbox or side bars to the picture: gray
or black. Changing the color of the bars can be useful if you’re trying to determine whether bars
on the screen are being added by the DVR or by the broadcaster.
Audio settings
From TiVo Central, choose ‘Messages & Settings,’ then ‘Settings,’ then ‘Audio’ to customize
audio settings.
Default audio language
Some shows are broadcast with more than one audio track, such as alternate language tracks.
When alternate audio tracks are available, you’ll see a bright alternate audio icon in the channel
banner:
The Default Audio Language setting lets you choose which audio language track will be heard by
efault when you watch a show. (Use the Audio icon in the channel banner to switch to another
d
audio track if available.)
Dolby Digital
.
Watching shows
3
If you have an A/V receiver or home theater system that supports Dolby Digital audio, use this
setting to choose how the DVR will record and output digital audio. Check your A/V receiver or
home theater system manual for its capabilities .
If a show is broadcast with a Dolby Digital audio track, you’ll see a dim Dolby Digital icon in
he channel banner:
t
Select the bright icon for options.
. If the icon is bright, alternate digital audio tracks are also available.
43
Page 54

Watching shows
3
Sound effects volume
Change the volume of or turn off the DVR’s sound effects (the tones played when you press
buttons on the remote control). The default is Medium.
44
Page 55

Parental Controls
When you turn Parental Controls off,
your password is deleted. You may
prefer to temporarily turn off
Parental Controls, so that another person in
your household does not choose a new
password.
Your DVR helps you make sure your family has access to only those shows you want them to
watch. Use Parental Controls to set limits on movie and television ratings, block specific
content, lock particular channels, and set a limit on the amount that may be spent on a Pay Per
View or DIRECTV on Demand program.
Using Parental Controls
From TiVo Central, choose ‘Messages & Settings,’ then ‘Settings,’ then ‘Parental Controls.’
(Or, select the padlock icon from the large channel banner.)
Watching shows
3
The padlock icon in the channel banner shows the current
Off No password or controls are set. The icon is dim and unlocked.
On Password and controls are set. The icon is bright and locked.
Temporarily Off Controls are set but turned off. The icon is bright and unlocked.
Changing Parental Controls settings
Once Parental Controls are on, you must enter your Parental Controls password to change any
Parental Controls settings.
Turn on Parental Controls Use the number buttons on the remote control to enter a four-digit
assword, then enter the same password again for confirmation.
p
Turn off Parental Controls Enter the password, and press SELECT. When Parental Controls are
off, the password is deleted and anyone can view any shows or watch any channels.
state of Parental Controls.
45
Page 56

Watching shows
3
Temporarily turn off Parental Controls Either enter the password to watch a show or chan nel, or
select ‘Temporarily turn off Parental Controls’ from the Parental Controls screen. When
Parental Controls are temporarily turned off, any show or channel can be viewed, but the
password is still required to change Parental Controls settings.
Auto Re-lock When Parental Controls are temporarily turned off, they re-lock automatically
after four hours of no remote control activity. Parental Controls won’t re-lock in the middle of a
show. Use this setting to disable Auto Re-lock.
Setting rating for TV and movies
Movies originally meant for release to theaters have a different rating system from shows made
for TV. Use rating limits to set rules for both rating systems, as well as for specific types of TV
content. Select the rating type to change it.
TV rating limit Ratings shaded in green are not locked; ratings in red are locked. Use the UP/
DOWN arrows to adjust which ratings are locked.
Movie rating limit Ratings shaded in green are not locked; ratings in red are locked. Use the UP/
DOWN arrows to adjust which ratings are locked.
Block by TV content Types of content marked by broadcasters as able to be blocked are listed.
Select each type of content you want to block, then use the UP/DOWN arrows to adjust which
ratings are blocked (shaded in red). Ratings in gray do not apply to that type of content. For
example, a TV-Y show would not have V-Violence content so there is nothing to block.
Block Unrated Programs Some movies and TV shows are unrated. Use this setting to block all
unrated movies or TV shows.
Manage Other Ratings Additional regional ratings may be available.
46
Page 57

Blocking channels
You can block access to any channel in the channel list. Press SELECT to lock or unlock a
channel. If someone in your household tries to watch a blocked channel, the parental control
password must be entered to continue.
Setting a spending limit
Set the maximum amount that may be spent on a single Pay Per View or DIRECTV on Demand
program. If someone in your household tries to purchase a Pay Per View event that costs more
than the spending limit, the parental control password must be entered to continue.
Watching shows
3
47
Page 58

Watching shows
3
48
Page 59

More than just TV
DIRECTV on Demand 50
Interactive Channels 54
Music, Photos, & Showcases 56
4
Page 60

More than just TV
4
You can also reach the DIRECTV on
Demand Home page by tuning
directly to channel 1000 while
watching Live TV or viewing the program
guide.
DIRECTV on Demand
Finding DIRECTV on Demand Shows
DIRECTV on Demand provides access to thousands of movie and TV titles that you can
download and watch anytime you wish. The majority are free, but there is also a full selection of
the best Pay Per View movies. This service is available to all DVR subscribers who connect
their TiVo HD DVR from DIRECTV to a broadband Internet connection via the Ethernet
connector on the back of the unit.
Note: To enjoy the DIRECTV on Demand service, you need your DVR connected to the
Internet, TiVo service and any other applicable monthly Advanced Receiver fees, DIRECTV
CINEMA Connection Kit, broadband Internet service with a connection speed of 750 Kbps or
higher (DSL or cable), a network router with an available Ethernet port, a land-based phone line
connection, and an available wall outlet.
To record DIRECTV on Demand shows:
1. Press the TiVo® button on your remote control to go to TiVo Central®. Then select
‘DIRECTV on Demand.’
2. Select one of the following:
50
• DIRECTV on Demand Home. View all On Demand titles (including TV, movies, music,
cartoons, and more).
• DIRECTV CINEMA. View all the movie titles available on DIRECTV on Demand.
• DIRECTV Showcase On Demand. Learn more about all that DIRECTV has to offer.
3. On the left side of the screen, select a category, like “Top Picks” or “Kids & Family.”
Page 61

4. Use the RIGHT arrow to move to the right side of the screen, and then select a subcategory,
if available.
5. SELECT the title you want to download. Titles may appear in a list or as “posters,”
depending on the category and subcategory you choose.
6. On the information screen, select ‘Download this program.’ The show is placed in the
download queue.
7. To watch your show, even if it’s still downloading, go to your Now Playing List. Select the
title, and then select ‘Buy & watch now.’
Note: HD shows take longer to download than SD shows.
Exploring DIRECTV on Demand channels
More than just TV
4
Many DIRECTV program providers have home pages for their own Video on Demand content.
Just add a 1 in front the of the usual DIRECTV channel number to find them. For example, if
you usually watch a particular network on channel 229, that network’s On Demand channel
would be 1229.
Check out your favorite programmer’s On Demand home page to get special programs, see
previews of exciting new shows, or catch episodes you may have missed.
To explore Video On Demand channels:
1. Press the TiVo button on your remote control to go to TiVo Central. Then select ‘DIRECTV
on Demand.’
2. Choose “DIRECTV on Demand Home.”
3. In the left column, select ‘Browse Channels.’
Video On Demand channels are also
available by pressing the RED or
GREEN button on your remote
control from any On Demand screen. You
can also access On Demand channels from
the program guide (just enter a channel
number and press ENTER, or scroll through
the channels to view them all), or by tuning
directly to the channel while watching live
TV.
51
Page 62

More than just TV
4
4. Select a show title from the left column, and then select an episode title from the right side of
the screen.
5. Choose “Download this program.” The show is placed in the download queue.
Checking the download queue
You can see what On Demand shows you have scheduled to download by displaying the On
Demand Download Manager. You can either:
• From any On Demand screen, press the YELLOW button (Queue) to see the entire queue of
shows you have waiting to download. The top title is currently downloading and the ones
below it are next in line.
• From TiVo Central, choose ‘Find Programs’ > ‘On Demand Download Manger.’
Pausing or canceling a download
If your home network gets congested, you can always pause your downloads by going to the On
Demand Download Manager and pressing the ENTER button on your remote control.
Downloads can be paused for 30 minutes, 1 hour, 2 hours, or indefinitely. If you want to resume
downloads, just press the ENTER button again.
To cancel a download, highlight a show title, and press the CLEAR button to delete it from the
queue.
To get to the On Demand Download Manager, press the TiVo button to get to TiVo Central,
then choose ‘Find Programs’ > ‘On Demand Download Manger.’
52
Page 63

Watching Your Downloaded Shows
Once a show has started downloading, it appears in your Now Playing List just like the rest of
your recorded shows. The download rate depends completely on the speed of your broadband
connection. If your connection fast enough, you can start watching your show immediately
while it is downloading. If the connection is slow or your home net work is congested, you can
start watching the show, but might hit a pause while the DVR waits for the broadband
connection to download more of the show.
More than just TV
4
53
Page 64

More than just TV
4
Interactive Channels
Interactive channels are unique because in addition to video and audio, they let you interact with
what you see on the screen. When accessing these channels you will have to wait a few seconds
for the software to download.
The DIRECTV Active® channel
The DIRECTV Active channel is the home of DIRECTV Interactive Service. Press the
ACTIVE button on your remote to get the latest weather, horoscopes, lottery results and more.
Finding more interactive channels
The NewsMix and SportsMix channels let you see up to eight of the hottest channels on one
screen. If you want to see one of the channels in full-screen, simply highlight it, and press
SELECT. Interactive channels are sprinkled throughout the guide.
Note: Access to channels depends on your programming package.
GSN Game Lounge
The GSN Game Lounge service contains memory and skill games that you can play on-screen
using only your remote. There are free as well as subscription-only games available. If you are
good enough, you might even see your name on the leader board.
To get to the GSN Game Lounge, go to channel 110 while watching live TV or viewing the
program guide.
54
Page 65

Exiting an interactive channel
When you want to exit an interactive channel, simply press the TiVo button, the Live TV
button, or the GUIDE on your remote control, or just type in a new channel number while
viewing the interactive channel.
Look for more interactive content
Interactive content like scores, statistics, and other information are also provided along with
some of our special sports and entertainment channels. Look for an on-screen popup that lets
you know when interactive content is available, and follow the on-screen instructions to use the
interactive features.
More than just TV
4
55
Page 66

More than just TV
4
Music, Photos, & Showcases
When you connect your TiVo HD DVR from DIRECTV to your home network, you can watch
slideshows of your digital photos on your big screen TV, or listen to playlists of your favorite
music files on your A/V system.
Note: These features require a home network connection and a PC with a media server. Visit
directv.com/mediashare for details.
Streaming music
To stream music from your computer, you'll first need to “publish” your music using the free
TiVo Desktop software application. You’ll need to install this application on your PC. You can
download it from tivo.com
Publishing your music means making MP3 files available over your home network to your
DVR. Publishing does not copy music files to your DVR, so published music does not use any
of your DVR’s recording space.
Note: TiVo Desktop works with music in the MP3 format, and with playlists in the following
formats used by common music players: M3U, PLS, ASX, and B4S.
Publishing music from your PC
1. Download and install the free TiVo Desktop application on your PC.
2. On your PC, open TiVo Desktop and select the Publish Media icon.
3. Click the ‘Music’ tab, then click ‘Add Music.’
56
Page 67

4. Navigate to the folder containing the playlist or folder of music you want to publish. When
To unpublish music files, go to your
computer and select the files you
want to unpublish. Then click the
Remove button. These files will no longer
be accessible from your DVR, but they will
remain on your computer.
you select a folder, any MP3 files within that folder are listed in the right frame of the Add
Music window.
5. To publish a whole folder of music, select the folder and click ‘Add.’ To publish individual
MP3 files, select them from the list on the right, then click ‘Add.’
Publishing music from your Mac
1. Download and install the free TiVo Desktop application on your Mac.
2. From the Apple menu, click ‘System Preferences.’
3. Under ‘Other,’ click ‘TiVo Desktop.’
4. Click ‘Start’ to begin publishing content.
5. Click the ‘Music’ tab, then click ‘Publish My Music.’
• To publish all of your iTunes library, select ‘Publish My Entire iTunes Library.’
• To publish only some of your playlists, select ‘Publish Only These Playlists,’ and then
select each playlist you want to publish.
Playing music on your DVR
More than just TV
4
1. From TiVo Central, select ‘Music, Photos, & Showcases.’
2. Select your music on your computer. (Your selection will vary depending on how your
computer is named.)
3. You will see any playlists or folders that you have published. Highlight one and press
PLAY. In a few seconds, music starts playing. After the first song ends, the second song in
the playlist or folder begins.
57
Page 68

More than just TV
4
Viewing photos
To view photos on your DVR, you'll first need to “publish” the photos you want to see.
Publishing your photos means making photo files available over your home network to your
DVR. Publishing does not copy photo files to your DVR, so published photos do not use any of
your DVR’s recording space.
Note: TiVo Desktop works with photos in the following formats: BMP, TIFF, DIB, GIF, JPG,
and PNG.
Publishing photos with your PC
1. Download and install the free TiVo Desktop application on your PC.
1. Open TiVo Desktop and select the ‘Share Music, Photos, & Video’ icon.
2. Click the ‘Photos’ tab, then click ‘Add Photos.’
3. Navigate to the folder containing the photos you want to publish. When you select a folder,
any photo files within that folder are listed in the right frame of the Add Photos window.
4. To publish a whole folder of photos, select the folder and click ‘Add.’ To publish individual
photo files, select them from the list on the right, then click ‘Add.’
Publishing photos with your Mac
1. Download and install the free TiVo Desktop application on your Mac.
2. Open TiVo Desktop and select the ‘Share Music, Photos, & Video’ icon.
3. From the Apple menu, click ‘System Preferences.’
4. Under ‘Other,’ click ‘TiVo Desktop.’
58
Page 69

5. Click ‘Start’ to begin publishing content.
6. Click the ‘Photos’ tab, then click ‘Publish My Photos.’
• To publish all of your iPhotos albums and photos, select ‘Publish My Entire iPhoto
Library.’
• To publish only some of your photo albums, select ‘Publish Only These Albums,’ and
then select each album you want to publish.
Viewing photos on your DVR
1. From TiVo Central, select ‘Music, Photos, & Showcases.’
2. Select your photos on your computer. (Your selection will vary depending on how your
computer is named.)
3. You will see any folders you have published. Do one of the following:
• To view a slideshow of photos, highlight the folder containing the photos you want to
see, and press PLAY.
• To view individual photos within a folder, highlight the folder containing the photos you
want to see, and press SELECT. Navigate to the photo you want to view and press
SELECT again. You'll see options for viewing the photo, including rotating options and
the option to view a slideshow of all photos in this folder. (You can also play a slideshow
by highlighting any photo and pressing PLAY instead of SELECT).
More than just TV
4
59
Page 70

More than just TV
4
Exploring Showcases
Showcases let you see exclusive video like the inside scoop on hit movies, special events, and
popular series, and demos of the latest gadgets and services.
Showcases are updated all the time. To check out what Showcases are available today:
1. From TiVo Central, select ‘Music, Photos, & Showcases.’
2. Choose ‘Showcases.’
3. Click on the Showcase that interests you, and prepare to be dazzled!
Showcases may contain video clips, including exclusive short films, promotional spots, and
movie trailers. Viewable clips are marked by the clapboard icon.
60
Page 71

Settings
Channel settings 62
Display settings 64
Network and phone settings 65
Remote control settings 68
Messages 71
Account & system information 72
Restart or reset system 73
Standby 74
5
Page 72

Settings
5
Channel settings
From the TiVo Central® screen, select Messages & Settings, then Settings, then Channels.
Channel list
This is the list of available channels. The DVR uses this list to determine which channels to
display in the guide and which channels are available
®
Search by Title, and WishList
channel list.
searches look for shows only on channels selected on this
Customizing your channel list
• Channels You Receive. The Channel List screen displays the complete list of channels
available. You may not actually receive or subscribe to some of these channels, or you may
not wish to display them in the guide, or search for shows on them.
Create a customized list of channels by pressing SELECT on each channel you want. A
yellow check mark appears next to each channel you select. Press SELECT again to remove
the check mark. The list of selected channels is your Channels You Receive list.
• Favorite Channels. Use Favorite Channels for channels you watch frequently. Include only a
few channels in this list, so that you can quickly see what’s coming up on them using the
guide. To indicate your Favorite Channels, highlight each and press THUMBS UP.
for recording shows. Features such as
62
Page 73

Channel Scan
If you have an off-air tuner connected to your DVR, channel scanning identifies all the channels
that the antenna can receive. Signals received via antenna are subject to weather conditions and
other environmental factors, so the availability of certain channels may vary.
Any scanned channel for which the DVR has received no program guide information is marked
with an asterisk ( * ) in the channel list.
Duplicate HD/SD Channels
This option allows you to hide all standard definition (SD) channels that have high definition
duplicates. This helps to keep your channel list more manageable and makes it easier to view
and record HD programming.
Note: Hiding SD channels will disable any Season Pass® recordings for those channels.
Settings
5
63
Page 74

Settings
5
Even if you choose to turn off the
front panel lights, one of the lights
on the front panel will flash briefly
when a button on the remote is pressed.
This indicates that the
DVR is receiving a
signal from the remote.
Display settings
From TiVo Central, choose ‘Messages & Settings,’ then ‘Settings,’ then ‘Displays’ to
customize the display of the channel banner, closed captioning, and the lights on the DVR.
Caller ID If this setting is enabled, your DVR is connected to a phone line, and you have Caller
as part of your home phone service, you’ll see a Caller ID message on your TV screen if a
ID
call comes in while you are watching live TV.
64
Channel Banner Normally, when you change channels, the channel banner
seconds. If you want it to disappear quickly, select ‘Clear Banner Quickly.’
Closed Captioning Change the way the DVR displays closed captioning text. To turn closed
oning on or off while watching a show, press INFO to view the channel banner, and select
capti
the closed captioning icon:
Displays on the Front of the DVR
panel. The lights indicate when the DVR is
selected video output format. You can choose to change the brightness of the lights.
.
You can change the display of the lights on the DVR’s front
receiving power and recording shows, as well as the
is displayed for a few
Page 75

Network and phone settings
The DVR makes regular connections to DIRECTV. The Network & Phone screen includes
details about the last successful connection.
From TiVo Central, select ‘Messages & Settings,’ then ‘Settings,’ then ‘Network & Phone.’
Available options include:
Connect to the DVR Service now Normally, you don’t need to select this option — the DVR
connects to DIRECTV automatically. After you start the connection, the status of the
connection is displayed. You can watch live TV, set up recordings, and search for shows while
the connection is in progress.
Change network settings See “Network settings” below.
Change phone settings See “Phone settings” below.
View network status Select to review information about your network connection.
View network diagnostics Select to test your connection, see a history of your video downloads,
and run other diagnostic tests related to your network connection.
Network settings
Settings
5
To get the most out of your DVR, you will want to connect it to your home network. When your
DVR is broadband connected, you have access to special DIRECTV features, including
DIRECTV on Demand and music and photo sharing, as well as to enhanced TiVo search
options.
If you have not yet connected your DVR to your home network, see “Network connection” on
page 76.
65
Page 76

Settings
5
Most of the time, you do not need to configure these settings, as they are usually configured
automatically when you first set up your
configure how the DVR receives an IP address, or you can as
network information manually. Follow the on-screen instructions to configure your wired
network.
DVR. However, if necessary, you can use this page to
sign a static IP address and other
Phone settings
If you have not yet connected your DVR to your phone connection, see “Phone connection” on
page 78.
The following settings are available:
66
Dial Prefix Select this if you normally dial a
you need to dial “9” to get an outside line). Use the number keys on the remote control to enter
the prefix. Press the PAUSE button after you have entered the prefix. This will insert a comma,
which creates a two second pause after the prefix is dialed.
Call Waiting Prefix Choose this to disable call waiting while connecting to DIRECTV. Without a
call wai
through, depending on your phone system. The DVR tries connecting again later.
The most common code that phone companies use to disable call waiting is *70, (star-sevenzero
area. Press CLEAR to enter a star (*). Press the PAUSE button after you have entered the prefix
to insert a comma, which creates a two second pause after the prefix is dialed.
Tone/Pulse Dialing If your phone system uses pulse dialing rather than tone dialing, change the
setti
ting prefix, the DVR might drop its connection and allow incoming calls to ring
-comma.) Check with your phone company to find out how to disable call waiting in your
ng to pulse here. (Most phone systems are tone.)
prefix before making a phone call (for example, if
Page 77

Availability Detection When Availability Detection is on, the DVR checks whether the phone
With Dial Tone Detection and
Availability Detection both turned
off, if you happen to be talking on
the phone when the
DVR tries to connect,
you hear it dial.
line is in use, which allows it to avoid disrupting a call in progress.
Settings
5
This setting is off by default. With Availability
modem call in progress (on your computer or other device), that call might be disrupted if the
DVR attempts to call DIRECTV. If you have a standard dial tone, and Availability Detection is
off, make sure Dial Tone Detection is on (see below).
If you are experiencing “Failed, Line unavailable” errors, or if
connections, you might have a low-voltage phone system that the DVR cannot detect. In this
case, it’s best to have Availability Detection off.
Dial Tone Detection This setting is on by default. If you leave it
tone before it starts dialing. However, if you have a non-standard dial tone, or a stuttering dial
tone (as some voice messaging systems have), the DVR is unable to detect the dial tone and
does not make its call.
Detection turned off, if you have another
the DVR is not making phone
on, the DVR checks for a dial
67
Page 78

Settings
5
Due to the great variety of TVs and
A/V receivers available, some makes
and models might not be compatible
with your TiVo remote control.
If you’re unable to program the TiVo remote
to work with your equipment, try online
support for remote controls. Search for
“Code Search” at tivo.com/support.
Remote control settings
Some buttons on the TiVo® remote are programmable. You have options to control power,
volume, and mute on your TV; volume and mute on your A/V receiver (stereo system); and
input selection on your TV — all from your TiVo remote!
68
To program your remote, from TiVo Central, select ‘Mess
‘Remote & Devices,’ then ‘Remote Control Setup.’ Follow the on-screen instructions.
To reset all the programmable buttons:
int the TiVo remote away from your DVR.
1. Po
2. Press and hold the TiVo remote’s TV PWR and TiVo buttons simultaneously until the light
on the remote lights, and remains lit when you release the buttons.
3. Press THUMBS DOWN three times, then press ENTER.
ages & Settings,’ then ‘Settings,’ then
Advance and replay buttons
When you press the ADVANCE
end of the show. Press it again,
fast forwarding, you skip to the next tick mark. When you press the INSTANT REPLAY
button at any time, you go back 8 seconds.
Use this setting to customize the behavior of the ADVANCE
buttons.
®
button while watching a recorded show, you skip to the
and you skip to the beginning. If you press ADVANCE while
and INSTANT REPLAY
®
Page 79

IR/RF & multiple DVRs setup
Use this setting to choose how you want to control this DVR with your remote control. Your
DVR is capable of receiving either infra-red (IR) or radio frequency (RF) remote control
signals.
• IR mode The DVR must be in line of sight with the remote control to receive signals.
• RF mode The DVR can receive remote control signals even if there are obstructions, like
walls, in the way.
Also use this setting to assign an ID for your DVR. This is helpful if you have multiple boxes
and want to control all of them separately; you should set each to a different ID.
Settings
5
69
Page 80

Settings
5
Satellite & off-air antenna settings
The options on this screen help you set up your satellite, test your transponder’s reception,
configure date and time informa
Test Satellite Signal Strength Use this option to ensure that your satellite dish is pointed
properly.
Satellite Setup This option allows you change your satellite setup. You will repeat portions of
Guided Setup to
Time Zone/ Daylight Savings Time Set your time zone.
complete the procedure.
tion, and replace your access card.
70
Replace access card Use this option only if you need to
new one. Once you begin the process on this page, your old access card will no longer be valid.
replace your existing access card with a
Page 81

Messages
From time to time, you may receive messages alerting you to new features, important software
changes, special promotions, or other news items.
When you receive a new message, the TiVo Central
Messages & Settings.’ Select this to read new messages.
You can also review both read and unread messages at any time:
screen displays the option ‘Read New
Settings
5
1. From TiVo
2. Select ‘Messages.’ A list of all of your messages appears. Messages you have not yet read
are marked with an envelope icon:
3. Use the UP/DOWN arrows to highlight a message, then press SELECT to read it. Use
CHANNEL UP/DOWN to page through a message if it doesn’t fit on the screen.
Central, select ‘Messages & Settings.’
.
71
Page 82

Settings
5
Account & system information
The Account & System Information screen provides information about your DVR and your
DIRECTV service account. From TiVo Central, select ‘Messages & Settings,’ then ‘Account &
System Information.’
System Information You’ll need some of the information provided here if you contact Customer
Support. This screen contains your access card number, receiver ID, software version, storage
capacity, and information about recent connections to DIRECTV. Use the CHANNEL UP/
DOWN button to see the rest of the screen.
Copyright & Trademarks This screen contains copyright, trademark, and other informat ion
related to DIRECTV.
72
Page 83

Restart or reset system
Operations like Clear & Delete
Everything may take over an hour.
During this time, it is recommended
that you turn off your TV to avoid “burn-in”
of static images on sensitive video
displays.
From TiVo Central, select ‘Messages & Settings,’ then ‘Restart or Reset System.’ Options on
this screen allow you to restart your DVR, erase information, or restore original factory settings.
Settings
5
Restart the DVR Shuts down the DVR, and starts it up again. This
shows, Season Pass
restart your DVR as a routine troubleshooting step.
Repeat Guided Setup Repeating Guided Setup resets your ch
recorded shows, Season Pass recordings, WishList Searches, or TiVo Suggestions.
Clear Thumb Ratings and Suggestions Removes all Thumbs Up and Thumbs Down ratings, and
eletes the list of upcoming TiVo Suggestions. This does not delete TiVo Suggestions that have
d
already been recorded.
Clear program information & To Do List Clears all program information, canc
recordings and everything in the To Do List, and removes all Thumbs Up and Thumbs Down
ratings. This does not delete shows in the Now Playing List. Completing this process could take
over an hour.
Clear & delete everything This option restores the DVR’s original factory settings. It clears all
Season Pass recordings, WishList Searches, Thum
Suggestions, Now Playing List recordings, program information, To Do List and setup
information, including channel lists and Parental Controls. Completing this process may take
over an hour.
recordings, WishList searches, or TiVo Suggestions. You might need to
does not affect recorded
annel lists. This does not affect
els all Season Pass
bs Up and Thumbs Down ratings, TiVo
73
Page 84

Settings
5
Standby
You can put your DVR in Standby mode by selecting ‘Standby’ from Messages & Settings. To
return to normal mode from Standby, press the TiVo button or the LIVE TV/SWAP button on
the remote or the FORMAT button on the front of the DVR.
When the DVR is in Standby:
• Your TV shows a black screen and the lights on the front of the DVR go out.
• Shows that are being recorded or are scheduled to record are still recorded.
• The DVR still connects to DIRECTV.
• If you temporarily turned off Parental Controls, Standby mode re-enables them.
• If live TV is paused when Standby is selected, the DVR remains paused for up to 30
minutes.
• If the program guide was set to display a category filter, filtering is turned off.
74
Page 85

Installation and Connections
Professional installation 76
Connections (network and phone) 76
Connections for auxiliary equipment 79
Guided Setup and activation 85
6
Page 86

Installation and Connections
Professional installation
For the best user experience and system performance, we highly recommend that your system
be professionally installed. Call 1-800-531-5000 to schedule an installation.
Connections (network and phone)
Network connection
To get the most out of your TiVo HD DVR from DIRECTV, you will want to connect it to your
home network. When your DVR is broadband connected, you can order Pay Per View
programming without calling DIRECTV, and you have access to special DIRECTV features,
including DIRECTV on Demand and music and photos sharing.
If your installer did not configure a network connection during installation, don’t worry.
Connecting your DVR to your home network is quick and easy. Just follow the steps below.
If your DVR is already connected to your home network and you want to change your network
settings, see
Connection methods
“Network and phone settings” on page 65.
76
There are two ways to connect your DVR to your home network:
• Wired connection
• Wireless connection
Page 87

Wired connection
A wired connection is a direct connection between your router and your DVR using an Ethernet
cable.
1. Plug one end of the Ethernet cable into either Ethernet port located on the back of your
DVR.
2. Connect the other end of the Ethernet cable to your Ethernet jack in the wall or directly in to
the free port of your wired router.
3. Verify that you are connected. Press the TiVo
select ‘Messages & Settings’ > ‘Settings’ > ‘Network & Phone.’
®
button on your remote control, and then
Wireless connection
A wireless connection uses your own wireless router and a wireless transceiver to send data
from your DSL/cable router to the DVR. Please be advised that DIRECTV does not recommend
using a wireless device, because it might not provide the best experience. A wired connection is
preferred to ensure the best digital entertainment experience.
However if you prefer to use Wireless, you must follow the manufacturer’s directions on
configuring your Wireless device before connecting it to your DVR. These instructions help you
make the right connections to your DVR.
Installation and Connections
Make sure that you have a wireless transceiver that uses an Ethernet port to connect to a media
device. USB devices are not supported by the DVR. You will also need a wireless router (in
place of a regular router).
1. Follow the instructions for your wireless device to initialize it for your home network before
continuing. The device must be fully initialized before it is connected to your DVR.
77
Page 88

Installation and Connections
2. Connect one end of an Ethernet cable to the LAN port on the back of the wireless
transceiver.
3. Connect the other end of the Ethernet cable to the Ethernet jack on the back of the DVR.
4. Verify that you are connected. Press the TiVo button on your remote control, and then select
‘Messages & Settings’ > ‘Settings’ > ‘Network & Phone.’
Phone connection
If you are unable to connect your DVR to a network connection, you can also connect using
your phone line. Connecting your DVR to a land-based telephone line saves you money because
it allows you to purchase Pay Per View movies and special events without calling DIRECTV to
order. It can be used for sports subscriptions and can also be used to enhance the interactive
features available on DIRECTV’s interactive channels. The DVR uses a toll-free number once a
month for a few minutes’ duration and is designed not to interfere with your regular phone
service. You will need an RJ11-type modulator jack (the most common type of phone jack). If
you disconnect the phone line, the DVR will not allow you to purchase Pay Per View programs,
and some features of the interactive channels will be limited.
Note: Do not connect your DVR to a digital PBX phone system — doing so could permanently
damage your equipment and void your warranty.
78
If your DVR is already connected to your phone line and you want to change your settings, see
“Network and phone settings” on page 65.
Page 89

Connections for auxiliary equipment
Never connect an IN to an IN or an
OUT to an OUT. Some A/V jacks and
inputs are color-coded. Always
match the color of the plug to the same
color of the jack. (HDMI cables are not
color-coded.)
To obtain the best picture quality,
make sure the DVR is connected
directly to the TV.
The following instructions apply if you are upgrading to a new TV or adding a surround sound
system, DVD player/burner or VCR some time after your professional installation.
Due to restrictions imposed by copyright holders, certain programming could include content
protection measures
equipment attached to the DVR. Please contact the manufacturer of such equipment for
additional information.
that might restrict viewing or recording with certain consumer electronics
Installation and Connections
Note: Not all cables come with your DVR; you mi
depending on your setup.
All of the video and audio outputs on your DVR offer good quality. When adding new
equipment, try to use the DVR video and audio output connectors in the following order to
ieve the highest picture and sound quality throughout your audio/video system.
ach
Video connections
The following video connections are
• HDMI (High-Definition Multimedia Interface) provid
audio in one connector.
• Component Video Output (YPbPr) provides high-quality video, but does not provide audio.
You will need to connect audio separately using the digital audio or RCA audio connectors.
• S-video provides good video, but does not provide audio. You will need to connect audio
separately using the digital audio or RCA audio connectors.
ght need to purchase additional cables
available:
es the best digital video and digital
79
Page 90

Installation and Connections
• RCA jacks provide good video and usually come bundled with three cables for one video
and two audio channels.
Audio connections
The following audio connections are available:
• HDMI (High-Definition Multimedia Interface) provides the best digital video and audio in
one connector.
• Digital Audio Optical provides excellent quality digital audio and is often used on newer
surround sound and DVD equipment.
• Digital Audio Coax provides high quality digital audio and is also found on newer surround
sound and DVD equipment.
• RCA jacks provide good audio quality and are found on older auxiliary equipment.
Connection diagrams
Because there are so many makes and models of TVs and auxiliary equipment, it is impossible
to fully describe all the possible connections between your DVR and that equipment. Please
refer to your TV and auxiliary equipment manuals for all of the connection options specific to
each make and model. The following images show examples of how your DVR may be
connected. In these examples, we try to use the best video connection that is supported by the
TV, the best audio that is supported by the surround sound, and the next best video/audio
connections on the DVD player/burner or VCR.
80
Page 91

Example 1: TV with HDMI connector
VIDEO AUDIO
IN
L
R
YPP
br
COMPONENT IN
VCR/DVD Player/Burner
HDMI
DIGITAL AUDIO
OPTICAL
Television
HD DVR
Surround System
COMPONENT VIDEO OUT
DIGITAL
AUDIO
OUT
L
R
VIDEO
L
R
OPTICAL
AUDIO
YPbPr
Here is an example using a TV that has an HDMI connector as the best video/audio input and a
surround sound system that has a digital audio optical connector as the best audio input:
Installation and Connections
81
Page 92

Installation and Connections
VIDEO
AUDIO
IN
L
R
VCR/DVD Player/Burner
DIGITAL AUDIO
COAX
Television
HD DVR
Surround System
COMPONENT VIDEO AUDIO
IN
L
YPP
br
R
COMPONENT VIDEO OUT
L
R
VIDEO
L
R
AUDIO
YPbPr
DIGITAL
AUDIO
OUT
COAX
Example 2: TV with component video connectors
Here is an example using a TV that has component video connectors as the best video input with
RCA audio connectors as the best audio input and a surround sound system that has a digital
audio coax connector as the best audio input:
82
Page 93

Example 3: TV with S-video connector (standard definition)
DIGITAL AUDIO
OPTICAL
Television
HD DVR
Surround System
S-VIDEO INAUDIO
IN
L
R
VIDEO AUDIO
IN
L
R
YPP
br
COMPONENT IN
VCR/DVD Player/Burner
COMPONENT VIDEO OUT
L
R
L
R
AUDIO
YPbPr
DIGITAL
AUDIO
OUT
OPTICAL
S-VIDEO
OUT
Here is an example of a TV that has an S-video connector as the best video input and RCA
audio connectors as the best audio input and a surround sound system with a digital audio
optical connector as the best audio input:
Installation and Connections
83
Page 94

Installation and Connections
DIGITAL AUDIO
COAX
Television
HD DVR
Surround System
VCR/DVD Player/Burner
L
R
L
R
AUDIO
DIGITAL
AUDIO
OUT
VIDEO
COAX
VIDEO
AUDIO
IN
L
R
VIDEO
AUDIO
IN
L
R
Example 4: TV with RCA connectors (standard definition)
Here is an example of a TV that has RCA connectors as the best audio/video inputs and a
surround sound system with a digital audio coax connector as the best audio input:
84
Page 95

Guided Setup and activation
If your DVR was not professionally installed, you need to follow the Guided Setup screens
when you first start the DVR.
1. Press PWR. The DVR will turn on. (Make sure your TV is also turned on!)
2. A Welcome screen appears.
3. Simply follow the on-screen directions to complete setup. If you’ve installed your satellite
dish and system yourself, you’ll be guided though various functions for optimizing your
signal and setup — including positioning your dish and a system test. After these setup
procedures are complete, you see a message on-screen that says, ‘Receiving Satellite Info,’
as the DVR gathers information from the satellite for the on-screen program guide.
4. During Guided Setup, you will be asked to activate your DVR. You’ll need the following:
• Service address, social security number, and a valid major credit card.
• Access card and DVR ID numbers.
When you’re ready, just call 1-800-531-5000, and pick the programming package that’s
right for you. A monthly TiVo service fee and other applicable monthly Advanced Receiver
fees will apply.
Installation and Connections
85
Page 96

Installation and Connections
86
Page 97

Troubleshooting
7
Page 98

Troubleshooting
Troubleshooting tips
Resetting/reauthorizing your DVR
Many problems can be corrected by performing a simple reset of the
DVR. If you experience frozen audio or video, blank screen, or the
system won’t respond to front panel button or remote control, try
one of these:
• Press the red RESET button behind the access card panel door
on the front of the DVR, then wait for program guide
information to be acquired.
• If the problems persist, try unplugging the power cord of the
DVR for 15 seconds, then plug it in again.
• Try reauthorizing your DVR: on a computer, go to directv.com/
reauthorize and follow the on-screen instructions.
Software updates
You may occasionally receive software updates to improve
performance and upgrade features and functions. These updates
occur automatically, usually at times when the DVR is not being
used or recording shows. If your DVR is being used when an update
is sent, you will see an on-screen message and you might experience
a disruption in reception for a few minutes. Your reception should
return to normal after the update is complete. Your DVR must be
plugged in to AC power to receive any updates.
On-screen error messages
There might be times when you see an on-screen error message. The
top line of the message gives a brief description of the error, while
the second line supplies an error code in parentheses.To resolve the
error, call Customer Service at 1-800-531-5000 and mention the
error code number when prompted.
Power
My DVR will not turn on
• Press POWER button on the front panel of the DVR.
• Verify that the power cord is plugged into the DVR and the wall
outlet.
• Check the outlet or power strip to make sure it is “live” by
plugging in something else.
• Replace batteries in remote control.
• Be sure remote is pointed at remote sensor on the DVR, and
sensor is not blocked.
• Try plugging the DVR into a different wall outlet.
• Unplug the DVR for five minutes, and then plug it in again.
88
Page 99

Troubleshooting
My DVR turns off unexpectedly
• Excessive heat may have caused the DVR to go into a standby
state. Ensure that your DVR has plenty of ventilation and that
nothing is on top of the DVR.
• Electronic protection circuit may have been activated due to a
power surge. Wait 30 seconds for internal circuits to reset, then
turn the DVR back on.
• You may have blown a circuit breaker or be experiencing a
power outage. Check the circuit breakers in your home. Consult
an electrician if the problem is frequent or severe, especially if
other household appliances or electronics are affected.
• Parental Controls rating limits may have been activated on your
DVR. If Parental Controls are on, turn your DVR back on, and
enter your parental controls password at the prompt.
My DVR turns on or changes channels unexpectedly
• A scheduled recording might be about to begin, so the DVR is
changing channels to record the show as requested. Check your
To Do List to see if there are other scheduled recordings (press
the TiVo
• Your TV’s timer might have been activated. Check your TV
owner’s manual to turn off the TV’s timer.
®
button, then select ‘Find Programs’ > ‘To Do List’).
Channels
Channels are missing from the guide
A channel is in the guide but I can’t tune to it.
• The channels might be excluded from the Channel List. To
update your channel list, see “Channel list” on page 62. You can
also try enter the channel number manually.
• Your satellite dish might be incorrectly configured. To check the
dish type set in your DVR’s preferences, go to TiVo Central,
then select ‘Messages & Settings’ > ‘Settings’ > ‘Satellite &
Off-Air Antenna’ > ‘Satellite Setup.’
• Your DVR information might need to be refreshed. To refresh
your DVR information, go to directv.com, click on Customer
Service > Troubleshooting > On-Screen Messages > Please Call
Customer Service, ext. 721. You will need to be logged into
your account on directv.com to complete this process.
Recordings
A show I tried to record does not show up in the Now
Playing List.
• Someone else might have prevented the recording or erased the
show after it recorded. To see if the show was recorded then
89
Page 100

Troubleshooting
deleted, press the TiVo button, then select ‘Find Programs’ >
‘To Do List’ > ‘Recording History.’ You will see a list of recent
programs with their recording status information.
• The recording might have been cancelled due to a conflict with
another show with higher priority. If the recording was cancelled
due to a scheduling conflict, record the show at a different time,
or adjust the priorities in the Season Pass Manager. See “Using
the Season Pass manager” on page 31.
• The show might have been blocked by Parental Controls. Check
the Parental Controls on your DVR. Adjust the content ratings, if
necessary.
I wanted to record a show, but I got an error
message saying it conflicted with another scheduled
record. What do I do?
• If you tried to record three programs at once, or watch a live TV
show with two others recording, you need to decide which
recording to cancel.
• To reduce recording conflicts between shows whose recording
times overlap just a couple of minutes, make sure Overlap
Protection is turned on. See “Recording with Overlap
Protection” on page 31.
I recorded a show, and the recording got cut off just
before the end, so I missed the last bit of the show.
• The show you were trying to record might have started or ended
early. Try setting the end time of the recording in the Record
Options so the recording ends one or two minutes later (or more,
if necessary). See “Setting a show’s recording options” on
page 38.
• If you were trying to record a live event, the event might have
run over its allotted time. Make sure that the ‘Extend Live
Recordings’ option is turned on. When this option is turned on,
you’ll be prompted to extend the recording time for live events.
See “Extending live recordings” on page 32.
• You might have had a recording conflict with a higher priority
show. Use the Season Pass Manager to raise or lower the
priorities of recordings. See “Using the Season Pass manager”
on page 31.
®
I’ve set up a Season Pass
recording, but now I get a
bunch of reruns and multiple copies of the same
show.
• When you set up a Season Pass, make sure you select “First-run
only’ as the ‘Show type.’
90
• If the program guide does not provide enough specific
information about a show, the TiVo service may not be able to
 Loading...