

Tiviar mini User Manual

mini
User Guide


Contents
1 Introduction 7
1.1 Features . . . . . . . . . . . . . . . . . . . . . . . . . . . . . . . . . 7
1.2 Accessories . . . . . . . . . . . . . . . . . . . . . . . . . . . . . . . 8
1.3 The Remote Control . . . . . . . . . . . . . . . . . . . . . . . . . . 9
1.4 Getting Started . . . . . . . . . . . . . . . . . . . . . . . . . . . . . 11
1.5 The Apps Screen . . . . . . . . . . . . . . . . . . . . . . . . . . . . 12
Customizing the Apps Screen . . . . . . . . . . . . . . . . . . . . . 13
2 Installation 14
2.1 Safety Precautions . . . . . . . . . . . . . . . . . . . . . . . . . . . 15
2.2 Satellite Dish Connection . . . . . . . . . . . . . . . . . . . . . . . 15
2.3 TV Connections . . . . . . . . . . . . . . . . . . . . . . . . . . . . . 16
HDMI connection . . . . . . . . . . . . . . . . . . . . . . . . . . . . 16
Composite Video Connection . . . . . . . . . . . . . . . . . . . . . 16
2.4 AV Receiver Connection . . . . . . . . . . . . . . . . . . . . . . . . 17
2.5 Network Connection . . . . . . . . . . . . . . . . . . . . . . . . . . 17
2.6 Mounting the Receiver on a TV . . . . . . . . . . . . . . . . . . . . 18
3 Scanning for Channels 20
3.1 Satellite Dish Settings . . . . . . . . . . . . . . . . . . . . . . . . . 20
LNB Settings . . . . . . . . . . . . . . . . . . . . . . . . . . . . . . 20
Unicable Settings . . . . . . . . . . . . . . . . . . . . . . . . . . . . 21
3.2 Using a Motorized Dish . . . . . . . . . . . . . . . . . . . . . . . . 21
Using DiSEqC 1.2 . . . . . . . . . . . . . . . . . . . . . . . . . . . . 22
Using USALS . . . . . . . . . . . . . . . . . . . . . . . . . . . . . . 23
3.3 Scanning for Satellite TV Channels . . . . . . . . . . . . . . . . . . 23
Scanning for Every Channel . . . . . . . . . . . . . . . . . . . . . . 24
Scanning a Specific Transponder . . . . . . . . . . . . . . . . . . . 25
Scanning for One Channel . . . . . . . . . . . . . . . . . . . . . . 25
3

4 Watching TV 27
4.1 Channel List . . . . . . . . . . . . . . . . . . . . . . . . . . . . . . . 28
Channel List Preferences . . . . . . . . . . . . . . . . . . . . . . . 28
4.2 TV Programme Guide . . . . . . . . . . . . . . . . . . . . . . . . . 29
Programme Guide Preferences . . . . . . . . . . . . . . . . . . . . 30
4.3 Controlling Audio . . . . . . . . . . . . . . . . . . . . . . . . . . . 30
4.4 Displaying Subtitles . . . . . . . . . . . . . . . . . . . . . . . . . . 31
4.5 Viewing Teletext . . . . . . . . . . . . . . . . . . . . . . . . . . . . 31
4.6 Watching Pay Channels . . . . . . . . . . . . . . . . . . . . . . . . 31
4.7 Watching Subchannels . . . . . . . . . . . . . . . . . . . . . . . . 32
4.8 Setting Up Timers . . . . . . . . . . . . . . . . . . . . . . . . . . . 32
Wake-Up Timer . . . . . . . . . . . . . . . . . . . . . . . . . . . . . 32
Sleep Timer . . . . . . . . . . . . . . . . . . . . . . . . . . . . . . . 33
Saving Energy . . . . . . . . . . . . . . . . . . . . . . . . . . . . . 33
4.9 Managing Channels . . . . . . . . . . . . . . . . . . . . . . . . . . 33
4.10 HbbTV . . . . . . . . . . . . . . . . . . . . . . . . . . . . . . . . . . 35
5 Recording TV 36
5.1 Recording TV Programmes . . . . . . . . . . . . . . . . . . . . . . 36
Scheduling TV Recordings Using the Programme Guide . . . . . 36
Manually Scheduling TV Recordings . . . . . . . . . . . . . . . . . 37
5.2 Time-Shifting . . . . . . . . . . . . . . . . . . . . . . . . . . . . . . 37
5.3 Playing Recordings . . . . . . . . . . . . . . . . . . . . . . . . . . . 38
5.4 Recording Preferences . . . . . . . . . . . . . . . . . . . . . . . . . 38
6 Playing Media Files 40
6.1 Managing Storage Devices . . . . . . . . . . . . . . . . . . . . . . 40
6.2 Managing Files . . . . . . . . . . . . . . . . . . . . . . . . . . . . . 41
6.3 Playing Recordings and Videos . . . . . . . . . . . . . . . . . . . . 42
6.4 Viewing Photos . . . . . . . . . . . . . . . . . . . . . . . . . . . . . 43
Slideshow Preferences . . . . . . . . . . . . . . . . . . . . . . . . . 43
6.5 Playing Music . . . . . . . . . . . . . . . . . . . . . . . . . . . . . . 43
6.6 Playing Media files from Other Devices . . . . . . . . . . . . . . . 44
Accessing Other Devices . . . . . . . . . . . . . . . . . . . . . . . 44
Allowing Other Devices to Access the Receiver . . . . . . . . . . . 45
4 C

7 Apps 46
7.1 Webzeal . . . . . . . . . . . . . . . . . . . . . . . . . . . . . . . . . 46
Viewing a Webpage . . . . . . . . . . . . . . . . . . . . . . . . . . 46
Navigating Webpages . . . . . . . . . . . . . . . . . . . . . . . . . 47
Bookmarks . . . . . . . . . . . . . . . . . . . . . . . . . . . . . . . 47
Entering Text . . . . . . . . . . . . . . . . . . . . . . . . . . . . . . 48
7.2 YouTube . . . . . . . . . . . . . . . . . . . . . . . . . . . . . . . . . 48
Playing Videos . . . . . . . . . . . . . . . . . . . . . . . . . . . . . 48
7.3 Free TV+ . . . . . . . . . . . . . . . . . . . . . . . . . . . . . . . . . 49
7.4 iTV+ . . . . . . . . . . . . . . . . . . . . . . . . . . . . . . . . . . . 49
7.5 iRadio+ . . . . . . . . . . . . . . . . . . . . . . . . . . . . . . . . . 50
7.6 TV Portal+ . . . . . . . . . . . . . . . . . . . . . . . . . . . . . . . . 50
7.7 Torrent Player . . . . . . . . . . . . . . . . . . . . . . . . . . . . . . 51
7.8 Weather . . . . . . . . . . . . . . . . . . . . . . . . . . . . . . . . . 51
7.9 T Apps . . . . . . . . . . . . . . . . . . . . . . . . . . . . . . . . . . 52
T Apps Server Settings . . . . . . . . . . . . . . . . . . . . . . . . . 52
8 Preference Settings 53
8.1 Language Settings . . . . . . . . . . . . . . . . . . . . . . . . . . . 53
Using Different Fonts . . . . . . . . . . . . . . . . . . . . . . . . . 53
8.2 Network Settings . . . . . . . . . . . . . . . . . . . . . . . . . . . . 54
Proxy Server Settings . . . . . . . . . . . . . . . . . . . . . . . . . 54
DDNS Settings . . . . . . . . . . . . . . . . . . . . . . . . . . . . . 54
8.3 Clock Settings . . . . . . . . . . . . . . . . . . . . . . . . . . . . . 55
8.4 Audio and Video Settings . . . . . . . . . . . . . . . . . . . . . . . 55
8.5 On-Screen Display Settings . . . . . . . . . . . . . . . . . . . . . . 56
8.6 Parental Control . . . . . . . . . . . . . . . . . . . . . . . . . . . . 56
8.7 Maintaining the Digital TV Receiver . . . . . . . . . . . . . . . . . 57
Sharing Channel Data . . . . . . . . . . . . . . . . . . . . . . . . . 58
8.8 Updating the Digital TV Receiver . . . . . . . . . . . . . . . . . . . 58
A Legal Notices 59
A.1 Copyright . . . . . . . . . . . . . . . . . . . . . . . . . . . . . . . . 59
A.2 Warranty . . . . . . . . . . . . . . . . . . . . . . . . . . . . . . . . 59
A.3 Trademarks . . . . . . . . . . . . . . . . . . . . . . . . . . . . . . . 59
C 5

A.4 Correct Disposal of This Product . . . . . . . . . . . . . . . . . . . 60
6 C

1 Introduction
1.1 Features
Beyond simply receiving satellite signals, this digital TV receiver has many con-
venient and advanced features:
• This receiver has two slots for CA modules and pay-TV cards. See Watching
Pay Channels on page 31.
• Users can use removable storage devices to record TV programmes. It is pos-
sible to schedule this receiver to record not only a single TV programme but
also every episode of a series using the programme guide. See Recording TV
on page 36.
• Users can pause and resume a live programme. See Time-Shifting on page
37.
• This receiver can play many kinds of media files, including photos, music, and
videos. See Playing Media Files on page 40.
• This receiver can play media files from other devices, such as computers and
network-attached storages. See Playing Media files from Other Devices on
page 44.
• This receiver provides a variety of apps, including YouTube. See The Apps
Screen on page 12.
7
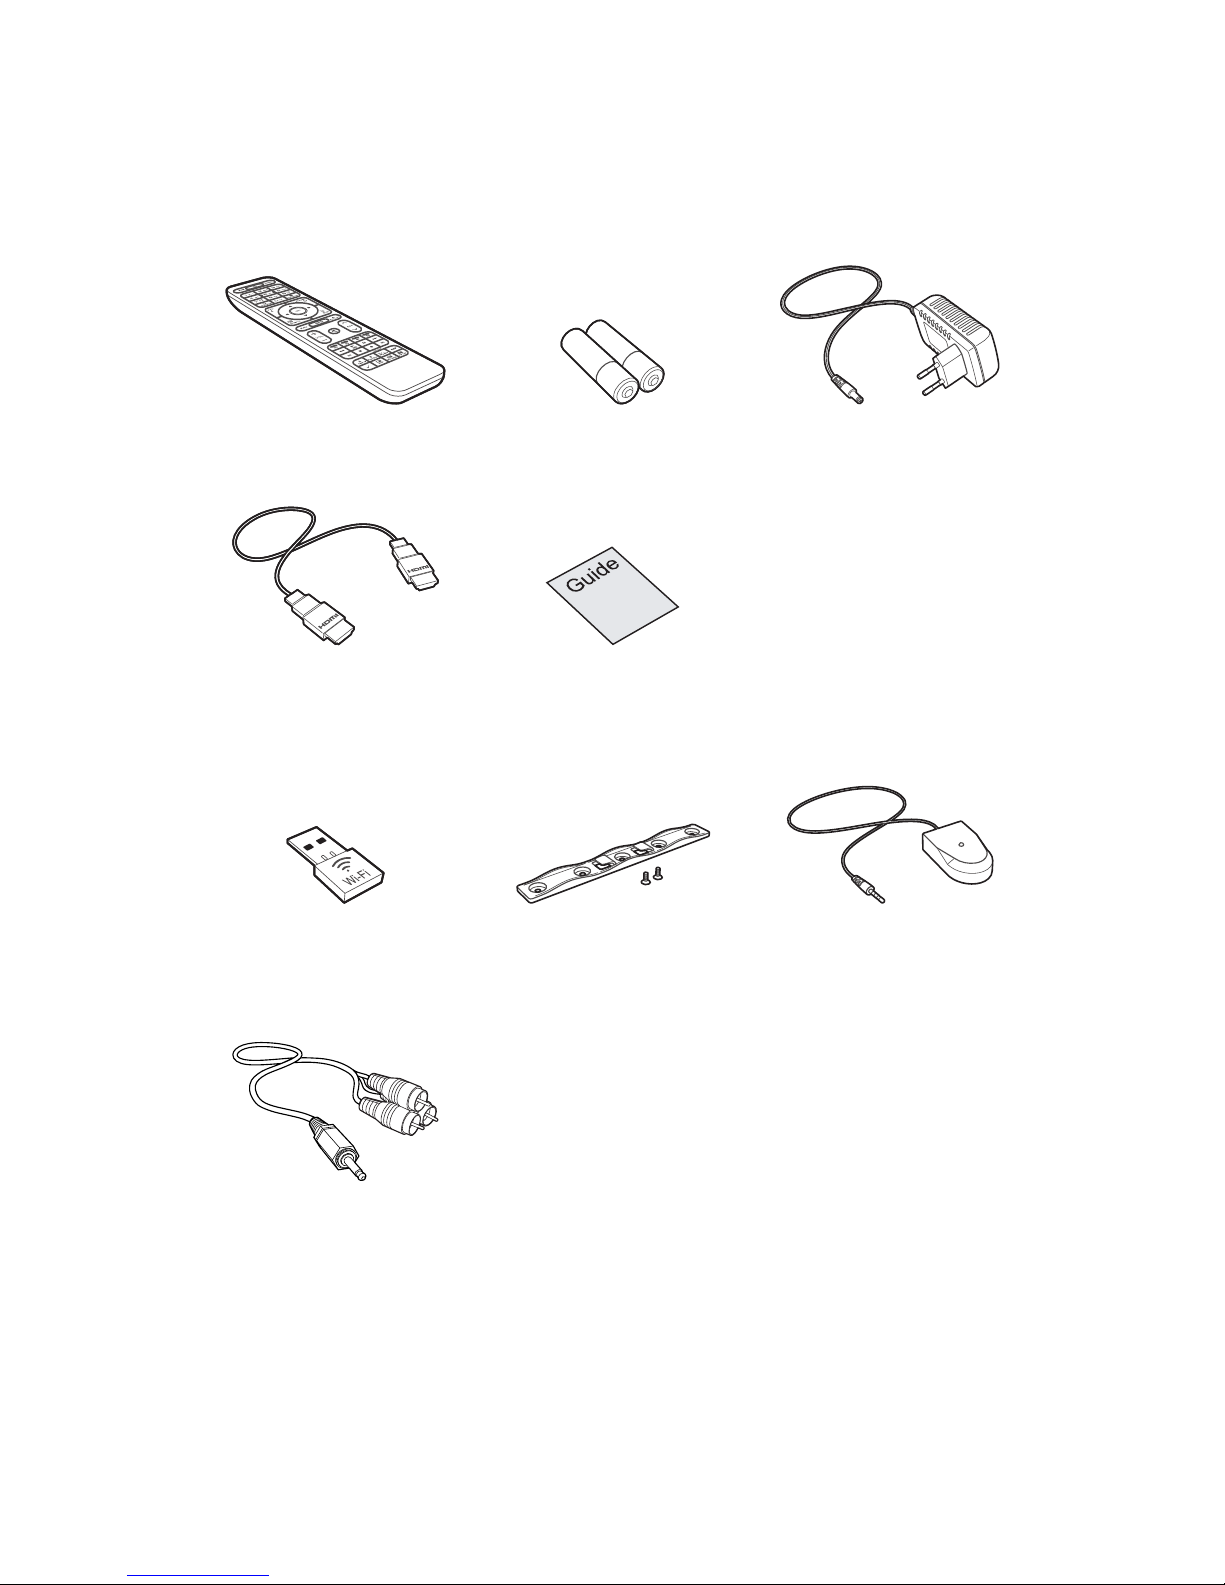
1.2 Accessories
The following accessories are included with the digital TV receiver.
Remote control Batteries Power adapter
HDMI cable Quick guide
The accessories below are separately sold.
Wi-Fi Dongle TV mount bracket Remote control
extender
Jack-to-RCA cable
Use the Wi-Fi dongle to connect the receiver to a wireless network. See Network
Connection on page 17.
8 I
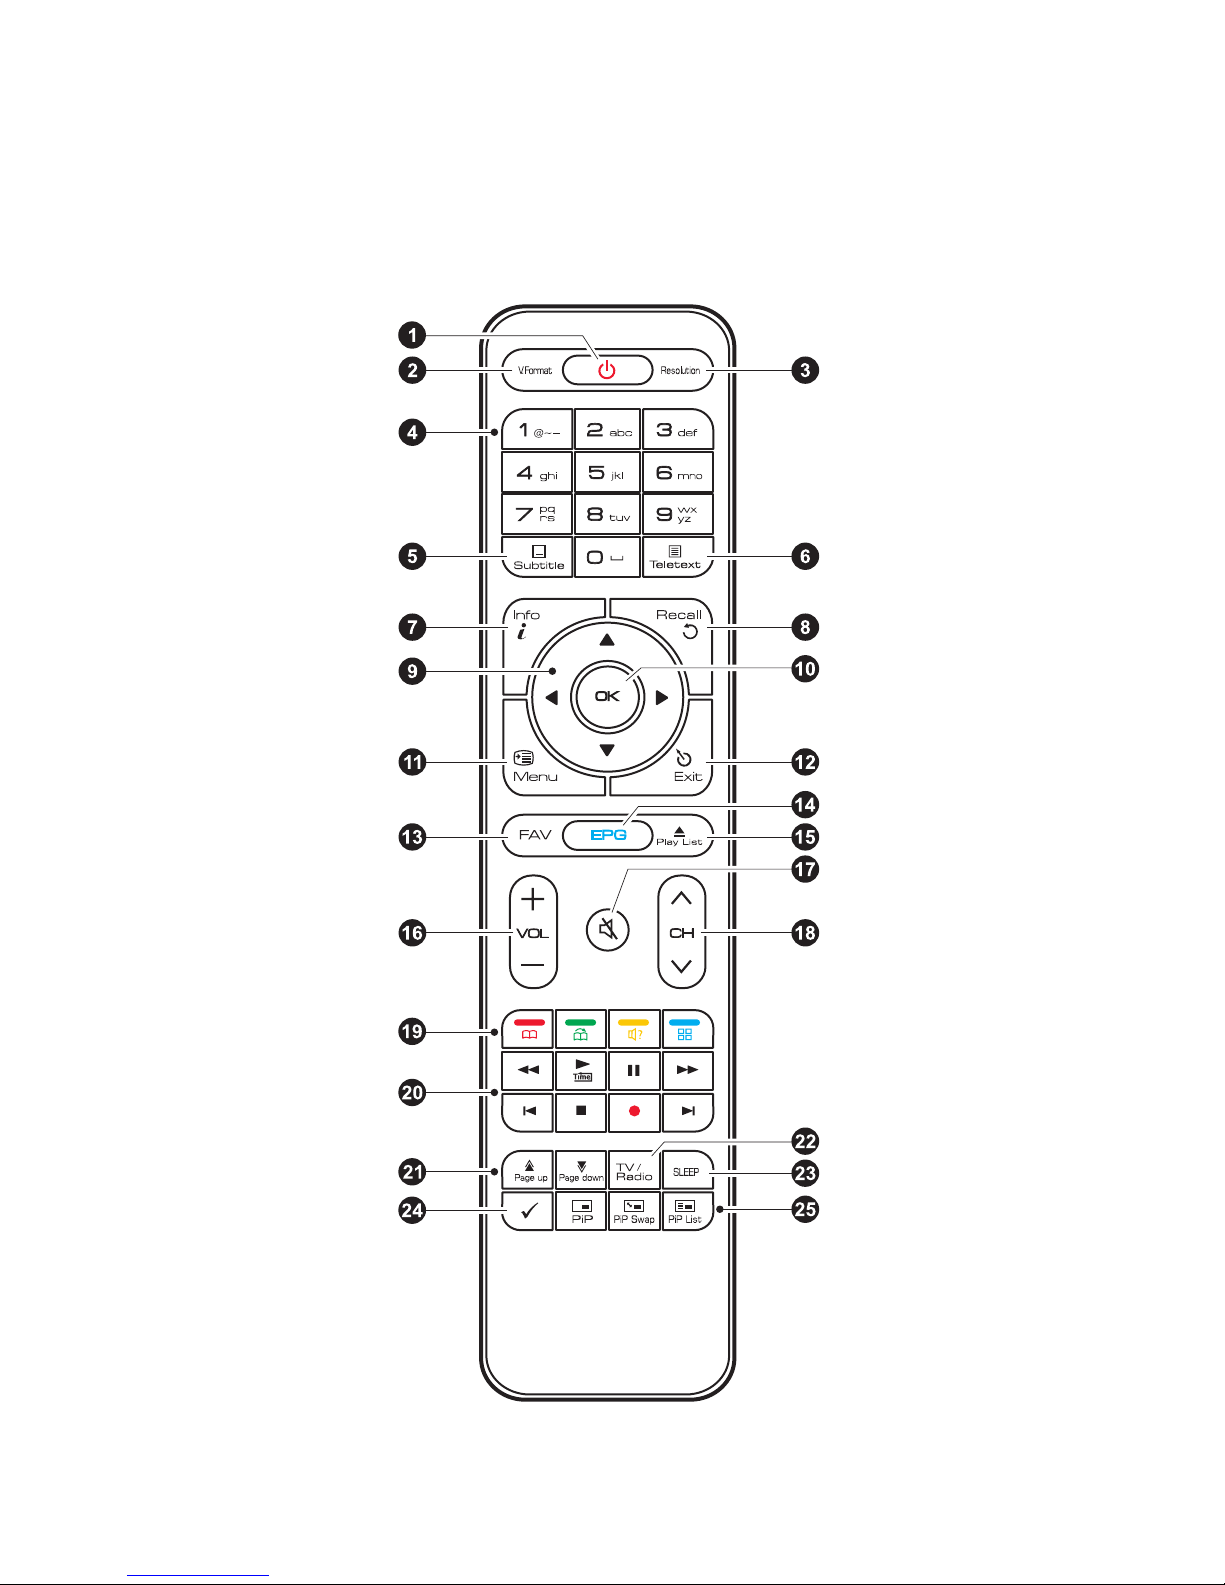
1.3 The Remote Control
Use the remote control to control the digital TV receiver. Before using, make sure
that batteries are installed correctly.
I 9

1
: Turn the digital TV receiver on or off.
2
V.Format Switch the display format (4:3 / 16:9). See Audio and Video Set-
tings on page 55.
3
Resolution: Change the picture resolution.
4
Use the numeric buttons to enter numbers.
5
Subtitle: Display subtitles. See Displaying Subtitles on page 31.
6
Teletext: Display teletext pages. See Viewing Teletext on page 31.
7
Info: Display information about the current programme.
8
Recall: Display the list of recently-viewed channels.
9
Use these navigation buttons to navigate the menus and interactive screens.
10
OK: Select an item. In addition, use this button to display the channel list.
See Channel List on page 28.
11
Menu: Display apps. See The Apps Screen on page 12. In addition, use this
button to return to the higher menu level.
12
Exit: Return to the previous screen or close the current list or dialog box.
13
FAV: Display the list of favourite channels.
14
EPG: Display the programme guide. See TV Programme Guide on page 29.
15
Play List: Display the list of files stored in a removable storage device. See
Playing Media Files on page 40.
16
Use these volume buttons to adjust the volume.
17
: Mute the sound.
18
Use these channel buttons to change channels.
19
These colour buttons perform different functions, depending on what the
receiver is currently doing.
20
Use these buttons to control recording and playback. See Recording TV on
page 36 and Playing Media Files on page 40.
21
Use these buttons to scroll lists.
22
TV/Radio: Switch between TV channels and radio stations.
23
SLEEP: Adjust the sleep timer. See Sleep Timer on page 33.
24
: This button performs different functions, depending on what the re-
ceiver is currently doing.
10 I

25
These buttons are no use.
1.4 Getting Started
Install the digital TV receiver properly, referring to Installation on page 14.
Plug the power adapter into a power outlet, and insert the connector into the
power socket on the rear of the receiver. Then press the power button on the
remote control to turn on the receiver.
When turning on the receiver for the first time, the initial setup process automat-
ically starts. Follow the on-screen instructions to finish the process. At each step,
either make a choice or skip the step.
1. Choose a language for the user interface.
2. Configure the network settings. See Network Connection on page 17 and
Network Settings on page 54.
3. Install add-ons to internet-based apps, such as Free TV+ and iRadio+, when
an internet connection is available. Additionally, determine whether to re-
store the receiver using the stored settings and channels, if there is any
backup data.
4. Set the clock. See Clock Settings on page 55.
5. Scan for TV channels. See Scanning for Channels on page 20.
I 11
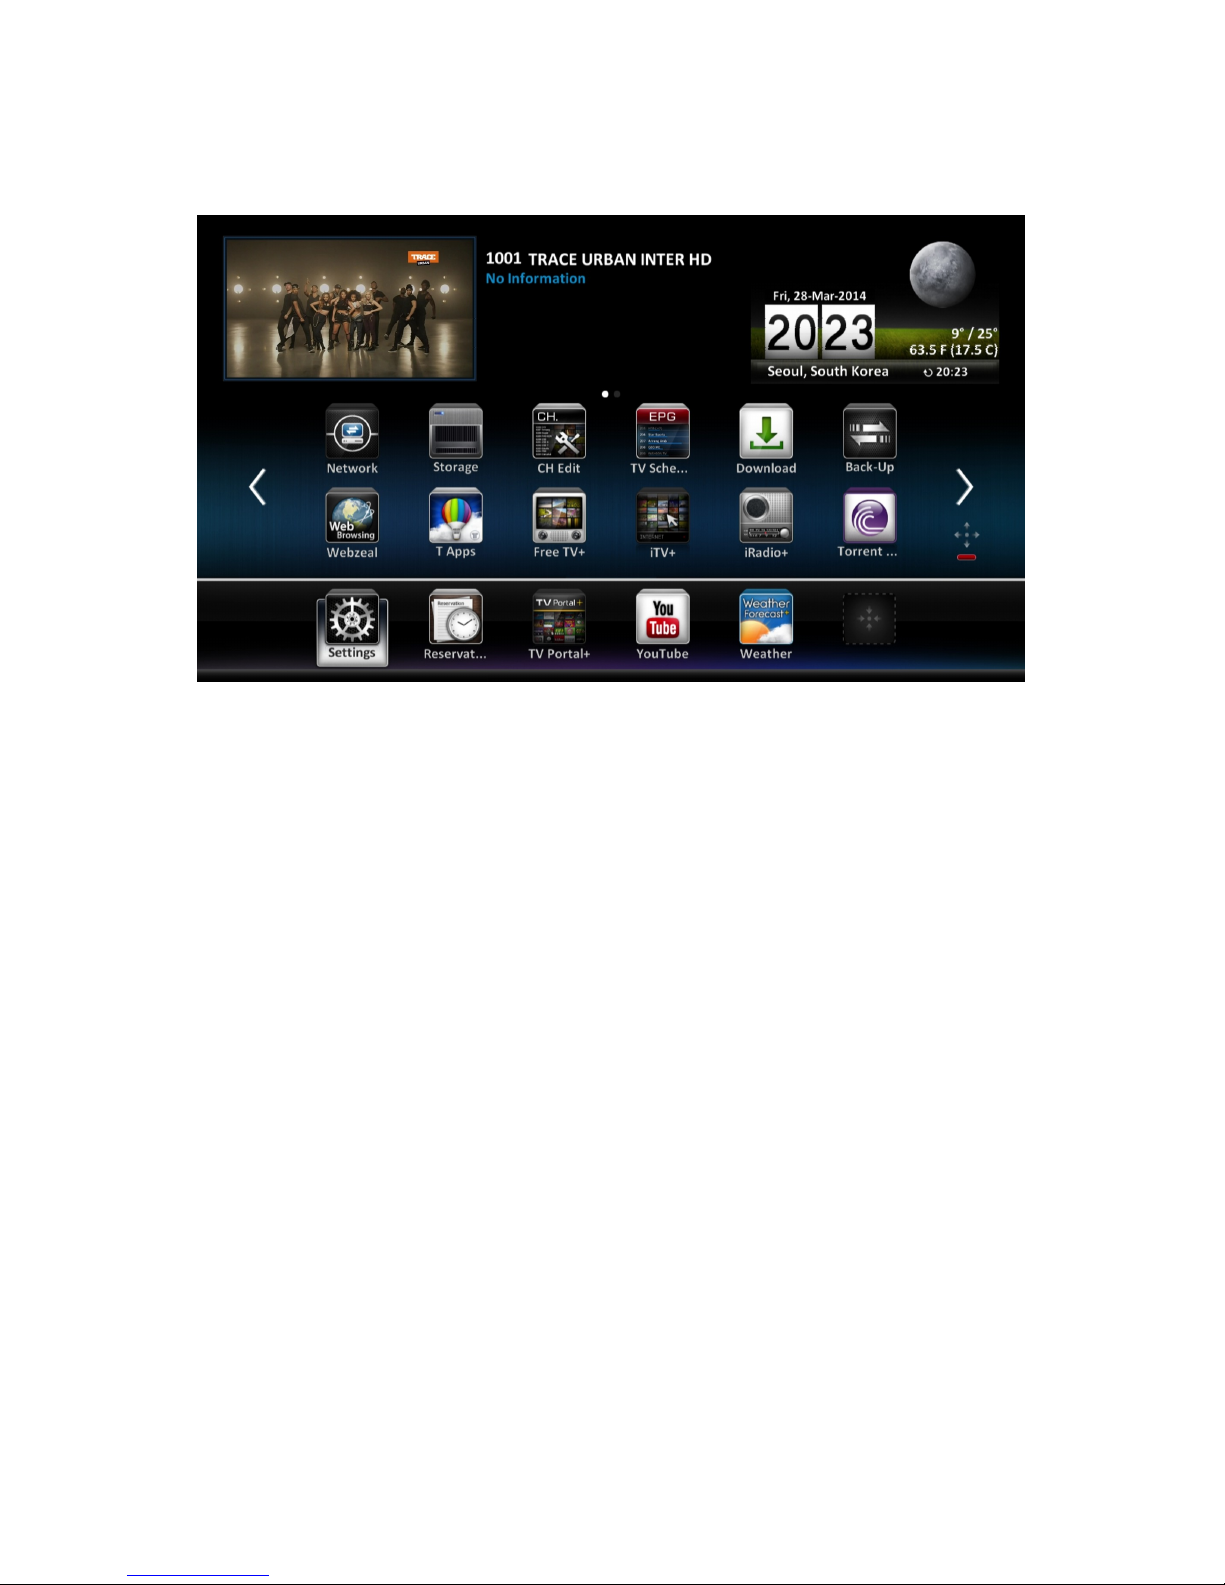
1.5 The Apps Screen
Pressing the Menu button displays app icons at the bottom of the screen. To
view more apps, press the up navigation button.
To access the customary menus, select Settings. Some apps allow users to
quickly access frequently-used setting menus and functions.
• Back-Up: See Maintaining the Digital TV Receiver on page 57.
• CH Edit: See Managing Channels on page 33.
• Download: See Updating the Digital TV Receiver on page 58.
• TV Schedule: See TV Programme Guide on page 29.
• T Air: See Accessing Other Devices on page 44.
• T Server: See Allowing Other Devices to Access the Receiver on page 45.
• Movie: See Playing Media Files on page 40.
• Music: See Playing Media Files on page 40.
• Network: See Network Settings on page 54.
• Photos: See Playing Media Files on page 40.
• Recordings: See Playing Media Files on page 40.
• Reservation: See Manually Scheduling TV Recordings on page 37.
• Storage: See Managing Storage Devices on page 40.
12 I

• YouTube: See YouTube on page 48.
For other apps, see Apps on page 46.
Note
While some apps, such as Calendar, are easy to use, other internet-based
apps may be unavailable or restricted, depending on the country, so this
guide does not cover every app provided by this receiver.
Customizing the Apps Screen
Users can rearrange app icons. Place the focus on an icon and press the red but-
ton. Move the icon to a new location using the navigation buttons, and then
press the OK button to fix it in place.
Put frequently-used apps in the bottom line for faster access.
I 13

2 Installation
Install the digital TV receiver, limited by the specifications shown in the table
below.
Maximum power consumption 24 W when in operation
0.5 W when in standby mode
Size 220 mm × 35 mm × 145 mm
Weight 0.6 kg
Operating temperature 0–45°C, 32–113°F
Storage temperature −10–70°C, 14–158°F
On the rear, this digital TV receiver has several connectors:
• A satellite dish connector
• AV connectors for a TV and an AV receiver
• USB ports for removable storage devices
• An Ethernet port for internet connection
• A remote control extender connector
The RS-232C port may be used only by an engineer for installation or service.
14
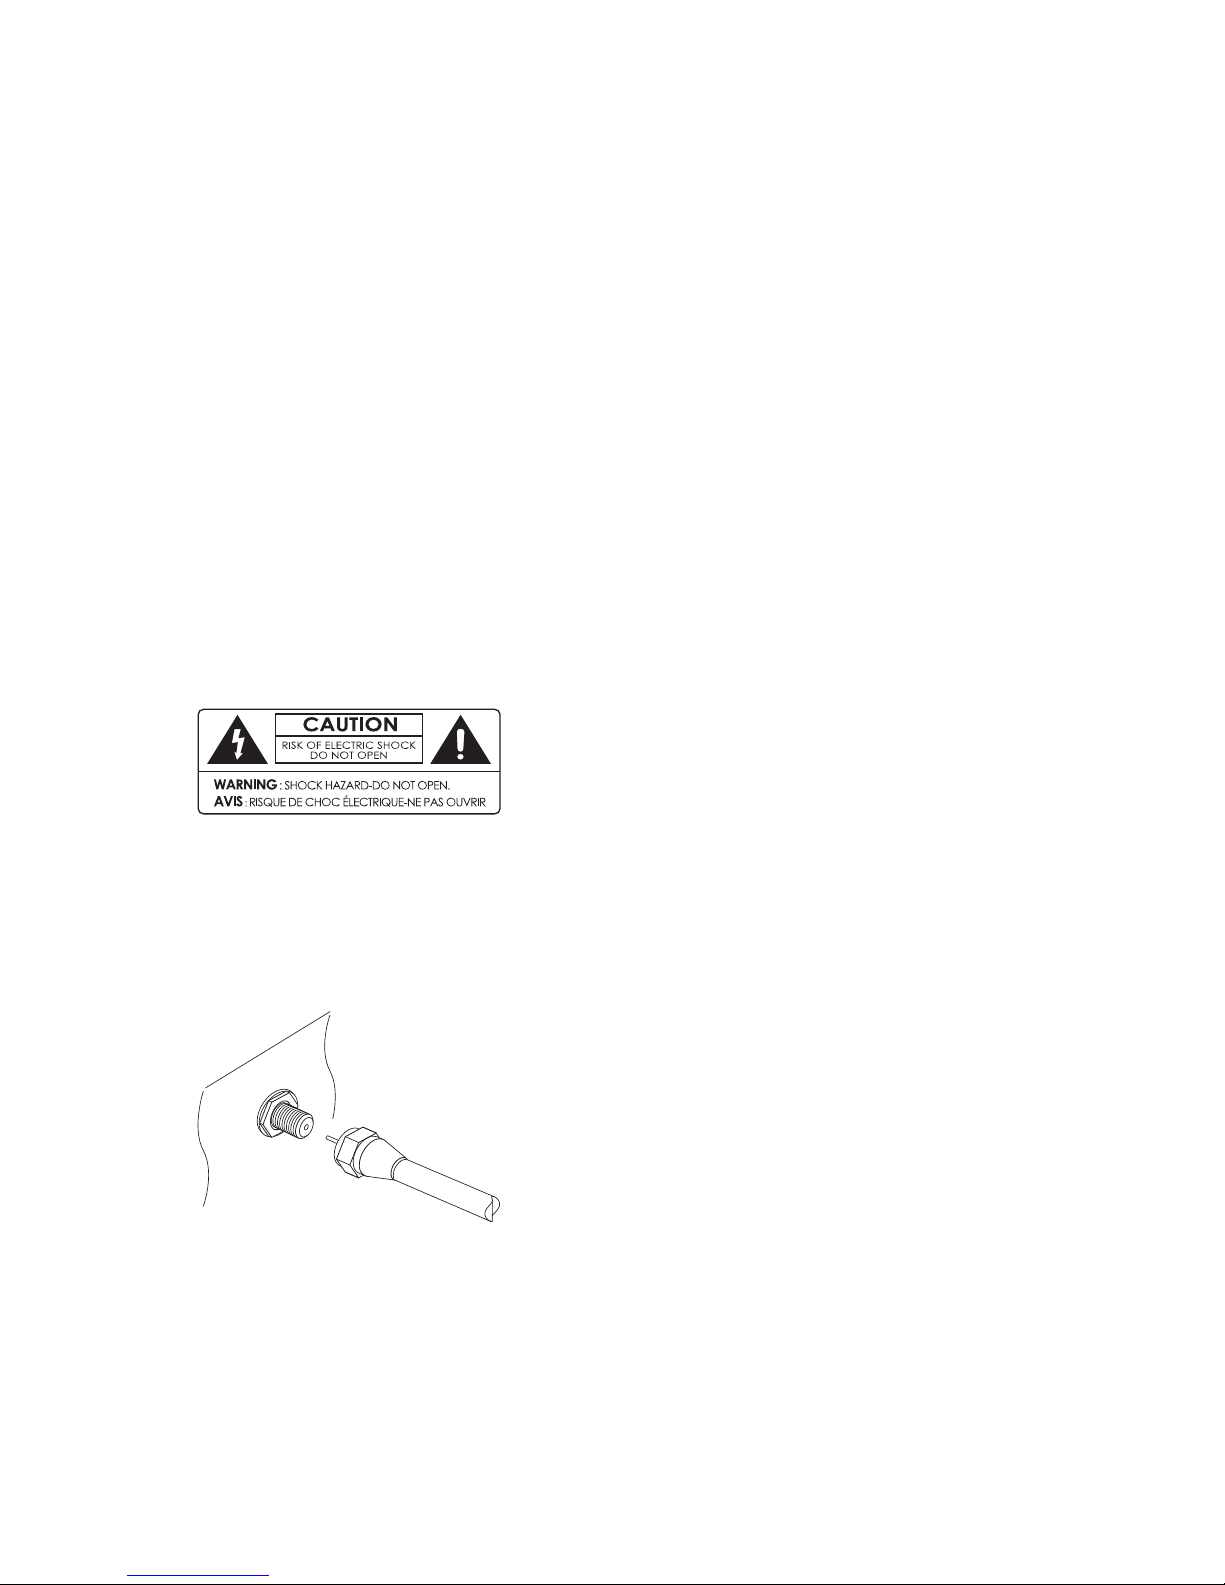
2.1 Safety Precautions
To avoid hazards and to keep the performance of the digital TV receiver at its
best, obey the following instructions:
• Do not block ventilation openings on the receiver.
• When installing the receiver in a cabinet, make sure to leave a space of at
least 10 centimetres around the receiver for cooling.
• Do not place the receiver in direct sunlight and close to heat-emitting devices
that can interfere with cooling.
• Do not expose the receiver to water and moisture to prevent fire and electric
shock.
• Use only accessories provided or specified by the manufacturer.
• Use dry cloth to clean the receiver.
Never open the receiver casing under any cir-
cumstances, or the warranty will be void.
Repair tasks must be done only by qualified per-
sons with expertise.
2.2 Satellite Dish Connection
Connect the cable from the satellite dish to LNB IN.
I 15
2.3 TV Connections
This digital TV receiver has two video connectors for use by a TV.
• HDMI
• Composite video
Use the HDMI connector to connect the receiver to a TV for the best picture qual-
ity. If the TV has no available HDMI connector, use the composite video con-
nector.
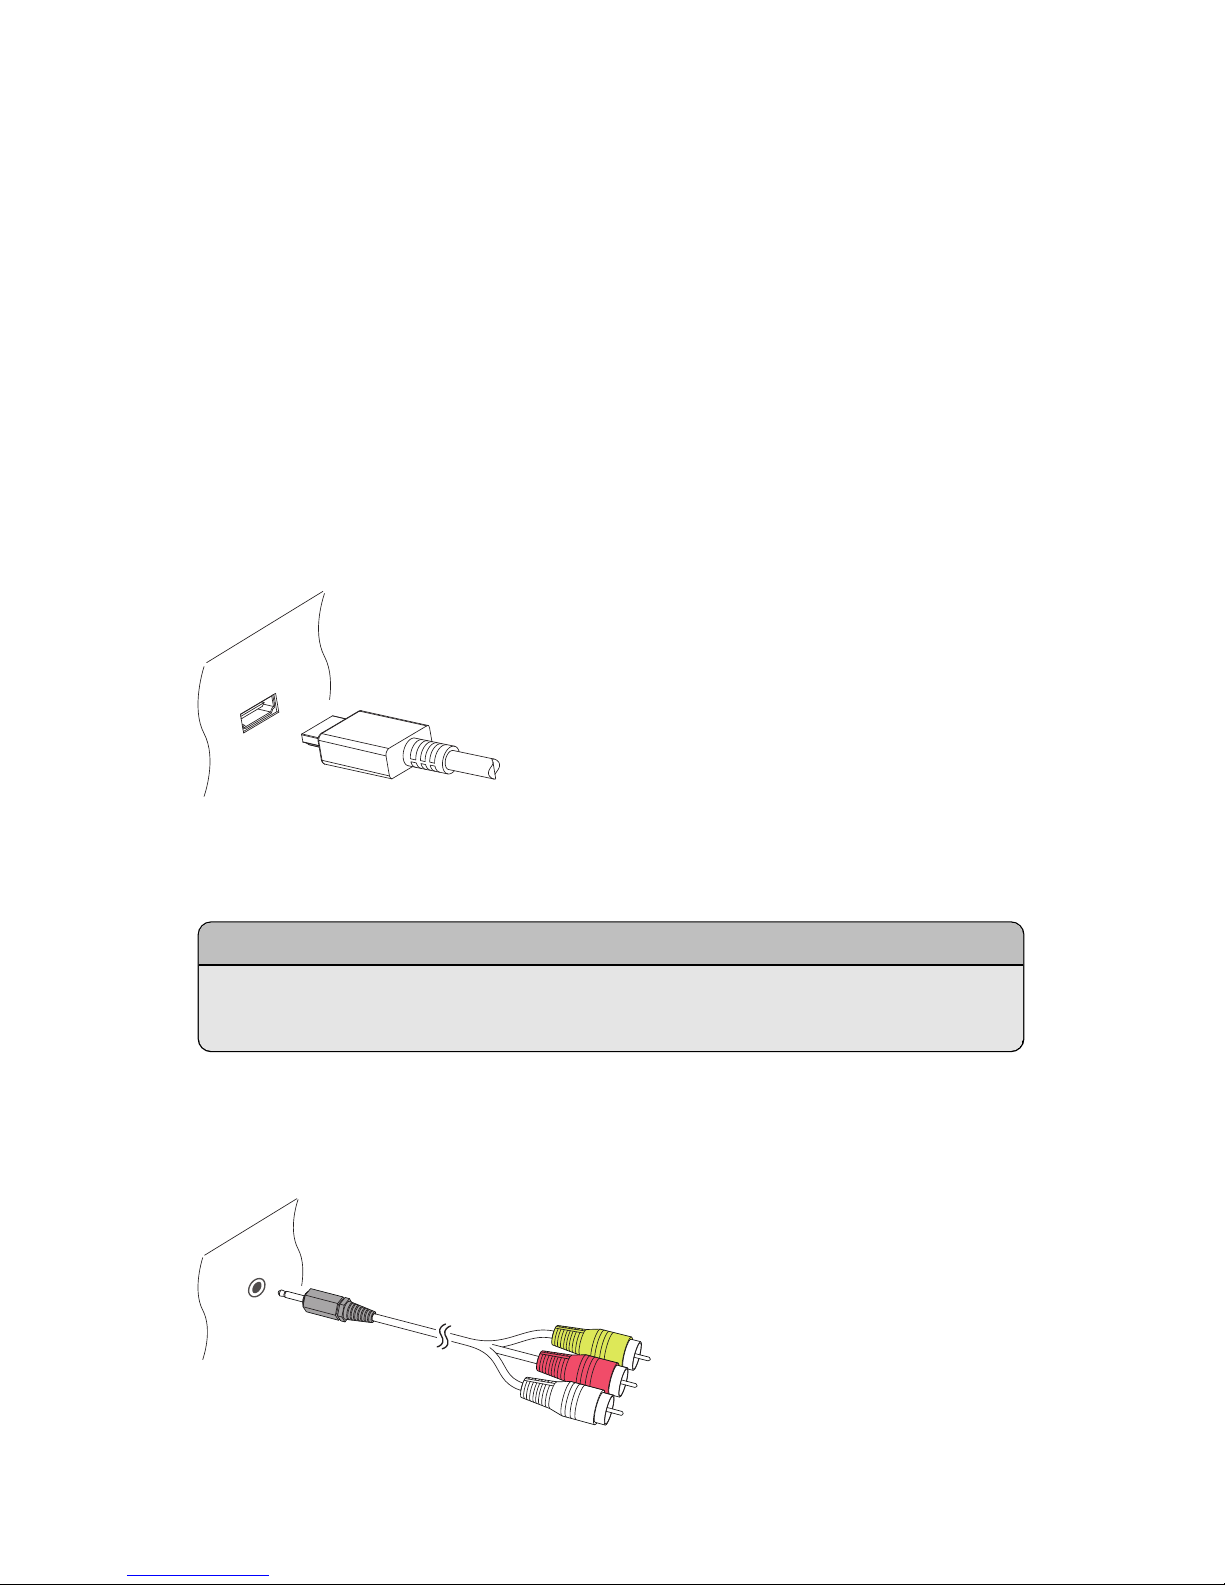
HDMI connection
Connect the receiver’s HDMI output connectors to the TV’s HDMI input con-
nector using an HDMI cable.
Note
Some HDMI cables and TVs may not be compatible with the receiver due to
differing HDMI specifications.
Composite Video Connection
16 I

Insert a jack-to-RCA cable’s jack into the A/V OUT socket on the receiver, then
insert the RCA plugs on the other end into the TV’s composite video and audio
input sockets. Make sure to match the connectors’ colours properly.
Note
Composite video connectors cannot carry HD video.
2.4 AV Receiver Connection
Use an AV receiver for better audio quality. Connect the receiver’s SPDIF con-
nector to the AV receiver’s digital audio input connector using an optical audio
cable.
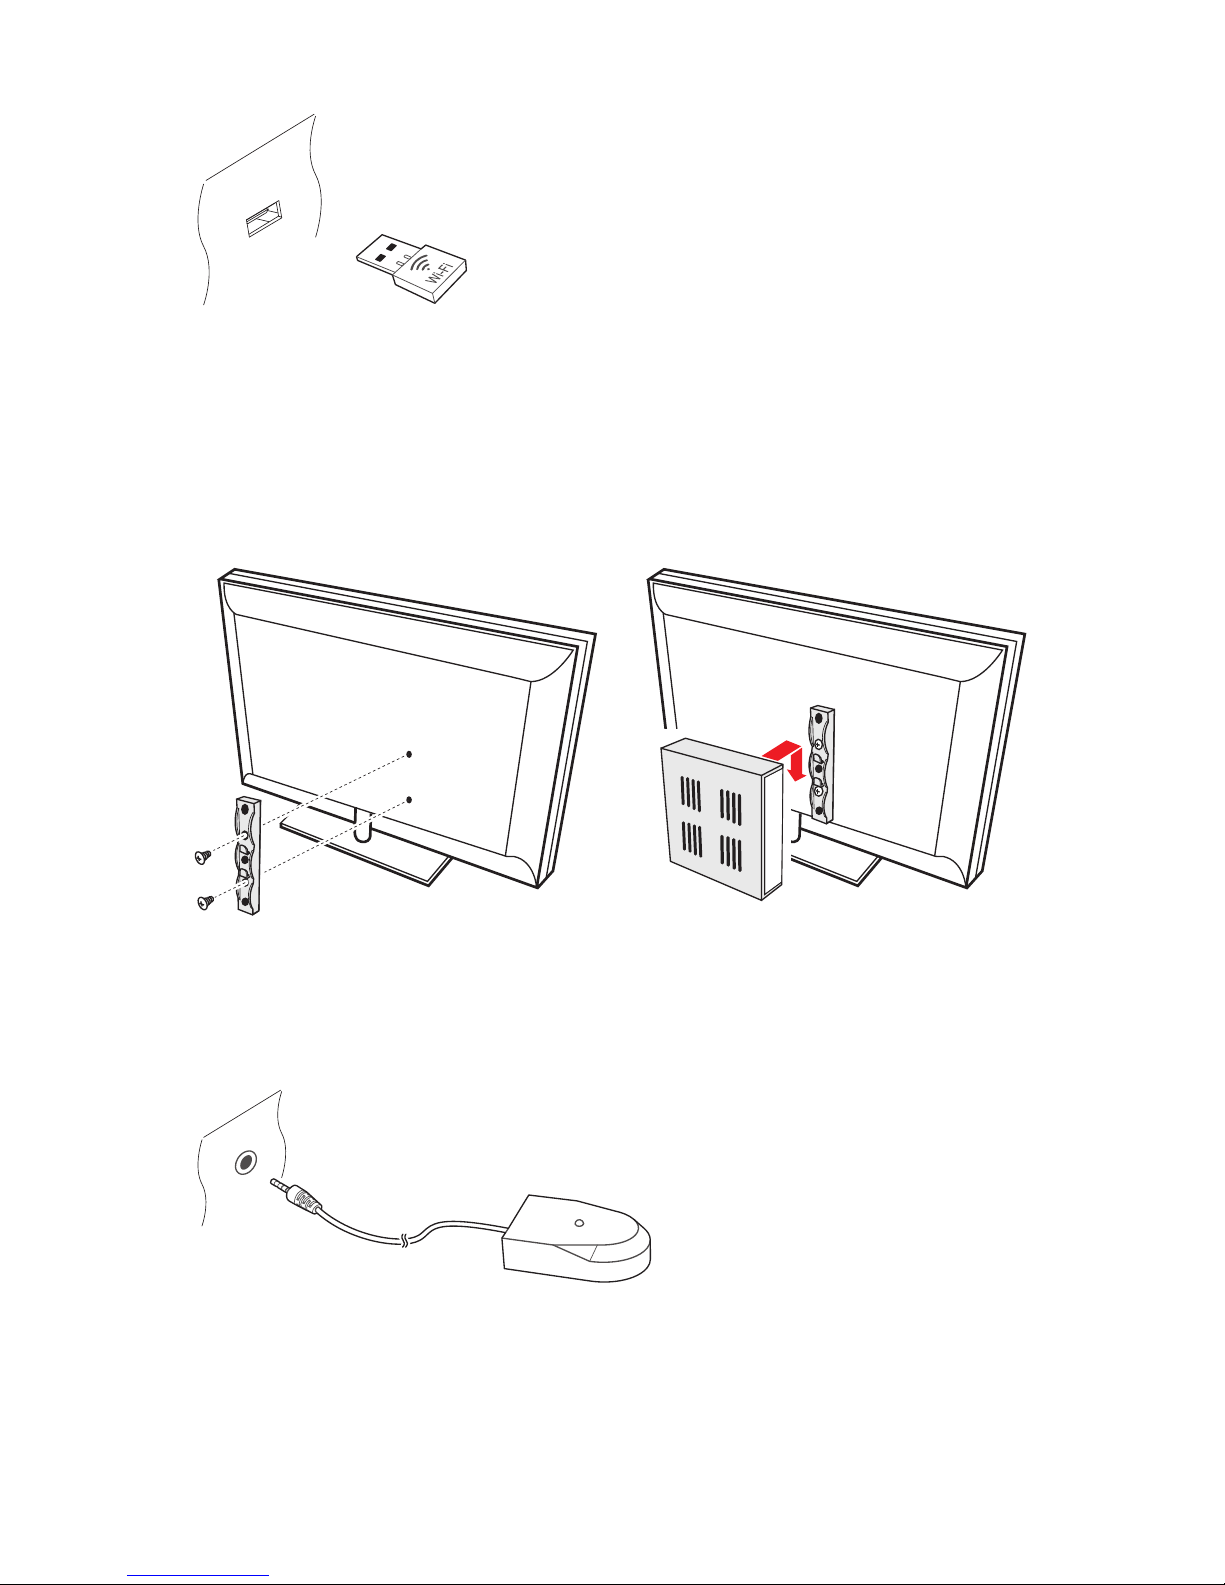
2.5 Network Connection
Connect the receiver to the wired or wireless network. If a network cable is avail-
able, connect the receiver’s LAN port to the router using a network cable.
If no network cable is available, use the Wi-Fi dongle for wireless network con-
nections. When the receiver is off, plug the Wi-Fi dongle into one of the USB
ports on the rear of the receiver.
I 17
For details on how to configure the network settings, see Network Settings on
page 54.
2.6 Mounting the Receiver on a TV
If necessary, mount the receiver on the TV to save space. Install the TV mount
bracket on the back of the TV, and then attach the receiver to the bracket, as
illustrated by the drawings above.
Connect the remote control extender to the IR Rec. socket on the receiver. Make
sure that the extender does not face directly into light sources, such as lamps or
18 I

displays. Directing light at the extender may interfere with remote control signal
transmission.
I 19
 Loading...