

Page 1
Titan Pro 1100B Assembly Instructions
Tools Required for Assembly
16mm Spanner 16mm Socket
13mm Spanner Extension bar for socket
10mm Spanner Phillips screwdriver
8mm Spanner Grease for lubrication
NOTE: THIS UNIT IS HEAVY SO TAKE CARE. 2 PEOPLE MAY BE REQUIRED
TO ASSEMBLE THE FIRST PART
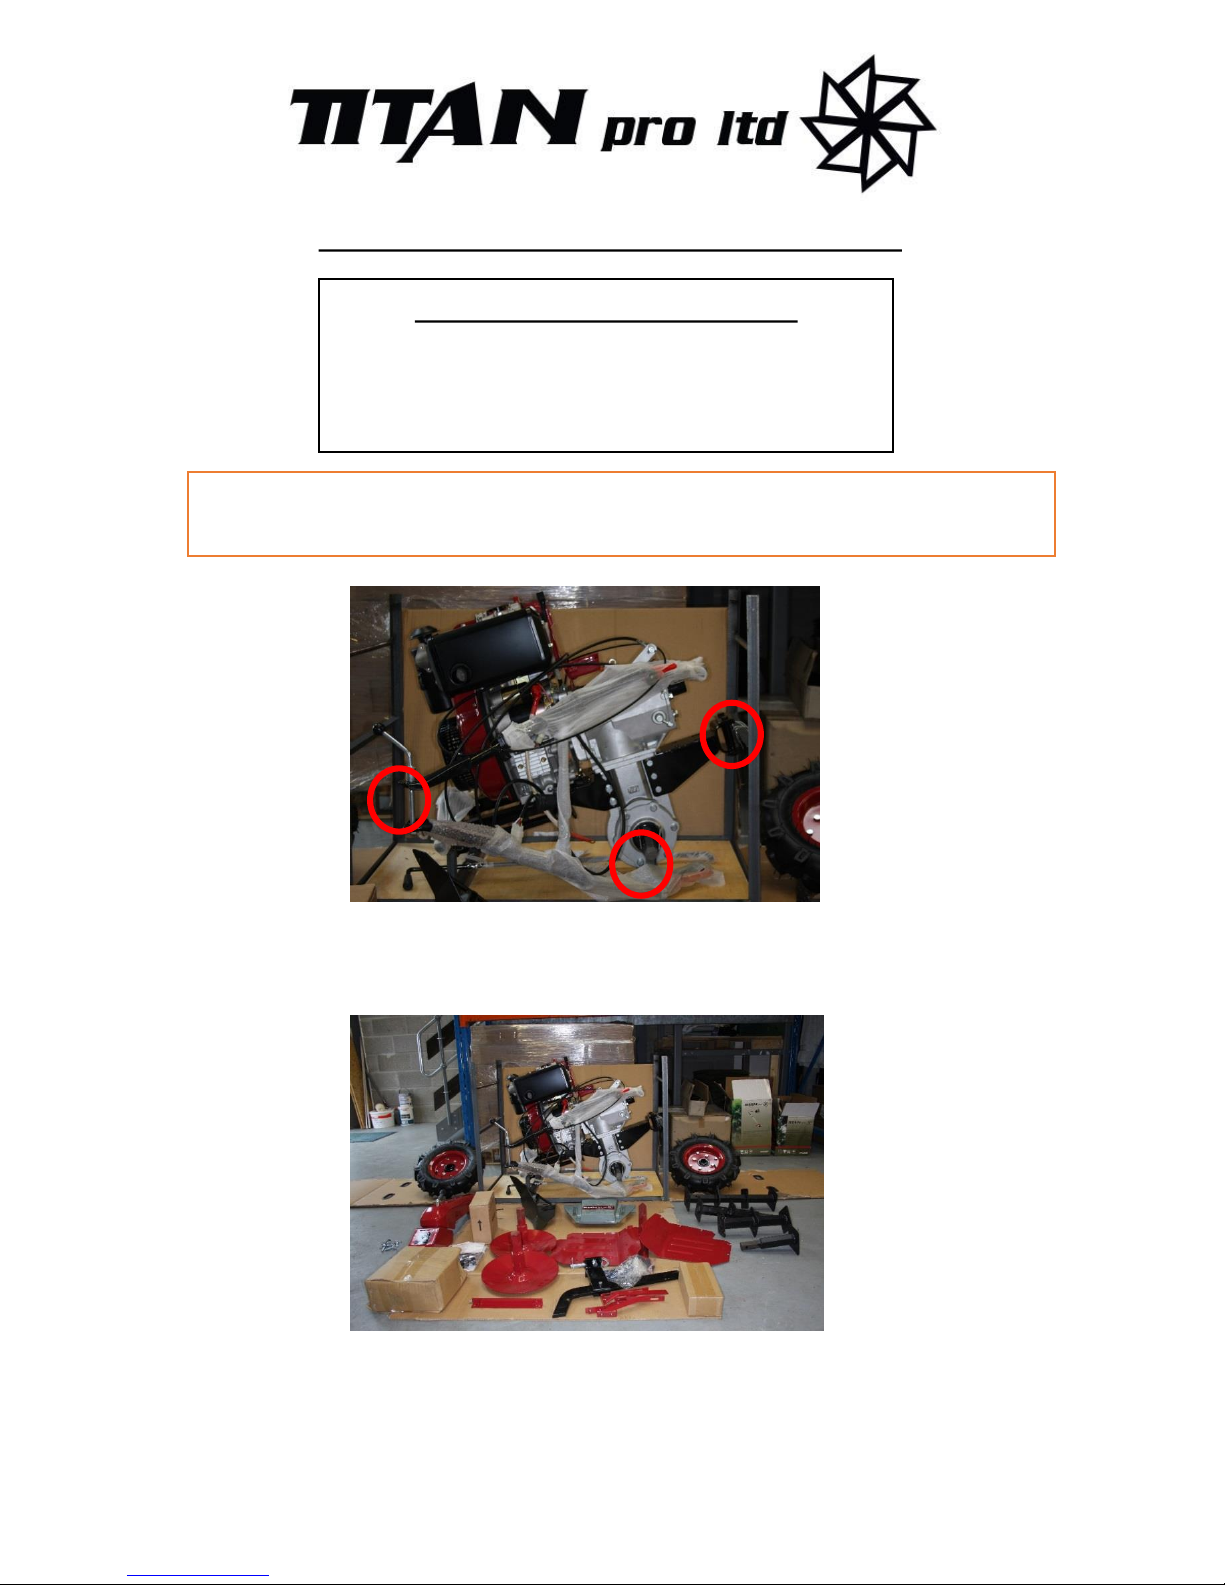
1. Unbolt main unit from packing frame.
2. Unpack all parts to the machine
Page 2
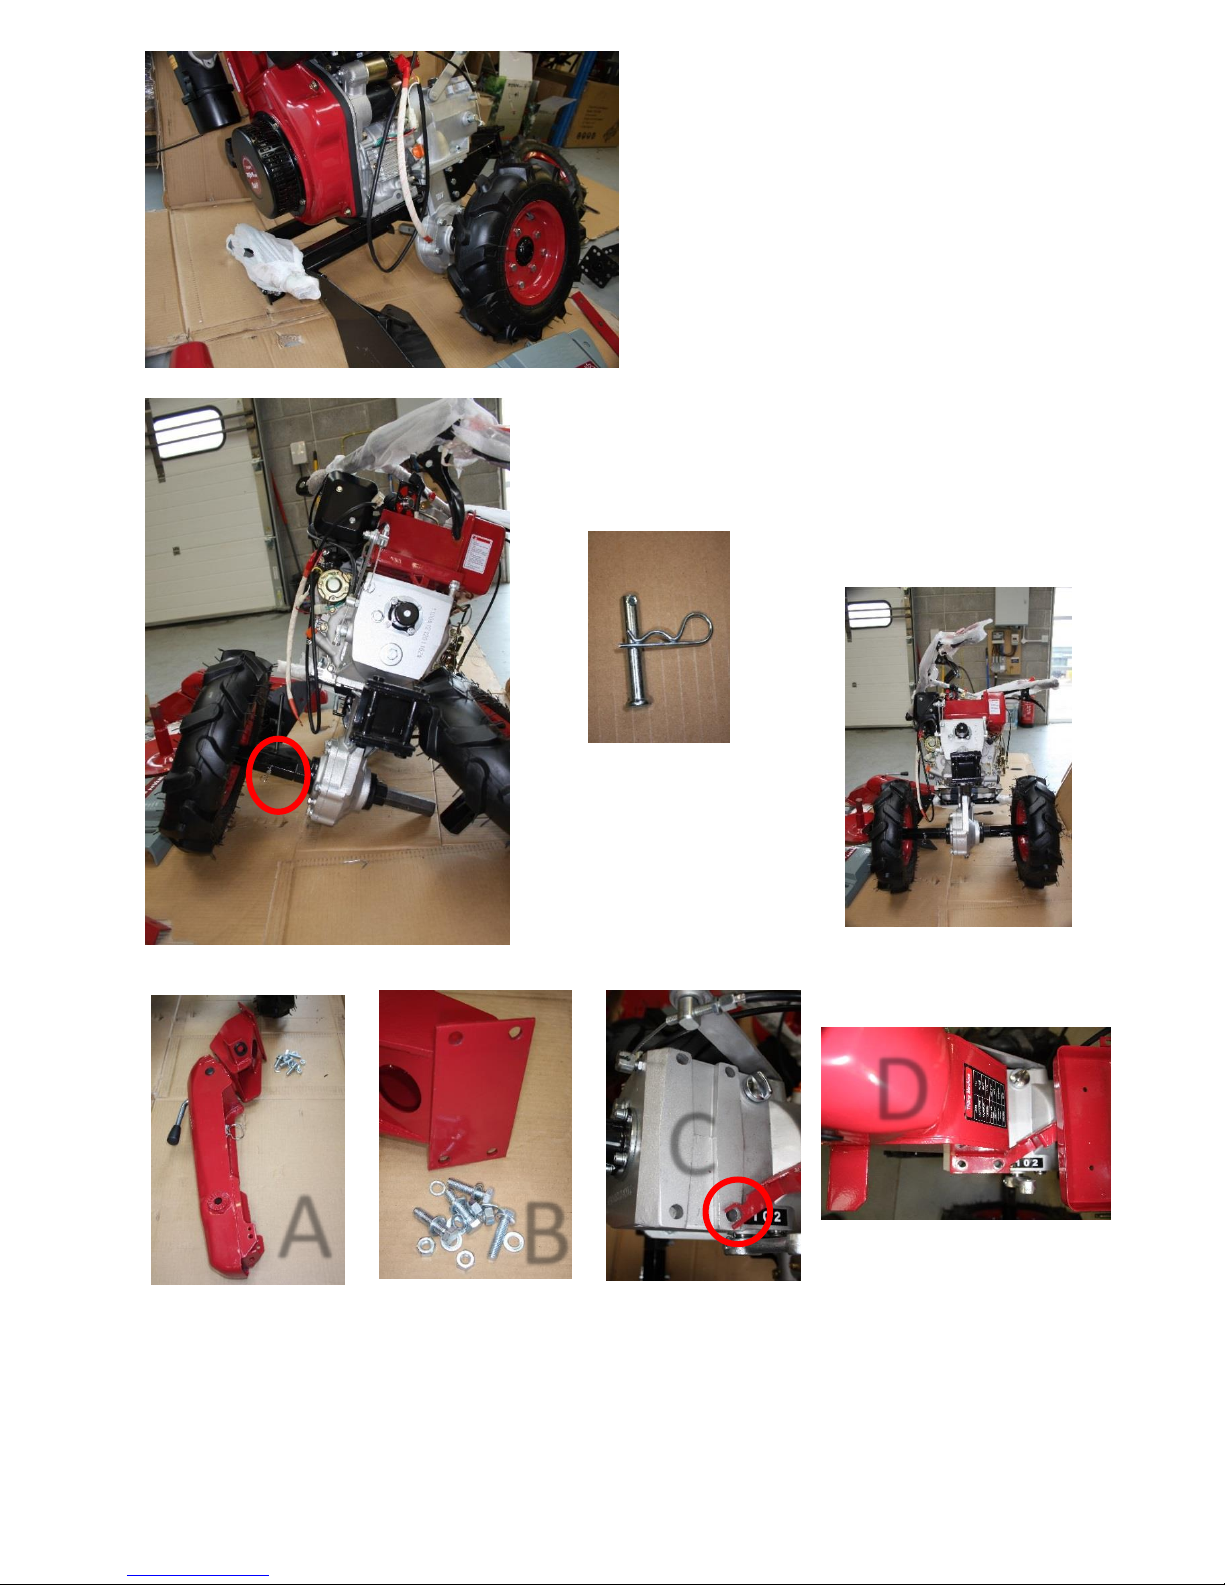
3. Lean Machine to the left and slide
on right hand wheel
4. Insert Pin (shown
below) into shaft as
shown to secure wheel
(Left)
5. Repeat on
right hand side.
6.
A Handrail Stand
B Bolts and brackets for fixing onto machine
C Slide handrail stand under bracket
D Bracket in position
A
B
C
D
Page 3
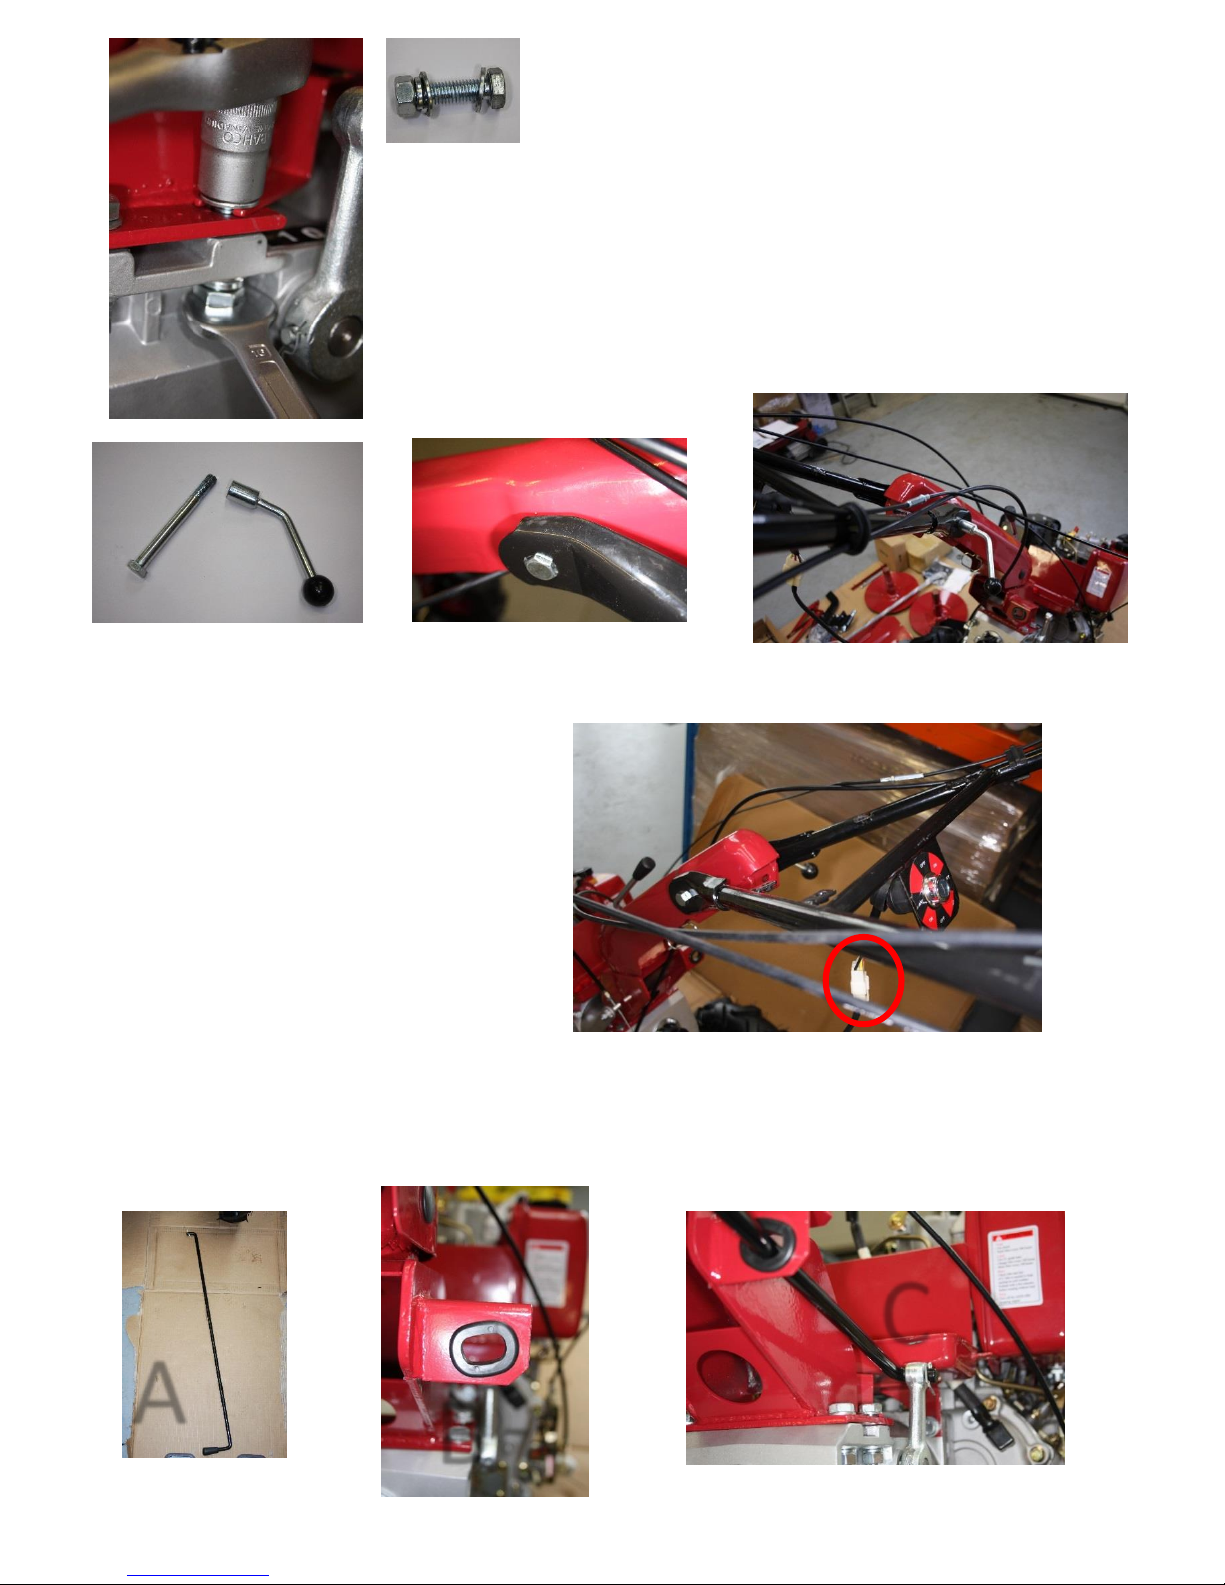
7. Using 4 x 16mm bolts fix bracket into place. Use
washer above and below bracket and spring washer
underneath.
8. Remove adjustment bolt and lever (above left) and slide handlebars onto handrail stand. Replace
bolt ensuring that the bolt goes into hexagonal hole (above middle). Tighten with lever to adjust to
desired position.
9. Screw ignition switch onto handlebars
and connect terminal block as shown
(right)
A
10.
A Gear shift lever with cotterpin attached
B Remove cotterpin and slide lever through hole
C Attach the lever to the gear shift selector and replace pin
B
C
Page 4

11.
A Front mud guard
mounting bracket (x2)
B Fit bracket to
mounts each side of
engine using 2 x
13mm bolts and
washers
A
B
B
12.
A Rear mud guard
mounting bracket
B Fit bracket to
mounts using 16mm
bolts and washers, fit
loosely.
A
13.
4 pieces of tines
cover
LEFT RIGHT
14.
Fit inner right hand
tine cover using
10mm bolts and
washers. Fit loosely.
Repeat on left side.
15.
Slide strengthening
supports underneath
cover (left) and align
holes (right). Loosely
screw 10mm bolts to
hold together.
Repeat on left side.
Page 5

16. Slide right hand outer tine cover under 3
bolts and tighten to secure in place. Repeat
on left side.
Tighten all bolts on tine cover, including those on
the rear bracket, ensuring that they are all tight.
17. Place the rubber battery protector into the
battery compartment.
18. Place battery into
compartment and fix with 2
side bolts and top supporting
bar (right).
20.Screw in the tool box to the top
of handlebars.
19. Screw live and neutral cables into
place on battery (marked black and
red on the battery).
Grease the terminal and replace cover.
Page 6

21. Place depth gauge into rear slot
on machine. Adjust the pin for
desired height.
22. Assembly of the tines.
The tines are left and right handed
and are marked as such. Picture
shows one bar and tines required.
Repeat this for the other tine bar
and extension bar.
Lay one right handed tine onto tine bar, curling up.
Then place a left handed tine across this one,
curling down and bolt in the middle (left).
Repeat this to place all four tines around the bar.
Bolt all four corners tightly.
Repeat the above for the next 2 layers, ensuring all
bolts are VERY securely fastened.
Page 7

To fit the tines to the machine, remove the pins holding the wheels on. Remove the
wheels, and slide on tines. Place red end caps on the ends and secure using the pin.
It is best practice to keep the drive shaft greased for easy removal of the wheels and
tines.
23. Assembly of the unit is now complete.
Grease the following cables as shown above
A Drive cable
B Clutch cable
C Dead mans handle cable
A
B
C
Page 8

Adjustment of Cables
To adjust cables:
Clutch Adjustment – Turn the nut on spindle
below handle one full turn and retry machine.
Deadman’s Handle
Cable – Loosen
bottom nut and
tighten top nut half
turn.
Lubricants
Engine Oil. - Using orange filler cap, fill
with oil. MAX 1.25 litres
Check levels using dip stick
Gearbox oil – Using silver filler cap located on
drive shaft, fill with oil. MAX 2.5 Litres
Check levels using dip stick
Please email – techsupport@titan-pro.co.uk for further assistance should you require it
 Loading...