

HHoommee ppaaggee:: hhttttpp::////wwwwww..ttiittaannooxx..ccoomm –– EE--MMaaiill iinnffoo@@ttiittaannooxx..ccoomm
VITA UTILE
La vita utile del dispositivo è stabilita in anni 5 dalla messa in servizio. Per tale periodo Titanox s.r.l. garantisce la
disponibilità delle parti di ricambio e un funzionamento sicuro purché siano rispettate dall’utilizzatore le
condizioni ambientali e di utilizzo definite nelle istruzioni per l’uso.
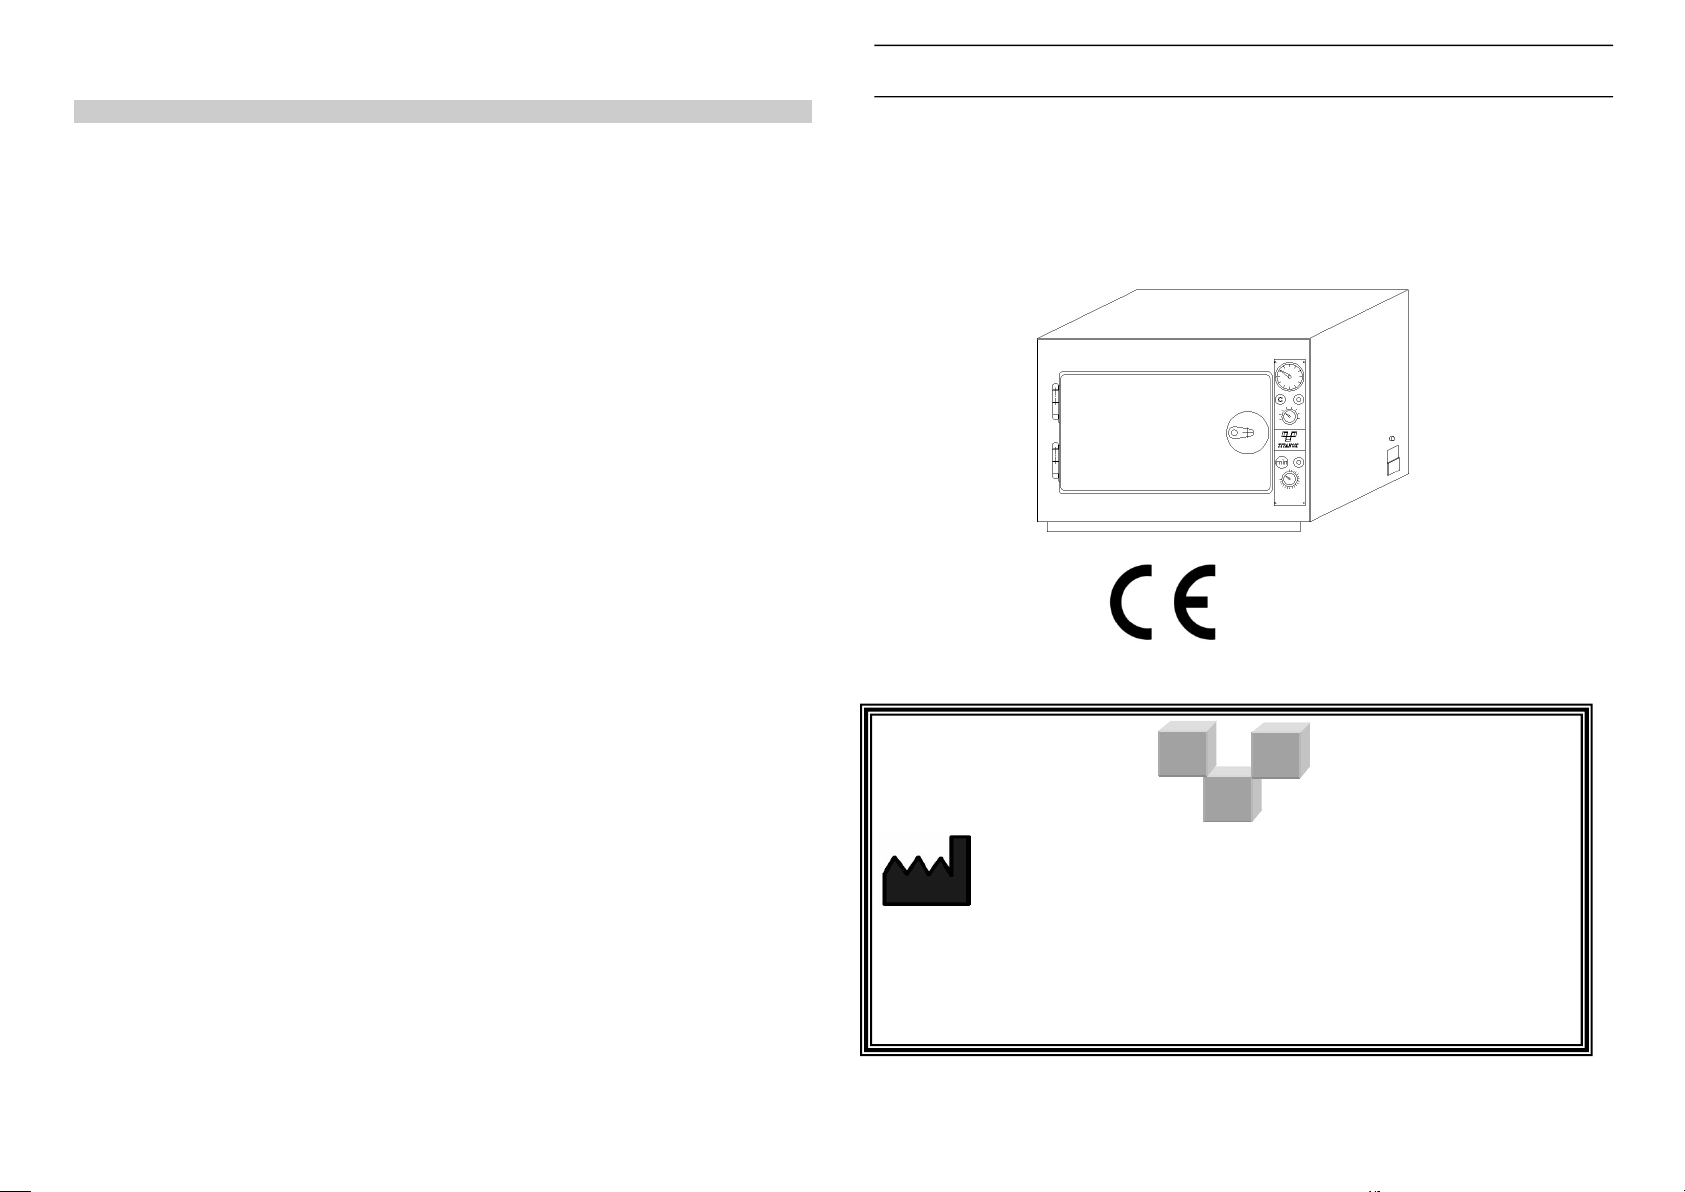
ISTRUZIONI PER L'USO
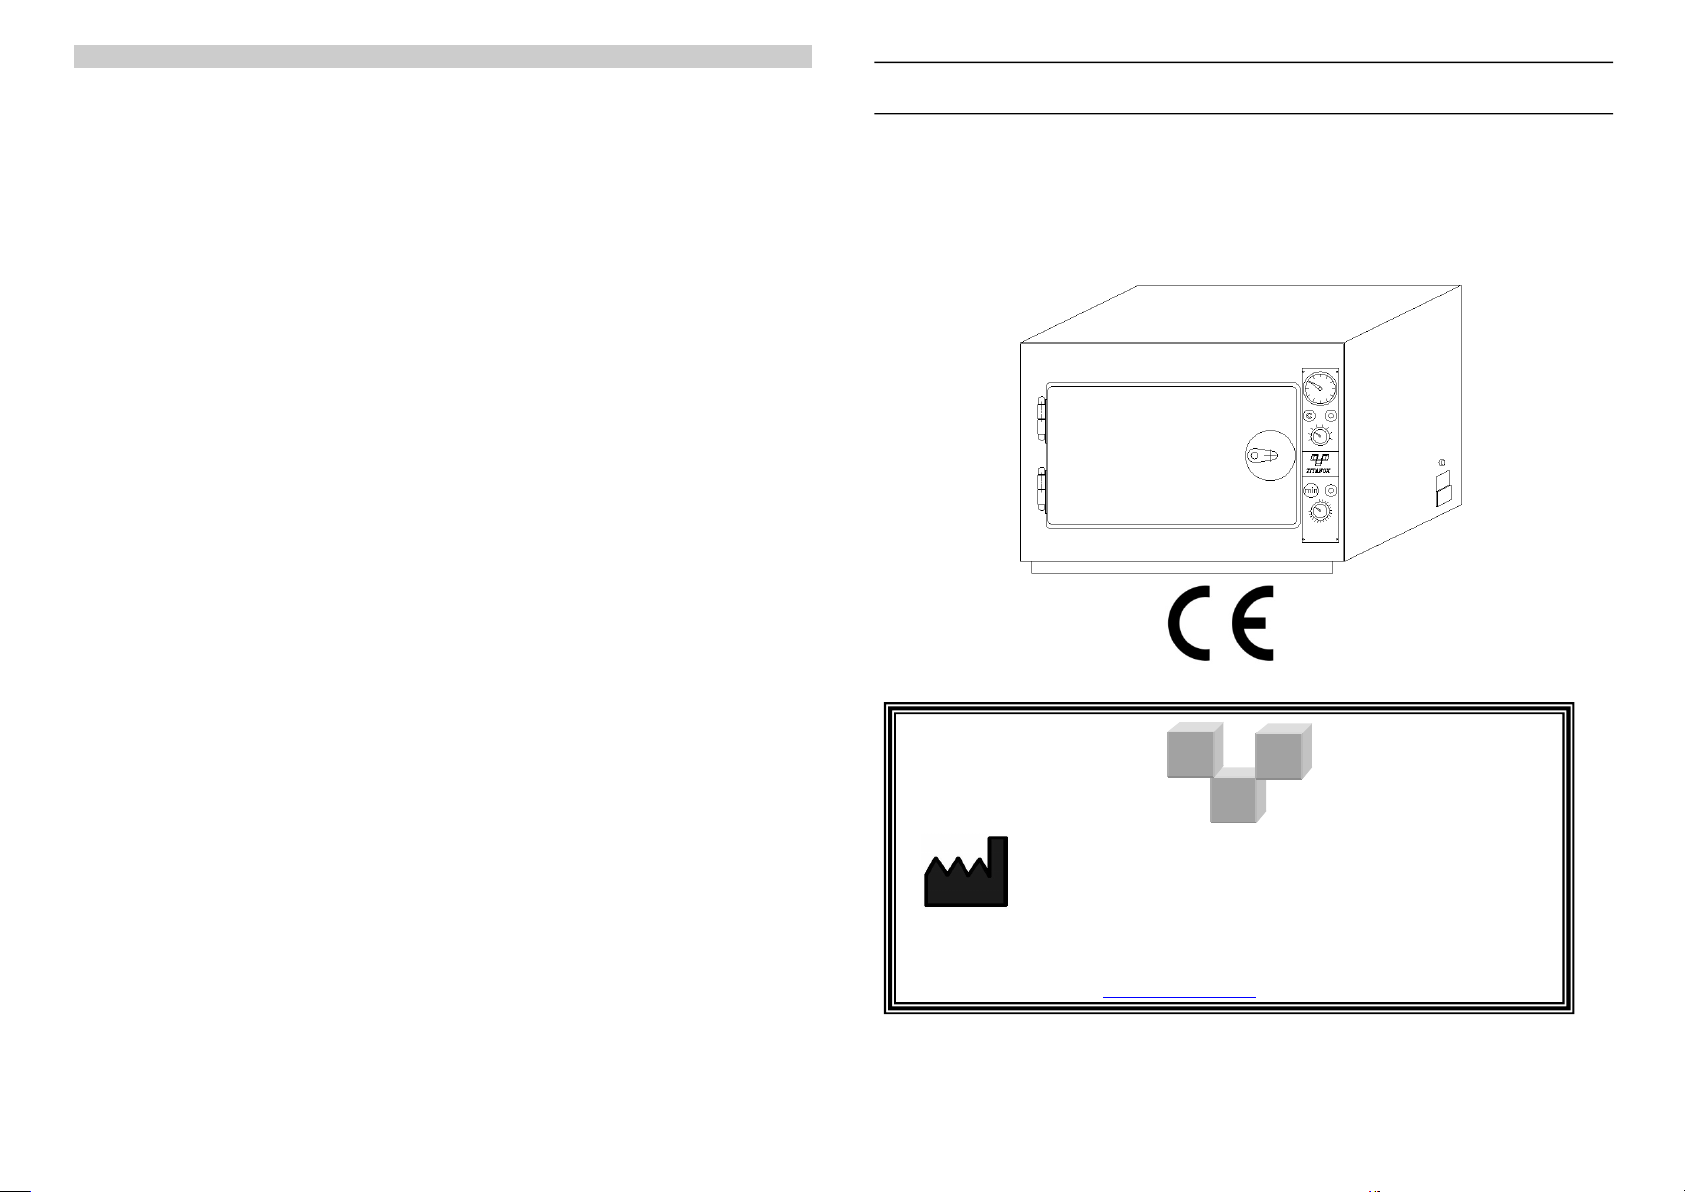
STERILIZZATRICE AD ARIA CALDA
MOD. PASTEUR ELETTRICO
A VENTILAZIONE FORZATA
0476
TITANOX s.r.l.
FFAABBBBRRIICCAA AARRTTIICCOOLLII MMEEDDIICCOO SSAANNIITTAARRII
MMEEDDIICCAALL SSAANNIITTAARRYY IITTEEMM FFAACCTTOORRYY
2266003388 TToorrrree ddèè PPiicceennaarrddii ((CCRR)) –– IITTAALLYY –– VViiaa CCaannoovvee,, 22//AA –– CCaannoovvee ddèè BBiiaazzzzii
TTeell.. ((00003399)) 00337755 339944006655 ((rr..aa..)) –– FFaaxx ((00003399)) 00337755 339944006677
Rev. 13 del 26.02.2019
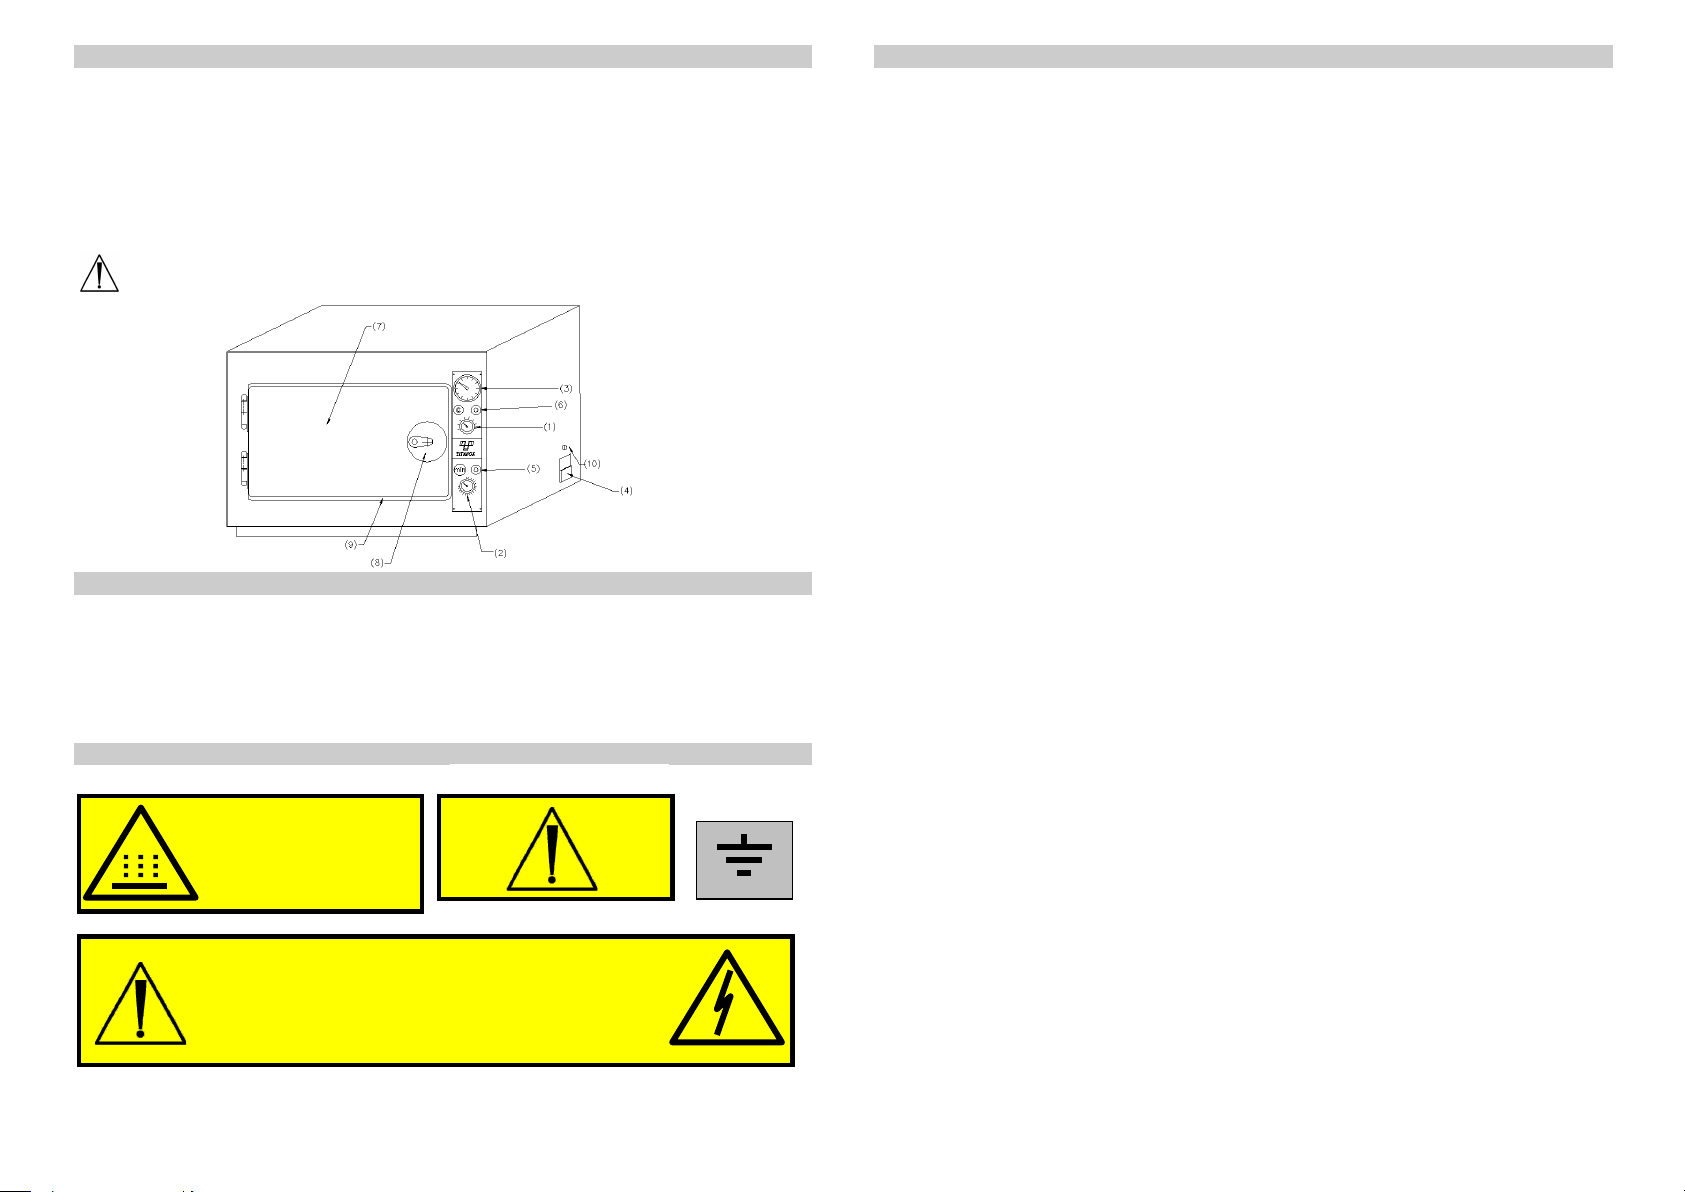
Pos. 1 Termoregolatore temperatura interna 50
210° C
Pos. 2 Programmatore Timer 2 ore o Manuale
Pos. 7 Ventola (interna)
C
Pos. 4 Spina di connettore con fusibili
Pos. 9 Guarnizione al silicone
Pos. 5 Spia verde “timer” o “manuale” inserito
Pos.10 Termostato di sicurezza 260° C
1 6
LEGGERE LE ISTRUZIONI
L’apparecchio è destinato ad essere utilizzato in ambiente sanitario allo scopo di sterilizzare dispositivi medici
chirurgici non termolabili. Il processo di disinfezione si basa esclusivamente sulla distruzione termica dei
microrganismi presenti sui dispositivi, ad una temperatura tipica di circa 180°C.
L'effettivo raggiungimento dello stato sterile dei dispositivi inseriti nelle sterilizzatrici dipende da molteplici
fattori, quali:
il livello di contaminazione iniziale del dispositivo (carica batterica totale);
il tipo di microrganismi contaminanti;
la permeabilità di tutte le parti contaminate del dispositivo all'aria calda prodotta dalla sterilizzatrice.
Per ulteriori informazioni si veda il punto ** AVVERTENZE ** più avanti.
DESTINAZIONE D’USO
L’apparecchio deve essere utilizzato solo ed esclusivamente da un’utenza qualificata.
Pos. 3 Termometro indicatore temperatura interna 0 200°
LEGENDA
Pos. 6 Spia “resistenze”
Pos. 8 Chiusura con chiave
INDICAZIONI DI SICUREZZA
ATTENZIONE: ALTA TEMPERATURA
ATTENTION: TEMPERATURE ELEVEE
CAUTION: HOT SURFACE
ACHTUNG: HEISS
PRECAUTION: ALTA TEMPERATURA
AT TENZ ION E: P R I M A D I A P R I R E T O G L I E R E LA T E N SI ONE
C A U T I O N : D I S C O N N E C T V O L T A G E B E F O R E O PE N I NG
AT TENT ION : A V A N T D’O U V R I R, E N L E V E R L A T E N S I O N
A C H T U NG : VO R D EM OFFN EN STR OMVE RSO RGU NG UNTE RBRE CHE N
C U I D A D O: A N T E S D E A B R I R D E S C O N E C T A R L A T ENS IÓN
C U I D A D O: A N T E S D E A B R I R T I R A R A T E N S Â O
MORSETTO DI
TERRA DI
PROTEZIONE
CONDIZIONI DI GARANZIA
1) L’apparecchio è garantito per un periodo di un anno dalla data di acquisto.
2) Per garanzia si intende la sostituzione o riparazione gratuita di componenti
riconosciuti difettosi di fabbricazione.
3) L’apparecchio sarà riparato solo presso il nostro stabilimento. Le spese ed i rischi
derivanti dal trasporto saranno a carico dell’acquirente.
4) Nel caso di intervento a domicilio, l’acquirente è tenuto a corrispondere il diritto
fisso di chiamata quale parziale rimborso spese viaggio e trasferta del nostro
personale.
5) Sono escluse dalla garanzia: le parti estetiche, i danni provocati da incuria, uso
ed installazione errati od impropri non conformi alle avvertenze riportate su questo
manuale d’istruzioni e comunque derivanti da fenomeni non dipendenti dal normale
funzionamento dell’apparecchio.
6) La garanzia decade qualora l’apparecchio sia stato manomesso o riparato da personale
non autorizzato.
7) E’ esclusa la sostituzione dell’apparecchio ed il prolungamento della garanzia a
seguito di intervenuto guasto.
8) E’ escluso il risarcimento di danni diretti o indiretti di qualsiasi natura a persone
o cose per l’uso o la sospensione d’uso dell’apparecchio.
9) La garanzia decade immediatamente se il relativo certificato presenterà alterazioni o
cancellature o non risulterà da noi emesso e convalidato. Il certificato deve seguire
l’apparecchio oppure essere consegnato al personale tecnico nel caso di riparazioni a
domicilio.
La ditta costruttrice Titanox S.r.l. si rende responsabile della sicurezza, dell’affidabilità
e delle prestazioni dell’apparecchio se:
il montaggio, le aggiunte, le ritarature, le modifiche o riparazioni sono effettuate da
personale della ditta Titanox S.r.l.;
l’impianto elettrico a cui viene collegato l’apparecchio è conforme alle vigenti norme
di sicurezza;
l’apparecchio è impiegato in conformità alle istruzioni di impiego e di
manutenzione.
Tale responsabilità decade immediatamente nel momento in cui l’apparecchio viene
manomesso o riparato da personale non autorizzato.
Per eventuali richieste di pezzi di ricambio, riparazioni o controlli è necessario
rivolgersi direttamente alla ditta costruttrice: TITANOX S.r.l. - Via Canove 2/A –
Loc. Canove de’ Biazzi - 26038 Torre de’ Picenardi (CR) – Italia - Tel. (0039) 0375
394065 – Fax (0039) 0375 394067 comunicando il numero di matricola del dispositivo
oggetto di riparazione.

MANUTENZIONE ORDINARIA
SIMBOLO
SIGNIFICATO
5 2
Prima di iniziare qualsiasi operazione di manutenzione assicurarsi che:
l’apparecchio non sia collegato con la rete di alimentazione.
l’apparecchio sia a temperatura ambiente.
Tenere perfettamente pulite le superfici interne e la griglia. Anche se col tempo cambiano colore e si
abbruniscono, non pulirli mai con prodotti abrasivi o infiammabili.
Tenere perfettamente pulite le superfici esterne che devono sempre essere speculari per poter
combattere la corrosione e la polvere.
MANUTENZIONE PERIODICA MENSILE
Dopo aver tolto la spina dalla presa di alimentazione, controllare che i fusibili non siano ossidati
specialmente se l'apparecchio rimane inutilizzato per diverso tempo oppure se l’apparecchio viene
tenuto in un ambiente umido.
La presa di alimentazione non deve cambiare colore né tantomeno ossidarsi. Se ciò si verificasse
sostituirla immediatamente.
Il cavo di alimentazione deve essere integro e non deve presentare tagli, abrasioni o piegature. Le
resistenze e l’impianto elettrico interno non necessitano di manutenzione.
USI CONSENTITI
L’apparecchio deve essere usato per sterilizzare materiali in metallo il cui punto di fusione sia
superiore ai 300° C (strumenti chirurgici, placche e viti metalliche).
All’interno della sterilizzatrice inserire solamente contenitori in metallo senza parti in plastica e
senza materiale tessile.
USI NON CONSENTITI
Nell’apparecchio non devono essere immessi articoli la cui temperatura di fusione risulti
inferiore ai 300° C o sconosciuta all’operatore.
PARTI ACCESSORIE
2 Ripiani interni
1 Cavo di alimentazione
ROTTAMAZIONE
La sterilizzatrice è costituita da vari materiali, con parti meccaniche, elettromeccaniche ed elettroniche.
La rottamazione deve essere eseguita in accordo alle leggi vigenti del paese di utilizzo.
*** AVVERTENZE ***
Prove di laboratorio effettuate eseguendo un ciclo di 120 minuti a 180°C su spore di
Bacillus subtilis var niger ATCC 9372 hanno dimostrato l’efficacia della sterilizzatrice.
Titanox non garantisce né può assicurare l'effettivo raggiungimento dello stato sterile dei
dispositivi inseriti nella sterilizzatrice, secondo la definizione di dispositivo medico sterile
prevista dalla Norma EN 556. L'utilizzatore della sterilizzatrice ha dunque la responsabilità
di condurre tutte le procedure di convalida del processo di sterilizzazione e le verifiche
necessarie per accertare l'effettivo completamento di ogni singolo ciclo di sterilizzazione.
CARATTERISTICHE TECNICHE
Modelli A3-213-400V A3-214-535V A3-215-670V
Carico Max 3 kg 4 kg 5 kg
Misure esterne
Larghezza mm 570 705 835
Altezza mm 400 475 555
Profondità mm 345 450 565
Misure interne
Larghezza mm 405 535 670
Altezza mm 210 345 415
Profondità mm 255 320 420
Peso netto 13 kg 22 kg 35 kg
Peso lordo 15 kg 25 kg 41 kg
Dati elettrici:
Tensione nominale 230 V 230 V 230 V
Potenza nominale 450 W 950 W 1900 W
Frequenza nominale 50/60 Hz 50/60 Hz 50/60 Hz
Fusibili di rete (mm 5x20) F5A-250 V F5A-250 V F10A-250 V
Ventilatore 23W 23W 23W
L'apparecchio è conforme ai requisiti di sicurezza elettrica previsti dagli istituti normativi
ed è fornito di spina bipolare che ne assicura la perfetta messa a terra.
LA NON OSSERVANZA DI QUANTO DESCRITTO IN QUESTO
LIBRETTO DI ISTRUZIONI FA DECADERE OGNI RESPONSABILITÀ
DELLA DITTA TITANOX S.R.L.
Attenzione!
Consultare la documentazione annessa
Attenzione! Alta Temperatura (max. 210 °C)
Indica il nome del Fabbricante
Il simbolo con l’anno indica la data di produzione
Simbolo RAEE per la gestione dei rifiuti di apparecchiature elettriche
ed elettroniche
Funzionamento possibile:
A TEMPO PROGRAMMATO: temporizzatore programmabile fino a due ore
A CICLO CONTINUO: manuale (non temporizzato)
CONDIZIONI AMBIENTALI
indeterminato. Per spegnere l’apparecchio riportare l’indice del timer in posizione 0.
3 4
Temperatura ambiente da 5 a 40° C.
Umidità relativa massima 80% per temperature sino a 31° C con diminuzione lineare
sino a 50% alla temperatura di 40° C condensazione compresa.
Pressione Atmosferica da 500 a 1060h Pa.
Variazioni della tensione di rete non superiori al 10%.
Valore delle sovratensioni transitorie in conformità alla categoria di installazione (il che
prevede 2500 V).
INSTALLAZIONE
L’apparecchio è stato tarato e collaudato in fabbrica, quindi non necessita di alcuna ulteriore taratura
o regolazione prima della sua installazione e messa in servizio.
Disimballare l'apparecchio e installarlo con le seguenti avvertenze:
1. Posizionare l’apparecchio su una superficie piana, dura e liscia e costituita da materiale non
infiammabile.
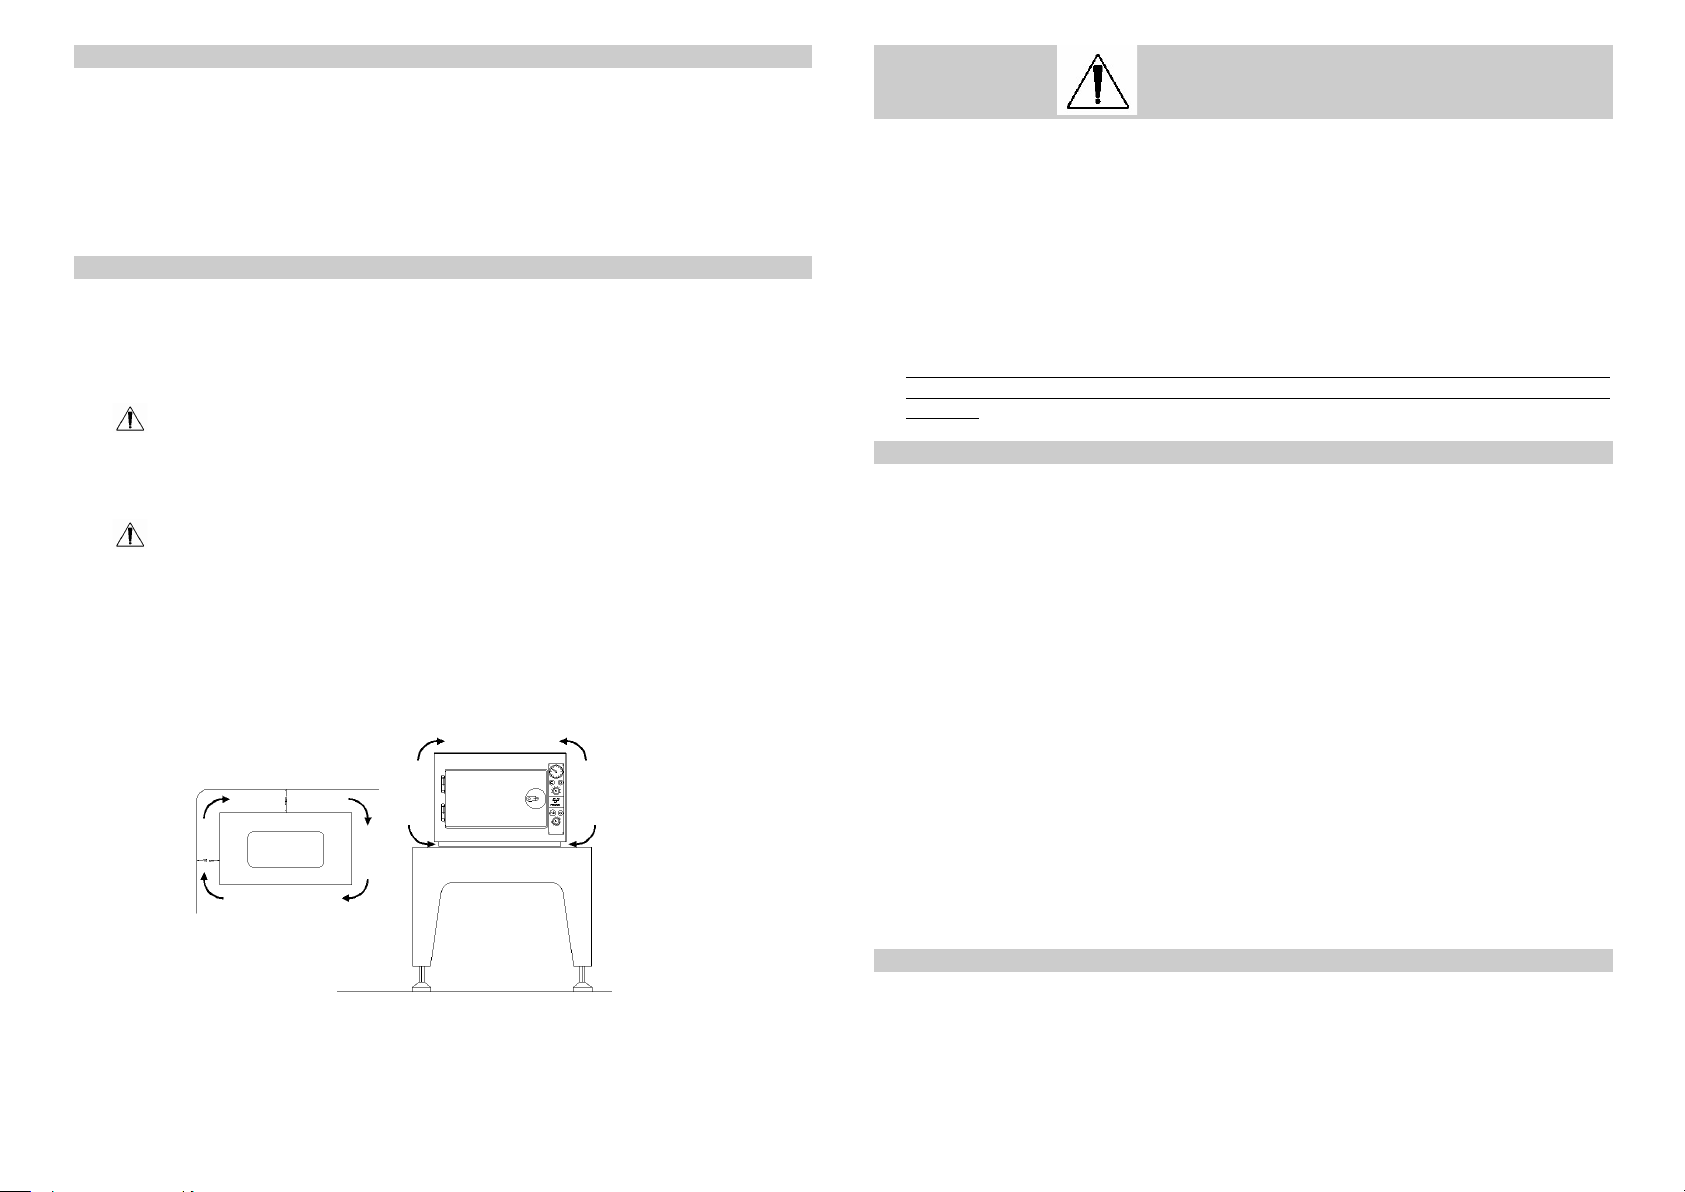
2. Lasciare uno spazio non inferiore ai 10 cm dalle pareti o dai mobili circostanti.
3.
4. Installare l’apparecchio in un luogo sufficientemente arieggiato, però non vicino a finestre o di
5.
6. Installare l’apparecchio in modo tale che il cavo di alimentazione non risulti mai piegato, ma
7. Nel caso in cui l’apparecchio venga posto su un carrello, verificare sempre che la parte inferiore
Una volta installato correttamente e collegato il cavo di alimentazione, l’apparecchio è pronto per
essere usato.
Non installare l’apparecchio vicino a lavelli o simili per evitare contatti con acqua o con
sostanze che potrebbero causare cortocircuiti all'impianto elettrico.
fronte a porte esterne che potrebbero causare una non naturale circolazione dell'aria all'interno
del dispositivo e quindi comprometterne il corretto funzionamento.
Non istallare l’apparecchio in prossimità di sorgenti di calore o in prossimità di altri
dispositivi elettrici.
che possa scorrere libero fino alla presa elettrica. Evitare il posizionamento del cavo vicino a
fonti di calore o vicino ad altri dispositivi che potrebbero a lungo andare lesionarlo.
del dispositivo non sia incassata od occlusa, al fine di garantire sempre una sufficiente
ventilazione.
AVVERTENZE DI SICUREZZA
L'apparecchio è stato progettato per essere utilizzato in luoghi interni.
L'apparecchio non è stato progettato per essere utilizzato in presenza di gas o di vapori esplosivi.
Non si devono versare acqua o altri liquidi sull'apparecchio, né sul suo basamento.
Prima di qualsiasi operazione di pulizia o di manutenzione bisogna sempre togliere la tensione
elettrica.
Assicurarsi che l'impianto di rete di alimentazione elettrica sia provvisto di messa a terra e che sia
conforme alle norme vigenti nel paese di installazione.
Non rimuovere nessuna etichetta o targhetta; in caso di necessità richiederne di nuove.
Richiedere esclusivamente ricambi originali.
Non aprire lo sportello dell’apparecchio finchè il termometro della temperatura interna non
indica una temperatura inferiore ai 30°C.
I dispositivi medici, prima di essere messi nella sterilizzatrice, devono essere lavati ed asciugati.
Il vapore acqueo residuo può creare incrostazioni sulle sonde e sulle resistenze alterandone la
precisione
FUNZIONAMENTO A TEMPO PROGRAMMATO
1. Inserire la presa di connessione del cavo di alimentazione in dotazione nella spina
dell’apparecchio (Pos. 4) e la spina di alimentazione nella presa di corrente a muro previo
controllo del voltaggio.
2. Ruotare la manopola del termoregolatore (Pos. 1) e portare l’indice sulla temperatura desiderata.
Questa operazione va sempre eseguita ad apparecchio freddo.
3. Inserire all’interno del dispositivo il materiale da sterilizzare.
4. Chiudere la porta a chiave (Pos. 8).
5. Programmare, ruotando la manopola del timer (Pos. 2) in senso orario, il tempo di
sterilizzazione, aggiungendo il tempo necessario per portare l’apparecchio ed il materiale posto
al suo interno alla temperatura desiderata. Il tempo necessario per raggiungere la
temperatura di 180°C è di circa 30/40 min. a sterilizzatrice vuota e di 60 min. con Carico
Max ben distribuito. Questa operazione provoca l’accensione della spia (Pos. 5) che segnala il
funzionamento dell’apparecchio e della spia “resistenze” (Pos. 6) che segnala l’inserimento
delle resistenze nel circuito. La scala graduata del termometro (Pos. 3) permette di controllare il
progressivo aumento della temperatura all’interno dell’apparecchio. Quando la temperatura
interna avrà raggiunto il valore programmato la spia “resistenze” (Pos. 6) si spegnerà per poi
riaccendersi dopo breve tempo segnalando il reinserimento delle resistenze nel circuito. Questo
procedimento permette di mantenere all’interno dell’apparecchio una temperatura costante fino
al termine del ciclo di sterilizzazione. Trascorso il tempo programmato, l’apparecchio si
spegnerà automaticamente.
Per garantire l’uniformità della temperatura all’interno della camera di riscaldamento e per
permettere una migliore circolazione dell’aria, il dispositivo risulta munito di una ventola (Pos.
7) cablata internamente.
FUNZIONAMENTO A CICLO CONTINUO
L’apparecchio dispone inoltre di un funzionamento manuale a ciclo continuo. Per utilizzare tale
opzione procedere fino al punto 4 descritto in precedenza. Ruotare, a questo punto, la manopola del
timer (Pos. 2) in senso antiorario. Con uno scatto si inserisce il ciclo continuo manuale a tempo

USEFUL LIFE
The useful life of the device is established in years 5 from the commissioning. For this period Titanox s.r.l.
guarantees the availability of spare parts and safe operation as long as the environmental and use conditions
defined in the instructions for use are respected by the user..
INSTRUCTIONS MANUAL
DRY HEAT STERILIZING UNIT
MOD. PASTEUR ELECTRIC
FORCED HOT AIR
0476
TITANOX
FFAABBBBRRIICCAA AARRTTIICCOOLLII MMEEDDIICCOO SSAANNIITTAARRII
MMEEDDIICCAALL SSAANNIITTAARRYY IITTEEMM FFAACCTTOORRYY
2266003388 TToorrrree ddèè PPiicceennaarrddii ((CCRR)) –– IITTAALLYY –– VViiaa CCaannoovvee,, 22//AA –– CCaannoovvee ddèè BBiiaazzzzii
TTeell.. ((00003399)) 00337755 339944006655 ((rr..aa..)) –– FFaaxx ((00003399)) 00337755 339944006677
s.r.l.
Rev.14 2019-02.26
INTENDED USE
The device is designed to be used in sanitary environments for the purpose of sterilizing non-heat sensitive
medical and surgical instruments. The process of disinfection is based exclusively on the thermal destruction of
the microorganisms present upon the instruments at a typical temperature of about 180º C.
Effectively reaching a sterile state for the instruments inserted into the sterilizers depends upon multiple factors:
The level of initial contamination of the instruments (total bacterial load);
The type of contaminating microorganisms;
The permeability of all the contaminated instrument parts by the hot air produced by the sterilizer.
For more information see the paragraph **attention** ahead.
The device must be used only and exclusively by qualified personnel.
INDEX
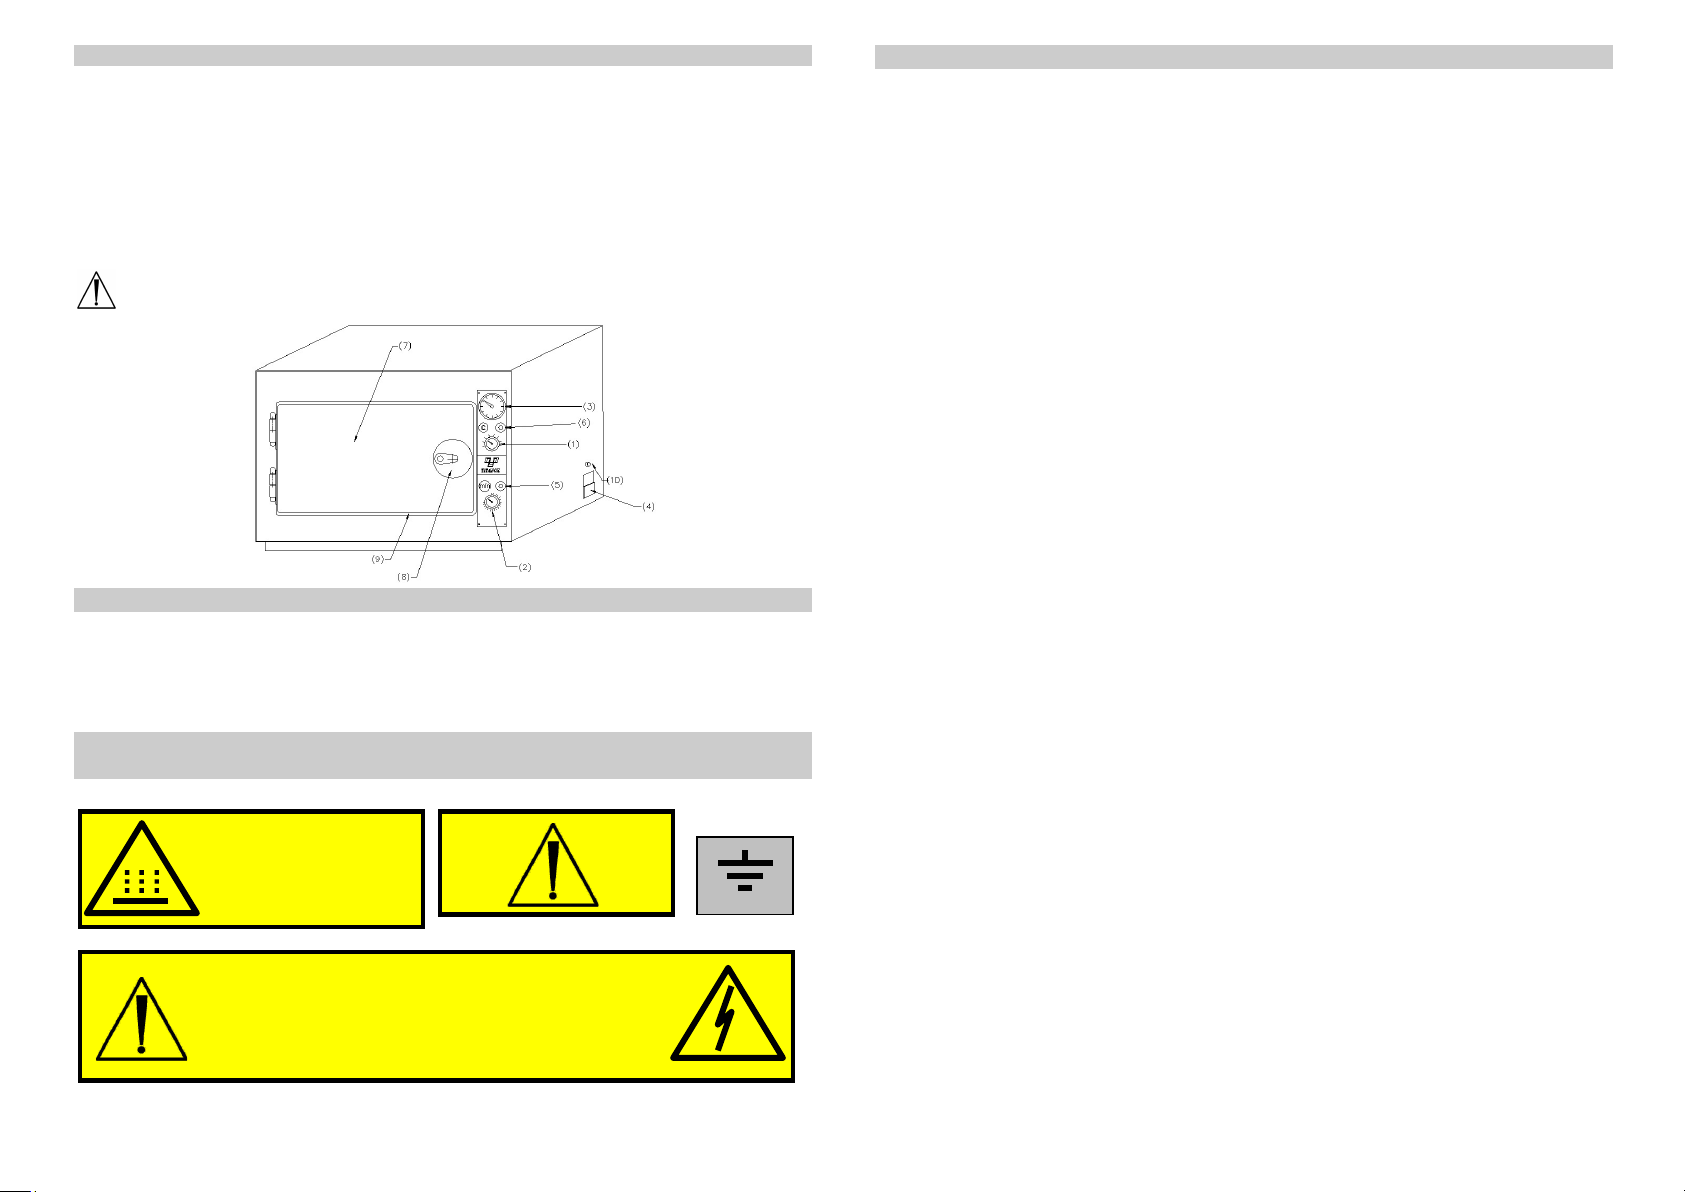
Pos. 1 Thermoregulator internal temperature 50 210° C
Pos. 2 Programming Timer 2 hours or Manual Pos. 7 Ventilation motor fan (inside)
Pos. 3 Thermometer indicating internal temperature 0 200° C
Pos. 4 Connection plug with fuses Pos. 9 Silicone gasket
Pos. 5 Warning light “timer” or “manual” connected Pos. 10 Security thermostat 260° C
Pos. 6 Warning light “resistances”
Pos. 8 Closure with key
SYMBOLS AND SAFETY WARNINGS
ATTENZIONE: ALTA TEMPERATURA
ATTENTION: TEMPERATURE ELEVEE
CAUTION: HOT SURFACE
ACHTUNG: HEISS
PRECAUTION: ALTA TEMPERATURA
AT TENZ IONE : P R I M A D I A P R I R E T O G L I E R E LA T E N SION E
C A U T I O N : D I S C O N N E C T V O L T A G E B E F O R E O PE N I NG
AT TENT ION : A V A N T D’O U V R I R, E N L E V E R L A T E N S I O N
A C H T U NG: VO R DE M OF FNE N ST ROMV ERSO RGUN G UN TERB RECH EN
C U I D A D O : A N T E S D E A B R I R D E S C O N E C T AR LA TE NSIÓ N
C U I D A D O : A N T E S D E A B R I R T I R A R A T E N S Â O
PROTECTION
BINDING-CLAMP
1
WARRANTY CONDITIONS
1) The device is warranted for a period of one year from date of purchase.
2) Warranty covers the substitution or repairs free-of-charge of components with
manufacturing defects.
3) The device will be repaired only at our factory. Charges, risks arising from the
transport of the device shall be on purchaser’s account.
4) In the event of repairs at purchaser’s home, purchaser shall be charged fixed call costs
covering partial reimbursement of travel and professional visit by personnel.
5) Warranty coverage excludes: internal lighting, damages caused by carelessness of
purchaser, incorrect and improper uses and installations not conforming to warnings,
indicated in these booklet instructions or in any case results from phenomenon
unrelated to the normal working of the device.
6) The warranty expires when the device is tampered with or repaired by unauthorised
personnel.
7) It is excluded the substitution and the extension of the warranty following a
breakdown.
8) It is excluded any compensation for damages direct or indirect of any nature to persons
or objects arising from use or suspension of use of the device.
9) The warranty expires immediately if the relative certificate shows alterations, erasing,
or it’s not issued or convalidated by us. The certificate must accompany the device, or
handed to maintenance personnel for home-repairs.
The manufacturing company Titanox S.r.l. is responsible for the safety, reliability and
performance of the device if:
the assembly, the additions, the re-setting, the modification or repairs are carried out
by personnel of Titanox S.r.l.;
the electrical system to which it is connected conforms to safety norms in country of
installation;
the device is used in conformity to instructions of use and maintenance.
This liability expires immediately when the device is tampered with or repaired by
unauthorised personal.
For any further requirements of spare parts, repairs or checks, it’s necessary contact
directly the manufacturer: TITANOX S.r.l. - Via Canove 2/A – Loc. Canove de’
Biazzi – 26038 Torre de’ Picenardi (CR) – Italia - Tel. (0039) 0375 394065 – Fax
(0039) 0375 394067 communicating the registration number of the device to repair.
6

Ventilation motor (fan)
23 W 23 W 23 W
ORDINARY MAINTENANCE
Before initiating any maintenance operation, make sure that:
the device is not connected to the power source.
the device is at ambient temperature.
Keep the internal parts and the grid perfectly clean. Even though they may change colour and
become brownish, never use abrasive or inflammable products for cleaning them.
Keep the external parts perfectly clean that they have to be always specular to prevent corrosion and
dust.
PERIODIC MONTHLY MAINTENANCE
After removing the plug from the power socket, check that the fuses are not oxidised specially when
the device is not used for a long time or kept in a humid ambient.
The power socket should not change colour or oxidise. If that happens, replace it immediately.
The power cable must be integral and it should not show cuts, abrasions or bending.
The resistances and the internal electrical system do not require any maintenance.
PERMITTED USES
The device must be used to sterilize metal materials whose point of melting is higher than 300°C
(surgical instruments, plates, and metal screw).
Inside the sterilizer place only metal containers without plastic parts and without textile material.
FORBIDDEN USES
It is forbidden to place in the device items whose temperature of melting is lower than
300°C or it’s not known to the operator.
ACCESSORY PARTS
2 Internal shelves
1 Mains cable
SELLING OFF
The sterilizing unit is made of various materials with mechanical, electro-mechanical and electronic
parts.
The selling off has to be made according with the regulations in force in the utilizing Nation.
TECHNICAL SPECIFICATIONS
Models: A3-213-400V A3-214-535V A3-215-670V
Loaded Chamber 3 kg 4 kg 5 kg
External sizes:
Width mm 570 705 835
Height mm 400 475 555
Depth mm 345 450 565
Internal Sizes:
Width mm 405 535 670
Height mm 210 345 415
Depth mm 255 320 420
Weights:
Net weight kg. 13 kg 22 kg 35 kg
Gross weight kg. 15 kg 25 kg 41 kg
Electrical Characteristics:
Nominal tension (Voltage) 230 V 230 V 230 V
Nominal power (Watt) 450 W 950 W 1900 W
Nominal frequency (Hz) 50/60 Hz 50/60 Hz 50/60 Hz
Net’s fuses (mm 5x20) F5A-250 V F5A-250 V F10A-250 V
The device is in conformity to electrical safety norms provided for by the normative
institutes and supplied with bipolar plug which assures perfect electrical grounding.
NON-COMPLIANCE WITH INSTRUCTIONS DESCRIBED IN THIS BOOKLET SHALL
FREE COMPANY TITANOX S.R.L. FROM ANY LIABILITY.
SYMBOLS MEANING
Warning !
See the annexed documentation
Caution! Hot surface (max. 210 °C)
Laboratory tests following a cycle of 120 minutes at 180ºC on Bacillus subtilis var niger ATCC
9372 spores demonstrated the efficiency of the sterilizer.
Titanox does not guarantee and cannot ensure the effective achievement of the sterile state of the
instruments placed in the sterilizer, according to the definition of sterile medical instruments foreseen
by the EN 556 Norms. The user of the sterilizer therefore has the responsibility to conduct all of the
confirmation procedures of the sterilization process and the necessary verifications in order to ensure
the effective completion of every single sterilization cycle.
5 2
It points the Manufacturer’s name
***ATTENTION***
This symbol, together with the year, points the production date
RAEE symbol to handle electrical and electronical devices wastes
Available operation:
TIME-PROGRAMMED: timer programmable up to 2 hours
CONTINUOUS CYCLE: manual (without timer)

ENVIRONMENTAL CONDITIONS
Ambient temperature from 5 to 40° C.
Relative humidity max. 80% for temperatures up to 31° C with linear decrease up to 50% at the
temperature of 40° C condensing included.
Atmospheric Pressure from 500 to 1060 hPa.
Voltage supply variation not higher than 10%.
Value of transitory over-voltage in conformity to the installation category (which provides for
2500V).
INSTALLATION
The device has been calibrated and tested at factory and as such does not require any further
calibration or adjustments before installation and start-up.
Unpack the device and follow the next advices:
1. Position the device on a levelled flat, hard and smooth surface, established with noninfiammable material.
2. Allow space not lower than 10 cm from walls and surrounding furniture.
3.
4. Install the device in a well aerated location, not near windows or external doors which could
5.
6. Install the device in such a way that the power cable is never twisted or bent, but it should
7. In the event the device is placed on a trolley, always check that the lower part of the device is
Once the device is correctly installed and power cable connected, it’s ready for use.
Do not install the device nearby water sinks or similar to avoid contacts with water or
substances which could cause electrical short-circuit to the system.
cause an unnatural circulation of the air inside the device and therefore compromise its correctly
running.
Do not install the device nearby heat sources or near other electrical devices.
connect to the socket free and unhindered. Avoid to positioning the power cable nearby heat
sources or other devices that shall caused damage on it in a long run.
not enclosed or hindered, as to allow continuos and sufficient ventilation.
SAFETY WARNINGS
The device is designed for use in internal locations.
The device is not designed for use in presence of gasses or explosive vapours.
No water or other liquids should be poured into device neither on its base.
Before any cleaning or maintenance actions, the power cable must always first be removed.
Make sure that the electrical system has electrical grounding and that it’s in conformity to the
safety norms in the country of installation.
Do not remove any label or plate, in case of need, ask for more.
Always insist on original spare parts.
Do not open the door of the device until the thermometer of the internal temperature do not
indicate a temperature lower than 30°C.
Medical devices, before being placed in the sterilizer, should be washed and dried. The residual
water steam may create deposits on the probes and resistances by altering the precision.
TIME – PROGRAMMED RUNNING
1. Insert the supplied connection socket of the mains cable in the plug of the device
(Pos. 4) and the feeder- plug in the wall mains socket, after checking the voltage value.
2. Turn the thermoregulator knob (Pos. 1) and set the desired temperature. This operation shall
always be carried out when device is cold.
3. Place materials to be sterilized inside the device.
4. Lock up the door (Pos. 8).
5. Set, by turning the timer knob (Pos. 2) anti-clockwise, the sterilization time adding necessary
time in order to bring the device and the material inside to the desired temperature. The
necessary time to reach the temperature of 180°C is about 30/40 minutes in case of empty
chamber sterilizer, and about 60 minutes with Loaded Chamber well arranged on the
trays. This operation switch on the warning light (Pos. 5) indicating that the device is working
and the warning light “resistance” (Pos. 6) indicating that the resistances are turned on in the
circuit. The graduated thermometer (Pos. 3) allows to check the progressive increase of the
internal temperature. When the internal temperature has reached the programmed value, the
warning light “resistance” (Pos. 6) is turned off for then, after brief time, again turned-on
indicating the re-connection of the resistances in the circuit. This operation allows to keep
inside the device a constant temperature up to the end of the sterilization cycle. After
programmed time has elapsed, the device turns itself off automatically.
In order to maintain an even temperature inside of the heating chamber and to allow a better
circulation of the air, the device is featured with a ventilation motor fan internally wired.
CONTINUOS -CYCLE RUNNING
The device has also a continuos-cycle running. For use this kind of running proceed up to point 4 of
the procedure for time-programmed running described above. Turn, at this moment, the timer knob
(Pos. 2) anti-clockwise. The indefinite-time manual continuos-cycle is inserted with a click. To turn
off the device, turn back the timer know to position 0.
3 4
Rev.12 du 26
-02-
2019
DUREE DE LA VIE UTILE
La durée de vie utile de l'appareil est établie à partir de 5 ans à compter de la mise en service. Pour cette période,
Titanox s.r.l. garantit la disponibilité des pièces de rechange et un fonctionnement en toute sécurité tant que les
conditions environnementales et d'utilisation définies dans le mode d'emploi sont respectées par l'utilisateur.
MANUEL D’INSTRUCTIONS
STÉRILISATEUR A L’AIR CHAUDE
MOD. PASTEUR ÉLECTRIQUE
A VENTILATION FORCÉE
0476
TITANOX
FFAABBBBRRIICCAA AARRTTIICCOOLLII MMEEDDIICCOO SSAANNIITTAARRII
MMEEDDIICCAALL SSAANNIITTAARRYY IITTEEMM FFAACCTTOORRYY
2266003388 TToorrrree ddèè PPiicceennaarrddii ((CCRR)) –– IITTAALLYY –– VViiaa CCaannoovvee,, 22//AA –– CCaannoovvee ddèè BBiiaazzzzii
TTeell.. ((00003399)) 00337755 339944006655 ((rr..aa..)) –– FFaaxx ((00003399)) 00337755 339944006677
s.r.l.

L’appareil est destiné a être utiliser en pièce sanitaire dans le but de stériliser dispositifs médicochirurgical pas
Pos. 1 Thermorégulateur température intérieure 50
210° C
Pos. 2 Programmeur Timer 2 heures ou Manuel
Pos. 7 Ventilateur (
intérieur
)
Pos. 3 Thermomètre indicateur température intérieure 50
210° C
Pos. 4 Fiche de connecteur avec fusibles
Pos. 9 Joint en
silicone
1 6
Consulter la documentation annexe
thermolabiles. Le processus étuvage se base exclusivement sur la distribution thermique des micro-organisme
présent sur les dispositifs, a une température typique a près de 180° C.
La réalisation effective d’état stérile des dispositifs insèrent dans les appareils dépend des facteur multiples,
comme :
Le niveau de contamination initial du dispositif
Le type des micro-organisme contaminent
La perméabilité de toutes les parties contaminées du dispositif a l’air chaud de l’appareil
Pour tout autre renseignement on va voir le point ** ATTENTION *** plus loin.
L’appareil doit être utilisé seulement par le personnel qualifié
LEGENDE
DESTINATION D’UTILISATION
Pos. 6 Lampe témoin “résistances”
Pos. 5 Lampe témoin “timer” ou “manuel” branché Pos. 10 Thermostat de sûreté 260°C
Pos. 8 Fermeture avec clé
SYMBOLES ET INDICATION DE SÉCURITÉ
ATTENZIONE: ALTA TEMPERATURA
ATTENTION: TEMPERATURE ELEVEE
CAUTION: HOT SURFACE
ACHTUNG: HEISS
PRECAUTION: ALTA TEMPERATURA
BORNE DE
PROTÉCTION
AT TENZ ION E: P R I M A D I A P R I R E T O G L I E R E LA T E N SI ONE
C A U T I O N : D I S C O N N E C T V O L T A G E B E F O R E O PE N I NG
AT TENT ION : A V A N T D’O U V R I R, E N L E V E R L A T E N S I O N
A C H T U NG : VO R D EM OFFN EN STR OMVE RSO RGU NG UNTE RBRE CHE N
C U I D A D O: A N T E S D E A B R I R D E S C O N E C T A R L A T ENS IÓN
C U I D A D O: A N T E S D E A B R I R T I R A R A T E N S Â O
CONDITIONS DE GARANTIE
1) L’appareil est garanti pour une période d’un an à partir du jour de son achat.
2) Par garantie on entend la substitution ou réparation gratuite des composants ayant des
défauts de fabrication.
3) L’appareil sera réparé seulement dans notre usine. Les coûts et les risques du transport
seront à la charge du client.
4) En cas d’intervention à domicile, le client devra payer un montant fixe en tant que
remboursement partiel des frais de voyage et de déplacement de notre personnel.
5) La garantie ne comprend pas: les parties esthétiques, les dommages provoqués par
incurie, l’usage et l’installation erronés, non conformes aux instructions figurant dans
ce mode d’emploi ou de toute façon dus à des phénomènes ne dépendant pas du
normal fonctionnement de l’appareil.
6) La garantie n’est plus valable au cas où l’appareil aurait été altéré ou réparé par du
personnel non autorisé.
7) On exclut la substitution de l’appareil et le prolongement de la garantie suite aux
dégâts qui se seront produits.
8) On exclut le remboursement des dommages directes ou indirectes de n’importe quelle
nature à des personnes ou choses pour l’usage ou la suspension d’usage de l’appareil.
9) La garantie n’est immédiatement plus valable en cas d’altération ou modification de ce
certificat ou en cas il ne sera pas émis et validé par notre entreprise. Le certificat devra
être livré avec l’appareil ou remis à notre personnel pour toute réparation à domicile.
La maison constructrice Titanox S.r.l. s’assume toute responsabilité en ce qui concerne la
sécurité, fiabilité et performance de l’appareil si:
l’assemblage, les jointures, le nouveau tarage, les modifications ou réparations auront
été effectués par du personnel de la maison Titanox S.r.l. ;
l’installation électrique à laquelle l’appareil est branché, est conforme aux normes de
sécurité en vigueur ;
l’appareil est utilisé conformément à ce mode d’emploi.
Cette responsabilité n’est immédiatement plus valable au cas où l’appareil aurait été altéré
ou réparé par du personnel non autorisé .
Pour toutes les éventuelles demandes de pièce de rechange, réparation ou contrôle, il
est nécessaire de s’adresser directement à la maison constructrice: TITANOX S.r.l. Via Canove 2/A – Loc. Canove de’ Biazzi - 26038 Torre de’ Picenardi (CR) – Italia Tel. (0039) 0375 394065 – Fax (0039) 0375 394067 communiquant le numéro de
matricule de l’appareil en objet de réparation.

ENTRETIEN ORDINAIRE
5 2
Modèles
A3-
213-400V A3-214-535V A3-215-670V
Charge Maximum
3 kg 4 kg 5 kg Mesures à l’extérieur
Largeur en mm
570 705 835 Hauteur en mm
400 475 555 Profondeur en mm
345 450 565
Mesures à l’intérieur
Largeur en mm
405 535 670
Hauteur en mm
210 345 415 Profondeur en mm
255 320 420
Poids net
13 kg 22 kg 35 kg
Poids brut
15 kg 25 kg 41 kg
Données électriques
Voltage nominal
230 V 230 V 230 V
Puissance nominale
450 W
950 W
1900 W
Fréquence nominale
50/60 Hz
50/60 Hz
50/60 Hz
Fusibles du réseau (mm5x20)
F5A-250 V F5A-250 V F10A-250 V
Ventilateur
23W 23W 23W
Avant de commencer toute opération d’entretien s’assurer que:
l’appareil n’est pas branché au réseau d’alimentation.
l’appareil soit à température ambiante.
Garder parfaitement propres les surfaces intérieures et la grille. Même si, avec le temps,
elles changent de couleur et deviennent brunâtres, il ne faudra pas les nettoyer avec des
produits abrasifs ou inflammables.
Garder parfaitement propres les surfaces extérieures qui doivent toujours être spéculaires
afin de combattre la corrosion et la poussière.
ENTRETIEN PERIODIQUE MENSUEL
Après avoir débranché la prise d’alimentation, contrôler que les fusibles ne se soient pas
oxydés, surtout si l’appareil reste longtemps sans être utilisé ou si l’appareil est installé
dans un endroit humide.
La prise d’alimentation ne doit pas changer de couleur ni s’oxyder. Dans ce cas, il faut la
substituer immédiatement.
Le câble d’alimentation doit être intact et il ne doit pas présenter coupes, abrasions ou
pliages. Les résistances et l’installation électrique interne ne demandent pas d’entretien.
USAGES CONSENTIS
L’appareil doit être utilisé pour la stérilisation de matériel en métal dont le point
de fusion est supérieur à 300° C (instruments chirurgicaux, plaques et vis métalliques).
A l’intérieur du stérilisateur placer uniquement des conteneurs métalliques sans pièces en plastique et sans matière
textile.
USAGES NON CONSENTIS
Ne pas placer dans l’appareil des matériaux dont la température de fusion est inférieure à 300° C ou
inconnue de l’opérateur.
PARTIES ACCESSORIES
2 Etagères à l’intérieur
1 Cordon d’alimentation
ÉCOULEMENT
Le stérilisateur est constitué par des parties mécanique, électromécanique et électronique.
L’écoulement doit être exécuté en accord avec les réglementations en vigueur dans le Pays
d’utilisation.
CARACTERISTIQUES TECHNIQUES
L’appareil est conforme aux normes concernant la sécurité électrique requises par les institutions compétentes en
la matière et il a été équipé d’une fiche bipolaire qu’en assure une parfaite mise à terre.
LA NON CONSIDÉRATION DE TOUT CE QUE FIGURE DANS CE MANUEL
D’INSTRUCIONS DECLINE TOUTE RESPONSABILITÉ DE LA MAISON TITANOX S.R.L.
SYMBOLES SIGNIFICATS
Attention !
Consulter la documentation annexe.
Attention! Température élevée (max. 210 °C)
Ce symbole indique le nom du Fabricant
Ce symbole avec l’année indique la date de fabrication
L’appareil a été projeté et testé pour assurer un cycle de stérilisation selon les lois en
vigueur. Il reste, en tout cas, responsabilité de l’utilisateur assurer le contrôle
microbiologique des matériaux soumis au traitement et vérifier l’effective réalisation
de l’état stérile d’eux-mêmes.
*** ATTENTION **
Symbole RAEE pour la gestion des déchets d’appareils électriques et
électroniques.
Fonctionnement possible:
A TEMPS PROGRAMMÉ: temporisateur programmable jusqu’à 2 heures.
A CYCLE CONTINU: manuel (pas temporisé)

CONDITIONS DU MILIEU
3 4
Température ambiante de 5 à 40° C.
Humidité relative max. 80% si la température varie jusqu’à 31° C, avec diminution linéaire jusqu’à 50%
pour une température de 40° C condensation comprise.
Pression Atmosphérique de 500 a 1060h Pa.
Variation du voltage du réseau ne dépassant pas 10%.
Valeur du survoltage transitoire conforme à la catégorie d’installation (c’est à dire 2500 V).
INSTALLATION
L’appareil a été calibré et testé en fabrique, par conséquent aucun réglage ni aucun tarage
ne sont recquis avant son installation et mise en fonctionnement.
Enlever l’emballage en respectant les conditions suivantes:
1. Installer l’appareil sur une surface droite, lisse et dure et constituée du materiel qui
n’est pas inflammable.
2. Laisser un espace non inférieur à 10 cm des parois ou des meubles tout au tour.
3.
Ne pas placer l’appareil a côté des éviers ou similaires afin d’éviter tout contact
avec l’eau ou avec des substances qui pourraient causer des courts circuits à
l’installation électrique.
4. Installer l’appareils à un endroit suffisamment aéré, mais pas à côté des fenêtres ni
face aux portes donnant sur l’extérieur car elles pourraient provoquer à l’intérieur de
l’appareil une circulation d’air qui n’est pas naturelle et donc en compromettant pour
son fonctionnement.
5.
Ne pas installer l’appareils à côté de sources de chaleur ou dispositifs electriques.
6. Installer l’appareils de façon à ce que le cable d’alimentation ne soit jamais plié mais
qu’il puisse arriver sans encombrements jusqu’à la prise de courant, on evitant de
positionner le cable à côté de sources de chaleur ou dispositifs qui pendant longtemps
pouvaint lesioner le cable lui meme.
7. Au cas où l’appareil serait positionné sur un chariot, il faudra vérifier que sa partie
inférieure ne soit pas encaissée ni bouchée, afin de garantir toujours une ventilation
suffisante.
Une fois que l’appareil a été mis en place et que le cable d’alimentation a été branché, il est
prêt pour être utilisé.
AVVERTISSEMENT DE SÛRÉTÉ
L’appareil a été projéte pour être utilisé à l’intérieur.
L’appareil n’a pas été projeté pour être utilisé en présence de gas ou de vapeurs explosives.
Ne pas renverser d’eau ni d’autres liquides sur l’appareil ou sur son embasement.
Avant toute opération de nettoyage ou d’entretien il faut énlever toujours le voltage.
S’assurer que le réseau d’alimentation électrique soit pourvu d’une prise à terre conformément
aux normes en vigueur dans le pays où l’appareil sera installé.
Ne pas enlever d’étiquettes ni de plaquettes, mais en demander d’autres si nécessaire.
N’employer que des pièces de réchange originelles.
Ne pas ouvrir la porte de l’appareil avant que le thermomètre n’ait indiqué que la temperature
interne a baissé jusqu’à un niveau inférieur à 30°C.
Le dispositifs médicaux, avant d’être placés dans le stérilisateur, doivent être lavés et séchés. La
vapeur d’eau résiduelle peut créer des dépôts sur les sondes et les résistances en altérant la
précision.
FONCTIONNEMENT A TEMPS PROGRAMMÉ
1. Introduire la prise du connecteur du câble d’alimentation en dotation dans la fiche de l’appareil
(Pos. 4) et la fiche d’alimentation dans la prise de courant à mur après avoir contrôlé le voltage.
2. Tourner le bouton du thermorégulateur (Pos. 1) et positionner l’indicateur sur la température
choisie. Cette opération doit être toujours faite lorsque l’appareil est encore froid.
3. Placer à l’intérieur de l’appareil tout le matériel à stériliser.
4. Fermer la porte à clé (Pos. 8).
5. Programmer, en tournant le bouton du timer (Pos. 2) en sens horaire, le temps de stérilisation, en
calculant aussi le temps nécessaire afin que l’appareil et le matériel placé à l’intérieur atteignent
la température désirée. Le temps nécessaire pour monter a la température de 180°C est près
de 30/40 minutes a vide et près de 60 minutes avec a Charge Maximum de matériel bien
distribué. Cette opération provoque l’allumage de la lampe témoin (Pos. 5) qui relève le
fonctionnement de l’appareil et de la lampe témoin “résistances“ (Pos. 6) a signaler
l’enclenchement des résistances dans le circuit. L’échelle graduée du thermomètre (Pos. 3)
permet de contrôler l’augmentation progressive de la température à l’intérieur de l’appareil.
Lorsque la température interne aura atteint la valeur qui a été programmée, la lampe
“résistances” (Pos. 6) s’éteindra pour s’allumer à nouveaux peu de temps après afin de signaler
le réenclenchement des résistances dans le circuit. Ce procédé permet de garder à l’intérieur de
l’appareil une température constante jusqu’à la fin du cycle de stérilisation. Une fois que le
temps programmé s’est écoulé, l’appareil s’éteindra automatiquement.
Pour assurer l’uniformité de la température à l’intérieur de la chambre de réchauffage et
permettre une meilleure circulation de l’air, l’appareil est équipé d’une ventilateur (Pos. 7)
réaliser intérieurement.
FONCTIONNEMENT A CYCLE CONTINU
L’appareil dispose aussi d’un fonctionnement à cycle continu. Pour utiliser cette option procéder jusqu’au point 4
décrit précédemment. Tourner le bouton du timer (Pos. 2) en sens anti-oraire. Un petit déclenchement signale que
le cycle manuel à temps indéterminé a été branché. Pour éteindre l’appareil ramener l’indicateur du timer à la
position 0.
 Loading...