

Titan-jet 19P2-R Installing Manual

Http://www.titanjet.com.cn
_______________________________________19P2-R Installing Guide
Attn: Jesse Long
Email: jesse@titanjet.com.cn
1
Brief Guide
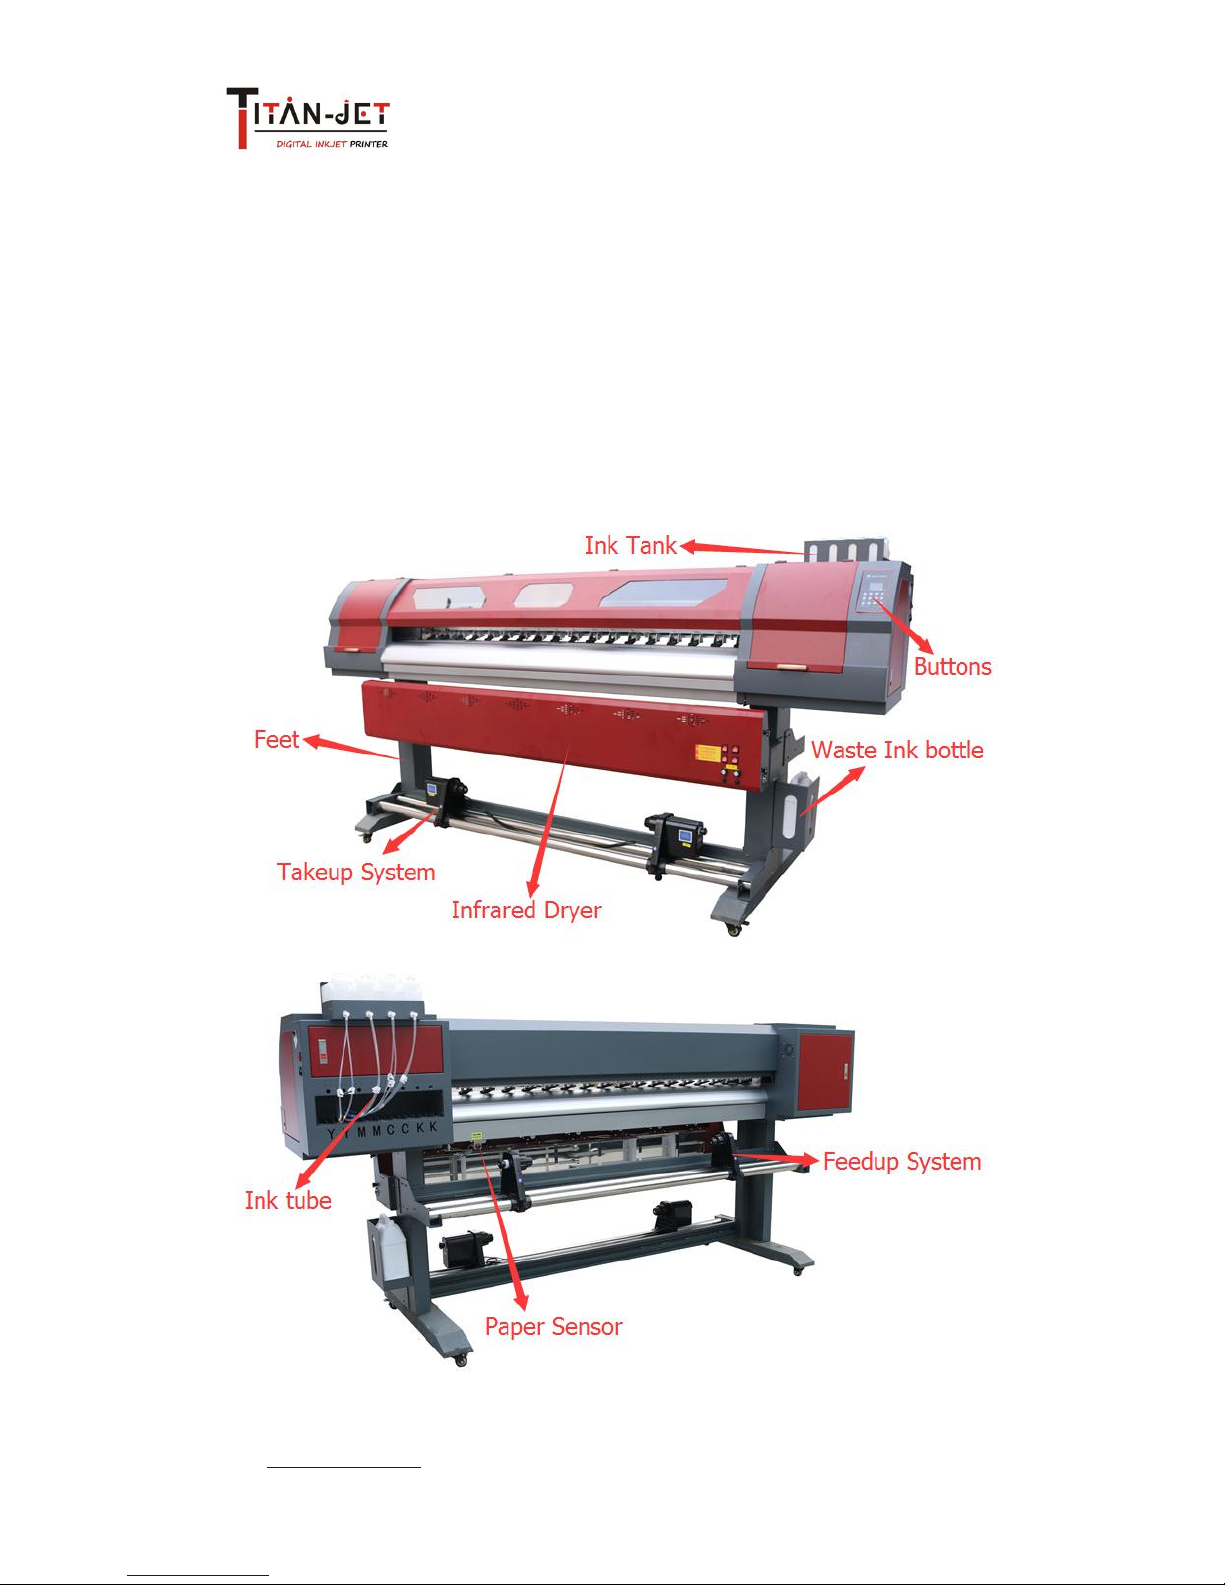
1. Assemble Printer(Include feet, Feedup, takeup,etc)
Warning: Do Not Install Printhead Now!!!
2. Printer Appearance Inspecting, Clean Scrap Iron or Aluminum.
3. Measuring the Voltage between fire line & Zero line & Earth line.
4. Turn power on.
5. Inspecting the Panel and Start “Self Test”
6. Software Installing
7. Connect USB line and Install Hardware
8. Print(Without head&Ink)
9. Install Printheads&Plug head cables
10. Ink System
11. Fill the inks&Clean printhead
12. Calibrations
13. Maintain
(Detailed Operation follows below step by step)
Http://www.titanjet.com.cn
_______________________________________19P2-R Installing Guide
Attn: Jesse Long
Email: jesse@titanjet.com.cn
2
Detailed Guide Steps
1. Assemble Printer(Include feet, Feedup, takeup,etc)
Unpack the printer woodencase, Assemble the Printer(Do not Install the Printhead).
Machine should be placed on Level & Stable Ground.
Avoiding direct Sunshine & Wet Condition, Water-Cooling System should be
equipped.
Temperature: 18℃~28℃ and Humidity: 50%~75%.
Keep away from Interference & Radiation Sources.
UPS & AVR shoud be used if it’s possible.
Http://www.titanjet.com.cn
_______________________________________19P2-R Installing Guide
Attn: Jesse Long
Email: jesse@titanjet.com.cn
3
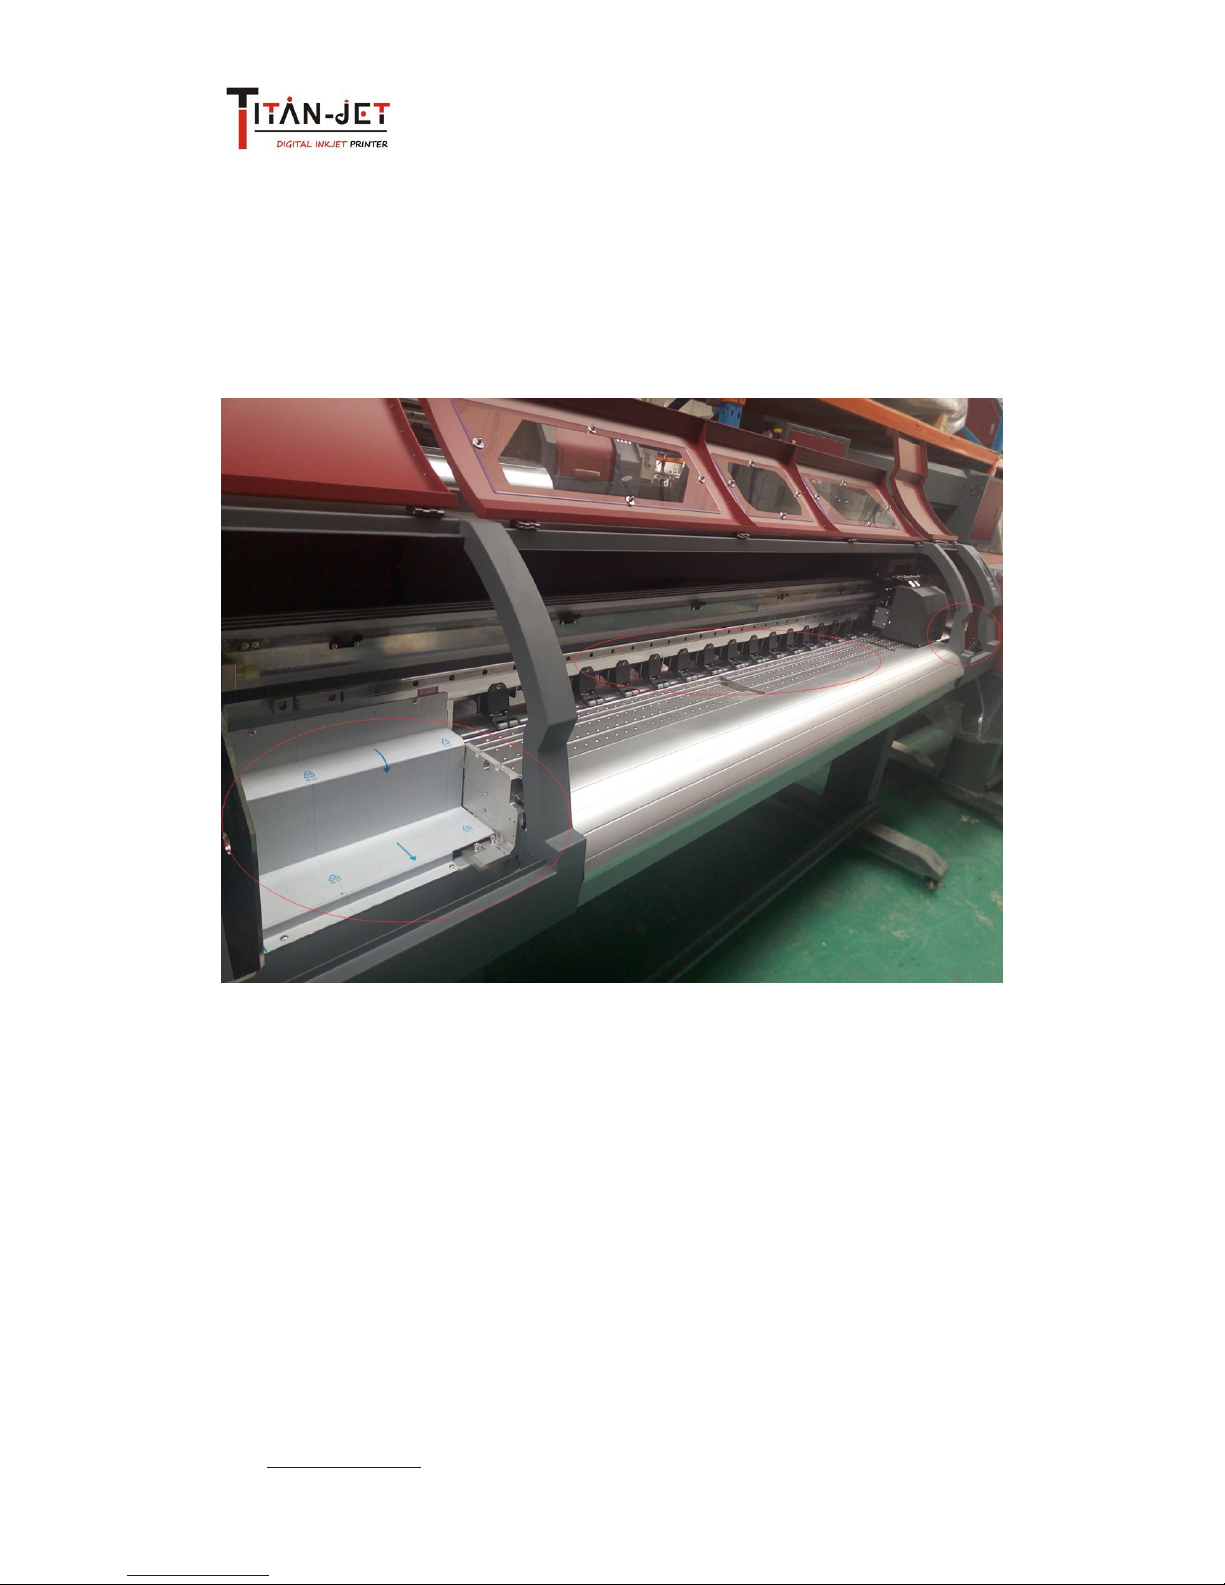
2. Printer Appearance Inspecting, Clean Scrap Iron or Aluminum.
After long time delivery, some scraps would be declined.
Using you hand to move the Carriage from right to left slowly and see whether it
moves smoothly.
Inspect the Printing Platform carefully, make sure there is no scrap on it. Lest it would
scrape the moving Carriage or even the Printhead.
Http://www.titanjet.com.cn
_______________________________________19P2-R Installing Guide
Attn: Jesse Long
Email: jesse@titanjet.com.cn
4
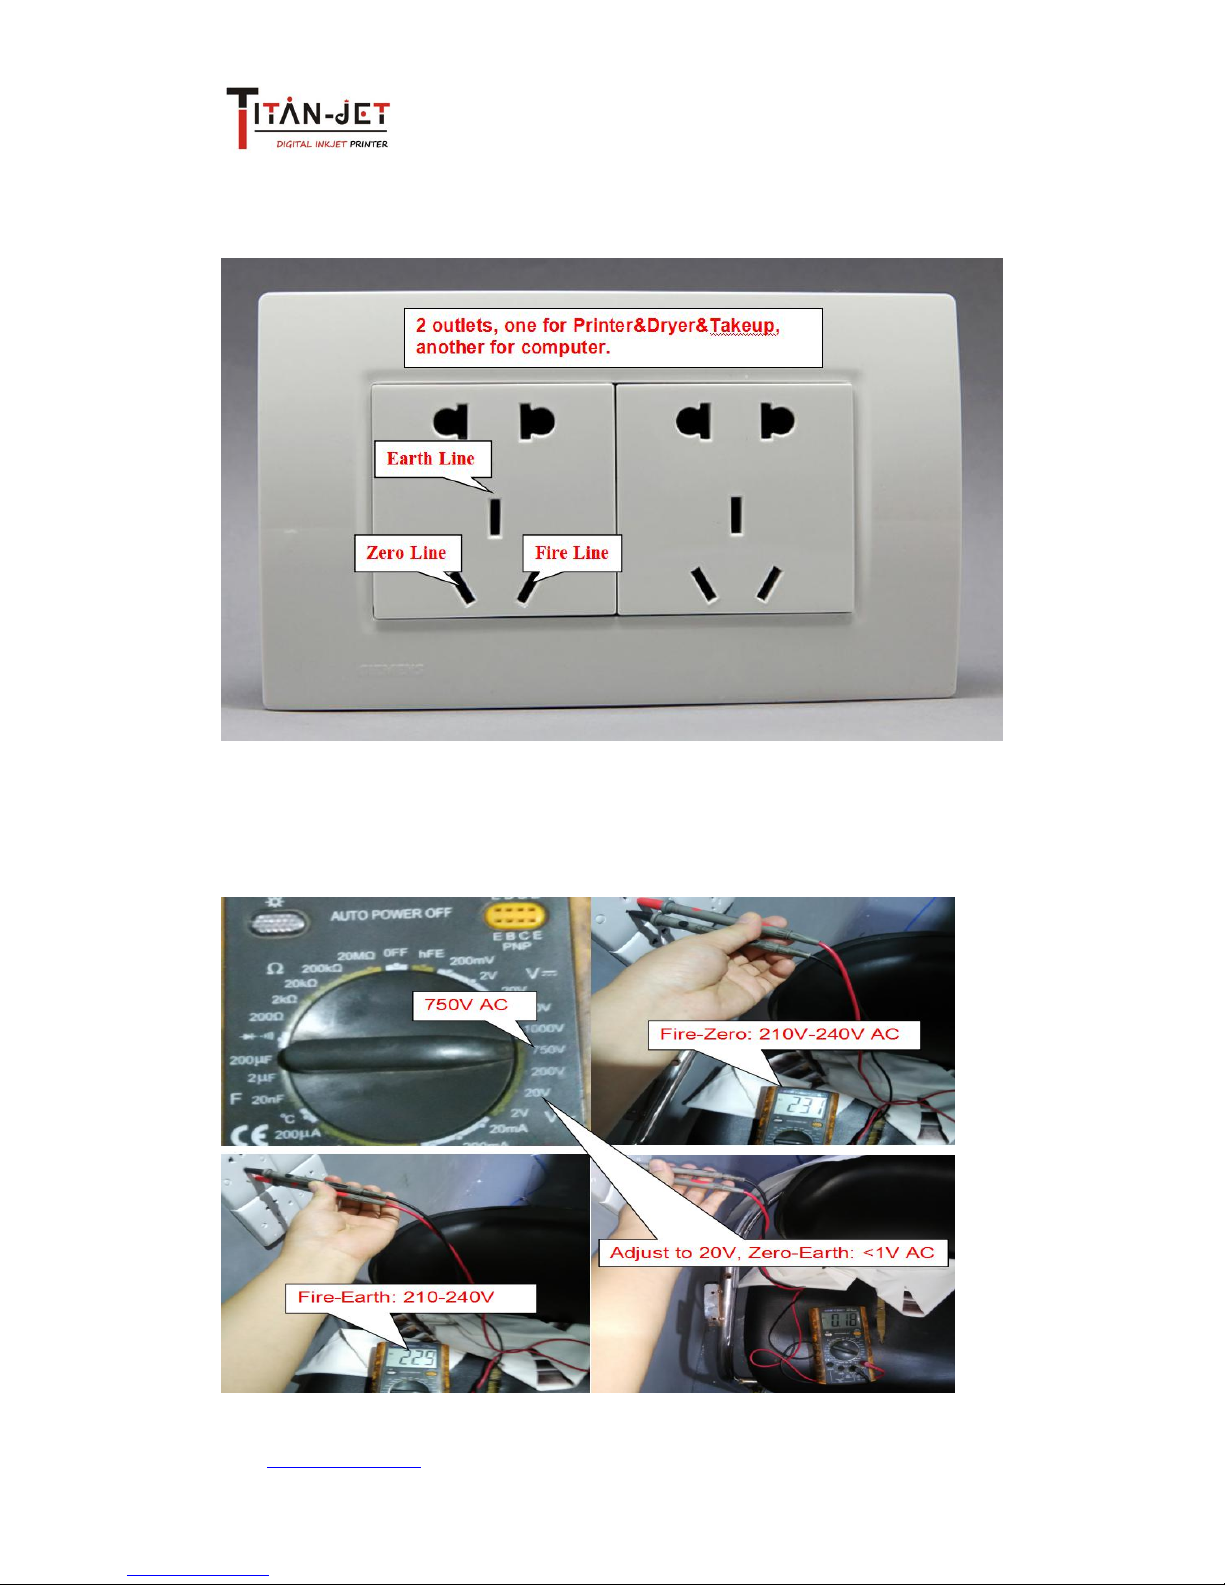
3. Measuring the Voltage between fire line & Zero line & Earth line.
Make sure There is enough outlets for printer&Dryer&Takeup and Computer&Monitor.
Using Multimeter to measure the Voltage, Normal Range between Zero Line & Fire
Line is 210V~240V AC.
Normal Range between Fire Line & Earth Line is 210V~240V AC.
Normal Range between Zero Line & Earth Line shoud less than 1V AC.
Http://www.titanjet.com.cn
_______________________________________19P2-R Installing Guide
Attn: Jesse Long
Email: jesse@titanjet.com.cn
5
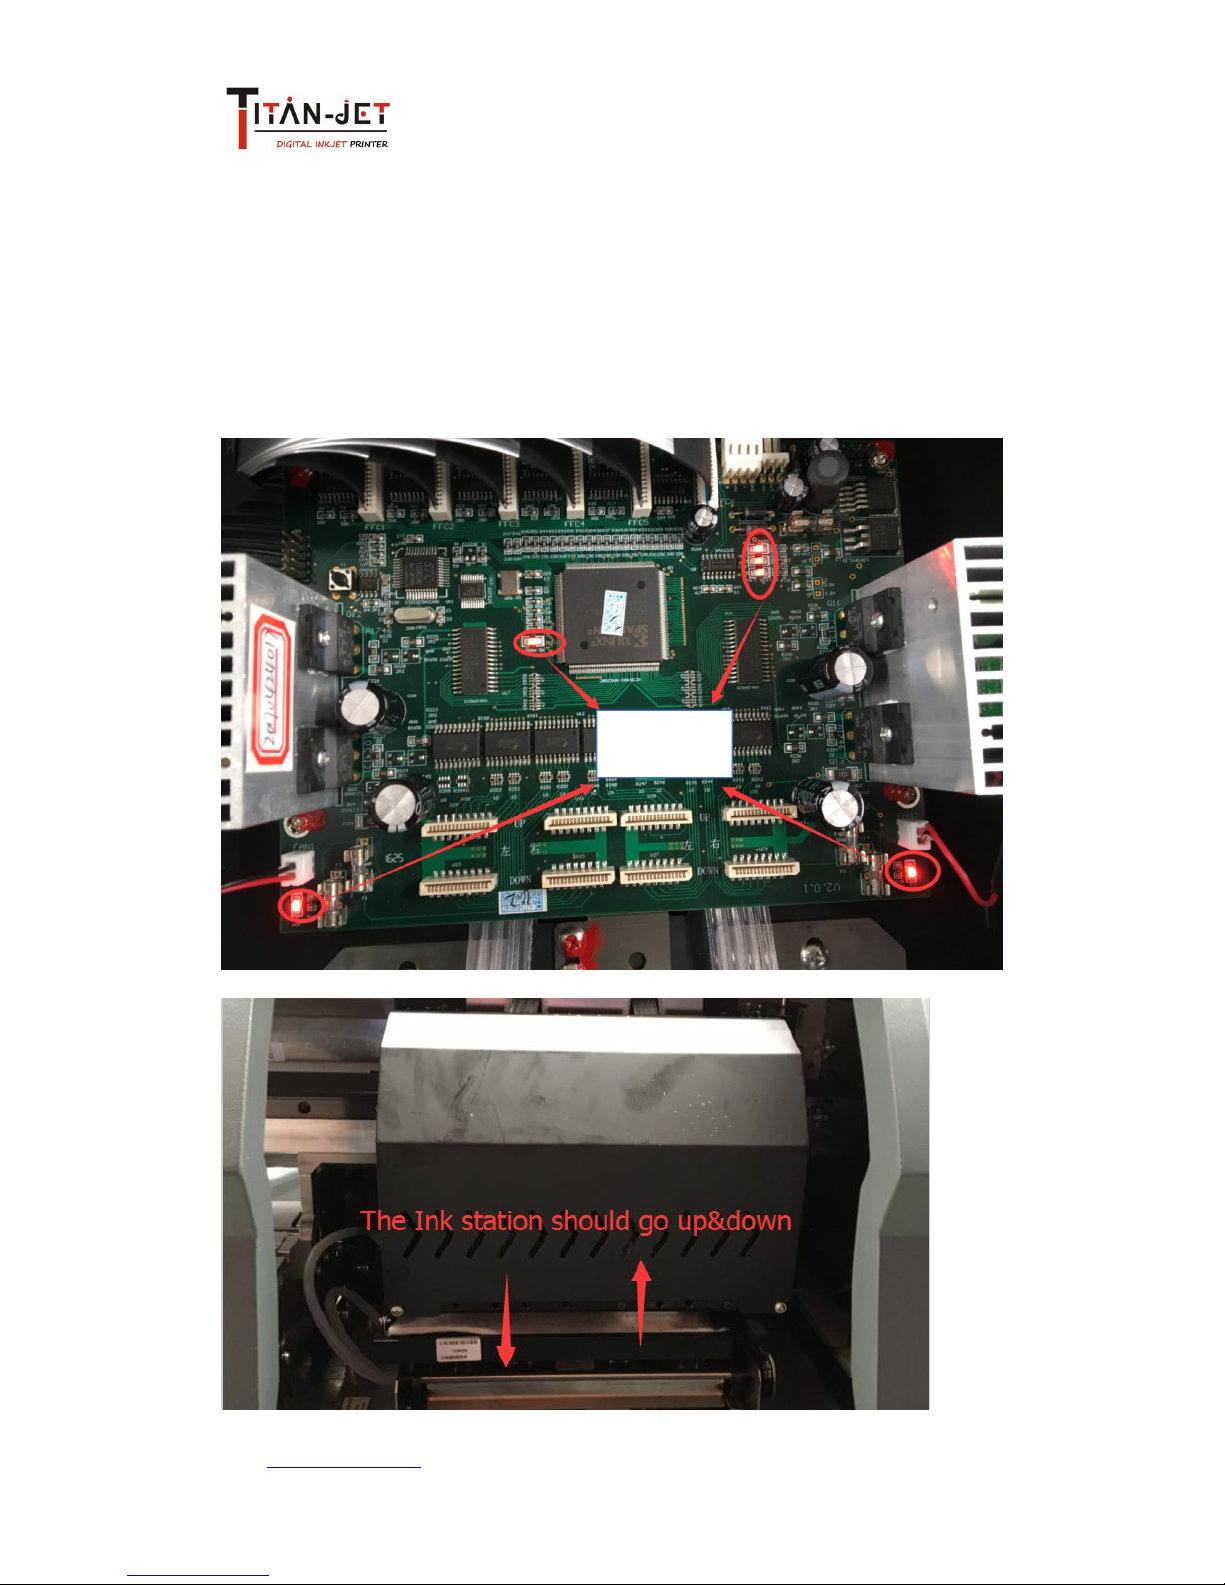
4. Turn power on(Without installing printhead).
After measuring the voltage, Using your hand to move the carriage from right to left
and see whether it moves smoothly.
Turn power on and check the Headboard, make sure there are 6 lights on.
Carriage should move left and then move right to Original Position.
Ink station should go up&down.
The headboard will emit “Beep” sound, it proves all normal.
6 lights
Http://www.titanjet.com.cn
_______________________________________19P2-R Installing Guide
Attn: Jesse Long
Email: jesse@titanjet.com.cn
6
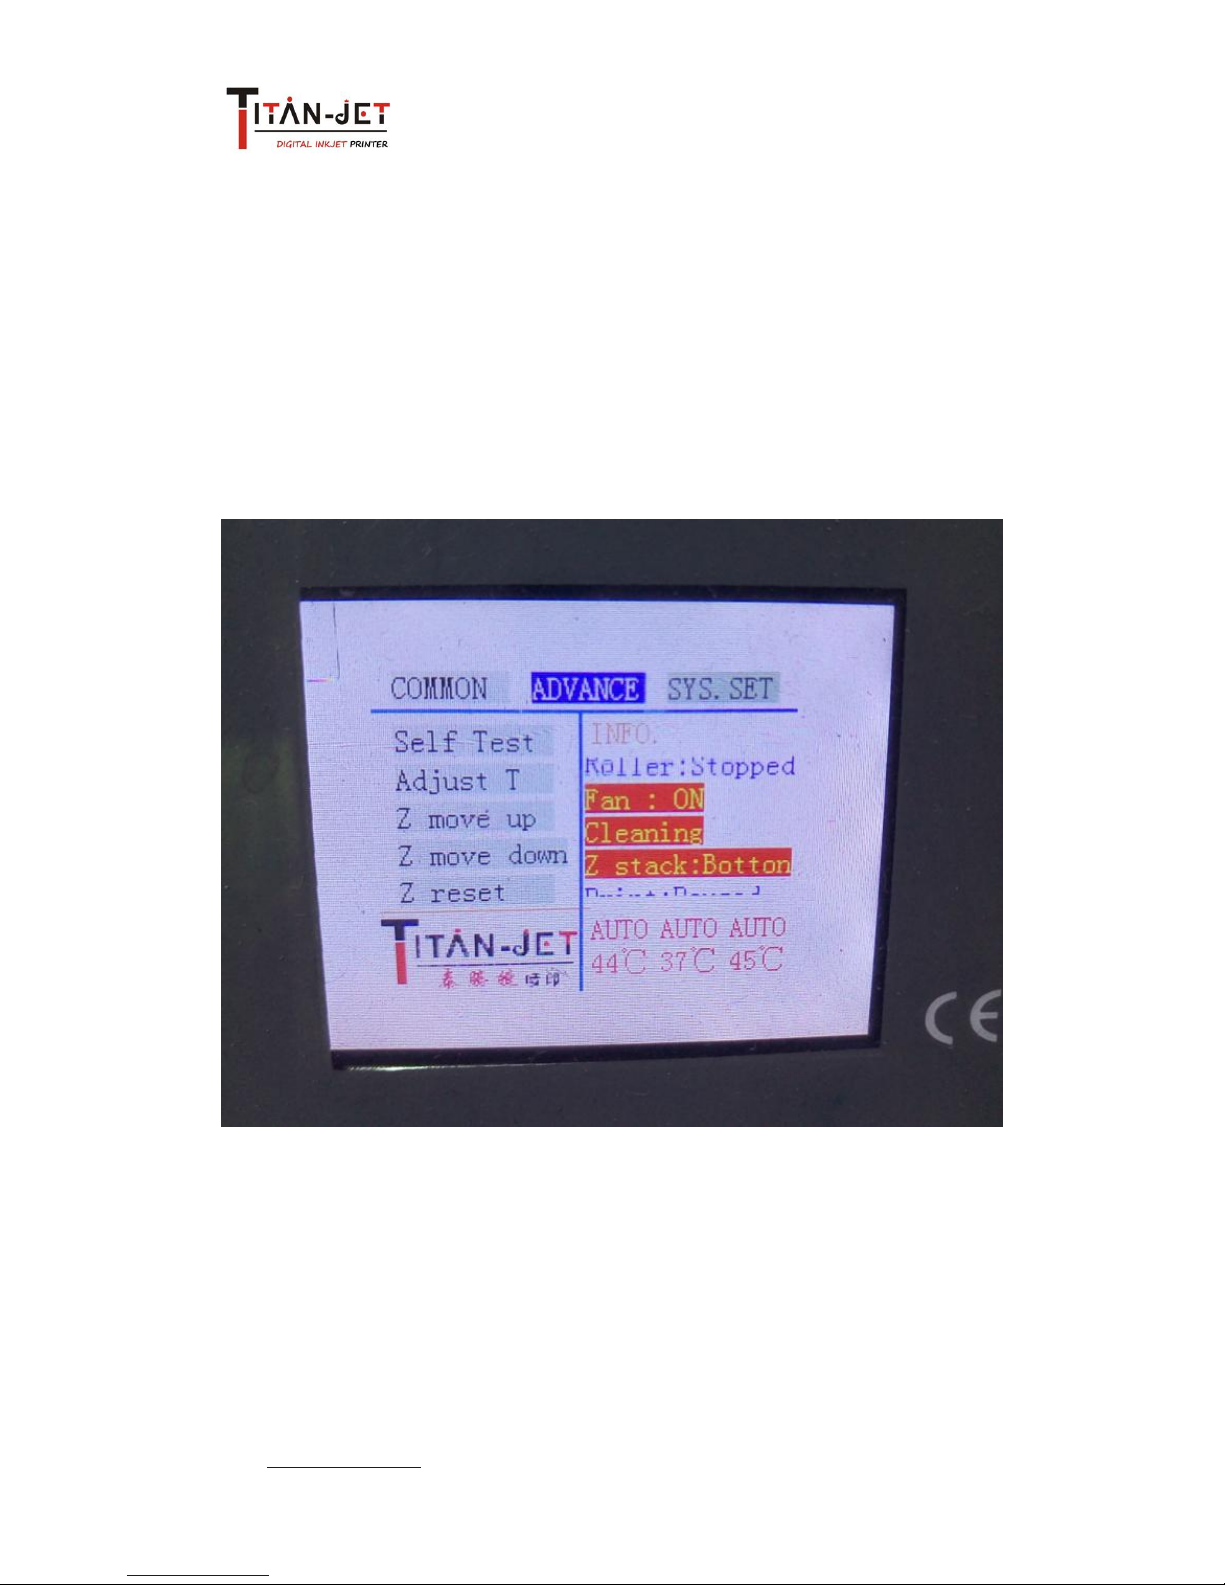
5. Inspecting the Panel and Start “Self Test”
Press Left or Right button to highlight “ADVANCE”, Press Enter to enter the
“ADVANCE” Menu, Press Up or Down to select “Self Test”.
Select these 3 options “Z move up” “Z move down” and “Z reset”, the ink station will
up or down.
Then select “Self Test”, and press “Enter” to start “Self Test”
Carriage and the Stepping will work.
The platform air-suck fans and LED lights will open automatically.
Let it runs several minutes.
Meanwhile, we can do the coming steps.
Http://www.titanjet.com.cn
_______________________________________19P2-R Installing Guide
Attn: Jesse Long
Email: jesse@titanjet.com.cn
7
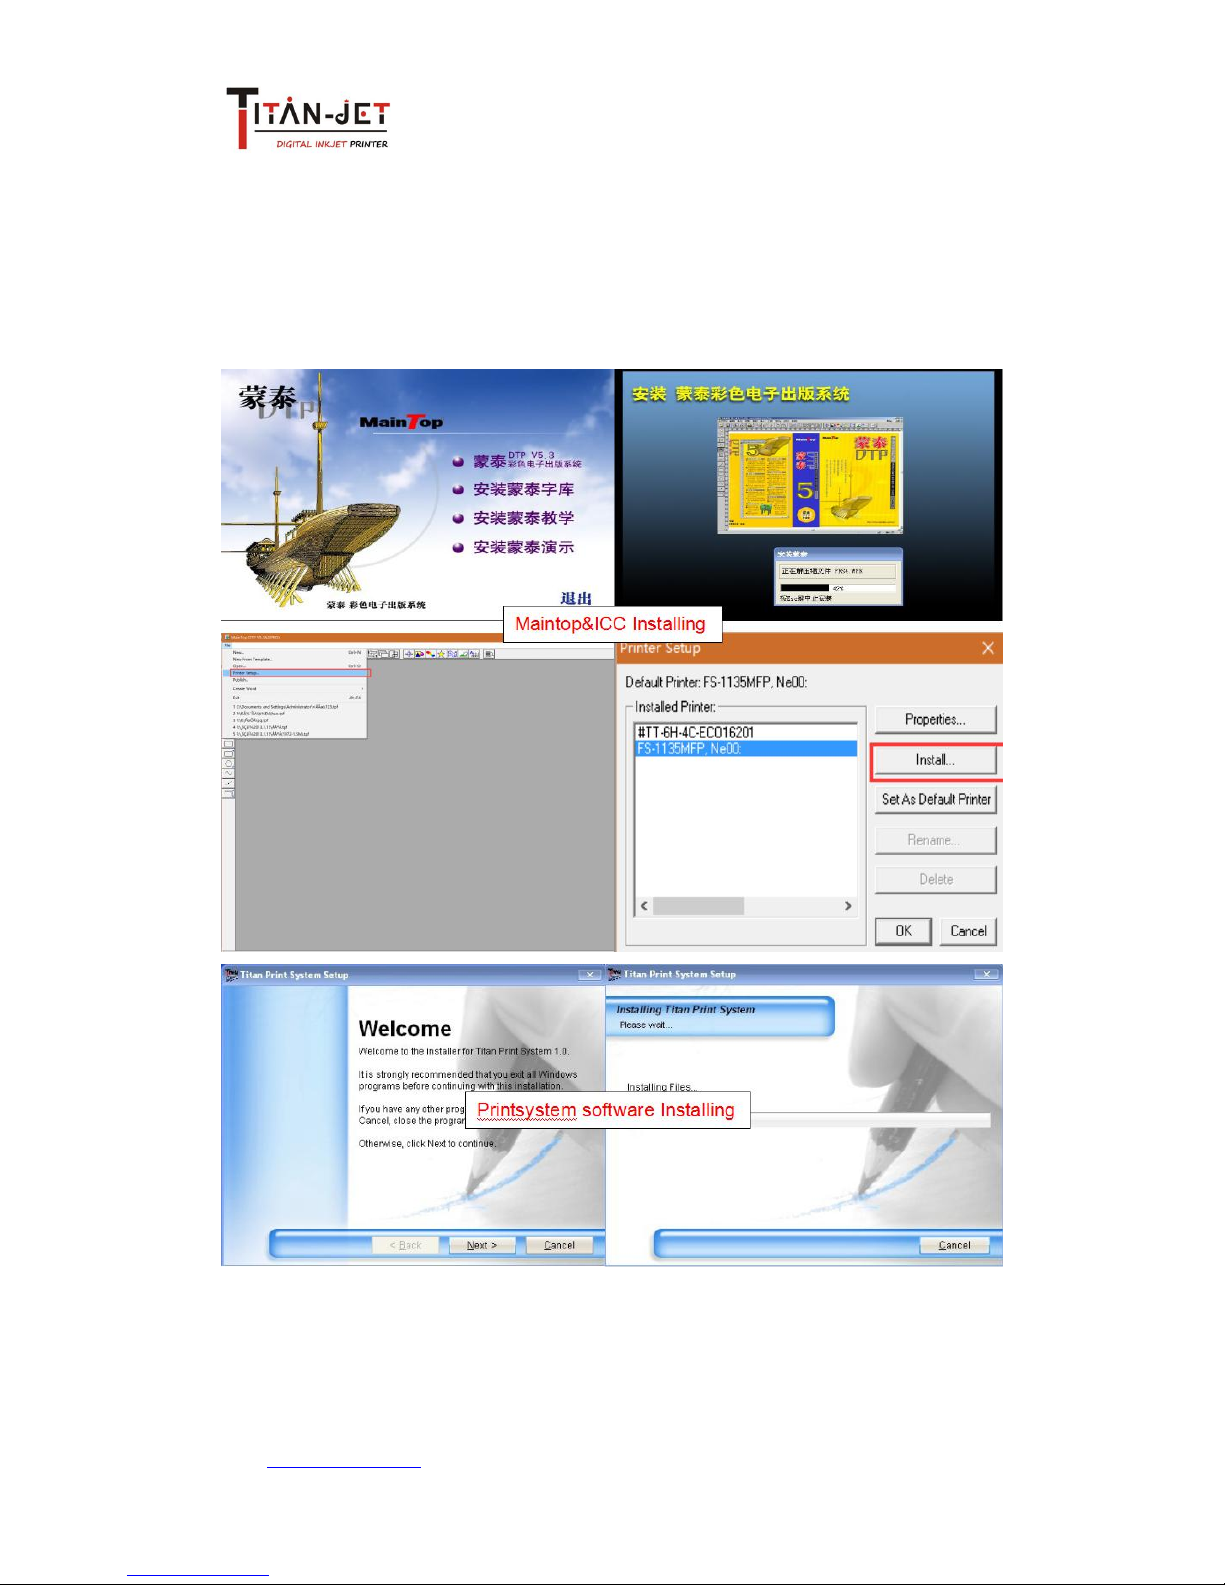
6. Software Installing.
RIP software, Detailed steps follow another Installing Guide.
PrintSystem software, Detailed steps follow another Installing Guide.
Make sure while installing software, there is NO USB connects between printer and
computer.
 Loading...