

Page 1
120
Volts/6
Am
ps/60Hz
Day/Night
Fan
Speed
Controller
Mercury 3
P
h
o
t
o
c
e
l
l
120
Volts/6
Am
ps/60Hz
Day/Night
Fan
Speed
Controller
Mercury 3
P
h
o
t
o
c
e
l
l
120
Volts/6
Am
ps/60Hz
Day/Night
Fan
Speed
Controller
Mercury 3
P
h
o
t
o
c
e
l
l
120
Volts/6
Am
ps/60Hz
Day/Night
Fan
Speed
Controller
Mercury 3
P
h
o
t
o
c
e
l
l
1
20
V
olts/6
A
m
p
s/6
0H
z
D
a
y
/
N
i
g
h
t
F
a
n
S
p
e
e
d
C
o
n
t
r
o
l
l
e
r
M
e
r
c
u
r
y
3
P
h
o
to
c
e
ll
1
20 V
olts/6
A
m
p
s/6
0
H
z
D
a
y
/
N
i
g
h
t
F
a
n
S
p
e
e
d
C
o
n
t
r
o
l
l
e
r
M
e
r
c
u
r
y
3
P
h
o
to
c
e
ll
Mercury 3
Day/Night Fan Speed Controller
Easy Guide
VANCOUVER, WASHINGTON U.S.A.
®
®
www.titancontrols.net
For technical assistance call us at
1-888-80-Titan or 1-888-808-4826.
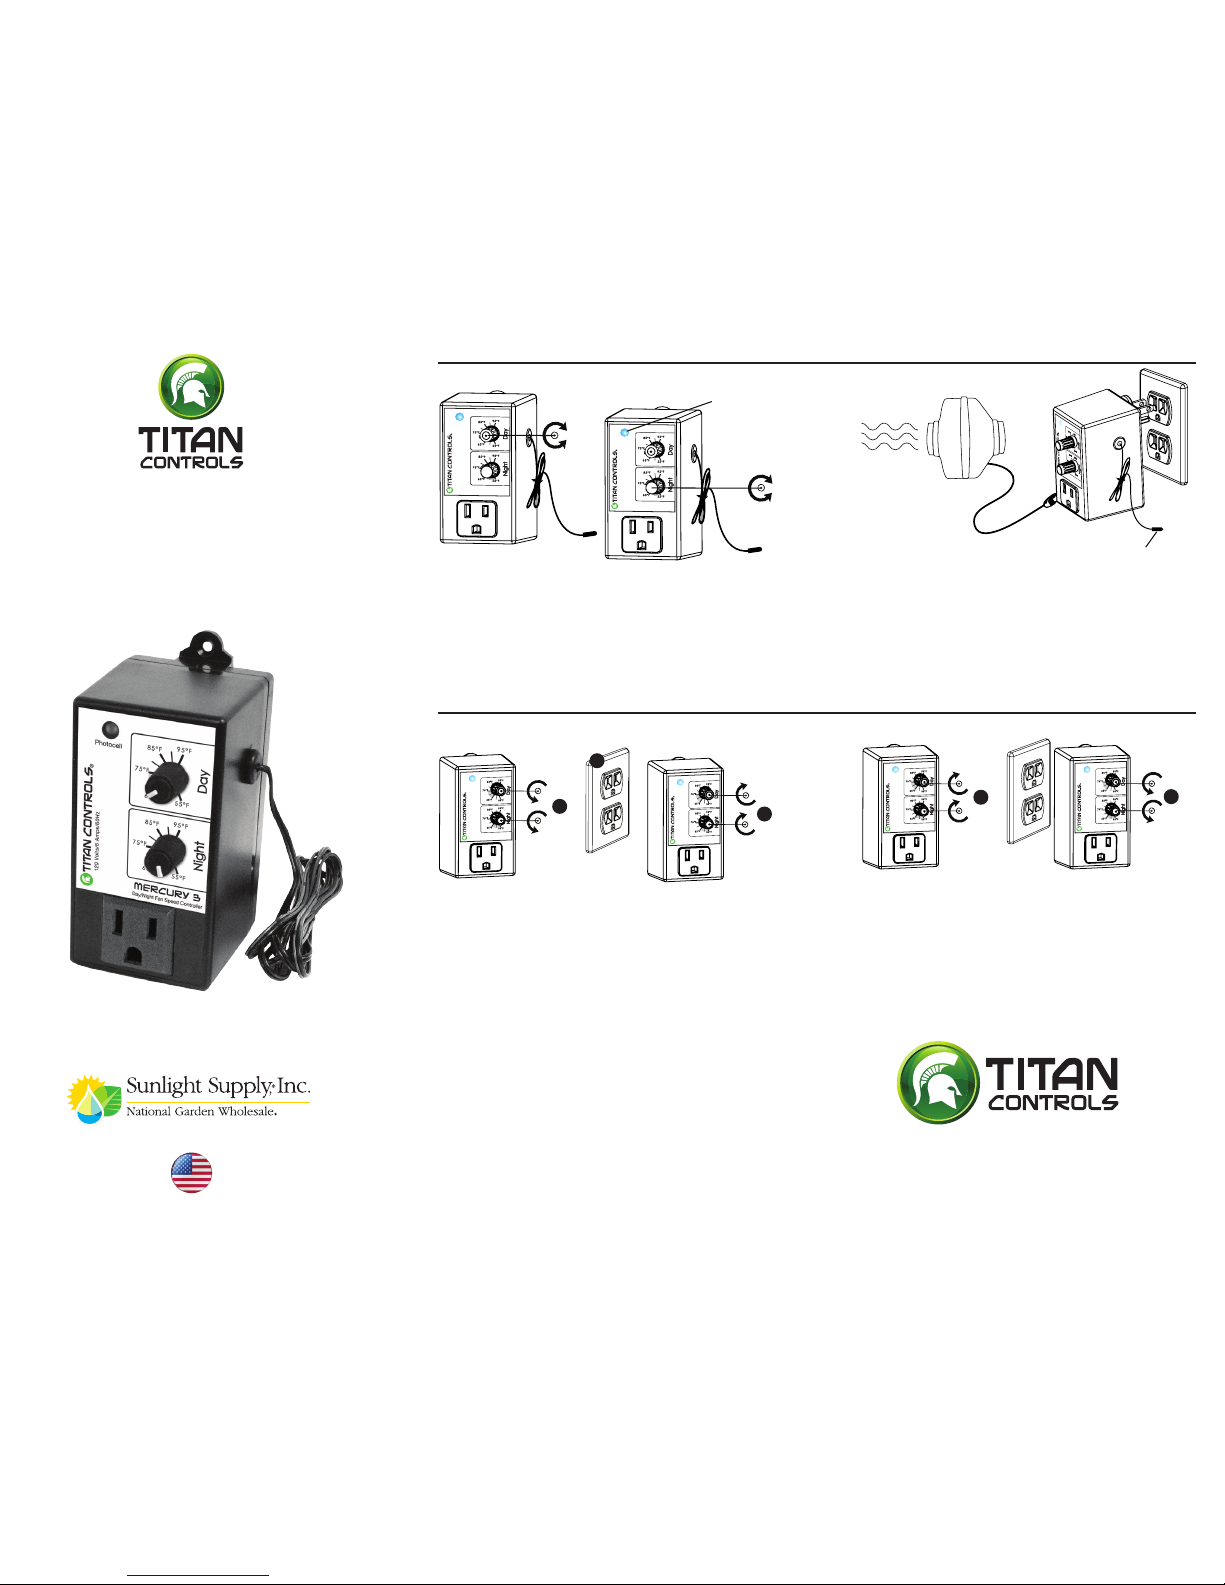
Step 1
Set values for Day and Night temperatures
Step 2
Plug into 120VAC outlet
Place the sensor at desired location
Connect the fan in the front panel outlet
Installation is now complete
OPTIONAL SETTINGS
INSTRUCTIONS – REV. B
Light sensor
(photocell)
Sensor
Day
temp
Night
temp
A
B
B
A
B
Change to Soft Control Mode
For medium variation and medium precision; use this mode when
equipment turns on and off repeatedly.
A. Set both values to minimum
B. Plug in, then set both values to maximum within 5 seconds
C. Follow instructions as shown in Step 1 & 2
Change to Tight Control Mode
For smaller variation and higher precision; use this mode for
best performance using correctly sized fan.
A. Set both values to maximum
B. Plug in, then set both values to minimum within 5 seconds
C. Follow instructions as shown in Step 1 & 2
Notes: This unit has been set to perform ‘soft control
mode’. For ‘tight control mode’, refer to Optional settings.
1
2
0
V
o
l
t
s
/
6
A
m
p
s
/
6
0
H
z
D
a
y
/
N
i
g
h
t
F
a
n
S
p
e
e
d
C
o
n
t
r
o
l
l
e
r
M
e
r
c
u
r
y
3
P
h
o
t
o
c
e
l
l
Page 2
120
Volts/6
Am
ps/60Hz
Day/Night
Fan
Speed
Controller
Mercury 3
P
h
o
t
o
c
e
l
l
120
Volts/6
Am
ps/60Hz
Day/Night
Fan
Speed
Controller
Mercury 3
P
h
o
t
o
c
e
l
l
120
Volts/6
Am
ps/60Hz
Day/Night
Fan
Speed
Controller
Mercury 3
P
h
o
t
o
c
e
l
l
120
Volts/6
Am
ps/60Hz
Day/Night
Fan
Speed
Controller
Mercury 3
P
h
o
t
o
c
e
l
l
1
20 V
olts/6
A
m
p
s/6
0
H
z
D
a
y
/
N
i
g
h
t
F
a
n
S
p
e
e
d
C
o
n
t
r
o
l
l
e
r
M
e
r
c
u
r
y
3
P
h
o
to
c
e
ll
1
20 V
olts/6
A
m
p
s/6
0
H
z
D
a
y
/
N
i
g
h
t
F
a
n
S
p
e
e
d
C
o
n
t
r
o
l
l
e
r
M
e
r
c
u
r
y
3
P
h
o
to
c
e
ll
Mercury 3
Controlador de la velocidad del ventilador
durante el día/la noche
Guía sencilla
VANCOUVER, WASHINGTON U.S.A.
®
®
www.titancontrols.net
Para obtener asistencia técnica, llámenos al
1-888-80-Titan o al 1-888-808-4826.
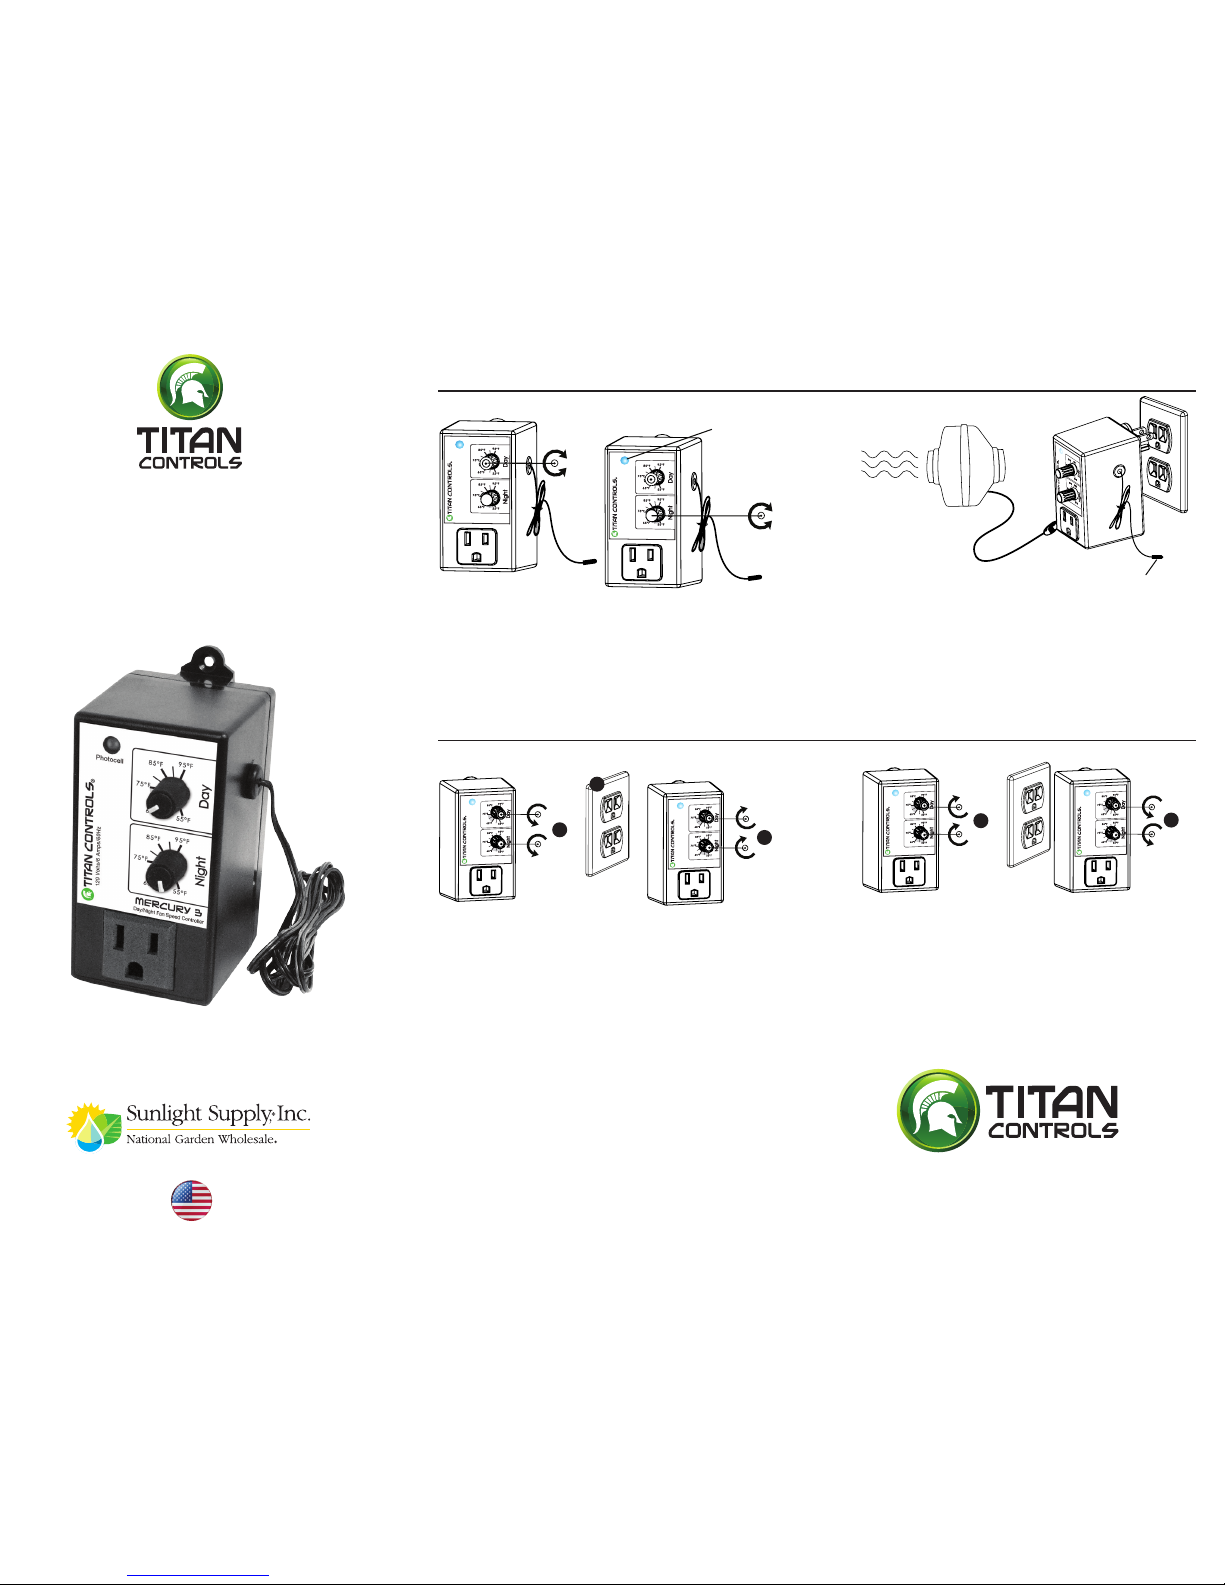
Paso 1
Fije los valores para las temperaturas de Día y Noche
Paso 2
Enchufe a un tomacorriente de 120 VAC
Coloque el sensor en el lugar deseado
Conecte el ventilador en el tomacorriente del panel delantero
La instalación se ha completado
CONFIGURACIONES OPCIONALES
INSTRUCCIONES - REV. B
Sensor de
luz (celda
fotoeléctrica)
Sensor
Temp.
día
Temp.
noche
A
B
B
A
B
Cambio a Modo de control suave
Para una variación media y una precisión media; utilice este
modo cuando el equipo se enciende y se apaga repetidamente.
A. Fije ambos valores al mínimo
B. Enchufe, luego je ambos valores al máximo en los
5 segundos siguientes
C. Siga las instrucciones descritas en el Paso 1 y 2
Cambio a Modo de control ajustado
Para una variación más pequeña y una precisión más alta;
utilice este modo para obtener un mejor rendimiento utilizando
un ventilador del tamaño correcto.
A. Fije ambos valores al máximo
B. Enchufe, luego je ambos valores al mínimo en
los 5 segundos siguientes
C. Siga las instrucciones descritas en el Paso 1 y 2
Notas: Esta unidad ha sido configurada para funcionar en “modo de
control suave”. Para obtener información sobre el “modo de control
ajustado”, consulte la sección de Configuraciones opcionales.
1
2
0
V
o
l
t
s
/
6
A
m
p
s
/
6
0
H
z
D
a
y
/
N
i
g
h
t
F
a
n
S
p
e
e
d
C
o
n
t
r
o
l
l
e
r
M
e
r
c
u
r
y
3
P
h
o
t
o
c
e
l
l
 Loading...