

Page 1
Mercury® 2
Fan Speed Controller
Easy Guide
VANCOUVER, WASHINGTON U.S.A.
®
®
www.titancontrols.net
For technical assistance call us at
1-888-80-Titan or 1-888-808-4826.
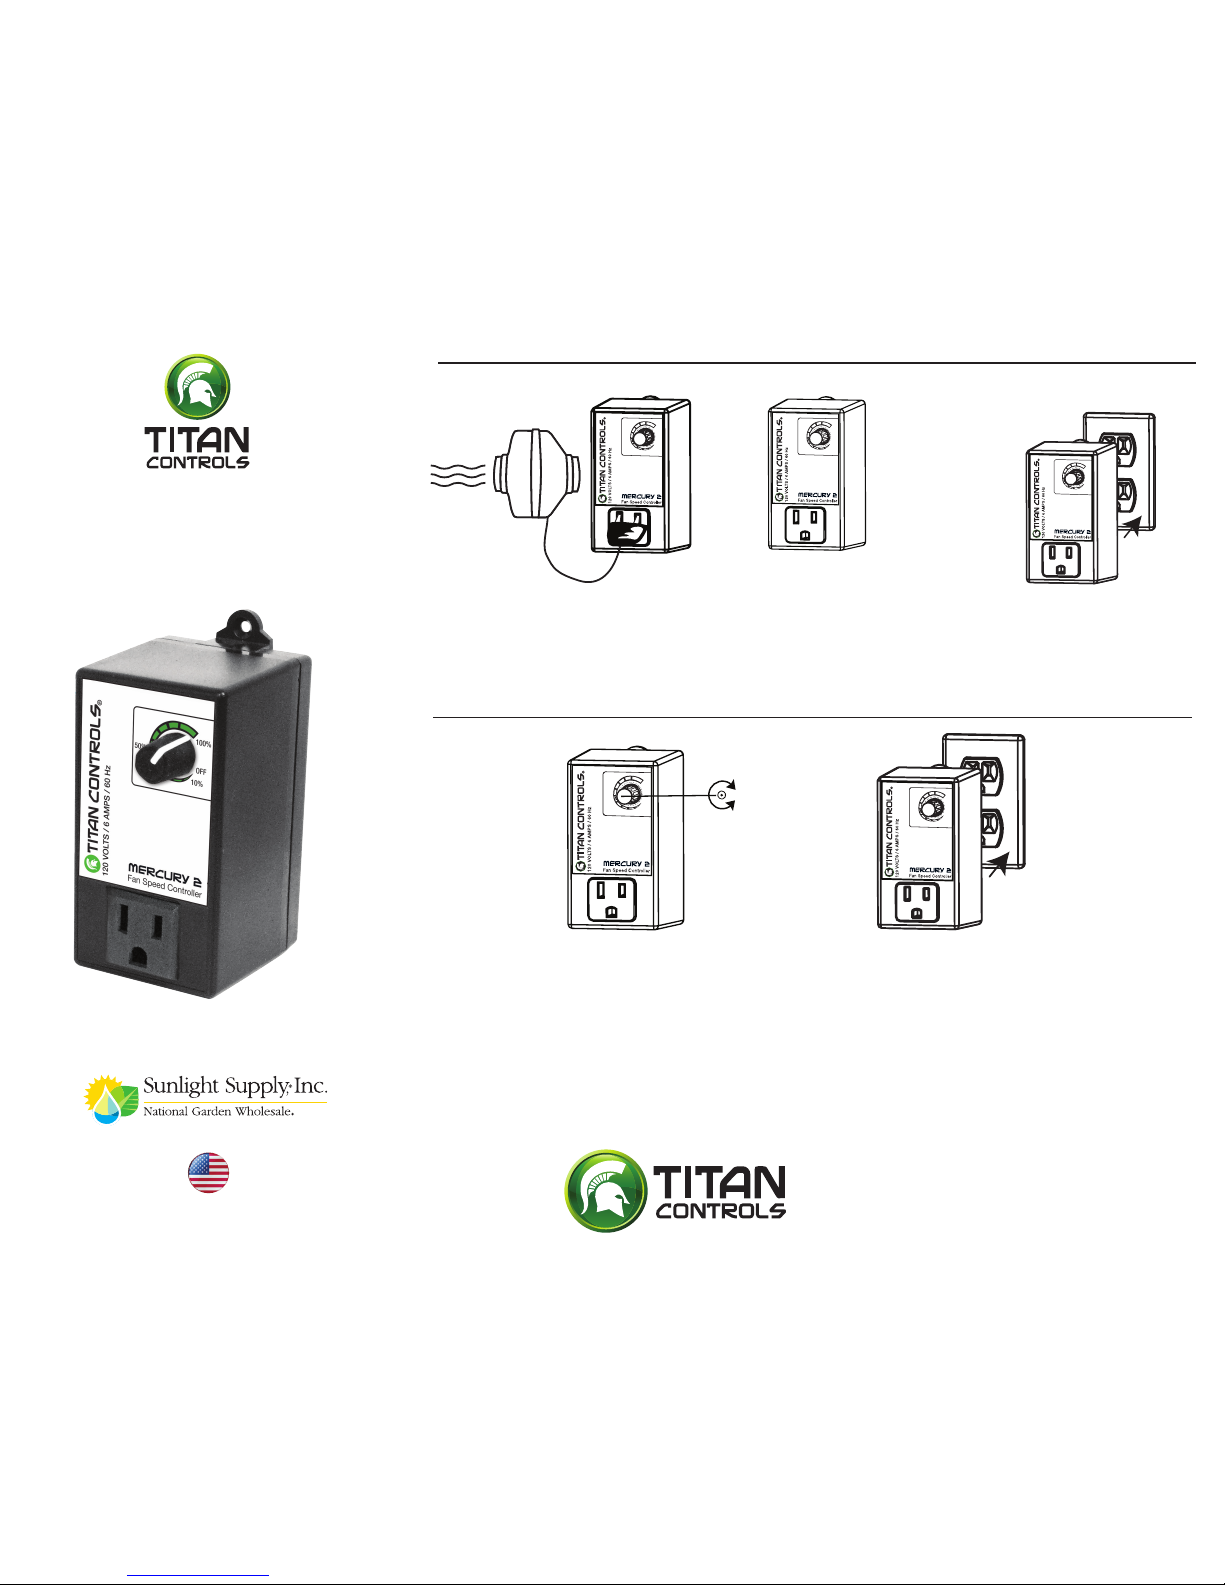
Step 1
Plug fan into 120 Volt outlet
on the front of the Mercury
®
2.
Step 2
Set your preferred fan setting
on the Mercury® 2.
OPTIONAL SETTINGS
INSTRUCTIONS – REV. B
“Fire-Up” Feature
The customer can easily enable or disable the “Fire-Up” feature by following
the instructions below. The “Fire-Up” feature will activate your fan at 100%
for 2 seconds and then reduce the speed to match your preferred setting
whenever your fan is activated for the rst time or if you experience a power
outage. This improves the start up of your fan and extends the life of your
fan. It is recommended that you enable the ‘Fire-Up’ feature if you set your
Mercury
®
2 at slow speeds. The default setting from the factory enables the
“Fire-Up” feature.
Note: This unit has been set to perform in the
“Fire-Up” position from the factory.
100%
OFF
10%
50%
100%
OFF
10%
50%
100%
OFF
10%
50%
Step 3
Plug the Mercury® 2 into a 120 Volt wall outlet and fan
should be activated at your preferred setting.
Installation is now complete.
The “Fire-up” feature can be activated by the customer by:
• Unplugging the Mercury
®
2 and setting the knob to “100%”.
(Diagram 2)
• Then plug the Mercury
®
2 into your 120 volt outlet, turn to 10%
and then turn to 100% within three (3) seconds. (Diagram 3)
• To verify the setting, plug your fan into the Mercury
®
2, then
unplug the Mercury
®
2 and plug back in to see (or hear) the effect
of the “Fire-Up” feature in action.
DIAGRAM 1
DIAGRAM 2 DIAGRAM 3
100%
OFF
10%
50%
DIAGRAM 2
100%
100%
OFF
10%
50%
DIAGRAM 3
Page 2
Mercury® 2
Controlador de velocidad del ventilador
Guía sencilla
VANCOUVER, WASHINGTON U.S.A.
®
®
www.titancontrols.net
Para obtener asistencia técnica, llámenos al
1-888-80-Titan o al 1-888-808-4826.
CONFIGURACIONES OPCIONALES
INSTRUCCIONES - REV. B
Notas: Esta unidad está configurada de fábrica para funcionar
en la posición de encendido gradual. Importante: Diseñado para
usar con motores de inducción de 120 voltios de una fase que no
superen los 750 vatios.
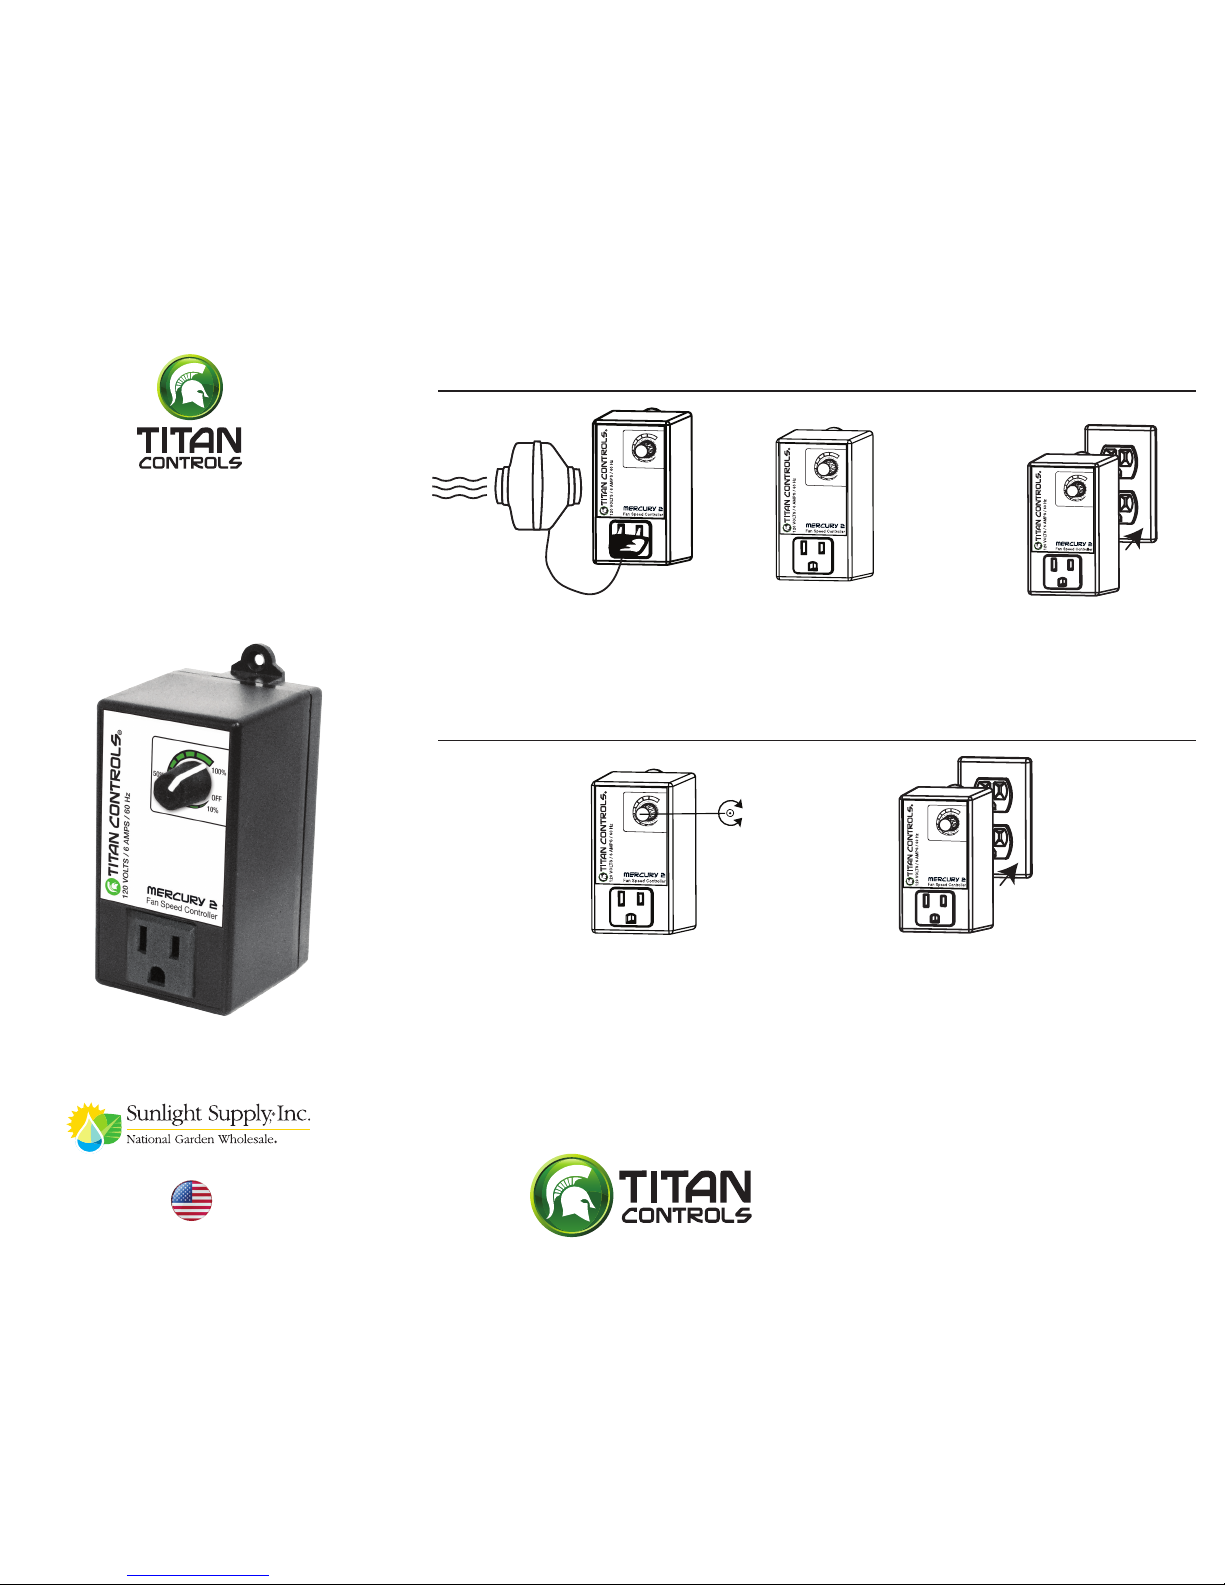
Paso 1
Enchufe el ventilador en el tomacorriente
de 120 voltios que se encuentra en el
frente del Mercury® 2.
Paso 2
Seleccione el valor de ventilación que preera en el Mercury® 2 (Diagrama 1)
100%
OFF
10%
50%
100%
OFF
10%
50%
Paso 3
Enchufe el Mercury 2 en un tomacorriente de
120 voltios de una fase. El ventilador debería
encenderse en el valor que usted seleccionó.
La instalación se ha completado
DIAGRAMA 1
DIAGRAMA 2 DIAGRAMA 3
CARACTERISTICA DE ENCENDIDO
El cliente puede habilitar o deshabilitar fácilmente la característica
de encendido gradual siguiendo las instrucciones a continuación. La
característica de encendido gradual se activa al encender el ventila
dor por primera vez o después de cortes de luz. Cuando está habilitada, pone en marcha el ventilador al 100 % durante 2 segundos y,
a continuación, reduce la velocidad hasta alcanzar la que se jó en
el controlador. De esta manera se mejora el encendido y se prolonga
la vida útil del ventilador. Es recomendable habilitar la función de
encendido gradual cuando je velocidades bajas en el Mercury
®
2. La unidad viene programada de fábrica con la característica de
encendido gradual habilitada.
El cliente puede activar la función de encendido gradual siguiendo
estos pasos:
• Desenchufe el Mercury
®
2 y gire la perilla a la posición “100 %”.
(Diagrama 2)
• Luego enchufe el Mercury
®
2 en un tomacorriente de 120 voltios,
gire la perilla a la posición “10 %” y, en un lapso no mayor a tres
(3) segundos, vuelva a girarla a la posición “100 %”. (Diagrama 3)
• Para vericar que haya quedado correctamente congurado,
enchufe el ventilador en el Mercury
®
2, luego desenchufe el
Mercury
®
2 y vuelva a enchufarlo para ver (u oír) el efecto del
encendido gradual en funcionamiento.
100%
OFF
10%
50%
DIAGRAMA 2
100%
OFF
10%
50%
DIAGRAMA 3
100%
100%
OFF
10%
50%
 Loading...