

Page 1
HPO High Performance Option Installation rev 2.1 GokartsUSA.com
High Performance Option
Honda GX160/200/clone
Titan TX200S
Predator
Superior Performance
GTC Industries
Titan TX200S Powersport 196cc Engine Based
uponHonda GX200 design, fit our kits and can be
used as a replacement engine for most American
Made Gokarts and Minibikes made over the last
40 years. Performance parts available to boost
horsepower all the way up to 26hp.
with HPO kit installed
Mikuni 22MM Carburetor
Mikuni Intake, Curved or Inverted
Exhaust Header, Stinger or Fatty
NOTE: If you are installing this engine on a
minibike, this engine is 14" tall. Measure your
minibike to make sure it will fit before ordering. If
you are ordering this engine for use on one of our
minibike kits, there may be an issue whereby the
gas cap is difficult to remove. We recommend
Tank Removal and installation of our 7" or 11"
Cylindical Gas Tanks with Engine Mount
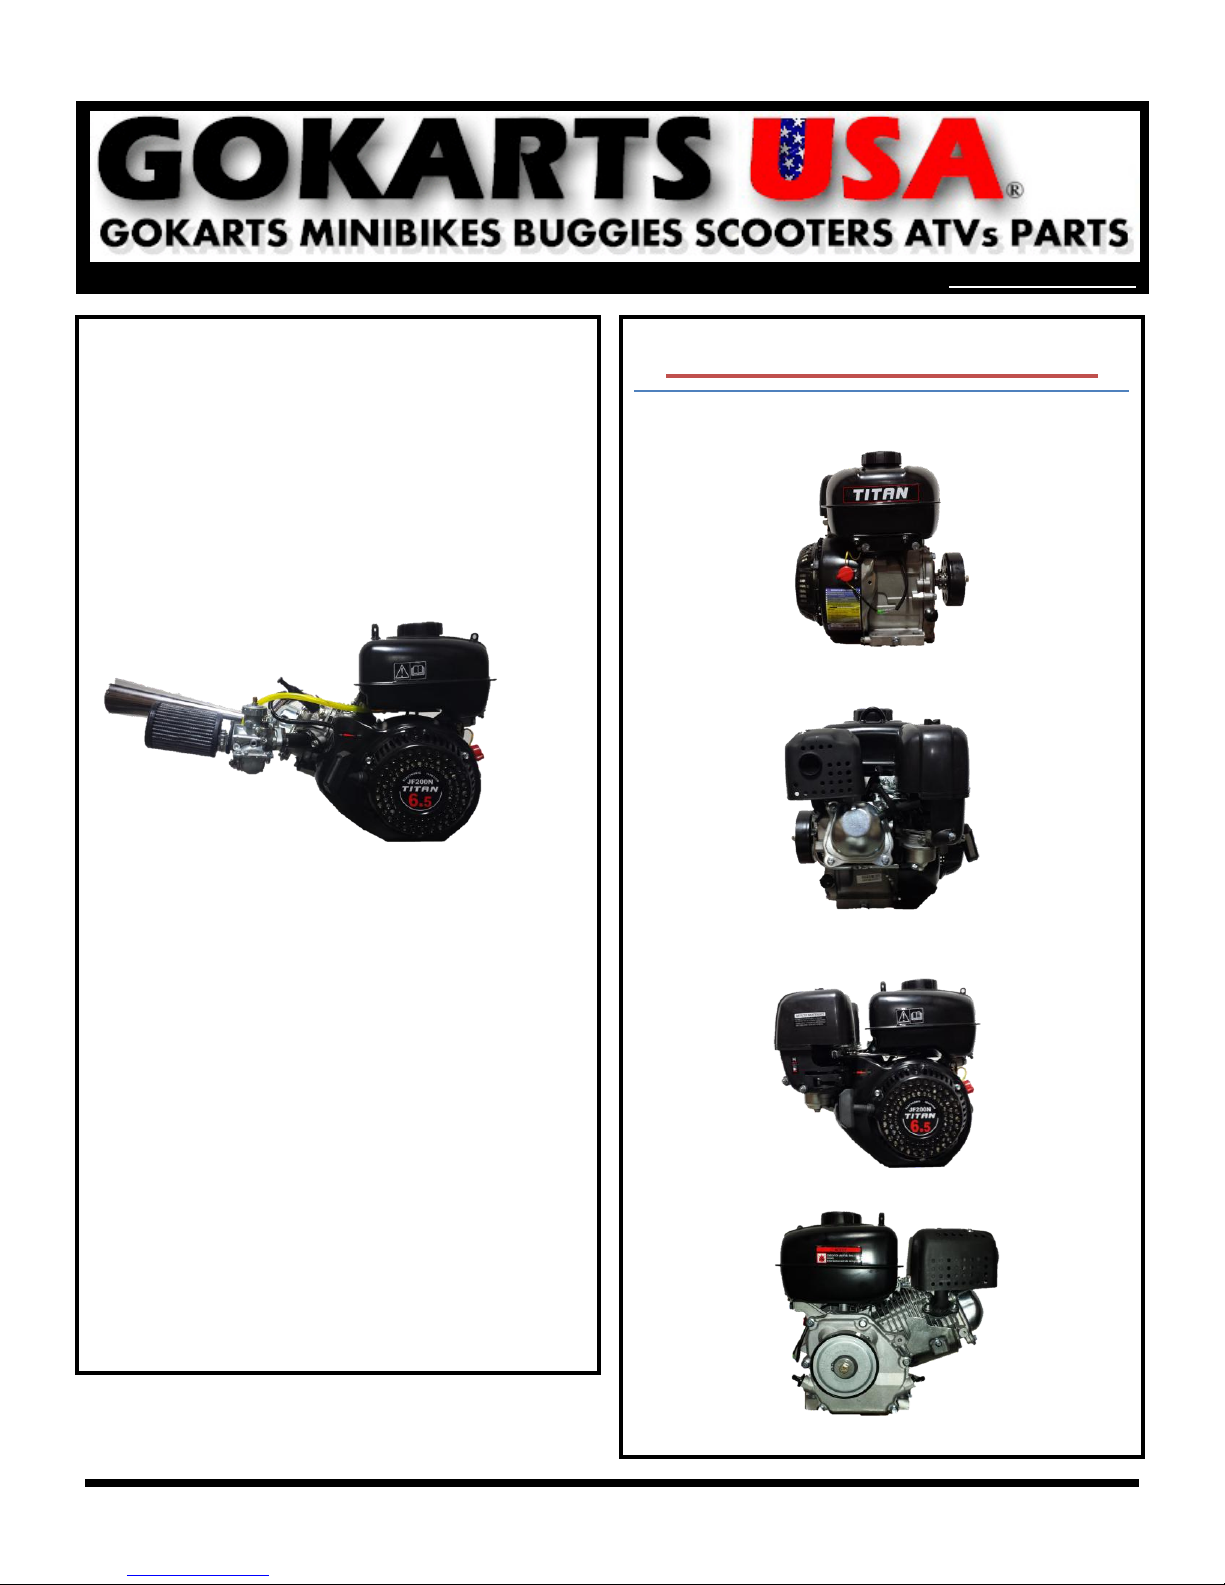
TITAN TX200S STOCK
Front View
Rear View
Right View
Left View
GokartsUSA.com HPO High Performance Option Installation Honda GX, Titan TX200S 1
Page 2
Engine Speciations:
Model
TX200S
Engine type
4-stroke 25° inclined single
cylinder
Bore×Stroke
68mm × 45mm
Displacement
196cc
Compression
ratio
8.5/1
Horsepower
6.5HP/3600rpm
Max. Torque
13Nm/2500rpm
Ignition
Non-contact transistorized
ignition(TCI)
Starter
Recoil hand-operated
Air cleaner
Semi-dry, oil bath, dual, double
silent cyclone
Fuel tank
capacity
3.6 L
Fuel
Consumption
290g/HP-hour
Engine oil
capacity
0.6 L
Dimensions
L:12-3/4", W:11.0", H:14-3/4"
Crankshaft: 3/4" x 2-7/16"
Dry weight
35 lbs.
Deconstruction Instructions
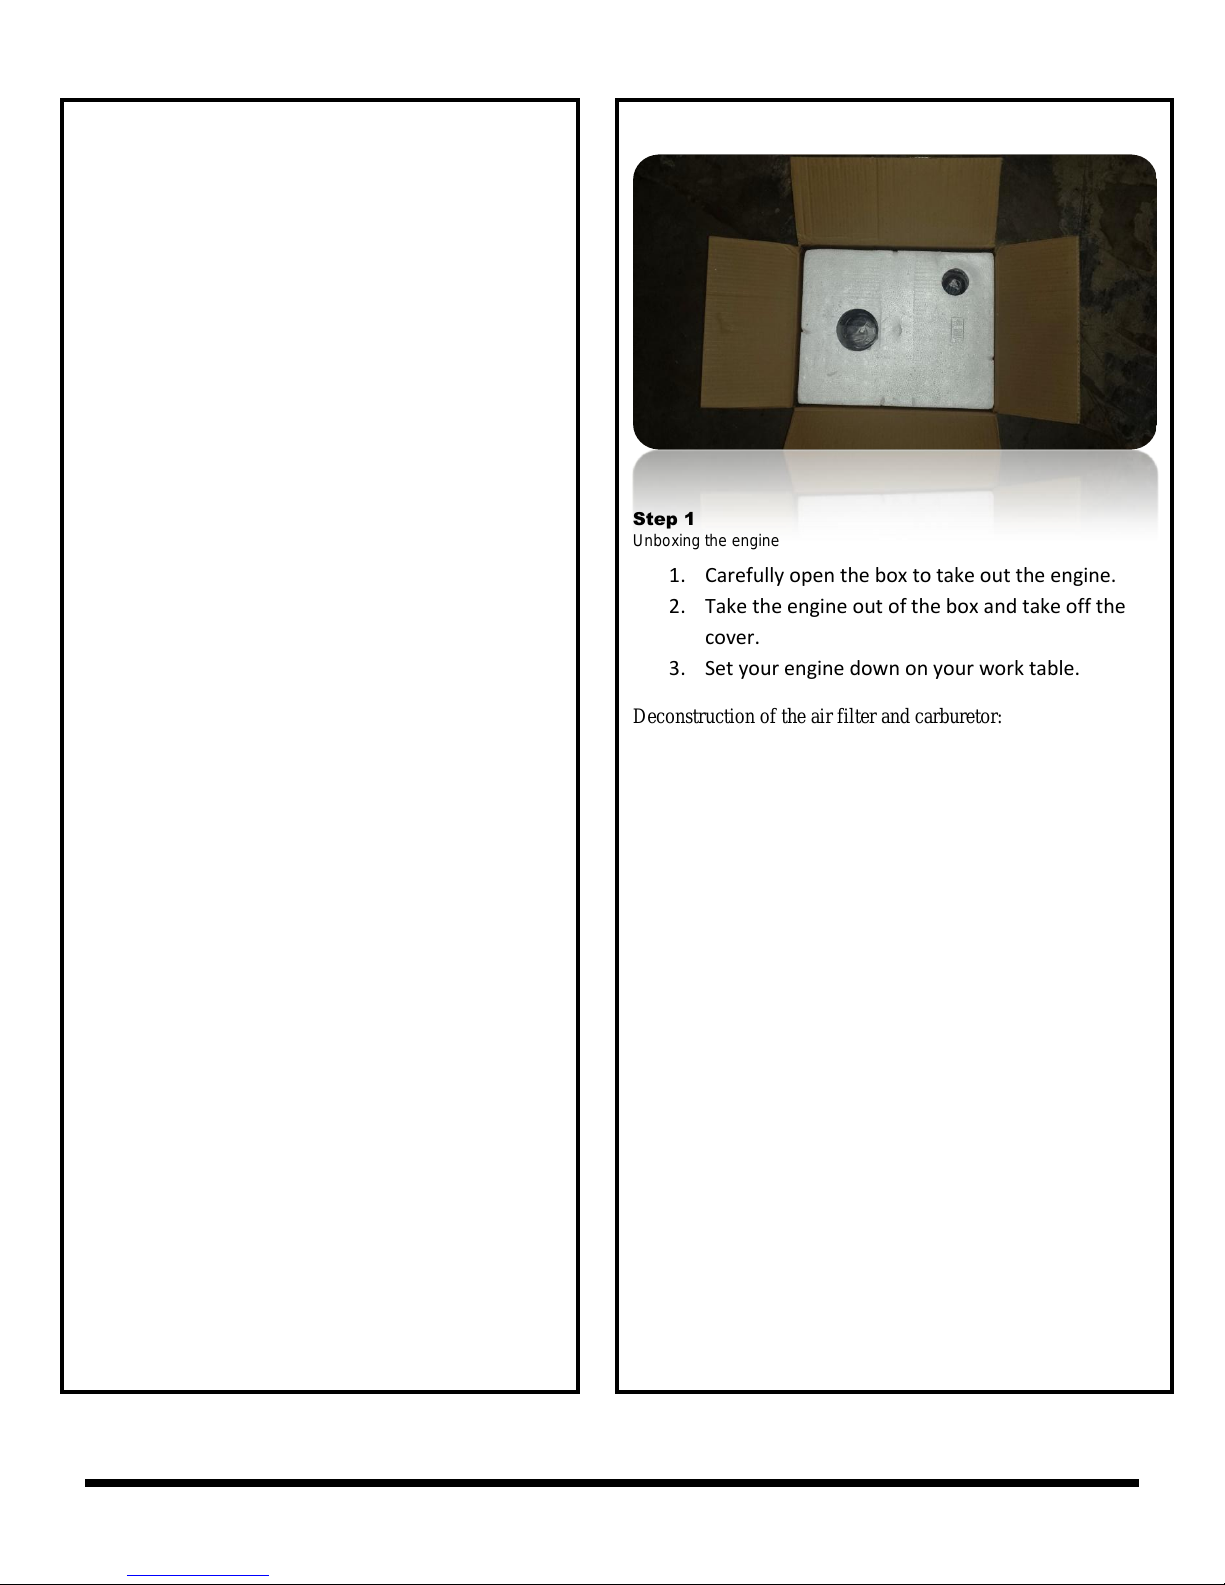
Step 1
Unboxing the engine
1. Carefully open the box to take out the engine.
2. Take the engine out of the box and take off the
cover.
3. Set your engine down on your work table.
Deconstruction of the air filter and carburetor:
Step one; carefully take off the gas tank with a SAE
5/16” or 8MM and SAE 3/8” or 10MM socket and a
3/8” ratchet (Standard American Edition). The gas
tank is attached to engine with 3 bolts. The front 2
bolts require you to use the 3/8” socket and the rear
bolt requires you to use the 5/16” socket. Lift up the
gas tank and set it aside for now.
Step two; take off the wing nut on top of the air filter.
Next lift up the air cleaner cover, then loosen the
second wing nut and remove the foam filter. The last
step is to remove the gasket and the grid cover.
GokartsUSA.com HPO High Performance Option Installation Honda GX, Titan TX200S 2
Page 3
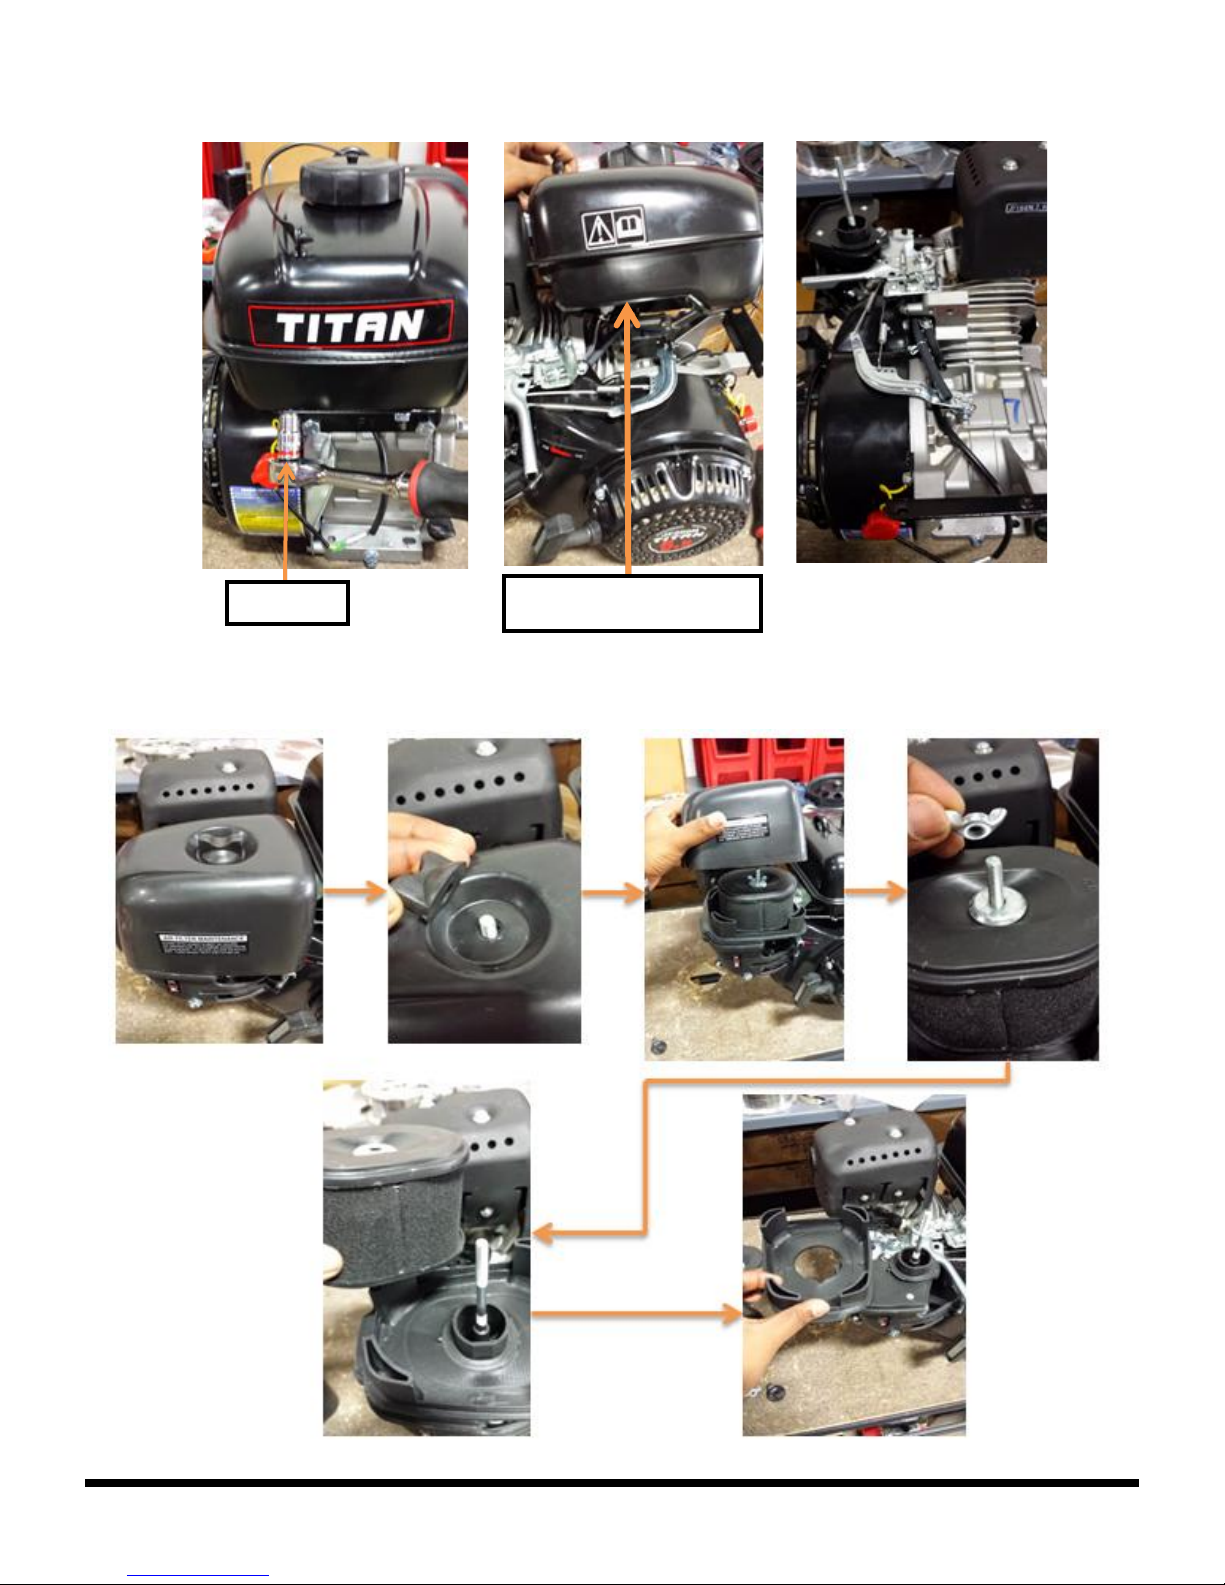
Step 1 Diagram:
3/8 Socket
Lift up the gas tank and set
Step 2 Diagram:
GokartsUSA.com HPO High Performance Option Installation Honda GX, Titan TX200S 3
Page 4
Step 3
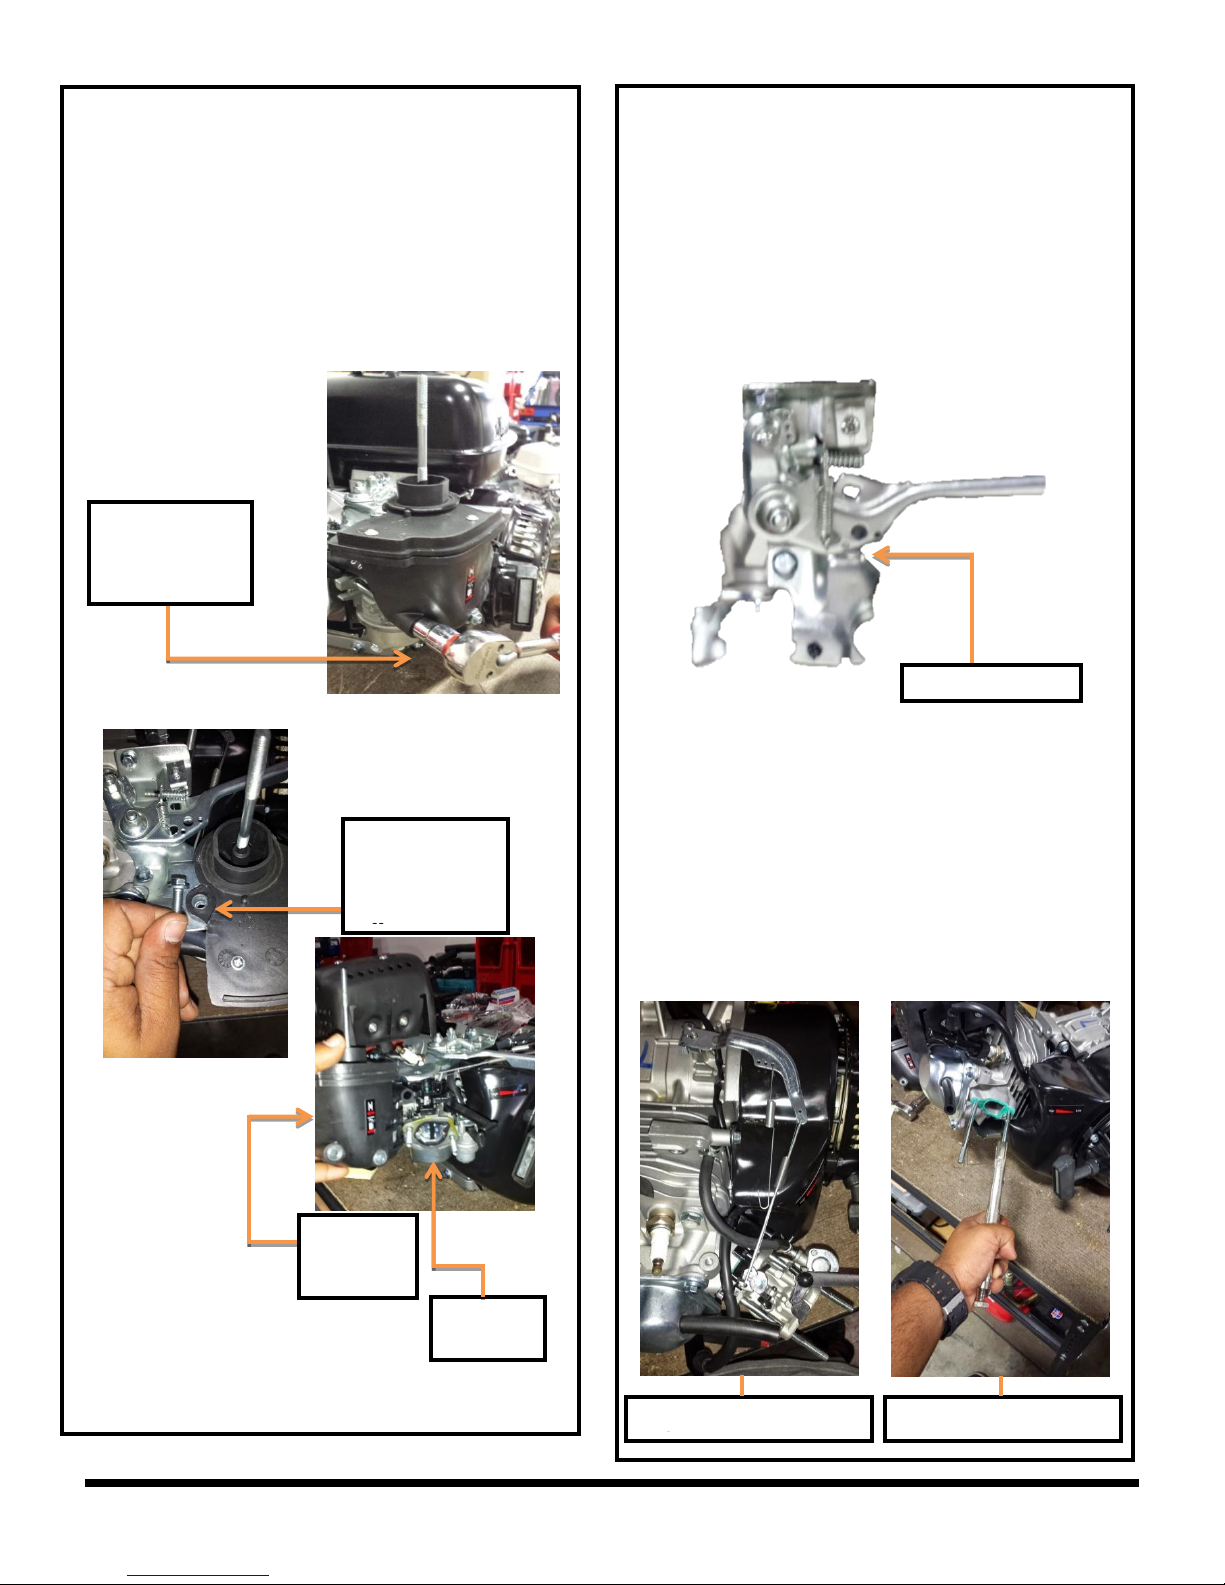
Choke cover removal:
Step three; using the 3/8” socket and ratchet
remove the fuel lever and choke lever cover.
After the bolts have been loosened, move the fuel
lever and choke lever all the left so that both of
them are in the off position.
Step 4
Throttle-lever removal:
Step four; now it’s time to take off the throttle
lever arm. The lever is attached to the engine
with 2 (5/16” bolts). Remove the spring and lift up
the lever (make sure that you do not remove the
governor or it will drop down into your engine
cylinder).
Step 5
Carburetor removal:
Step five; after the throttle lever has been
removed, you can now remove the carburetor
and set it aside for now. Now you see that there
are two 4.5” bolts. To remove them use a pair of
vice grips. Clamp down on the bolt with vice grip,
make sure that the vice grip is clamped on the
bolt at 1.5” in. Start applying pressure to remove
the bolt. Repeat the same process on the other
bolt.
Use a 3/8”
socket with a
3/8” ratchet
Fuel lever
and choke
cover
Stock
carbureto
You will need
to remove this
bolt in order to
take the cover
Pull forward upon the
Twist to the left
GokartsUSA.com HPO High Performance Option Installation Honda GX, Titan TX200S 4
Page 5
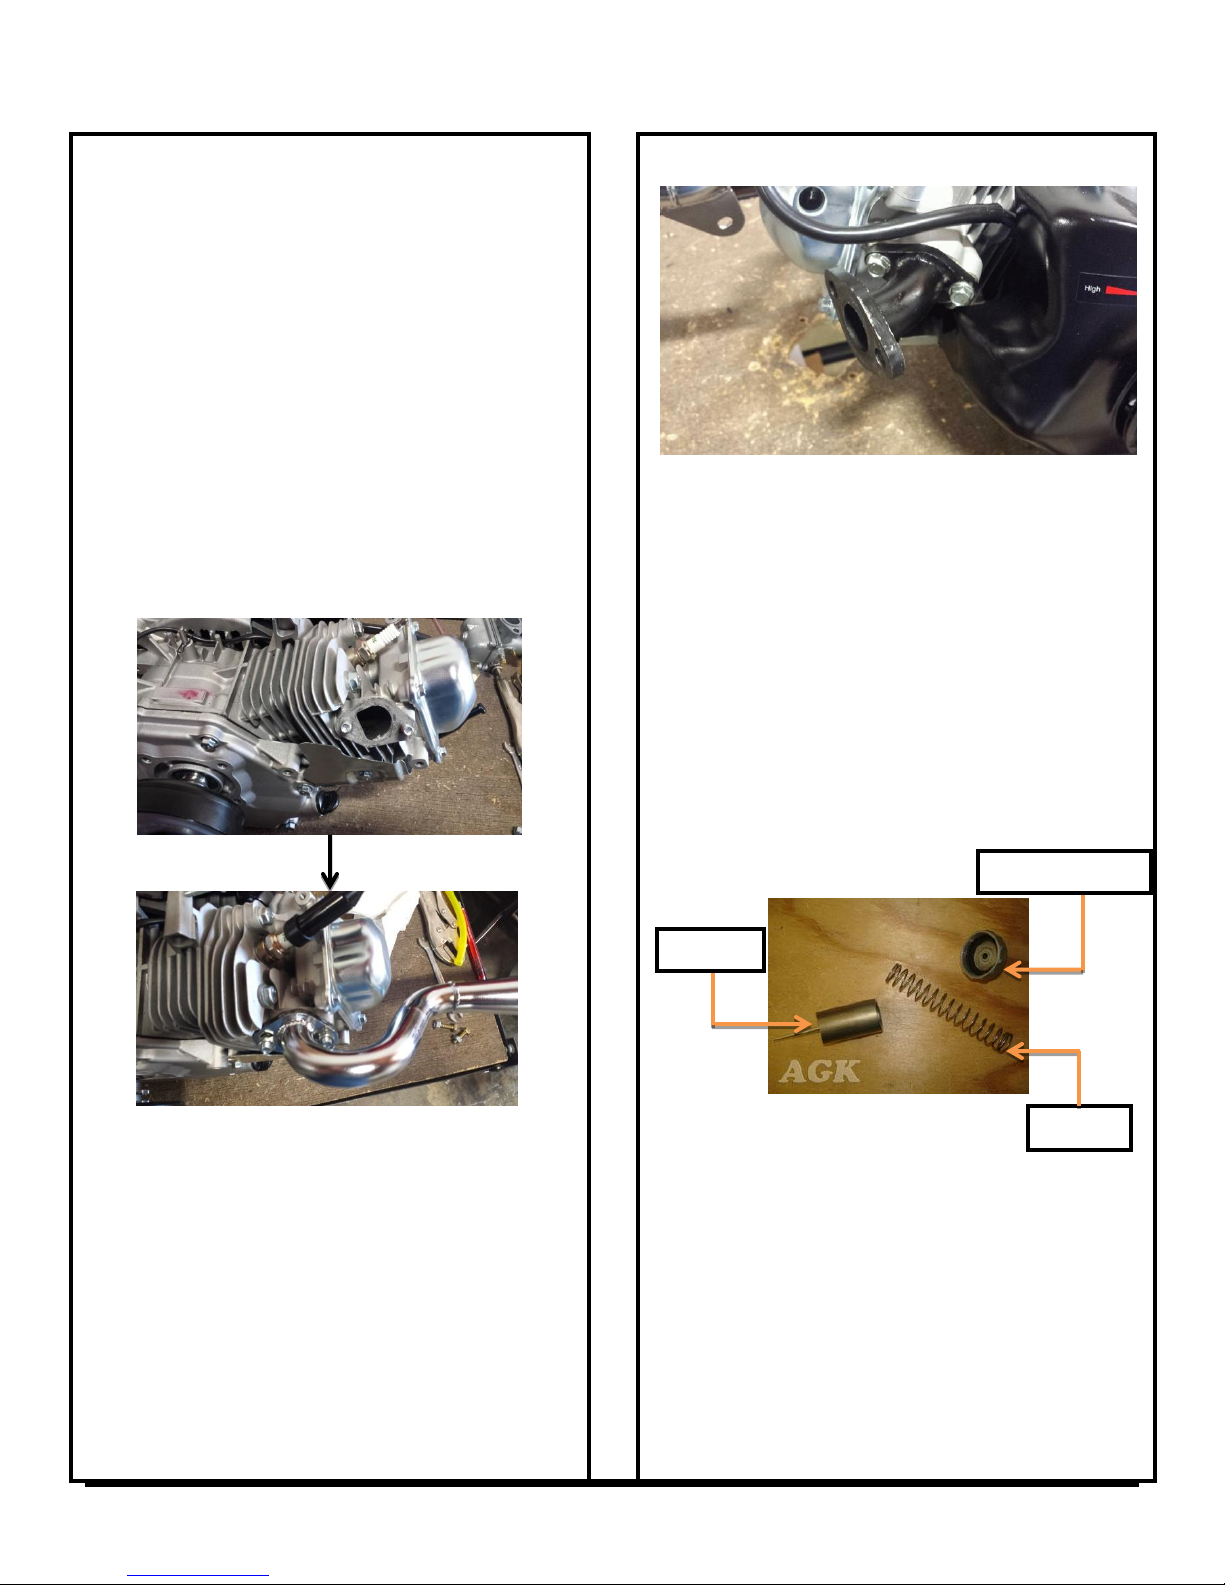
Installing the Mikuni Carburetor and
Exhaust Pipe:
Now that you have removed the exhaust and the carburetor,
it is time to install the HPO kit on your engine.
Step 1
Installing the exhaust pipe:
Step one; attach your Stinger or Fatty exhaust to
the engine block and start to tighten the 1.5” nut
on to the exhaust. Stop tightening it when you
feel the nut is snug on the bolt.
Step 2
Installing the exhaust pipe:
Step two; now it is time install your new Mikuni
carburetor. First install the exhaust manifold to
the intake. Use two 3/8” bolts to attach the
manifold to the intake, tighten until you feel it is
snug.
Step 2 Diagram:
Step 3
Installing the exhaust pipe
Step three; now it’s time to install the throttle
cable to your carburetor. To attach the throttle
cable, make sure that the cable is already set
place on your bike. Now unscrew the cap on the
carb and take out the spring. Now that you have
removed the cap and the spring you will be able
to see the slide inside the carburetor. Reach in
with your index finger and pull out the slide.
Now push the needle jet out threw the slide.
Notice that there are five notches at the top of
the needle where the clip can be adjusted. You
can adjust the clip by putting it on the desired
setting. The bottom notch would be the richest
air to fuel ratio and the top notch would be the
leanest setting. But for the base line test adjust
the clip to its center notch.
Slide
Spring
Carburetor Cap
GokartsUSA.com HPO High Performance Option Installation Honda GX, Titan TX200S 5
Page 6
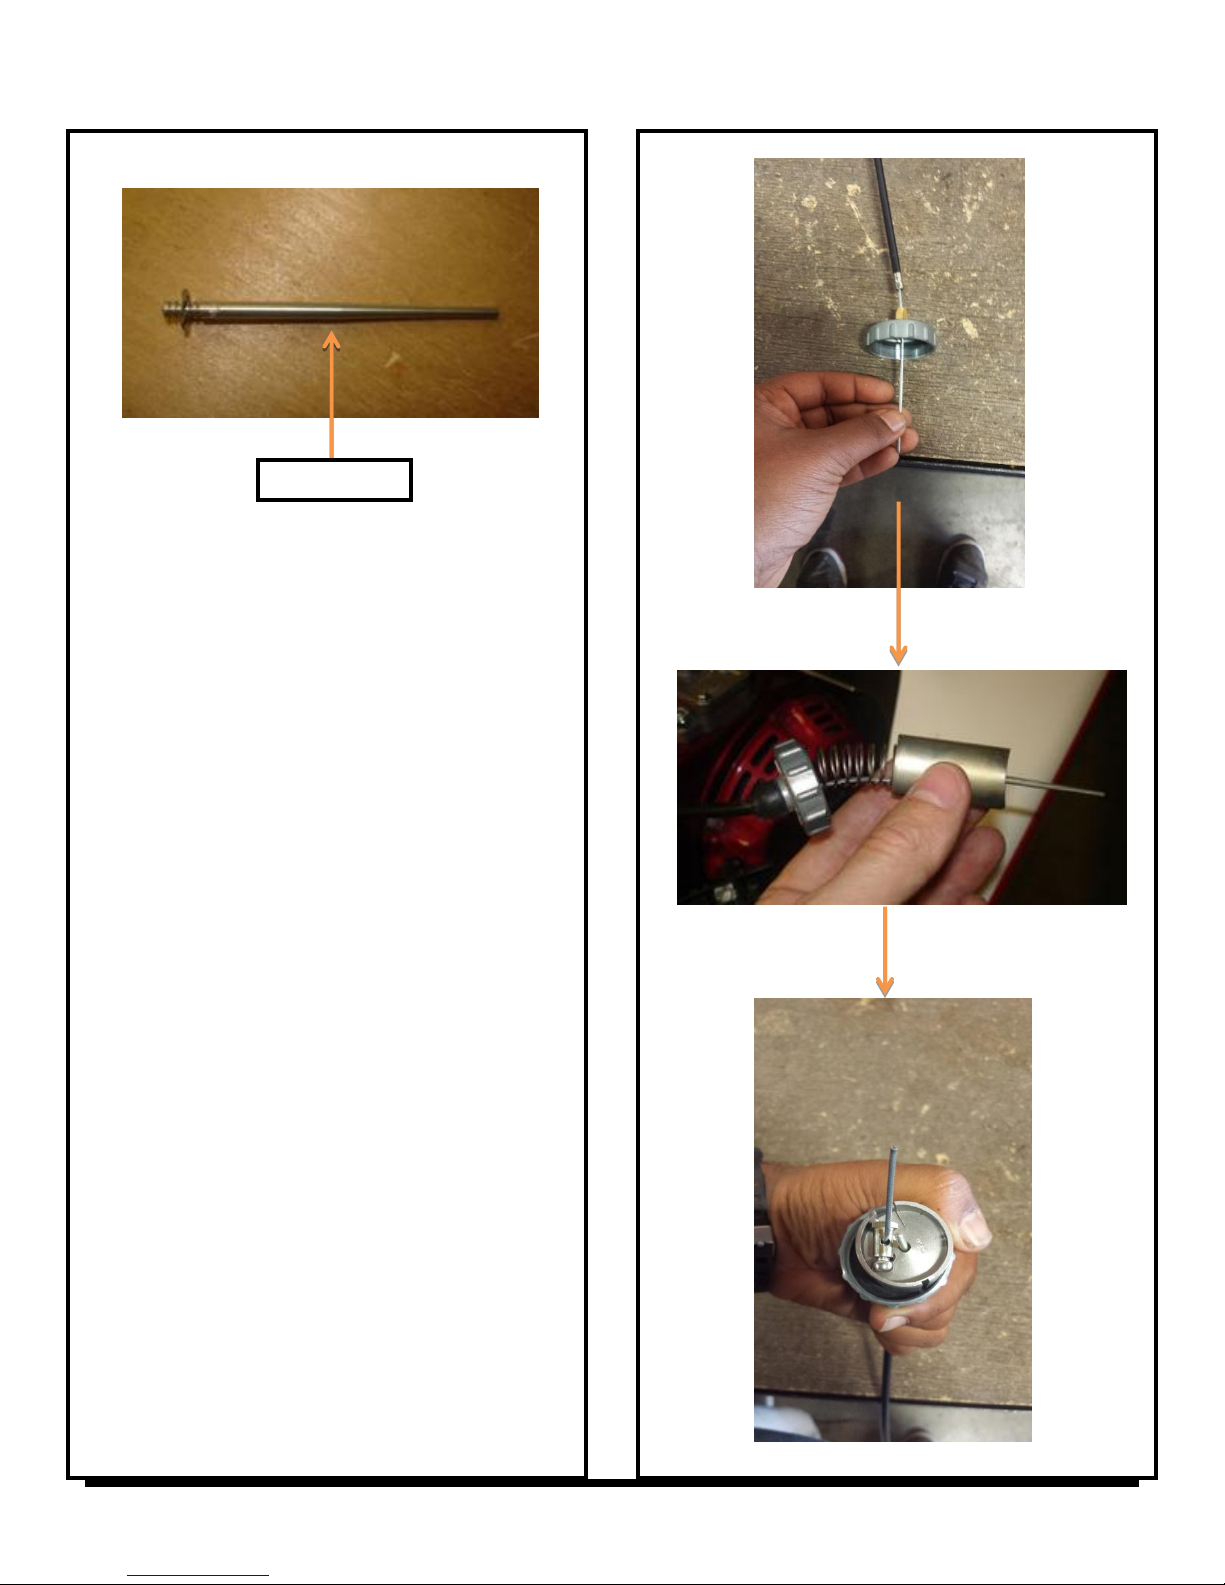
Step 4
Finish building the carburetor:
Step four; now thread the throttle cable through
the top of your cap and out through the slide. The
slide will have an opening at the bottom. Once
the cable is through the slide grab your wire stop
and thread the cable through the wire stop and
then adjust the tightness of the cable with the
screw on top of the wire stop. Now it’s time to
thread the spring in threw your wire cable. To do
this, take the end piece of the spring and open it
slightly so that you can twist on the spring on to
the cable.
Needle Jet
GokartsUSA.com HPO High Performance Option Installation Honda GX, Titan TX200S 6
Page 7
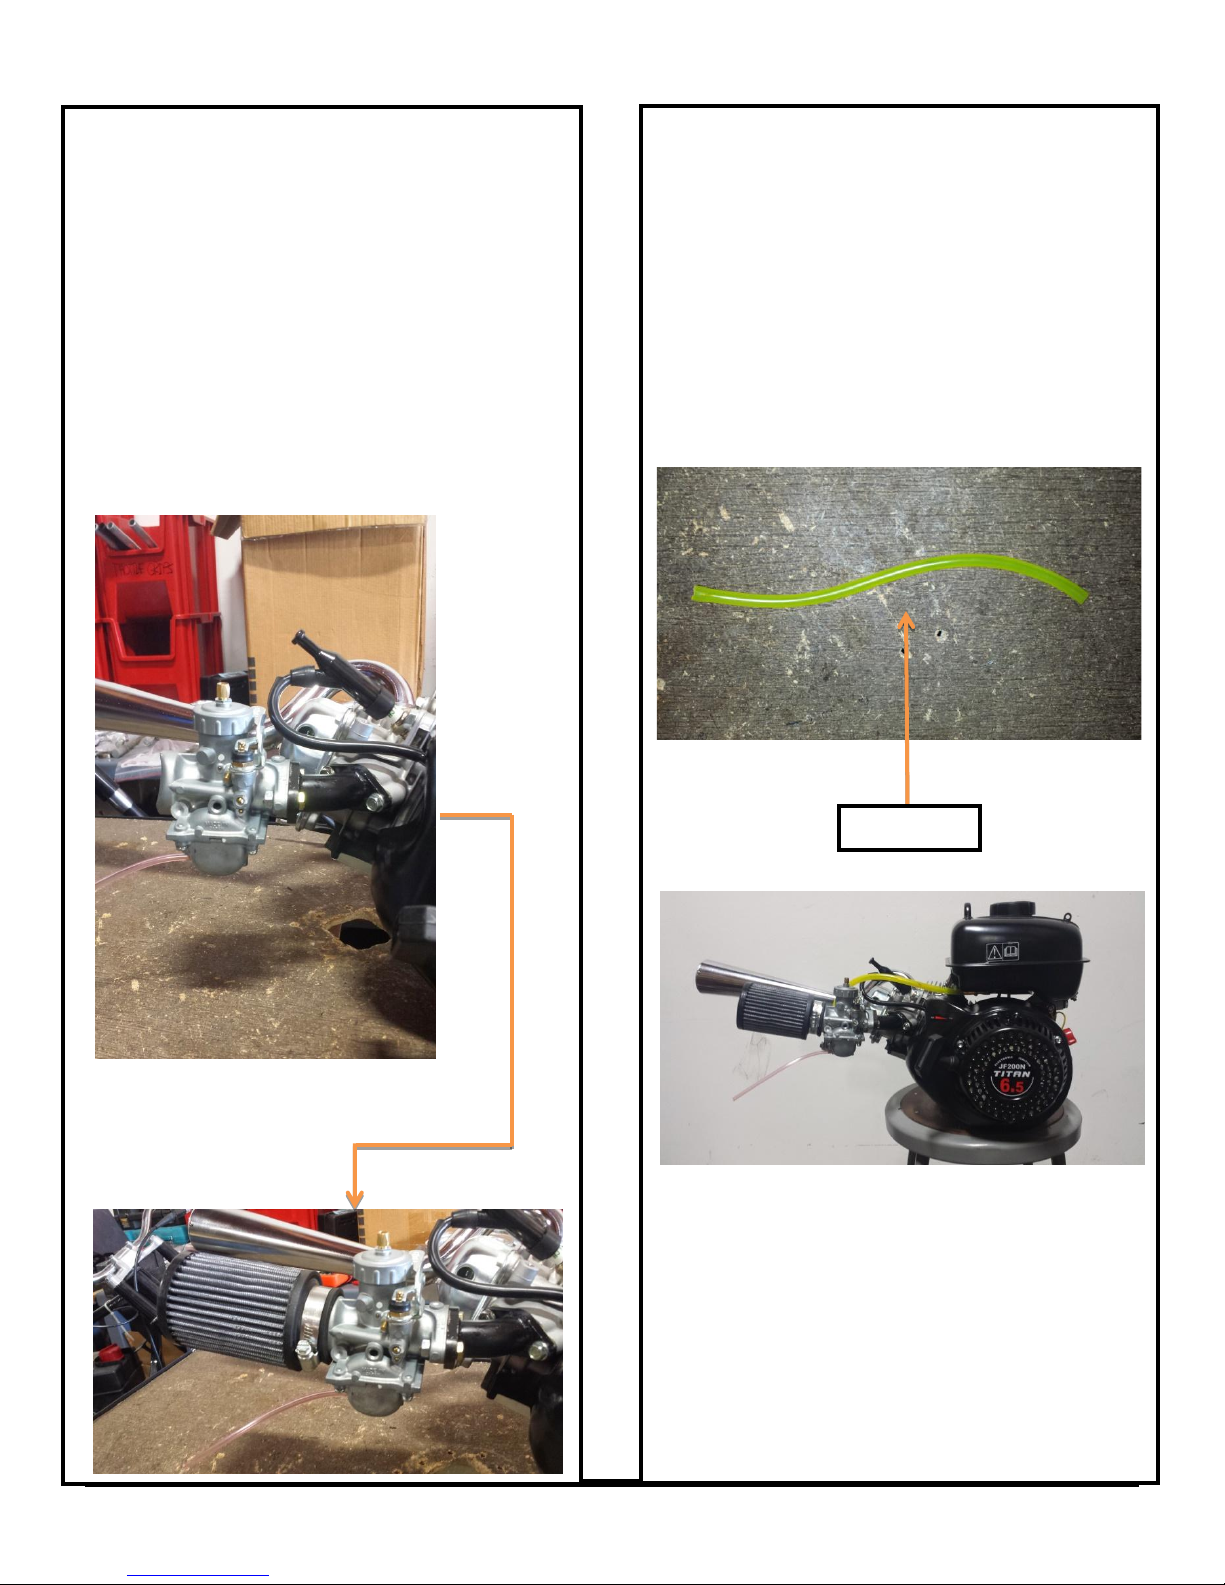
Step 5
Installing the carburetor:
Step five; screw the cab back on to the
carburetor. Now you can attach the carb to the
manifold. You will need two 3/8” bolts and two
3/8” nuts. Now attach the air filter to carb with the
hose clamp. Stop once you feel the hose clamp is
snug on the carb.
Step 6
Installing the gas tank:
Step 6; now that you have attached the
carburetor and the exhaust pipe, it’s time to install
the gas tank again. Cut the piece of fuel line to
the correct length and attach it to the fuel tank
with two hose clamps. Now you can finally install
the fuel tank on to the engine. Bolt back the nuts
to the engine.
Congratulation you have successfully
installed your HPO kit on to your
TitanTX200S.
Fuel Line
GokartsUSA.com HPO High Performance Option Installation Honda GX, Titan TX200S 7
 Loading...