

tispro SX2000, Steamer Operation Manuals
TISPRO SX2000 Ionic Facial Steamer #390410
AMERICA’S BEST
VALUE BRAND!
Item #390410 • New Hudson, MI 48165
www.tngworldwide.com • 800.362.6245
Made in China • ©2012 TNG
AMERICA’S BEST
VALUE BRAND!
Technical data:
Name: SX2000 Ionic Facial Steamer
Rated voltage (V)AC 50Hz: 110
Rated spraying amount: 700ml/ hour
Temperature at the steam vent: 194°F
Power: 750W
Cup volume: 1.35 Liter
Net Weight: 8.5 Kilograms
Electric shock prevention grade: Grade I
Warnings:
1. This machine is not suitable for the person who has corporeity weakness, slow
reaction or pneumonia unless it is guided by a responsible person for safe use.
2. Children should be supervised.
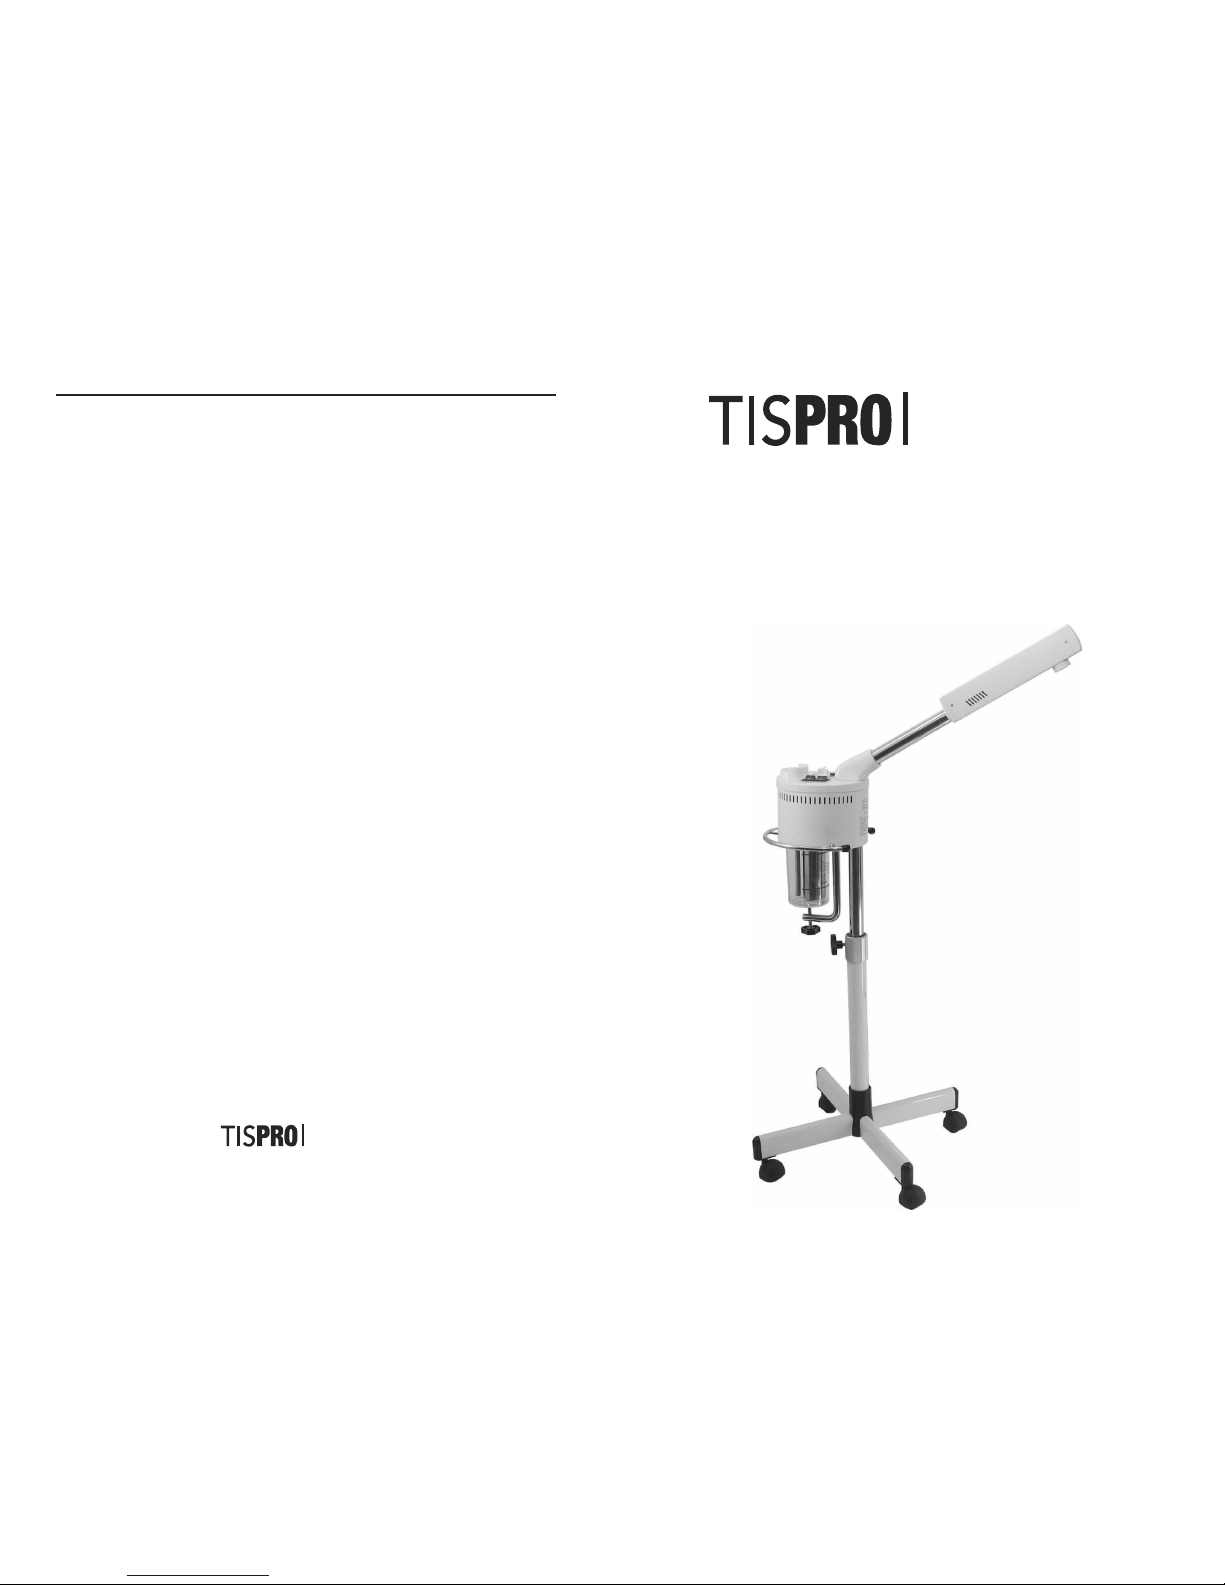
SX2000 Ionic Facial
Steamer with Stand
Model #390410
TISPRO SX2000 Ionic Facial Steamer Operation Manual
Congratulations on your purchase of the TISPRO SX2000 Ionic Facial Steamer. Please read
the instructions and safety tips before use. Your Ionic Facial Steamer comes with a one-year
limited warranty. If for any reason you need service, please call 800-362-6245. Replacement
glass jars are also available.
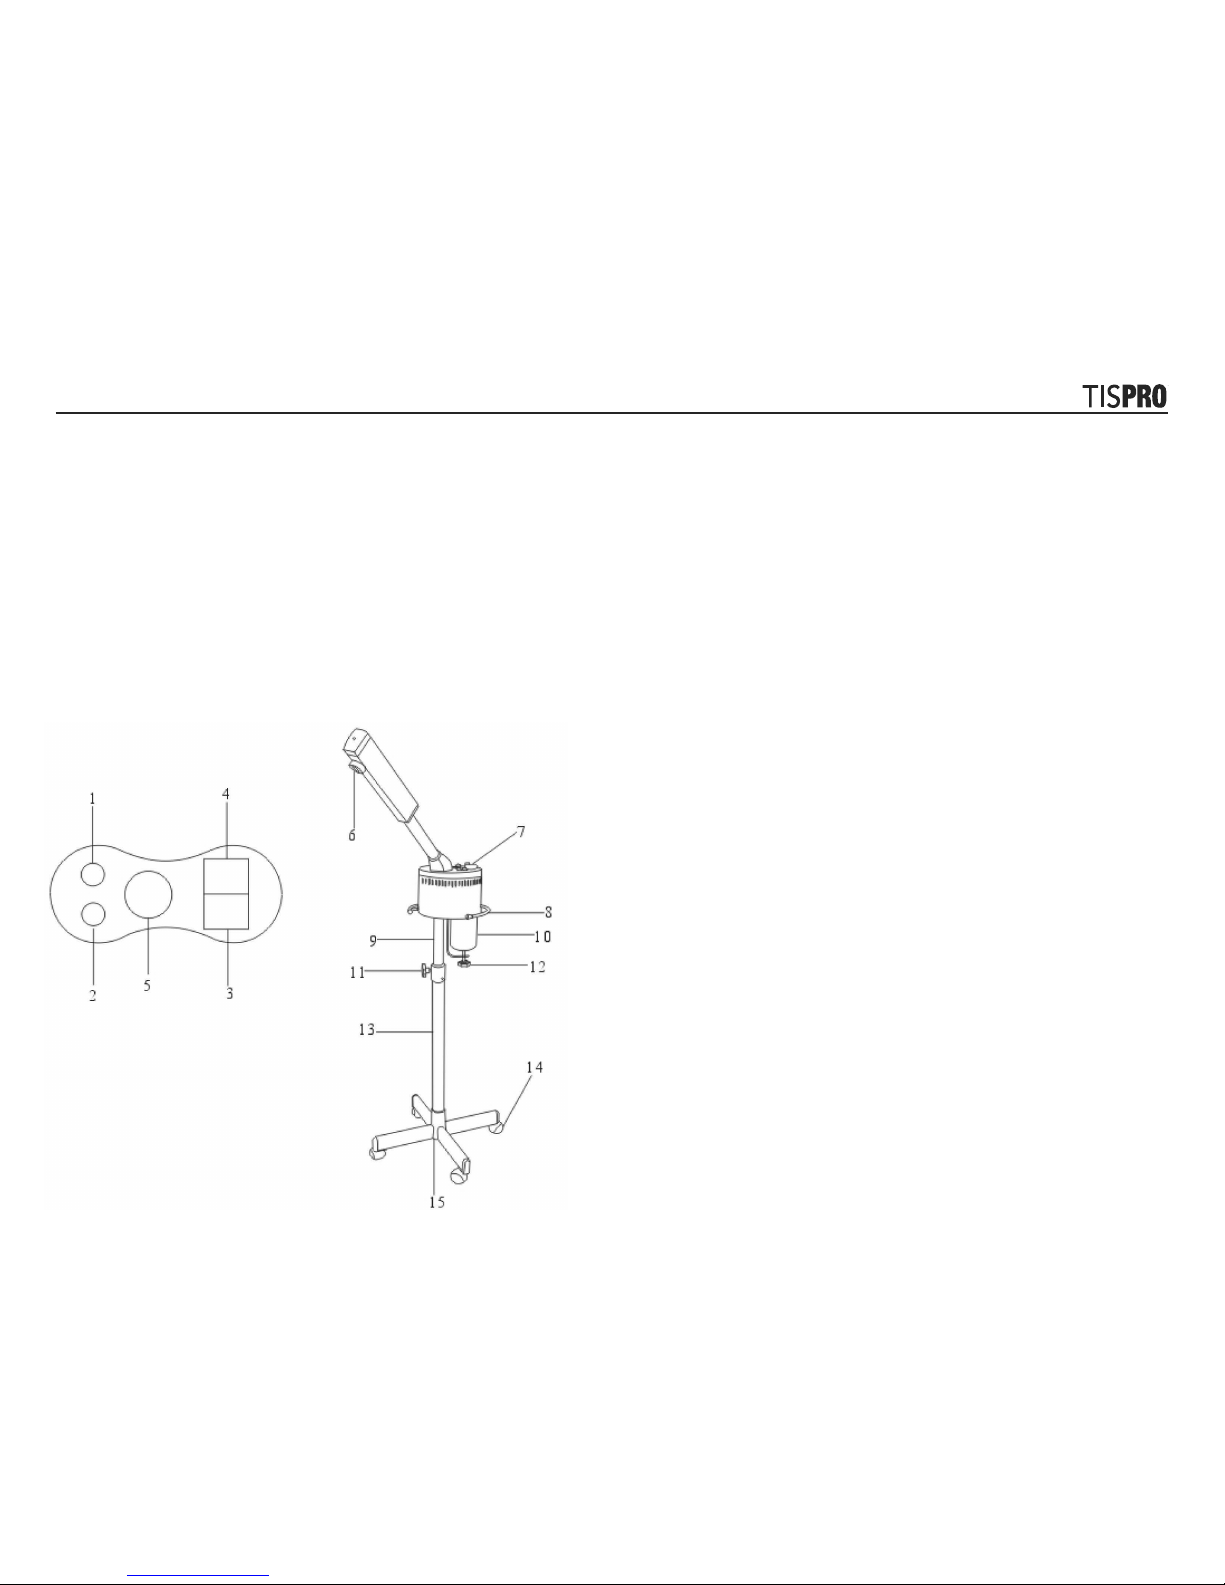
Operation:
(1) Power indicator
(2) Ultraviolet indicator
(3) On/Off switch
(4) Ultraviolet switch
(5) Timer
(6) Spray nozzle
(7) Water inlet
(8) Hand rest
(9) Vertical adjusting tube
Instructions:
(1) Fill the water cup with distilled water to the warning line. [Note: using tap water will
damage the unit and void warranty].
(2) Connect to electricity (110V), and push down the power switch to turn on. Steam will
begin to emit from the spray nozzle in 6-8 minutes. Press the ultraviolet switch and
ionized steam vapor will stream out.
(3) When the water surface falls below the heating wire, the machine will disconnect
power automatically. If continuous use is expected, unplug unit. Empty the remaining
water in the cup and refill.
(4) The proper position for using steam is from the chin up and to cover the entire face.
Duration of use depends on the user’s skin type.
Caution:
(1) Don’t put into the glass jar (10) any chemicals or additives or it will cause water to squirt
instead of vaporize.
(2) Wait until the vapor spray is coming out of spray nozzle (6) before directing to client.
(3) After each use, empty the remaining water in the glass jar and clean unit. If there is
any calcium oxide on the heating wire, remove it with soft metal brush or by soaking
overnight in vinegar solution.
(4) Don’t use detergent when cleaning the glass jar.
(5) Only use with rated voltage and frequency.
(6) Do not disconnect the unit with wet hands.
(7) Do not move the unit using the power cord.
(8) Stop the use of the unit if damaged.
(9) Keep out of the reach of children.
(10) Do not use unit near bathtubs, showers, basins or other vessels containing water.
(11) Always empty the remaining water after each use.
(12) Wait until the unit temperature becomes room temperature before changing water.
(10) Glass jar
(11) Vertical adjusting knob
(12) Glass jar adjusting knob
(13) Outer tube
(14) Floor stand with casters
(15) Locking screw
 Loading...