

Page 1

User Guide (en)
tiptel Ergophone 6220
tiptel Ergophone 6222
tiptel
Page 2

Important information
This phone is intended for inexperienced users. The
factory settings only make available the functions
that are generally used most often. This manual
therefore concentrates primarily on these basic
functions.
Use menu option "User level settings" in the "Settings" menu to switch the phone from "Beginner
mode" to "Advanced mode". Additional functions
then become available to you.
Note: If you change phone settings in "Advanced
mode", these changes remain available
even if you later revert back to "Beginner
mode".
All options in the Main menu described in this manual are in the factory settings for the device. You
can mask the main menu options that you do not
intend to use via menu option "Visibility main menu"
in the "Settings" menu.
Page 3

Contents
Important information ......................................... 2
Contents .............................................................. 3
Safety information ............................................... 8
Initial use ........................................................... 10
Installing the SIM card(s), memory card
and battery ................................................... 10
Charging the battery .................................... 12
Switching on the phone ............................... 13
Setting the date and time ............................ 13
Display symbols ................................................ 15
General information on using the phone ......... 16
Custom setup .................................................... 17
Using the phone as you want to .................. 17
Call signalling as you want it ....................... 19
Making calls as you want to ........................ 19
Making and accepting calls .............................. 20
Accepting calls............................................. 20
Rejecting calls .............................................. 21
Calling with direct dial .................................. 21
Dialling with redial function .......................... 21
Dialling from Contacts ................................. 21
Dialling via the Photo
Speed Dial Contacts .................................... 22
3
Page 4

Dialling with speed dial ................................ 22
Dialling with the M1 and M2
memory buttons ........................................... 23
During a call ................................................. 23
Loudspeaker volume ................................... 23
Contacts ............................................................ 24
Options ........................................................ 24
Call ............................................................ 25
Write message .......................................... 25
Add new contact ....................................... 25
View contact ............................................. 27
Edit ............................................................ 27
Delete ........................................................ 27
Additional options ..................................... 27
Main contacts ............................................... 27
Messages (SMS) ............................................... 28
Viewing received messages ........................ 28
Sending messages ...................................... 29
Writing message text ................................... 30
More message options ............................. 30
Silent mode ....................................................... 31
Call history ........................................................ 31
Displaying missed calls ............................... 32
Camera .............................................................. 32
Flash ............................................................ 33
4
Page 5

Size .............................................................. 33
Quality .......................................................... 33
Shutter sound .............................................. 33
Storage ........................................................ 34
Image viewer ................................................ 34
Other camera options ............................... 34
Transferring photos to a computer ........... 34
FM radio ............................................................. 35
Radio mode options .................................... 35
Channel list ............................................... 35
Auto search ............................................... 36
Additional options ..................................... 36
Sound recorder ................................................. 36
Recorder options ......................................... 36
New record ............................................... 37
List ............................................................ 37
Storage ..................................................... 37
Alarm .................................................................. 38
Calculator .......................................................... 39
Bluetooth ........................................................... 39
Settings .............................................................. 40
Phone settings ............................................. 40
Date & Time .............................................. 40
Language .................................................. 41
Font size ................................................... 41
5
Page 6

Tones ........................................................ 41
Talking keys ........................................... 41
Volume ...................................................... 42
Additional phone settings ......................... 42
Display settings ..................................... 42
Arrow keys ............................................. 42
Alert type ................................................ 43
User level settings ........................................ 43
Additional settings ............................................ 44
Call settings ................................................. 44
Visibility main menu ..................................... 44
Order main menu ......................................... 45
Security settings .......................................... 46
Network selection ........................................ 46
Emergency settings ..................................... 46
Restore factory settings ............................... 47
Connection to a computer ................................ 47
SOS call ............................................................. 48
Testing of the emergency call function ....... 49
Emergency call configuration ...................... 49
Emergency numbers ................................ 50
Emergency button active .......................... 50
Emergency SMS ....................................... 51
Emergency alert ........................................ 51
Cancelling an emergency call ..................... 51
6
Page 7

Important information on
emergency functions ................................... 52
Appendix ............................................................ 53
Warranty ....................................................... 53
Guarantee .................................................... 53
Declaration of conformity ............................. 53
Disposal ....................................................... 54
7
Page 8

Safety information
Only use the phone at places where it is permit-
ted. As a rule, use of mobile phones is prohibited in hospitals, aircraft and at filling stations.
Do not open the device yourself, and do not at-
tempt repairs on your own. Repairs may only be
performed by qualified specialists.
Do not expose the phone to smoke, chemicals,
humidity, dust or excessive heat (direct sunlight).
Keep the phone and accessories away from
children.
The phone's speaker can be set
to a very loud volume. Check the
volume before use to avoid damaging your hearing. Loud noises
over longer periods can result in hearing damage.
When driving, only use this phone with an ap-
proved hands-free set. Observe the legal regulations specific to the country of use.
Keep the phone 20cm from any implanted
pacemaker. Switch off the phone immediately if
you feel or suspect any impairment.
8
Page 9

Do not use any power supply unit other than the
one supplied.
Only use original accessories and batteries.
The phone is not waterproof. Avoid contact with
liquids.
Do not rely exclusively on your mobile phone's
emergency function in emergencies. Establishing an emergency connection may not always
be possible for technical reasons.
Dispose of the device and the battery in line with
environmental guidelines. Your local waste disposal provider offers collection points for electronic waste and batteries. Do not dispose of the
device or battery in household rubbish or throw
into a fire.
Please dispose of packaging mate-
rials in line with local regulations.
9
Page 10
Initial use
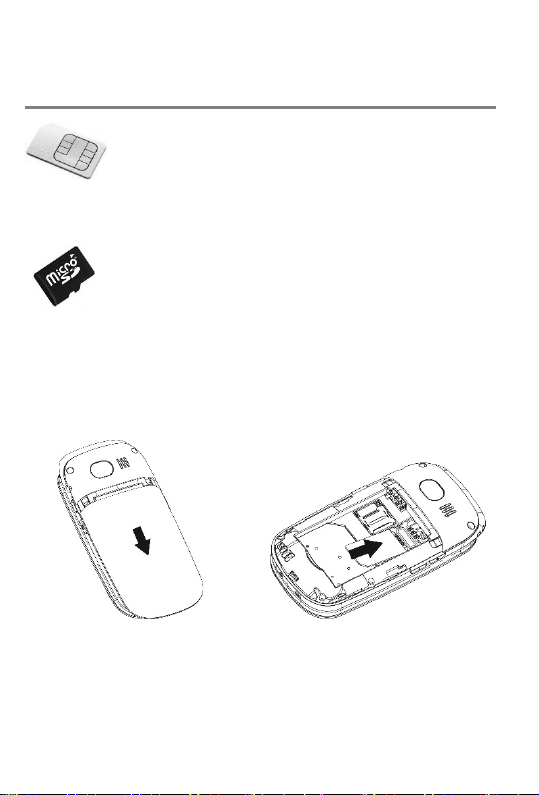
Installing the SIM card(s), memory card and battery
A SIM card, available from your phone
supplier, is required to use the phone.
The SIM card(s), battery and memory card must be
installed before the phone is used for the first time.
A memory card (not included in the delivery) is required to save photos with the in-
tegrated camera. The Ergophone
6220/6222 supports Micro SD memory cards with a
capacity of up to 8 GB - these can be purchased on
the accessories market and at electronics shops.
Fig. 1 Fig. 2
10
Page 11
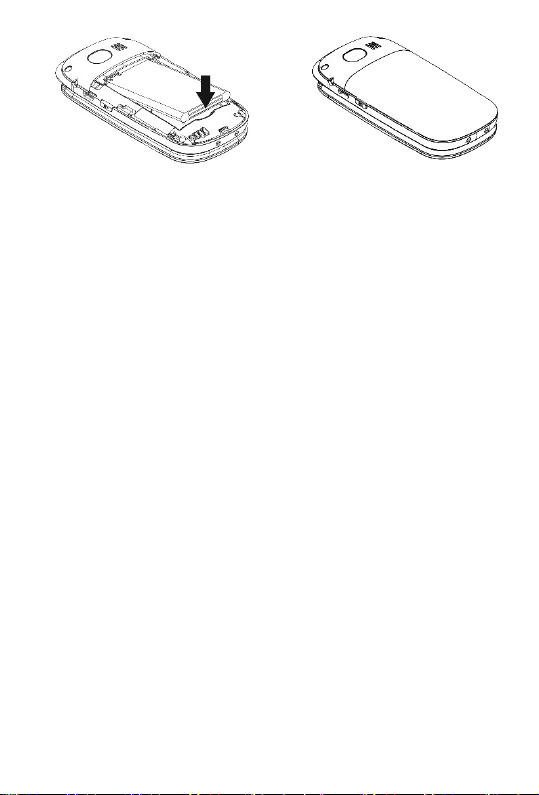
Fig. 3 Fig. 4
The casing cover on the back of the device must be
removed to insert the SIM card, a memory card and
the battery. Press the cover where the mark is and
then slide it downwards (Fig. 1).
Carefully install the SIM card in the card holder.
Push the SIM card under the metal clamp with the
contacts facing downwards and the notch towards
the underside (Fig. 2).
To insert an SD memory card, move the metal clip
to the left and then rotate it upwards. After inserting
the card and closing the metal holder, push the
holder down such that it secures the card and can
no longer be opened upwards. Exercise extra care
here. If the metal holder does not slide easily, it is
usually an indication that the card is not inserted
correctly.
The battery is inserted next (only possible in the
correct position - Fig. 3).
11
Page 12
Then replace the casing cover and slide it upwards
until it clicks into place (Fig. 4).
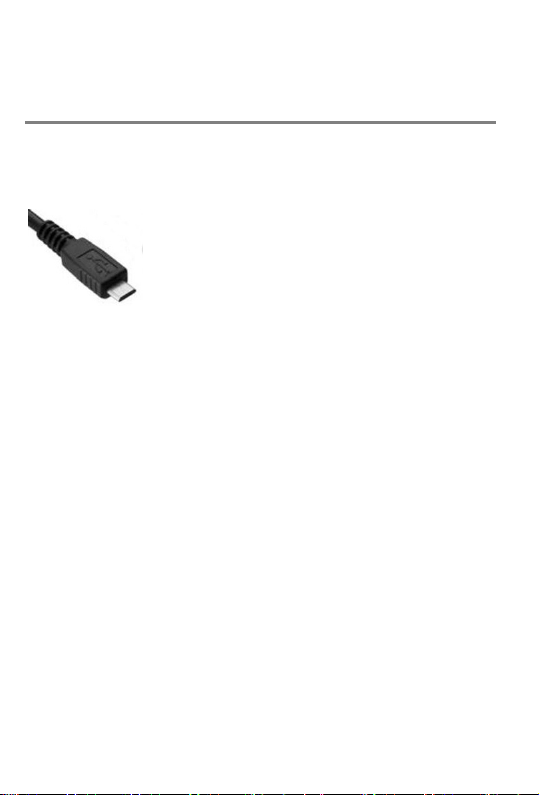
Charging the battery
A charger and a power supply unit are supplied
with your phone.
Insert the small connector on the
power supply unit into the jack on
the rear of the charger cradle. The
side of the connector with the USB
logo must be facing the top side of
the charger cradle. If it is not easy to insert the connector into the jack, check the direction and avoid
applying force. Then plug the power supply unit into the socket.
Place the telephone in its closed position in the
charger; the battery now charges.
Instead of charging via the charger cradle, the
power supply plug can also be connected directly
to the jack on the side of the telephone. The battery
can also be charged via a computer's USB connector. In both cases, the USB logo on the connector must be facing the front of the phone.
Battery performance diminishes over time. If you
notice after a time that you need to recharge your
phone more frequently, replace the battery.
12
Page 13
For safety reasons, the battery switches off before it is totally discharged. If you have not used
the telephone for a long time, wait up to 10
minutes after you have plugged in the charger.
This switches the battery back on and the charging process starts.
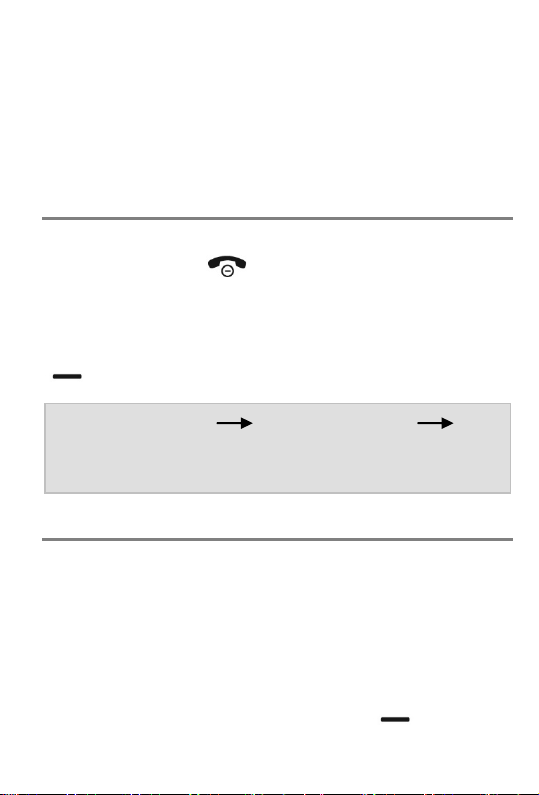
Switching on the phone
To switch on the phone, press the red hang up key
for 3 to 5 seconds .
You are then prompted to enter the SIM card PIN (if
enabled for the SIM card). Enter the PIN from the
keypad, then press the display button on the left
(Display OK).
Note: In Settings Security Settings
PIN, you can change the SIM card PIN
and enable/disable the prompt for it.
Setting the date and time
After switching on for the first time (and when the
battery is removed for longer periods), the telephone automatically synchronises date and time
from the service provider network.
If your service provider does not support this functionality, the date and time must be set manually.
To do this, press the left Display key under
13
Page 14

"Menu", then keep pressing the "down arrow" key
until "Settings" is displayed. Then press the
key under "OK" three times to access "Settings", then "Phone Settings", then "Date & Time".
Select "Set date" then "Set time", and use the keypad to enter the current date and time.
The correct date and time are then shown on the
display.
14
Page 15
A
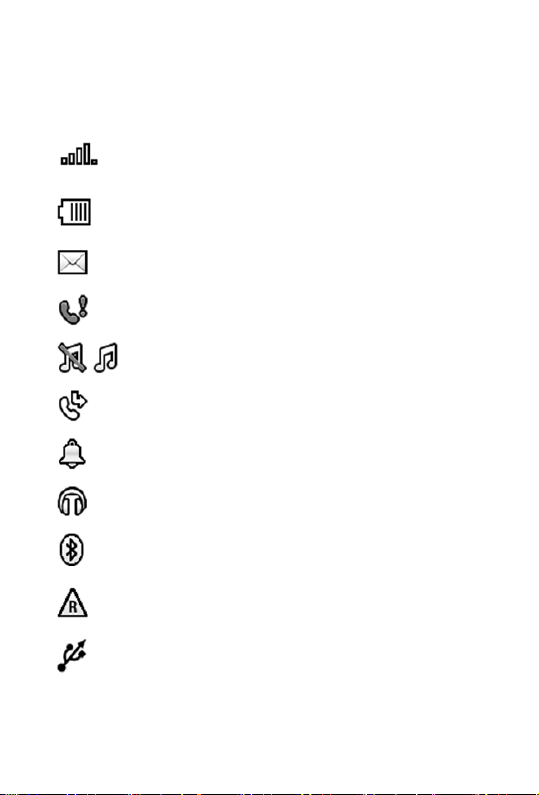
Display symbols
Multiple symbols are displayed at the top of the
display depending on your current situation.
Shows the signal strength of the wireless network.
Battery charge status.
Unread text message(s) (SMS or MMS).
Missed call(s).
Silent profile enabled/disabled.
Call divert enabled.
larm enabled.
Headset connected.
Compatibility with Bluetooth devices
enabled.
Roaming. The phone is registered in a
network abroad.
The phone is connected to a computer.
15
Page 16

General information on using the phone
The left and right Display keys have different
functions depending on the status of the device.
The functions currently available for the keys are
shown above the keys on the display.
The right-hand Display key is usually used to cancel
the function or to go back one step. The left-hand
Display key is usually used to confirm functions or
open the Options menu.
In standby, the left Display key calls up the main
menu, the right Display key opens the contacts.
The and keys are used to select entries
in menu lists. When the phone is in standby, the
key is used to access the picture contacts and
the key to access the alarm. These settings
can be changed to what you want in Settings
Phone Settings Arrow Keys.
The red hang-up key is used to end a call, to
reject a call and (with prolonged pressing) to switch
the device on and off. Within menus, settings can
be cancelled with this key.
The green Dial key is used for calling after entering a number, or to select a contact. Pressing
this key in standby opens the list of recently called
numbers for redial.
16
Page 17

Prolonged pressing of the key switches between “Ring”, “Silent” and “Vibration”. Press the
key twice in quick succession for the + sign
(necessary for making international calls).
The key enables you to toggle between upper
and lower case during the text entry of, for example,
an SMS or a name in Contacts.
Custom setup
An ergonomic telephone should be simple to use
and make communication more easy for the user.
At the same time it should also meet your needs,
however individual they may be. The tiptel Ergophone 6220/6222 enables you to customise the
phone to your needs in a special way.
Note: Some of these functions can only be set in
"Advanced mode", but are also available
afterwards in "Beginner mode".
Using the phone as you want to
Are you a new user wanting a mobile that enables
you to "only" make and receive calls quickly and
easily, or are you an experienced user who attaches
importance to comprehensive functionality?
17
Page 18

"Tell" this to your tiptel Ergophone 6220/6222 under
Settings User level settings. In Settings, and
when using the phone, the "Beginner mode" setting
only makes available functions that are normally
used frequently. "Advanced mode" gives you access to the full functionality of the device.
Not using all of the phone's functions and do not
want to be shown functions that are not used?
"Tell" your tiptel Ergophone 6220/6222, under Settings Visibility main menu, the functions you
want to be shown in the main menu.
You want quick access to frequently used functions?
"Tell" your tiptel Ergophone 6220/6222, under Settings Order main menu, the order in which you
want functions to be displayed.
The function assignments of keys and in
standby mode for accessing the photo contacts
and alarm not as you would like them?
"Tell" your tiptel Ergophone 6220/6222, in Settings
Phone Settings Arrow Keys, which functions you want to be assigned to these keys in
standby mode.
18
Page 19

Call signalling as you want it
Have a favourite tune and want to use it as the ringtone for your mobile?
Install in the mobile a memory card with the tune on
it, and "tell" your tiptel Ergophone 6220/6222, under
Settings Phone settings Tone settings
Set as Ring tone, that you would like this tune
to be used.
Not only want to hear that you are being called, but
also know who is calling?
Save your contacts in the telephone's memory and
select, in the contact details with caller ringtone, a
specific ringtone for this caller.
Do you also want to see as well as hear who is calling?
"Tell" this to your tiptel Ergophone 6220/6222 by
storing contacts in the telephone's memory and
adding a picture of the caller. It is then shown on
the display for incoming and outgoing calls.
Making calls as you want to
Want the phone to verbally repeat digits as you enter them to check you are entering them correctly?
"Tell" your tiptel Ergophone 6220/6222, under Settings Phone Settings Tone Settings
19
Page 20

Other alert rings Key tone that you would like
to enable "Talking keys".
Have a few contacts who you ring often?
"Tell" your tiptel Ergophone 6220/6222, under Con-
tacts Options Main contacts, who these
contacts are and your mobile will always display
them at the top of the contact list. Also, these contacts (possibly with photo) are available for speed
dialling after pressing the key when the phone
is in standby, when you assign to this key the "Main
Contacts" function under Settings Phone Settings Arrow Keys.
Making and accepting calls
Accepting calls
When a call comes in, the telephone rings (provided the "Silent" profile is not enabled).
The caller number is shown on the display. If the
caller having the number is stored in Contacts, the
name of the caller (and possibly picture) is displayed instead of the number.
The call is accepted by pressing the green Dial key
.
20
Page 21

Rejecting calls
Pressing the red hang up key rejects an incoming call.
Calling with direct dial
For direct dialling, enter the desired call number
with the numeric keys, then press the green Dial
key . The connection is established as required.
Dialling with redial function
Pressing the green Dial key without first entering a number when the phone is in standby opens
the call log. It shows you recently dialled numbers,
and the calls you have accepted and missed.
With the and keys, you can scroll up and
down the call log. Pressing the green Dial key
again dials the number selected.
Dialling from Contacts
In standby, if you press the right Display key ("Contacts" in the display), contacts are called up and the
first entry is displayed. Use arrow keys and
to scroll up and down.
21
Page 22

Pressing the green Dial key directly dials the
number selected.
Dialling via the Photo Speed Dial Contacts
Contacts specified as main contacts can be accessed directly by pressing the key. The photo
stored for the contact is shown on the display. The
call is made by pressing green Dial key . For
this, the "Main Contacts" function must be assigned
to the key in Settings Phone Settings
Arrow Keys.
Dialling with speed dial
The phone has speed dial keys that are used to
store numbers dialled frequently. When the phone
is in standby, the speed dial keys are accessed by
pressing digits - for about 2 seconds. The relevant number stored is then dialled automatically.
Prolonged pressing of the key calls the answering machine.
Note: To use the speed dial buttons, they must
first be configured in Contacts Options Others Speed dial.
22
Page 23

Dialling with the M1 and M2 memory buttons
The phone has two buttons labelled M1 and M2.
Prolonged pressing of these enables a contact
stored to be called.
Note: To use the M1 and M2 buttons, they must
first be configured in Contacts Options Other M1/M2 memory key.
During a call
During a call, you can toggle between hands-free
and Earpiece mode using right-hand display key
. Use the left-hand display key to access the
Options menu with the "Hands-free / Earpiece",
"New record / Stop recording" and "Mute on/off"
functions.
Loudspeaker volume
The ring volume is defined in Settings Phone
Settings Volume Set as ring Tone. The
loudspeaker volume during a call is set in Settings
Phone Settings Volume Call volume.
Both can also be changed whilst the phone is ringing and during a call with the and buttons, or with the volume rocker switch on the lefthand side of the phone.
23
Page 24

Contacts
A contact consists of a name and the corresponding call number; it structures your
phone book for calling subscribers and
sending short text messages. To access the contacts, press right Display key when the phone
is in standby. The contacts are opened. You can
also access the contacts via the main menu, under
"Contacts".
All contacts stored are displayed and the first contact is selected automatically. The and
keys enable you to switch within the contact list.
Pressing a digit key on the keypad (in quick succession when necessary) selects from the contact
list the contact beginning with that letter. For example, pressing once selects the first contact beginning with the letter "M". Pressing three times
in quick succession selects the first contact starting
with the letter "O".
Pressing the green Dial key calls the contact
selected.
Options
Pressing the left display key in the contact list
opens the Options menu.
24
Page 25

Call
"Call" dials the phone number of the contact. Instead of selecting this menu item, you can also
simply press the green selector key once the
contact is open.
Write message
Select "Write message" from the Options menu to
write a short message (SMS) to the contact.
Add new contact
You can create a new entry with "Add new entry".
Both "Name" and "Mobile" open. A separate ring
tone and a picture of the caller can be specified in
addition for contacts stored on the phone.
First, select "Name" and press left Display key
"Edit". Then use the numeric keys to enter the
name. Pressing a digit key once selects the first letter shown on it; successive pressing selects the following letters.
Press to enter a space character. The keys
enables you to toggle between upper and lower
case, initial letter of a word in upper case and the
rest in lower case, and numerical entry only. Press
the key for a selection of special characters.
25
Page 26

Once you have finished entering the name, press
the left display key, "OK".
Next, select "Mobile" with the key, and press
left Display key . Enter the number using the
numeric keys. After entering the number, confirm
again with left display key , "OK".
Once the name and number have been entered, select "Save" and confirm with left display key ,
"OK".
If you have chosen for the contact to be stored in
the phone, a caller ring tone and caller picture can
also be selected.
You can select between the default ring tone, one of
the other ring tones available in the phone or one of
your own ring tones stored on an optional SD card.
WAV and MP3 formats are supported as individual
ring tones.
You can select your own picture, stored on an optional SD card, as the picture. It is shown on the
display when calls are made by and to this person.
The photos for this must be stored in JPG format
(240x320 pixels, maximum file size 10 KB). The
caller picture selected is also used for the "Main
photo contacts for speed dialling" function (available from the key when the phone is in
standby).
26
Page 27

Tip: You can also take caller pictures with the
integrated camera.
View contact
Shows the details of a contact selected.
Edit
Changes the settings for the contact selected.
Delete
Deletes the contact selected.
Additional options
Available to you as additional options in "Advanced
mode" are the deletion of multiple contacts, copying
of single and multiple contacts, creation of main
contacts, configuration of the M1 and M2 memory
keys, and speed dialling for keys 2 to 9.
Main contacts
Contacts are read by the telephone from the SIM
card and phone memory, and shown in alphabetical order. The "Main contacts" option enables you
to define up to eight contacts for the top places in
the contact list so that they can be accessed particularly quickly. In "Advanced mode", access the con-
27
Page 28

tacts, and then the options using left Display key
, and there "Main Contacts". In the list of main
contacts shown, you can now select up to eight
contacts to always be listed at the top of the contact
list.
Contacts specified as main contacts can be accessed directly by pressing the key. The photo
stored for the contact is shown on the display. The
call is made by pressing green Dial key . For
this, the "Main Contacts" function must be assigned
to the key in Settings Phone Settings
Arrow Keys.
Messages (SMS)
Your phone enables you to send and receive short text messages (SMS).
Viewing received messages
An SMS received is shown on the display.
Press left Display key for an overview of messages received; the latest message is displayed at
the top. To view the message, press Display key
on the left and then “Open”.
Pressing the left Display key while the message is
being displayed opens the Options menu, allowing
28
Page 29

you to respond to the sender with an SMS or to call
the sender.
Provided you have not deleted them, received SMS
messages remain available to you in your "Inbox"
under "Messages" in the main menu.
Individual or all messages can be deleted from the
list of messages.
Sending messages
In addition to answering received messages, you
can also write and send messages by yourself.
To do this, select from the Main menu "Messages"
and then "Write message". A window opens enabling you to enter the message from the keypad.
Briefly pressing right Display key deletes the
character entered last, and prolonged pressing deletes the entire text.
When you have finished your text, press left Display
key to access the options, then select "Send
to".
The recipient window opens in which you can
chose to enter the recipient number manually or
copy it from the contacts. The recipients selected
are displayed at the bottom.
29
Page 30

To send, choose one of the recipients selected,
then press left Display key "Option" and then
"Send". The editing and removing of the recipient
selected, or all recipients, are available as additional
options.
Writing message text
The numeric keys are used to write the actual text
message. Three or four letters are printed next to
numeric keys to . Pressing a key once displays
the first letter, twice in quick succession the second
letter, etc.
So, for the word "Hallo", you would need to press
twice, then once, then three times, then
three times and then three times.
Press to enter a space character. The key enables you to toggle between upper and lower case,
initial letter of a word in upper case and the rest in
lower case, and numerical entry only. Press the
key for a selection of special characters.
More message options
Available in "Advanced mode" are your incoming
messages, outgoing messages, drafts, saved (sent)
messages, templates, message settings and the
configuration of the answering machine (mailbox)
number.
30
Page 31

Text messages written and successfully sent are not
saved with the phone's factory settings set. Enable
the saving of SMS messages successfully sent in
Messages Message Settings SMS Settings Sent Messages.
Silent mode
You can enable and disable Silent mode
with the "Silent mode" setting in the Main
menu. Calls and messages continue to be
received in Silent mode but the phone does not
ring. This setting is always recommended when the
phone ringing is likely to disturb others.
Tip: You can enable and disable Silent mode
more easily with prolonged pressing of the
key.
Call history
Pressing the green Dial key when the
phone is in standby accesses the call history, with all calls displayed in one list (di-
alled, received and missed calls).
You can view the individual "Missed calls", "Dialled
calls" and "Received calls" histories from menu option "Call history" in the Main menu.
31
Page 32

Use the and keys to scroll within the call
histories.
Press the green selector key to call the chosen number.
Pressing the left Display button opens the call history options. Besides dialling numbers here, you can
also send a message, save the number as a contact
and delete the call selected.
Displaying missed calls
The display and additional display show you when
you have received calls in your absence.
You can cancel the indicator with right Display key
. Use left Display key to show missed
calls in the missed calls log.
Camera
Open the camera function from the "Camera" option in the main menu, or directly via
the camera key on the keypad. A
memory card (not included in the delivery) is required to use the integrated camera. The Ergophone 6220/6222 supports Micro-SD memory cards
up to 8 GB (available from the accessories market
and electronics stores).
32
Page 33

After the camera is started, the picture is shown on
the display. Press the key to increase and the
key to decrease the size of the object. Press
camera key to take a picture. The photo is
saved automatically.
If you press the left Display key while in camera mode, you can select between "Image viewer"
and "Settings".
Flash
Switch on the torch LED as an additional flash.
Size
This is where you set the resolution of the camera.
Quality
This is where you set the quality. Select “Enhanced”
for the best quality.
Shutter sound
Enable a sound made by conventional cameras
when taking pictures.
33
Page 34

Storage
Here you specify whether photos are saved in the
internal camera memory or on a memory card installed. Select the memory card here.
Image viewer
Select "Image viewer" to display all photos saved.
Use the and keys to select an image
from the list. Press left Display key to open or
delete the image from Options. When one of the
images is shown on the display, you can show the
next with the key, or the previous with the
key.
Other camera options
In “Advanced” mode, you are able in the image
viewer to specify additional images as background
and contact images, as well as rename and copy
images. Switch from the photo camera to the video
camera to film videos.
Transferring photos to a computer
You can use a USB cable to connect the phone to a
computer to transfer photos to it. Please refer to the
"Connecting to a computer" section for more detailed information.
34
Page 35

FM radio
Your phone features an integrated FM
(VHF) radio. It can be accessed from "FM
radio" in the Main menu.
When you turn the radio on, the station last tuned is
selected.
Select the previous and next saved stations with the
M1 and M2 keys. Use the and keys to
adjust the loudspeaker volume in Radio mode.
Switch playback on and off with the key (muting). Radio mode is ended by pressing right Display
key or with the "Quit FM Radio" option. Access
the options in Radio mode with left Display key
.
Radio mode options
Press the left Display key to open the options
in Radio mode.
Channel list
Shows the radio stations stored and provides the
option of setting up stations manually and of editing/deleting stations after an automatic search.
35
Page 36

Auto search
This function searches for radio stations and stores
them automatically in the station list.
Additional options
Also available in “Advanced” mode are the options
to manually enter a radio frequency, save a station
found, record radio stations and enable Background mode.
Sound recorder
The sound recorder enables you to record
memos to be saved in the device memory
or on a memory card. You can also make
recordings during a call.
To do this, select "Sound recorder" from the Main
menu.
Use the M1 key to start, to pause and continue,
and M2 to stop and save, a recording.
Recorder options
The options are available from the left Display key
as long as neither recording nor playback is in
progress.
36
Page 37

New record
Starts a new recording.
List
Accesses the list of recordings stored. From “Options”, the recording selected can be played, deleted or set as the ring tone (such as “John is ringing”). Playback can be paused and resumed with
the key. The M1 and M2 keys are used to
switch to the previous and next recording respectively.
Storage
Select here the storage medium for recordings.
Note The internal device memory can only store
a few short recordings. If you want to
make recordings more frequently, inserting a memory card is recommended.
37
Page 38

Alarm
To use your phone's alarm function, select
"Alarm" from the main menu.
Three alarms are displayed. You can select
an alarm with the and keys. Press left
Display key to enable it or edit its settings.
In Settings, you can set the wake-up display, the
wake-up time and tone, and the type (ring, vibrate
or both), and the repeats (once, every day or on definable weekdays).
An alarm symbol is shown in the top left of the display as soon as an alarm is enabled.
At the wake-up time, the phone rings and/or vibrates and shows the date, time and text entered.
"Off" and "Snooze", set with left and right Display
keys , are also displayed. "Off" ends the alarm
function. "Snooze" delays the wake-up call.
38
Page 39

Calculator
To use your phone as a calculator, open
"Calculator" from the main menu.
Use the keypad numerals to enter the
numbers for the calculation. To enter decimal places, enter a decimal point with the key.
Arithmetic operators +, -, x, / and = are selected
using the and keys.
Selecting right Display key deletes the calculation result; pressing it a second time closes the calculator.
Bluetooth
Your Tiptel Ergophone 6220/6222 is compatible with Bluetooth headsets.
The function can be enabled and disabled from this
main menu option.
In "Advanced mode", you can also specify whether
your mobile can be seen by other Bluetooth devices, change the name of your mobile, show coupled
Bluetooth devices, add new devices and configure
other settings.
39
Page 40

Settings
Most of your phone settings are configured
in this menu option. The Settings menu
has several sub-menus that also have sub-
categories for settings.
Your phone is supplied with convenient default set-
tings so that you need only customise individual
settings when needed.
Only a few setting options are available in the
"Basic" user setting. Switching to "Advanced mode"
provides considerably more setting options. Settings configured in "Advanced mode" are retained
on reverting back to "Beginner mode".
Phone settings
This is where you set the date, time, language, font
size, tones, volume and displays.
Date & Time
Enter the current date and time here.
If in “Advanced” mode you set "Auto update" to
"On", the phone automatically takes the date and
time from the service provider network, and automatically adjusts for transitions between summer
and winter time and changes across time zones.
This service is not offered by all providers however.
40
Page 41

Manually setting the date or time disables automatic
updating.
Language
The language of display messages is set here. If
"Auto" is set, the phone's automatic setting is the
language of the SIM card installed.
Font size
You can choose here between small, normal and
extra-large lettering.
Tones
This is where you set the tones for incoming calls
and messages.
In “Advanced” mode, the key tones, the battery
warning tone, the tones sounded when the phone is
switched on and off, and opened and closed, can
also be set.
Talking keys
A special function on this device is the set of
"Speaking keys" - these can be enabled from
"Tones" “Other alter rings” "Key Tone". If
"Speaking keys" is enabled, the phone announces
the digits pressed.
41
Page 42

Volume
This is where you set the volumes for the ring, message and key tones, the alarm, for switching on and
off the phone, and the receiver.
Additional phone settings
Additional phone settings are available in "Advanced mode".
Display settings
A separate background image for the display in
standby can be selected. Whether the date, time
and network operator are shown on the display can
be set. The duration of the display lighting and its
brightness can be changed. The duration of the
display lighting also applies for the additional display in the phone cover.
Arrow keys
Use the "arrow keys" to set which phone function is
accessed when keys and are pressed
when the phone is in standby.
Selecting "Main Contacts" here accesses the Quick
Photo Selection function when the key is pressed.
All contacts defined as main contacts are displayed
with their pictures for quick selection.
42
Page 43

Alert type
You can set here whether the phone rings, vibrates
or does both simultaneously, or vibrates first and
then rings.
User level settings
In the "Beginner mode" setting, the phone only offers those functions in all menus and in Settings
that are generally used frequently. Foregoing nonused functions makes using the phone very simple
in this setting.
All functions supported by the phone remain available in all menus and settings in "Advanced mode".
If you make phone setting changes in "Advanced
mode", these changes remain available even if you
later revert back to "Beginner mode". So if you want
to change a setting not available in "Beginner
mode", you can temporarily enable "Advanced
mode" to make the setting change.
43
Page 44

Additional settings
Available in the Settings menu of "Advanced mode"
are additional menu options and sub-menus that
are not available in "Beginner mode".
Call settings
Available here as additional settings:
Call forwarding
Call waiting
Number display
Accept mode (call accepted by opening the
phone, pressing any key or automatic)
Visibility main menu
The main menu also makes available functions that
perhaps you do not need. If you do not use the
alarm, the tasks and the calculator for example,
these functions can be hidden in "Visibility main
menu".
Accessing this menu option shows all main menu
options - each one can be enabled or disabled individually.
Even if you disable options in the main menu, the
respective functionality remains available in part.
Disabling "Messages" in the main menu for example
44
Page 45

means the phone still receives short messages, notifies you of them and lets you read and answer
them. Disabling "Contacts" for example means the
contacts continue to be available from the right Display key.
Order main menu
You can specify here the order in which the main
menu options are displayed. This means you can
position frequently used functions at the start, and
less commonly used functions at the end of the
main menu.
Accessing this menu option shows all main menu
options in the current order, and "Select" is shown
on left Display key .
Use the and keys to select the main
menu option you want to move to another place,
and then press the left Display key . The Display key text changes to "Moving". Now use
and to select the main menu option in front of
which you want to move the menu option selected,
and then re-press left Display key .
The main menu is then displayed in the new order.
You can move more menu options or exit the setting for the order using right Display key
("Back").
45
Page 46

Security settings
Here you specify whether a prompt is issued for the
PIN stored on the SIM card (code, password) when
the phone starts up; you can also change the PIN.
You are also able to set up a block on the phone
and change the phone password in addition to
locking the SIM card. This is where you can also set
up a blacklist and its settings (reject calls and/or
SMS messages from numbers on the blacklist).
Note: The phone password (factory setting
) is also used as a prompt for resetting the device to the default settings.
Network selection
Specified here is whether the connection to the
wireless network is established automatically or
manually.
Emergency settings
The settings for the emergency function are configured here. Please refer to the "Emergency" section
for a description.
46
Page 47

Restore factory settings
The phone can be reset to the factory settings here.
Please note that only the settings are reset.
The phone password (factory setting )
must be entered to reset the phone to the factory
settings.
Connection to a computer
Connect the telephone's micro USB jack to the USB
port on your computer. "Mass Storage" is shown on
the display. Press left Display key . Now the
memory integrated in your phone and any memory
cards inserted are displayed on your computer as
new devices with exchangeable media.
If you wish to use your own ring tones, images for
contacts or your own background image, copy the
relevant audio or image file from your computer to
the phone memory or memory card. These files are
selected in the phone as ring tones, contact images
or background images and must remain stored in
memory. We therefore recommend creating a folder
in memory for these kinds of files so that they are
not deleted accidentally.
47
Page 48

SOS call
Your phone features an emergency function, activated by pressing the emergency key on the back
of the device for about two seconds.
If at least one emergency number is entered in the
configuration and the emergency key is enabled,
the phone initiates an emergency call when the
emergency key is pressed for 2 seconds or so.
The phone then sounds an alarm tone and (if activated) sends an SMS with an individually configurable text to the (up to 5) emergency number(s)
stored.
Next, the telephone will call the first of the saved
emergency numbers.
If the call is not accepted, the phone calls the next
emergency number stored. If a connection to a person cannot be established on any of the emergency
numbers, the phone repeats up to three times in
succession all emergency numbers entered.
The cycle of making emergency calls ends once a
connection is established. No more emergency
numbers are then called.
If no connection can be established to the maximum number of five numbers (a maximum of three
48
Page 49

times each), the phone sets Auto answer mode. It
then automatically accepts incoming calls.
Whilst the telephone is calling one of the emergency numbers, the number is displayed. Since the call
is made in hands-free mode, you can hear whether
the called party picks up.
Testing of the emergency call function
Thoroughly test the emergency call function after
setup. This process should involve the owner of the
Ergophone and those whose numbers are stored in
the phone.
During the test, remember that the user of the
phone is in a stressful situation when making the
emergency call. Those receiving the emergency call
should therefore be familiar with using the emergency function so as to be able to issue instructions
as required (such as on how to end the emergency
call function).
Emergency call configuration
To configure emergency calling, it must be enabled
and the emergency text and numbers must be entered.
With the phone in standby, select the left Display
key, then "Settings" in the main menu and then
49
Page 50

"Emergency settings". This is where all the settings
for configuring emergency calls are.
Note: The emergency settings are only available
in "Advanced mode". If an SOS call has
been set up in this user setting, it remains
available even if the user settings are reset
to "Basic".
Emergency numbers
Enter your emergency numbers (up to five) under
"Emergency numbers". In an emergency, the first
number entered is called first, then the second, etc.
Accessing the menu option shows the five memory
locations for emergency numbers. Press the left
Display key and select the emergency number
from the contacts.
Emergency button active
Here you specify whether the emergency key on
the back of the phone is enabled or disabled.
When the key is enabled, the emergency function is
active as described. With the key disabled, the
emergency call function is not available, even if you
have saved the emergency numbers and text.
50
Page 51

Emergency SMS
From "Settings", select whether the emergency
SMS is sent before the emergency number is dialled, and whether its contents can be changed.
Note: If you enter as emergency numbers
phones which cannot receive SMS messages, the service provider calls the subscriber and reads out the SMS. This call
would block the emergency number telephone at the very moment the mobile telephone is trying to make the emergency
call. Therefore only enable sending of an
SOS SMS when all phones are able to receive SMS messages as text.
Emergency alert
You specify here whether the phone sounds an
alarm at the start of an emergency call.
Cancelling an emergency call
If an emergency call is triggered accidentally, it can
be aborted with prolonged pressing again of the
emergency call key. If you press the red hang-up
key only slightly, the phone will disconnect
this call but will start with the next number anew.
51
Page 52

Important information on emergency functions
Do not rely exclusively on this emergency func-
tion. The emergency function cannot be enabled
in certain situations (such as no network coverage or no credit for outgoing calls).
Make sure that no answer machines are con-
nected to emergency numbers.
Discussing the entering of emergency numbers
with the holders of these numbers is absolutely
imperative so that they know exactly what to do
in an emergency.
The general emergency number for mobile net-
works (112) may not be entered as an emergency number; this also applies to 110 and other official emergency numbers.
After setting up the emergency function, test it
thoroughly and rectify any mistakes.
Please note that the emergency call might also
be initiated by coming into contact with other objects (such as when in a handbag), so take appropriate care of the phone when the emergency function is enabled.
52
Page 53

Appendix
Warranty
Your point of contact for warranty obligation benefits is the specialist retailer where you acquired your
device.
Warranty conditions are based upon the legal regulations of the country in which the device was purchased. Your specialist retailer will be glad to provide more information.
Guarantee
Tiptel provides a voluntary guarantee on the device, the conditions of which are published on
http://www.tiptel.com. The guarantee conditions
applicable at the time of purchase apply. The original sales slip (receipt, bill) with serial number
and/or IMEI number is used as proof of purchase.
Please keep these documents in a safe place.
Declaration of conformity
This device satisfies the requirements of the EU directive on radio and telecommunication terminal
equipment and the mutual recognition of their conformity. The CE mark on the device confirms conformity with the above directive.
53
Page 54

We hereby declare that the device satisfies all fundamental requirements of European directives.
For details on the declaration of conformity please
visit http://www.tiptel.com.
Disposal
Packaging: Dispose of card and cardboard boxes
in the used paper container and throw plastic parts
into a recycling container.
Device disposal: Used electrical devices should not
be disposed of in the household waste. Dis-pose of
the device at your local collection points (scrap or
recycling yards). Please contact your lo-cal authority for information on disposal sites.
(Rechargeable) batteries: (Rechargeable) batter-ies
may not be disposed of in the household waste. As
a consumer, you have a legal obligation to return
(rechargeable) batteries. Please contact your local
authorities, or the specialist retailer from where you
purchased the device, for information on disposal
sites.
54
Page 55

Page 56

Tiptel.com GmbH
Business Solutions
Halskestraße 1
40880 Ratingen
Deutschland
Tel.: 0900 100–84 78 35*
Internet: www.tiptel.de
E-Mail: info@tiptel.com
International: www.tiptel.com
*(1,49 Euro/Min. aus dem Festnetz der
Deutschen Telekom, abweichende
Mobilfunkpreise möglich)
Tiptel AG
Pumpwerkstrasse 40
8105 Regensdorf
Schweiz/Suisse/Svizzera
Tel.: 044 843 1
Fax: 044 843 13 23
E-Mail: tiptel@tiptel-online.ch
Internet: www.tiptel-online.ch
Tiptel NV/SA
Leuvensesteenweg 510 bus 4
1930 Zaventem
Belgique/België
Tel.: 0903 99 333 *
Fax: 02 714 93 34
E-Mail: tech@tiptel.be
Internet: www.tiptel.be
* (1,20 Eur / Min.)
3 13
Tiptel GmbH
Ricoweg 30/B1
2351 Wiener Neudorf
Österreich
Tel.: 02236 677 464-0
Fax: 02236 677 464-22
E-Mail: office@tiptel.at
Internet: www.tiptel.at
Tiptel B.V.
Camerastraat 2
1322 BC Almere
Nederlands
Telefoon: 036 53 666 50
Fax: 036 53 678 81
e-mail: info@tiptel.nl
Internet: www.tiptel.nl
Tiptel s.a.r.l.
23, avenue René Duguay-Trouin
78960 Voisins-le-Bretonneux
France
Tél.: 01 39 44 63 30
Fax: 01 30 57 00 29
e-mail: support@tiptel.fr
Internet: www.tiptel.fr
(en) 07/2016
EDV 4935561
 Loading...