

Page 1
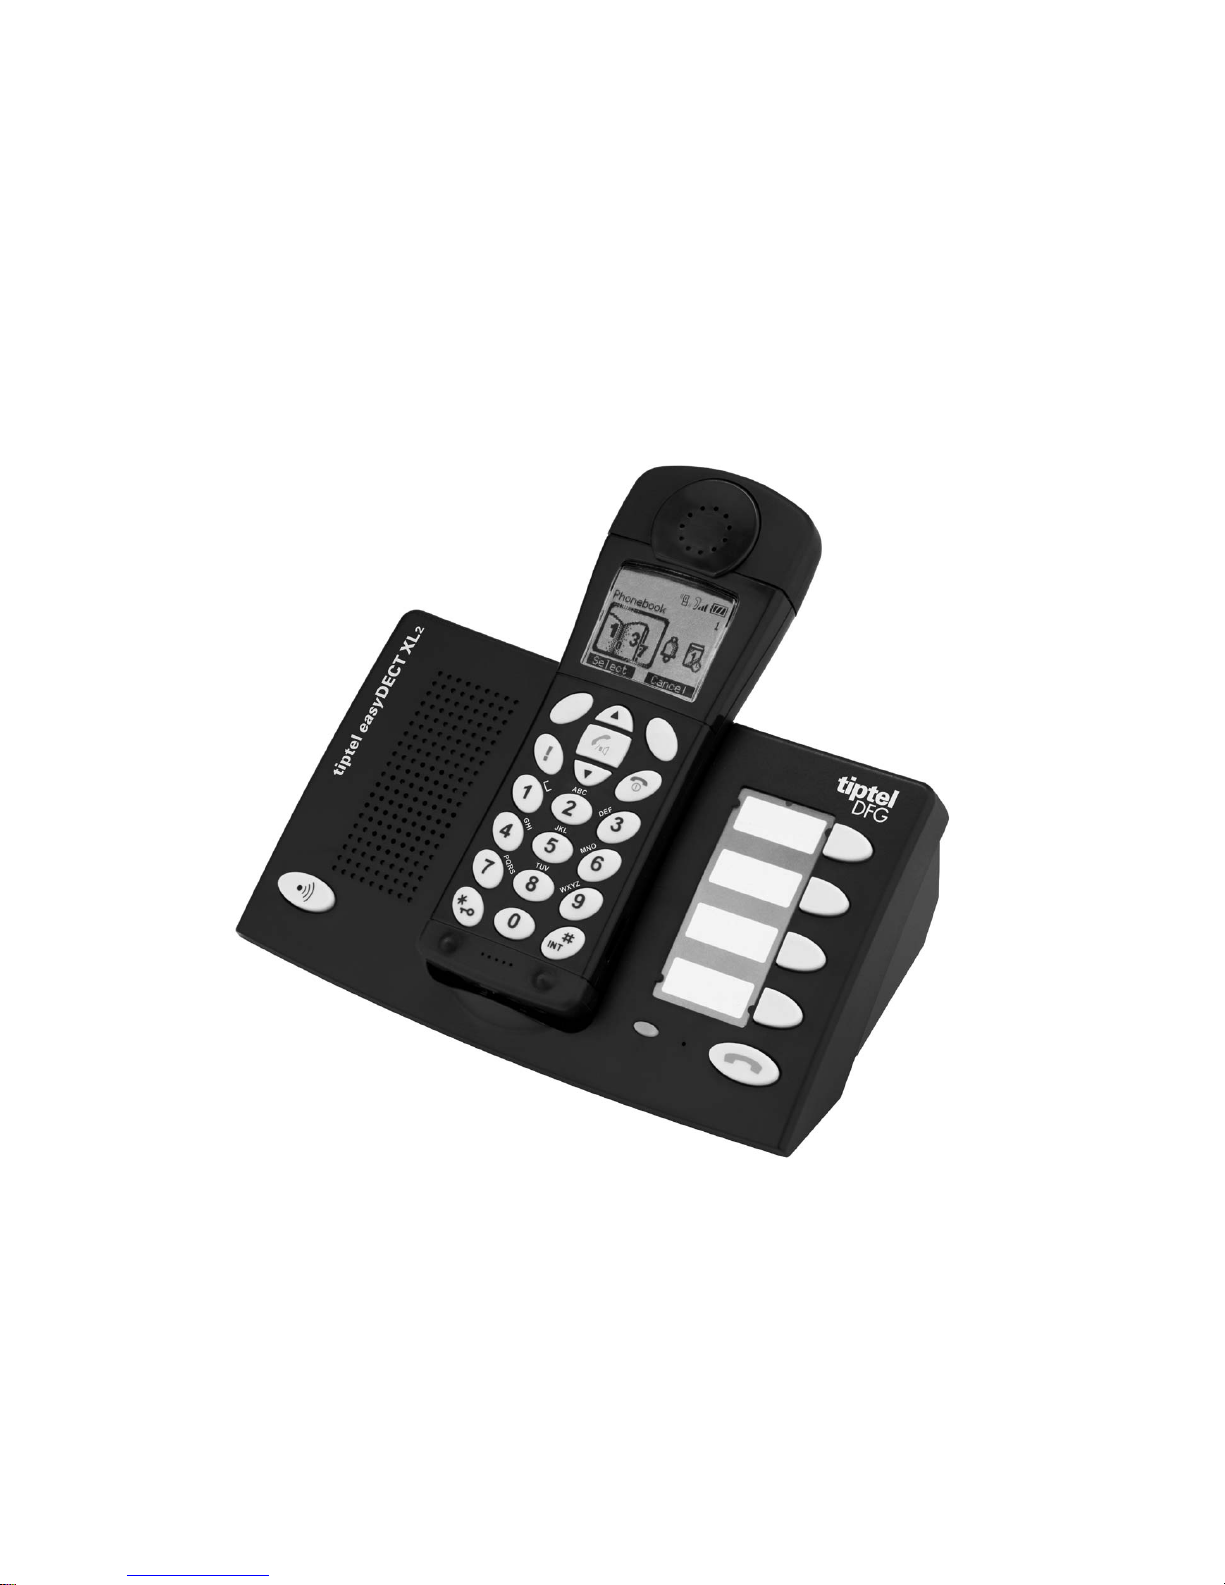
Ergonomic cordless phone
tiptel easy
Operating instructions (UK)
DECT XL
2
tiptel
DFG
Page 2

Safety information
Only use the power supply unit supplied.
Fit only the recommended rechargeable batteries of the same type! Use no
other types of batteries or non-rechargeable batteries, as they could
damage health and cause personal injury.
Ensure correct polarity when fitting rechargeable batteries, and use the
battery type according to these instructions.
The operation of medical appliances may be affected. Be aware of the
technical conditions within the particular environment (e.g. doctor's
practice).
The handset may cause an intrusive 'hum' in hearing aids.
Do not install the base in bathrooms or shower rooms. The handset and
base are not watertight.
Drivers must not use their phones while driving (Walk and Talk function).
Switch off your phone while on board an aircraft (Walk and Talk function)
and ensure that it cannot be switched on again accidentally.
Do not use the phone in environments subject to explosion hazard (e.g.
auto paint shops).
Ensure that your easyDECT XL 2 is accompanied by these instructions
when you give it to others to use.
Dispose of the batteries and phone in accordance with environmental
regulations.
Carry the handset by means of the carrying strap only in front at the body
over the clothes. Thus it is always freely accessible.
Carry the handset by means of the carrying strap only with full conscious-
ness and pay attention you to the fact that the strap does not get
caught. The risk of injury cannot be completely excluded.
Emergency call function: In rare cases, the function of sending out an
emergency call cannot be guaranteed. This might be the case if e.g. the
telephone network fails or if the radio transmission from the handset to the
base station is subject to interference.
If the device is used for people who are in a critical or life-threatening health
condition, you should not refrain from additional safety means.
Page 3

1
Table of contents
Before using ................................................................................................. 4
Scope of supply .............................................................................................. 4
Operating elements ........................................................................................4
Setting up ...................................................................................................... 8
Installing the telephone .................................................................................. 8
Installing the base station .................................................................................... 8
Setting up the handset ....................................................................................... 10
Attaching the carrying strap to the handset ....................................................... 12
Connecting a headset ........................................................................................ 12
Inserting the name plate on the base station ..................................................... 13
Setting the display language ........................................................................13
Turning handset on / off ............................................................................... 14
Choosing the dial mode ............................................................................... 14
Setting date & time ....................................................................................... 15
Taking the telephone out of operation .......................................................... 16
Basic functions .......................................................................................... 17
Standby mode (waiting for incoming calls) ................................................... 17
Making a call ................................................................................................ 17
Receiving a call ............................................................................................ 18
Putting a call on hold ....................................................................................19
Adjusting voice volume................................................................................. 19
Using speakerphone (Handsfree mode of handset)..................................... 19
Redialing last dialed numbers ...................................................................... 20
Flash signal .................................................................................................. 20
Using the base station speed dialing keys ................................................... 21
Adjusting loudspeaker volume of base station .............................................21
Transferring a call from base station to handset .......................................... 22
Temporary tone dial switchover .................................................................... 22
Fuzzy dialing ................................................................................................ 22
Battery checking and handling .....................................................................24
Out of range indication ................................................................................. 24
Locking keys on handset.............................................................................. 25
Paging .......................................................................................................... 25
Call lists ...................................................................................................... 26
Page 4

2
Table of contents
Phonebook ...................................................................................................26
Storing a phone number by using phonebook menu ......................................... 26
Storing a phone number in standby mode ......................................................... 27
Entering a name ................................................................................................. 28
Entering a dialing pause .................................................................................... 29
Searching for and dialing a number in phonebook ............................................ 29
Editing or deleting a phonebook entry ............................................................... 30
Redialing the last dialed numbers ................................................................ 31
Searching for and dialing a number in outgoing calls list .................................. 31
Using outgoing calls options .............................................................................. 32
Incoming calls .............................................................................................. 32
Searching for and dialing a number in incoming calls list .................................. 33
Using incoming calls options .............................................................................. 33
Dialing a Call by Call number (network code number) ................................. 34
Using menus ............................................................................................... 36
Accessing menu mode ................................................................................. 36
Bell & Beep ................................................................................................. 39
Setting key tone ........................................................................................... 39
Adjusting ringer of handset .......................................................................... 39
Adjusting ringer of base station .................................................................... 40
Alert type of handset .................................................................................... 42
Diary ............................................................................................................ 43
Alarm ............................................................................................................ 43
Calculator ..................................................................................................... 44
Handset settings ........................................................................................ 46
Setting standby display ................................................................................ 46
Selecting a language .................................................................................... 47
Registering a new handset ........................................................................... 47
Selecting base .............................................................................................. 49
Storing Call by Call numbers ........................................................................ 49
Setting access code ..................................................................................... 50
Resetting the handset .................................................................................. 50
Base settings .............................................................................................. 52
Changing base PIN ...................................................................................... 52
Page 5

3
Table of contents
Deactivating a handset ................................................................................. 53
Barring outgoing calls ................................................................................... 53
Changing flash time ..................................................................................... 54
Resetting the base station ............................................................................ 55
Emergency call mode ................................................................................... 55
Description of emergency call mode .................................................................. 55
Storing emergency numbers .............................................................................. 56
Turning emergency call mode ON/OFF ............................................................. 57
Sending out an emergency call .......................................................................... 57
Process of an emergency call ............................................................................ 58
Manually disrupting an emergency call.............................................................. 58
Making special emergency call settings ............................................................ 59
Storing call numbers to speed dialing keys .................................................. 61
Favorite (special functions)....................................................................... 63
Walkie talkie ................................................................................................. 63
Room Monitoring .......................................................................................... 63
SMS, Email* and Fax* .................................................................................. 65
Setting service center number ........................................................................... 66
Setting terminal number*.................................................................................... 66
Writing and sending a new message ................................................................. 67
Message transmission ....................................................................................... 70
Viewing received messages .............................................................................. 70
Using outbox ...................................................................................................... 71
Deleting all messages ........................................................................................ 72
Setting the public key (confidential messages)* ................................................ 73
Appendix ..................................................................................................... 75
Maintenance ................................................................................................ 75
Cleaning the cordless phone........................................................................ 75
Troubleshooting............................................................................................ 75
Technical specifications ................................................................................77
Service ......................................................................................................... 78
Guarantee .................................................................................................... 78
CE sign ......................................................................................................... 79
Ecological information .................................................................................. 79
Index ............................................................................................................ 80
Page 6
Before using
4
Before using
Scope of supply
The content of the package is:
Base station,
Handset,
AC adapter,
Telephone connection cable,
Carrying strap for the handset
Two batteries for the handset
Additional items
- Operating manual
- Quick reference guide
- 4 info cards for the recipient of an emergency call
- 2 name plates and a plastic cover for the speed dialing keys
- 2 plates and a plastic cover for Police / Fire service.
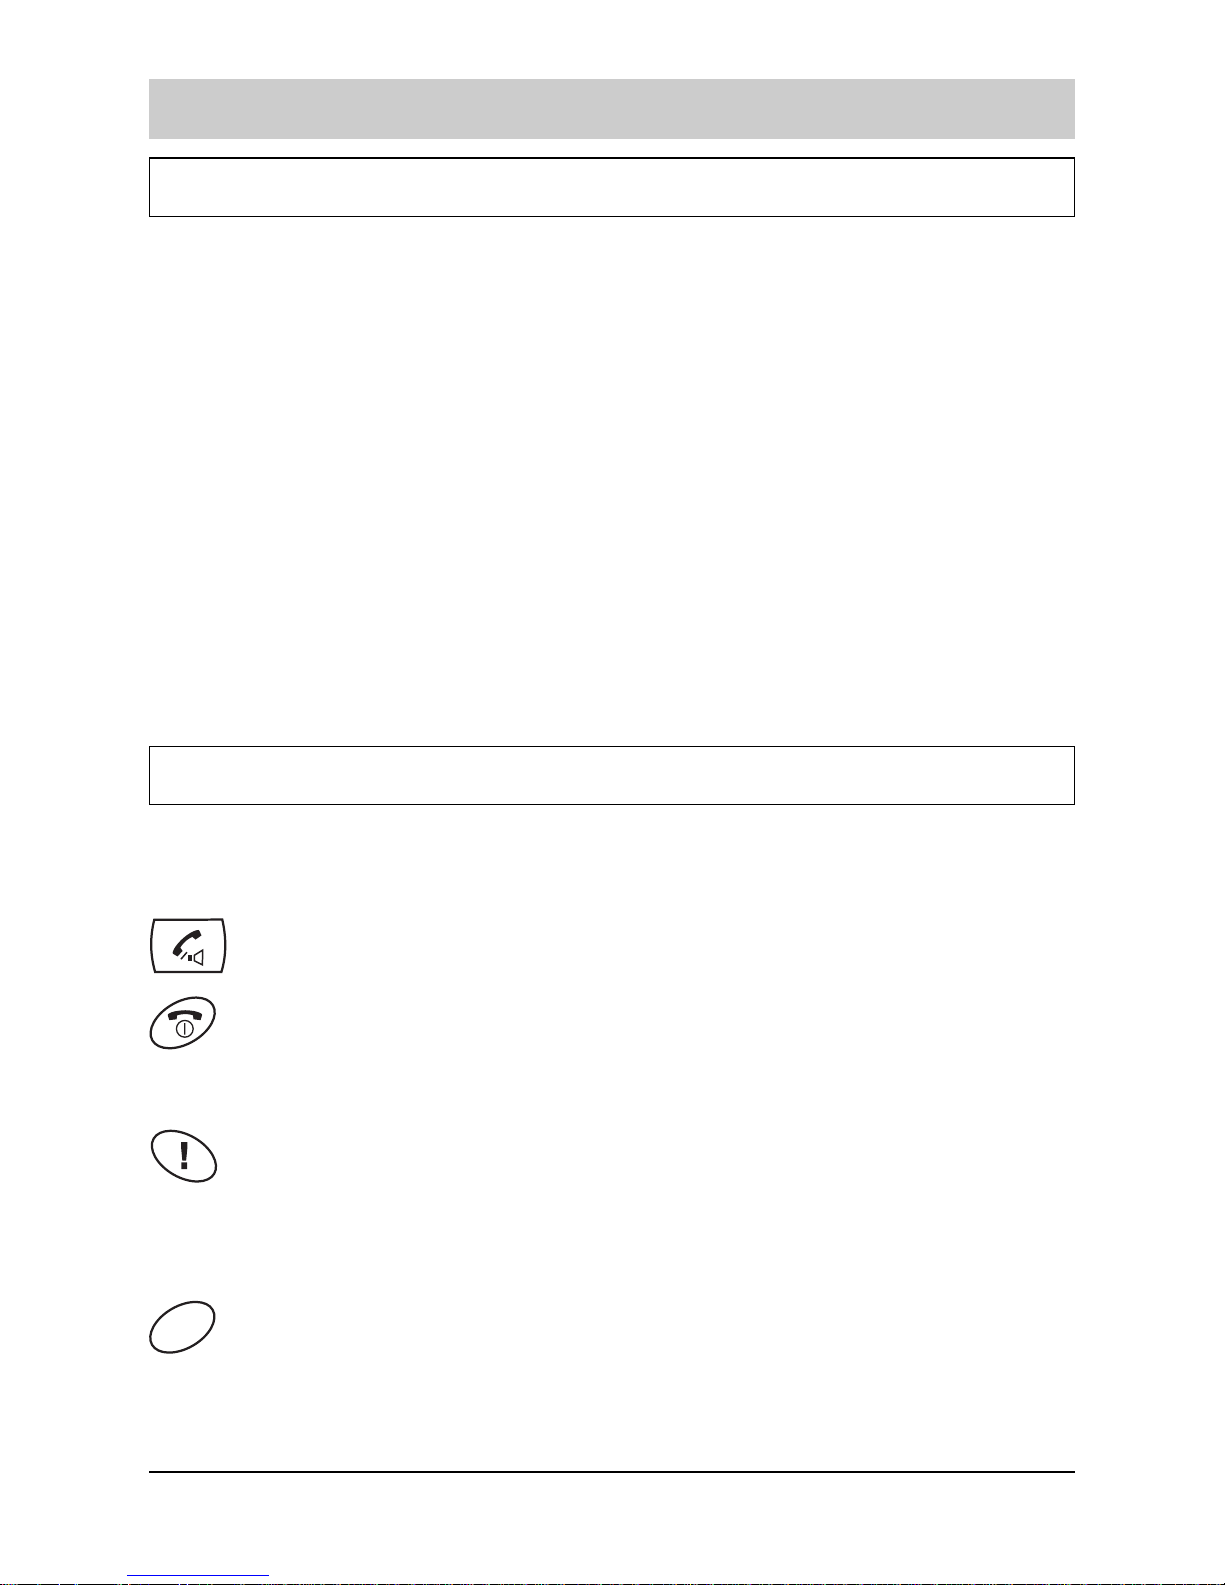
Operating elements
Key assignment on the handset
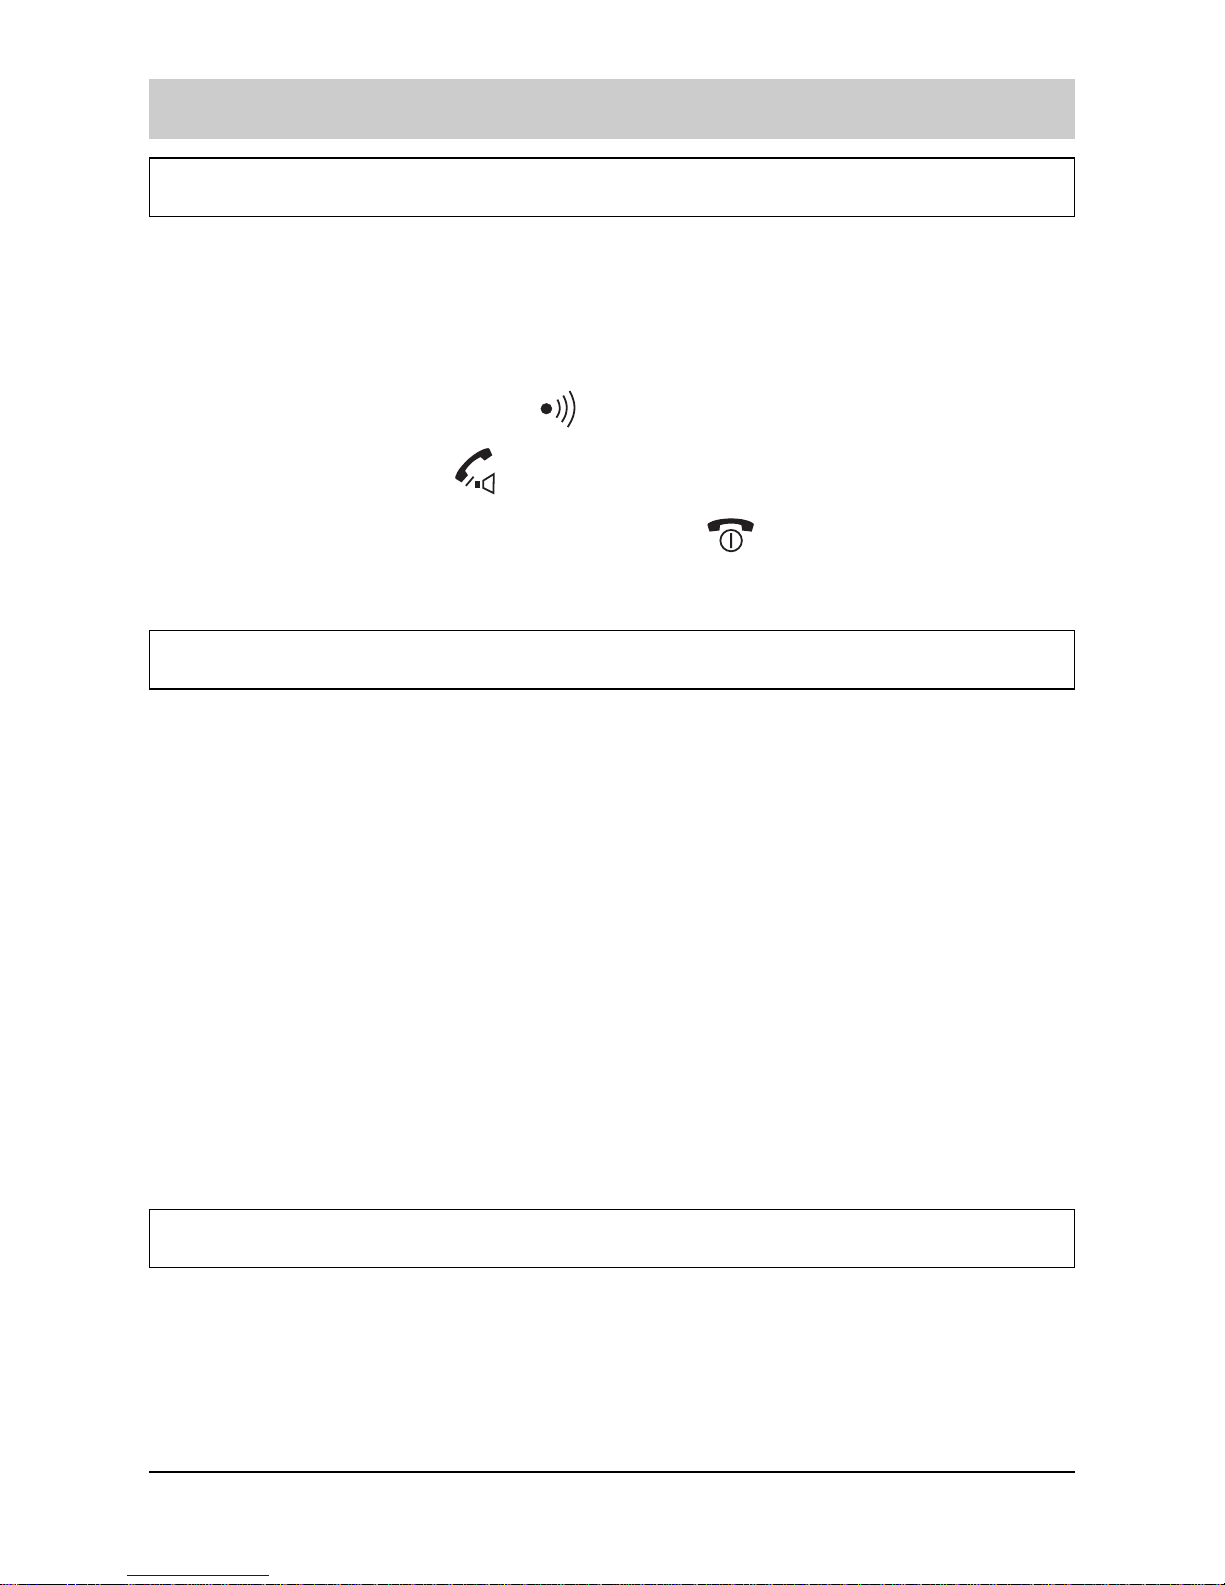
Lift key makes telephone calls and answers them. If pressed during a
call, activates the speaker phone for handsfree operation.
Replace key: if held pressed, turns the phone on or off. In menu mode,
briefly press it to cancel your input and return to standby mode. During
a call, briefly press it to end the call.
Emergency call key triggers an emergency call if the emergency
call function is set up. Press down the key for a few seconds in
case of emergency. The emergency call key lights up, if emergency
function is activated.
Soft keys - perform the functions indicated by the text immediately
over them (on the bottom line of the display) which changes time by
time.
Page 7

5
Before using
Arrow keys: In standby mode, they scroll through the phonebook
entries. In menu mode, scroll through the menu options. During a call,
adjust the volume. When editing text (SMS), the keys move the cursor
to the left or to the right.
Intercom-key:
- short press: enters the hash #
- long press: activates the intercom communication. Putting a call on
hold.
Call restriction key:
- short press: enters the star *
- long press: call restriction of handset on / off.
Page 8
Before using
6
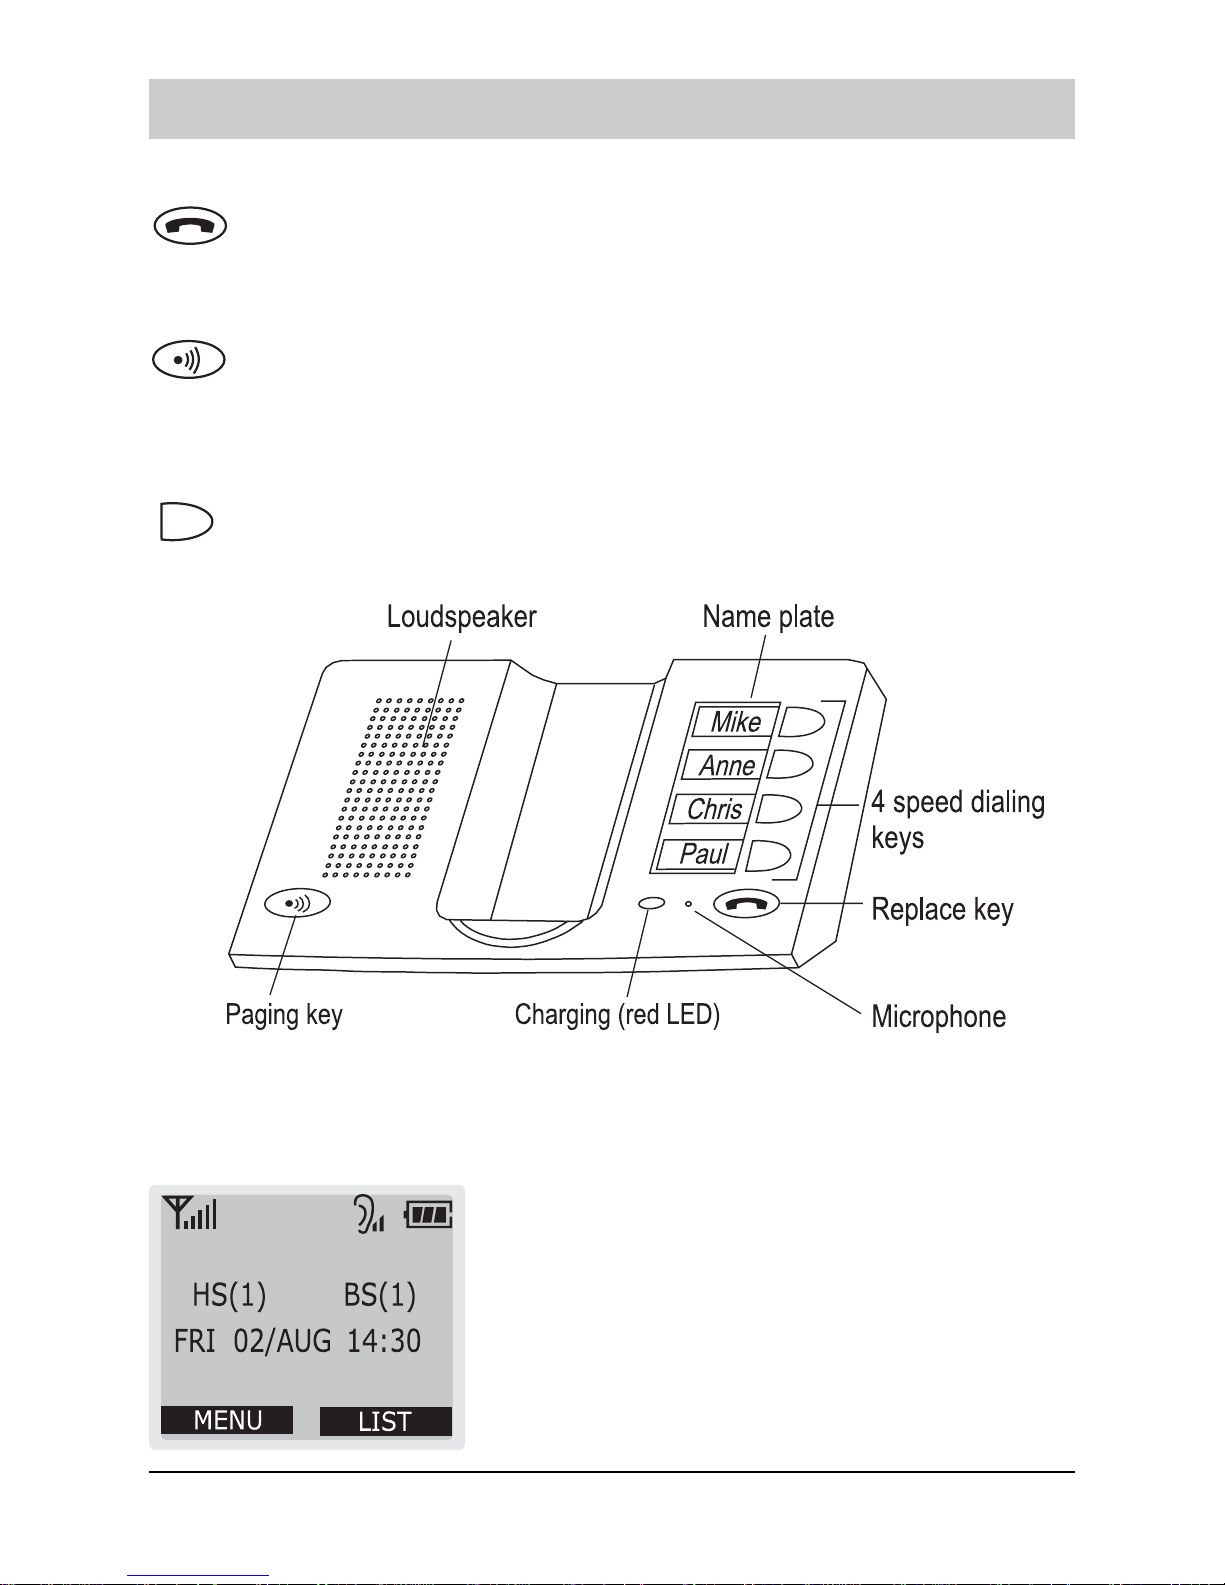
Key assignment on the base station
Replace key: This key is used to end a call established using
speed dialing keys on the base station. The key lights up, if the line is
engaged. The key signals an incoming call by flashing.
The Paging key calls all handsets registered. You can use this key
to find your handset. The ringing tells you where the handset is
located. With the paging key, a call can be transferred from base
station to handset.
The Speed dialling key dials a stored call number.
Display
The display comprises the following three areas:
Icon area.
Text and graphic area.
Indicates, time by time, the functions of the two soft
keys.
Page 9

7
Before using
Icon area:
The signal strength icon displayed at all times when your phone is on,
and shows the current signal strength. The greater the number of
bars, the stronger the signal.
The line icon indicates that the line is engaged.
The alarm icon appears when you set an alarm to ring at a specified
time.
The caller ID icon indicates that there is a received call which you
missed.
The vibration icon indicates, that an incoming call is signalled by
buzzer (vibration alarm on handset).
The voice volume icon indicates the current voice volume level. The
more bars, the louder the volume.
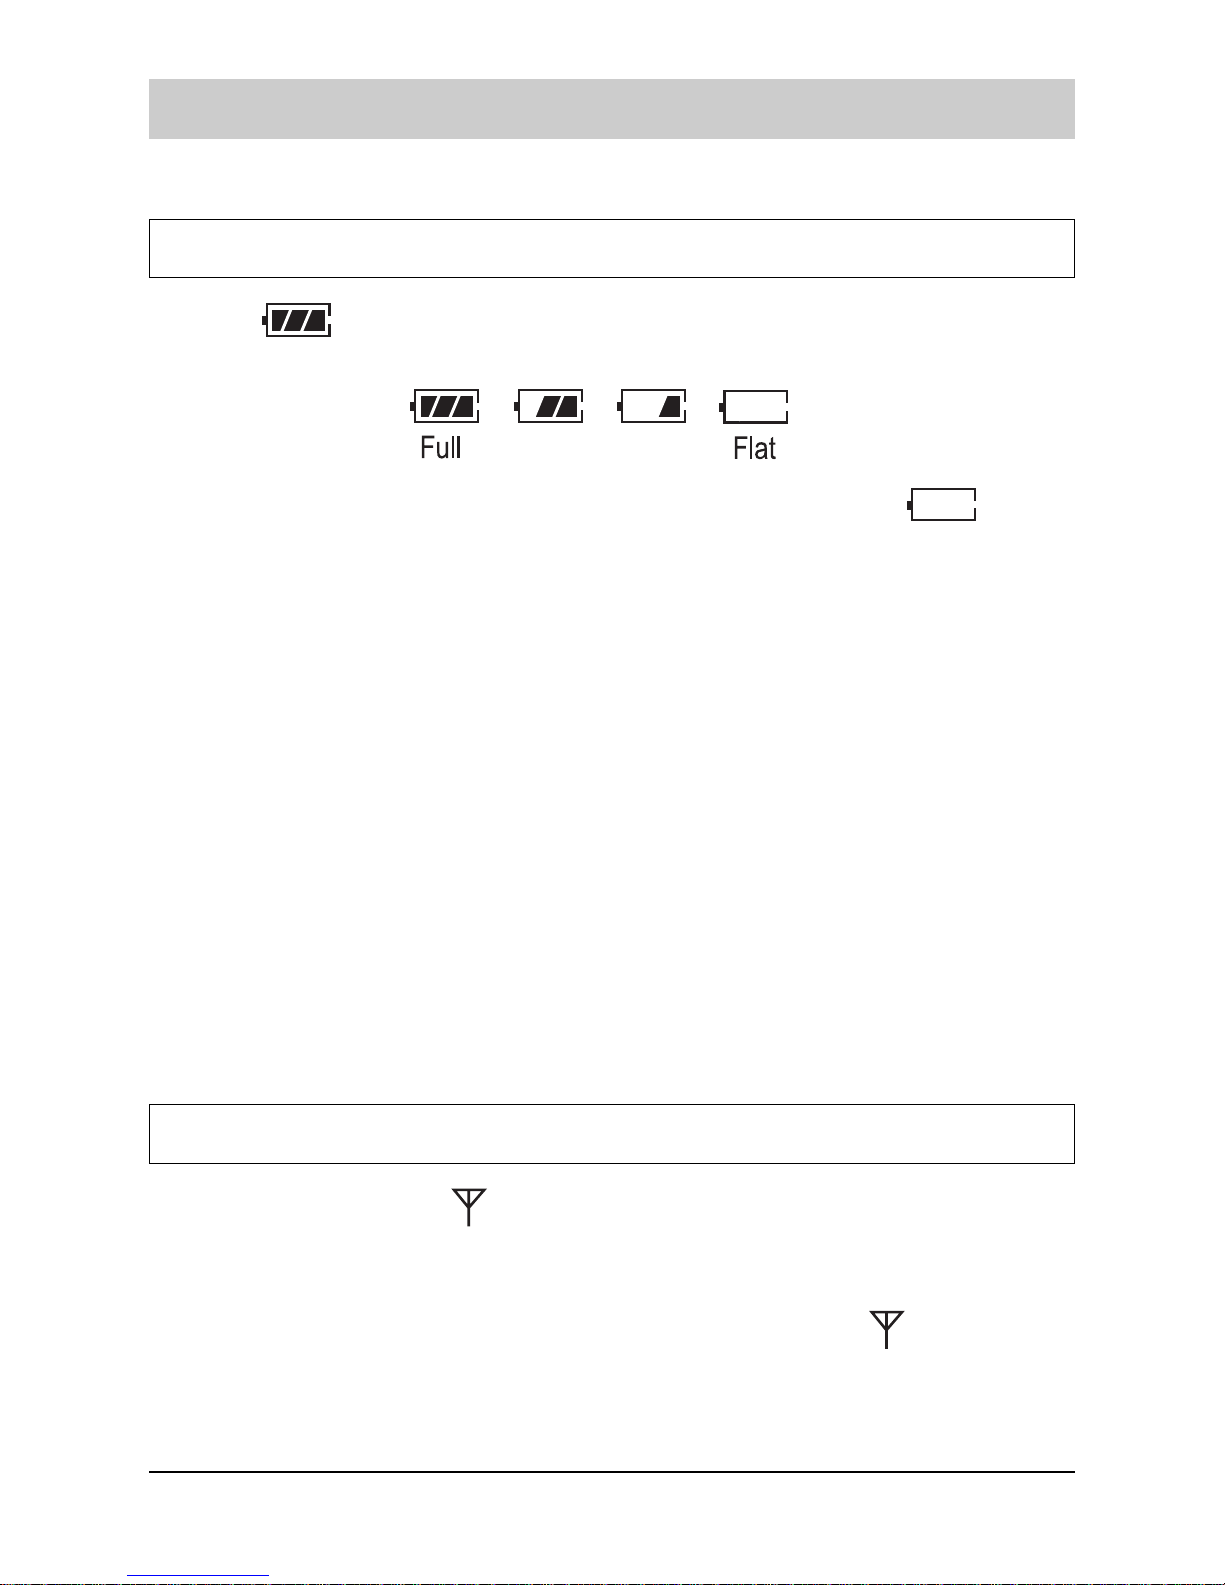
The batterie status icon is displayed all times when your phone is on,
and shows the level of your battery power. The more bars you see, the
more power you have left.
Speakerphone (handsfree mode) of handset ON.
In standby mode, you can also display an analogue clock instead of the over
stated information. For further references please see page 47.
Text and graphic area:
This area displays in-use information such as the other partys number, call duration,
menus, etc. In standby mode, it displays the base number, and the current time.
Page 10
Setting up
8
Installing the telephone
Installing the base station
Install the base in a dry and dust-free location away from direct sunlight and
make sure that both power and telephone outlets are available nearby. Choose
a location where relative humidity and temperature are inside normal value for
any electric appliances. Install the base in an open location away from other
electronic devices which can create strong interferences (e.g. computer, air
conditioning systems, TV etc.)
To avoid risks for people, or damages to the power and telephone cables of the
base, do not put anything on them and dont place the base where the cables
be walked on.
Place the base on a firm, solid surface. If you put it on something unsteady, it
may fall and be damaged. Should you place the base on valuable furniture,
place a proper protection under the base.
The base is designed for indoor use only.
Page 11
Setting up
9
You should only use the AC adapter supplied. You should only
use the connection cable supplied.
Batteries in the base station
4 batteries can be loaded into the base station (not supplied). They are used for
power failure protection. This protection is recommended if you are using the
emergency call function. Please use 4 standard batteries (NiMH = Nickel metal
hydride, 1200 mAh and higher).
Only insert recommended, rechargeable batteries of the same type!
Never use ordinary batteries, as this can lead to damage to health or
personal injury. Do not use any other types of chargers. This could
damage the batteries.
Please dispose of used batteries properly (do not thrown them in the domestic
rubbish). The cover of the battery compartment is screwed down for safety reasons.
This means that the compartment cannot accidentally come open and that the
batteries are securely fitted.
Power failure
If the 4 batteries are fitted in the base station and the AC dadapter is disconnected,
the batteries will bridge this power failure. Make sure that the power supply plug
remains always put.
Inserting / replacing batteries in the base station
For safety reasons, disconnect the telephone from the telephone network and the
mains, by removing the telephone plug and the AC adapter were previously
connected. Unscrew the screw on the battery compartment cover using a narrow
Phillips screwdriver. Insert or replace the batteries (NiMH). Ensure that the polarity
is correct. Replace and screw down the battery compartment cover.
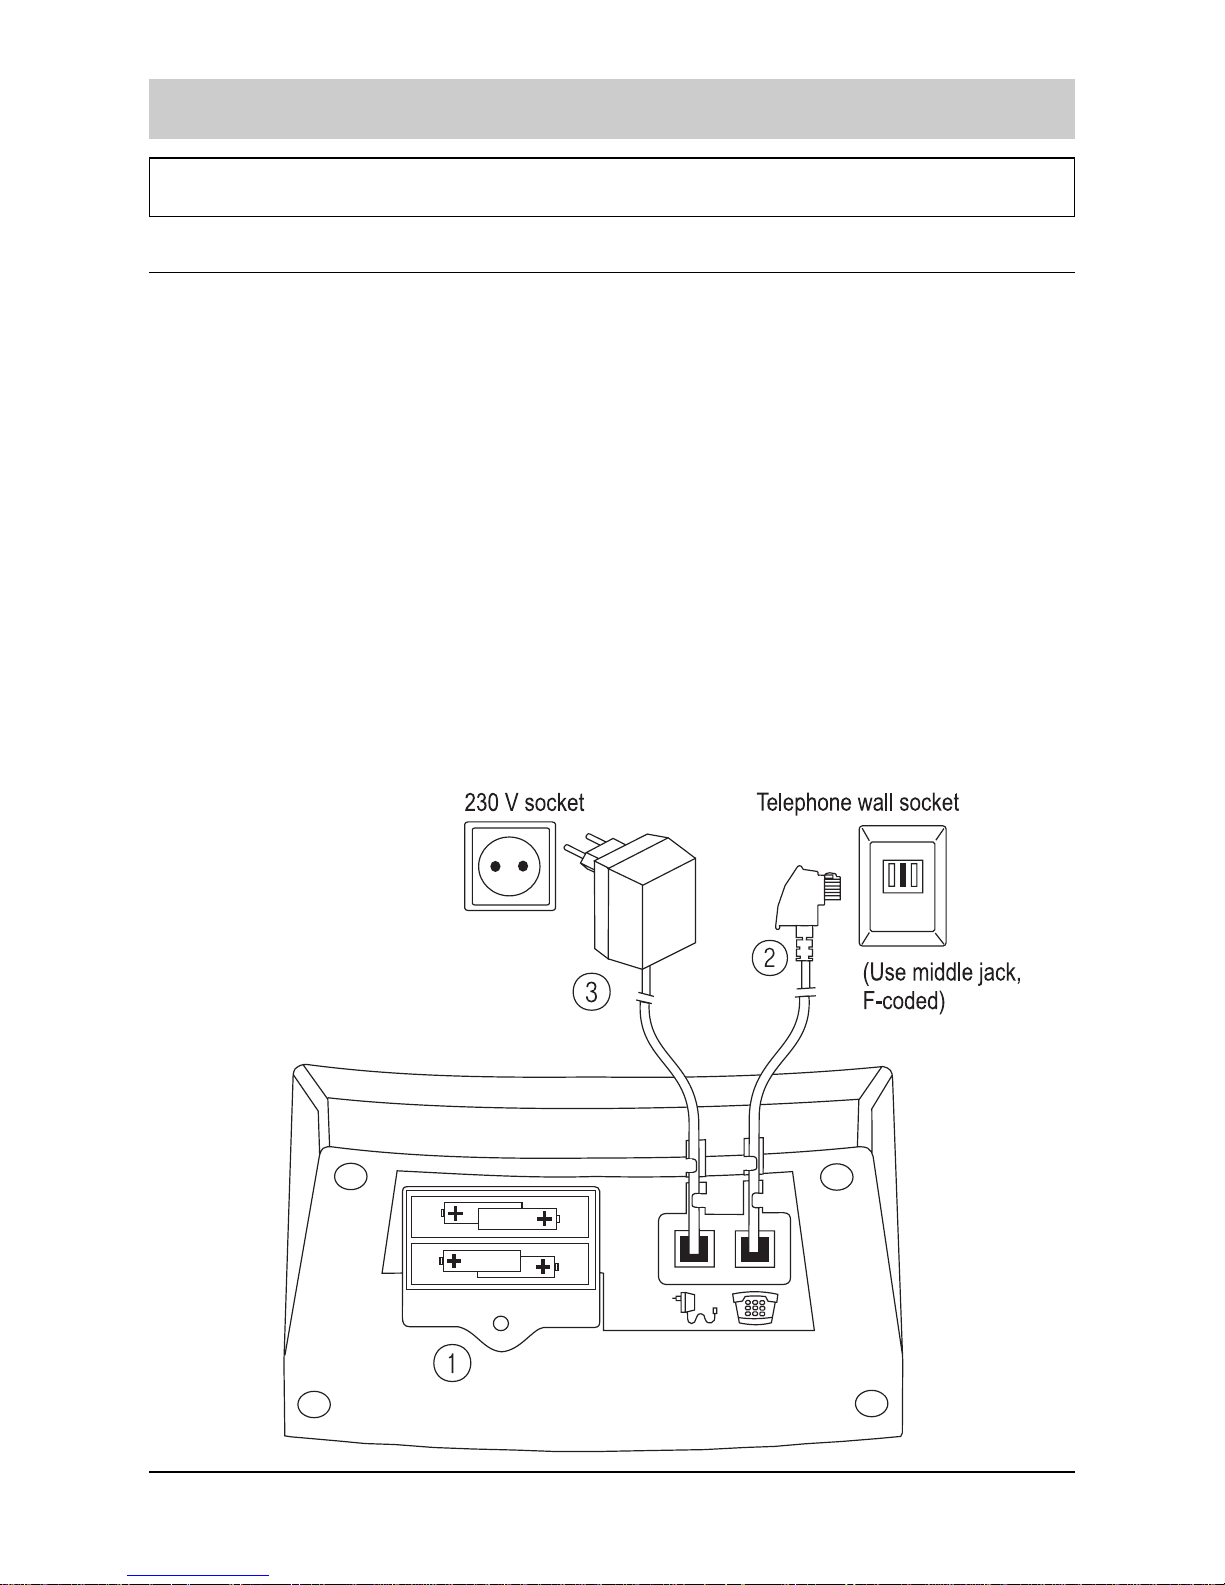
Connect telephone to C/O line
The telephone connecting cable has two different plugs. The smaller of them should
be plugged into the socket marked with a telephone symbol on the base of the
telephone. Place the cable in the appropriate cable duct. Plug the TAE plug into
your telephone connections TAE socket (code F).
2
1
Page 12
Setting up
10
Connect telephone to Power
Plug the AC adapter cable plug into the socket with the mains symbol. Place the
cable in the appropriate cable duct. Then plug the AC adapter into a 230V socket.
Removing the cables
First of all unplug the AC adapter from the 230V socket and then remove the TAE
plug from your telephone connections TAE socket.
To remove the cables on the underside of the telephone press (e.g. with a ballpoint
pen) the plugs locking clips towards the body of the plug and pull out the plug by
the cable.
Setting up the handset
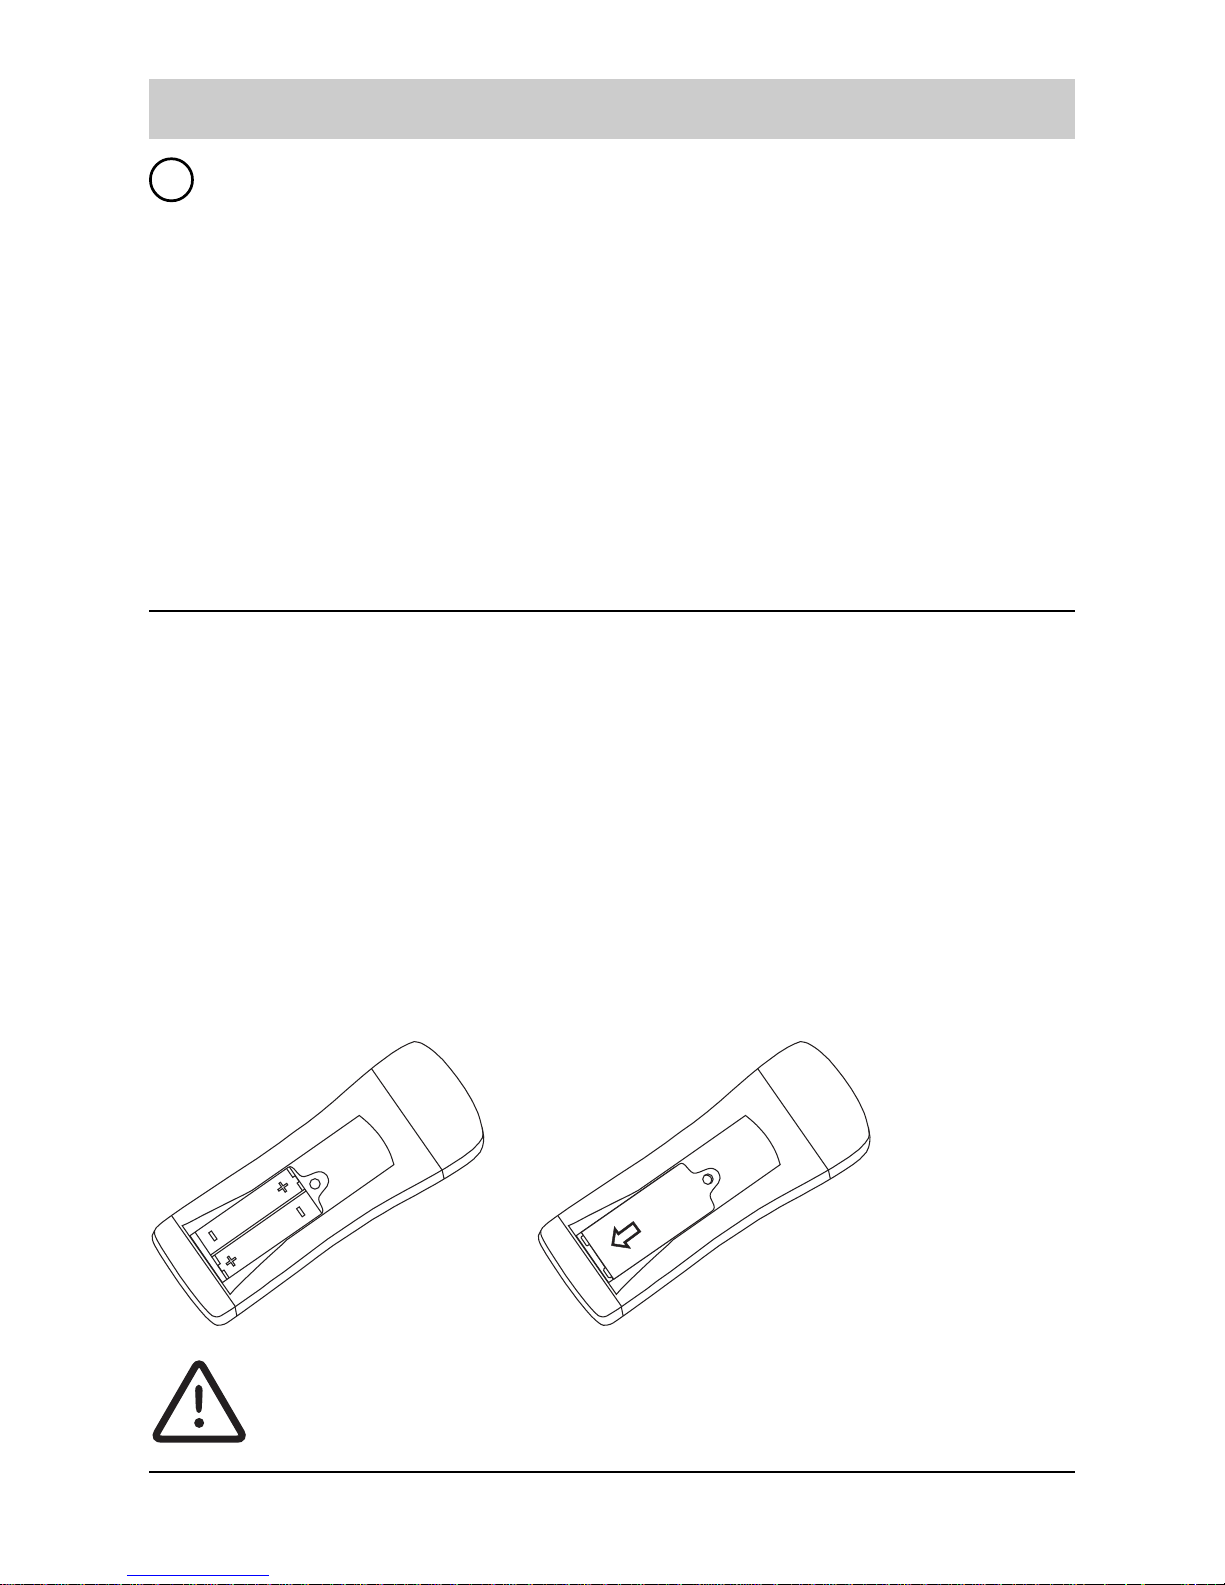
Opening the battery compartment and inserting the batteries
The battery compartment is on the rear of the handset under the Police / Fire
label. The cover of the battery compartment is screwed down for safety reasons.
This means that the compartment cannot accidentally open and that the batteries
are securely fitted.
Unscrew the screw using a Phillips screwdriver and remove the battery
compartment cover (not necessary for initial installation).
Insert the attached batteries (NiMH = Nickel metal hydride), with the correct
polarity (see Fig. on the left). You will hear a confirmation tone.
Only insert recommended, rechargeable batteries of the same type
(NiMH, 1200 mAh and higher). Never use ordinary batteries, as this
3
Page 13

Setting up
11
can lead to damage to health or personal injury. Do not use any other
types of chargers. This could damage the batteries.
Replace the cover (see Fig. on the right of page 10) and tighten the screw.
Inserting plate and plastic cover
Enter your own call number and the call numbers for the police and fire service in
the appropriate fields. Slide the label flat into the recess under the clips (see Fig.
on the left). Slide the cover over them (see Fig. on the right).
You can remove the cover by inserting a paper clip into the groove and slowly and
carefully lifting the cover. Once you have released the cover from the two lower
clips, you can remove it from the recess. Repeat this procedure for the label.
Placing the handset on the base station
Place the handset on the base station with the display pointing upwards. The
confirmation tone sounds and the red LED on base station lights up.
Leave the handset in the charging cradle so that the batteries can be charged.
The fist time you charge the batteries, we recommend an uninterupted
charging time of at least 15 hours, regardless of the charge level
display.
When the batteries are new, they doesnt provide 100% of them
efficiency; it means that they might be discharged earlier. To reach the full
battery duty, you have to run-in the batteris with at least 3-4 deep
charging / discharging cycles, after that they will reach their maximum
Page 14
Setting up
12
capacity.
With the daily use, it is not necessary to place the handset to the base
after each call. It is better for the batteries, if they load themselves nearly
to empty and then again fully.
The batteries warm up during charging; this is a perfectly normal
process and is not dangerous.
The charge level for the batteries displayed is only correct after an
uninterrupted charging / discharging process. You should not,
therefore, open the battery compartment unnecessarily.
The charge level display is used for orientation of the remained energy
reserve.
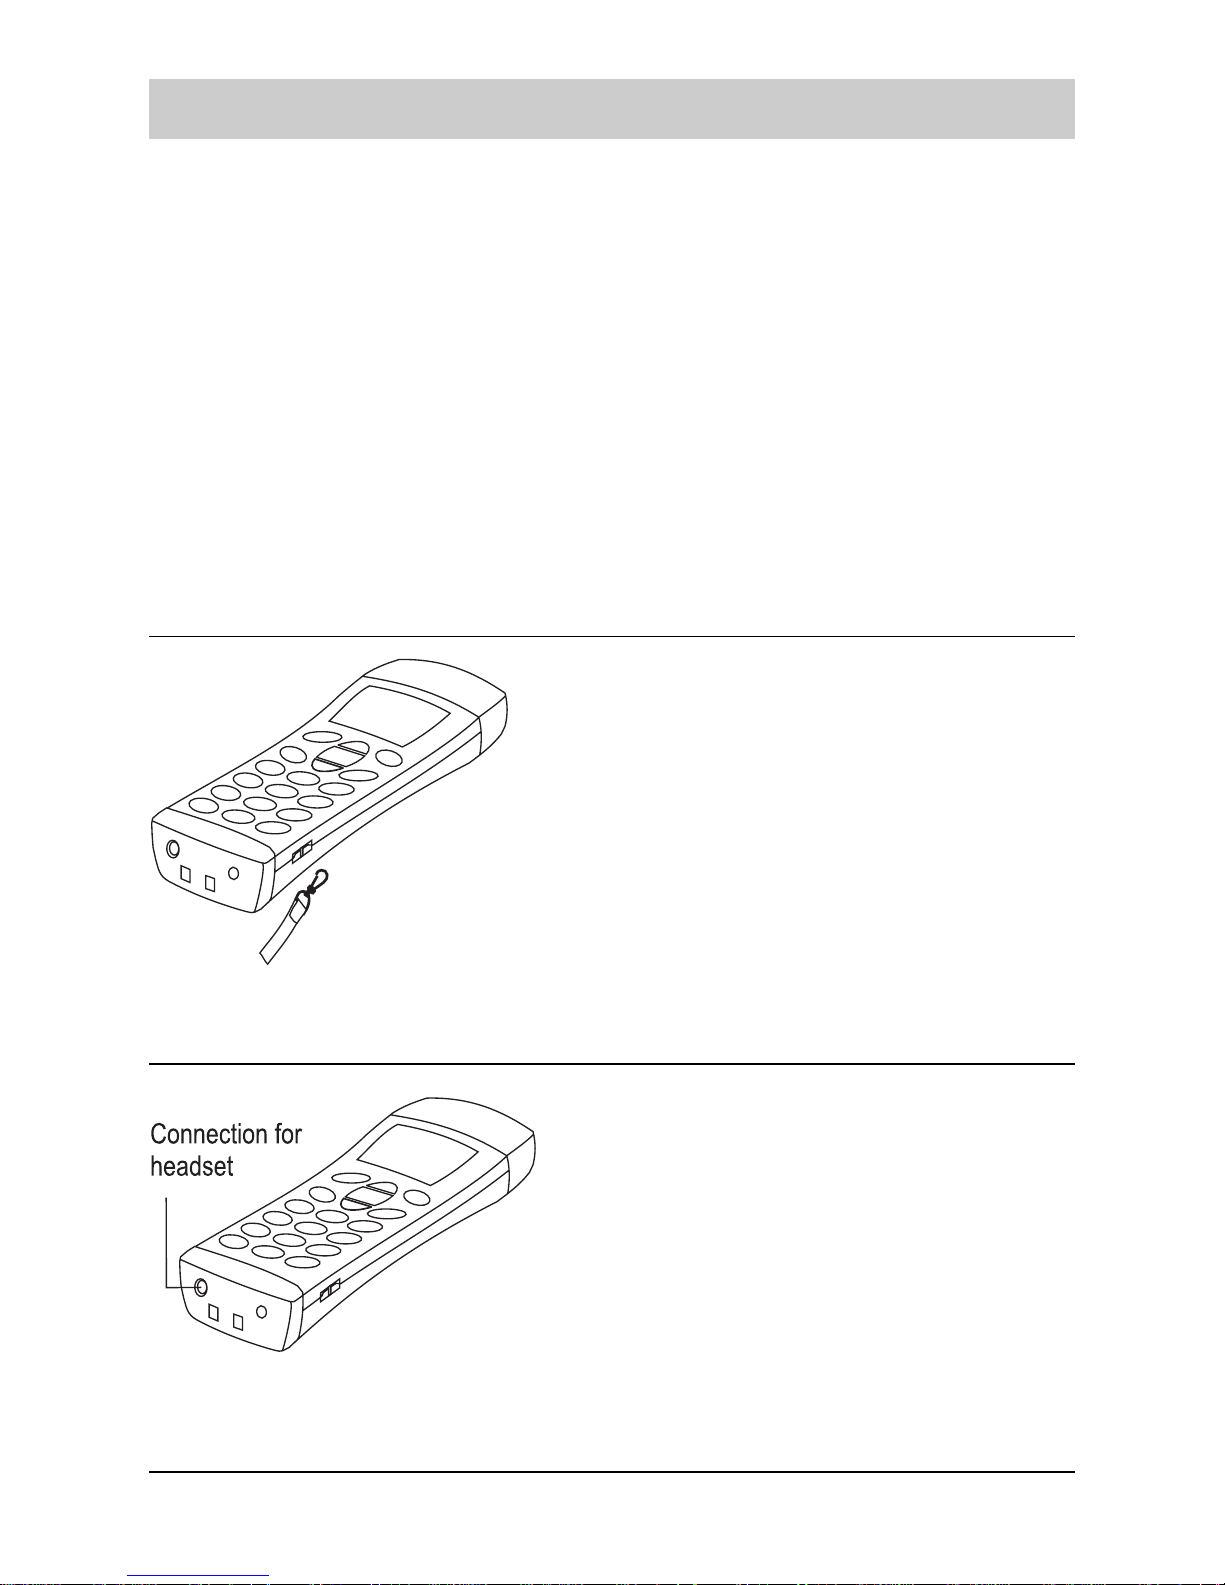
Attaching the carrying strap to the handset
Fit the carrying strap hooks in the eyes on
the left and right of the handset. Test
that the hooks are fitted correctly before
hanging the carrying strap onto them. The
length of the carrying strap can be adjusted
as required. Please notice the safety
informations inside the front cover.
Connecting a headset
Standard headsets with a 2.5 mm jack
plug can be connected to the underside of
the handset.
Page 15
Setting up
13
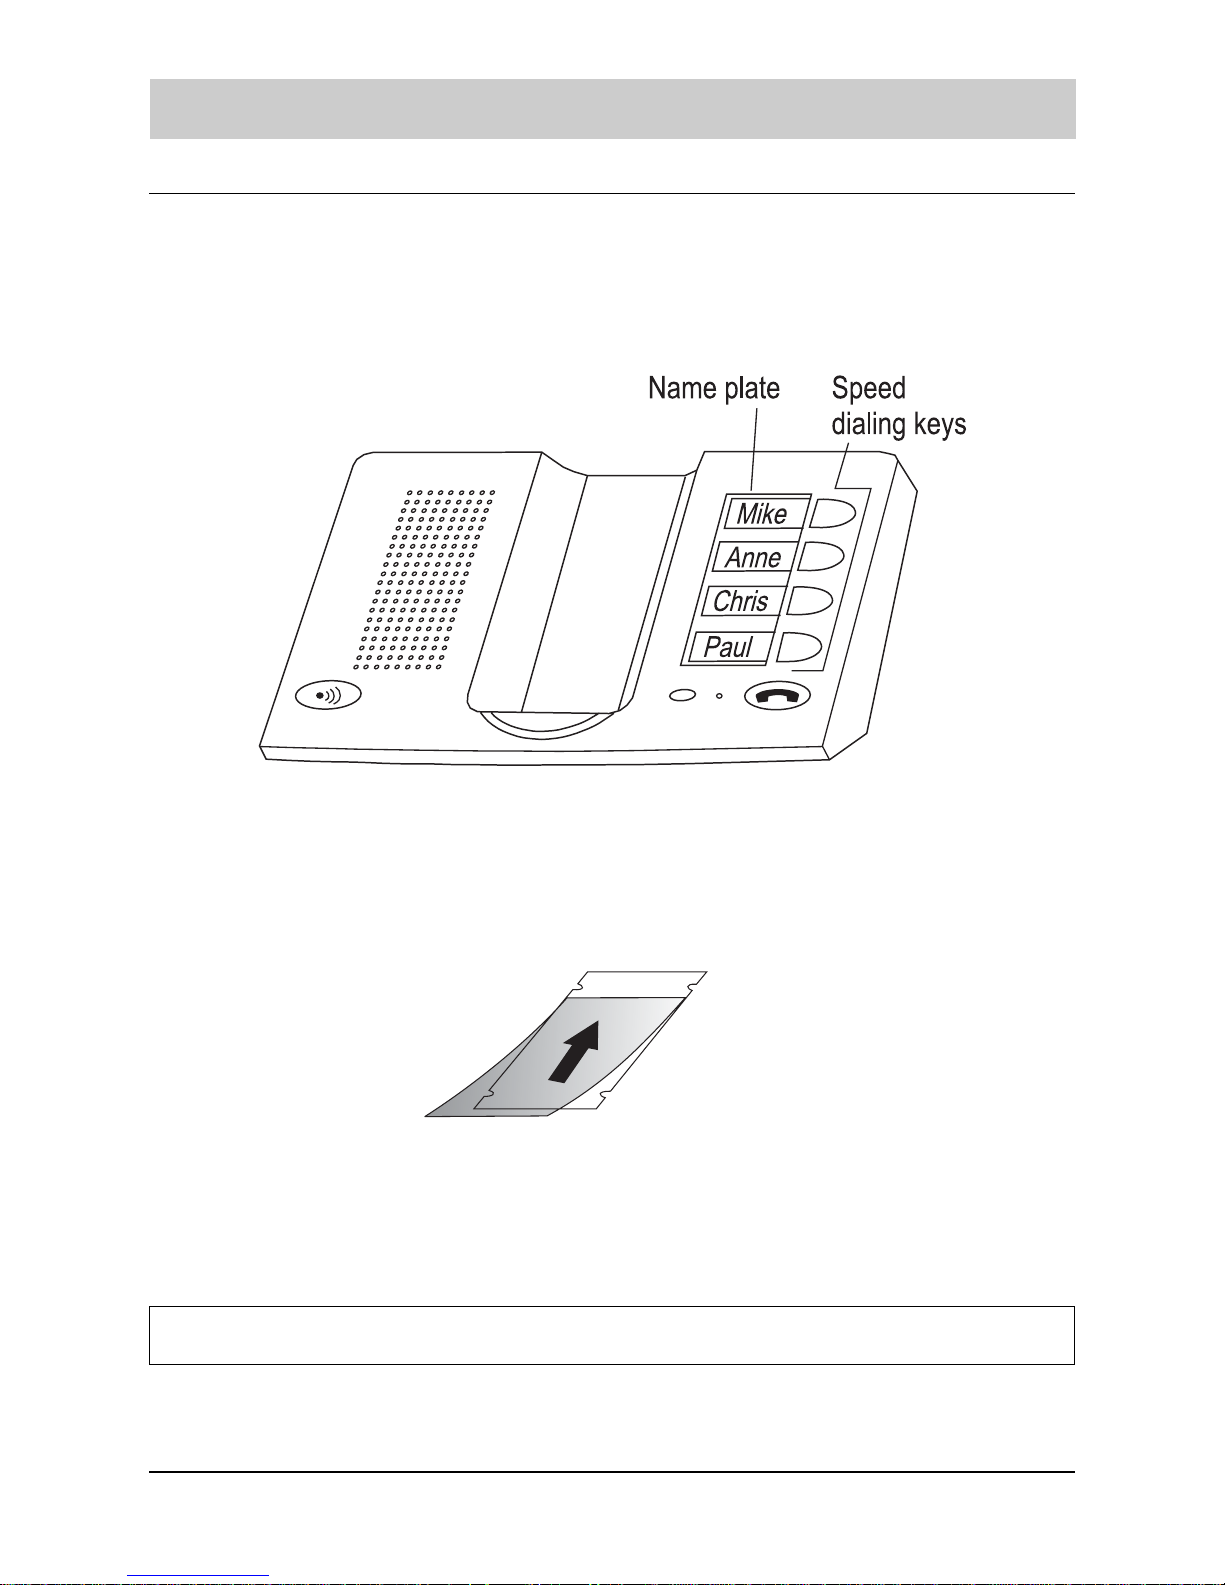
Inserting the name plate on the base station
Please label the fields on the plate with the names of the people, whose call numbers
you want to store under the respective speed dialing keys. Then insert the plate
into the recess.
Attach the plastic cover: Slide the cover into the top fixing (see Fig. below), bend it
slightly and then guide it into the bottom fixing.
Removing the plastic cover and the strip: Insert an appropriate implement (e.g. an
open paper clip) into the bottom centre groove and carefully push up the cover /
plate until you can get hold of it.
Setting the display language
When setting up, the telephone allows you to select the language, you prefer.
The language-selection appears in the display.
Page 16
Setting up
14
Press the arrow keys to choose the desired language, and press the
OK soft key to confirm.
Turning handset on / off
When you place the handset on the base station, it automatically turns on.
1. To turn the handset on (when it is off), keep the key
pressed
until you switch the display on.
2. To turn the handset off, keep the key
pressed until the
goodbye message appears. Then the display turns off.
Nothing will appear on the display when the battery power is very low.
You should fully charge the handset before using it.
The first time the phone turns on, the display shows the handset and the
base number, e.g. HS(1) and BS(1). You can set the phone to display a
large analogue clock instead of the other parameters. For further details
please see the paragraph Setting standby Display
If you purchased an optional handset and didnt register the handset,
UNREGISTERED is displayed when the phone turns on. To register the
handset, see par. Registering a new handset.
Choosing the dial mode
In order to provide compatibility with other telephone systems, your phone can be
set to either pulse-dialing (rotary), or tone dialing (DTMF). Your phone is preset to
the tone dialing mode, anyway if you are not sure which dialing requires your
telephone network please contact your local service provider. To change the dialing
mode:
1. Press the MENU soft key.
2. Press the arrow keys to choose BS Settings, and press the
SELECT soft key.
3. Enter the base PIN (preset at the factory to 0000) and press the
Page 17
Setting up
15
OK soft key.
4. Press the arrow keys to choose 3:Dial Mode, and press the
SELECT soft key. The current setting appears with the check
symbol at the right end.
5. Press the arrow keys to choose TONE or PULSE, then press the
SELECT soft key to save the selection.
6. Press the key
to return to standby mode.
You can change the base PIN. For details, see the par. Changing base
PIN.
Setting date & time
If you like to fully get benefit from the functions of your cordless phone, you have to
enter the current date and time.
1. Press the MENU soft key.
2. Press the arrow keys to choose BS Settings, and press the
SELECT soft key.
3. Enter the base PIN (preset at the factory to 0000) and press the
OK soft key.
4. Press the arrow keys to choose 7:System Time, then press the
SELECT soft key. The current settings are displayed: the date on
the upper line in the Day/Month/Year format and the time in the
Hours:Minutes ones in the lower line.
5. Enter the current date and time using the number keypad (6 digits
for the date and 4 ones for the time as below explained).
6. Press the OK soft key to save the setting.
7. Press the
key to return to standby mode.
Page 18
Setting up
16
To enter the date, type the six digits which represent the day, month and
year. e.g. for 15th June 2004 enter 150604. You can enter the year from
2000 to 2050. Enter the time in a 24-hour format. e.g. for 10:15PM enter
2215.
If you want to correct a digit in the middle while setting the date and time,
use the arrow keys to move the cursor to the wrong number, then enter a
correct number.
If the electric supply is disconnected from the base (e.g. a black out or a
disconnection of the AC adaptors cable), the system time resets and
need to be set again.
Taking the telephone out of operation
If you want to take the telephone out of operation for longer periods, remove the
batteries from the handset and the base station.
Page 19
Basic functions
17
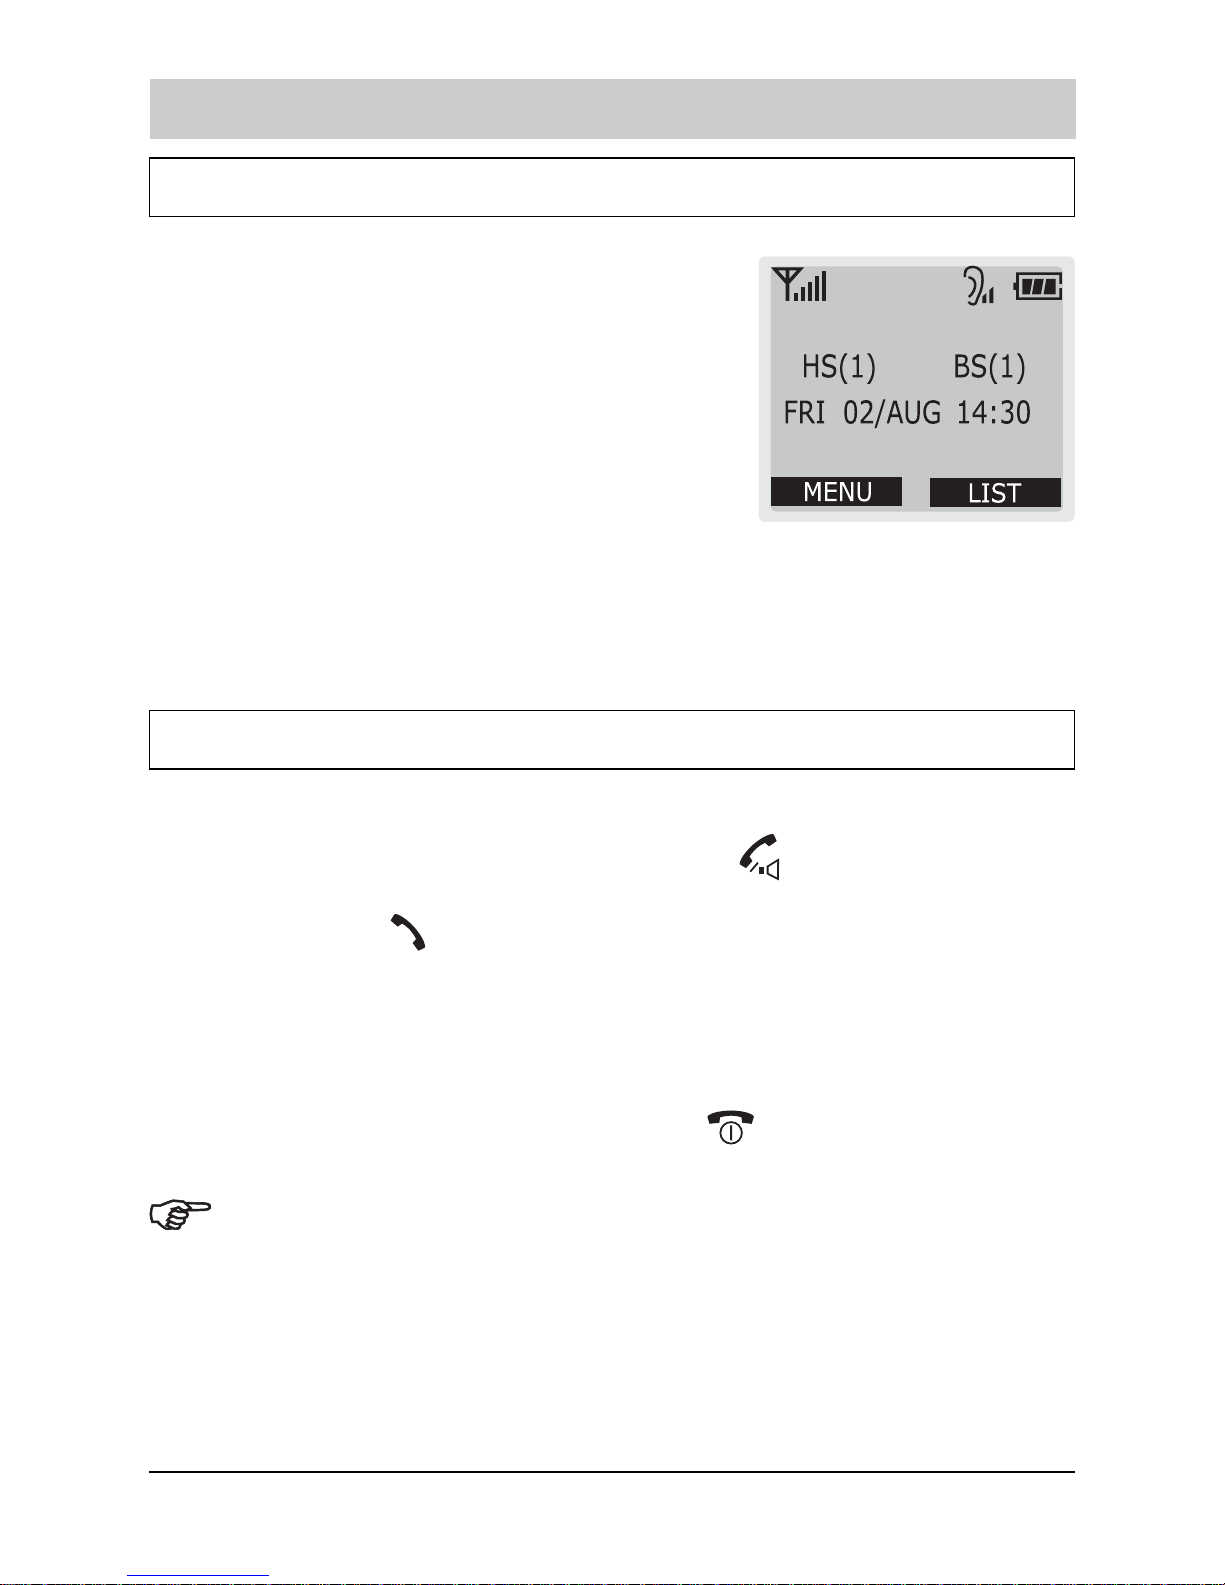
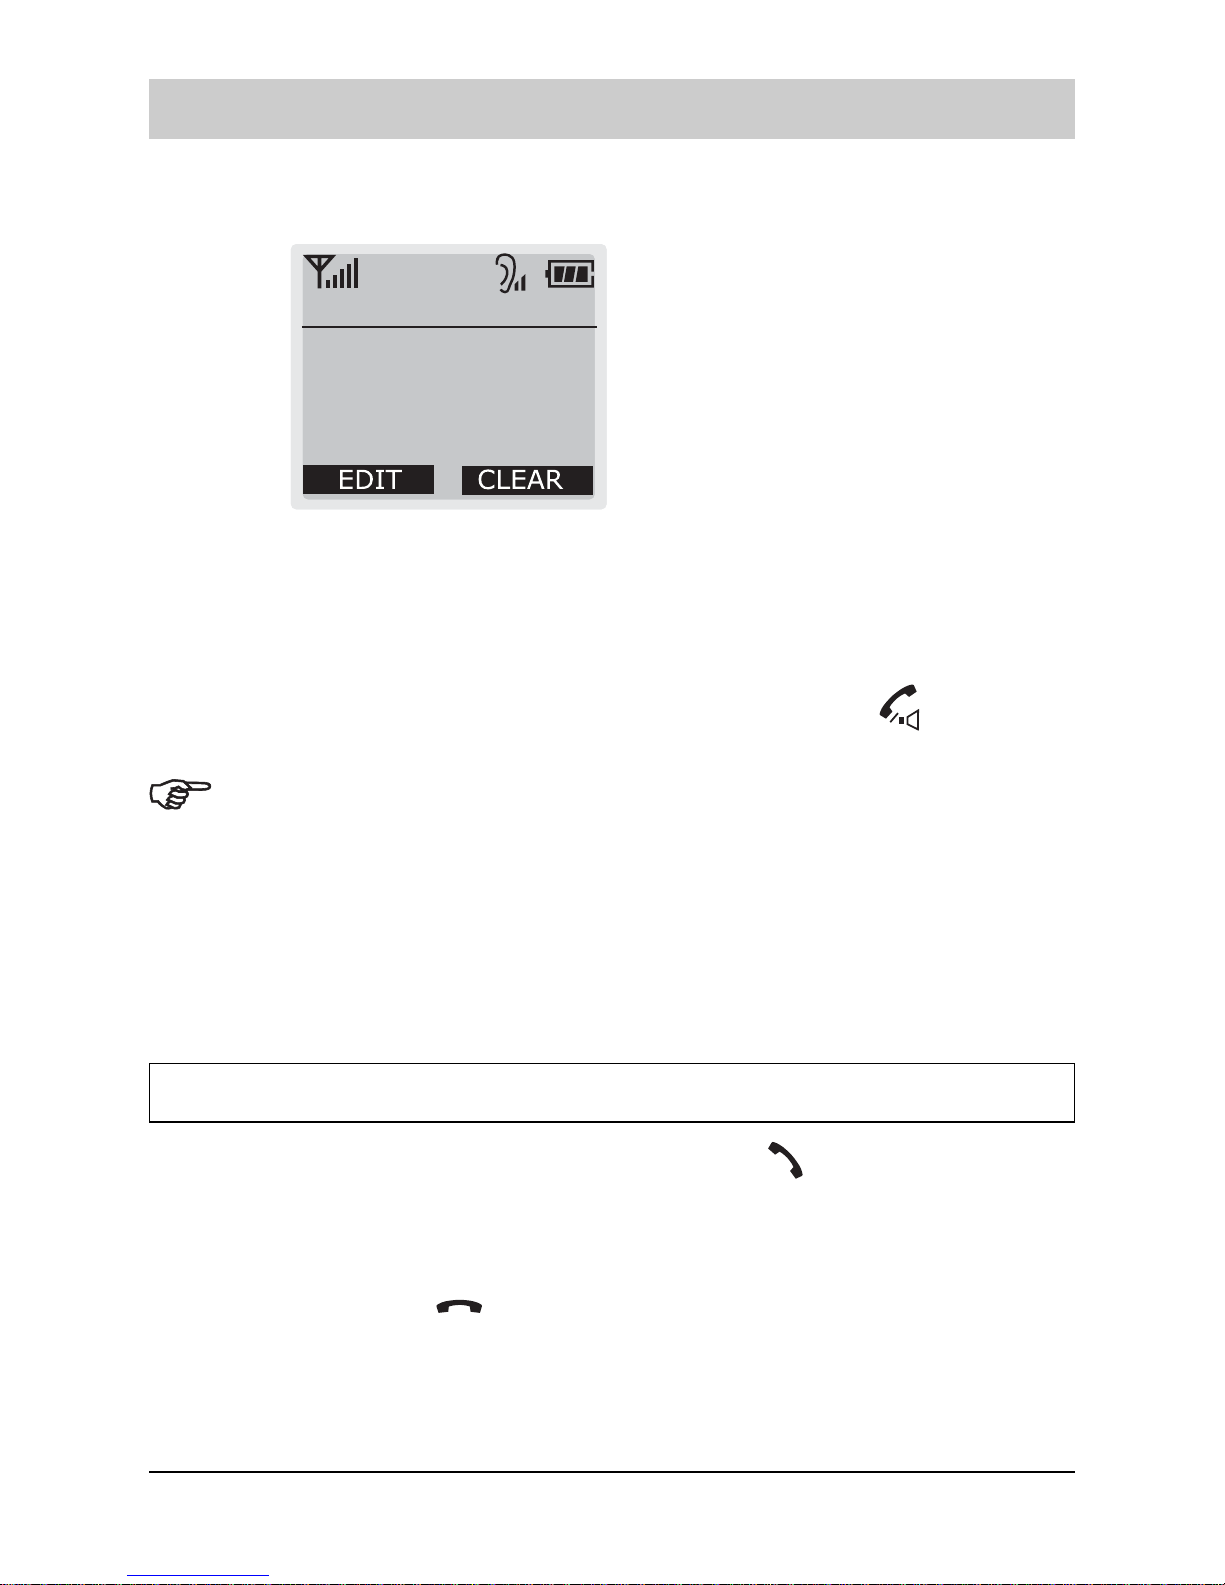
Standby mode (waiting for incoming calls)
Standby is the initial screen that appears every time
you turn on the handset. When your phone is in
standby mode, you are ready to receive phone calls
and you will see the handset and base number or
the handset name (if you have one saved) and the
current date and time.
When your phone is in standby mode, you can use
the phone to make or receive calls, or to use menu
functions.
You can access the main menu in standby mode by pressing the MENU soft key.
The list of the main menu items is stated in the par. List of menu functions (see
page 37). You can also access the calls list by pressing the LIST soft key.
Making a call
You can make your calls in two ways. This is the most traditional one:
1. Pick up the handset and press the key
to engage the line. You
hear a dial tone and Call to appears on the top of the display with
the icon
appearing in the icon area.
2. Dial a telephone number. The display shows the number as you
have entered it. When you hear your called party, speak with a
normal voice level.
3. To end the call, either press the key
or replace the handset on
the base station.
If you notice that the number you entered hasnt been really called (you still
hear the dial tone as you have never dialed the number), try to change the
dial mode. Refer to par. Choosing the dial mode.
This procedure is more convenient and reliable, because you can check the number
you have entered and make corrections before dialing:
Page 20
Basic functions
18
1. Enter a telephone number. Check the number on the display.
Call to
2615042
2. If you have made mistakes (i.e. the number you dialed is not the
one you want to call) modify it as described in the below stated
notes.
3. When the number correctly appears, press the key
to dial it.
If you make a mistake while entering a number, press the CLEAR soft key
to clear the last digit and correct the number. You can also keep it
pressed for more than one second in order to clear all digits you have
entered and return to standby mode.
The EDIT soft key allows you to save the number you have dialed or
insert dialing pauses. See par. Storing a phone number in standby
mode and Entering a dialing pause respectively.
Receiving a call
When a call is received, the phone rings and the icon blinks on the display of
the handset. If the incoming call can be identified you will also see the callers
number in the display. If the callers number was proviously entered in the
phonebook, you will see his/her name instead of his/her number.
On base station, the key
is flashing.
1. To answer the call, press any key while the phone is ringing. When
you are on the phone, the display shows the call time.
Page 21
Basic functions
19
2. To end the call, either press the key
or replace the handset on
the base station.
If the handset is on the base, simply pick it up to answer the phone. You
do not need to press any keys.
The callers identification can work only if your telephone network
supports the service as well as the callers one. However the caller can
still hide his/her number.
Putting a call on hold
While you are on the phone, you can put the call on hold.
1. Press the INT key longer than 2 sec. during a call to put the call on
hold. The display shows ON HOLD and your party hears a short
double beep.
2. To reactivate the held call, press the INT key again (longer than 2
sec.). ON HOLD disappears from the display and you can go on
talking.
Adjusting voice volume
Voice volume can be set in a very loud level.
During a conversation, the arrow keys adjust the level of the ear piece volume. You
can adjust the volume in three levels which are showed by the bars of the icon.
The more bars you see, the louder the volume.
Voice volume icon with tree bars = high volume level:
Using speakerphone (Handsfree mode of handset)
During a call, you may turn on the speakerphone built in the handset. In this mode
you can simply put your handset on a surface (e.g. a desk) and enjoy the comfort
of the handsfree conversation.
1. To turn the speakerphone on, press the key
during a call (line
engaged). The icon
appears on the display.
Page 22
Basic functions
20
2. To turn the speakerphone off, and keep on talking in normal mode,
press again the key
. The icon disappears.
Warning. Before putting the handset near your ear, be sure to have
turned the speakerphone off.
The speakerphone can be used up to a certain distance (depending on
various conditions). Be sure that your party can clearly hear you as you
are hearing him/her.
Redialing last dialed numbers
Your phone allows you to retrieve the last 20 numbers you have dialed and recall
them quickly.
To view and dial the numbers:
1. Press the LIST soft key in standby mode.
2. Press the SELECT key to access 1:Outgoing Call option. The
display shows the list of the numbers you have dialed.
3. If you want to scroll through the list, press the arrow keys until you
find the number you want to call.
4. Press the key
to dial the number.
When no numbers are found, Redial list is empty is displayed.
Each time you dial a new number, the oldest number stored in the redial
memory is automatically erased, and the redial memory is updated.
More information you will find on page 31.
Flash signal
When the line is engaged, the FLASH soft key sends the Flash signal. This key is
used in conjunction with special services (e.g. call waiting, conference etc.) which
can be available in your phone network. For further details please contact your
Page 23
Basic functions
21
network telephone company. Moreover, if you are connected to an extension of a
switchboard (PABX), you can use the FLASH soft key to locally transfer a call to
another extension.
To transfer a call, or use the said special services, press the FLASH
soft key while the line is engaged.
If the FLASH soft key does not work properly, you need to change the
Flash time. See the par. Changing flash time on page 54.
Call waiting and other services can be available with additional charges.
For further details please contact your local telephone company.
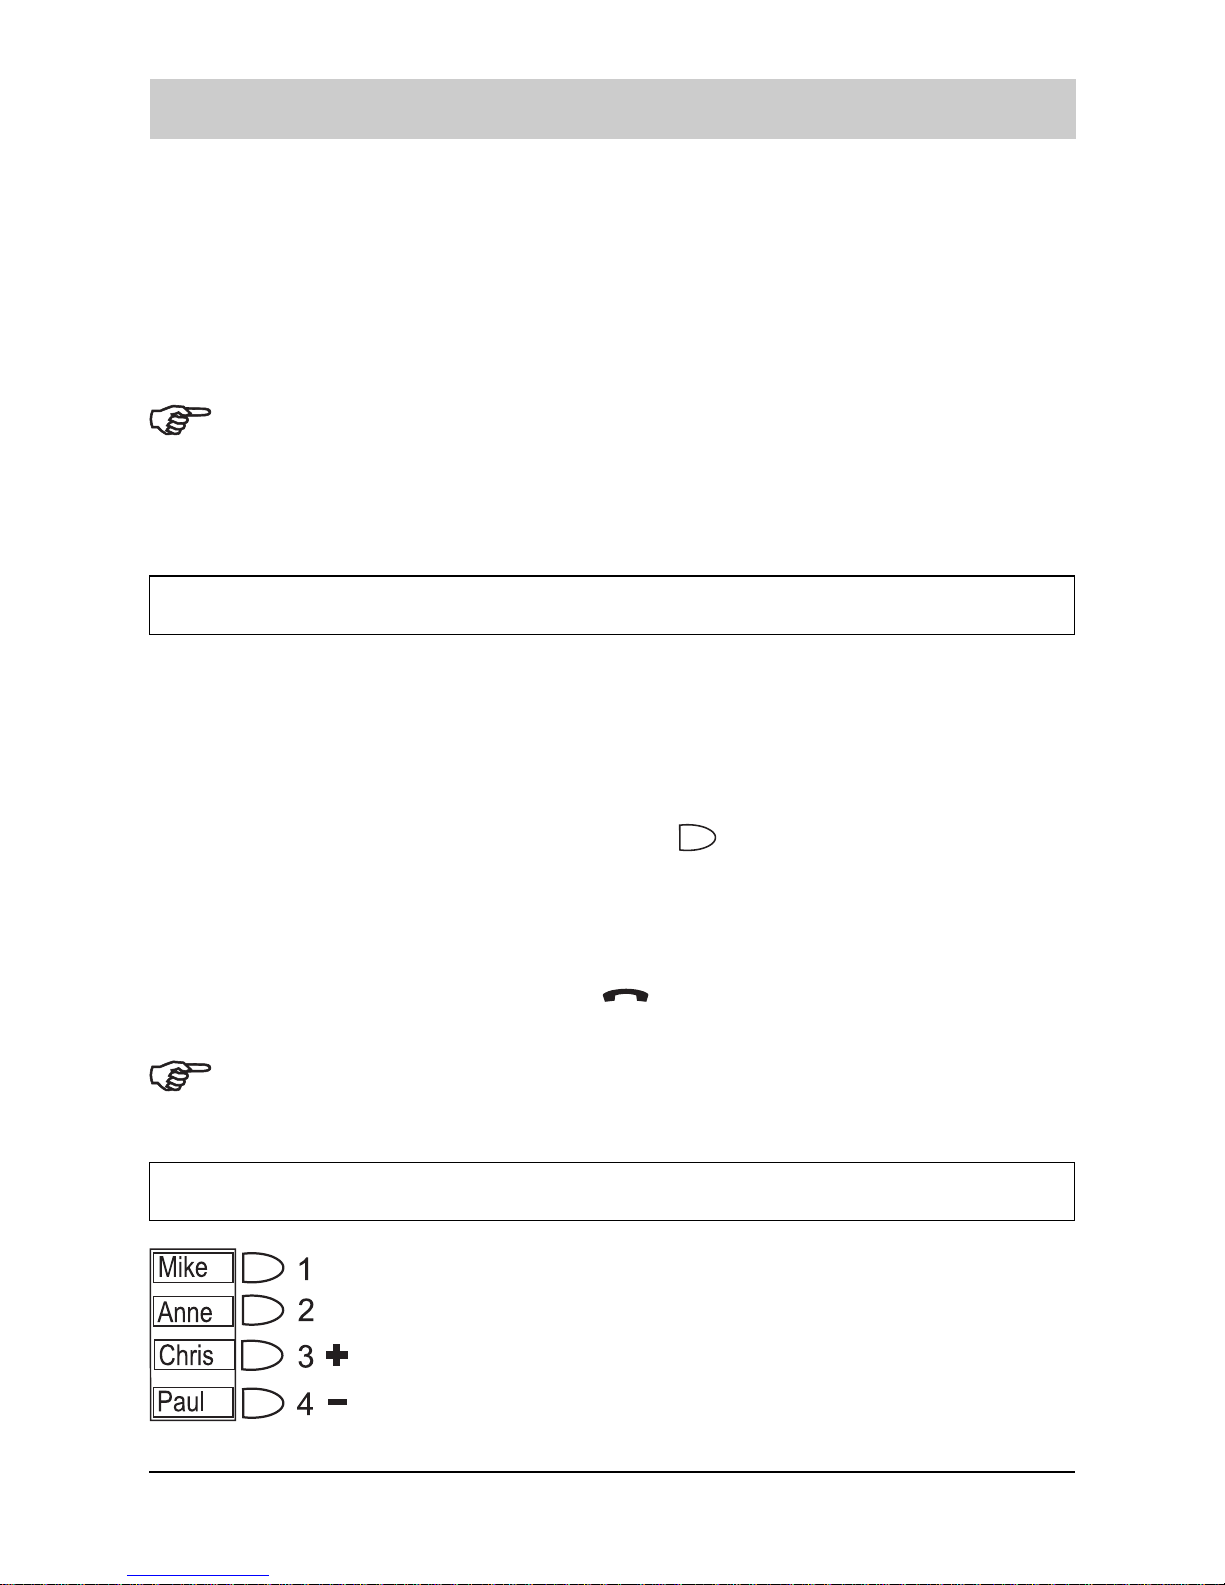
Using the base station speed dialing keys
The base station has 4 speed dialing keys, to which you can assign call numbers.
Calls dialed using a speed dialing key can be continued on the base station in
hands free mode. But it is also possible to transfer a call to a handset (see paragraph
Transferring a call from base station to handset on page 22.
Press the desired speed dialing key
.
The base station switches to handsfree mode and the number is
dialed.
After conversation, press key
on base station to finish the call.
How to store speed dialing numbers, see paragraph Storing call numbers to
speed dialing keys on page 61.
Adjusting loudspeaker volume of base station
During a call in handsfree mode at the base station, you
can adjust loudspeaker volume in 4 levels. Select the desired
level using the speed dialing keys 3 and 4. (Key 3 = higher
level, key 4 = lower level). The adjusted level will be stored for
the next call.
Page 24
Basic functions
22
Transferring a call from base station to handset
You can dial a number by using speed dialing keys and, after the recipient has
answered, you can transfer the call to the handset.
1. You are calling in handsfree mode at the base station.
2. Press the paging key
of base station. The handset rings.
3. Press the key
to transfer the call from base station to handset.
4. To end the call, either press the key
or replace the handset on
base station.
Temporary tone dial switchover
If you are using the pulse dialing because your telephone line doesnt support tone
dialing (please make reference on par. Choosing the dial mode), you might not
be able to access certain external services (e.g. automatic call centers, voice
mailboxes, interactive telephone systems etc.), because they need the tone dialing.
No problem: you can access them anyway doing this:
1. Call the number of the service you need to access as you do
normally.
2. As soon as you reached the service, press the star key *: your
phone is converted to the tone dial mode temporarily, so you can
use the service.
3. When you hang up, the phone returns to the pulse mode.
Fuzzy dialing
This convenient function speeds up the manual dialing of the numbers which you
communicate more frequently with. When enabled, just dial only the first digits,
because your phone takes care to automatically complete it for you. Obviously,
this can happen only if the number you are dialing is inside the list of the last dialed
numbers (ref. par. Redialing last dialed numbers) or inside the list of the last
Page 25

Basic functions
23
received calls (ref. par. Incoming calls) or inside the phonebook (ref. par.
Phonebook).
To enable/disable the fuzzy dial feature:
1. Press the MENU soft key.
2. Press the arrow keys to choose HS Settings, then press the
SELECT soft key.
3. Press the arrow keys to choose 2:Fuzzy Dial, then press the
SELECT soft key.
4. Press the arrow keys to choose ON (or OFF to disable it).
5. Press the SELECT soft key to save the setting.
6. Press the
key to return to standby mode.
To place a call using the fuzzy dial feature:
1. Be sure that fuzzy dialing is active and the phone in standby mode.
2. Enter, one by one, the first digit(s) of the phone number you want to
call. If they match with one or more numbers in the phonebook, or in
the lists of last incoming/outgoing, your phone prompts you to
complete the number with the digits left highlighting them.
3. If the prompted number is the one you want to call, go on with the
next step. Otherwise keep on entering other digits until you see the
desired number.
4. If the number is correct, press
to dial it (if not press to exit).
Obviously, if none of the prompted numbers match with the one you want to
call, it means that both you havent communicated recently with it and that
its not included in the phonebook. In this case just dial the number normally
and call it to automatically include it in the outgoing call list. Next time the
Page 26
Basic functions
24
fuzzy dialing will work with it.
Battery checking and handling
The icon displays continuously at the top right corner. It shows the level of
your batteriy power: the more bars you see, the more power you have left.
When the batteries are low, you hear a warning tone and the icon blinks.
When the batteries are too low for the phone to operate, the handset automatically
turns off with warning beeps. In this case, place the handset on the base station to
charge the handset batteries for 15 hours. More information about charging you
will find in the paragraph Placing the handset on the base station on page 11.
Restoring the batteriy duty
When possible, to keep the maximum battery duty, charge the batteries only when
they are completely discharged, (i.e. when the battery icon has no bars inside or,
at least, with one bar) and dont remove the batteries from the base station before
the necessary time to provide a full charge.
If with the time the batteries doesnt allow the full duty, try do fully discharge them
(by normally using the phone) up to make the handset automatically switched off
as over stated, then leave the handset in the base station for 15 hours before
removing it. Repeat this deep charging/discharging cycle for at least 3 times. If the
battery duty still doesnt increase, replace the batteries.
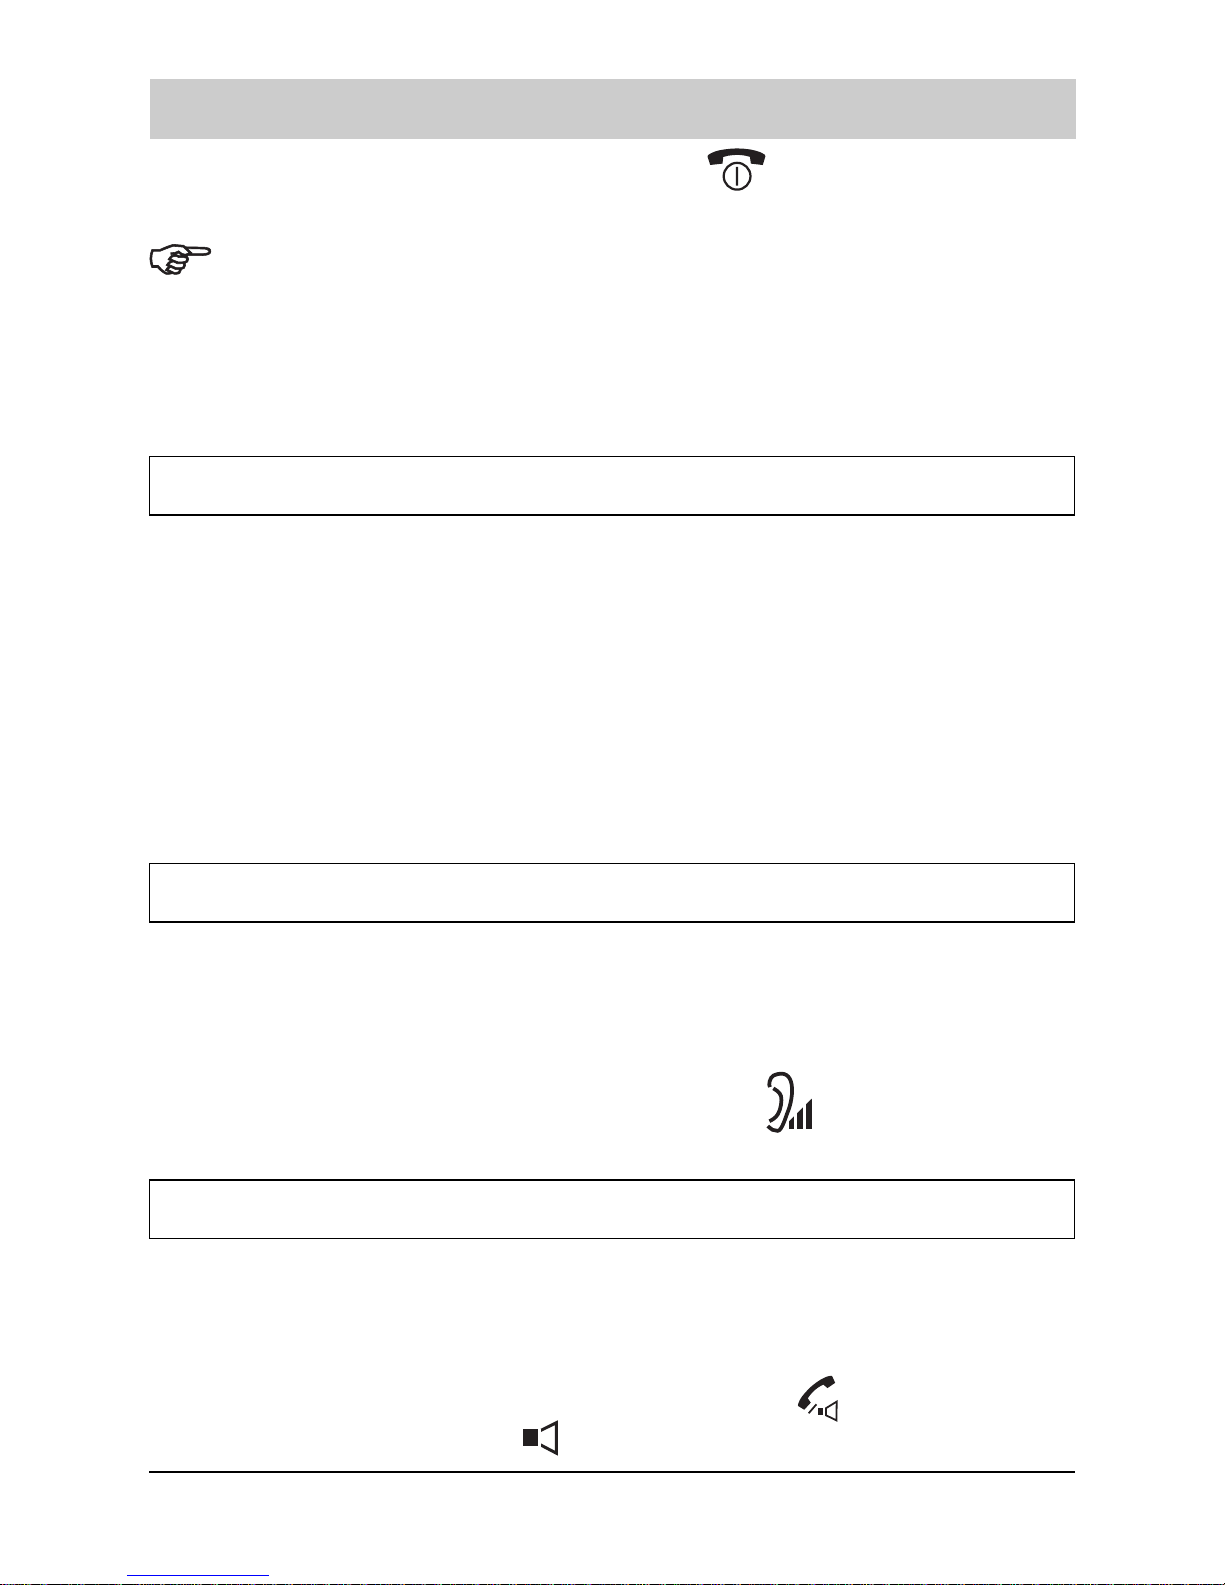
Out of range indication
The bars at the right of the icon show continuously the signal strength received
from the base. If you are too far from the base, the radio signal might become too
weak and the phone might not access to the telephone line. In these conditions
you cant make or receive phone calls, for this reason the icon
flashes.
Outdoors, the range is up to 300 metres, inside buildings, a range of up to 50
metres is possible.
If you carry the handset too far from the base during a call, the telephone line
Page 27

Basic functions
25
disconnects and the handset returns to standby mode. Check to see if the icon is
flashing on the display. If so, move the handset closer to the base.
If the radio coverage of your base is not sufficient for your purpose, you might
consider to buy an additional optional base and register your handset on it, obtaining
a small personal cordless network. For further details please see the par.
Registering a new handset and Selecting base.
Locking keys on handset
This function is useful to avoid unwanted function activations by accidentally
pressing any keys when you are carrying your handset. If you activate the key
lock, of the keys are inhibited, except for the
one.
In this condition, when a call comes in, you can answer the call by pressing any
key. When the call ends, the keys will be locked again.
To lock the keys, in the standby mode just keep the key
pressed
till the display shows KEY LOCK.
To unlock the keys keep the key
pressed again till the KEY LOCK
message disappears from the display.
Paging
You can page the handset from the base station making it ringing with a special
ring. Its useful to locate a lost handset or call the user who currently has the
handset.
To send the paging signal, press the Paging key
of the base. All
the phones which are registered with the base ring for 30 seconds.
To stop the paging signal before 30 seconds are passed, press the
Paging key
again or any keys on the handset(s).
If a call comes in while the handset is being paged, the handset stops the
paging operation and starts ringing normally in order to allow you to answer
the call.
Page 28

Call lists
26
The LIST soft key in standby mode allows you to access the Phonebook, Outgoing
calls list, Incoming calls list and Call by Call number list.
Phonebook
The phonebook built in your cordless phone allows you to store frequently used
numbers so that you can easily make a call without having to remember or enter
the phone number. Moreover, it reduces the risks of wrong dialing. You can store
up to 100 entries in your internal phonebook, each of them contains a fixed line
number and a mobile one which can be independently associated to a different
ring.
There are two ways to store the phonebook entries: by using the Phonebook menu
or in standby mode.
Storing a phone number by using phonebook menu
1. Press the LIST soft key in standby mode, then press the arrow keys
to choose 3:Phonebook and press the SELECT key to access the
phonebook.
Or,
press the MENU soft key, then press the SELECT soft key to
access the phonebook.
2. Press the arrow keys to choose 2:New Entry and press the
SELECT soft key. The Name field will be highlighted.
3. Enter a name that you want to use (up to 12 alphanumeric
characters). For details of entering a name please see the par.
Entering a name.
4. Press the arrow key
in order to highlight the fixed telephone icon
or the mobile telephone one, then enter the phone number (up to 24
digits).
5. Press the arrow key
in order to highlight the icon at the right of
the entered number, then press NEXT sof key in order to select the
ring you like to associate to the number. Every time you select a
Page 29

Call lists
27
ring, the phone sounds with it.
6. If you need to store both a fixed and a mobile number, repeat the
steps 4 and 5.
7. Press the OK soft key to save the setting.
8. Press the key to return to standby mode
If you make a mistake while entering a number or name, use CLEAR
soft key to clear the last character.
Storing a phone number in standby mode
You can store a phone number after dialing a number without accessing the
Phonebook menu.
1. Enter a phone number in standby mode.
2. Press the EDIT soft key.
3. Select 1:Save Number by pressing the SELECT soft key.
4. Select the fixed telephone icon or the mobile telephone one by
using the arrow keys and press the SELECT soft key. You
see the number you entered in the selected position.
5. Complete storing the entry by starting from step 3 described in the
last paragraph Storing a phone number by using phonebook
menu.
When you are entering the number in step 1, you can also insert one or more
dialing pauses in order to store them in the phonebook as well. For details
please see the par. Entering a dialing pause on page 29.
Page 30

Call lists
28
Entering a name
1. To enter a specific alphanumeric character, press one or more times
the key labeled with the required character: once for the first
character, twice for the second and so on. The list of characters
available for each key is shown in the following table.
2. Select other letters in the same way. The cursor moves to the
right when you press a different key.
When entering the same letter twice or a different letter on the same key,
wait for a few seconds for the cursor to move automatically, and then
select the next letter.
To delete letters, use the CLEAR soft key.
If you want to shift the case while entering letter, press the # key.
Example: to enter Ross, press:
Three times the 7 key = R (the first character is automatically set
as capital).
Three times the 6 key = o.
Four times the 7 key = s (wait till the cursor moves to the right).
Four times the 7 key = s.
Page 31

Call lists
29
Entering a dialing pause
A pause is useful when you access an interactive voice response system, such as
an automated banking system. A pause provides a delay of 3 seconds. When you
are dialing a number in standby mode and need to insert a pause, please follows
these steps:
1. Press the EDIT soft key.
2. Press the
soft key, and select 2:Insert Pause by pressing the
SELECT soft key. A P appears as a confirmation of the pause
entry.
3. Enter the following digits of the number and press the softkey EDIT.
4. Store the number, described in the par. Storing a phone number in
standby mode on page 27.
Searching for and dialing a number in phonebook
You can search the entries stored in the phonebook by entering the first initial
characters of their names (alphabetic search). You can also scroll through the
whole list of the phonebook entries in standby mode without accessing the
phonebook menu.
Alphabetic search
1. Press the LIST soft key in standby mode and then press the arrow
keys to select 3:Phonebook, then press SELECT soft key to
access the Phonebook option.
Or,
press the MENU soft key and then press the SELECT soft key.
2. Press the SELECT soft key to access 1:Search.
3. Enter the first few letters of the name by using the alphanumeric
keys, and press the OK soft key.
The display shows the name list starting from the character(s) you
have entered. The phone number of the currently selected entry is
Page 32

Call lists
30
shown on the top line.
4. If necessary:
to select another name (if the list displays more than one) press
the arrow keys.
to select the icon of the fixed telephone number or the mobile
telephone of the selected entry press the NEXT soft key.
5. When the desired number displays, press the
key to dial it.
Or to return to standby mode, press the
key.
If you press the OK soft key, you can view the details of the selected entry
and access the option features. For details, see the par. Editing or deleting a
phonebook entry.
Searching by scrolling the phonebook list
1. Press the arrow keys in standby mode. The display shows the
whole list of all of the phonebook entries in alphabetical order.
2. Press the arrow keys to scroll to the desired entry.
3. If necessary, press the NEXT soft key to select the fixed line
telephone icon or the mobile telephone one under the selected
entry.
4. When you find the desired number, press the
key to dial it. Or to
return to standby mode, press the
key.
Editing or deleting a phonebook entry
1. Find the phonebook entry that you want to edit or delete. Refer to
par. Searching for and dialing a number in phonebook.
2. When the desired entry is highlighted, press the OK soft key to view
the details of the selected entry.
Page 33

Call lists
31
3. Press the OPTION soft key to display the phonebook option menus.
4. Press the arrow keys to choose 1:Edit or 2:Delete, and press the
SELECT soft key.
5. Now, depending on the over stated selection:
1:Edit: If you have selected this option, perform the necessary
editing using the command described from step 3 in the par.
Storing a phone number using phonebook menu.
2:Delete: If you have selected this option, a message asks if you
really want to delete the entry. Press the OK soft key to confirm or
CANCEL to exit without deleting the entry.
6. To return to standby mode, press the
key.
Redialing the last dialed numbers
Your phone allows you to quickly call again the last 20 dialed numbers.
Searching for and dialing a number in outgoing calls list
1. In standby mode, press the LIST soft key.
2. Press the SELECT key to access 1:Outgoing Call. The list of
outgoing calls is displayed.
3. Scroll through the outgoing calls list using the arrow keys until you
find the desired number, and press the SELECT soft key. You will
also see the name (if available) and the date/time in which you did
the call as well as its duration. If the number was previously entered
in the phonebook, you can also see its associated name.
4. To place a call to the number, press the
key.
To return to standby mode, press the
key.
Page 34

Call lists
32
At step 2, if the list is empty, the phone informs you about that with the
message Redial list empty and returns in standby mode.
Using outgoing calls options
Using the outgoing calls options, you can edit, save, or delete a number in the
outgoing calls list.
1. Find the desired number in the outgoing calls list as per the steps 1
through 3 in the par. Searching for and dialing a number in
outgoing calls list.
2. Press the OPTION soft key to display the option menus.
3. Press the arrow keys to choose the desired option:
1:Edit: allows you to edit the number. Use the CLEAR soft key to
delete the last entry (after editing the number, you can save it in the
phonebook with the following option or place a call to the number).
2:Save number: allows you to save the number in the phonebook.
See par. Storing a phone number in standby mode, step 4.
3:Delete: allows you to delete the selected number.
4:Delete All: allows you to delete the whole redial list (a message
asks if you really want to delete all the entries). Press the OK soft
key to confirm or CANCEL to exit without deleting the entries).
4. To return to standby mode, press the
key.
Incoming calls
When you receive a call, the callers phone number is displayed, if the callers
information is transmitted from the network on which the call was made and the
caller dont hide it. The last 30 received calls are stored in the Incoming call list,
and you can call the said numbers back, delete or store them in the phonebook.
Moreover, when there is a received call which you missed, the
icon appears
on the display. This icon automatically disappears as soon as you view the number
using the incoming call option.
Page 35

Call lists
33
Searching for and dialing a number in incoming calls list
1. In standby mode, press the LIST soft key.
2. Press the arrow keys to choose 2:Incoming Call, then press the
SELECT soft key. The list of incoming calls displays.
3. Scroll through the incoming calls list using the arrow keys until you
find the desired number, and press the SELECT soft key. You will
also see the name (if available) and the date/time in which you
received the call as well as its duration. If the number was
previously entered in the phonebook, you can also see its
associated name.
4. To place a call to the number, press the
key.
To return to standby mode, press the
key.
At step 2, if the list is empty, the phone informs you about that with the
message Caller ID list empty and returns in standby mode.
Using incoming calls options
You can edit, save, or delete a number in the incoming calls list as follows:
1. Find the desired number in the incoming calls list as per the steps 1
through 3 in the par. above.
2. Press the OPTION soft key to display the option menus.
3. Press the arrow keys to choose the desired option:
1:Edit allows you to edit the number. Use the CLEAR soft key to
delete the last entry (after editing the number, you can save it in the
phonebook with the following option or place a call to the number).
2:Save number: allows you to save the number in the phonebook
see par. Storing a phone number in standby mode, step 4.
3:Delete: allows you to delete the selected number.
4:Delete All: allows you to delete the whole incoming calls list (a
Page 36

Call lists
34
message asks if you really want to delete all the entries). Press the
OK soft key to confirm or CANCEL to exit without deleting the
entries).
4. To return to standby mode, press the
key.
Dialing a Call by Call number (network code number)
This feature lets you add special code numbers, which allows you to access different service providers you might be subscribed. This way allows you to get the
best fare depending on the type of call you are going to make (e.g. regional calls,
long distance calls etc.). You can recall the access number easily, and put it before
the phone number you want to call by entering the phone number manually or by
accessing the phonebook.
How to store Call by Call code numbers see paragraph .Storing Call by Call
numbers on page 49.
Dialing a Call by Call number manually:
1. Press the LIST soft key in standby mode,
2. Press the arrow keys to choose 4:Call by Call and press the
SELECT key to access the list. The display shows the currently
stored call by call numbers. The service providers names appear if
you have stored them, otherwise you will see only the code
numbers.
3. Press the arrow keys to choose the desired Call by Call number,
then press the SELECT soft key. The display shows Call to in the
top line and the code number in the second line.
4. Enter the phone number you want to call. It will be showed after the
selected Call by Call number.
5. Press the
key to dial the number.
Page 37

Call lists
35
Dialing a Call by Call number with the phonebook:
1. Follow the over stated steps 1 and 3.
2. Press the arrow keys to recall the phonebook entries which appear
in alphanumeric order.
3. Using the alphanumeric keys, enter the first character of the name
you want to find in your phonebook. The phone searches and
displays the names beginning with the character you entered.
You can also scroll through the phonebook entries by using the
arrow keys.
4. When you find the desired entry, press the OK soft key. The
selected phone number displays after the previously selected Call
by Call number.
5. Press the
key to dial the number.
Page 38

Using menus
36
This phone offers a range of functions that allows you to tailor the phone to your
needs. These functions are arranged in menus and submenus.
Accessing menu mode
There are two ways to access the menu mode: by scrolling or by quick access.
Accessing menu by scrolling
Its the one we used till now:
1. In standby mode, press the MENU soft key in order to see the main
menu items and scroll them by using the arrow keys.
2. Find the item you need, then confirm the selection with the SELECT
soft key.
3. If the menu you have selected contains submenus or options, press
the arrow keys to select the one you want, then press the SELECT
soft key to enter in the submenu/option.
4. Press the arrow keys to find the setting of your choice, then press
the SELECT soft key to save your selection.
Depending on the selected menu, you might find additional options to
choose. In this case just use the over stated commands when applicable
referring on the description contained in the related paragraph.
Quick access
You can save time by directly dialing the menu (or option) number associated
with it. The number associated with each menu/option is showed in the List of
menu functions stated the next chapter, or you can read it on the display the
first time you access them with the scrolling access.
1. In standby mode, press the MENU soft key.
2. Press the number key associated with the desired item (for example
Page 39

Using menus
37
press 2 to select the Bell&Beep item). You will see the options
available for the selected item (in the example 1:Key Tone, 2: Ring
Type. 3: Ring Volume etc.)
3. Press the number key associated with the desired option item (for
example press 3 to select 3:Ring Volume)
4. Press the arrow keys to select the setting of your choice.
5. Press the SELECT soft key to save your selection.
Options with scrolling and quick access
Both with the scrolling and quick access, you have the following available
options:
To return to the previous menu level, press the CANCEL key
To return to the standby mode, press
or hold down the CANCEL soft
key.
Moreover, if you dont press any keys for about 30 seconds, the display will
automatically return to standby mode from any menu.
If you press the
key when a number is displayed, the phone will dial it.
List of menu functions
This list shows the menu structure available and indicates the number assigned to
each menu or option. For further details, please refer to the appropriate
paragraph/chapter stated inside brackets). D = Default telephone setting.
1. Phonebook
1: Search (page 29)
2: New Entry (page 26)
2. Bell & Beep
1: Key Tone (D: Type 1) (page 39)
2: Ring Type of handset (D: Type 1) (page 39)
3: Ring Volume of handset (D: Vol. 2) (page 40)
4: Alert Type (D: Ring) (page 42)
Page 40

Using menus
38
3. Diary
1:Alarm (D: OFF) (page 43)
2:Calculator (page 44)
4. HS Settings
1:standby Display (D: Digital clock) (page 46)
2:Fuzzy Dial (D: OFF) (page 22)
3:Language (page 47)
4:Register (page 47)
5:Select Base (page 49)
6:Call by Call (page 49)
7: Access Code (page 50)
8:Reset Handset (page 50)
5. Base Settings
1:PIN Change (D: 0000) (page 52)
2:Deactivating a handset (page 53)
3:Dial Mode (D: Tone) (page 14)
4:Call Bar (page 53)
5:Flash Time (D: 100 msec.) (page 54)
6:Base Reset (page 55)
7:System Time (page 15)
8:Emergency Call (D: OFF) (page 55)
Number of call sequences (D: 9) (page 59)
Pause time (D: 3 min.) (page 60)
Duration of active connect. (D: 90 sec.) (page 60)
9:Speed dialing (page 61)
0:Base Ringer
Ring Type (D: Type 1) (page 40)
Ring Volume (D: Vol. 2) (page 41)
6. Favorite
1:Walkie-Talkie (D: OFF) (page 63)
2:Room Monitoring (D: OFF) (page 63)
3:SMS (page 65)
Page 41

Bell & Beep
39
You can use the Bell&Beep menu to customize the following sound options Key
tone, Ring type, Ring volume and Alert type for handset. Additionally you will
find the describtion of Ring type and Ring volume of base station.
Setting key tone
Every time you press a key, your handset ackowledges it with a key tone. You can
set your handset with a different key tone or to not sound the key tone.
1. Press the MENU soft key to display the main menu items.
2. Press the arrow keys to choose Bell&Beep, and press the
SELECT soft key.
3. Press the SELECT key to access 1:Key Tone option. The current
setting appears inside the box with a check symbol at the right.
4. Press the arrow keys to scroll through the desired setting:
OFF Key tones disabled
TYPE 1 Standard key tone (beep)
TYPE 2 Two-frequency tone (bee-bop).
5. Press the SELECT soft key to save the setting.
6. Press the key to return to standby mode.
Adjusting ringer of handset
Selecting ring type of handset
You can select your own ringing sound. 10 ring types (melodies) are available.
1. Press the MENU soft key to display the main menu items.
2. Press the arrow keys to choose Bell&Beep, then press the
SELECT soft key.
3. Press the arrow keys to choose 2:Ring Type, then press the
SELECT soft key.
Page 42

Bell & Beep
40
4. Press the arrow keys to choose the ring type you want. Each time
you press the arrow key, the handset sounds with the selected ring.
5. Press the SELECT soft key to save the setting.
6. Press the
key to return to standby mode.
Adjusting ring volume of handset
You can adjust the volume in three levels: Level 1 to 3, the higher the number, the
louder the volume. You can also select OFF to turn the ringer off.
1. Press the MENU soft key to display the main menu items.
2. Press the arrow keys to choose Bell&Beep, then press the
SELECT soft key.
3. Press the arrow keys to choose 3:Ring Volume, then press the
SELECT soft key. The current ring volume level is indicated by the
check symbol.
4. Press the arrow keys to choose the volume level you want. Each
time you press the arrow key, the handset sounds with the
selected loudness.
5. Press the SELECT soft key to save the setting.
6. Press the
key to return to standby mode.
Setting OFF turns the ringer of the handset off. When a call comes in, only
the incoming call message and icon appear on the display with the flashing
icon
.
Adjusting ringer of base station
Selecting ring type of base station
You can select your own ringing sound. 10 ring types (melodies) are available.
1. Press the MENU soft key to display the main menu items.
Page 43

Bell & Beep
41
2. Press the arrow keys to choose BS Settings, then press the
SELECT soft key.
3. Enter the current base PIN to access the BS Settings menu, and
press the OK soft key.
4. Press the arrow keys to choose 0:Base Ringer, then press the
SELECT soft key.
5. Press the SELECT key to access 1:Ring Type option.
6. Press the arrow keys to choose the ring type you want. Each time
you press the arrow keys, the base sounds with the selected
ring.
7. Press the SELECT soft key to save the setting.
8. Press the
key to return to standby mode.
Adjusting ring volume of base station
You can adjust the volume in three levels: Level 1 to 3, the higher the number, the
louder the volume. You can also select OFF to turn the ringer off.
1. Press the MENU soft key to display the main menu items.
2. Press the arrow keys to choose BS Settings, then press the
SELECT soft key.
3. Enter the current base PIN to access the BS Settings menu, and
press the OK soft key.
4. Press the arrow keys to choose 0:Base Ringer, then press the
SELECT soft key.
5. Press the arrow keys to choose 2:Ring Volume, then press the
SELECT soft key. The current ring volume level is indicated the
check symbol.
6. Press the arrow keys to choose the volume level you want. Each
Page 44

Bell & Beep
42
time you press the arrow keys, base station sounds with the
selected loudness.
7. Press the SELECT soft key to save the setting.
8. Press the
key to return to standby mode.
Alert type of handset
You can set how you want to be notified of incoming calls: with a ringing tone, with
a ringing tone and buzzer (vibration alarm) or with buzzer only.
1. Press the MENU soft key to display the main menu items.
2. Press the arrow keys to choose Bell&Beep, then press the
SELECT soft key.
3. Press the arrow keys to choose 4:Alert Type, then press the
SELECT soft key. The current type is indicated by the check
symbol.
4. Press the arrow keys to choose the alert type you want:
Ring
Vibrator
Ring & Vibrator
5. Press the SELECT soft key to save the setting.
6. Press the
key to return to standby mode.
Page 45

Diary
43
Using the Diary menu, you can use your phone as a convenient alarm clock and
calculator.
Alarm
This option allows you to set a recurring daily/monthly/yearly alarm. You can use it
not only as a wake up call, but also as reminder, because you can associate it with
a text message which you see in the display every time it rings.
Activating/deactivating the alarm feature
1. Press the MENU soft key to display the main menu items.
2. Press the arrow keys to choose Diary, and press the SELECT soft
key.
3. Press the SELECT key to access 1:Set Alarm option.
4. Select the alarm frequency option by pressing the arrow keys and
then press the SELECT soft key. You can choose from Daily,
Monthly and Yearly.
5. Using the arrow keys, select ON to activate the alarm feature or
OFF to deactivate it, then press the SELECT soft key.
6. Now, depending on your setting at step 4:
If you have set Yearly or Monthly, you will be on the Date field. If you
selected Yearly, set the date with dd/mm format by using the
numeric keys. Instead, if you have set Monthly, you just set the date
with the dd format (only the day).
If you have set Daily, the Date field will show Everyday. Go on with
the next step
7. You are now on the Time field. Set the time with hh:mm format by
using the numeric keys.
8. The cursor turns to the Message field. Enter a message of up to
12 characters to display when the alarm sounds.
Page 46

Diary
44
9. Press the
key to highlight the icon and press the soft key
NEXT to select the ring type for the alarm.
10. Press the OK soft key to save the setting. The icon
appears on
the display.
11. Press the
key to return to standby mode.
At step 7 you need to enter the hour in 24-hour format.
If at step 8 you do not want to enter a message, you can skip to the next
step. For details on entering text, see par. Entering a name.
If you skip the step 9, the ring type is automatically set to the ring type
you have previously set for the incoming ring as per the par. Adjusting
ring volume of handset.
Calculator
Using this feature, you can use the phone as a calculator. You can perform
calculations including addition, subtraction, multiplication and division on your
phone.
To use the calculator:
1. Press the MENU soft key to display the Main menu items.
2. Press the arrow keys to choose Diary, then press the SELECT soft
key.
3. Press the arrow keys to choose 2:Calculator and press the
SELECT soft key.
4. Enter the first number (operand) using the numeric keys.
5. To select the operation for your calculation, press the arrow keys
until the required arithmetic symbol appears; +(addition),
(subtraction), * (multiplication), / (division).
6. Enter the second number (second operand) using the numeric keys.
Page 47

Diary
45
7. To get the result, press the OK soft key.
8. Repeat steps 4 through 7 every time you want to make another
calculation.
9. Press the
key to exit.
To erase any mistakes and clear the display, press the CLEAR soft key.
To change the sign of a number from positive (+) to negative (-) and vice
versa, use the key # before entering the number.
Page 48

Handset settings
46
Using the HS settings menu, you can customize various settings for the handset
such as the standby display and language used to display the menu messages.
For details on fuzzy dialing (which is under the HS Settings menu), please see
page 22.
Setting standby display
Using this feature, you can select the style of the display in standby mode. You can
choose between:
Digital clock: its the default standby screen explained in par. Setting date &
time. It shows the digital clock as well as other parameters, such as the
base number, the handset number (or an handset name you can enter as
explained later on in this paragraph) etc..
Analogue clock: its shows an elegant analogue clock. In this condition you
cant see the over stated information, however as soon as you press any key,
the analogue clock temporarily disappears restoring the normal handset
conditions.
To select a standby display mode:
1. Press the MENU soft key to display the main menu items.
2. Press the arrow keys to choose HS Settings, then press the
SELECT soft key.
3. Press the SELECT soft key to access 1:Standby Display:
4. Press the arrow keys to choose Digital Clock or Analogue Clock,
then press the SELECT soft key.
5. At this time, if you have selected the Analogue Clock go to step 7.
Instead, if you have selected the Digital Clock, you can choose if
the standby screen should display the base number and handset
number or an alphanumeric name you can assign (e.g. your name,
your company name, your office name etc.). Use the arrow keys to
choose ON if you want to show the name or OFF to show the
base number and handset number.
Page 49

Handset settings
47
6. At this time, if you have selected OFF, just go to step 7. Instead, if
you have selected ON, type your preferred handset name. Enter it
by following the directions described in par. Entering a name, then
press the OK soft key to save the name.
7. Press the
key to return to standby mode. You will see the
result of your settings (digital clock with base/handset name, same
with the name you typed or the analogue clock).
Selecting a language
You can change the language used to display the menu messages.
1. Press the MENU soft key to display the main menu items.
2. Press the arrow keys to choose HS Settings, then press the
SELECT soft key.
3. Press the arrow keys to access 3:Language option, then
press the SELECT soft key. The current language appears inside
the box with a check symbol on the right.
4. Press the arrow keys to select the language you want, then
press the SELECT soft key.
5. Press the
key to return to standby mode.
Registering a new handset
You can register to your base additional handsets (up to 6 in total) in order to share
the same line with other people. To do that you should assign a number to each
new handset you will register. As you know, the supplied handset is already
registered with the number 1, in fact it shows HS(1). For security reasons, the
registration procedure can be done only by people who are nearby your base
station and know the base PIN which acts as phones authentication code.
Page 50

Handset settings
48
A handset can be registered to up to 4 different base stations in order to
extend the radio coverage. A base can be used with up to 6 handsets in total.
Obviously the base can be accessed by one handset a time (because a
base station is connected to one line).
To register a handset:
1. Press the MENU soft key to display the main menu items.
2. Press the arrow keys to choose HS Settings, then press the
SELECT soft key.
3. Press the arrow keys to access 4:Register option, then press the
SELECT soft key.
4. Press the arrow keys to choose the base number you want. Press
the SELECT key.
5. Hold down the Paging key
of the base station for more than 3
seconds until you see the key
of the base station flashing.
Then release the key. The ID number of the base station appears in
the display.
6. Press the OK soft key on the handset. The display asks you to
enter the base PIN code (preset to 0000) which acts as phones
authentication code (AC).
7. Enter the said code, then press the OK soft key on the handset. If
the registration has performed successfully, the new handset will
show the phone and base numbers (e.g. HS(2) BS(1)) and returns
in standby mode.
At step 4, if a check symbol appears at the right side of the base number, it
indicates that the base number is already registered on your handset. Use
another one.
Page 51

Handset settings
49
Selecting base
Your handset can be used with up to four base stations, provided that it has been
previously registered with them as per the last paragraph. This menu option allows
you to select the base you want to use:
1. Press the MENU soft key to display the main menu items.
2. Press the arrow keys to choose HS Settings, then press the
SELECT soft key.
3. Press the arrow keys to choose 5:Select Base, then press
the SELECT soft key.
4. Press the arrow keys to select the base you want (the current base
appears with the check symbol on the right), then press the
SELECT soft key.
At step 4 you can also select Best Base. In this case the handset will
automatically find the first available base unit when you lose contact while
moving around.
Storing Call by Call numbers
The phone has three Call by Call memory cells in which you can store Call by Call
code numbers.
1. Press the MENU soft key to display the main menu items.
2. Press the arrow keys to choose HS Settings, then press the
SELECT soft key.
3. Press the arrow keys to select 6:Call by Call, then press the
SELECT soft key.
4. Press the arrow keys to choose the desired memory cell, and press
the SELECT soft key. The phone asks you to enter the code
number.
Page 52

Handset settings
50
5. Enter the desired code number and press the OK soft key.
6. Enter the service providers name to associate to the code number
and press the OK soft key.
7. Press the
key to return to standby mode.
How to dial a Call by Call number see page 35.
Setting access code
Some telephone systems, such as PABX (Private Automatic Branch of eXchange)
or KTS (Key Telephone Systems), require an access code (e.g. 9 or 0) to access
an external line and listen for the outside dial tone before dialing the outside number.
You can set your phone in order to automatically insert one-digit access code
when you use a phone number from the incoming calls list.
1. Press the MENU soft key to display the main menu items.
2. Press the arrow keys to choose HS Settings, then press the
SELECT soft key.
3. Press the arrow keys to choose 7:Access Code, then press
the SELECT soft key.
4. Enter the one-digit access code by using the number keypad, and
press the OK soft key.
5. Press the
key to return to standby mode.
When you dial a phone number by using the incoming call list, it will be
dialed after the one-digit access code and the preset pause time.
Resetting the handset
If you reset the handset, all the user selectable features restores to the factory
preset initial settings: all the numbers in phonebook will be erased, as well
Page 53

Handset settings
51
as the incoming/outgoing call lists, the selected language etc. It is mainly useful for
two purposes:
If you have made many wrong settings and you want to restore the
handset to the factory preset initial settings.
If the phone shows logical malfunctions (not correct symbols on the
display, incorrect behavior etc.), the problem can be caused by a AC
power supply noise or an electrostatic spike which can temporarily alter
the memory of the internal microprocessor. In this case the reset could
solve the problem.
To activate the reset:
1. Press the MENU soft key to display the main menu items.
2. Press the arrow keys to choose HS Settings, then press the
SELECT soft key.
3. Press the arrow key to choose 8:Reset Handset , then press the
SELECT soft key. Your phone asks you to confirm the selection.
4. Press the OK soft key to reset your phone. To exit, press the
key.
Be careful! When you reset the handset you will loose any data stored in
it (e.g. name and numbers in phonebook). Dont forget to note them down
before resetting the handset.
If necessary, you can also reset the base settings. Please see the par.
Resetting the base station.
Page 54

Base settings
52
You can customize your base unit to suit your preferences using the BS Settings
menu. This menu is protected by a base PIN (Personal Identification Number)
which is required for the access.
You can set the date, time, and dial mode in the BS Settings menu. For
information on how to set these features, see paragraphs Choosing the
dial mode and Setting date & time on page 14 / 15.
Changing base PIN
A base PIN is required to protect your base against unauthorized use. It is set to
0000 at the factory. You can change the base PIN as follows:
1. Press the MENU soft key to display the main menu items.
2. Press the arrow keys to choose BS Settings, then press the
SELECT soft key.
3. Enter the current base PIN and press the OK soft key.
4. Press the SELECT soft key to access 1:PIN Change option.
5. Enter the new four-digits PIN you want to use for the base, and
press the OK soft key.
6. Enter the new PIN again to confirm it, and press the OK soft key.
7. To exit, press the
key.
If at step 3 you enter the wrong PIN, your phone returns to standby mode.
Moreover, the display does not show the PIN as you enter it in order to
maintain it secret.
If there are several handsets registered to the base station, the other
handset users cannot access the BS Settings menu without having the
newly changed Base PIN.
Forgetting the base PIN is the same as losing a key. If you have forgotten
the handset PIN, please contact your dealer.
Page 55

Base settings
53
Deactivating a handset
If necessary, you can clear the registration of a registered handset in order to
stop its access to one or more base stations. Just follow these steps:
1. Press the MENU soft key to display the main menu items.
2. Press the arrow keys to choose BS Settings, then press the
SELECT soft key.
3. Enter the current base PIN and press the OK soft key.
4. Press the arrow keys to choose 2:Release HS, then press
the SELECT soft key. The display shows all the handsets currently
registered to the base.
5. Press the numeric key(s) related to the handset(s) number(s) you
want to clear the registration, then press the OK soft key.
The display of the handset(s) which you have cleared the
registration show(s) UNREGISTERED and they cannot be used
anymore with the base.
Barring outgoing calls
You can to set the phone to restrict numbers that can be dialed. Calls beginning
with the numbers you specify using this menu can not be dialed. You can set up to
4 different restricted numbers containing up to 4 digits each.
To activate or deactivate a call barring number:
1. Press the MENU soft key to display the main menu items.
2. Press the arrow keys to choose BS Settings, then press the
SELECT soft key.
3. Enter the current base PIN and press the OK soft key.
4. Press the arrow keys to choose 4:Call Bar, then press the
SELECT soft key.
Page 56

Base settings
54
5. Press the arrow keys to choose the barring memory location, and
press the SELECT soft key.
6. Press the arrow keys to choose ON (barring enabled) or OFF
(barring disabled), then press the SELECT soft key.
7. If you select ON, enter the number you want to restrict (up to four
digits) and then press the OK soft key.
8. To exit, press the
key.
If you want to edit a stored nummer, please overwrite it.
Changing flash time
During a conversation, the FLASH soft key allows you to access the special services
offered by the telephone network or transfer a call to another extension when you
are connected to a PABX (Private Automatic Branch of eXchange). For details,
see par. Flash signal on page 20.
The default setting is 100 msec. If your FLASH key does not work properly, you
need to adjust the Flash time as follows:
1. Press the MENU soft key to display the main menu items.
2. Press the arrow keys to choose BS Settings, then press the
SELECT soft key.
3. Enter the current base PIN and press the OK soft key.
4. Press the arrow keys to choose 5:Flash Time, then press the
SELECT soft key. The display shows the current setting with the
check symbol at the right end.
5. Press the arrow keys to choose the desired flash time, then
press the SELECT soft key. You can choose from 80, 100, 120, 180,
250, 300, 500 or 600 ms.
6. To exit, press the
key.
Page 57

Base settings
55
We recommend to contact your service provider or refer to your PABX users
manual in order to know the proper flash time to use with your network.
Resetting the base station
Similarly to the handset reset (ref. par. Resetting the handset), you can reset the
base station. This restores all the user selectable features under the BS Settings
menu to the factory preset initial settings. The base station reset can help to solve
some logical malfunctions related to the base station. To reset the base just follow
these steps:
1. Press the MENU soft key to display the main menu items.
2. Press the arrow keys to choose BS Settings, then press the
SELECT soft key.
3. Enter the current base PIN and press the OK soft key.
4. Press the arrow keys to choose 6: Base Reset, then press the
SELECT soft key. The display asks you to confirm the base reset.
5. At this time:
If you want to reset the base station, press the OK soft key.
If you dont want to reset the base station, press the CANCEL soft
key.
Resetting the base station does not affect the handsets registered to
the base station.
Emergency call mode
Description of emergency call mode
With emergency call mode set (can be turned on/off via the menu), if necessary an
emergency call can be triggered using the emergency call key ( ! ) on the handset.
In emergency call mode, emergency calls have priority over nearly all other
telephone functions.
Page 58

Base settings
56
When emergency call mode is set, the emergency call key lights. Because of
this reason, the handset has to be charged daily!
Emergency call mode do not work, if you use other manufacturers base stations.
Before you turn on emergency call mode, it is necessary to store the emergency
numbers!
Storing emergency numbers
You can store a maximum of 4 emergency numbers. When the emergency call is
activated, these are dialed in sequence. Each emergency number may have a
maximum of 24 digits.
1. Press the MENU soft key to display the main menu items.
2. Press the arrow keys to choose BS Settings, then press the
SELECT soft key.
3. Enter the current base PIN and press the OK soft key.
4. Press the arrow keys to choose 8:Emergency Call, then press the
SELECT soft key.
5. Press the arrow keys to choose 2:Store Number, then press the
SELECT soft key.
6. Press the arrow keys to select the memory location (14), then
press the OK soft key.
7. Enter the call number and press the EDIT key.
8. Press the SELECT key to access 1:Save Number. The emergency
call number is stored.
9. Select further memory locations or press the
key to exit.
If necessary, one or more dialing pauses can be stored. After step 7,
press the arrow keys to choose 2:Insert Pause and confirm by the
soft key SELECT. Enter the following digits of the number and press
the EDIT soft key. Continue with step 8.
Page 59

Base settings
57
Turning emergency call mode ON/OFF
Important:
Before you turn on emergency call mode, it is necessary to store the emergency
numbers!
1. Press the MENU soft key to display the main menu items.
2. Press the arrow keys to choose BS Settings, then press the
SELECT soft key.
3. Enter the current base PIN and press the OK soft key.
4. Press the arrow keys to choose 8:Emergency Call, then press the
SELECT soft key.
5. Press the SELECT key to access 1:Emergency Mode.
6. Press the arrow keys to select ON or OFF, and press the
SELECT key.
7. Select further settings. Or or press the
key to exit.
When emergency call mode is set, the emergency call key lights.
Sending out an emergency call
When the emergency call key is held down for a few seconds, up to 4 stored
emergency numbers are dialed one after another.
Hold down the emergency call key ( ! ) for a few seconds. In the
display appears the emergency no. (1-4) currently being dialed, and
the call duration.
Page 60

Base settings
58
Process of an emergency call
Enclosed, you will find 4 information cards for the recipient of the
emergency call. Fill in the card and pass them on to the people whose
call numbers you have stored as emergency numbers in your telephone.
In case of an emergency call, those people will then know what to do.
The telephone of the recipient must be set to the tone dialing mode
(DTMF).
If the recipient do not answers, the telephone dials the next number.
If an emergency call is accepted by a recipient but not acknowledged
using the 5 key (see above), the telephone classifies the emergency call
as not accepted and dials the next number.
If an emergency call is picked up an answering machine, the telephone
classifies the emergency call as not accepted and dials the next number.
Manually disrupting an emergency call
If you have accidentally triggered the emergency call, you can stop it again using
the following procedure.
Press repeatedly the star key * and the INT key.
Person seeking help
Press emergency key ( ! ) of the
handset.
The handset is automatically
switched to the handsfree mode.
End conversation:
Press the
key of the handset.
Recipient of an emergency call
DTMF-telephone is ringing. Pick-up
the handset. The emergency S.O.S.
signal-sequence is heard. Press
number key 5 (acknowledgement).
The emergency S.O.S. signalsequence is stopped.
Conversation with person seeking
help.
Page 61

Base settings
59
Making special emergency call settings
Your telephones default settings are as follows:
After an emergency call has been triggered, the telephone dials the
sequence of stored numbers up to 9 times (number of sequences = 9).
After an unsuccessful sequence, the telephone waits 3 minutes before it
starts the next sequence (pause after unsuccessful sequence = 3 min.).
The time, in which the emergency number is dialled, the telephone called
and the S.O.S. tone sequence can be heard is 90 seconds (duration of
active connection = 90 sec.).
When connecting to an emergency server, it is possible for them to use
the emergency identification code, in the form of a numberal sequence of
DTMF tones, to receive information about the caller (default setting: no
code specified).
If you do not want to change these settings, you can skip the programming steps in
this section.
Setting the number of sequences
A sequence is defined as a single, sequential dialling of all programmed emergency
numbers.
1. Press the MENU soft key to display the main menu items.
2. Press the arrow keys to choose BS Settings, then press the
SELECT soft key.
3. Enter the current base PIN and press the OK soft key.
4. Press the arrow keys to choose 8:Emergency Call, then press the
SELECT soft key.
5. Press the arrow keys to choose 3:Call Sequence, then press
the SELECT soft key. The set number of sequences is displayed.
6. Select the number of sequences (1-9) using the arrow keys and
press the OK soft key.
7. Select further settings. Or press the
key to exit.
Page 62

Base settings
60
Pause after unsuccessful sequence
You can set the duration (1-9 minutes), for which the telephone waits after an
unsuccessful sequence.
1. Press the MENU soft key to display the main menu items.
2. Press the arrow keys to choose BS Settings, then press the
SELECT soft key.
3. Enter the current base PIN and press the OK soft key.
4. Press the arrow keys to choose 8:Emergency Call, then press the
SELECT soft key.
5. Press the arrow keys to choose 4:Pause Time, then press
the SELECT soft key. The set pause duration is displayed.
6. Select the pause duration (1-9 minutes) using the arrow keys and
press the OK soft key.
7. Select further settings. Or press the
key to exit.
Duration of active connection
The Duration of active connection is the time, in which the emergency number is
dialed, the telephone called and the S.O.S. tone sequence played back. Example:
The telephones default setting is 90 seconds. The S.O.S. tone sequence is played
for this entire time (although it can only be heard when the call is accepted). If a
recipient answers the call after 60 seconds, he will hear the S.O.S. tone sequence
for a maximum of another 30 seconds. You can set a duration from 30 99 seconds.
Do not select too short a duration, so that the tone sequence will still be heard, if
there is a delay in the handset of the telephone called being lifted.
1. Press the MENU soft key to display the main menu items.
2. Press the arrow keys to choose BS Settings, then press the
SELECT soft key.
3. Enter the current base PIN and press the OK soft key.
Page 63

Base settings
61
4. Press the arrow keys to choose 8:Emergency Call, then press the
SELECT soft key.
5. Press the arrow keys to choose 5:Duration, then press the
SELECT soft key. The set duration is displayed.
6. Delete figures using the CLEAR soft key. Enter the desired duration
(30 99 seconds) using the number keys and press the OK soft
key.
7. Select further settings. Or press the
key to exit.
Emergency call identification code
If the emergency call is answered by an emergency server, the emergency
identification code (max. 20-digits), in the form of a numberal sequence of DTMF
tones, can provide the recipient with information about the caller.
1. Press the MENU soft key to display the main menu items.
2. Press the arrow keys to choose BS Settings, then press the
SELECT soft key.
3. Enter the current base PIN and press the OK soft key.
4. Press the arrow keys to choose 8:Emergency Call, then press the
SELECT soft key.
5. Press the arrow keys to choose 6:ID-Code, then press the
SELECT soft key.
6. Enter the ID-Code using the number key and press the OK soft key.
7. Select further settings. Or press the
key to exit.
Storing call numbers to speed dialing keys
How to dial with the keys see paragraph Using the base station speed dialing
keys on page 21.
Page 64

Base settings
62
You can store 4 speed dialling numbers (max. 24-digits):
1. Press the MENU soft key to display the main menu items.
2. Press the arrow keys to choose BS Settings, then press the
SELECT soft key.
3. Enter the current base PIN and press the OK soft key.
4. Press the arrow keys to choose 9:Direct No., then press the
SELECT soft key.
5. Press the arrow keys to choose the desired memory location (1-4),
then press the SELECT soft key.
6. Enter the call number and press the EDIT key.
7. Press the SELECT key to access 1:Save Number. The emergency
call number is stored.
8. Select further memory locations or press the key to exit.
If necessary, one or more dialing pauses can be stored. After step 6,
press the arrow keys to choose 2:Insert Pause and confirm by the
soft key SELECT. Enter the following digits of the number and press
the EDIT soft key. Continue with step 7.
Page 65

Favorite (special functions)
63
With this menu you can access to several special functions: Walkie-Talkie, Room
Monitoring and SMS.
Walkie-talkie
Two handsets can talk each other like walkie talkies without engaging the line. To
do so, they must be set on the same radio channel.
Activating walkie-talkie
1. Press the MENU soft key to display the main menu items.
2. Press the arrow keys to choose Favorite, then press SELECT soft
key.
3. Press the arrow keys to choose 1:Walkie-Talkie, then press the
SELECT soft key. The phone asks you to enter a channel number.
4. Enter a 4-digit channel number you want, and press the SELECT
soft key. The display shows Walkie-Talkie.
5. Be sure that your party at the other handset is set on the same
radio channel. In this case you can use your handset as a walkietalkie and talk with him.
The handset cannot be used as a phone while in walkie-talkie mode.
Deactivating walkie-talkie
In standby mode, just press the EXIT soft key. Your phone restores
the normal working condition.
Room Monitoring
You can monitor rooms, in which your easyDECT XL 2 is located, from elsewhere.
Requirement: The Room monitoring function must be enabled on the handset in
the room to be monitored. The telephone, with which you dial from elsewhere,
Page 66

Favorite (special functions)
64
must be set to DTMF dialing mode. Lift the handset and dial the call number.
Base station and handset of easyDECT XL 2 ring once and the telephone ties up
the line. Then enter the four-digit access code.
The handset of easyDECT XL 2 switches to listening mode and you can hear what
is happening in the room. If you prefer silent monitoring without the single ring,
you should deactivate the ringing tone on the base station and the handset (see
Page 39).
Make sure that you observe data protection laws when using silent
monitoring.
Before you turn on the Room monitoring function, the access code must
be programmed (see paragraph below)
Changing the access code for room monitoring
The 4-digit access code for room monitoring is not preset and must be entered by
the user. You can change your access code at a later date if necessary. Entering
the code initially and any subsequent changes use the following procedure:
1. Press the MENU soft key to display the main menu items.
2. Press the arrow keys to choose Favorite, then press SELECT soft
key.
3. Press the arrow keys to choose 2:Room Monitor, then press the
SELECT soft key.
4. Enter the current base PIN and press the OK soft key.
5. Press the arrow keys to choose 2:Monitor Code, then press the
OK soft key.
6. Enter the Monitor Code (4 digits) using the number key and press
the OK soft key. (The code 0000 is not permitted and will not be
accepted!).
7. Press the
key to exit.
Page 67

Favorite (special functions)
65
Turning the Room monitoring function on the handset on/off
Before turning the function on, it is necessary to store the monitor code.
1. Press the MENU soft key to display the main menu items.
2. Press the arrow keys to choose Favorite, then press SELECT soft
key.
3. Press the arrow keys to choose 2:Room Monitor, then press the
SELECT soft key.
4. Enter the current base PIN and press the OK soft key.
5. Press the arrow keys to choose 1:Monitor Mode, then press the
SELECT soft key.
6. Press the arrow keys to to select ON or OFF, and press the OK
key.
7. Select further settings. Or or press the
key to exit.
Turn the Room monitoring function off again after use. If the
function remains turned on, the telephone only rings once for an
incoming call (or not at all if you have turned the ringing tone off).
SMS, Email* and Fax*
Using the SMS menu, you can create, send, receive, and save your text messages.
You can also use the SMS to send fax or email messages (text only).
To enable the SMS feature, you must subscribe to the SMS service supplier and
set the service center numbers in your phone before using it.
Services such as SMS, SMS-to-email and SMS-toFax are available only if
provided by your local telephone network.
You can access to the SMS menu only when the handset is inside the radio
coverage of the base.
* This feature may not be available with your easyDECT XL 2 country version.
Page 68

Favorite (special functions)
66
Setting service center number
To enable the SMS feature you should ask your service supplier the service center
numbers and store it in your phone as follows:
1. Press the MENU soft key, then press the arrow keys to choose
Favorite, then press SELECT soft key and select 3:SMS by
the arrow keys. Press the SELECT soft key.
2. Press the arrow keys to choose 5:SMS Settings, then press the
SELECT soft key.
3. Press arrow keys to choose 1:Service Ctr1 or 2:Service Ctr2,
then press the SELECT soft key.
4. Enter the service number using the numeric keys. You can enter up
to 16 digits and press the OK soft key to save the setting.
6. To exit, press the
key.
You can access the SMS menu only when the handset is inside the radio
coverage of the base.
At step 3, please note that Service Ctr1 is for messages being sent and
Service Ctr2 are for messages being received.
Setting terminal number*
When more than one handset is registered to one base, setting the terminal number
on each handset is required. It allows the message sender to specify the handset
which will receive the message by entering the addressee's terminal number. You
can set each terminal number with a number from 1 to 9.
You can enter the same terminal number in more than one handset.
If you do not enter the terminal number, the handset is automatically set to the
terminal number 1.
1. Press the MENU soft key, then press the arrow keys to choose
Favorite, then press SELECT soft key and select 3:SMS by
pressing the SELECT soft key.
Page 69

Favorite (special functions)
67
2. Press the arrow keys to choose 5:SMS Settings, then press the
SELECT soft key.
3. Press the arrow keys to choose 3:Terminal No, then press the
SELECT soft key.
4. Enter the 1-digit terminal number using the numeric keys. You can
also use the arrow keys.
5. Press the SELECT soft key to save the setting.
7. To exit, press the
key.
* This feature may not be available with your easyDECT XL 2 country version.
Writing and sending a new message
You can create a text message containing up to 160 alphanumeric characters
and send it as a SMS, fax or e-mail message.
Sending SMS
1. Press the MENU soft key, then press the arrow keys to choose
Favorite, then press SELECT soft key and select 3:SMS by
pressing the arrow keys. Press the SELECT key.
2. Press the SELECT soft key to choose 1:Write Message.
3. Enter the message text (up to 16 characters) by using the
alphanumeric keys, then press the OK soft key.
(4. Press the SELECT soft key to choose 1:SMS)*
5. Press the arrow keys to choose 1:Enter Number or 2:Search
Number.
Enter Number allows you to manually dial a phone number by using the
numeric key.
Search Number allows you to select a number from the phonebook.
6. Enter the phone number where you want to send the message or
Page 70

Favorite (special functions)
68
select it from the phonebook entries (by using the or key and the
SELECT soft key), then press the OK soft key.
7. Press the arrow keys to choose the operation you want to do with
the just typed SMS message:
Send sends the message immediately.
Save Only saves the message in the Outbox without sending it
Terminal No - enters the other partys terminal number.*
Notification - activates or deactivates the notification feature. If
activated, the service provider informs you whether or not your
message has been successfully sent.*
Public Key associates an alphanumeric public key and a numeric
reception code to the message. This avoids that unauthorized
users could read the message. For details about the public key
and reception code, see par. Setting the Public Key.*
8. Press the arrow keys to choose the required option. To send the
message just select Send. The message is transferred to the
selected destination as described in the par. Message
Transmission.
At step 3, to shift the case, press the * key while entering text. For details
about entering the text please see the par. Entering a name.
If you have an incoming call while creating a message, you can retrieve
the message after answering the call. When you access the 1:Write
Message option, if there is an unsent message the display shows Want
to edit your last message?. You can choose Yes to finish writing the
message and send it. To cancel, select No, you will be prompted to write
a new message.
Sending a Fax message*
1. Just start writing a normal SMS as described in steps from 1 to 3 in
par. Sending SMS.
2. Press the arrow keys to choose 2:Fax and press the SELECT soft
key. The display prompts you to enter the fax header (e.g. your
Page 71

Favorite (special functions)
69
name or the one of your office/company).
3. Enter the fax header, then press the OK soft key. You can enter up
to 80 characters including spaces. For details about entering the
text, please see the par. Entering a name.
4. Enter a fax number, and press the OK soft key.
5. Press the arrow keys to choose Send, then press the OK soft key.
The fax message is transferred to the selected destination as
described in the par. Message transmission.
At step 5 you can also select Save Only, in this case the fax message is
saved in the outbox without being sent.
Sending an email message*
1. Just start writing a normal SMS as described in steps from 1 to 3 at
par. Sending SMS.
2. Press the arrow keys to choose 3:Email and press the SELECT
soft key. The display prompts you to enter your partys email
address.
3. Enter the e-mail address using the alphanumeric keys, then press
the OK soft key. See the bottom note for details.
4. Press the arrow keys to choose Send, then press the OK soft key.
The email message is transferred to the selected destination as
described in the par. Message transmission.
At step 3, you can enter an address up to 80 characters, spaces included.
To enter @, use the 1 key as described in par. Entering a name.
At step 4 you can also select Save Only, in this case the email message
is saved in the outbox without being sent.
Page 72

Favorite (special functions)
70
Message transmission
When the message is being sent, the display shows Sending SMS and then
shows Success! or Fail! according to the sending result.
When the sending is successful, the display shows Save Message? Use the
arrow keys to save the message in the Outbox or not.
If the sending fails, the display shows the following options:
Transmit Again retries to send the message.
Save Message - saves the message in the Outbox
Use the arrow keys to select the required option.
* This feature may not be available with your easyDECT XL 2 country version.
Viewing received messages
While a message is being received, the display shows Receiving SMS. Then, if
the message is received properly, the display shows New Message until you
read the message or you press any key.
If the message is set with an alphanumeric public key, the display shows it instead
of the senders phone number. This is to prevent an unauthorized person from
reading the message. If you want to read the message, you must enter the password
that you have associated with the public key in the Key settings menu. For further
details, see the par. Setting the public key.
Your phone stores up to 20 messages recently received in the Inbox on your phone.
You can receive a message of 640 characters long. When you access Inbox under
the Message menu, you can read and edit the received messages.
Viewing a received message:
1. Press the MENU soft key, then press the arrow keys to choose
Favorite, then press SELECT soft key and select 3:SMS by
pressing the SELECT soft key.
2. Press the arrow keys to choose 2:Inbox, then press the SELECT
soft key. The list of the messages you have received is displayed.
Already read messages are marked with a check symbol.
Page 73

Favorite (special functions)
71
3. Select a message that you want to read using the arrow key, and
press the SELECT soft key. The display shows the senders phone
number, the message text, and the time in which you received the
message.
4. You can access the following options by pressing the OPTION soft
key:
Delete deletes the selected message.
Reply replies by sending your reply message.
Forward sends the received message to other person.
Make a Call allows you to call the sender back.
Save Number - saves the senders phone number in your
phonebook.
5. Press the
key to exit.
Using outbox
The Outbox on your phone stores the last 20 outgoing short messages, fax and email messages (both the successfully sent ones and the failed ones). Moreover, if
you have an incoming call while creating a message, the message will be
automatically stored in the outbox so that you can recall the message after answering
the call. If necessary, you can review or resend any messages stored in the outbox.
To view a message in the outbox:
1. Press the MENU soft key, then press the arrow keys to choose
Favorite, then press SELECT soft key and select 3:SMS by
pressing the arrow keys. Press the SELECT soft key.
2. Press the arrow keys to choose 3:Outbox, then press the SELECT
soft key.
The display shows the list of the outgoing messages. For e-mail
messages, the first part of the e-mail address is displayed instead of
the phone number.
3. Select a message that you want to read using the arrow key, and
Page 74

Favorite (special functions)
72
press the SELECT soft key. The display shows the addressees
phone number (not for e-mails), the message text, and the time in
which you sent the message.
4. While you read the fax or e-mail, you can press the OPTION soft
key to view the fax header or email address.
5. To access the options, press the OPTION soft key again. The
following options are available:
Delete deletes the selected message
Send Same Msg allows you to send the message as it is.
Edit Msg - allows you to edit the message and then send it.
Moreover, only for SMS messages, the following additional options
appear:
Make a Call allows you to call the sender back.
Save Number - saves the senders phone number in your
phonebook.
6. Press the
key to exit.
Deleting all messages
You can delete all of the messages stored in the Inbox and the Outbox as follows:
1. Press the MENU soft key, then press the arrow keys to choose
Favorite, then press SELECT soft key and select 3:SMS by
pressing the arrow keys. Press the SELECT soft key.
2. Press the arrow keys to choose 4:Delete All, then press the
SELECT soft key.
3. Press the arrow keys to choose Inbox All Del or Outbox All Del
and press the SELECT soft key. The first option deletes all the
messages stored in the inbox, the second one deletes all the
messages stored in the outbox.
4. The display prompts you to confirm the deletion. If you really want to
Page 75

Favorite (special functions)
73
delete all press the messages the SELECT soft key, if not press the
CANCEL soft key.
5. Press the
key to exit.
Setting the public key (confidential messages)*
With this feature you can prevent an unauthorized person from accessing your
private messages. You can store up to 3 alphanumeric public keys and associate
each of them to a numeric password. After setting your public keys/passwords,
you can give a public key to any one needing to send you a private message.
When you receive a message protected by a public key, the message cannot
be opened unless you enter the associated password.
To set the public key:
1. Press the MENU soft key, then press the arrow keys to choose
Favorite, then press SELECT soft key and select 3:SMS by
pressing the arrow keys. Press the SELECT soft key.
2. Press the arrow keys to choose 6:Key Settings, then press the
SELECT soft key.
3. Press the arrow keys to choose the desired Public Key memory cell,
then press the SELECT soft key.
4. Enter the alphanumeric public key you want to use and press the
SELECT soft key. You can enter up to 5 characters following the
directions stated in par. Enter a name.
5. Enter a 4-digit password to associate to the public key and press
the SELECT soft key.
6. Enter the password once again to confirm it and press the SELECT
soft key.
7. Press the
key to exit.
Page 76

Favorite (special functions)
74
The public key feature is a typical function which could be available in the
fixed and cordless SMS-featured phones only, so it is not available in the
mobile phones.
* This feature may not be available with your easyDECT XL 2 country version.
Page 77

Appendix
75
Maintenance
Your DECT phone doesnt need particular maintenance operations. Just follow
what stated in the notes and warnings in this manual, particularly what is included
in Warning notes at the beginning of this manual as well as in the paragraphs
Setting up and Battery checking and handling.
Cleaning the cordless phone
Should you need to clean your cordless phone, please use only a soft and dry
cloth to remove the dust. In case it becomes particularly dirty, you can slightly
dampen it with water avoiding to clean the charging contacts with it.
Please keep always cleaned the charging contacts at the handset and base side
by using a soft and dry cloth to remove the dust. If they become particularly dirty,
gently rub them with a very soft rubber eraser for pencils.
Dont use alcohol, cleaners, aerosol or abrasives to clean the handset.
Dont use the dampened cloth near the charging contacts
Troubleshooting
Symptom
The handset doesnt
switch on
Possible cause
Batteries discharged or
not (well) installed.
Batteries damaged or
not suitable
Faulty handset
Solution
Try charging the handset for few
minutes, then remove it from the
base. If it still doesnt switch on,
check the battery installation.
If you already did the above stated
operation unsuccessfully, try
replace the batteries.
Contact an autorized service
centre.
Page 78

Appendix
76
Symptom
Handset works, but
doesnt access the base
station.
Handset works and
access the base unit, but
no dial tone is heard.
Handset works perfectly,
but the numbers are not
dialed to the line.
Handset works perfectly,
but you hear a beep
during the phone calls.
Noice and audio
interferences on your
phone calls.
Handset works perfectly,
but doesnt ring with
incoming calls.
Handset can only
receive calls. Keypad
locked.
The phone doesnt dial
certain numbers
Phone doesnt work
properly with some
special services or if
connected to an
exchange extension
(PABX).
Possible cause
No power connection in the
base station.
Handset not registered to
the base station or lost of
registration.
Wrong connection of the
phone line cord.
You have set the dial done
multi frequency system
(DTMF), but your line
doesnt support it.
Batteries near to be fully
discharged
Handset too far from the
base.
Ring volume level set to
OFF.
You have disabled the
keypad lock function.
Outgoing calls barring
function activated.
Flash time not properly set.
Solution
Ceck the connection of the
AC power adapter
Try registering the handset to
the base.
Check the connection of the
line cord.
Try selecting the pulse dial.
Check the batterie charge
and charge it if necessary.
Get closer to the base
station.
Select another ring level.
Try by keeping the * key.
Chek the call barring function
and change it if necessary.
Check the flash time.
Page 79

Appendix
77
Symptom
Battery duty is very low.
Logical malfunctioning in
the handset or base
station.
SMS feature doesnt
work.
Possible cause
You regularly charged the
battery with more than one
bar.
Charging contacts not
clean
Batteries life reached the
end.
AC power adapter supply
noise or electrostatic
spikes could temporarily
altered the internal
memory.
Faulty handset or base
unit.
No service centres have
been set.
Solution
See par. Battery checking
and handling
Clean them.
Replace the batteries.
Try performing a reset in the
handset or base station.
Contact an authorized service
centre.
Set the service centres.
Technical specifications
Frequency Range 1.88~1.90 GHz
Channels 120 duplex channels
RF carrier Power < 250 mW (24 dBm)
Modulation GFSK
Frequency Stability ± 50 kHz
Operation time Ni-MH Standby: up to 100 hours., Talk time: up to 10 hours
Charging time 15 hours
Ambient temperature Normal: 15°C - 35°C, Extreme: 0°C - 40°C
Humidity 0 % ~ 90 %
Weight (grams) Base unit: ca. 305 g (without batteries)
Handset: ca. 168 g (without batteries)
Size (LxBxH) Base unit: ca. 124,5 x 197,5 x 76,0 mm
Handset: ca. 173,0 x 62,5 x 35,2 mm
Page 80

Appendix
78
Power supply Base input: DC 9V, 300/150 mA
Handset input: 1.2V x 2, 1300 mA
Service
You have purchased a modern product of TIPTEL AG, which was designed and
manufactured in Ratingen near Düsseldorf. Our high-tech manufacturing facilities
Made in Germany grant a continuous level of the highest quality. This is even
underlined by our certification according to DIN EN ISO 9001. If, however, problems
occur or you have questions on operating the device, please contact your local
dealer.
Guarantee
Please contact your local dealer or importer for details of guarantee for non EC
countries. Within the European Community the following guarantee regulation
applies: Your contact for services arising from guarantee obligations is the authorised
dealer where you bought the device.
TIPTEL AG will grant a guarantee of 2 years from the date of handover for the
material and for the manufacturing of the telecommunications terminal unit.Initially,
the purchaser shall have only the right of subsequent performance. Subsequent
performance entails either repair or the supply of an alternative product. Exchanged
devices or parts shall become the property of the authorised dealer.
If the subsequent performance fails, the purchaser can either demand a reduction
in the purchase price or withdraw from the contract.
The purchaser shall notify the dealer immediately of any defects found. Proof of
the guarantee entitlement shall be furnished by standard proof of purchase (receipt
or invoice).
The guarantee entitlement shall expire if the purchaser or an unauthorised third
party interferes with the device. Damage caused by inappropriate handling,
operation, storage or by force majeure or other external influences shall not be
covered by the guarantee.
The guarantee shall not cover any consumable material (e.g. batteries) or defects
that only slightly impair the value or the usability of the device.
Claims for damage caused by transport shall be asserted to the delivery company.
Page 81

Appendix
79
Notes on settlement:
Repairs can only be conducted by the TIPTEL Service. A warranty repair does not
prolong the warranty period neither for the replaced parts nor for the device. This
guarantee is not transferable and shall expire if the device is sold on to another
party. It shall also expire if the device is interfered with by third parties or if the
serial number on the device has been removed or made illegible. There is a
guarantee seal on the tiptel easyDECT XL 2. Please do not damage or remove
this seal because otherwise, your guarantee will expire.
The General Terms and Conditions of TIPTEL AG, which are part of the contract
for a dealer, shall also apply. In the event of a complaint, the defective product
shall be sent to the relevant TIPTEL subsidiary, the importer or dealer along with a
description of the defect and the proof of purchase.
CE sign
This device is approved for the connection and use within the analogue public
telephone networks in all EC countries according to the European Requirements.
Due to technical deviations in individual countries, we cannot grant an unlimited
guarantee for the successful operation at all types of telephone accesses.
TIPTEL AG hereby declares that the device complies with all fundamental requirements of the European directive 1999/5/EEC, 89/336/EEC (electromagnetic
compatibility) and 73/23/EEC. This conformity is confirmed by the CE sign on the
device. Further details on the declaration of conformity can be found under the
following internet address: http://www.tiptel.org
Ecological information
During the normal use of the telephone you will not have any contact to substances
damaging to your health. The device is not battery-operated. The plastics used for
manufacturing this device exclusively consist of partially recycled granules. The
packaging materials do not consist of plastics but of partially recycled cardboard
and paper.
If you do not have further use of your tiptel easyDECT XL 2, TIPTEL AG will take
back the device without any charge. The device will be properly taken to pieces for
recycling.
Page 82

80
Index
A
AC adapter 9, 10
Access code 50
Access code for room monitoring 64
Accessing menu mode 36
Adjusting ringer of handset 39
Adjusting voice volume 19
Alarm 43
Alert type of handset 42
Buzzer 42
Ringing tone 42
Vibration alarm 42
Alphabetic search 29
B
Barring outgoing calls 53
Base PIN 52
Base settings 52
Batteries 9, 24
Capacity 12
Charging 11, 24
Checking and handling 24
Compartment 10
in the base station 9
in the handset 10
Inserting / replacing 9
Remove 16
Bell & Beep 39
Buzzer 42
C
C/O line 9
Calculator 44
Call Bar 53
Call by Call number 34, 49
Dialing a Call by Call number 34
Storing 49
Call lists 26
Capacity 12
Carrying strap 12
CE sign 79
Changing base PIN 52
Changing flash time 54
Charging 11
Cleaning the cordless phone 75
Connect telephone to C/O line 9
Connect telephone to Power 10
Corrections before dialing 17
D
Date 15
Deactivating a handset 53
Default telephone setting 37
Dial mode 14
DTMF 14
Pulse-dialing 14
Dialing Pause 29, 56, 62
Diary 43
Display 6
Display language 13
Disrupting an emergency call 58
E
Ecological information 79
Editing or deleting a phonebook entry 30
Email and Fax 65
Sending a Fax message 68
Sending an email message 69
Setting the public key 73
Terminal number 66
Emergency call mode 55
Description 55
Disrupting an emergency call 58
Duration of active connection 60
Identification code 61
Pause after unsuccessful sequence 60
Process of an emergency call 58
Sending out an emergency call 57
Setting the number of sequences 59
Special emergency call settings 59
Storing emergency numbers 56
Page 83

81
Index
Turning emergency call mode ON/OFF 57
Entering a name 28
F
Fax 65
Flash signal 20
Flash time 54
Fuzzy dialing 22
G
Guarantee 78
H
Handset settings 46
Handsfree mode 19, 22
Headset 12
I
Icon 7
Incoming calls 32
Options 33
Searching for and dialing a number 33
Inserting plate and plastic cover 11
Installing the base station 8
K
Key assignment on the base station 6
Key assignment on the handset 4
Key lock 25
Key tone 39
L
Language 47
Last dialed numbers 20
Locking keys on handset 25
Loudspeaker volume on base station 21
M
Maintenance 75
Making a call 17
Manually disrupting an emergency call 58
Menus 36
Accessing menu mode 36
Default telephone setting 37
Options 37
N
Name plate 13
Network code number 34
NiMH 9, 10
O
On hold 19
Operating elements 4
Out of range indication 24
Outbox 71
Outgoing calls 53
Outgoing calls list 31
P
PABX 55
Paging 25
Pause 29, 56, 62
Phonebook 26
Alphabetic search 29
Dialing pause 29
Editing or deleting a phonebook entry 30
Entering a name 28
Scrolling the phonebook list 30
Searching for and dialing a number 29
Storing a phone number 26, 27
PIN 52
Plastic cover 11, 13
Plate 11
Police / Fire label 10
Process of an emergency call 58
Putting a call on hold 19
R
Receiving a call 18
Redialing last dialed numbers 20
Page 84

82
Index
Redialling the last dialed numbers 31
Options 32
Outgoing calls list 31
Searching for and dialing a number 31
Registering a new handset 47
Removing the cables 10
Resetting the base station 55
Resetting the handset 50
Ringer of base station 40
Ring type 40
Ring volume 41
Ringer of handset 39
Ring type 39
Ring volume 40
Ringing tone 42
Room Monitoring 63
Access code 64
Turning on 65
S
Scope of supply 4
Sending out an emergency call 57
Service 78
Setting access code 50
Setting date & time 15
Setting key tone 39
Setting up 8
Setting up the handset 10
SMS 65
Deleting all messages 72
Message transmission 70
Service center number 66
Using outbox 71
Viewing received messages 70
Writing and sending a new message 67
Speakerphone 19
Special emergency call settings 59
Duration of active connection 60
Identification code 61
Pause after unsuccessful sequence 60
Setting the number of sequences 59
Speed dialing keys 21, 61
Storing call numbers 61
Using 21
Standby display 46
Standby mode 17
Storing emergency numbers 56
Strap 12
T
Taking out of operation 16
Technical specifications 77
Temporary tone dial switchover 22
Time 15
Tone dial switchover 22
Transferring a call 22
Troubleshooting 75
Turning emergency call mode ON/OFF 57
Turning handset on / off 14
V
Vibration alarm 42
Voice volume 19
Volume 19, 40
Loudspeaker 21
Ring volume 40, 41
Voice 19
W
Walkie talkie 63
Page 85

TIPTEL AG
Halskestraße 1
D - 40880 Ratingen
Tel.: 0 18 05 84 78 35*
Vanity Tel.: 0 18 05 TIPTEL*
Fax: 0 18 05 84 78 49*
E-mail: support@tiptel.de
Internet: www.tiptel.de
International:
E-mail: export@tiptel.de
Internet: www.tiptel.com
*(0,12 Euro pro Minute)
Tiptel GmbH
Tenschertstraße 5
A - 1230 Wien
Tel.: 01 - 616 78 71
Fax: 01 - 616 78 71 - 22
E-mail: office@tiptel.at
Internet: www.tiptel.at
Tiptel AG
Bahnstrasse 46
CH - 8105 Regensdorf
Tel.: 044 - 884 01 80
Fax: 044 - 843 13 23
E-mail: tiptel@tiptel-online.ch
Internet: www.tiptel-online.ch
Tiptel B.V.
Camerastraat 2
NL 1322 BC Almere
Telefoon: 0900 BELTIPTEL of
0900 2358478 (niet gratis)
Fax: 036 53 678 81
E-mail: info@tiptel.nl
Internet: www.tiptel.nl
Tiptel NV
Leuvensesteenweg 510 bus 4
B 1930 Zaventem
Telefoon: 0903 99 333 (1,12 Euro / min.)
Fax: 02 714 93 34
E-mail: tech@tiptel.be
Internet: www.tiptel.be
Tiptel sarl
23, avenue René Duguay-Trouin
F 78960 Voisins-Le-Bretonneux
Tél. : 01 / 39 44 63 30
Fax : 01 / 30 57 00 29
e-mail : support@tiptel.fr
Internet : www.tiptel.fr
Copyright by TIPTEL / DFG
Subject to modifications
(UK) 09/2004
EDV 4935344
 Loading...