

Page 1
Manual (en)
Call Manager with automatic attendant
and Music-On-Hold for PABXs
tiptel 545 SD
tiptel
Page 2

Page 3

Safety instructions
3
Safety instructions
The device may not be installed or operated in the following environments:
o in the open
o in damp or wet rooms (bathroom, shower, swimming pool ...)
o at locations with direct sunlight
o in explosive areas
o with ambient temperatures below 0 °C or above 40 °C
o with strong concussions or vibrations
o in dusty environment
During a thunderstorm you should neither use the phone nor connect or disconnect
any cables (Danger of an electric shock when a lightning hits the telephone network).
Unauthorized removal of the telephone system's cover or inappropriate repairs may
result in hazard for the user.
When disposing of the device all applicable national laws and regulations must be
obeyed.
The socket outlet must be near this facility and be easily accessible.
Install all connection cables with care so that no tripping hazards result from the in-
stallation. Connection cables may not be bent excessively, pulled, or stressed mechanically. Connection cables may only be installed inside of buildings.
ISDN connections, data and audio ports are SELV circuits and may only be con-
nected to circuits which are also SELV themselves.
With any malfunction the power cord must be removed from the wall outlet and all
telecommunication cables must be disconnected.
You may only use and connect headsets that meet the safety requirements of IEC
60950 item 6.2 (connection to TNV 3 circuits). For more information please contact
your specialist dealer or the headset manufacturer.
Installations must be carried out by persons having the appropriate technical train-
ing and experience necessary to be aware of the hazards to which they are exposed
in performing a task and of measures to minimise the danger to themselves or other
persons.
Applicable regulations in accordance with IEC60950 and IEC60364 have to be ob-
served.
Equipment with connection to AC supply circuits may lead to an accumulation of
contact currents at the telephone system. The service personnel must make sure
that the touch current (leakage current) at no time will exceed 3.5 mA.
Devices with protective earth plugs (safety plugs) may only be connected to wall
outlets with protective earth contact.
Before opening the cabinet the system must be disconnected from mains (remove
power cord) and from any telecommunication cables
Power supplies may only be used if approved by the manufacturer
Page 4
Button allocation
4
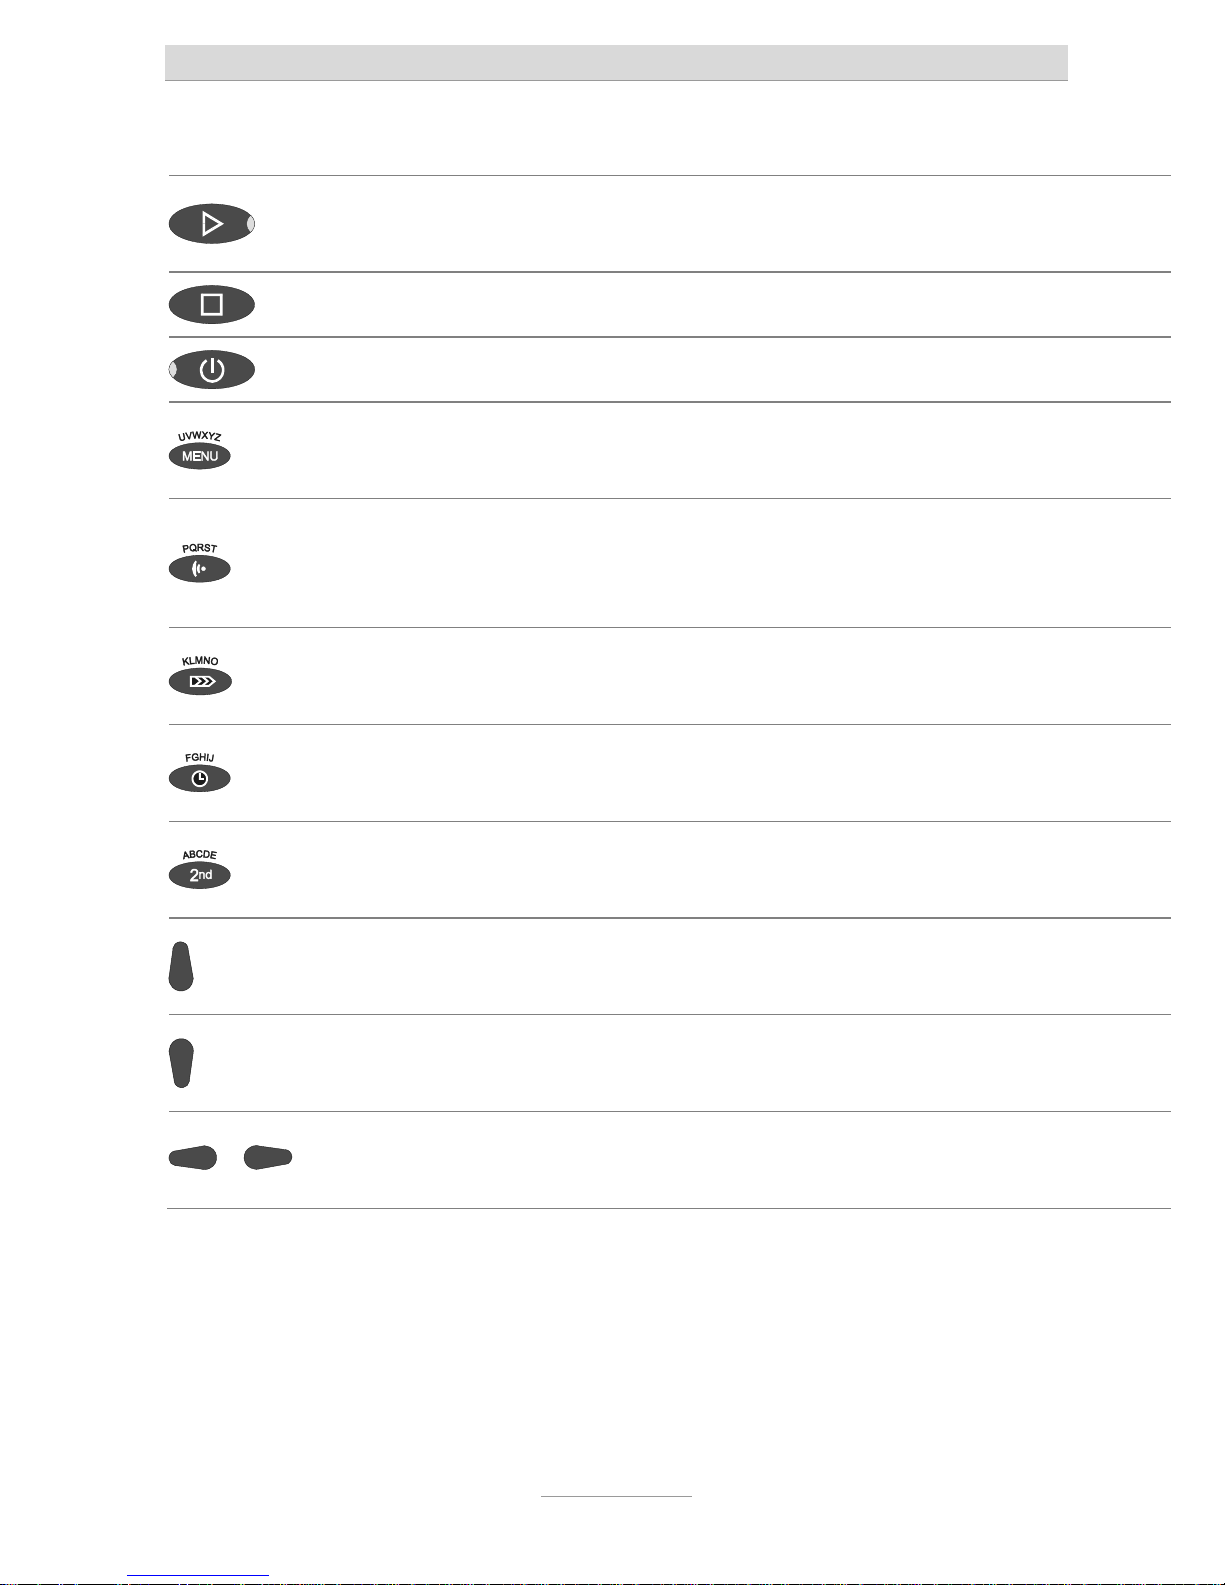
Button allocation
Playback: Starts playback of incoming messages that have not yet been
listened to. If pressed during playback lets you repeat the last 3 seconds.
Stop: Ends the current function; is used to close open menus.
Answering mode: Switches answering mode on or off.
Menu: Opens the menu. For text entries is used as the entry button for
letters and numbers.
Message: When pressed briefly starts playing current message back. When
pressed and held starts recording the current message. For text entries is
used as the entry button for letters and numbers.
Message transfer: Switches message transfer on or off. For text entries is
used as the entry button for letters and numbers.
Timer: Switches timer on or off. For text entries is used as the entry button
for letters and numbers.
Secondary function: Enables a secondary function. For text entries is used
as the entry button for letters and numbers.
Control button (up): Opens the call list, is used to navigate through and
make settings in the menus.
Control button (down): Opens the telephone book, is used to navigate
t
hrough and make settings in the menus.
or
Control buttons (left/right): changes the volume, is used to navigate through
and make settings in the menus.
Page 5
Button allocation
5
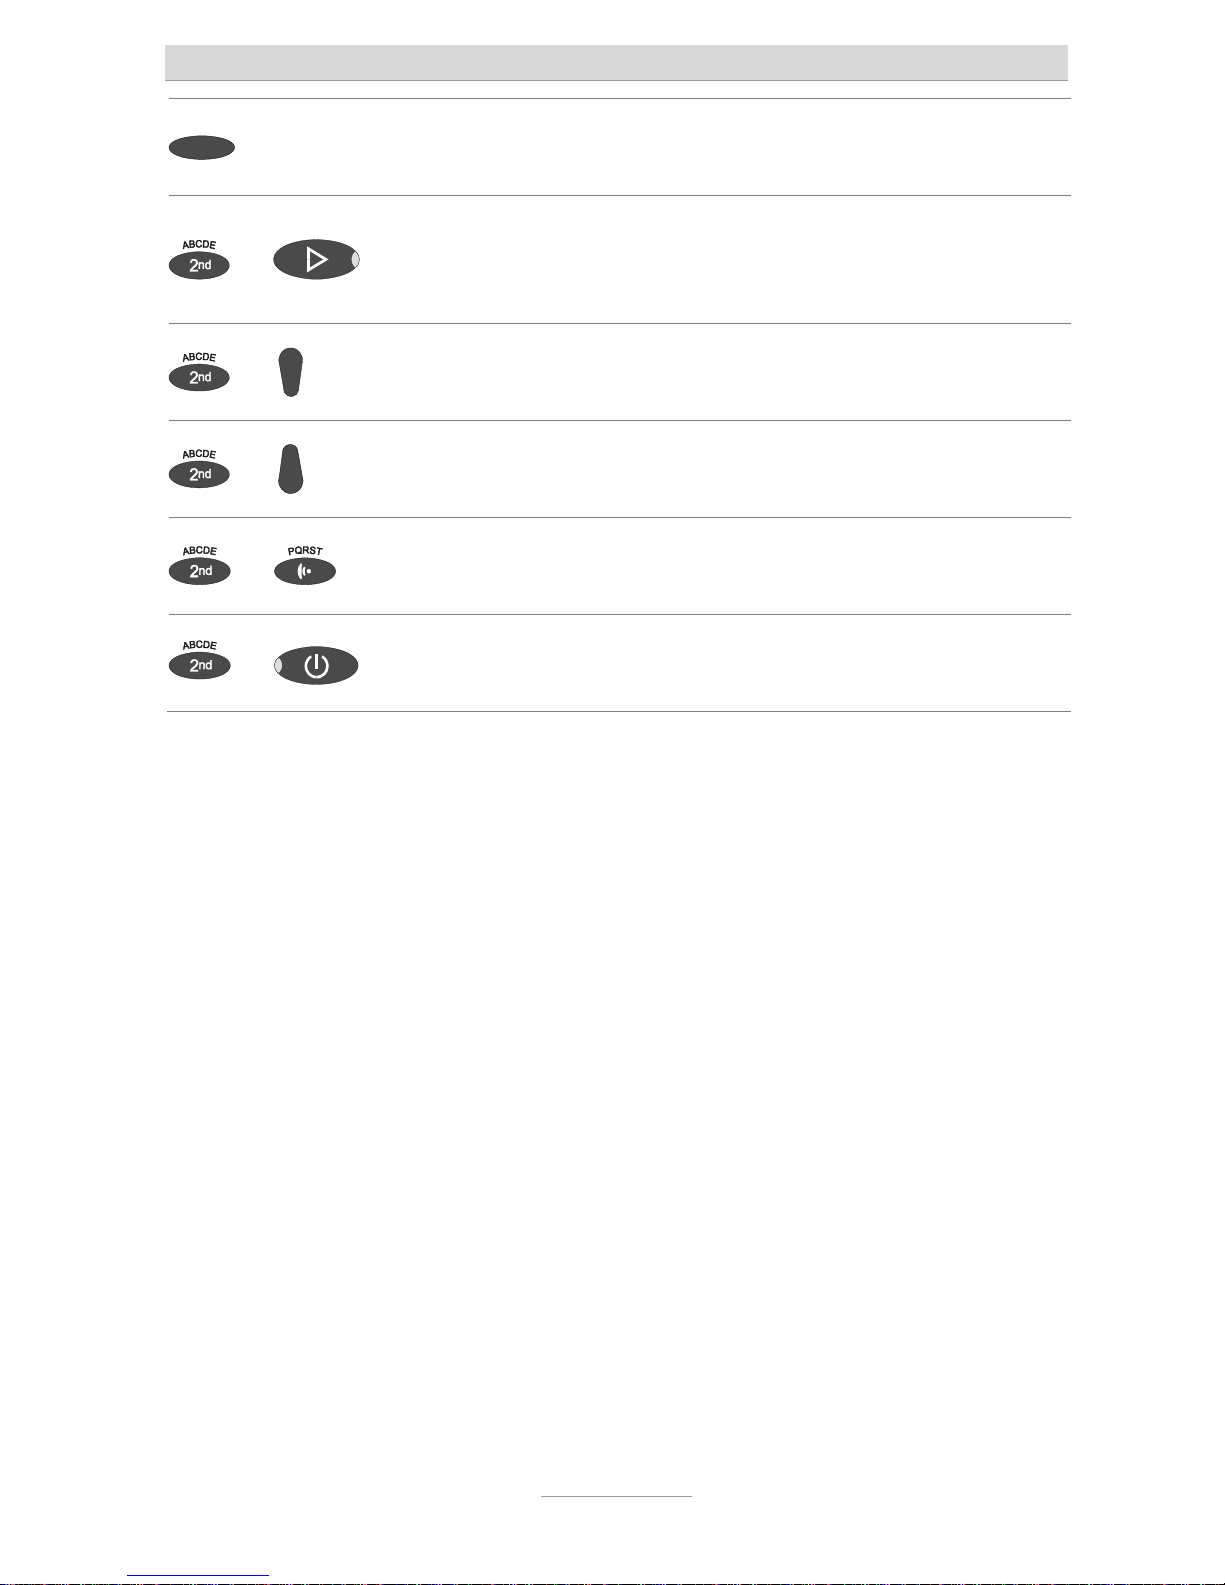
Selection button: Used to select from menus, entry fields and functions that
are displayed next to the corresponding button.
and
Secondary function and playback can be pressed in succession: Starts
playback for all incoming messages. Playback starts with the oldest and
ends with the newest recording.
and
Secondary function and control key (down) pressed in succession: Opens
t
he entry field for the telephone book.
and
Secondary function and control key (up) pressed consecutively: Message
list will be opened
and
Secondary function followed by pressing and holding message: Starts
recording the outgoing message via the audio input.
and
Secondary function and Answering mode pressed in succession: opens the
settings and activates the absence manager.
Page 6
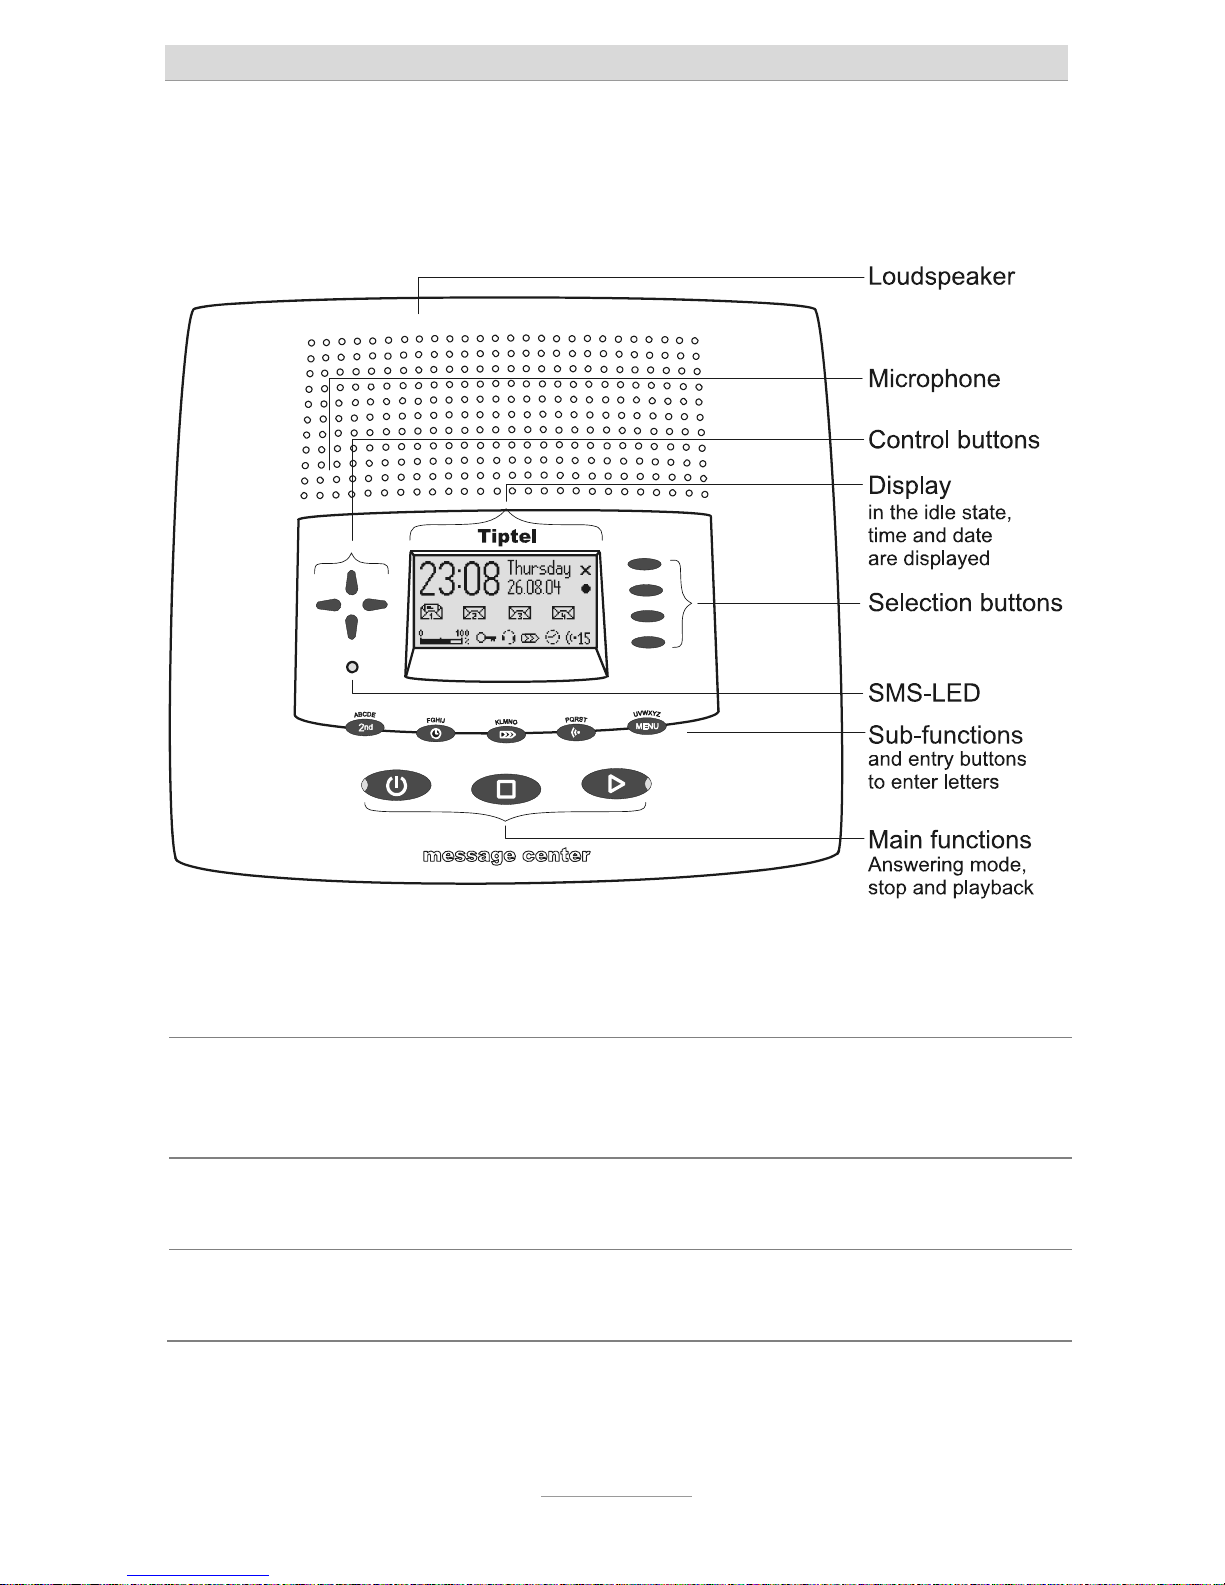
User elements
6
User elements
SMS-LED Flashes when there are new, unread short messages. Flashes quickly if
t
he mail inbox is full and there is no more memory for new short mes-
sages.
LED in the answering
mode button
Is lit when answering mode is switched on (answering machine active).
LED in the playback
button
Flashes when there are new, unread incoming messages.
Page 7

Contents
7
Contents
Safety instructions
......................................................................................................................... Fehler
! Textmarke nicht definiert.
Button allocation ............................................................................................. 4
User elements ................................................................................................. 6
Contents .......................................................................................................... 7
Display symbols .............................................................................................. 11
Getting started ................................................................................................ 13
Parts supplied ............................................................................................. 13
Installation ................................................................................................... 13
Connecting .................................................................................................. 13
Notes on memory cards ............................................................................. 14
Outgoing messages ........................................................................................ 16
General ........................................................................................................ 16
Sample outgoing messages ....................................................................... 16
Recording an outgoing message ............................................................... 17
Recording OGMs from an external signal source ...................................... 18
Notes for sound studios .............................................................................. 19
Checking OGMs .......................................................................................... 19
Deleting OGMs ............................................................................................ 20
Answering mode ............................................................................................. 21
Playing back and deleting incoming messages ............................................ 23
Playing back new incoming messages ...................................................... 23
Playing back all incoming messages ......................................................... 23
Play back of individual messages .............................................................. 24
Repeating .................................................................................................... 24
Pausing playback ........................................................................................ 24
Skip ............................................................................................................. 24
Fast forward and rewind ............................................................................. 25
Deleting individual incoming messages ..................................................... 25
Deleting all incoming messages ................................................................. 25
Dialling the caller directly ............................................................................ 25
Monitoring/Personal info (memo) .................................................................. 27
Monitoring telephone calls ......................................................................... 27
Personal info ............................................................................................... 28
Page 8

Contents
8
Absence manager ........................................................................................... 29
Call list ............................................................................................................. 31
Telephone book .............................................................................................. 33
General ........................................................................................................ 33
Entering and saving entries ........................................................................ 33
Summary of possible characters ................................................................ 36
Search entries ............................................................................................. 36
Checking and changing entries .................................................................. 37
Personal OGM (call filter) ............................................................................ 38
Vocal Clip .................................................................................................... 39
Dialling from the telephone book ............................................................... 40
Automatic redialling /Automatic call back when engaged (CCBS) ........... 41
Message function ............................................................................................ 42
Remote access ................................................................................................ 43
Remote access ........................................................................................... 43
Remote access functions ............................................................................ 44
Remote activation of the answer mode ...................................................... 47
Short messages (SMS) .................................................................................. 48
Configuring the telephone connection ....................................................... 48
Registering and de-registering with your message centre ........................ 48
Entry options for short messages ............................................................... 49
Inbox ........................................................................................................... 50
Outbox ......................................................................................................... 52
Sending a message (SMS) ......................................................................... 54
Templates.................................................................................................... 56
Message centre ........................................................................................... 57
Timer ................................................................................................................ 58
Setting options for timer ............................................................................. 58
Programming timer ..................................................................................... 59
Sample programming for timer .................................................................. 60
Switching on timer ...................................................................................... 61
Message transfer ............................................................................................ 62
Setting options for message transfer ......................................................... 62
Settings for message transfer ..................................................................... 63
Message transfer by SMS ........................................................................... 65
Sample call number entries ........................................................................ 66
Switching on message transfer .................................................................. 66
Individual ringing tone .................................................................................... 67
Page 9

Contents
9
Call forwarding ................................................................................................ 69
Setting options for call forwarding .............................................................. 69
Settings for call forwarding ......................................................................... 70
Sample call forwarding entries ................................................................... 72
Automatic monitoring ..................................................................................... 73
Setting options for automatic monitoring ................................................... 73
Settings for automatic monitoring .............................................................. 74
Security lock .................................................................................................... 75
Locking the device/Changing PIN .............................................................. 75
Unlocking device ........................................................................................ 76
Welcoming and connecting callers ................................................................ 77
Setting options for welcoming and connecting callers .............................. 77
Settings for welcoming and connecting callers ......................................... 78
Answering mode with a welcome message and call transfer .................... 81
Examples of use .......................................................................................... 81
Music-on-hold for PABXs ............................................................................... 91
Setting options for the on-hold music ........................................................ 91
Music-on-hold settings................................................................................ 92
Answering mode with music-on-hold ......................................................... 93
Mailboxes ........................................................................................................ 94
General ........................................................................................................ 94
Setting options for mailboxes ..................................................................... 94
Setting up mailboxes .................................................................................. 95
Using the mailboxes ................................................................................... 97
Remote access to mailboxes ...................................................................... 98
Automatic call forwarding to the mailbox ................................................... 98
Settings ............................................................................................................ 99
Setting options ............................................................................................ 99
Settings menu ............................................................................................. 102
Adjusting the volume .................................................................................. 103
Service menu .................................................................................................. 104
Page 10

Contents
10
Appendix ......................................................................................................... 105
Service ........................................................................................................ 105
Guarantee ................................................................................................... 105
CE symbol ................................................................................................... 107
Troubleshooting .......................................................................................... 108
Firmware-Update ........................................................................................ 109
Delivery status ............................................................................................. 110
Technical data ............................................................................................. 112
Index ................................................................................................................ 113
Brief instructions ............................................................................................. 117
Page 11

Display symbols
11
Display symbols
Answering mode switched on.
Answering mode switched on,
new incoming messages
available.
Playback
Caller's number, telephone
answering mode.
Recording taking place,
microphone on.
Call forwarding
Monitoring active
Volume
General recording
Remaining incoming message
capacity
Timer on, switching time, time
Secondary function
Message transfer switched on
Enter a call number from the
t
elephone book
Selected outgoing message.
Delete
Search forwards
Automatic call back
Search backwards
Redial
Call unsuccessful
Call successful
Branch to a sub-menu
Mailbox 1 set up, new incoming
messages available
Device locked
Mailbox 1 set up
Ongoing recording via audio
input
Delete
Inbox old, old message,
already listened to
Inbox new, new message, not
yet listened to
Page 12

Display symbols
12
Entry (text) possible
Notes on errors and operation
Send/receive short message
Switch on/off basic settings,
software update, call forwarding
Automatic answering, line busy
Transfer telephone book to a
second device
Ringing signal for incoming
calls
Data exchange with PC.
Outgoing call
Answering mode with music on
hold.
Appointment, absence
manager active
Answering mode with automatic
attendant.
Page 13

Getting started
13
Getting started
Parts supplied
Your tiptel 545 SD package contains:
tiptel 545 SD
Telephone connection cable
Mains plug 11.5V / 350 mA / 50 Hz
USB cable for connecting to a PC
CD-ROM with drivers and application software
2 transfer cables pin/pin and pin/cinch
Operating instructions
Memory card
Installation
Your tiptel 545 SD has been produced for normal operating conditions. Solutions in
furniture varnish, cleaning oils or paint cleaners can loosen the base. Bases that
have been altered in this way may leave tracks behind on the furniture.
Therefore use a non-slip underlay especially for new or freshly treated furniture.
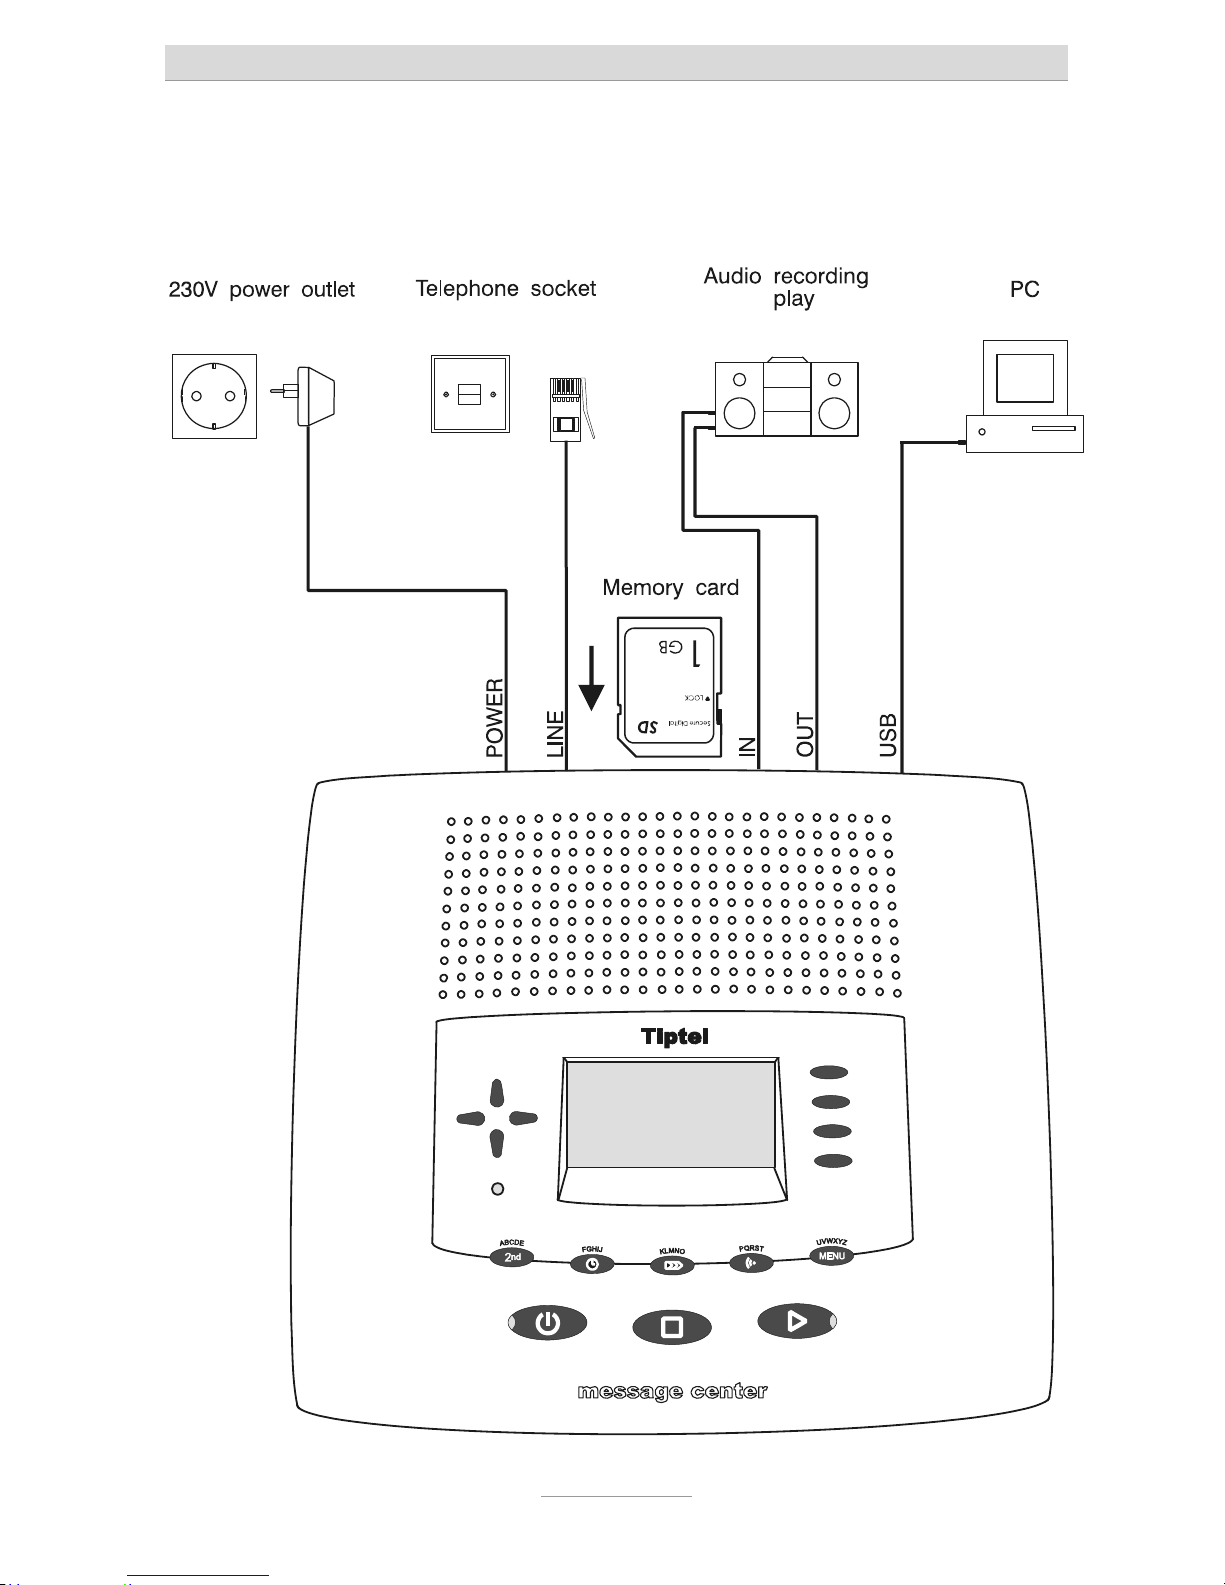
Connecting
Before you can use your tiptel 545 SD you first need to connect all the necessary
cables.
1 Fit the small connector of the mains plug into the "POWER" jack and the plug
into a 230 V socket outlet.
2 Fit the small connector of the telephone connection cable into the "LINE" jack
and the telephone plug into the telephone socket (Socket for auxiliary device).
3 Insert memory card to dead stop into corresponding slot (see picture).
4 If you want to transfer incoming messages to an external medium fit the trans-
fer cable with the jack plug to the "OUT" socket and the cinch plug to the audio input on the external device (audio system, cassette recorder etc.). You
may also connect PC loudspeakers (active speakers) to the "OUT" connector.
Page 14

Getting started
14
5 If you want to record outgoing messages from an external source fit the trans-
fer cable with the jack plug to the "IN" socket and the cinch plug to the audio
output on the external device (audio system, cassette recorder etc.).
6 If you want to transfer the telephone book from one different tiptel 545 SD to
another use the transfer cable with two jack plugs. Fit the plugs to the "OUT"
socket on one device and the "IN" socket on the other.
7 If you want to configure the device via the PC fit the USB cable with the square
plug into the device and the flat plug into the PC.
8 After the first start-up the device will ask you to select the language you wish
to use. Use the control keys (up and down) to select the desired language.
Then exit the menu by pressing the stop key.
Notes on memory cards
Your tiptel 545 SD supports all standard SD (Secure Digital) and MMC (Multi Media
Card) memory cards with a capacity between 32 MB and 2 GB. Memory cards are
offered by many manufacturers with different grades of quality, so that we cannot
recommend a special card or manufacturer.
If the device reports a memory card error or you observe gaps in your recordings
you should use a memory card of another manufacturer.
Memory use is - depending on the recording quality selected - between one and
two minutes per MByte. With a 512 MByte memory card this will result in some 8.5
or 17 hours.
Once you insert a new memory card a directory call "TIPTEL" will be created. This
directory can contain up to 999 recordings. In case you have set up mailboxes the
device will create sub-directories (MBX1, MBX2, etc.). Each mailbox directory can
contain up to 99 recordings.
The memory card must be formatted the FAT16 file system. In case there is an error
message upon inserting the card you can re-format it in the device. All data on the
card, however, will get lost this way.
If you wish to use memory cards with more than 2 GByte (e.g. 4 GByte) the card
must be formatted once in your tiptel 545 SD. The device will partition the card in
such a way that there is only one partition with the size of 2 GByte is available. This
operation cannot be undone.
A standard card reader in your computer can be used to read out the memory card,
so that you can archive recordings to your computer or just play them back on your
Page 15
Getting started
15
computer. Recordings that have been edited or renamed by your computer can no
longer be played back with your tiptel 545 SD.
Only replace the memory card in the devices basic mode. Never replace or
pull the card during play back or recording.
Page 16

Outgoing messages
16
Outgoing messages
General
Your tiptel 545 SD has 14 individual outgoing messages (OGM 1-14) and one preconfigured outgoing message (OGM 15). You can select the OGMs via the selection
button next to the OGM symbol. OGM 15 can not be personalised. A distinction is
made between two types of outgoing message: OGMs with and without the option
to record an incoming message. For OGMs that can record an incoming message
the caller can leave a message after the OGM. For OGMs that cannot record an incoming message (OGM only) the caller is given information but cannot leave a
message.
Sample outgoing messages
Outgoing message with incoming message option
Hello, this is the connection for Peter Miller from … I am currently away from the office and expect to return by [time]. You can reach me in person between [time] and
[time] or call me on … Alternatively, you can leave your name and number and I will
call you back. Please speak after the beep.
Outgoing message without incoming message
Hello, this is John Smith, sales representative for … in … My office is temporarily
closed due to illness (annual holidays etc.). Please call Mr. …, in … on … He will be
happy to assist you. Thank you for your call. Goodbye.
Page 17
Outgoing messages
17
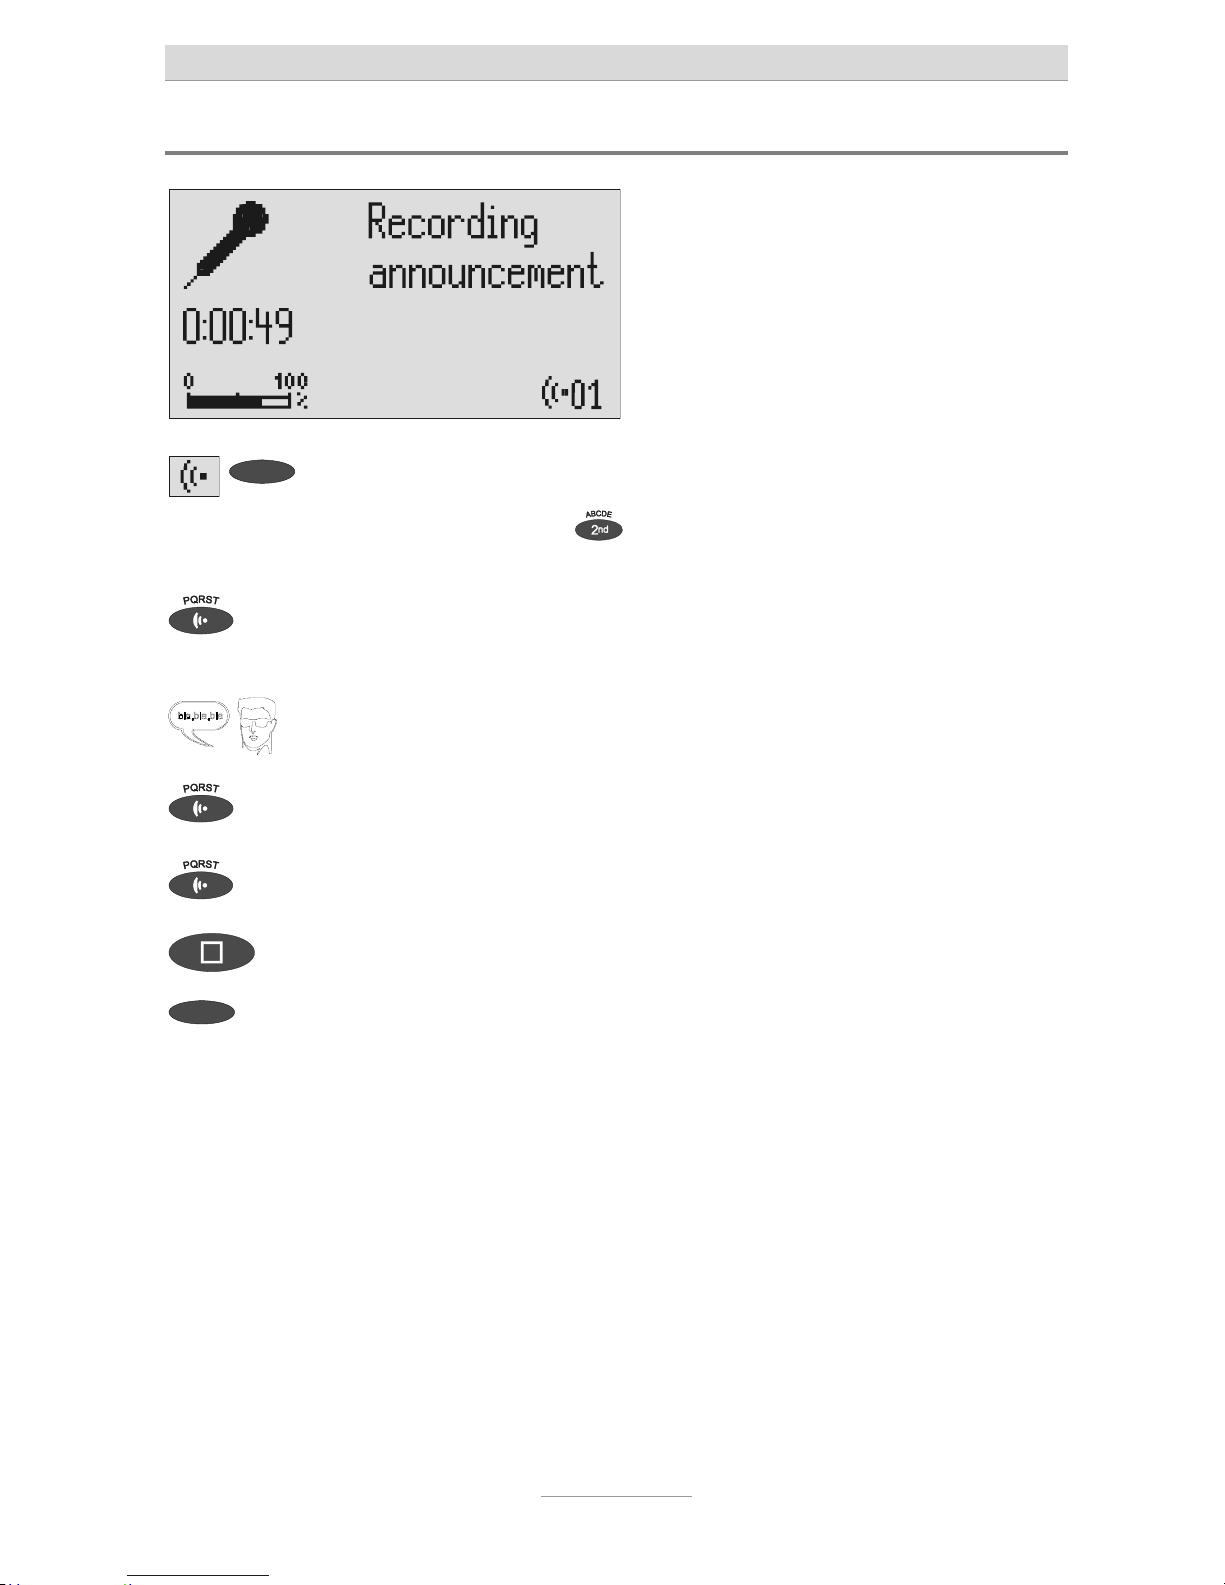
Recording an outgoing message
Select the desired OGM using the
selection button next to the OGM
symbol. Prior pressing of
allows you to browse in reverse.
The selected OGM is displayed next to
t
he symbol on the bottom right of the
display.
Press and hold OGM. Wait, you will hear a short tone, a micro-
phone is displayed to signal ongoing incoming message.
Start speaking (maintain approx. 15
cm distance from the microphone).
The display shows the time that you have
been speaking.
Release OGM to interrupt recording. "With incoming message" and "Without
incoming message" is displayed.
To continue the recording press and
hold OGM again.
The recording continues.
To cancel the recording press stop. The recording is cancelled.
Using the selection button next to
t
he relevant line select whether the
OGM should provide the option of
leaving an incoming message or
not.
The OGM is completed and is played
back for verification purposes. If the
OGM gives the option of recording and
ICM you will hear a beep at the end. If the
OGM does not give the option of recording you will hear two beeps at the end.
If you record OGM 14 without the option to record (OGM only) when the
incoming message memory is full your tiptel 545 SD switches to this OGM
automatically.
Page 18

Outgoing messages
18
Recording OGMs from an external signal source
You can also record professional outgoing messages via the audio input from an
external signal source (e.g. cassette recorder).
Select the desired OGM using the
selection button next to the OGM
symbol.
The selected OGM is displayed next to
t
he symbol on the bottom right of the
display.
Press secondary function The secondary function symbol is dis-
played.
Press and hold OGM. Wait, you will hear a short tone, a cas-
sette is displayed to signal an ongoing
recording.
Start the playback for the external
signal source.
Y
ou can follow the ongoing recording via
t
he loudspeaker. The display shows the
t
ime that you have already been record-
ed.
To end the recording release OGM. "With incoming message" and "Without
incoming message" is displayed.
Using the selection button next to
t
he relevant line select whether the
OGM should provide the option of
leaving an incoming message or
not.
The recording is completed and is played
back for verification purposes. If the
OGM gives the option of recording an
ICM you will hear a beep at the end. If the
OGM does not give the option of recording you will hear two beeps at the end.
Page 19
Outgoing messages
19
Notes for sound studios
Professionally produced announcements can also be directly transferred to the device by using the memory card. In order to do so copy your announcements with
your computer to the directory "TIPTEL". In case mailboxes have been set up copy
these announcements to the corresponding sub-directories (MBX1, MBX2, etc.).
You have to use the following file names: For announcement 1 "OGM1.WAV", for
announcement 2 "OGM2.WAV", for announcement 3 "OGM3.WAV", etc.. Since mailboxes only have one single announcement each of these are named "OGM.WAV".
For announcements without recording (Announcement only) instead of "OGM"
please use "OGO" as file name. The device detects the required type of announcement by the file name.
Following audio formats are being supported:
8 kHz, 8 Bit, A-Law, Mono
16 kHz, 8 Bit, A-Law, Mono
8 kHz, 16 Bit, PCM, Mono
16 kHz, 16 Bit, PCM, Mono
As soon as the device detects the memory card the announcements will automatically be saved to the internal memory.
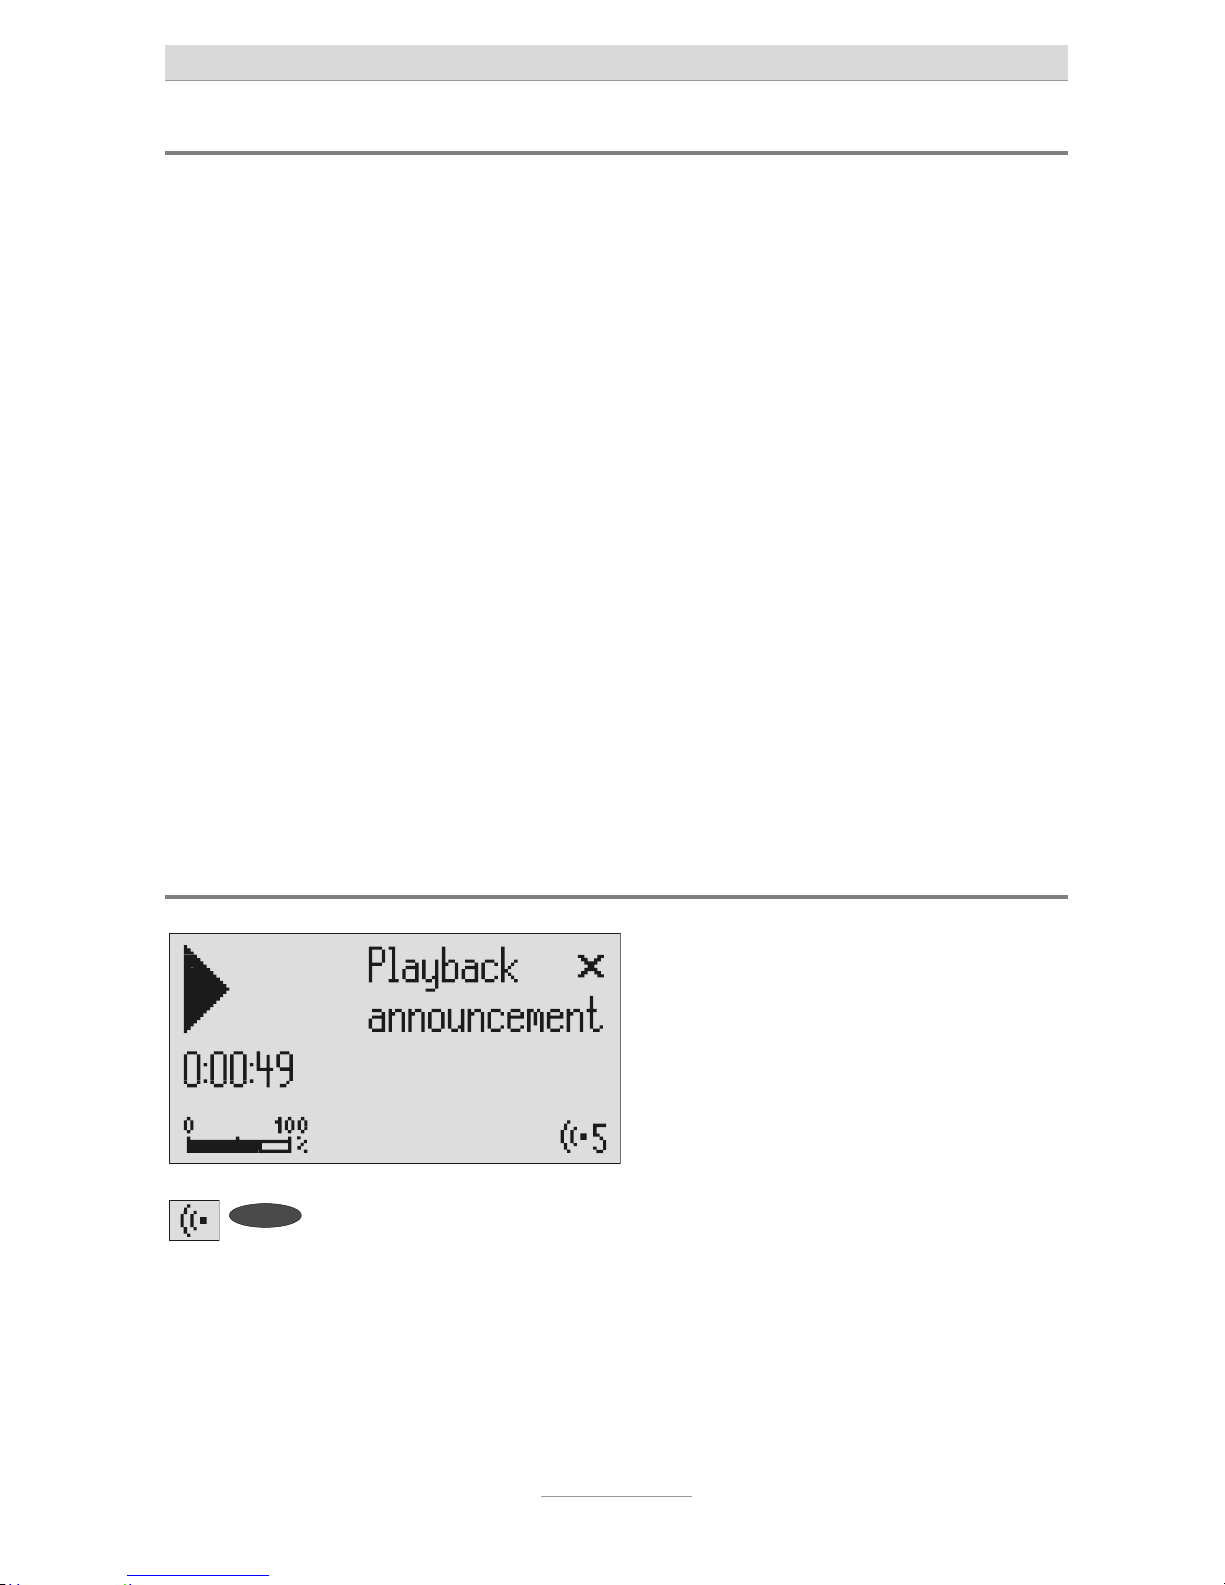
Checking OGMs
Select the desired OGM using the
selection button next to the OGM
symbol.
The selected OGM is displayed next to
t
he symbol at the bottom right of the dis-
play.
Page 20
Outgoing messages
20
Press OGM briefly. The OGM is played back. The playback
symbol, the time that you have already
heard and the number of the current
OGM are displayed.
The volume can be set using the
control buttons (left/right).
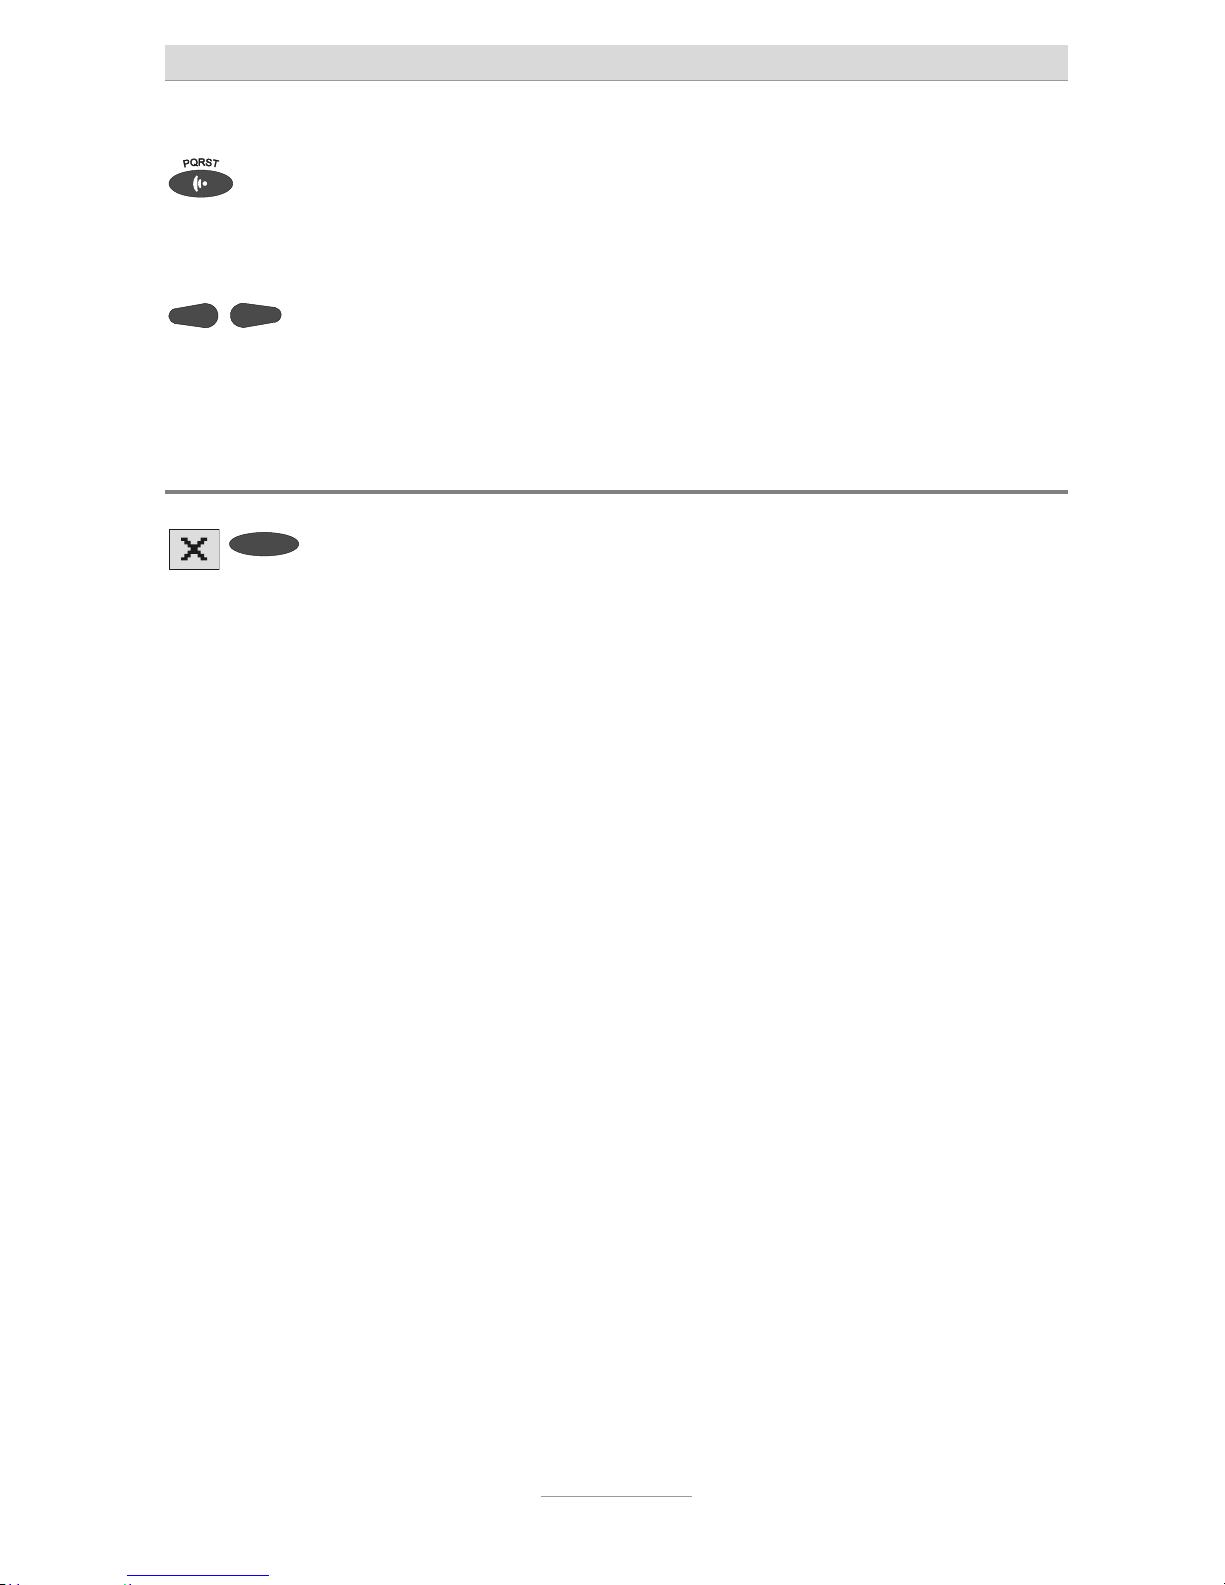
Deleting OGMs
Press the selection button next to
t
he delete symbol speed during
playback.
The current OGM is deleted.
Page 21
Answering mode
21
Answering mode
Make sure that there is enough memory for new messages (max. 999). You
may need to change the memory card or delete messages.
If required select the OGM using the
selection button next to the OGM
symbol.
The selected OGM is displayed next to
t
he symbol on the bottom right of the
display. The symbol flashes if the OGM
has not been recorded or has been deleted.
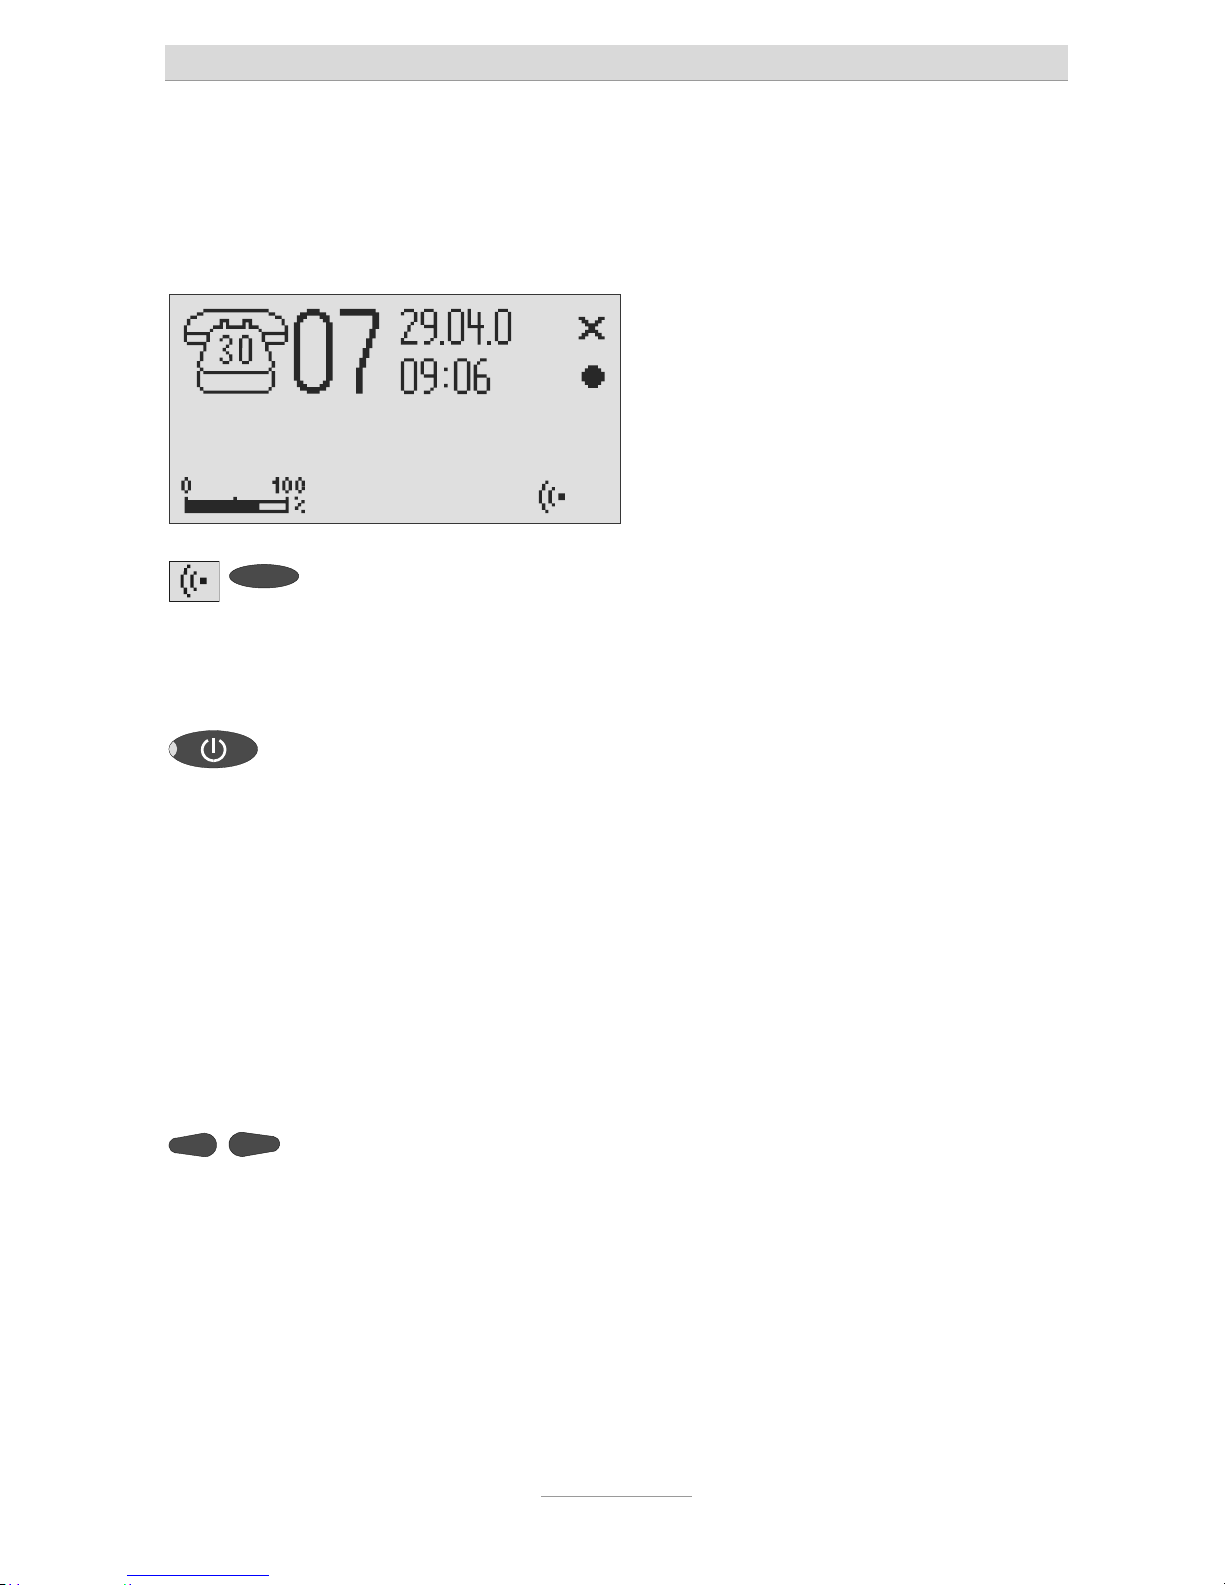
Press answering mode. The LED in the answering mode button
lights up. For OGMs "without the option
t
o record" a telephone with the number of
calls is displayed. For OGMs "with the
option to record" in addition the number
of incoming messages is shown in large
digits to the right of the telephone.
If the caller's number is transferred during a call the display changes and the
call number is displayed. If the telephone
number matches one from the telephone
book, the caller's name is displayed.
The volume can be set using the
control buttons (left/right).
Incoming messages can be screened.
Y
ou can accept the call at any time by
lifting the telephone receiver. The playback button flashes if you have new, unread messages.
Page 22

Answering mode
22
Press answering mode again to
switch off answering mode.
Further incoming calls will not be answered. The standby status is displayed.
If you record OGM 14 without the option to record (OGM only) when the in-
coming message memory is full your tiptel 545 SD switches to this OGM automatically. Otherwise the device leaves the answering mode and does not
respond to further calls.
Page 23
Playing back and deleting incoming messages
23
Playing back and deleting incoming messages
Playing back new incoming messages
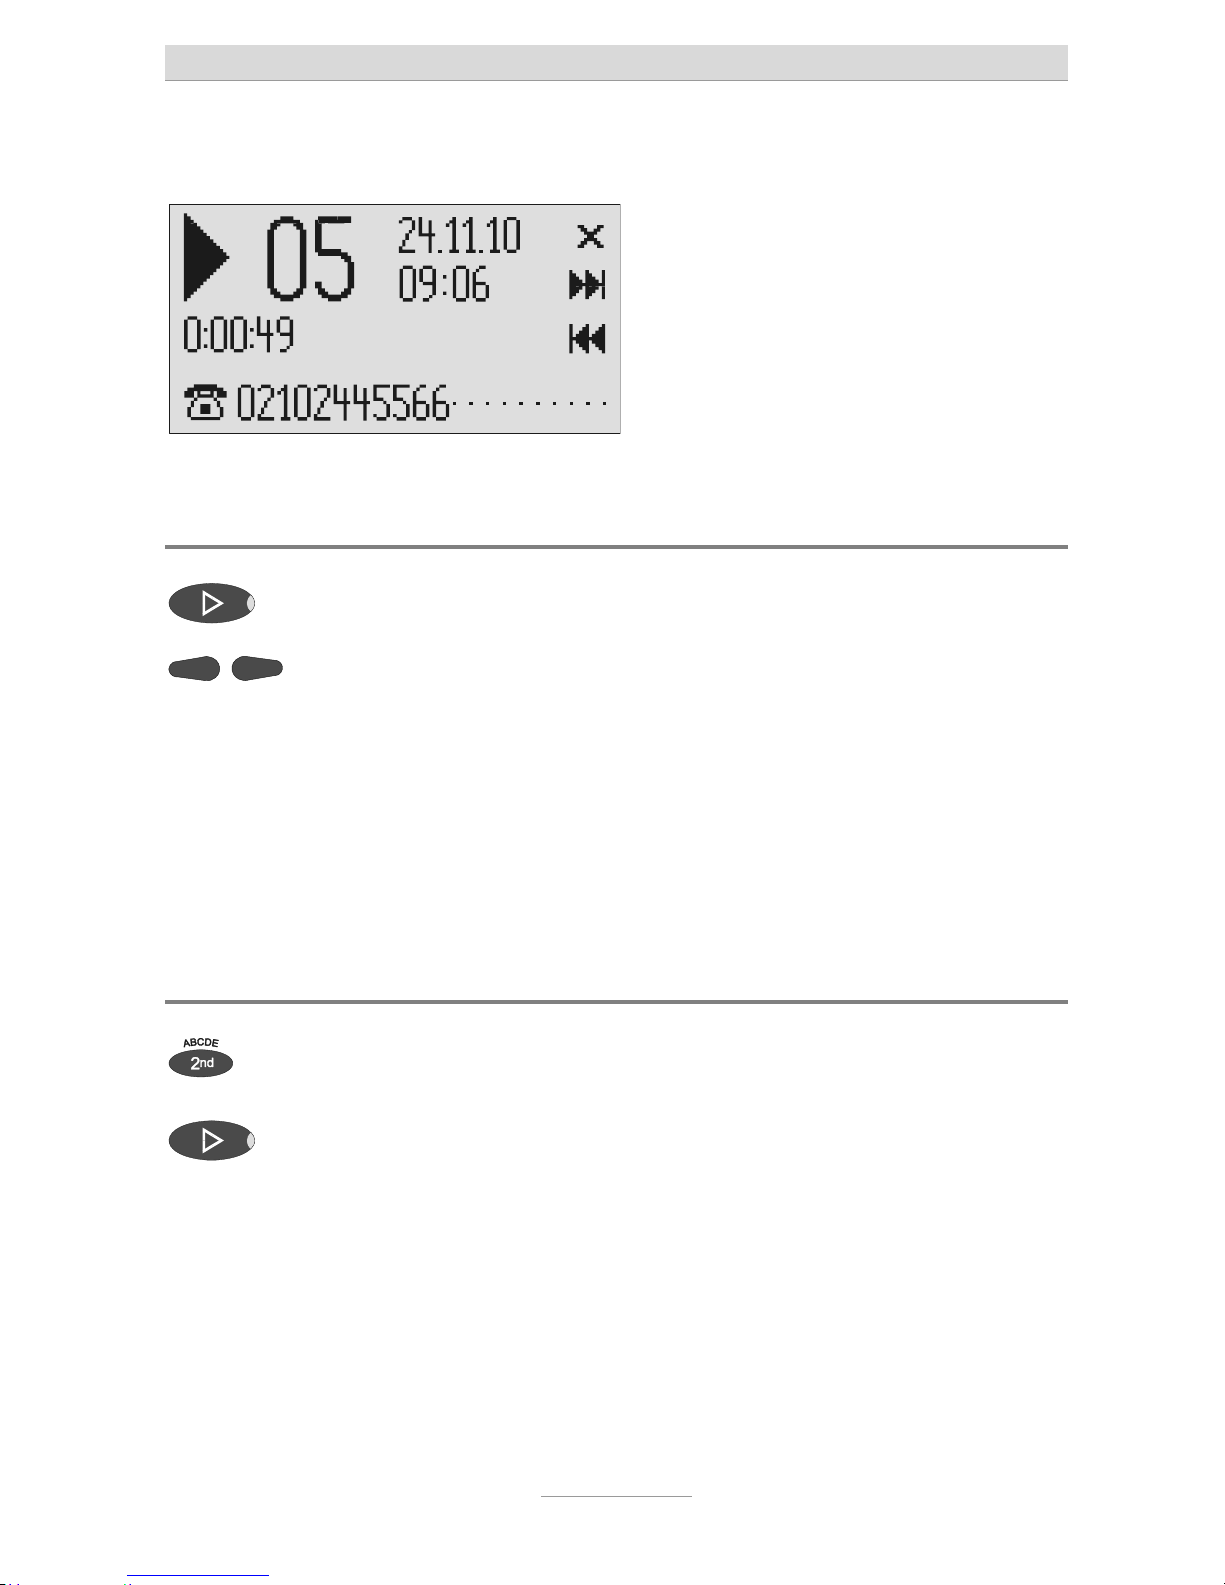
Press playback. Starts playback of unheard incoming
messages. The current number, remaining playback time and date and time of
t
he incoming message are displayed. If
t
he caller's telephone number is transferred during a call then this is also displayed. If the telephone number matches
one from the telephone book, the caller's
name is displayed.
The volume can be set using the
control buttons (left/right).
The LED in the playback button flashes if you have new, unread messages.
Playing back all incoming messages
Press secondary function The secondary function symbol is dis-
played.
Press playback. The playback starts with the first incom-
ing message.
You can also transfer incoming messages via the audio output on an ex-
ternal device (e.g. cassette recorder). The transfer starts automatically with
the playback function.
Page 24
Playing back and deleting incoming messages
24
Play back of individual messages
Press 2nd function key. The display will show you the 2nd func-
t
ion icon.
Press cursor key (up). The message list will be opened.
Use cursor keys to browse
(up/down) for message to be
played back.
Press play to play back selected
message.
Playback will start.
You may also open the message list via the menu.
Repeating
Press playback during playback. The last three seconds are repeated.
Pausing playback
Press stop. Playback is paused.
Press playback. Playback continues.
Skip
Press the selection button next to
t
he go backwards or forwards
symbol.
The incoming message you are listening
t
o is skipped or repeated.
Page 25
Playing back and deleting incoming messages
25
Fast forward and rewind
Press and hold the selection button
next to the go backwards or forwards symbol.
Playback is interrupted and the display
counts down or up the playback time.
Deleting individual incoming messages
Press the selection button next to
t
he delete symbol during playback.
The current incoming message is erased.
New message numbers are assigned to
all incoming messages that follow.
Deleting all incoming messages
Press stop. The display shows standby and answer-
ing mode.
2s
Press the selection button next to
t
he delete symbol for 2 seconds.
All incoming messages are deleted.
Dialling the caller directly
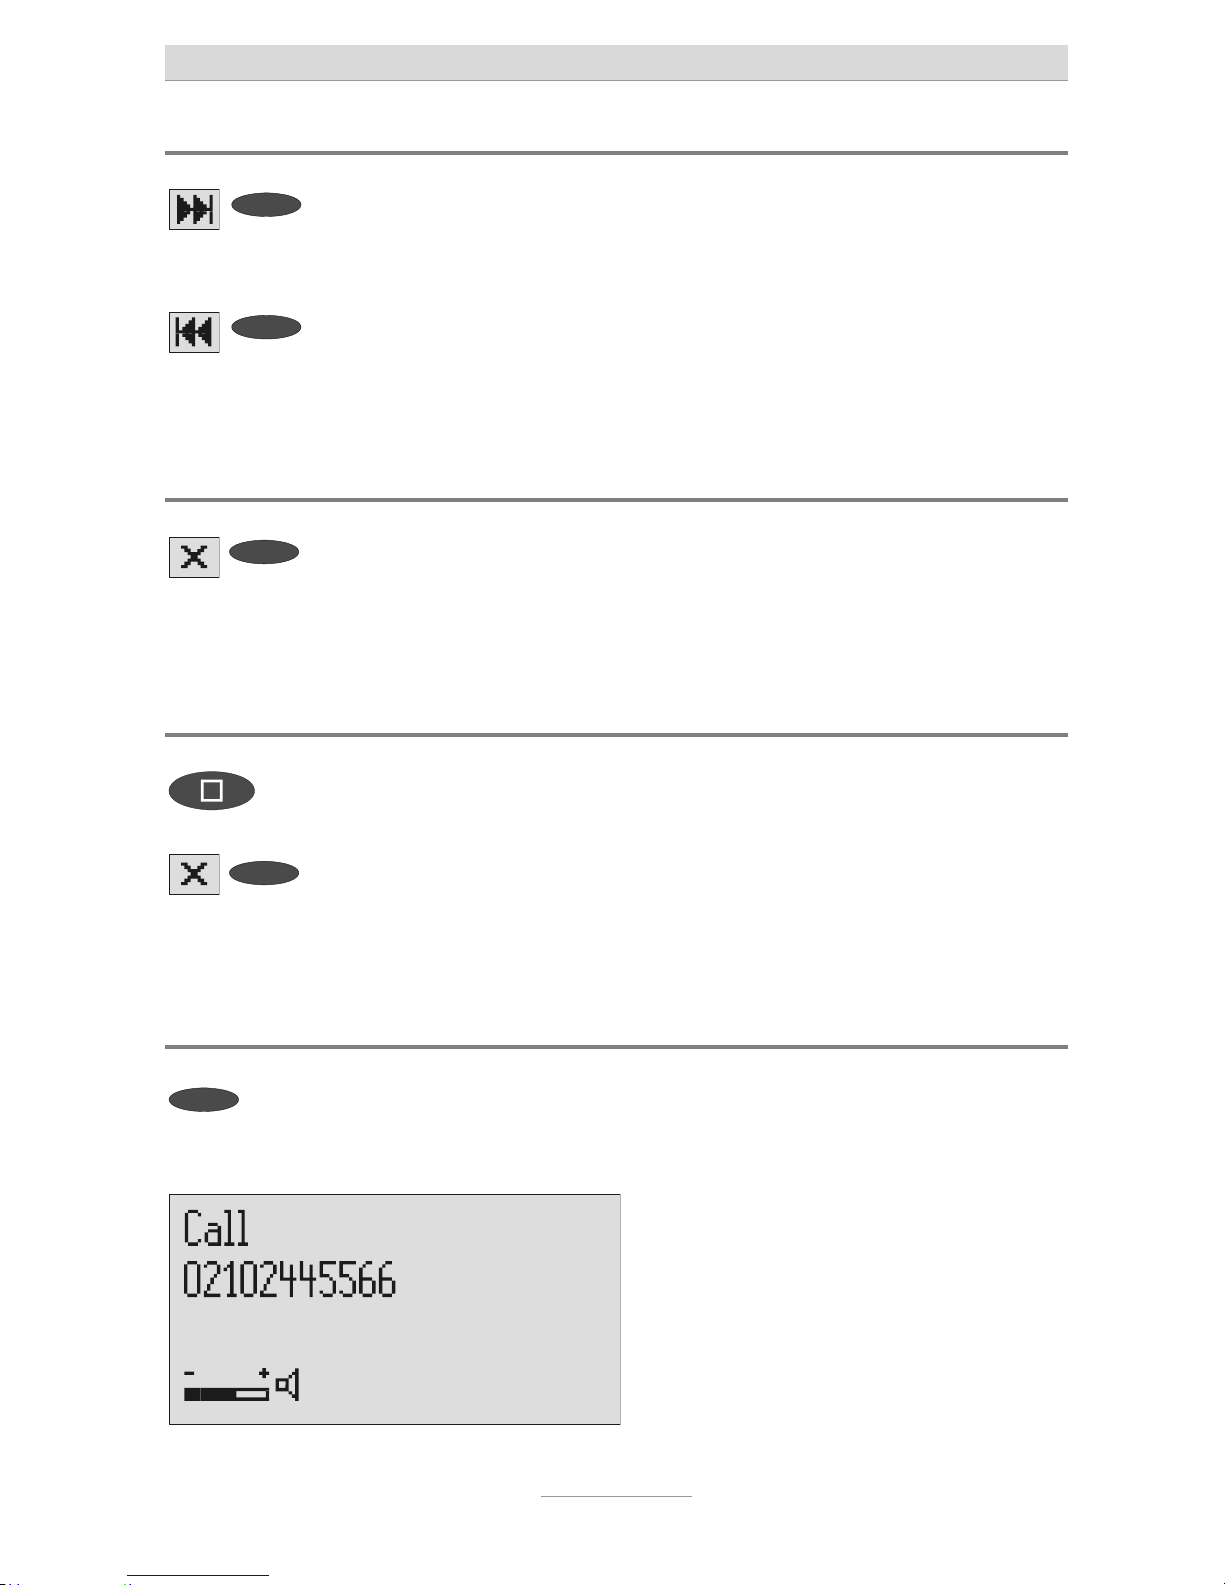
Press the selection button next to
t
he displayed telephone number or
t
he name during playback.
The device starts dialling the selected
t
elephone number. Dialling can be
screened via the loudspeaker.
Page 26
Playing back and deleting incoming messages
26
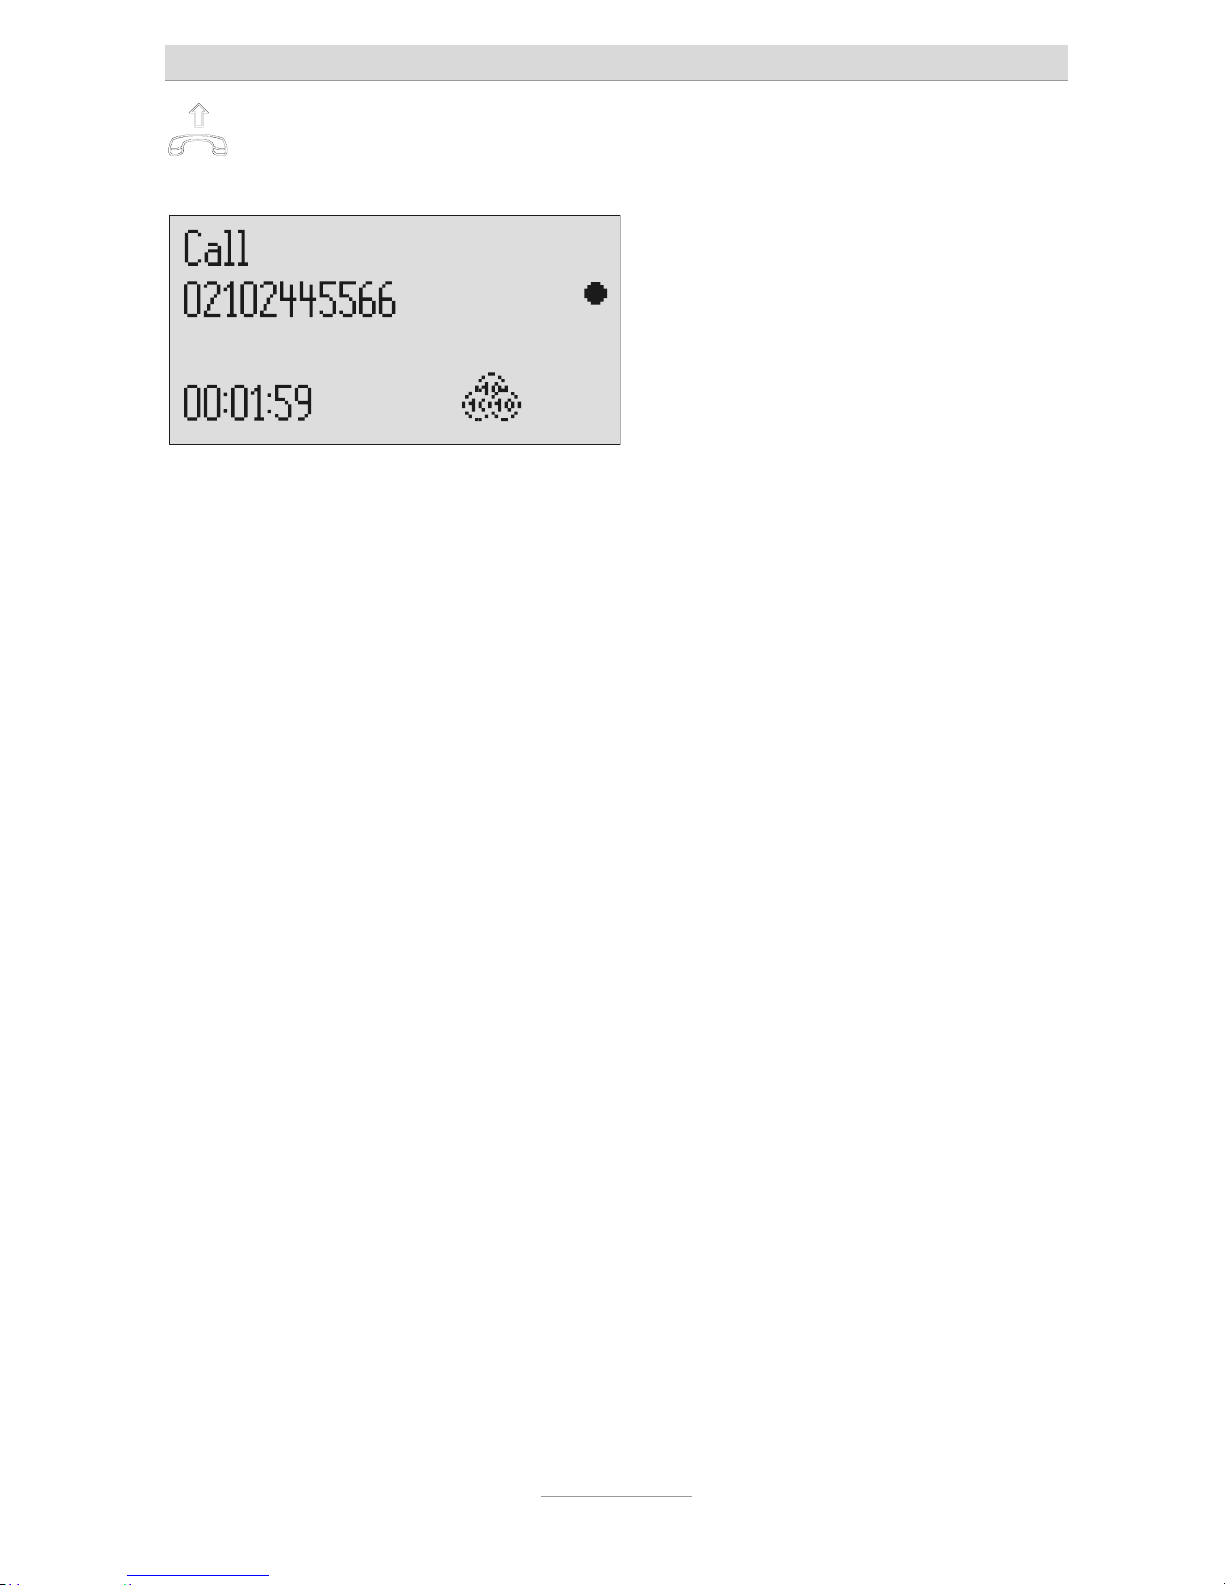
After dialling accept the call by lifting the receiver.
The display shows a stopwatch that
counts the duration of the current call.
Page 27
Monitoring/Personal info (memo)
27
Monitoring/Personal info (memo)
Monitoring telephone calls
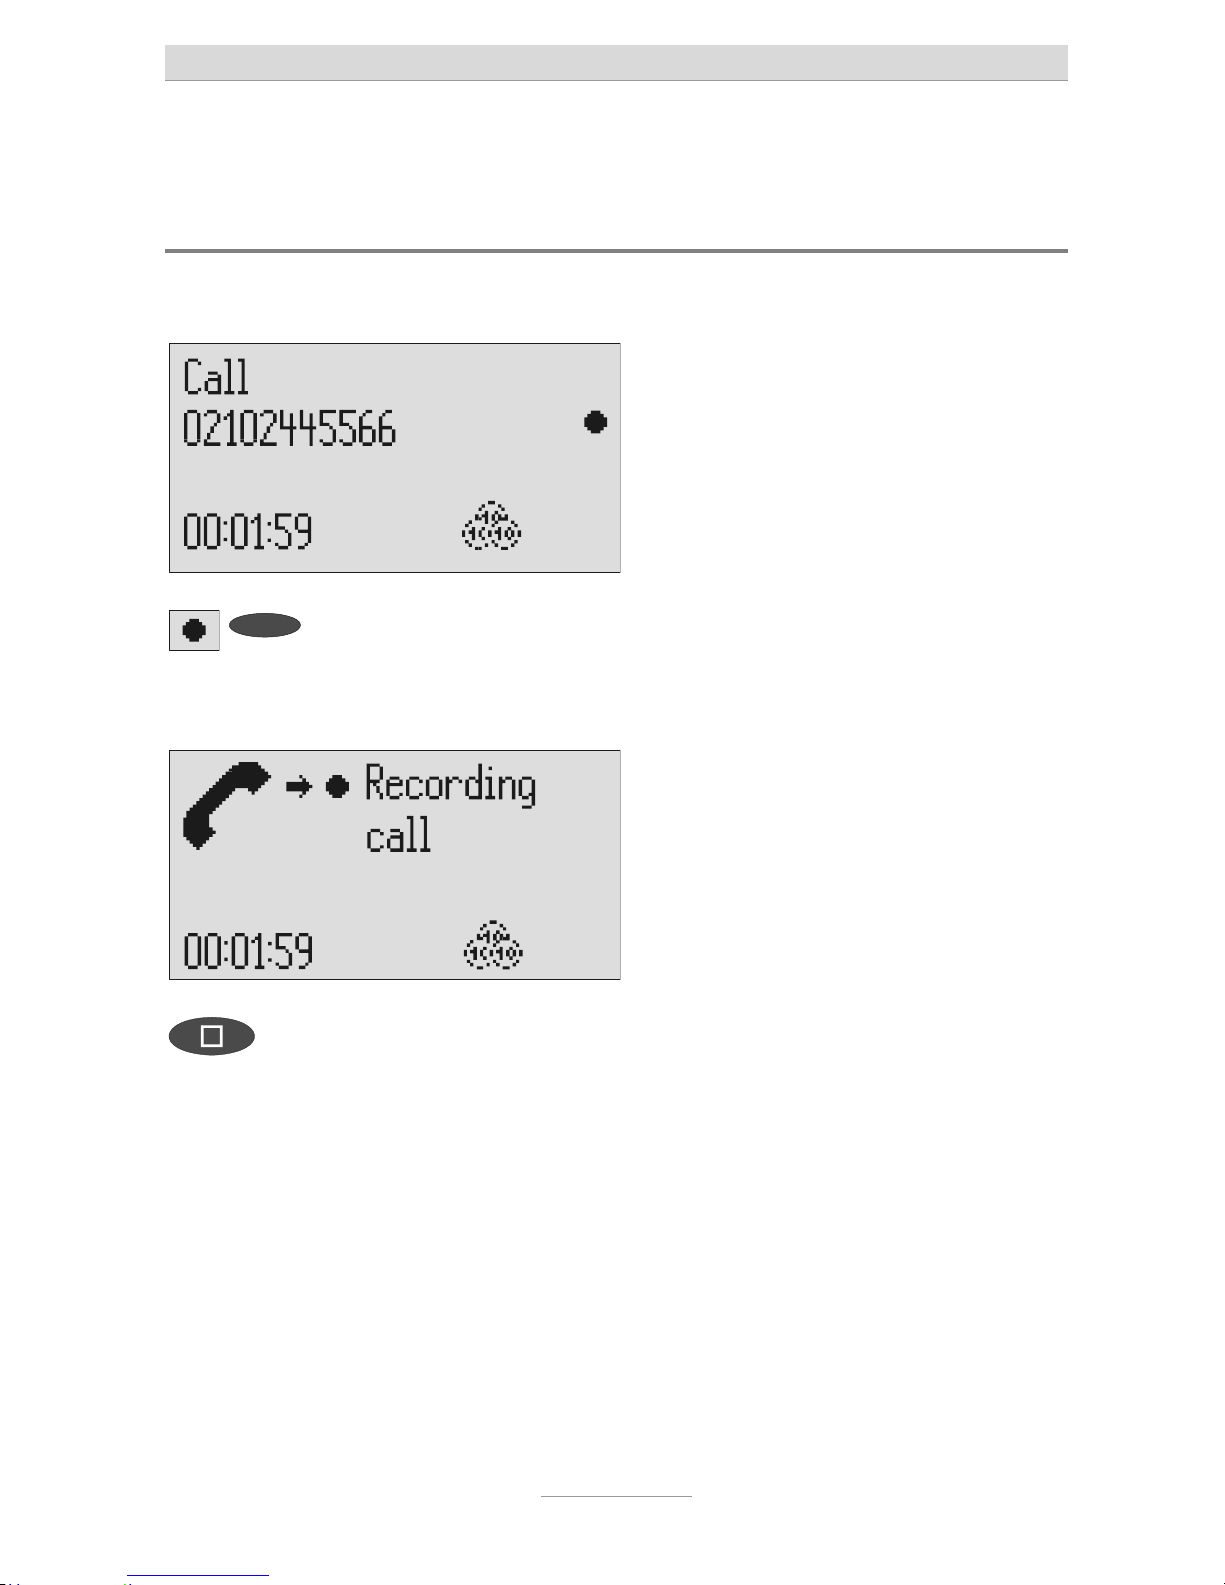
You can record the content of important calls.
Press the selection button next to
t
he record symbol speed during a
call.
The device starts to record. A lifted telephone receiver is displayed so as to indicate an ongoing recording.
To end the recording press stop or
hang up.
The standby status is again displayed. If
answering mode was activated before,
t
his continues.
A monitoring recording is stored as any other regular recording and can be
played back at any time.
You can also transfer recordings via the audio output on an external device
(e.g. cassette recorder). The transfer starts automatically with the playback
function.
Page 28
Monitoring/Personal info (memo)
28
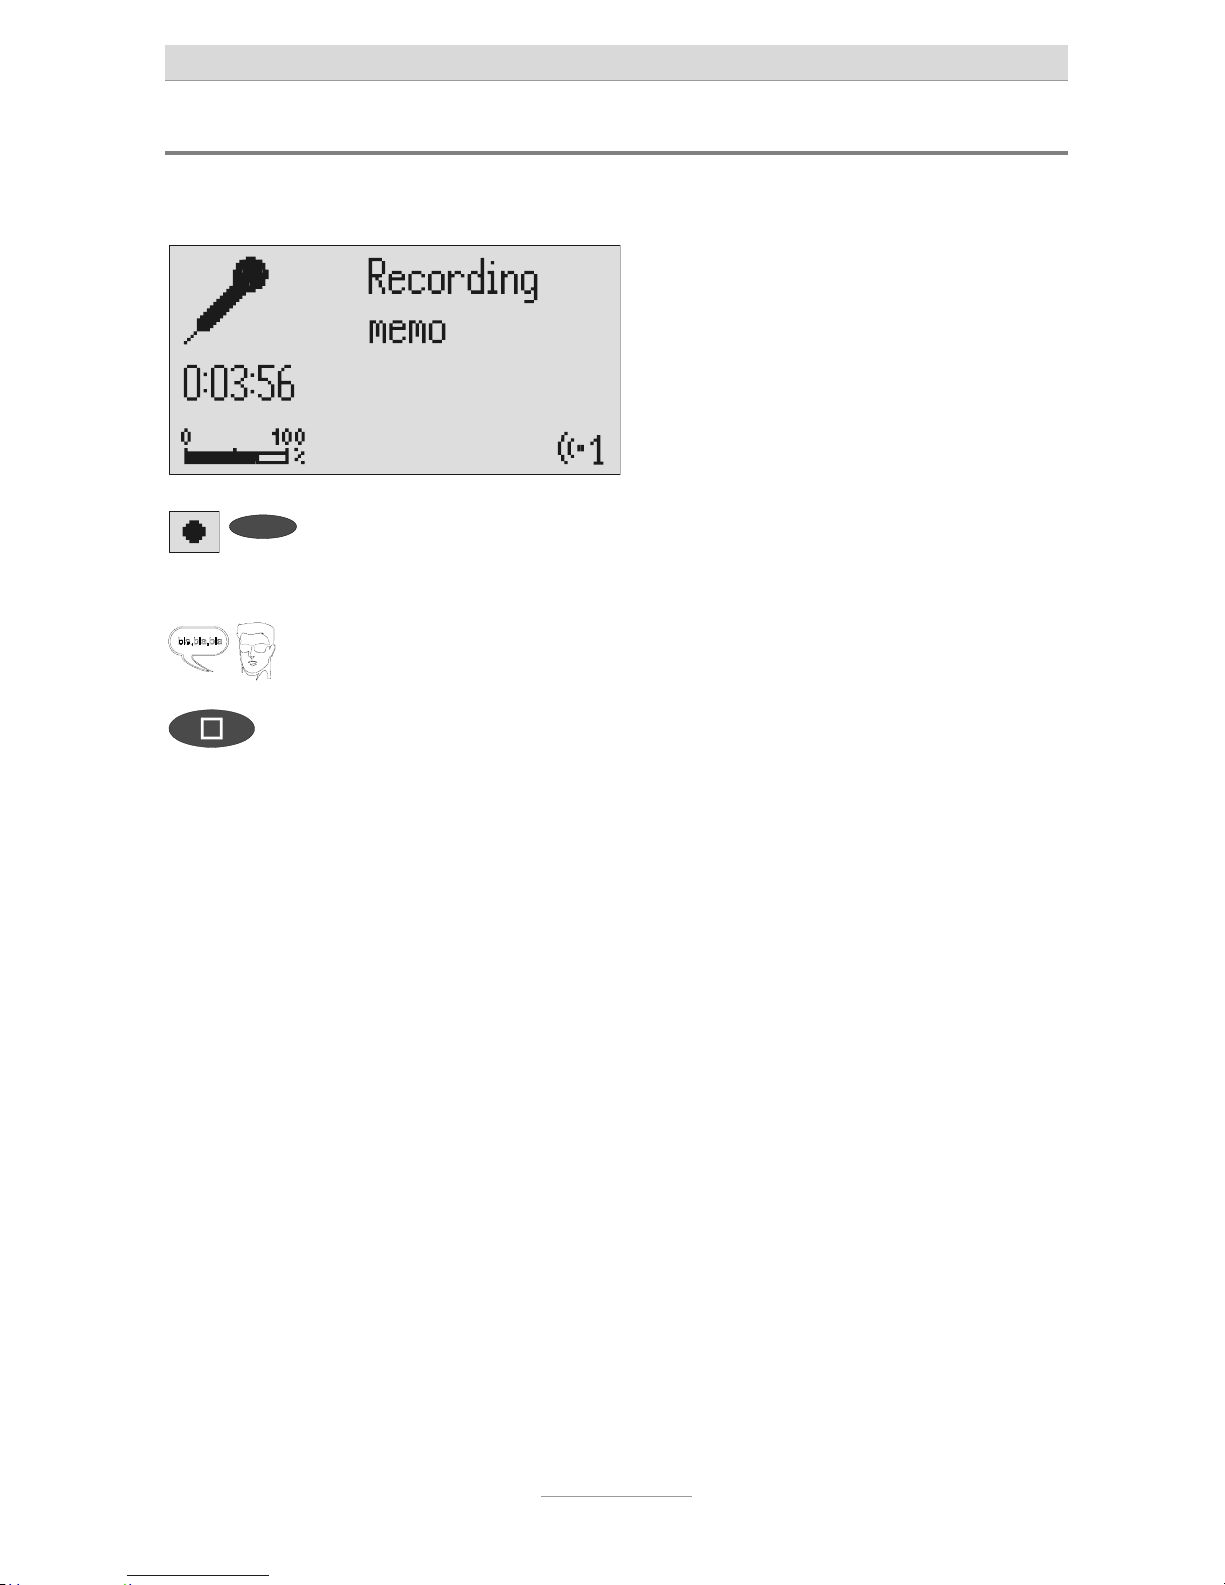
Personal info
You can record personal information via the in-built microphone.
Press the selection button next to
t
he record symbol.
Wait, you will hear a short tone, a microphone is displayed to signal ongoing recording.
Start speaking (maintain approx. 15
cm distance from the microphone).
The display shows the minutes and seconds that you have been speaking.
To stop the recording press stop. The recording ends. The LED in the play-
back button flashes to signal a new message. If answering mode was activated
before, the incoming message counter
increases by 1.
You can also record your personal info during answering mode. Other people
can call this up using the remote control code.
Page 29
Absence manager
29
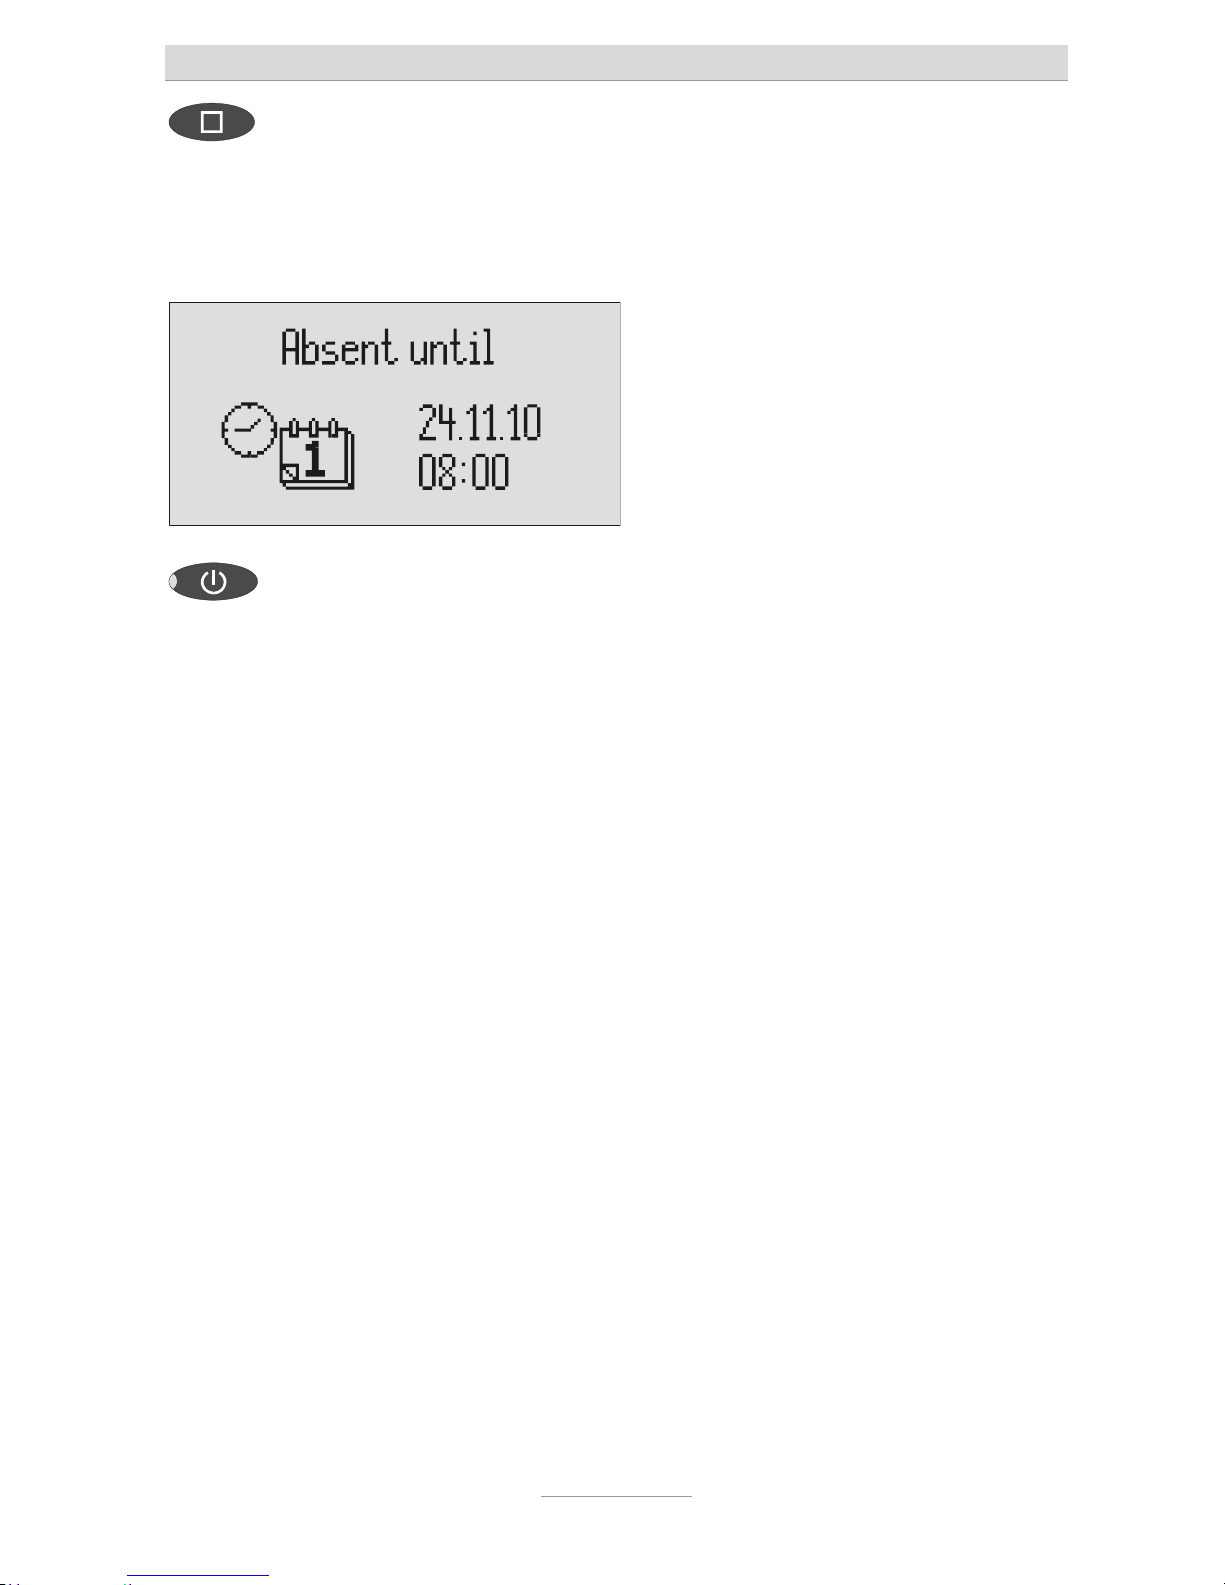
Absence manager
If you leave your office for a while, for example to attend a meeting, your tiptel 545
SD can inform your callers as to when you will be available again. Callers will hear
this message:
"Hello, the person you are trying to call will be available again from … I repeat [time]
… Thank you, the device will switch off."
After the set time has passed your tiptel 545 SD switches this message off automatically.
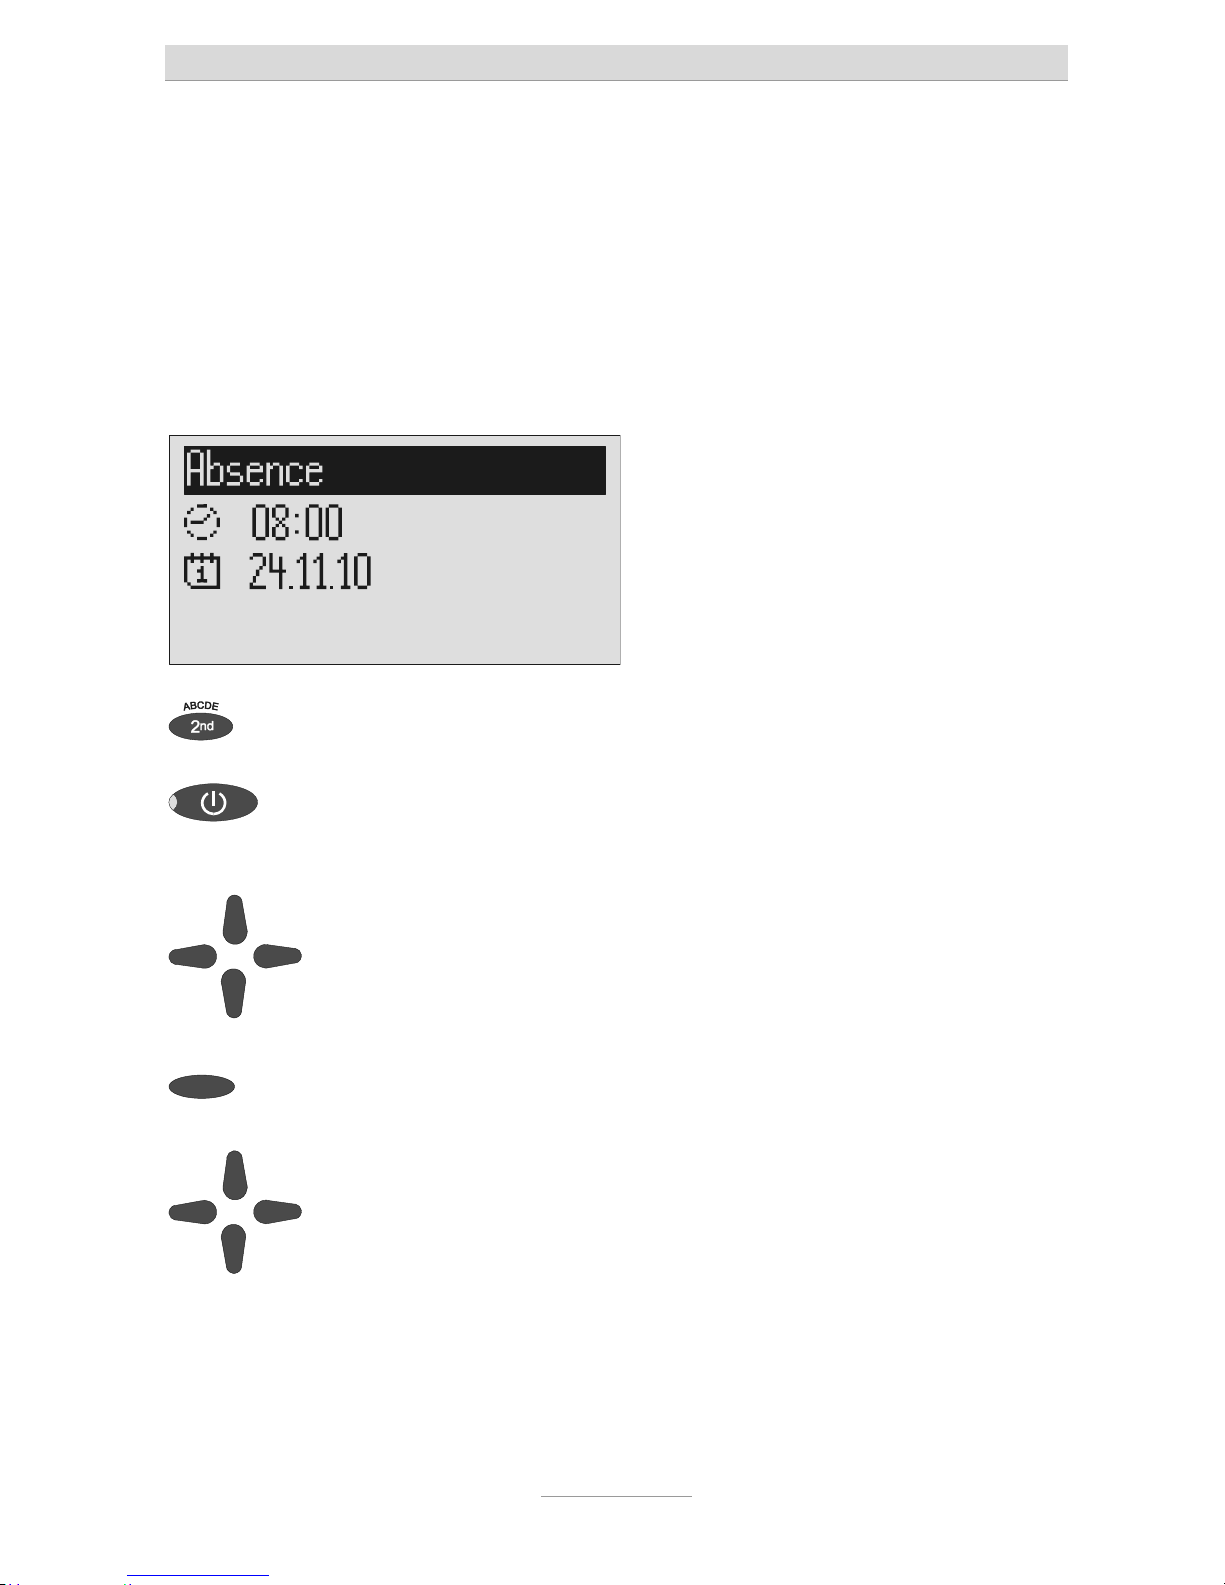
Press secondary function The secondary function symbol is dis-
played.
Press answering mode. The display changes and shows the cur-
rent date and time.
The hours flash.
Set the desired time using the con-
t
rol buttons (up/down, left/right).
The display shows the absence time that
will be announced.
Y
ou can also reset the date entry
using the selection button next to
t
he date.
The day flashes.
Set the desired date using the con-
t
rol buttons (up/down, left/right).
If you change the date the message will
also announce the day and month.
Page 30
Absence manager
30
Press stop. The setting is complete, the LED in the
answering mode button lights up and the
display shows the absence time. Calls
are answered and the caller hears the
absence message.
Press Answer mode to end the absence manager ahead of time.
The display changes and returns to the
initial state.
Timer switching times are not activated when the absence manager is active.
Page 31

Call list
31
Call list
The last 50 calls received are saved in call list with their date and time. If the caller's
telephone number is transferred during a call then this is also displayed. If the telephone number matches one from the telephone book, the caller's name is displayed. The call list also provides information on whether the call was successful
(conversation took place or a message was left). You can select the telephone
numbers from the call list directly by pressing the button. You can delete individual
entries or the complete list. You can transfer telephone numbers directly into the
telephone book.
Press control button (up). The display shows the newest entry from
t
he call list. A smiling or sad face indicates whether the connection was successful or whether the caller hung up
without being answered.
Y
ou can search the whole list using
t
he control buttons (up/down).
To call a caller back press the selection button next to the telephone
number.
The telephone number is dialled automatically.
To copy the telephone number to
t
he telephone book, press the selection button next to the sub-menu
symbol.
The entry field for the telephone book is
displayed with the copied telephone
number. Now all you have to do is enter
t
he name.
Page 32

Call list
32
To delete an entry press the selec-
t
ion button next to the delete symbol.
The entry is deleted.
2s
To delete the whole call list press
t
he selection button next to the delete symbol for 2 seconds.
The entire call list is deleted.
To exit the list press stop. The initial state is again displayed.
Page 33

Telephone book
33
Telephone book
General
The telephone book manages the names and telephone numbers of your business
partners. You can save up to 100 entries. An entry comprises the name (search
term) and the telephone number. The name must begin with a letter and the telephone number should begin with an area code so that the corresponding name can
be displayed later when the call number is received. You can do without entering
the code for your local network if you have already done so in the settings (refer to
Page 99 "Settings/Own number". All entries are sorted alphabetically.
You also have the option of assigning an individual ringing tone (refer to Page 39
"Vocal clip") or a personalised OGM (refer to Page 38 "Personal outgoing message"
to an entry. If at a later stage the call number for this entry is received you will hear
the individual ringing tone from the device's loudspeaker or the caller will hear the
special OGM that you have assigned to him.
Entering and saving entries
Press secondary function The secondary function symbol is dis-
played.
Press control button (down). The entry field for the name and the tele-
phone number are displayed. The cursor
is positioned in the name field.
Page 34

Telephone book
34
If required change occupancy of the
entry buttons by pressing the con-
t
rol button (up) (refer to p. 36,
"Summary of possible characters"
t
able).
The display shows the possible occupancies:
(ABC) = Capital letters
(abc) = Small letters
(12!?) = Numbers and special
characters
...
Enter name. You reach the individual letters by pressing the individual
entry button once or more.
Example: You require "M". Press
forwarding button three times (the
"M" is in the third position on this
button).
The entry location flashes.
Press control button (right) to move
t
o the next entry location.
The cursor moves to the next entry loca-
t
ion.
Use the control button (left) to
move the cursor one place backwards, for example to overwrite a
character.
The cursor moves to the left.
Y
ou can insert a character by
pressing the control button (down).
An empty space is inserted to the left of
t
he cursor.
To delete an entry move the cursor
t
o the location and press the selec-
t
ion button next to the delete symbol.
The character under the cursor is deleted.
2s
To delete the whole entry press the
selection button next to the delete
symbol for 2 seconds.
The whole entry is deleted.
Press the selection button next to
t
he empty entry field for the telephone number.
The cursor appears in the telephone
number entry field.
Page 35

Telephone book
35
Enter the first digit of the call number using the control buttons
(up/down).
Digits and special symbols are displayed.
The special symbols have the following
meanings:
~ = Wait for dial tone / 3 Sec. pause
i = Internal (for PABX)
F = Flash (for PABX)
H = Hook flash (for PABX)
Press control button (right) to
change to the next entry location.
The cursor to the next entry location.
Use the control button (left) to
move the cursor once place backwards, for example to overwrite a
character.
The cursor moves to the left.
Y
ou can insert a character by
pressing secondary function and
t
he control button (down).
An empty space is inserted to the left of
t
he cursor.
To delete an entry move the cursor
t
o the location and press the selec-
t
ion button next to the delete symbol.
The character under the cursor is deleted.
2s
To delete the whole entry press the
selection button next to the delete
symbol for 2 seconds.
The whole entry is deleted.
To stop the entry press stop several
t
imes.
The entry is stored. The initial state is
again displayed.
For PABX the prefix for the public telephone network is dialled before each
call number (refer also to Page 101 "Settings, PABX/prefix"). To suppress this
enter "i" before internal call numbers.
Page 36

Telephone book
36
Summary of possible characters
Button Occupancy (ABC) Occupancy (abc) Occupancy (12!?)
A B C D E Ä É a b c d e ä é è , . ? ! : ‘ ; "
F G H I J f g h i j ì ( ) - + & = %
K L M N O Ö k l m n o ö ò / * # € @ < >
P Q R S T p q r s t ß 1 2 3 4 5
U V W X Y Z Ü u v w x y z ü ù 6 7 8 9 0
Search entries
Press control button (down). The telephone book is opened.
Search for the desired entry using
t
he control buttons (up/down).
The entries scroll through the display.
or
...
Select initial letters by pressing the
corresponding entry button one or
more times (e.g. "T" – press "OGM"
button five times).
The entries with the requested initial let-
t
ers appear in the display.
Page 37

Telephone book
37
Y
ou can enter (up to 5) other letters
for the search using the control but-
t
on (right) and the corresponding
entry keys.
The corresponding entries are displayed
for selection.
Checking and changing entries
Search for names as described under "Search entries".
2s
Press the selection button next to
t
he desired name for 2 seconds.
The entry field for the name and the telephone number are displayed. The entry
location flashes.
Carry out the required changes.
To stop the entry press stop several
t
imes.
The changes are saved. The initial state
is again displayed.
Page 38

Telephone book
38
Personal OGM (call filter)
You can assign each entry in the telephone book to one of the fourteen individual,
recordable OGMs. If the telephone number calling matches the entry the caller
hears an OGM that is specially recorded for him. You can also switch the answering
machine off for certain callers.
Open entry field. The entry field for the name and the tele-
phone number are displayed.
For a new entry: Press second
function and then control button
(down).
2s
For an existing entry:
Search for entry (as described in
"Searching entries") and press the
selection button next to the entry
for 2 seconds.
Press the selection button next to
t
he sub-menu symbol for 2 seconds.
The display shows the current OGM.
Set the desired OGM using the
control buttons (up or down).
The numbers 1 to 14, none and a dash
appear in the display. If you select "none"
t
he answering machine does not switch
itself on automatically for this entry. The
function is switched off using the dash.
To stop the entry press stop several times.
The entry is stored. The initial state is again
displayed.
The desired OGM can be recorded as described in the "OGM" chapter (Page
16).
Page 39

Telephone book
39
Vocal Clip
You can assign each entry in the telephone book to one of the fourteen individual
ringing tones. If the telephone number calling matches the entry you hear an individual ringing tone from the tiptel 545 SD loudspeaker.
Open entry field. The entry field for the name and the tele-
phone number are displayed.
For a new entry: Press second
function and then control button
(down).
2s
For an existing entry:
Search for entry (as described in
"Searching entries", p. 36) and
press the selection button next to
t
he entry for 2 seconds.
2x
Press the selection button next to
t
he sub-menu symbol twice.
The display shows the current ringing
t
one.
Set the desired ringing tone using
t
he control buttons (up or down).
The numbers 1 to 14 and a dash appear
in the display. The function is switched
off using the dash.
To stop the entry press stop several
t
imes.
The entry is stored. The initial state is
again displayed.
The desired ringing tone can be recorded as described in the "Individual ring-
ing tone" chapter (Page 67)
Page 40

Telephone book
40
Dialling from the telephone book
Each telephone number from the telephone book can be dialled directly from your
tiptel 545 SD.
Search for names as described under "Search entries", 36.
Press the selection button next to
t
he desired name.
The device starts dialling the selected
t
elephone number. Dialling can be
screened via the loudspeaker.
After dialling accept the call by lifting the receiver.
The display shows a stopwatch that
counts the duration of the current call.
Page 41

Telephone book
41
Automatic redialling /Automatic call back when engaged
(CCBS)
If the person you are trying to call is constantly engaged your tiptel 545 SD can take
over by repeatedly trying to call the other person. For automatic re-dialling if the
caller is engaged there is a pause and the device repeats the dialling up to 10
times. With the "Call back if engaged" function a call is signalled to you as soon as
the person you are trying to reach is free. Your telephone network or extension system must support this function (refer also to your network operator and PABX manufacturer user instructions). To activate "Call back on busy" you usually dial a certain combination of digits (e.g. Hook flash *37#). The combination of digits must be
pre-entered as described in "Settings/Call back code" (Page 100).
Y
ou call someone and the number
is engaged.
"Subscriber busy" is displayed.
To start automatic re-dialling press
t
he selection button next to the re-
dial symbol.
After the pre-set time the dialling is repeated up to 10 times.
or
To start automatic call back, press
t
he selection button next to the call
back symbol.
As soon as the person you called has
hung up the call back is signalled to you.
Accept the call by lifting the receiver.
Y
ou can have your conversation.
Y
ou do not want automatic re-dial
or call back on busy. Press stop, lift
t
he receiver or simply wait 10 se-
conds.
The initial state is again displayed.
Page 42

Message function
42
Message function
The message function enables a caller that knows the message code to leave a
message even if your tiptel 545 SD plays an OGM with no option to leave an incoming message. The message function enables the caller to skip the OGM for OGMs
that give the option of leaving an ICM.
You can enter your personal message code as described in "Settings" (Page 101).
Call tiptel 545 SD.
Y
ou hear the OGM.
Start entry with the star button. The OGM stops.
Enter the message code via the telephone keypad. If you make a mis-
t
ake delete entry using the star key
and start again.
A voice message confirms recognition of
each digit.
To confirm the entry press the hash
button.
The device requests you to speak. If you
enter an incorrect code your tiptel 545
SD switches off immediately.
Leave a message and then replace
t
he handset.
The telephone from where you make the settings must be set to tone dialling
(DTMF).
Page 43

Remote access
43
Remote access
You can access your tiptel 545 SD remotely from anywhere in the world using the
keypad on a tone-enabled (DTMF) telephone. You need a personal remote access
code to access the phone remotely. You can set your personal remote access code
as described in "Settings" (Page 100).
Remote access
Call tiptel 545 SD.
Y
ou hear the current OGM.
Start entry with the star button. The OGM stops.
Enter the remote access code via
t
he telephone keypad. If you make a
mistake delete entry using the star
key and start again.
A voice message confirms recognition of
each digit.
To confirm the entry press the hash
button.
If the correct code is detected your tiptel
545 SD notifies you via a voice message.
If the code is wrong the device breaks
t
he connection.
Start the desired function by entering the corresponding number.
If there are new messages playback
starts automatically.
Press digit 8 to end a function. The current function ends.
End remote access by pressing star
and hash in succession.
180 seconds after the last button entry your tiptel 545 SD asks whether you
are still on the line with the "Please quit" voice message. You must respond to
this quit request within 8 seconds by pressing any key otherwise the device
breaks the connection.
Page 44

Remote access
44
Remote access functions
Playback ICM function
To playback all ICM
Press 3.
The playback starts with the first recording.
To playback new ICM
Press 2.
Starts playback of recordings that have not
yet been listened to.
Repeat
Press 5 during playback.
The last three seconds are repeated.
To pause playback
Press 8.
Playback is paused.
To continue playback
Press 5.
Playback is continued from where it was
paused (e.g. after a quit request).
Skip
Press 4 for back or 6 for forwards during playback.
The ICM you are listening is skipped or
repeated.
To delete the current ICM
Press 7 during playback.
The current incoming message is deleted.
To delete all ICMs
Press * and 7 in succession.
All incoming messages are deleted.
Intercom function
Room monitoring/intercom
Press 1.
The microphone switches on and you can
listen to what is happening in the surroundings of your tiptel 545 SD.
Press 1 again. The device switches to intercom. People
located there can hear your voice from the
loudspeaker.
Page 45

Remote access
45
Switching function
To switch message transfer on/off
Press * and 4 in succession.
The current status "on" or "off" is announced.
To switch timer on/off
Press * and 3 in succession.
The current status "on" or "off" is announced.
...
To change the OGM (only possible for
OGMs 1 to 6)
Press 7 and the desired OGM 1 … in
succession
The selected outgoing message is played
back for checking. The next caller is greeted with this message.
Changing the OGMs function
...
To change the OGM (only possible for
OGMs 1 to 6)
Press 9 and the desired OGM 1 … in
succession
The tiptel 545 SD asks you to speak.
Record an outgoing message.
For an outgoing message with incoming message option: After recording
t
he OGM press 8.
The OGM is played back for checking. At
t
he end you hear one signal tone.
or
For an OGM without incoming message
option (OGM only):
After recording the OGM press #.
The OGM is played back for checking. At
t
he end you hear two signal tones.
The message is played back again for checking after you change or modify it.
Your tiptel 545 SD will then ask whether you are still on the line with the
"Please quit" voice message. You must respond to this quit request within 8
seconds by pressing any key otherwise the device breaks the connection.
Page 46

Remote access
46
Message transfer function
Changing the 1st call number for
message transfer (only the first number can be changed)
Press * and 9 in succession.
The first current call number is announced.
Next comes the request to enter a new call
number.
Enter new call number.
For special symbols press the following
buttons in succession:
Each digit is confirmed.
= Wait for dial tone / 3 Sec. pause
= Flash (short)
= Internal
= Hook flash (long)
= S (send by SMS)
= *
To delete the call number
Press * and 7 in succession.
The call number is deleted.
To accept the call number
Press * and 8 in succession.
The new call number is played back for
checking.
Call forwarding function
Activating call forwarding
Press * and 1 in succession
The current target call number is announced. Next comes the request to enter
a new target call number.
Enter the new target call number.
For special symbols press the following
buttons in succession:
Each digit is confirmed.
= Wait for dial tone / 3 Sec. pause
= Flash (short)
= Internal
= Hook flash (long)
= *
To delete the target call number
Press * and 7 in succession.
The target call number is deleted.
Page 47

Remote access
47
To accept the target call number without executing the function press * and
8 in succession.
The new target call number is played back
for checking.
To accept the target call number and
execute the function press * and # in
succession.
After ending the remote access your tiptel
545 SD switches call forwarding on. All
new calls are forwarded to the new target
call number.
Switch off device function
Switching answering mode on/off
Press * and 0 in succession.
Y
our tiptel 545 SD disconnects and will
not answer any more calls.
Remote activation of the answer mode
Call tiptel 545 SD. After 50 seconds the device answers
with a beep.
Enter the remote access code via
t
he telephone keypad. Start entry
with * and confirm with #.
The OGM is played for checking. The
device can be operated remotely (e.g. to
record a new OGM). After leaving the
function your tiptel 545 SD is in answering mode and will answer calls.
Page 48

Short messages (SMS)
48
Short messages (SMS)
The SMS service allows you to send or receive SMS messages to other terminals.
The messages are not transferred directly to the other terminal but instead are sent
to your network operator's message centre. The message can contain up to 160
characters. You can save up to 20 messages in the inbox. To use the SMS it is essential that there is support for transferring the call number (CLIP). Then all you
have to do is register with your message centre and away you go.
You can also send your short message to a subscriber that does not have an SMSenabled device. The short message is then read out loud as a voice message.
Please refer to your network operator's information material for this and other functions.
Please observe the following points so that you can send and receive short messages (SMS) with your tiptel 545 SD:
Configuring the telephone connection
Analogue telephone connection
If you have an analogue telephone connection, please check whether you can access the "Call number transfer" and "Call number display" (CLIP, incoming and outgoing) functions. To do so, please ask your network operator if these features are
available for your connection.
ISDN connection
If you have an ISDN connection check that call number display (CLIP), is activated
and that call number transfer (CLIR) is not suppressed in your PABX
Registering and de-registering with your message centre
You have to register your tiptel 545 SD for your network operator's SMS service to
receive fixed network SMS. In Germany, for example, you can reach the Deutsche
Telekom message centre nationally by calling "0193010". Enter this number under
"SMS centre".
The registration process varies between network operators. Ask your network operator how to do this.
Page 49

Short messages (SMS)
49
For example, for the Deutsche Telekom operator you have to send an SMS with the
following content to register:
"ANMELD" to the target call number 8888
You will then receive a confirmation message from the Deutsche Telekom SMS service. You can now be sure that you can send and receive SMS using your tiptel 545
SD.
You can deactivate receiving SMS messages by sending "ABMELD" to target call
number 8888. Future SMS that are sent to your call number are then read as voice
messages.
As of: September 2009
Entry options for short messages
Inbox ....................................... This is where you find all the short messages you
have received and can scroll through, read, delete
or copy them to templates.
Outbox .................................... The messages here can be sent directly when dis-
patch is activated next time. You have the option of
creating a new message, changing an old one or
deleting it. The SMS can contain up to 160 characters.
Dispatch ................................. Enter the recipient's number here (including area
code). You can transfer the call number from the
telephone book.
Templates ............................... You can create up to 5 different templates, change
or delete old templates. Each template can be copied to the outbox.
Message centre ..................... Enter the number for the message centre here. Your
network operator will provide the correct number.
You can also enter a second centre for another
supplier. It is them possible to receive SMS messages via both centres. Please note that in contrast
messages are only sent via the first centre.
Never enter outside line numbers (prefixes) for your
PABX before the call number (e.g. 0)! This is done
in the "Settings/PABX/prefix" menu (refer to Page
101).
Page 50

Short messages (SMS)
50
Inbox
If you have new, unread messages (SMS) the SMS LED flashes. If the SMSLED blinks rapidly there is no space in the inbox for new messages. Delete
the older messages to create more space.
Press menu. The main menu is displayed.
Press the selection button next to
"Messages (SMS)".
The messages menu is displayed.
Press the selection button next to
"Inbox".
The inbox is displayed.
Page 51

Short messages (SMS)
51
Y
ou can scroll through individual
entries using the control buttons
(up/down).
New, unread messages are marked with
an arrow.
2s
To copy a message to the templates press the corresponding selection button for two seconds.
The message is copied and the display
changes to templates.
To copy the telephone number to
t
he telephone book, press second-
ary function and the relevant selec-
t
ion button.
The entry field for the telephone book is
displayed with the copied telephone
number. Now all you have to do is enter
t
he name.
To read a message press the selec-
t
ion button next to the desired mes-
sage briefly.
The selected message is displayed.
Y
ou can scroll through the messages using the control buttons
(up/down).
2s
To delete the message press the
selection button next to the delete
symbol for 2 seconds.
The message is deleted.
To exit the menu press stop.
The device must be in standby for you to receive a message (SMS). Your
tiptel 545 SD will not respond if you are currently scrolling through the menu
or changing settings. This ensures that you can not be disturbed (for example
when entering an SMS).
Page 52

Short messages (SMS)
52
Outbox
Press menu. The main menu is displayed.
Press the selection button next to
"Messages (SMS").
The messages menu is displayed.
Press the selection button next to
"Outbox".
The display changes and displays the
outbox.
Y
ou can scroll through the existing
messages using the control buttons
(up/down).
2s
To delete the outbox press the selection button next to the delete
symbol for 2 seconds.
The outbox is deleted.
To edit the text press the selection
button next to the desired line.
The cursor is displayed at the start of the
corresponding line.
Page 53

Short messages (SMS)
53
If required change the occupancy of
t
he entry buttons by pressing the
control button (up) (refer to "Summary of possible symbols" table in
t
he "Telephone book" chapter).
The display shows the possible occupancies:
(ABC) = Capital letters
(abc) = Small letters
(12!?) = Numbers and special
characters
...
Y
ou reach the individual letters by
pressing the individual entry button
once or more.
Example: You require "M". Press
forwarding button three times (the
"M" is in the third position on this
button).
The entry location flashes.
Press control button (right) to
change to the next entry location.
The cursor to the next entry location.
Use the control button (left) to
move the cursor once place backwards, for example to overwrite a
character.
The cursor moves to the left.
Y
ou can insert a character by
pressing the control button (down).
An empty space is inserted to the left of
t
he cursor.
To delete an entry move the cursor
t
o the location and press the selec-
t
ion button next to the delete sym-
bol.
The character under the cursor is deleted.
To stop the entry press stop.
Page 54

Short messages (SMS)
54
Sending a message (SMS)
For a message (SMS) to be sent it is essential that something is in the outbox
and that a message centre has been entered.
Open the message menu as described in "Inbox" and "Outbox".
The messages menu is displayed.
Press the selection button next to
"Dispatch".
The display changes to send. The cursor
is at the first digit of the recipient's call
number.
Enter the first digit of the call number using the control buttons
(up/down).
The numbers 0 to 9 in the display.
Press control button (right) to
change to the next entry location.
The cursor to the next entry location.
Use the control button (left) to
move the cursor once place backwards, for example to overwrite a
digit.
The cursor moves to the left.
To transfer a call number from the
t
elephone book, press the selection
button next to the "Insert" symbol.
The call number is entered to the left of
t
he cursor.
Page 55

Short messages (SMS)
55
Search for names as described under "Search entries" ("Telephone
book" chapter Page 36).
Y
ou can insert a character by
pressing secondary function and
t
he control button (down).
An empty space is inserted to the left of
t
he cursor.
To delete an entry move the cursor
t
o the location and press the selec-
t
ion button next to the delete sym-
bol.
The character under the cursor is deleted.
To transfer the call number press
stop.
The call number is transferred and "Dispatch" is displayed.
To start the transfer, press the selection button next to "Dispatch".
The device creates the connection to the
message centre and transfers the outbox
t
o the selected recipient's call number.
Then the messages menu is displayed
again.
Page 56

Short messages (SMS)
56
Templates
Here you can save up to 5 templates that you can edit, delete or copy to the outbox
individually.
Open the message menu as described in "Inbox" and "Outbox".
The messages menu is displayed.
Press the selection button next to
"Templates".
The display switches to the templates.
Y
ou can scroll through individual
t
emplates using the control buttons
(up/down).
The start of the selected template is displayed.
2s
To copy a template to the outbox
press the corresponding selection
button for two seconds.
The template is copied and the display
changes to outbox.
To create or edit a template press
t
he selection button next to the de-
sired template briefly.
The selected template is displayed.
Open or edit the template as described in detail in "Outbox".
Page 57

Short messages (SMS)
57
Message centre
Enter the telephone number for your message centre here (e.g. Deutsche Telekom
0193010). If you are using the device in a different country or network, your network
operator will tell you the call number of your message centre. In some countries you
have to enter two telephone numbers – one to send and the other to receive. The
send number must be saved in memory location 1.
Open the message menu and
search for the message centre en-
t
ry.
Press the selection button next to
"Message centre".
The display changes and the first digit in
t
he first call number flashes.
To move to the 2
nd
centre press the
selection button next to the second
call number.
The cursor moves to the second call
number.
Set the call number using the con-
t
rol buttons (up/down, left/right).
If you have set up two message centres you can receive SMS messages from
both. But you always send via the first centre.
Page 58

Timer
58
Timer
The timer function contains up to 10 switching times during which answering mode,
outgoing messages, message transfer and call forwarding can be switched on/off
or changed.
Setting options for timer
Switching time ...................... You set the times here for when the function should
be switched on, off or changed. Dashes mean that
no switching time has been programmed.
Weekday ................................ You set the weekdays here for when the function
should be switched on, off or changed. A dash
means that no change takes place on this day.
Answering mode ................... On, off or -. A dash means no change (the previous
status is continued).
OGM ....................................... 1 to 15 or -. A dash means that the previous mes-
sage is continued.
Message transfer .................. On, off or -. A dash means no change (the previous
status is continued).
Call forwarding ..................... On, off or -. A dash means no change (the previous
status is continued).
Page 59

Timer
59
Programming timer
Press menu. The main menu is displayed.
Press the selection button next to
t
imer.
The entry field for the first switching time
is displayed.
Y
ou can search the individual
switching times using the control
buttons (up/down).
The display switches between the 10
possible switching times.
Press the selection button next to
t
he switching time and make the
desired settings using the control
buttons (up/down).
The cursor is at hours.
Use the control buttons (left/right)
t
o switch between the desired
hours, minutes and weekdays on
which the switching time is to be
valid.
The cursor moves between hours,
minutes and weekdays. A dash for "Mo"
for example means that the switching
t
ime will not be carried out on Monday.
Page 60

Timer
60
Use the two lower selection buttons
and the control buttons (left/right)
t
o find what needs to be changed in
t
he selected time.
The symbols have the following meanings:
= Answering mode
= OGM
= Message transfer
= Call forwarding
Make the desired settings using the
control buttons (up or down).
A dash means that the previous status is
continued.
To set the order in which numbers
are dialled press the selection but-
t
on next to "Message transfer on".
The display shows the currently set
order in which the 4 numbers for
message transfer are dialled.
To delete a switching time press the
selection button next to the delete
symbol.
The empty entry field is displayed again.
2s
To delete the timer press the selec-
t
ion button next to the delete symbol for 2 seconds.
All switching times are deleted.
To stop entering additional switching times press stop.
The settings are confirmed.
To stop the entry press stop several
t
imes.
The initial state is again displayed.
Sample programming for timer
You want your tiptel 545 SD to switch on OGM 1 on Mondays to Fridays at 17.00
and switch off at 08.00. When the office closes on Friday and over the weekend the
answering machine should use OGM 2 throughout. This requires 3 switching times.
Page 61

Timer
61
Switching on timer
Press timer. The display shows a clock as the symbol
for activated timer. The timer sets the
current functional status.
Press timer again to switch off timer.
The clock symbol disappears.
Page 62

Message transfer
62
Message transfer
For message transfer the answering machine dials the saved call numbers consecutively after each new incoming message. If the subscriber called picks up he will
hear the following outgoing message:
"Automatic call, ..x.. incoming messages, please collect remotely, I repeat …" or if
you have entered your own call number as identification "automatic call from subscriber (own call number), ..x.. incoming messages, please collect remotely, I repeat".
It is possible to start remote control for the recorded message(s) during the message. Proceed as described in "Carry out remote control" (*Code#). If you do not
access the messages remotely the device dials the next call number after a waiting
period (5 - 180 seconds). If no remote control is carried out during the repeat time
(5 – 60 minutes) the device dials the complete call number sequence again as a
reminder. If there is no remote control your tiptel 545 SD makes no, one or two repetitions depending on the setting you have chosen.
Setting options for message transfer
Waiting period ...................... 5 to 180 sec. This is the time from hanging up to
dialling the next call number.
Repeat period ....................... 5 to 60 minutes. This is the time that passes before
all call numbers are called again.
Repetitions ............................ 1, 2 or no repetitions
Playbacks .............................. 1 – 8 times. You can set here how often to replay
the forwarding message.
1. Call number ....................... >>
2. Call number ....................... >>
3. Call number ....................... >>
4. Call number ....................... >>
Page 63

Message transfer
63
Settings for message transfer
Press menu. The main menu is displayed.
Press the selection button next to
message transfer.
The message transfer menu is shown in
t
he display.
Search for the desired setting op-
t
ion using the control buttons
(up/down).
All setting options are displayed.
Press the selection button next to
t
he desired line and if necessary
change the entry using the control
buttons (up/down).
The display shows the current setting.
or
Page 64

Message transfer
64
When entering the call numbers
press the selection button next to
"Call number" and make the desired
settings using the control buttons
(up/down).
The entry location flashes.
Digits and special symbols are displayed.
The special symbols have the following
meanings:
~ = Wait for dial tone / 3 Sec. pause
i = Internal (for PABX)
F = Flash (short, for PABX)
H = Hook flash (long, for PABX)
S = Send by SMS
Press control button (right) to
change to the next entry location
and enter other digits.
The cursor to the next entry location.
Use the control button (left) to
move the cursor once place backwards, for example to overwrite a
character.
The cursor moves to the left.
To transfer a call number from the
t
elephone book press the selection
button next to the "Insert" symbol.
The call number is entered to the left of
t
he cursor.
Search and select names as described under "Search entries".
The name is displayed below the call
number.
To enter a character press secondary function and then control button
(down).
An empty space is inserted to the left of
t
he cursor.
To delete a digit, move the cursor to
t
he location and press the selection
button next to the delete symbol.
The character under the cursor is deleted.
2s
To delete the whole call number
press the selection button next to
t
he delete symbol for 2 seconds.
The entire call number is deleted.
Page 65

Message transfer
65
To make further settings press stop. The settings are confirmed.
To stop the entry press stop several
t
imes.
The initial state is again displayed.
Message transfer by SMS
In addition to normal message transfer (as described above) you can also be informed about new voice messages by SMS. You will receive a short message, e.g.
on your mobile phone:
You have 2 new messages from:
1. 01701234567
2. 0210212345
Ashton, Deidra
Use this function if you do not want to be disturbed and will pick up your messages
later using remote access.
To ensure you receive an SMS instead of a message place an "S" before the target
call number.
Your device must also be set up for SMS messages, refer to "Short messages
(SMS) chapter".
Example:
You would like to receive an SMS to your mobile phone when you have new messages on your tiptel 545 SD.
When you enter your mobile phone call number in the "Forwarding/call number"
menu, enter an "S" before it.
Page 66

Message transfer
66
Sample call number entries
For PABX the prefix for the public telephone network is dialled before each call
number (refer also to Page 101 "Settings, PABX/prefix"). To suppress this enter "i"
before internal call numbers.
If you would like message transfer by short message (SMS) you must enter an "S"
before the call number.
Normal subscriber 0123456789
PABX
Extension to extension i 269
Short message (SMS) S 017012345678
Switching on message transfer
Press message transfer. The message transfer symbol is dis-
played.
Press message transfer again to
switch off message transfer.
The symbol for message transfer is displayed.
During ongoing message transfer the message transfer symbol flashes.
Page 67

Individual ringing tone
67
Individual ringing tone
If you want to select a different ringing tone from the standard one on the telephone
you can record up to 14 different ringing tones here. It is not possible to change
ringing tone 15 because it is pre-configured. Choose the ringing tone for your telephone and your tiptel 545 SD will play it back. Please note that your individual ringing tone is only played back on the second call signal. During playback it is not
possible to receive a new call number (CLIP).
Press menu. The main menu is displayed.
Search for the "Individual ringing
t
one" entry using the control but-
t
ons (up/down).
Press the selection button next to
"Individual ringing tone".
The entry field for the individual ringing
t
one is displayed.
Page 68

Individual ringing tone
68
Press the selection button next to
"Ringing tone" and select it using
t
he control buttons (up/down).
The numbers 1 to 15 and "-" appear in
t
he display. The individual ringing tone is
switched off using the "-".
Set the desired volume using the
control buttons (left/right).
The volume bar indicates the set volume
level.
To record a new ringing tone press
and hold the selection button next
t
o the record symbol.
Now record your individual ringing tone
by playing any sound in front of the integrated microphone.
Release the button. The recording is completed and is played
back for verification purposes.
To playback an existing recording
press the selection button next to
t
he playback symbol.
The ringing tone is played back.
To delete the ringing tone, press the
selection button next to the delete
symbol.
The ringing tone is deleted.
To exit the menu press stop. The initial state is again displayed.
To record ringing tones from an external signal source press the secondary
function (2nd) button before recording.
Page 69

Call forwarding
69
Call forwarding
If your telephone network or PABX supports the "call forwarding" function you can
enter the required settings here. Then you only have to enter the times for which
you want to activate call forwarding in the "timer". For example at 6 pm you can
switch calls automatically to your private line and then switch them back again to
your business line at 8 am the following day (day/night switching).
In order to switch on call forwarding it is usual to dial a code before the target call
number (e.g. *21*). A second code (e.g. #21#) switches call forwarding off again.
(Refer also to your network operator's or system manufacturer's user instructions).
Setting options for call forwarding
Activate ................................... You can enter the code to switch on call forwarding
here. You can enter up to 15 characters. A dash
means: "Entry location deleted".
Deactivate ............................... You can enter the code to switch off call forwarding
here. You can enter up to 15 characters. A dash
means: "Entry location deleted".
Target call number ................. >>
Target call number ................. Enter the target call number to which the call is to
be forwarded here. You can enter up to 25 characters for the target call number.
Page 70

Call forwarding
70
Settings for call forwarding
Press menu. The main menu is displayed.
Search for the "Call forwarding"
entry using the control buttons
(up/down).
Press the selection button next to
"Call forwarding".
The call forwarding menu is shown in the
display.
Press the selection button next to
t
he setting that you wish to change.
The cursor is located at the entry point.
Select the desired entry location
using the control buttons (left/right)
and change it with the control but-
t
ons (up/down).
The display shows the current setting.
or
Page 71

Automatic monitoring
71
When entering the target call number set the first digit using the con-
t
rol buttons (up/down).
Digits and special symbols are displayed.
The special symbols have the following
meanings:
~ = Wait for dial tone / 3 Sec. pause
i = Internal (for PABX)
F = Flash (short, for PABX)
H = Hook flash (long, for PABX)
Press control button (right) to
change to the next entry location
and enter other digits.
The cursor to the next entry location.
Use the control button (left) to
move the cursor once place backwards, for example to overwrite a
character.
The cursor moves to the left.
To transfer a call number from the
t
elephone book, press the selection
button next to the "Insert" symbol.
The call number is entered to the left of
t
he cursor.
Search and select names as described under "Search entries", p.36.
To enter a character press secondary function and then control button
(down).
An empty space is inserted to the left of
t
he cursor.
To delete a digit, move the cursor to
t
he location and press the selection
button next to the delete symbol.
The character under the cursor is deleted.
2s
To delete the whole entry press the
selection button next to the delete
symbol for 2 seconds.
The entire entry is deleted.
To make further settings press stop. The current setting is confirmed.
Page 72

Automatic monitoring
72
To stop the entry press stop several
t
imes.
The initial state is again displayed.
You can also activate call forwarding by remote access (Refer to remote ac-
cess).
Sample call forwarding entries
Example 1:
Your main connection is with "Deutsche Telekom" and you have activated the "call
forwarding" service. Please note that the target call number must end with a hash
(#).
Activate ................................... *21*
Deactivate ............................... #21#
Target call number ................. 021024712#
Example 2:
You have a tiptel.com PABX, the answering machine is connected to extension 50
and you want to divert the calls to extension 51.
Activate ................................... *21*
Deactivate ............................... #21#
Target call number ................. i 51#
Example 3:
You have a tiptel 1/8 Fax CLIP PABX, are connected with it to "Deutsche Telekom"
and you have activated the "call forwarding" service. You want to forward all external
calls to your private connection.
Activate ................................... *21*
Deactivate ............................... #21#
Target call number ................. 336699#
For PABX the prefix for the public telephone network is dialled before each
call number (refer also to Page 101 "Settings, PABX/prefix"). To suppress this
enter "i" before internal call numbers.
Page 73

Automatic monitoring
73
Automatic monitoring
If you have activated "automatic monitoring" the recording starts as soon as the
handset is lifted. The recording stops automatically when you replace the receiver.
You can decide whether to record all calls or only incoming calls (recording threatening calls). To avoid filling up the memory with unimportant recordings you still
have the option of saving the recording only after pressing a confirmation on the
device. You also have the option of activating the monitoring via the contact control
via the alarm input.
Setting options for automatic monitoring
Activate function ................... Yes or no. You can switch the function on and off
here.
All calls .................................. Yes or no. Select "No" if you only want to record in-
coming calls.
Confirm save ......................... Yes or no. If you select "Yes" you have to confirm
saving the recording otherwise it will be deleted automatically.
Page 74

Automatic monitoring
74
Settings for automatic monitoring
Press menu. The main menu is displayed.
Search for the "Automatic monitoring" entry using the control buttons
(up/down).
Press the selection button next to
"Automatic monitoring".
The entry field for automatic monitoring
is displayed.
Press the selection button next to
t
he setting that you wish to change
until the desired setting is displayed.
The display shows the current setting.
To stop the entry press stop several
t
imes.
The initial state is again displayed.
Page 75

Security lock
75
Security lock
In order to protect your tiptel 545 SD from unauthorised use you can lock the device
with a PIN (personal identification number). The PIN is number containing 1 to 4
digits. You must enter this PIN to unlock the device. In the factory pre-set, the PIN
code is "0000".
Locking the device/Changing PIN
Press menu. The main menu is displayed.
Search for the "Security lock" entry
using the control buttons
(up/down).
Press the selection button next to
"Security lock".
The PIN entry field is displayed.
Enter the first digit of the PIN using
t
he control buttons (up/down).
The display shows the current setting.
Select the next or previous entry
location using the control buttons
(left/right).
The cursor is located at the selected en-
t
ry point.
After entry press the selection but-
t
on next to PIN.
The device displays the choice of "Lock
unit" or "Change PIN".
Page 76

Security lock
76
Press the selection button next to
"Lock unit".
The display returns to the initial state. A
small key shows that the device is
locked.
or
Press the selection button next to
"Change PIN".
The tiptel 545 SD requests you to enter a
new PIN.
Use the control buttons to enter a
new PIN.
The display shows the current entry.
To stop the entry press stop several
t
imes.
The new PIN is confirmed and the initial
state is again displayed.
Unlocking device
Use the control buttons to enter the
PIN.
The display shows the current setting.
After entry press the selection but-
t
on next to PIN.
The small key is no longer displayed. The
device can now be used.
Page 77

Welcoming and connecting callers
77
Welcoming and connecting callers
Your tiptel 545 SD can welcome your callers in PABXs and then transfer them to a
different extension (e.g. a central number). If the extension to which the caller is
transferred is engaged the caller hears the configured engaged message.
In situations where several incoming calls are received at the same time in a manual switchboard a call can be forwarded to the tiptel 545 SD. With this "overflow"
process the caller no longer has the impression that nobody is in the office.
The tiptel 545 SD can also be used as an "automatic switchboard". In this case, the
caller himself decides which number he wants to be connected to by pressing a
number key on his tone dialling (DTMF) telephone. This makes just about every
telephone system capable of supporting direct dialling. If the dialled number is
engaged, the associated mailbox message is activated if you have configured this
option (see also "Mailboxes").
Setting options for welcoming and connecting callers
Reception message............... 1 to 14 or -. Here you select the recorded mes-
sage which you wish to use as the welcome message. If you select "-" the "Welcoming and connecting callers" function will be switched off.
Hold ......................................... Here you enter the method for holding calls for
internal inquiry purposes on your PABX (how a
transfer is initiated). Normally this is the Flash
function "F".
Retrieve .................................. Here you enter how to get back (retrieve) a trans-
ferred caller in your PABX. Normally this is the
Flash function "F". On some systems, however,
you have to set e.g. "F0" or "FF".
Destination number ............... Here you enter the number of the extension to
which the caller is to be transferred. The caller will
be transferred to this extension when he has listened to the full welcome message (fixed destination number).
Page 78

Welcoming and connecting callers
78
Engaged message ................. 1 to 14 or -. Here you select the message to be
played to the caller if the destination number is
engaged. If you select "-" no check is made as to
whether the number is engaged.
Automatic switchboard ......... >>
1st destination no. .... Here you enter the number of the extension to
which the caller is to be connected when he
presses the 1 key.
2nd destination no. .... Here you enter the number of the extension to
which the caller is to be connected when he
presses the 2 key.
.
.
.
8th destination no. ..... Here you enter the number of the extension to
which the caller is to be connected when he
presses the 8 key.
Settings for welcoming and connecting callers
Press Menu. The main menu is displayed.
Use the control buttons (up/down)
t
o move to the "Reception &
switching" entry.
Press the selection button next to
"Reception & switching".
The reception and switching options are
displayed.
Page 79

Welcoming and connecting callers
79
Use the control buttons (up/down)
t
o move to the desired setting op-
t
ion.
All setting options are displayed.
Press the selection button next to
t
he desired line and if desired
change the entry using the control
buttons (up/down).
The display shows the current setting.
or
When entering the destination number press the selection button next
t
o "Destination number" and use the
control buttons (up/down) to set the
first digit.
The current input position blinks.
Numbers and special characters are dis-
played. The meanings of the special
characters are as follows:
~ = Wait for dialling tone / 3 sec. pause
i = Internal (for PABXs)
F = Flash (briefly, for PABXs)
H = Hook Flash (long, for PABXs)
Press the control button (right) to
move to the next input position and
enter further digits.
The cursor moves to the next input posi-
t
ion.
Press the control button (left) if you
wish to move the cursor back by
one position, e.g. to overwrite a
character.
The cursor moves to the left.
To take over a number from the
t
elephone book as the destination
number press the selection button
next to the Insert symbol.
The destination number is inserted to the
left of the cursor.
Page 80

Welcoming and connecting callers
80
Y
ou can search for and select
names as described in "Search en-
t
ries".
The name appears below the number.
To insert a character press the secondary function button and the con-
t
rol button (down).
A space is inserted to the left of the cursor.
To delete a character move the cursor over it and then press the selec-
t
ion button next to the Delete symbol.
The character at the cursor position is
deleted.
2s
To delete the entire destination
number press the selection button
next to the Delete symbol for 2 seconds.
The entire destination number is deleted.
To make further settings press
Stop.
The settings are stored.
To end the input press the Stop but-
t
on several times.
The initial status is once again displayed.
Page 81

Welcoming and connecting callers
81
Answering mode with a welcome message and call
transfer
The "Welcoming and connecting callers", "Music-on-hold for PABX systems"
and "Answering machine" functions can not be used at the same time.
Use the selection button next to the
message symbol to select the message to be used as the welcome
(reception) message.
The selected message is indicated next
t
o the symbol at the bottom right of the
display. If the message has not yet been
recorded or if it has been deleted the
symbol blinks.
Press the answering mode button. The LED in the answering mode button
lights up and the "Reception & switching"
symbol appears in the display.
To switch off the answering mode
with a welcome message and call
t
ransfer, press the answering mode
button again.
The continuous playback stops and the
initial status is displayed.
If you have the message switched via the timer feature, you can switch, for
example, between "Welcoming and connecting callers" during the day and
automatic transfer to the answering machine in the evenings.
Examples of use
Some practical examples of the wide range of applications for the tiptel 545 SD are
provided below. In each case a practical situation and a possible solution are described. For the described call transfer functions the tiptel 545 SD must be connected to the analog port (a/b port) of a telephone system.
Page 82

Welcoming and connecting callers
82
Automatic switchboard
A small sales office cannot afford a switchboard with an operator but nonetheless
wants to provide callers with a professional impression. Following a friendly welcome message the user should be advised of which number he should press on
his phone to be connected to the appropriate department.
The solution:
1. An external call is received.
2. The telephone system forwards the call to the tiptel 545 SD message centre.
3. The device accepts the calls and plays, for example, the following welcome
message: "Hello. You are connected with the Erlensee company. If you would
like to speak to the Sales department please press 1. If you wish to speak to
the Dispatch department please press 2. If you wish to speak to the Service
department please press 3. If you decide not to press any key you will be
connected with the switchboard; please wait a moment."
4. The caller in this case wants to talk to the Service department and presses
the 3 key on his telephone. The tiptel 545 SD message centre then connects
the call to the appropriate extension. The call is answered and the caller is
now connected to the department with which he wanted to speak.
5. If the desired extension is engaged and if the mailbox for extension 3 is configured, the caller hears, for example, the following message: "All Service
staff are currently dealing with other calls. If you wish to try again please
press 3 again. If you wish to be connected to the switchboard please press 0.
.... You have not pressed a key yet; please try again later. Thank you for your
understanding, goodbye."
Page 83

Welcoming and connecting callers
83
Necessary settings:
1. Record the welcome (reception) message as a "message without the option
of leaving an incoming message" (see also "Recording messages" on page
16). In our example we select message 10 as the reception message.
2. Open the main menu and select the "Reception & switching" menu option.
Select reception message "10".
3. Now set how an internal inquiry (the "Hold" function) is initiated on your
PABX. Normally this is the Flash function (F). If in doubt check the operating
instructions for your PABX.
4. Now set how a call can be retrieved ("Retrieve" function) on your PABX.
Normally this is also the Flash function (F). If in doubt check the operating
instructions for your PABX.
5. Under "Destination number" enter the number of your switchboard (e.g. 21).
This is the extension to which the call should be transferred if the caller
doesn’t make a selection on his keypad.
6. If the switchboard is "engaged" the call should be transferred back to the
tiptel 545 SD message centre. The caller then once again hears the welcome
message (which requires that the PABX is capable of automatically transferring the call back when a destination number is engaged). In this case leave
the setting "-" under "Engaged message" as it is.
7. Now enter the three destination numbers under "Automatic switchboard". For
the 1st destination number, enter the extension for Sales, for the 2nd destination number, enter the extension for Dispatch and for the 3rd destination
number enter the extension for Service.
8. To switch on the engaged messages for the three destination numbers, activate the associated mailboxes. To do this, open the main menu and select
the "Mailbox setup" entry. Select the first mailbox and set "Enabled" to "Yes".
Then repeat this procedure for mailboxes 2 and 3.
9. Record the three mailbox messages (which will later serve as engaged messages) as "messages without the option of leaving an incoming message".
To do this from the neutral status, press the selection button next to the 3
mailbox symbols. The first mailbox blinks and the engaged message for the
Sales department can then be recorded. Then select the 2nd and 3rd mailboxes in turn and record the appropriate messages (see also "Mailboxes" on
page 94).
Page 84

Welcoming and connecting callers
84
Timer-controlled voicemail system
Your tiptel 545 SD has a timer system which can automate certain processes (see
also "Timer" on page 58). If the sales office in the first example above wants, for
example, to offer a mailbox with a message recording capability for each of the
three departments outside normal business hours, (i.e. Monday to Friday from
18.00 to 09.00 and the weekends) this function can automatically replace the
switching function.
The solution:
1. An external call is received outside normal business hours.
2. The "automatic switchboard" has been deactivated by the timer at 18.00. The
voicemail system now handles incoming calls and the caller hears, for example the following message: "Hello. You are connected with the Erlensee
company. You are calling outside our normal business hours, during which
you can contact us personally; these are Monday to Friday from 9 a.m. to 6
p.m. If you would like to leave a message for the Sales department please
press 4; if you would like to leave a message for the Dispatch department
please 5 or if you would like to leave a message for the Service department
please press 6. .... You have not decided to leave a message; the voicemail
system will now switch off. Thank you for calling, goodbye."
3. The caller presses, for example, the 6 key on his phone. He then hears the
message from the Service department and can then leave a message: "You
can now leave a message for the Service department. Please leave your
name and telephone number and we’ll get back to you. Please speak after
the tone."
4. At 09.00 the device then automatically switches back to the "automatic
switchboard" function with the appropriate message.
Page 85

Welcoming and connecting callers
85
Necessary settings:
1. Record a welcome (reception) message as a "message without the option of
leaving an incoming message" (see also "Recording messages" on page 16).
In our example we select message 9 as the welcome message for the
voicemail system.
2. Now set up the three mailboxes. To do this open the main menu and select
the "Mailbox setup" entry. Select the fourth mailbox and set "Enabled" to
"Yes". Then repeat this procedure for mailboxes 5 and 6.
3. Record the three mailbox messages as "messages with the option of leaving
an incoming message". To do this from the neutral status press the selection
button next to the mailbox symbols. Select the fourth mailbox and record the
message for the Sales department. Using the same procedure then record
the appropriate messages for mailboxes 5 and 6 (see also "Mailboxes" on
page 94).
4. Now all that remains to be done is to program 2 switchover times in the timer. To do this open the main menu and select the "Timer" entry. Set the first
switchover time as follows: Set Time (clock symbol) to "09:00", under Weekdays (Mo Tu We) deactivate Saturday and Sunday (-), set Answering mode
(telephone symbol) "On" and Message (message symbol) to "10".
Now set the second switchover time as follows: Set Time to "18:00", leave
Weekdays unchanged, Set Answering mode to "On" and Message to "9".
Page 86

Welcoming and connecting callers
86
Welcoming and connecting callers
Each caller shall first be welcomed and then transferred to the central number for
the Accounts department. If all connections are engaged the caller shall be given
the opportunity of leaving a message.
The solution:
1. An external call is received.
2. The telephone system forwards the call to the tiptel 545 SD message centre.
3. The device accepts the call and plays, for example, the following welcome
message: "Hello. You are connected with the Accounts department of the Er-
lensee company. To help us process your inquiry quickly please have your
customer number and the invoice number at hand. You will now be connected to a free member of the accounts staff; just a moment ..."
4. Following the message the device dials the destination number (the central
number for Accounts). The call is either then answered by a member of staff
or
5. if all desks are engaged the device reconnects to the caller, plays a message
(an engaged message) and offers the caller the opportunity to leave a message: "Unfortunately all of the accounts staff are currently dealing with other
inquiries. If you wish you can leave a message after the tone and we’ll get
back to you as soon as possible." The caller can now leave his message. The
recorded message can be called up later either directly on the device or remotely from another telephone.
Page 87

Welcoming and connecting callers
87
Necessary settings
1. Record the welcome message as a "message without the option of leaving
an incoming message" (see also "Recording messages" on page 16). In our
example we select message 5 as the welcome message.
2. Record the engaged message as a "message with the option of leaving an
incoming message". In our example we select message 4 as the engaged
message.
3. Open the main menu and select the "Reception and switching" entry. Set the
reception message to "5".
4. Now set the method for initiating a call transfer (internal inquiry) on your
PABX. Normally this is the Flash function "F". If in doubt check the operating
instructions for your PABX.
5. Now set how a call is retrieved on your PABX (the "Retrieve" function). Normally this is also the Flash function "F". If in doubt check the operating instructions for your PABX.
6. Under Destination no. enter the central number for the Accounts department,
e.g. 24.
7. Set the engaged message to "4".
Holding loop
A call shall be accepted even though the called party is engaged and the caller
shall be held on the line until the called party is free. Your tiptel 545 SD continues
to try to connect the call until the desired party is reached.
Page 88

Welcoming and connecting callers
88
The solution:
1. An external call is received.
2. If the desired extension is engaged, the telephone system transfers the call
to the tiptel 545 SD (please note that your telephone system must sup-
port the "Call forwarding when engaged" feature and ensure that calls
are forwarded in such cases to the extension to which your tiptel 545 SD
is connected). The caller then hears, for example, the following welcome
message: "Hello. You are connected with the hotline of the Erlensee company. Unfortunately, all of our staff are currently dealing with other customers at
the moment. You will automatically be connected to the next free advisor.
Please wait a moment ..."
3. After playing the message, the device once again connects the call to the
destination number and hangs up.
4. If the destination number is still engaged, the telephone system once again
transfers the call to your tiptel 545 SD. The caller then hears the message
again and the process continues as described above.
5. When the extension becomes free, the call is answered by one of the hotline
staff.
Necessary settings
1. Record the welcome message as a "message without the option of leaving
an incoming message" (see also "Recording messages" on page 16). In our
example we select message 6 as the welcome message.
2. Open the main menu and select the "Reception and switching" entry. Set the
reception message to "6".
3. Now set the method for initiating a call transfer (internal inquiry) on your
PABX. Normally this is the Flash function "F". If in doubt check the operating
instructions for your PABX.
4. Under Destination no. enter the number of the extension for which the holding loop has been configured (e.g. 22).
Page 89

Welcoming and connecting callers
89
Menu-guided information system
A travel agency, in addition to providing personal advice and assistance, wants to
allow its customers to be able to call up details of current travel offers and concerts
via a telephone information system. If the customer is interested in a specific offer
he shall be able to leave a message.
The solution:
1. An external call is received.
2. The telephone system forwards the call to the tiptel 545 SD message centre.
3. Your tiptel 545 SD accepts the calls and plays, for example, the following
message: "Hello. You are connected with the Sunnytime travel agency infor-
mation system. To call up our current "Constance coach trip" summer saver
offer please press 1 on your telephone. For more information about beach
holidays in sunny southern regions please press 2. For current information
about cultural trips please press 3. If you decide not to call up any information
you can leave a message and your phone number or fax number after the
tone."
4. The caller presses, for example, the 1 key on his phone. He then hears the
details about the currently offered trip to Constance and information about
additional options: "Our summer saver is a 14-day bus trip to Constance ... If
you wish to call up more information or leave a message please press 0.
Thank you for calling."
5. While this message is playing, the caller presses 0, hears the welcome message again and can then leave his message.
Page 90

Welcoming and connecting callers
90
Necessary settings
1. Record the welcome message as a "message with the option of leaving an
incoming message" (see also "Recording messages" on page 16). In our example we select message 1 as the welcome message.
2. Activate the mailboxes (1-3) required for our example. To do this open the
main menu and select the "Mailbox setup" entry. Select the first mailbox and
set "Enabled" to "Yes". Then repeat this procedure for mailboxes 2 and 3.
3. Record the three mailbox messages as "messages without the option of
leaving an incoming message". To do this from the neutral status press the
selection button next to the 3 mailbox symbols. The first mailbox blinks and
the message for the "summer saver offer" can then be recorded. Then select
the 2nd and 3rd mailboxes in turn and record the appropriate messages
(see also "Mailboxes" on page 94).
Page 91

Music on hold for PABXs
91
Music-on-hold for PABXs
You can use your tiptel 545 SD to play the on-hold music into your PABX. To do
this, connect the "OUT" output to the audio input of your PABX using the supplied
cable. The on-hold music is played in an endless loop without ever wearing out. It is
also possible to insert an on-hold announcement at an interval of your choice. The
on-hold music and announcement are each stored in one of the tiptel 545 SD’s 14
message storage areas. These "messages" are then fed into the PABX using the
settings described on the following pages.
If you wish to endlessly feed in an announcement which already includes background music (recorded in a sound studio) or just music into your PABX, simply use
the on-hold message and set "Music" to "-". The music source can also be, for example, an MP3 player connected to the input marked "IN". In this case set "Music" to
"External".
Setting options for the on-hold music
Announcement ....................... 1 to 14 or -. Here you select the message which you
have recorded as the on-hold announcement. If you
select "-" the "Music-on-hold" function is switched
off.
Music ...................................... 1 to 14, External or -. Here you select the message
number where you have recorded a piece of music.
Selection of "External" allows you to feed in music
via the "IN" input. If you do not want music to be automatically faded in and out then, simply select "-".
Interval ................................... 5 to 60 seconds. Here you set for how long the mu-
sic remains faded in.
LINE output ........................... Normal and MOH. If you select MOH the on-hold
music will additionally be output on the "LINE" output. This makes the connected telephone line (the
extension of your PABX) permanently engaged.
OUT output ............................ Normal and MOH. If you select MOH the output will
then only be used for on-hold music. When recordings are being played there is then no signal on the
output.
Page 92

Music on hold for PABXs
92
Music-on-hold settings
Press Menu. The main menu is displayed.
Use the control buttons (up/down)
t
o move to the "Music on hold" en-
t
ry.
Press the selection button next to
"Music on hold".
The music-on-hold menu is displayed.
Use the control buttons (up/down)
t
o move to the desired setting op-
t
ion.
All settings options are displayed.
Press the selection button next to
t
he option which you wish to
change repeatedly until the desired
setting is displayed.
The current setting is displayed.
or
When entering numbers, press the
selection button next to the appropriate line.
The input position blinks.
Page 93

Music on hold for PABXs
93
Use the control buttons (up/down)
t
o change the setting.
The displayed number increases or decreases.
To end the input of numbers, press
t
he selection button next to the relevant line again.
The input position stops blinking.
To end the input, press Stop several
t
imes.
The initial status is once again displayed.
Answering mode with music-on-hold
The "Music-on-hold for PABX systems", "Welcoming and connecting callers",
and "Answering machine" functions can not be used at the same time.
Use the selection button next to the
message symbol to select the message to be used as the on-hold announcement.
The selected message is indicated next
t
o the symbol at the bottom right of the
display. If the message has not yet been
recorded or if it has been deleted, the
symbol blinks.
Press the answering mode button. The LED in the answering mode button
lights up and the "Music-on-hold" symbol
appears in the display.
To switch off the answering mode
with music-on-hold, press the answering mode button again.
The continuous playback stops and the
initial status is displayed.
If you have the message switched via the timer feature, you can switch, for
example, between "Music-on-hold for PABXs" during the day and automatic
transfer to the answering machine in the evenings.
Page 94

Mailboxes
94
Mailboxes
General
You have the option or setting up in addition to the actual answering machine up to
8 mailboxes. Each mailbox has its own OGM, remote control code and its own target call number for message transfer. If your tiptel 545 SD is used by several people
the caller can leave a message in the relevant mailbox. You should mention this
function in the OGM. To select one of the 8 mailboxes the caller has to press the
relevant number (1…8) on the keyboard of a tone-enabled telephone. The mailbox
OGM is played and the caller can leave a message.
For PABX systems under certain circumstances there is the option of selecting the
relevant mailbox automatically (refer to "Automatic call forwarding to the mailbox", p.
98).
Another usage is an information centre where the caller first hears the set message
from the actual answering machine. The OGM contains notes on where the desired
information is located (mailbox 1, 2, 3 or 8).
Setting options for mailboxes
Activate .................................. Yes or no. If you enter "Yes" here the mailbox will be
switched on. If a mailbox is switched off any existing
ICMs and the OGM are lost.
Access code .......................... If you want to access your mailbox remotely you
have to enter the access code for this mailbox.
Quick check code .................. If you want to access your mailbox by remote con-
trol quickly without having to enter the access code,
you can for example enter your mobile phone call
number here. If this call number is detected for a
call the device starts remote control immediately.
Page 95

Mailboxes
95
Extension ............................... If you want to use the "Automatic call forwarding to
mailbox" function you can enter the relevant extension number here.
Target call number ............... If you want to use the mailboxes and the "message
transfer" function you must enter the target call
number here.
Setting up mailboxes
Press menu. The main menu is displayed.
Search for the "Set up mailboxes"
entry using the control buttons
(up/down).
Press the selection button next to
"Mailbox setup".
The mailbox setup menu is displayed.
Search for the desired mailbox using the control buttons (up/down).
8 mailboxes are displayed.
Page 96

Mailboxes
96
Select the desired mailbox using the
selection button.
The settings menu for the selected mailbox is displayed.
Search for the desired setting op-
t
ion using the control buttons
(up/down).
All setting options are displayed.
Press the selection button next to
t
he setting that you wish to change
until the desired setting is displayed.
The display shows the current setting.
or
When entering digits press the selection button next to the desired
line.
The entry location flashes.
Change the settings using the con-
t
rol buttons (up/down).
The display counts up or down.
For settings with several digits
move the entry location to the required location using the control
buttons (left/right).
The selected entry location flashes.
To end digit entry press the selec-
t
ion button next to the desired line
again.
The entry location stops flashing.
To stop the entry press stop several
t
imes.
The initial state is again displayed.
Page 97

Mailboxes
97
Using the mailboxes
The corresponding symbols are displayed when you have set up mailboxes. In answering mode the number of ICMs in the mailbox is indicated to the right of the
symbol. The mailboxes include playback and delete ICMs, monitoring/personal info
(memo) and OGM functions. These functions are described in detail in the previous
chapters. Because there is only one OGM for each mailbox it goes without saying
that it is not possible to select the OGM.
Press the selection button next to
t
he mailbox symbol until the desired
mailbox flashes.
The selected mailbox flashes.
E. g.
Carry out desired function, e.g.
playback all ICMs.
Playback of all the ICMs in the selected
mailbox starts.
To go back to the actual answering
machine press the selection button
next to the mailbox symbols until no
mailbox is flashing.
The mailboxes stop flashing.
Page 98

Mailboxes
98
Remote access to mailboxes
Remotely accessing mailboxes is done in the same manner as remotely accessing
the answering machine. The precise description is found in the "Remote access"
chapter.
The following mailbox functions are available remotely:
Room monitoring/Intercom
Playing back the new ICMs in this mailbox
Playing back all ICMs in this mailbox
Skip back
Repeat the last 3 seconds/continue playback
Skip forwards
Deletes the ICM currently playing back
Stopping and pausing playback
Changing the outgoing message for this mailbox
Deleting all incoming messages for this mailbox
Changing the target call number for message transfer for this mailbox
Automatic call forwarding to the mailbox
Your PABX must meet the following requirements: The CLIP function (transfer of call
number) must be supported and the call number of the extension that has forwarded must be transferred.
Connect your tiptel 545 SD to a free extension (analogue port) on your PABX. Set
the mailboxes up and enter the call numbers of the corresponding extensions. Record individual OGMs for the individual mailboxes and switch the device to answering mode. In order to now switch the mailbox on or off from an extension you have
to activate call forwarding from this extension to the tiptel 545 SD.
Example: Your tiptel 545 SD is connected to extension 25 on your PABX. The ex-
tensions 21 to 24 are assigned to mailboxes 1 to 4. Extension 21 is programmed to forward calls to 25. An incoming call on extension 21 is forwarded to mailbox 1. The caller hears the message from mailbox 1 and
can then leave a message.
Page 99

Settings
99
Settings
Setting options
Language ............................... German, English, French, Italian or Dutch
Clock ...................................... >>
Time ............................. You can re-set the time here.
Date ............................ You can re-set the date here.
Network time .............. Yes or no. You can transfer the time to the internal
clock if this is permitted by your telephone network
or your PABX (the year is not transferred and must
be set manually).
DST .............................. Yes or no. Select "Yes" if you want your tiptel 545
SD to change automatically to summer time on the
last Sunday in March and to winter time on the last
Sunday in October.
Time ancmnt ............... Yes or no. You can set here whether to announce
the time after each ICM.
Date ancmnt .............. Yes or no. You can set here whether to announce
the date after each ICM.
Number ancmnt .......... Yes or no. You can set here whether to announce
the call number transferred after each ICM.
Ancmnt at unit ........... Yes or no. Here you can switch the "speaking clock"
off and on when playing back from the device.
Quality ................................... 128 KB/sec or 64 KB/sec. There are two levels for
the recording quality. At the higher quality (128
KB/sec) the recording capacity halves.
Rec. length ............................ 1 to 5 minutes or endless. Here you can limit the
time that is available to callers for messages.
Call screening ....................... Yes or no. You can set here whether to monitor the
message during recording or not.
Ringing tones ........................ 2 to 9 ringing tones. The number of ringing tones
before calls are answered can be set here.
Page 100

Settings
100
My number ............................. >>
Number ...................... If you enter your own call number your tiptel 545 SD
announces this call number for internal OGM texts.
Remote control ...................... >>
Access code ............... The access code is a 1 to 4 digit number between 0
and 9999. Remote control is switched off using the "
– " code.
Quick check ................ If you want to access the remote control quickly
without having to enter the access code you can for
example enter your mobile phone call number here.
If this call number is detected for a call the device
starts remote control immediately.
Toll-saver .................... Yes or no. If you select "Yes" and there are new
ICMs your tiptel 545 SD answers calls after two ringing tones (no matter the number of ringing tones
set). If there are no new ICMs the device only answers the calls after the number of ringing tones set
in the "Ringing tones" option. So before accepting
the call you already know whether there are new
ICMs and whether remote control is worthwhile.
Remote on/off ............ Yes or no. You set whether the answering mode
should be activated remotely or not.
Remote delete ............ Yes or no. You can set here whether the "Delete
ICMs remotely" option is activated or not.
Room monitoring ....... Yes or no. You set whether the "room monitoring"
should be activated or not.
Message code ....................... The message code is a 1 to 4 digit number between
0 and 9999. The message function is switched off
using the " – " code
Call-back code ...................... You enter the call-back code of your network opera-
tor (for Deutsche Telekom network e.g. H*37#).
The "H" refers to the request key with hook flashfunction. You can enter up to 15 characters.
 Loading...