

Page 1
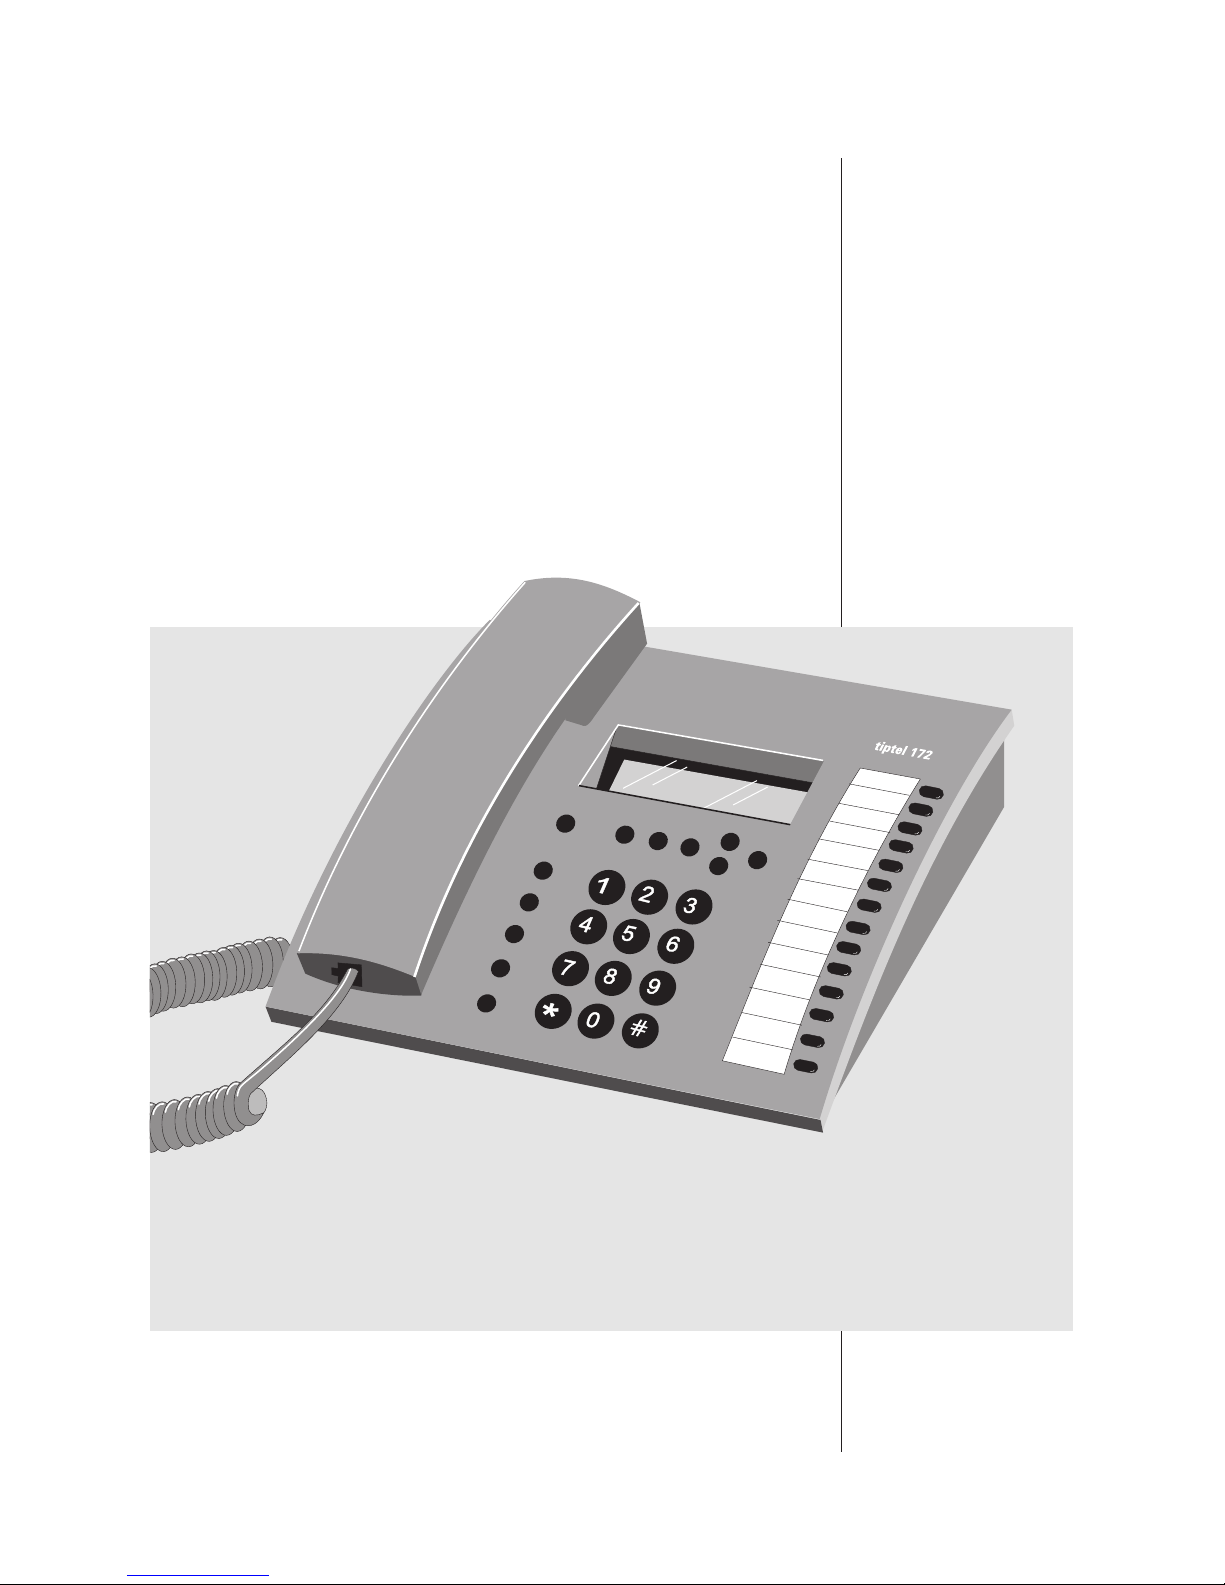
Operating Instructions (UK)
Feature phone
with integrated
telephone directory
tiptel 172
tiptel
Page 2

2
Table of contents
Initial operation
Scope of supply . . . . . . . . . . . . . . . . . .3
Connection . . . . . . . . . . . . . . . . . . . . . .3
Insert batteries . . . . . . . . . . . . . . . . . . .4
Inserting the nameplate . . . . . . . . . . . .4
Illustration . . . . . . . . . . . . . . . . . . . . . . .5
Factory pre-set . . . . . . . . . . . . . . . . . . .5
Button functions . . . . . . . . . . . . . . . . . . .6
Displays and symbols . . . . . . . . . . . . . .7
Information on operation and
programming . . . . . . . . . . . . . . . . . . . . . .8
Telephone calls
Answering a call . . . . . . . . . . . . . . . . . .9
Manual dialling . . . . . . . . . . . . . . . . . . .9
Dialling with off-line call preparation . .10
Dialling via speed dialling stations . . . .10
Dialling via the redial function . . . . . . .10
Extended redialling . . . . . . . . . . . . . . .11
Automatic redialling . . . . . . . . . . . . . . .11
Dialling from the electronic telephone
directory . . . . . . . . . . . . . . . . . . . . . . .12
Dialling via direct call . . . . . . . . . . . . .12
Dialling from the call list . . . . . . . . . . .13
Mute function . . . . . . . . . . . . . . . . . . .13
Handset volume . . . . . . . . . . . . . . . . .14
Loudspeaker / hands-free operation . .14
Switching between handset and
loudspeaker . . . . . . . . . . . . . . . . . . . .15
Telephone directory
Store telephone numbers for speed
dialling stations . . . . . . . . . . . . . . . . . .16
New entries . . . . . . . . . . . . . . . . . . . .17
Change entries . . . . . . . . . . . . . . . . . .17
Delete entries . . . . . . . . . . . . . . . . . . .18
Appointments
New appointments . . . . . . . . . . . . . . .19
Change appointment . . . . . . . . . . . . . .19
Delete appointment . . . . . . . . . . . . . . .20
Direct, VIP and blocked calls
Store and activate direct call numbers .21
Store entries in the VIP list . . . . . . . . .21
Change entries in the VIP list . . . . . . .22
Delete entries in the VIP list . . . . . . . .23
Store entries in the blocked
numbers list . . . . . . . . . . . . . . . . . . . .23
Change entries in the blocked
numbers list . . . . . . . . . . . . . . . . . . . .24
Delete entries in the blocked
numbers list . . . . . . . . . . . . . . . . . . . .24
Call blocking
Store blocked numbers . . . . . . . . . . . .25
Change blocked numbers . . . . . . . . . .25
Delete blocked numbers . . . . . . . . . . .26
Activate blocked dialling . . . . . . . . . . .26
Select blocked dialling type . . . . . . . . .26
Program charge factor . . . . . . . . . . . .27
View and delete accumulated charges 27
Set up an account . . . . . . . . . . . . . . . .28
Change/reset account . . . . . . . . . . . . .28
Delete account . . . . . . . . . . . . . . . . . .29
Settings
Time / date . . . . . . . . . . . . . . . . . . . . .30
Dialling mode . . . . . . . . . . . . . . . . . . .30
PABX operation . . . . . . . . . . . . . . . . .31
Dialling pause . . . . . . . . . . . . . . . . . . .31
PIN . . . . . . . . . . . . . . . . . . . . . . . . . . .32
Ringing tone . . . . . . . . . . . . . . . . . . . .32
Loudspeaker volume . . . . . . . . . . . . . .34
Resume factory pre-set . . . . . . . . . . . .34
Miscellaneous
Troubleshooting . . . . . . . . . . . . . . . . .35
Technical data . . . . . . . . . . . . . . . . . .36
Important information . . . . . . . . . . . . .37
Index . . . . . . . . . . . . . . . . . . . . . . . . .38
Dear customer,
Thank you for your confidence in tiptel products. Having purchased the tiptel 172, you made your
decision for a high-quality feature phone made in Germany with a lasting value.
Please take some time to try out the various functions and to get familiar with your new telephone.
TIPTEL AG
Ratingen
Page 3
3
Initial operation
Scope of supply
The tiptel 172 scope of supply comprises:
m a telephone connecting cable m a curled cable (handset cable)
m five batteries type AAA m an operating instruction
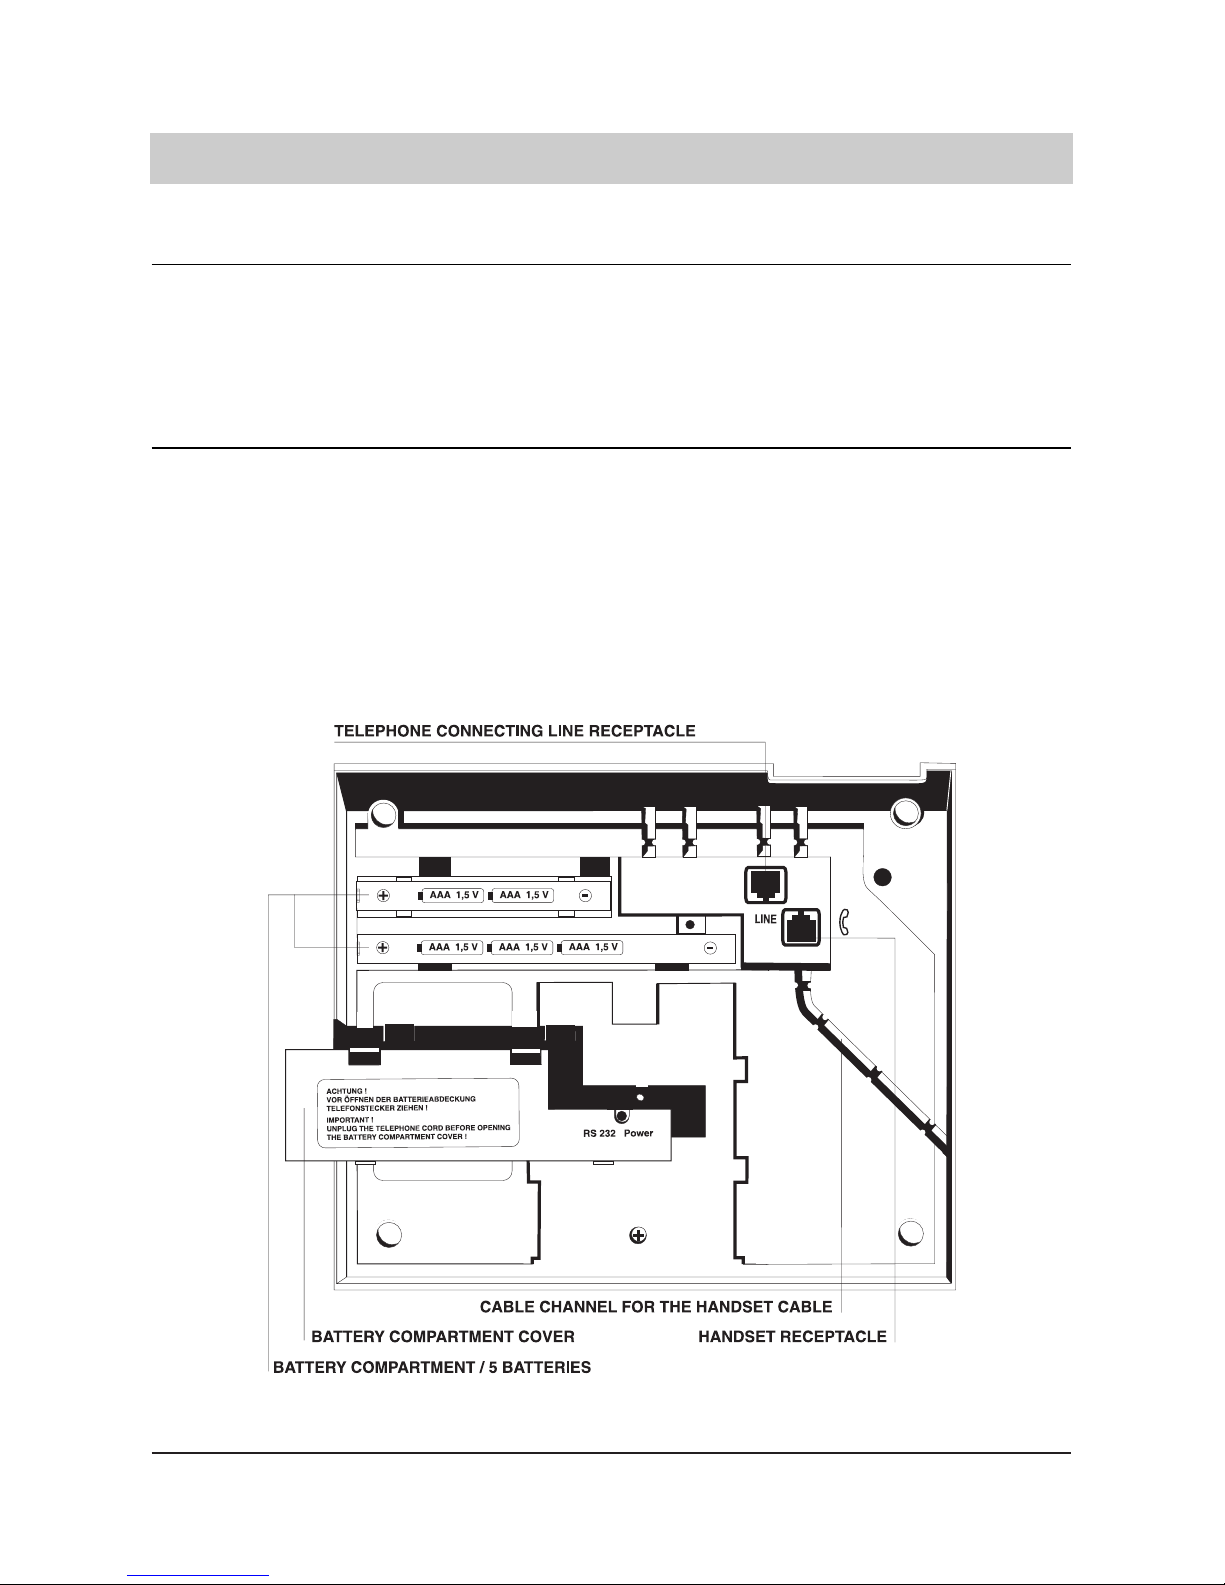
Connection
tiptel 172 is designed as terminal for analog telephone lines.
In order to take the device into operation you have to:
- Plug the long end of the curled handset cord in the handset-jack at the bottom of the housing.
The small end of the cord has to be plugged in the corresponding receptacle of the handset.
- Plug the small plug of the telephone connecting cable in the LINE jack a the bottom of the housing and plug the telephone line connecting plug in the telephone wall socket.
Use the cable channels when connecting the cables.
Now, you can start making phone calls. Insert the batteries in order to use all features (see next page).
Page 4

4
Initial operation
Insert / exchange batteries
Your telephone tiptel 172 is equipped with 5 customary batteries (1.5V microcells, type AAA).
The batteries support all functions that are possible while the handset is on hook, e. g. display,
internal watch, appointments, CLIP and others. All stored telephone numbers and settings are
retained even when no batteries are inserted.
For initial insertion and exchange of the batteries, follow these steps:
1. For safety reasons, unplug your telephone from the telephone wall socket by unplugging the
telephone line plug.
2. Open the battery compartment cover (see connection diagram) by pressing the two clamps.
3. Remove recharged batteries and insert new batteries. Consider the correct polarity when ins-
erting the batteries (type "AAA" = microcells 1.5V).
4. Close the battery compartment cover.
5. Plug the telephone line plug.
Please consider:
The batteries will discharge when the device is not connected to the telephone network and the
handset is picked up. Discharged batteries may be subject to leakage and thus can damage your
telephone. The batteries should be exchanged in time and then disposed environmentally. We
recommend alkaline-manganese batteries.
As for all functions with battery power supply, the display will be switched off about 5 seconds
after having pressed a button.
Inserting the nameplate
You can program frequently used telephone numbers for the speed dialling stations. The nameplate is positioned on the left side of the speed dialling stations. Here, you can write the corresponding names or information referring to the stored telephone numbers.
1. Remove the protective plastic cover by sliding it downwards with your fingers.
2. Use a pair of scissors to cut out the nameplate provided in the operating instructions.
3. Write the corresponding names or information on the nameplate.
4. Insert the nameplate after writing.
5. Insert the protective plastic cover again.
Page 5
5
Initial operation
Factory pre-set
The factory pre-set for tiptel 172 is as follows:
Dialling method: . . . . . . . . . . .tone dialling
Dialling restriction: . . . . . . . . . .none
Pause duration: . . . . . . . . . . . .3 seconds
Signal key: . . . . . . . . . . . . . . .flash
PIN: . . . . . . . . . . . . . . . . . . . . .0000
Ringing tone melody: . . . . . . . .number 30
Ringing tone volume: . . . . . . . .maximum
Incremental volume . . . . . . . . .off
In chapter "Settings" you can find a description about how to reset the telephone to the factory
pre-set.
Illustration
Page 6
6
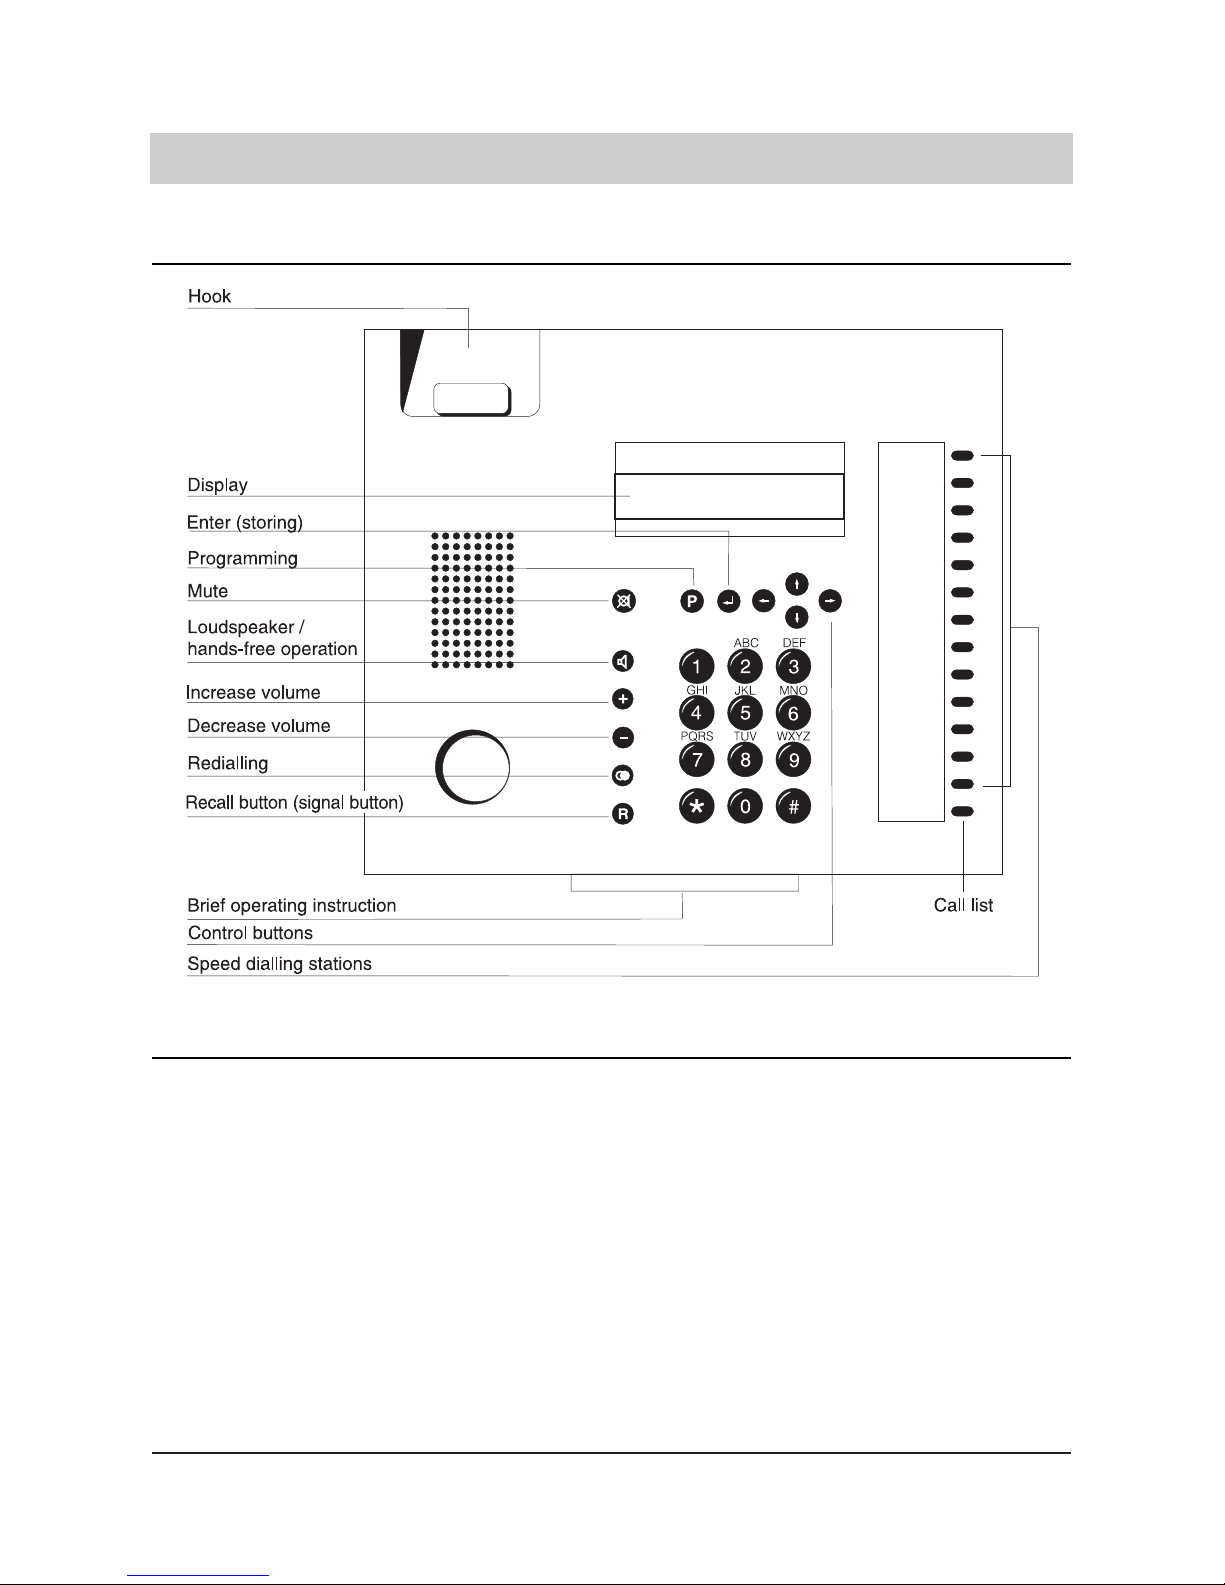
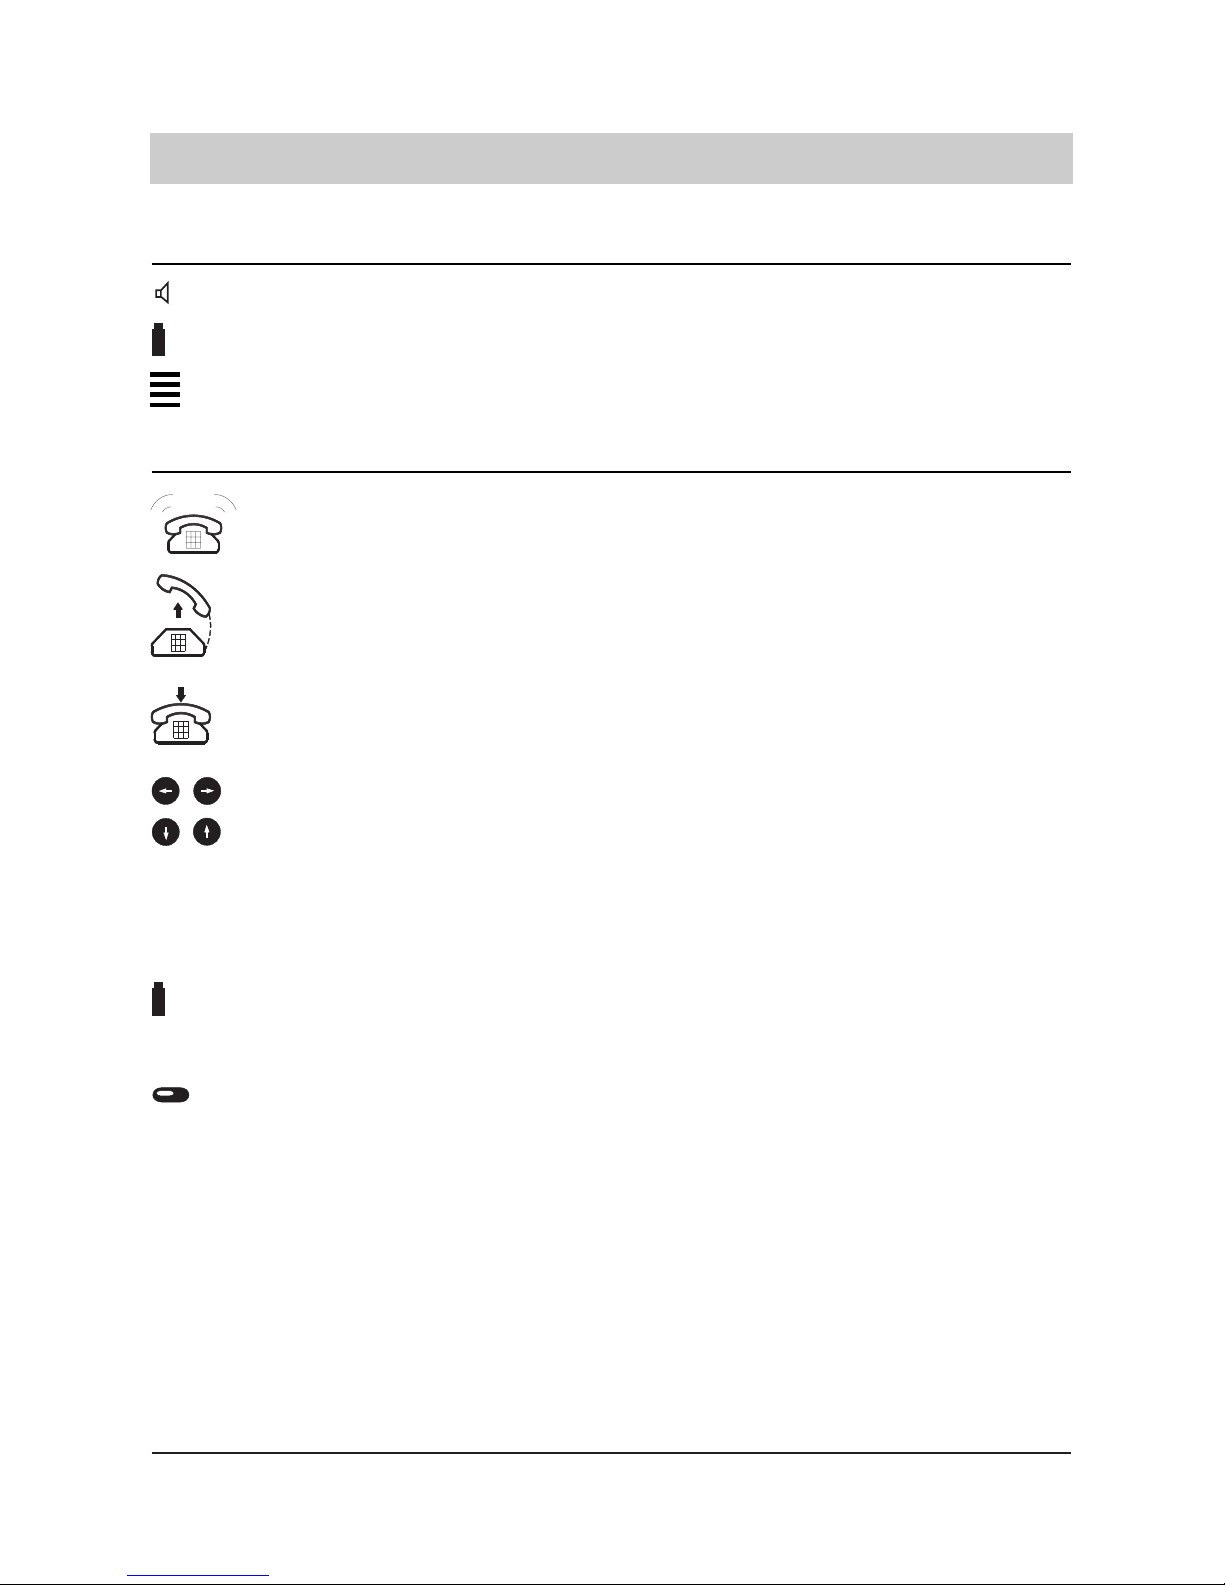
Button functions
The "mute" button turns the handset's microphone on or off.
The "loudspeaker" button turns the hands-free operation on or off and serves to
connect and disconnect an established telephone line
The "plus" and "minus" buttons serve to increase or decrease the volume of the loudspeaker or handset.
The "recall" button creates an impulse (earth or flash) used when operating the telephone within a telephone system.
The "redial" button opens the redial memory for the 4 telephone numbers dialled last.
Numeric buttons to dial telephone numbers and to enter letters for the use of the telephone directory.
Buttons for special functions, e. g. services provided by the telephone network operator.
The "programming" button allows access to the programming menu and serves to
resume the initial state from any sub-menu.
Use the "arrow" keys to select different menus.
Scrolling within a menu.
Selecting a special menu item and branch to the corresponding sub-menu - or to
enter a blank, e. g. between two words.
To move from a sub-menu to the corresponding main-menu without storing any entry
or function - or to delete a letter or number.
The "enter" button serves to save a text or numeric value.
Use the speed dialling stations to dial the corresponding stored telephone number.
Replacing the handset will terminate a current function or entry.
-
2
P
+
R
1
#
Page 7
7
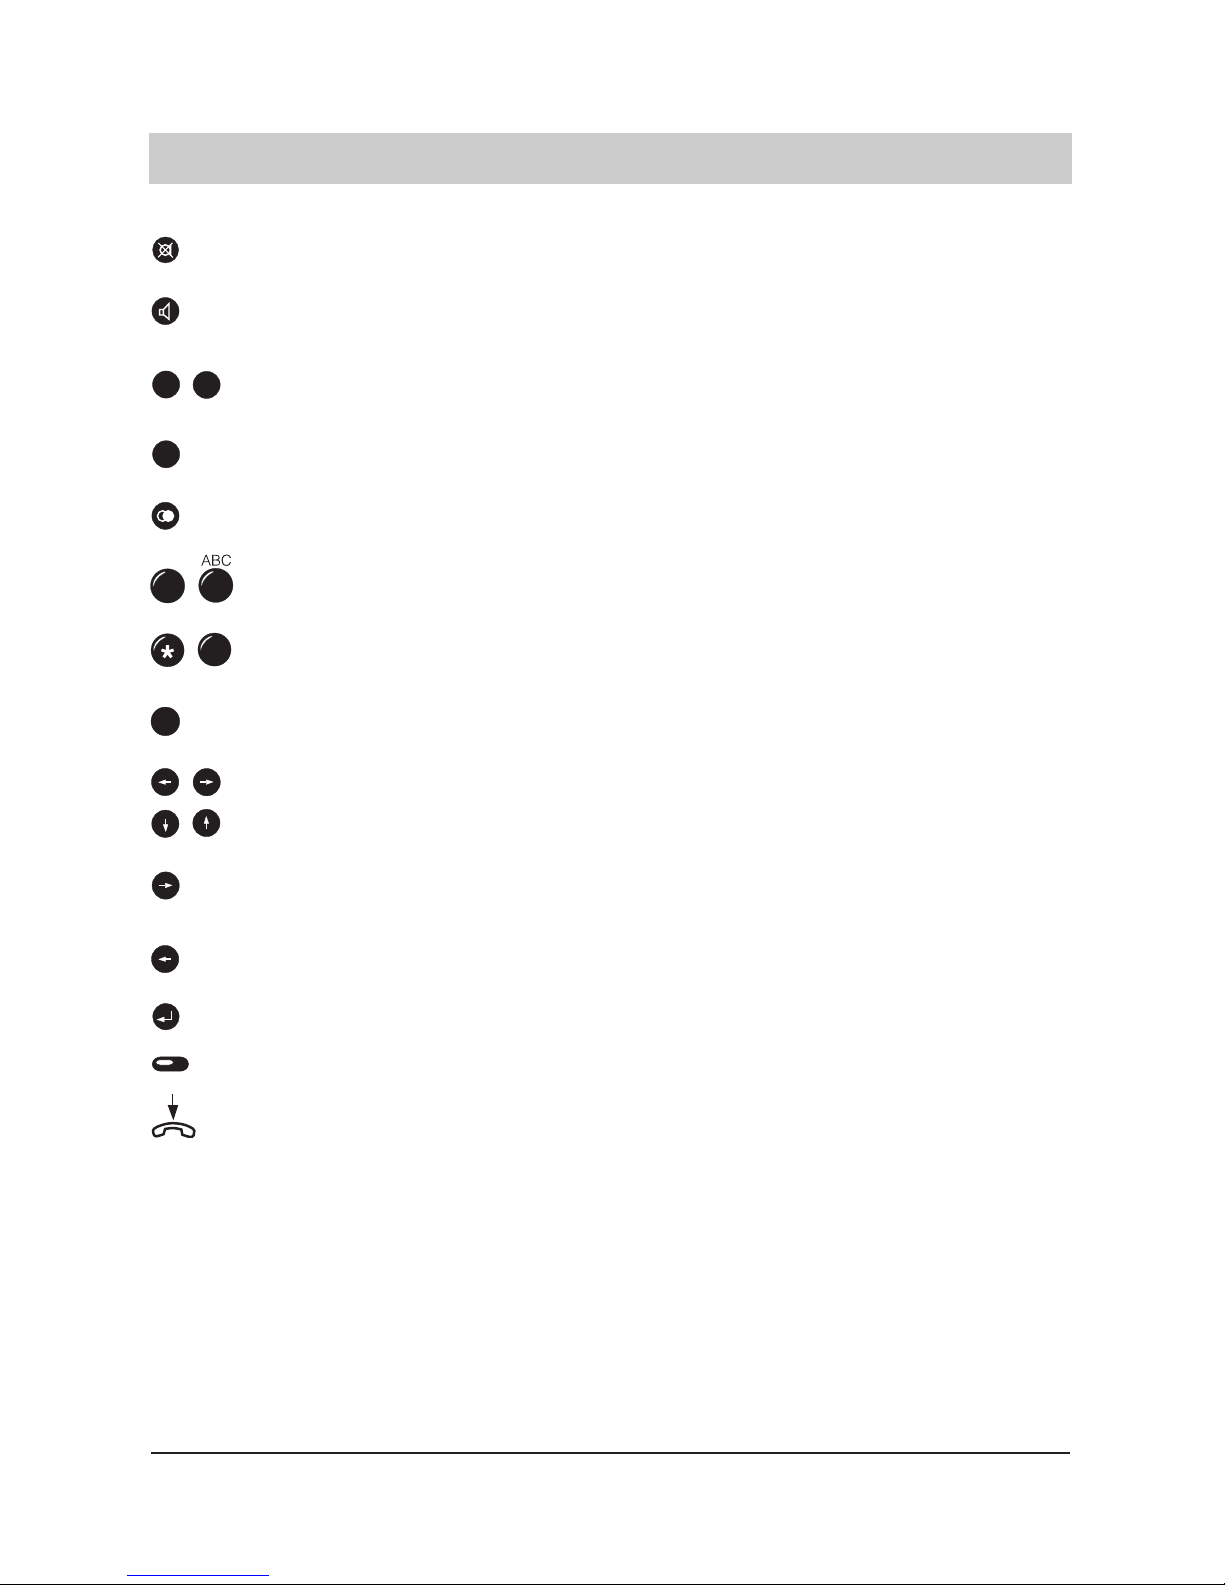
Displays and symbols
The telephone rings.
Pick-up the handset.
Replace the handset.
Use the arrow buttons to scroll, branch and select entries.
An important remark or hint.
This function is only available when batteries are inserted.
Speed dialling station.
Hands-free mode/loudspeaker on.
Low battery capacity / batteries discharged.
New entry in the call list.
Displays
Applied symbols
!
Page 8
8
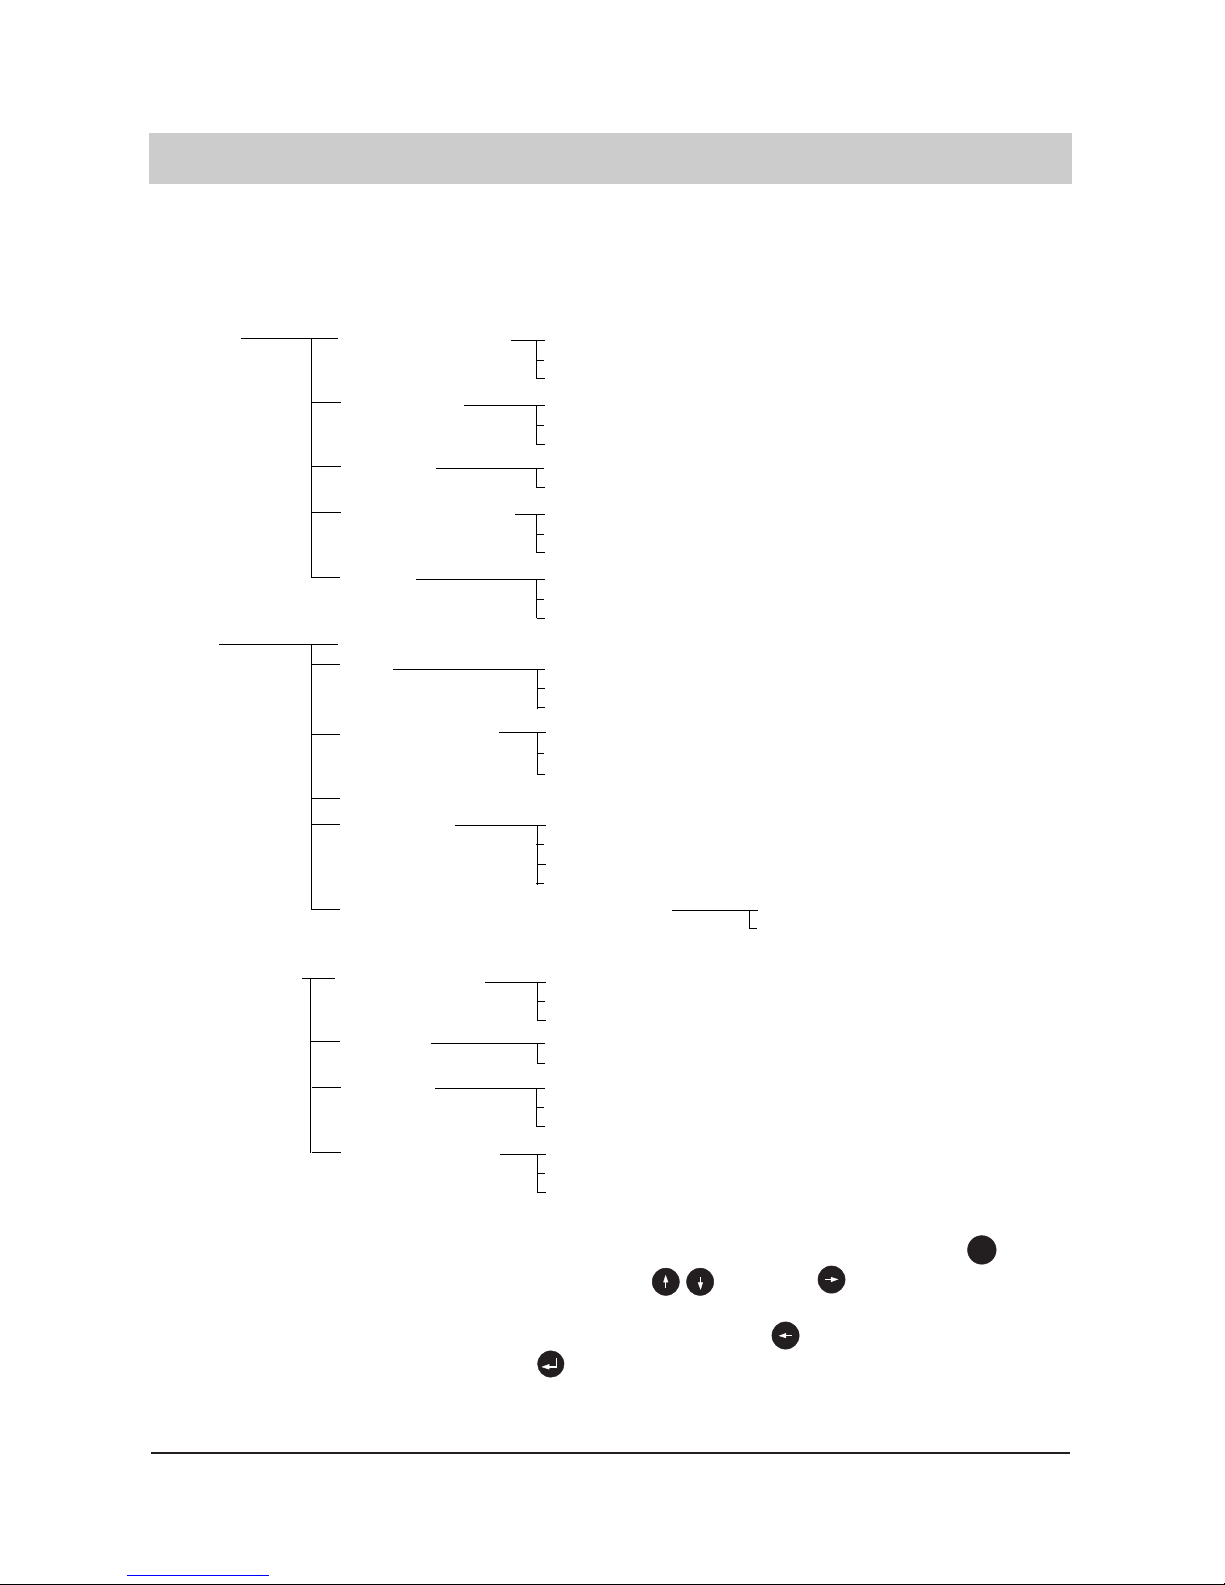
Information on operation and programming
All adjustable functions are accessible via menus. Hereinafter, please find an overview on the
different menu levels:
1st level 2nd level 3rd level 4th level
Main menu Telephone directory New entry
Change entry
Delete entry
Appointments New entry
Change entry
Delete entry
Direct call Direct call number
Direct call
Blocked numbers list New entry
Change entry
Delete entry
VIP list New entry
Change entry
Delete entry
Settings Date + time
PIN Ringing tone
Ringer melody
Volume
Auto ringer control Loudspeaker volume
Dialling mode
Tone / flash
Tone / hook-flash
Pulse / earth Tone / earth
PABX operation
CO line access
CO line code
Main PABX access number Dialling pause
Factory pre-set
Call blocking/charge Blocked dialling No call blocking
Blocked numbers
Compl. call blocking
Charges Charge factor
Charge total delete
Accounts New entry
Change entry
Delete entry
Blocked numbers New entry
Change entry
Delete entry
You can access the programming menu by picking up the handset and pressing the button.
You can scroll all levels by using the arrow buttons . Use the button to select a specific menu or a function to be changed.
You can go one level higher (without storing your entry) by the button. A change or a new
entry can be saved by the enter button .
If you do not press any button for 40 seconds, the device automatically resumes the main menu.
P
Page 9
9
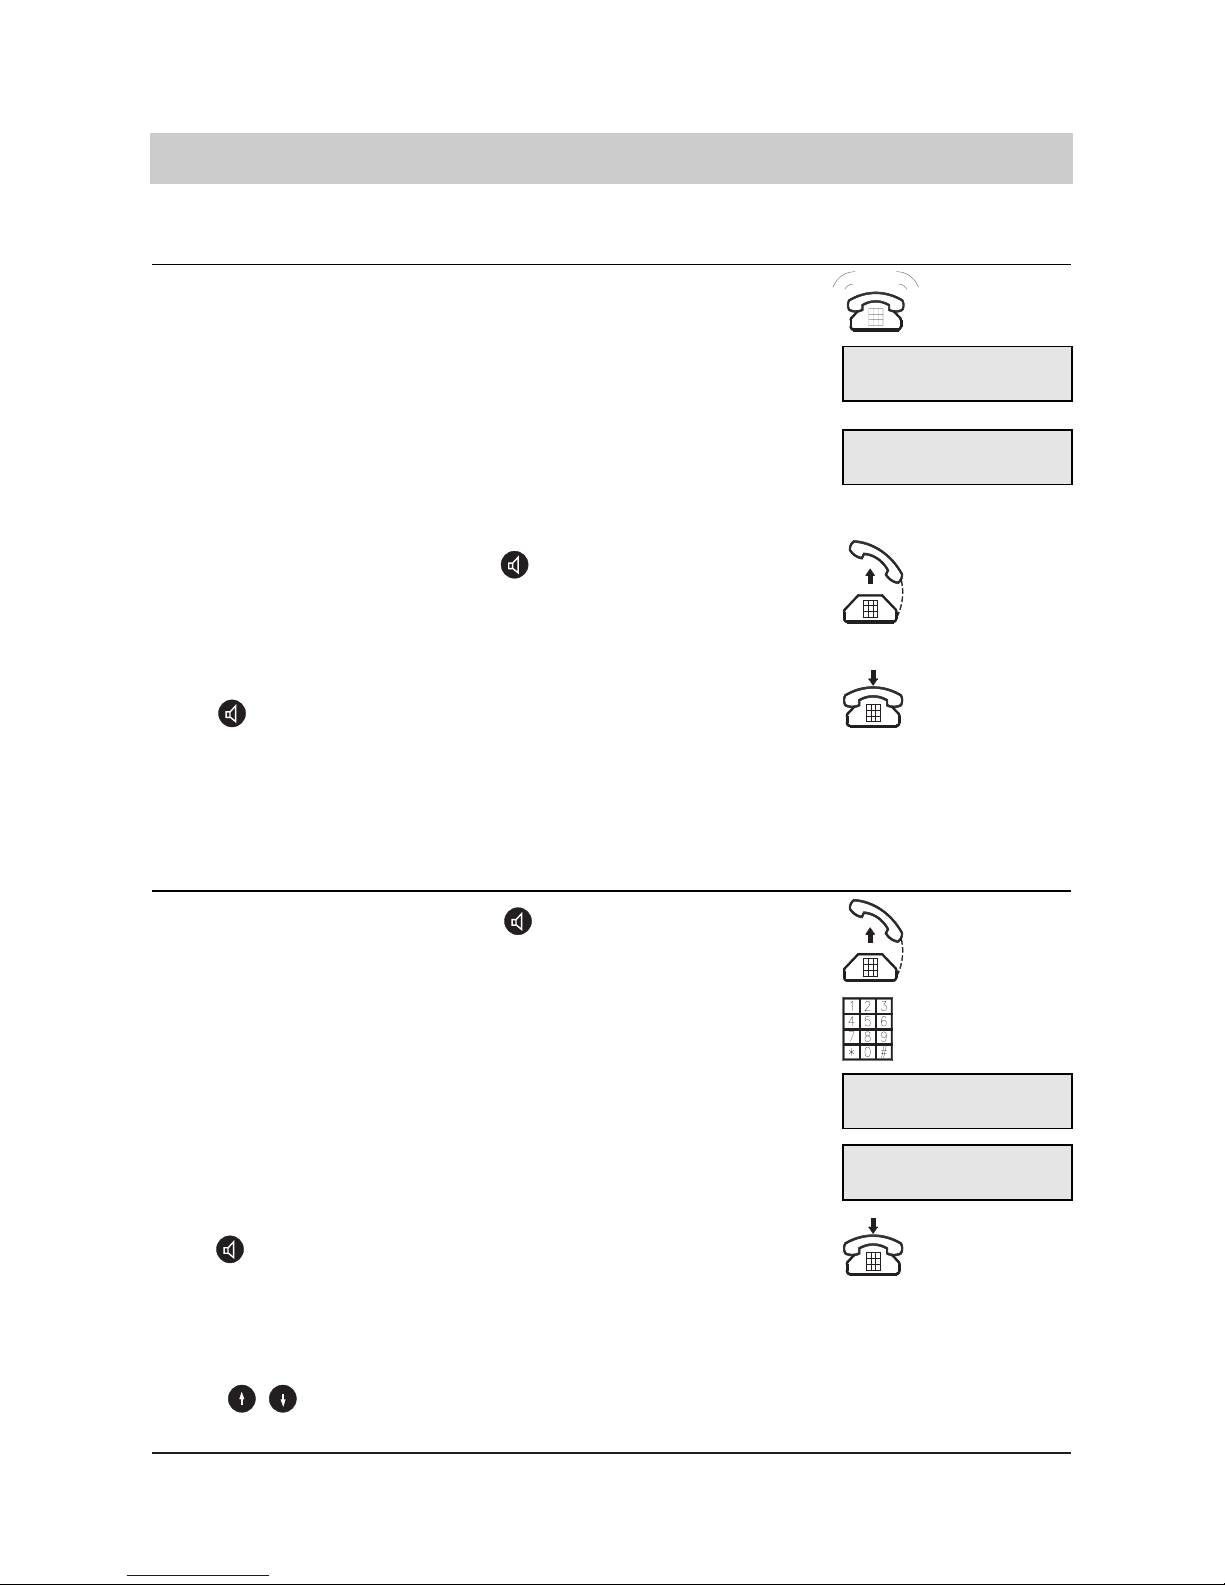
Telephone calls
1. Your telephone rings.
2. The display shows "Inc. Call".
3. The calling subscriber's telephone number is displayed if the func-
tion CLIP is active. If the calling subscriber's number is stored in
your telephone directory, the corresponding name will be displayed directly.
4. Pick-up the handset or press the button.
5. You can hold the conversation.
6. After having ended the conversation, replace the handset or press
the button again.
1. Pick-up the handset or press the button.
2. Dial the target telephone number via the numeric keypad.
3. The telephone number is shown in the display. The device starts
dialling.
4. After dialling, the duration of the call is displayed.
5. After having ended the conversation, replace the handset or press
the button again.
Answering a call
Remark:
If you receive a charge pulse by your telecommunications network provider, the current charges
are also displayed. You have the choice between three different displays which can be selected
via the buttons: date and time / charges / call duration.
Manual dialling
10-10-98 9:45
Inc. call
10-10-98 9:45
02114567
11-10-98 11:35
0211234567
0:00:08
0211234567
!
Remark:
The calling line identification presentation (CLIP) is a feature provided by your local telecommunications network operator and possibly has to be applied for and released.
!
Page 10
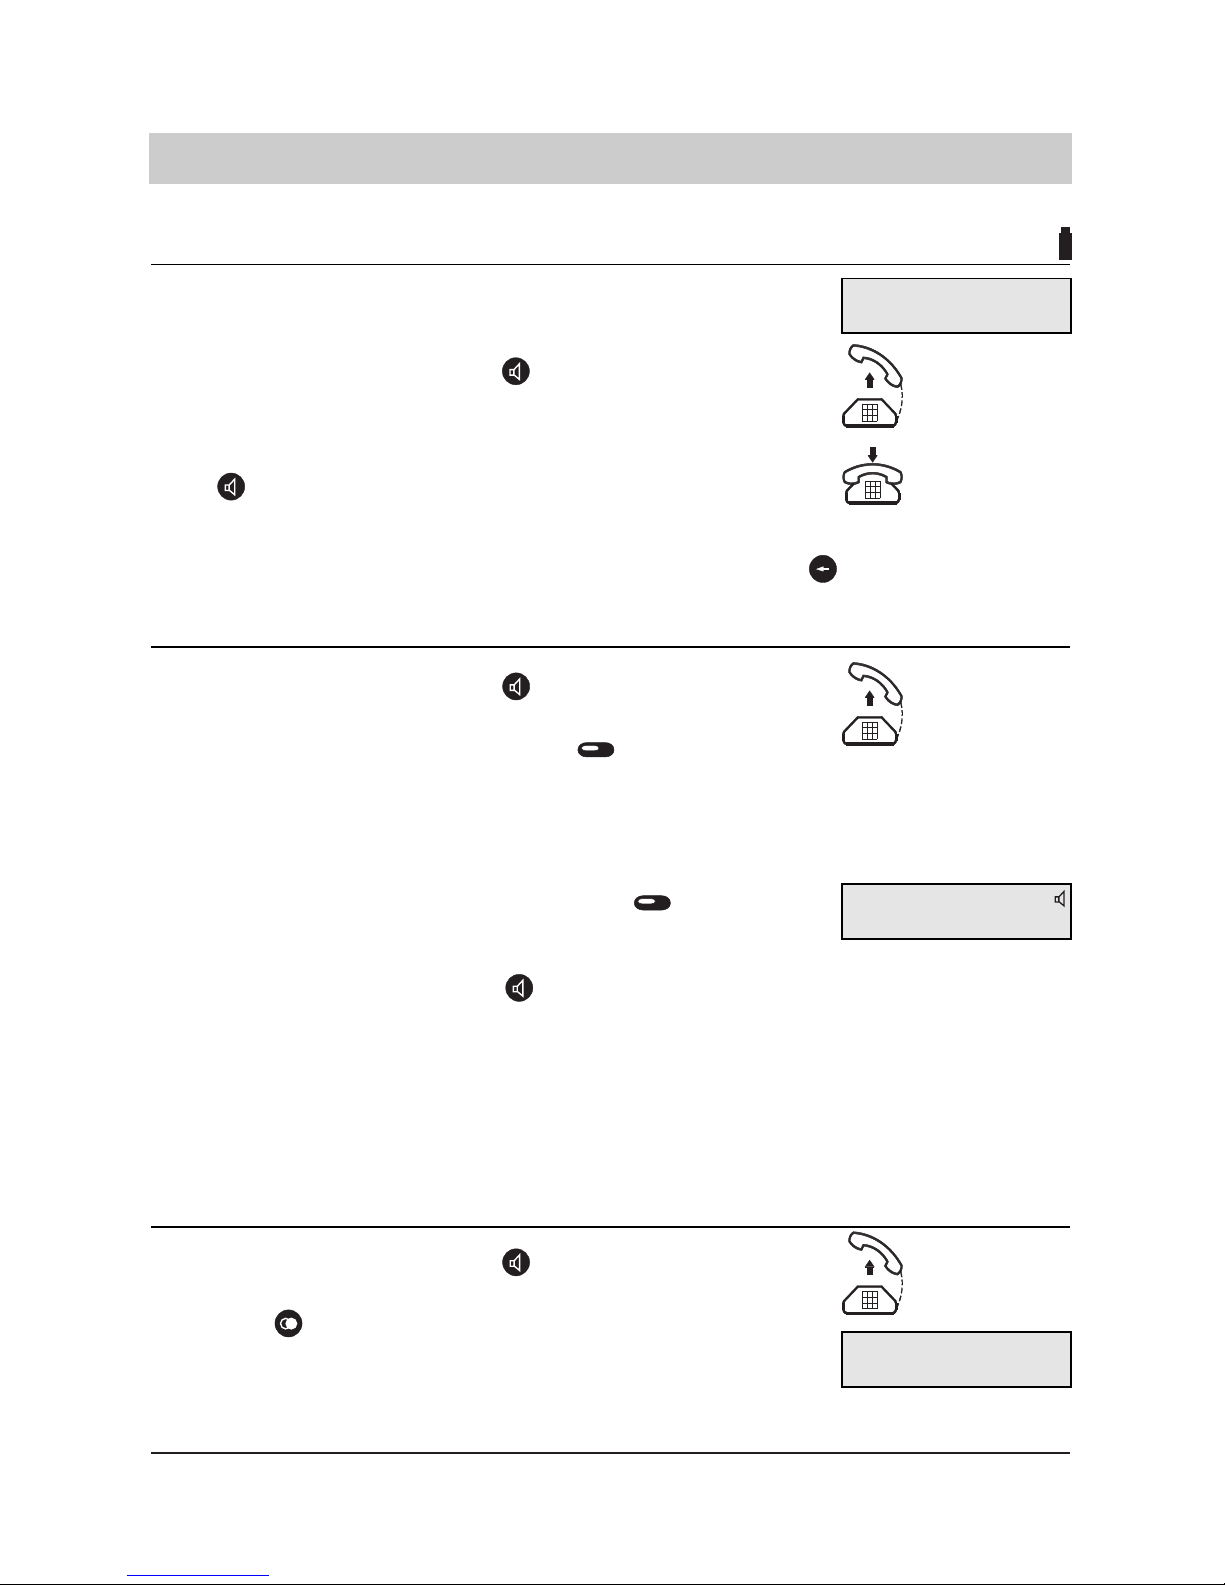
1. Pick-up the handset or press the button.
2. Press the button. The telephone number called last will be dial-
led.
10
Telephone calls
Remark:
If you entered a wrong number, you can delete this by pressing the button.
1. First, dial the complete telephone number.
2. Pick up the handset or press the button. The entered telepho-
ne number is dialled.
3. After having ended the conversation, replace the handset or press
the button again.
1. Pick-up the handset or press the button.
2. Press the desired speed dialling station . The selected tele-
phone number is displayed and will be dialled.
or
1. Press the corresponding speed dialling station . The selected
telephone number is displayed.
2. Pick up the handset or press the button. The telephone num-
ber is dialled.
Dialling with off-line call preparation
Dialling via speed dialling stations
Redialling
14-12-98 8:30
0211234567
11-11-98 14:50
0211234567
11-11-98 14:52
0211234567
!
See also chapter "Storing telephone numbers for speed dialling stations".
Page 11
1. Press .
2. Press .
3. Replace the handset.
11
Telephone calls
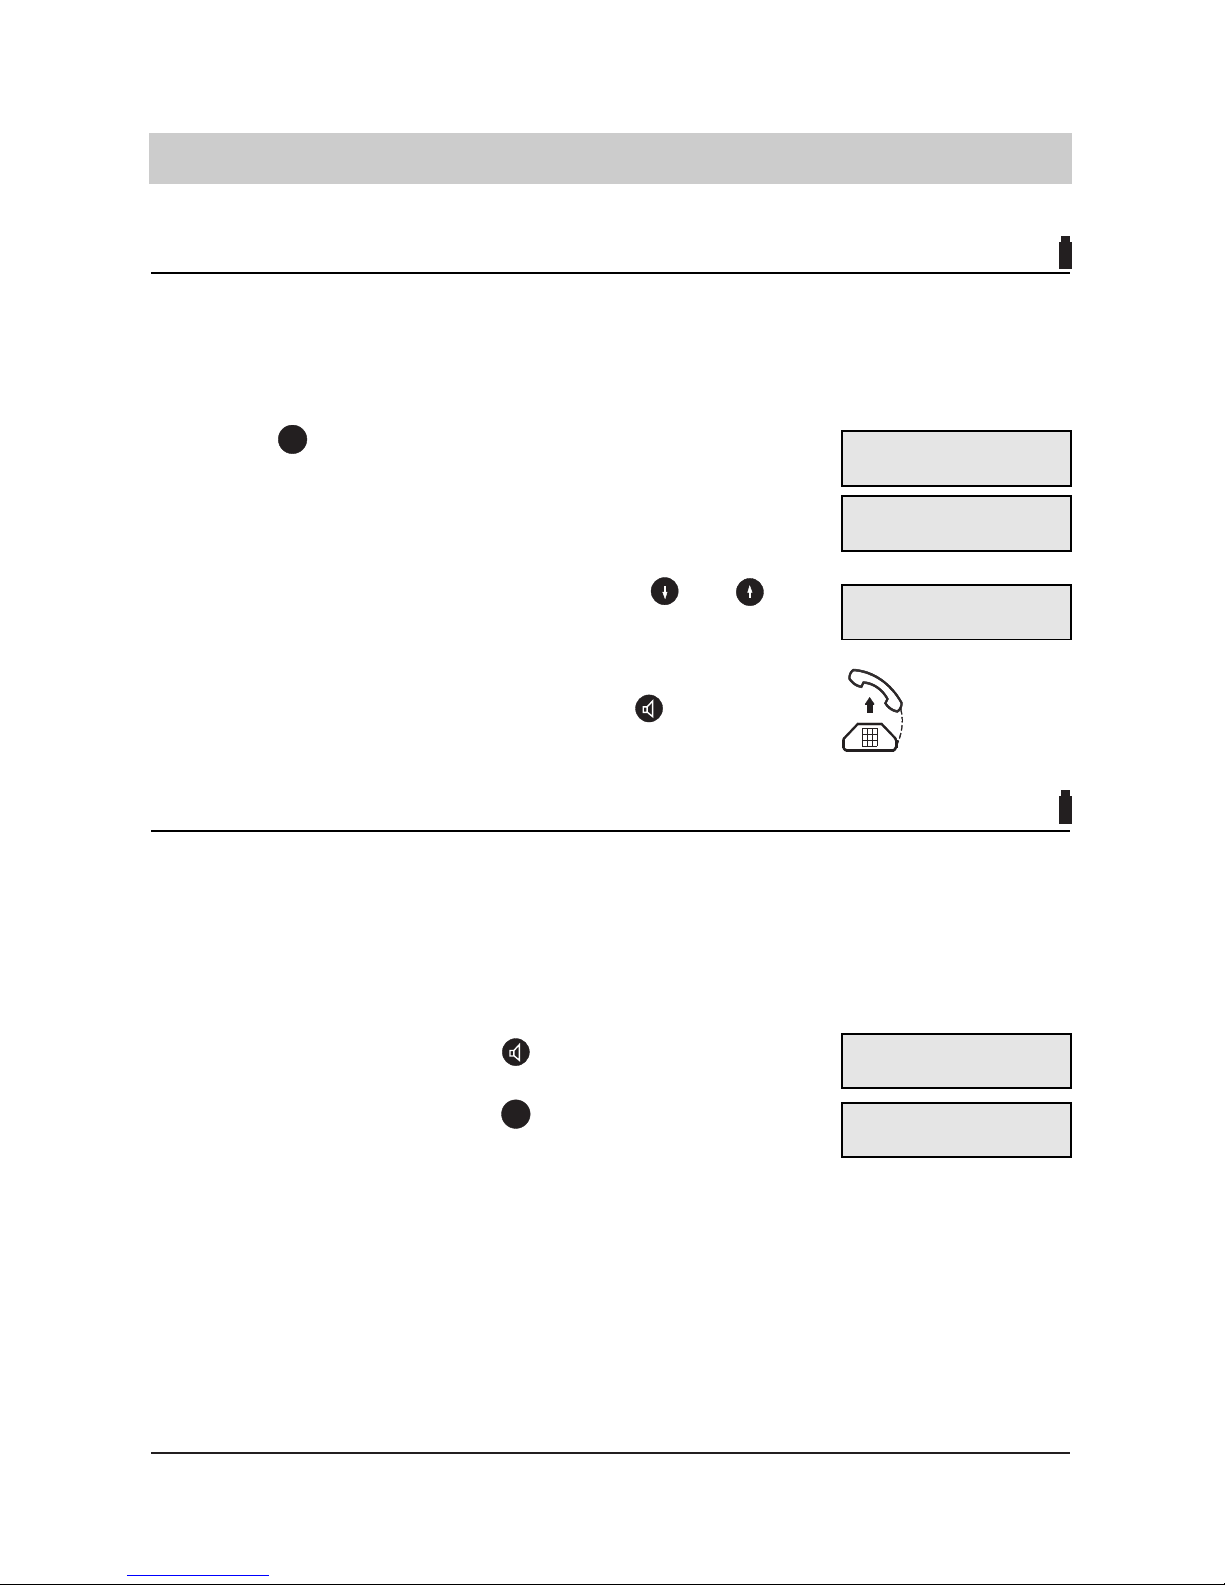
1. Press the button. The last called telephone number is display-
ed.
2. Use the buttons to scroll the redialling memory and to sel-
ect one of the last 4 dialled telephone numbers.
3. The selected telephone number is dialled when you pick-up the
handset or press the button.
Extended redialling
Your tiptel 172 provides an "extended redialling" function, i. e. it is not only possible to dial the
telephone number called last but you can select one of the last four telephone numbers called.
Automatic redialling
If you call a subscriber whose line is busy, your tiptel 172 allows an automatic redialling process
for the subscriber number in question.
Start automatic redialling:
You have dialled the target telephone number and the subscriber is busy:
The device makes a dialling pause for about 1 minute and will repeat the dialling process up to
10 times.
When the called party answers the call:
1. Pick-up the handset or press the button for a
hands-free operation.
Stop automatic redialling:
Press any button when the device is in the idle state. The automatic redialling is terminated. The
automatic redialling is stopped automatically if no connection was established after having redialled the corresponding telephone number 10 times.
03-05-98 16:30
0211234567
main menu
redialing active
03-05-98 16:30
00091352
P
Page 12
12
12-02-98 13:04
0123456
Telephone calls
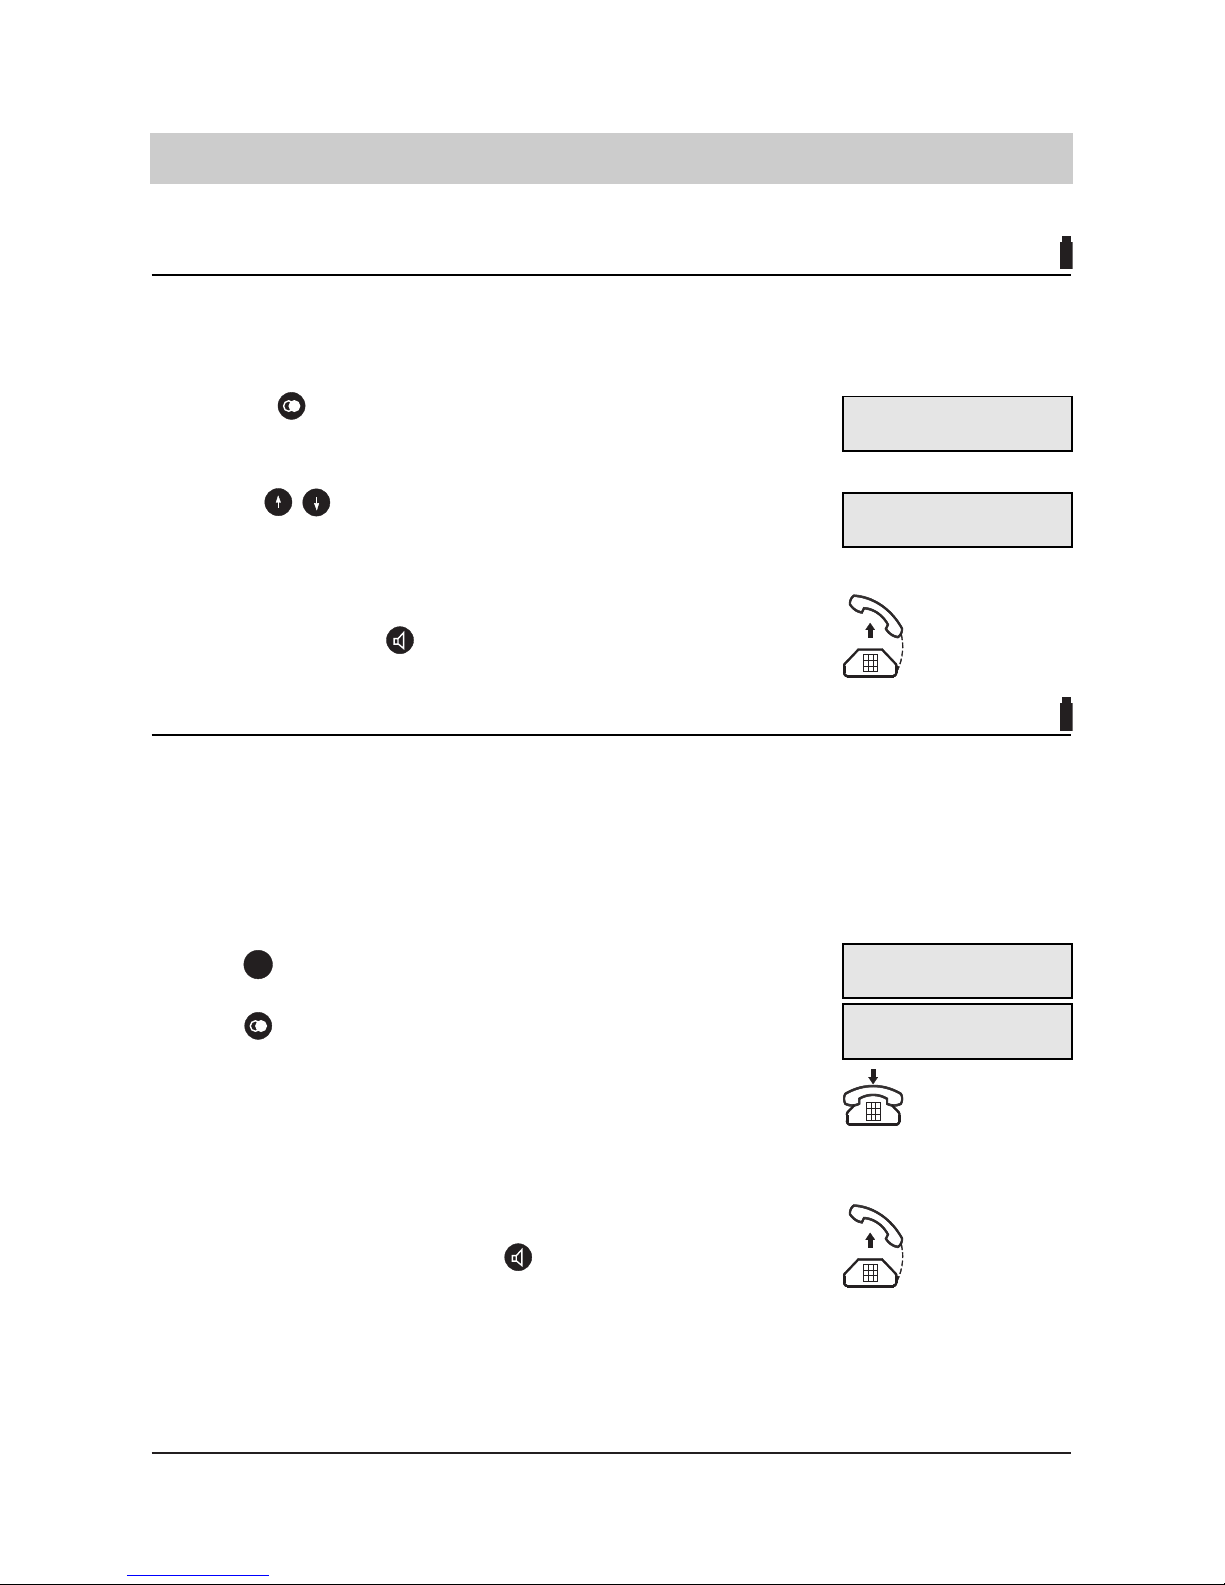
1. Press the button while the handset is on hook.
2. Enter the initial letter of the searched name (e. g. press the nume-
ric button "3" two times to enter a name beginning with "E").
3. You can scroll the telephone directory using the and until
you find the desired entry.
4. The telephone number referring to the selected name will be dial-
led when you pick-up the handset or press the button.
1. Pick-up the handset or press the button.
2. Press any button (except for the button). The direct call num-
ber is displayed and dialled.
Direct call
The direct call function allows you to dial a specific stored telephone number by just pressing any
button. Frequently, the direct call is also called "baby call". The child at home can call the parents
when the telephone number where those currently are is stored as direct call number by just
pressing any button. Please see chapter "Storing and activating direct call numbers" for a
description on how to store the direct call number.
Dialling from the electronic telephone directory
Your tiptel 172 provides an integrated telephone directory for the storage of 100 names and related telephone numbers. The telephone directory is sorted in alphabetical order so that it will be
easy to find the desired name entry. Please read chapter "Electronic telephone directory" and
"Important information" for a description about how to store telephone numbers and names in
the electronic telephone directory.
look for … E
select name
Emily
0815
direct call active
P
P
Page 13

Remark:
The display shows the symbol every time when a new entry was registered in the call list.
After accessing the call list, this symbol is no longer displayed.
1. Access the call list by pressing the button "Call list" (= last
speed dialling station).
2. You can scroll the entries by the buttons and select the cor-
responding telephone number by pressing the button.
3. Press the button or pick-up the handset. The telephone num-
ber is dialled.
13
1. Press the button. The LED is lit and the handset microphone
is switched off. You can make your enquiry in the room.
2. Press the button again. The LED is no longer lit and the micro-
phone is switched on again. You can resume the telephone conversation.
Telephone calls
18-12-98 13:20
09871234
Dialling from the call list
The 10 last incoming calls and the time of the specific call are stored in the call list on the condition that the calling line was presented.
This is a feature provided by your telecommunications network operator which has to be
applied for and released.
Mute function
When holding a telephone conversation, you can make a confidential enquiry in the room which
cannot be heard by your telephone partner.
!
Page 14

14
Telephone calls
Loudspeaker / hands-free operation
When holding a telephone conversation, you can activate the loudspeaker so that people present in the room can listen to the conversation.
1. Press the button. The loudspeaker symbol is displayed and the
loudspeaker turns on.
2. You can adjust the volume by pressing the or button.
3. The loudspeaker can be deactivated by pressing the button
again.
Remark:
The volume adjustment made during the call is not stored. If you want to adjust the volume permanently, you can do this via the programming menu (see chapter "Settings").
handset volume 2
handset volume 1
12-12-98 7:45
loudspeaker volume 4
!
+
-
Handset volume
During a telephone conversation, you can increase the handset volume by two levels.
1. Press the button. The volume is increased by one levels.
2. Press the button. The volume is decreased by one level.
3. Having replaced the handset, the volume from the factory pre-set
is resumed (level 1).
+
-
Page 15

15
Telephone calls
b) You make an outgoing call
1. Dial the desired telephone number, press a speed dialling station
or start the dialling procedure via a telephone directory entry.
2. Press the button. The hands-free mode is activated and the
telephone number is dialled.
3. If you press the button again, the hands-free mode is deac-
tivated and the line is disconnected.
Switching between handset and loudspeaker
You are holding a telephone conversation and want to switch from the handset to the hands-free
mode.
1. Press the button and keep it pressed while replacing the hand-
set.
2. Release the button. The hands-free symbol is displayed and
the hands-free mode is activated.
3. You can adjust the volume by pressing the or button.
4. When you want to resume the handset operation, just pick-up the
handset to deactivate the hands-free mode.
a) You receive an incoming call
1. Press the button to activate the hands-fee mode.
2. You can adjust the volume by pressing the or button.
3. If you press the button again, the hands-free mode is deac-
tivated and the line is disconnected.
In addition to the loudspeaker, the hands-free mode allows you to hold a telephone conversation while the handset is on-hook.
13-10-98 11:36
13-10-98 11:36
Inc. call
13-10-98 11:37
loudspeaker volume 4
13-10-98 11:39
0987654
14-10-98 10:18
098612345
14-10-98 10:18
loudspeaker volume 5
+
-
+
-
Page 16

16
Telephone directory
Store telephone numbers for speed dialling stations
Your tiptel 172 provides 13 speed dialling stations which can be programmed individually. These
serve to store frequently used telephone numbers.
1. Pick-up the handset and press the button.
2. Press the desired speed dialling station (except for the last one
which is reserved for the call list). If a number has been assigned
before, you will now have it displayed.
3. Enter the desired telephone number via the numeric keypad. If you
made a wrong entry, you can use the button to delete it.
If you want to change an existing entry:
Delete the currently stored telephone number gradually by the
button and enter the new telephone number.
If you want to delete an existing entry:
Delete the currently stored telephone number gradually by the
button until the entire number is removed.
4. Press the button. The entry is stored.
5. Now, you can store further telephone numbers (repeat the process
as of point 2) or stop the process by replacing the handset.
memory key 3
_
memory key 3
01234
main menu
entry stored
P
Page 17

17
Remark:
If the telephone is operated within a PABX and thus a code number has to be dialled for the
access to the public exchange (e. g. "0"), this code number has to be entered even here.
Telephone directory
New entries
Your tiptel 172 provides an alphabetical telephone directory for the storage of 100 names and
telephone numbers.
In order to make a new entry, proceed as follows:
1. Pick-up the handset and press the button.
2. Select the main menu by the button.
3. Select the telephone directory by the button.
4. Select "new entry" by the button.
5. Enter the desired name via the numeric keypad (see chapter
"Remarks - how to enter a name").
6. Press the button and enter the telephone number via the nume-
ric keypad.
7. Pressing the button will store the name and the telephone num-
ber in the telephone directory.
main menu
telephone directory
telephone directory
new entry
telephone directory
entry stored
!
P
Change entries
1. Pick-up the handset and press the button.
2. Select the main menu by the button.
3. Select the telephone directory by the button.
4. Scroll the options using the and buttons and select "chan-
ge entry" by the button.
main menu
telephone directory
telephone directory
change entry
P
enter number
_
enter name
_
Page 18

18
5. Enter the initial letter of the searched name. The device will now
look for all entries with this initial which can be scrolled by the
buttons.
6. Select the desired name by the button. Pressing the button
will delete the stored name - letter by letter. When the name entry
was corrected, you may change the relating telephone number
after pressing the button.
7. Press the button to save the changed name and telephone
number in the telephone directory.
1. Pick-up the handset and press the button.
2. Select the main menu by the button.
3. Select the telephone directory by the button.
4. Scroll the options using the and buttons and select "delete
entry" by the button.
5. Enter the initial letter of the searched name. The device will now
look for all entries with this initial which can then be scrolled by the
buttons.
6. If you found the specific entry, just press to delete it.
Delete entries
main menu
telephone directory
telephone directory
delete entry
Albert
0732198765
telephone directory
entry deleted
P
Telephone directory
seach entry
look for ... A
Albert
0732198765
telephone directory
entry changed
Page 19

19
Appointments
main menu
appointments
appointments
new entry
appointments
entry stored
New appointments
The device can manage 10 different one-time or daily (recurring) appointments. A signal tone at
the corresponding time serves as a reminder for the entered appointment.
1. Pick-up the handset and press the button.
2. Select the main menu by the button.
3. Scroll the options using the and buttons and select "appoint-
ments" by the button.
4. Select "new entry" via the button.
5. Enter the desired date and time of the appointment and for the
reminder. You can mark a one-time appointment (E) or a daily
(recurring) appointment via the buttons.
6. The appointment is stored when pressing the button.
P
appointments
25-01-99 05:20 E
Change appointment
1. Pick-up the handset and press the button.
2. Select the main menu by the button.
3. Scroll the options using the and buttons and select "appoint-
ments" by the button.
4. Scroll the options using the and button and select "change
entry" via the button.
5. You can scroll through all existing appointments by the and
buttons. When the appointment to be changed is displayed,
you can select it by the button.
main menu
appointments
appointments
change entry
change entry
25-01-99 05:20 E
P
Page 20

20
1. Pick-up the handset and press the button.
2. Select the main menu by the button.
3. Scroll the options using the and buttons and select "appoint-
ments" by the button.
4. Scroll the options using the and button and select "delete
entry" via the button.
5. You can view all existing appointments by using the and
buttons. When the corresponding appointment is displayed,
you can delete it by the button.
Delete appointment
appointments
delete entry
appointments
16-12-98 7:30 E
appointments
entry deleted
main menu
appointments
P
Appointments
6. Correct the date and time.
7. The changed appointment is stored when pressing the button.
appointments
entry changed
appointments
19-12-98 10:45 E
Acoustic reminder for appointments
You will hear several signal tones at the time of the appointment in order to remind you.
Page 21

21
Direct, VIP and blocked calls
main menu
direct call
direct call number
098765
1. Pick-up the handset and press the button.
2. Select the main menu by the button.
3. Scroll the options using the and buttons and select "direct
call" by the button.
4. Enter the direct call number.
If you want to activate the direct call immediately:
5. Press the button. The direct call umber is stored and the direct
call will become active.
If you do not want to activate the direct call yet:
6. Press the button.
7. Press the button. The direct call umber is stored and the direct
call will not become active yet.
Store and activate direct call numbers
P
Remark:
When the direct call function is active, telephone calls can only be made to the stored direct call
number as the direct call will always be executed when pressing any button. Nevertheless, you
can receive incoming calls during the active direct call function.
direct call
direct call off
!
Page 22

22
Change entries in the VIP list
1. Pick-up the handset and press the button.
2. Select the main menu by the button.
3. Scroll the options using the and buttons and select "VIP
list" by the button.
4. Scroll the options using the and buttons and select "chan-
ge entry" via the button.
5. You can use the buttons to view all existing entries. When
you positioned on the entry to be changed, select it by pressing the
button.
6. Correct the entry.
7. Pressing the button will save the changed entry.
main menu
VIP-list
VIP-list
change entry
change entry
07110000
VIP-list
entry changed
enter telephone number
07114567
P
8. Pick-up the handset and press the button.
9. Select the main menu by the button.
10. Scroll the options using the and buttons and select "VIP
list" by the button.
11. Select "new entry" via the button.
12. Enter the telephone number via the numeric keypad and confirm
your entry by the button.
Store entries in the VIP list
In the VIP list, you can store telephone numbers of preferred callers. Whenever a person having
an entry in your VIP list calls you, this will be indicated by a special ringing tone. In this way, you
can always distinguish VIP callers from normal calls. The prerequisite for the VIP list function is
that the caller's telephone number is presented via CLIP.
Direct, VIP and blocked calls
enter telephone number
_
main menu
VIP-list
VIP-list
new entry
P
Page 23

23
VIP-list
entry deleted
Direct, VIP and blocked calls
main menu
VIP-list
VIP-list
delete entry
delete entry
0234565789
1. Pick-up the handset and press the button.
2. Select the main menu by the button.
3. Scroll the options using the and buttons and select "VIP
list" by the button.
4. Scroll the options using the and buttons and select "delete
entry" via the button.
5. You can use the buttons to view all existing entries.
6. When you have positioned on the entry in question, press the
button to delete it.
Delete entries in the VIP list
P
Store entries in the blocked numbers list
When you do not wish to receive incoming calls by a specific party, you can store this party's
telephone number in the blocked numbers list. As a result, the telephone will not ring in the case
of an incoming call by this telephone number. The prerequisite for the blocked number function
is that the caller's telephone number is presented via CLIP.
1. Pick-up the handset and press the button.
2. Select the main menu by the button.
3. Scroll the options using the and buttons and select "blocked
numbers list" by the button.
4. Select "new entry" via the button.
5. Enter the corresponding telephone number via the numeric keypad
and confirm your entry by pressing the button.
main menu
blocked numbers list
blocked numbers list
new entry
P
enter number
_
Page 24

24
1. Pick-up the handset and press the button.
2. Select the main menu by the button.
3. Scroll the options using the and buttons and select "blocked
numbers list" by the button.
4. Scroll the options using the and buttons and select "delete
entry" by the button.
5. You can view all existing entries using the buttons.
6. When you found the desired entry, you can delete it by pressing the
button.
Delete entries in the blocked numbers list
main menu
blocked numbers list
delete entry
blocked numbers list
delete entry
0211456789
blocked numbers list
entry deleted
P
Change entries in the blocked numbers list
Direct, VIP and blocked calls
main menu
change entry
0567890
1. Pick-up the handset and press the button.
2. Select the main menu by the button.
3. Scroll the options using the and buttons and select "blocked
numbers list" by the button.
4. Scroll the options using the and buttons and select "chan-
ge entry" by the button.
5. You can view all existing entries using the buttons. When
you found the entry to be changed, select it by the button.
6. Correct the desired entry.
7. The correction will be stored when you press the button.
P
blocked numbers list
change entry
blocked numbers list
entry changed
blocked numbers list
enter number
0711 _
Page 25

25
Call blocking
Change blocked numbers
1. Pick-up the handset and press the button.
2. Scroll the options using the and buttons and select "call
blocking/charge" by the button.
3. Scroll the options using the and buttons and select "blocked
numbers" by the button.
4. Scroll the options using the and buttons and select "chan-
ge entry" via the button.
5. You can view all existing entries by the buttons.
6. When you have found the desired entry, select it by the button.
7. Correct the entry and save it by pressing the button again.
blocked numbers
change entry
call blocking / charge
blocked numbers
enter number
07114567
blocked numbers
entry changed
change entry
0180
P
1. Pick-up the handset and press the button.
2. Scroll the options using the and buttons and select "call
blocking/charge" by the button.
3. Scroll the options using the and buttons and select "blocked
numbers" by the button.
4. Select "new entry" via the button.
5. Enter the telephone number to be blocked via the numeric keypad
and confirm your entry by pressing the button.
R, *, # must not be entered
Store blocked numbers
If you want to prevent that specific telephone numbers or area codes can be dialled, you can do
this via the call blocking function of your tiptel 172. Having stored the numbers in question, you
have to activate the "call blocking" function.
enter number
_
blocked numbers
new entry
call blocking / charge
blocked numbers
P
!
Page 26

26
1. Pick-up the handset and press the button.
2. Scroll the options using the and buttons and select "call
blocking/charge" by the button.
3. Select "blocked dialling" via the button.
4. Scroll the options and select the desired blocked dialling type.
5. Pressing the button will activate the selection.
1. Pick-up the handset and press the button.
2. Scroll the options using the and buttons and select "call
blocking/charge" by the button.
3. Scroll the options using the and buttons and select "blocked
numbers" by the button.
4. Scroll the options using the and buttons and select "delete
entry" via the button.
5. You can view all existing entries by the buttons.
6. When you have found the desired entry, you can delete it by pres-
sing .
Activate blocked dialling
Your tiptel 172 provides different blocked dialling types in order to prevent unauthorised calls:
- The "complete call blocking" will block all outgoing calls.
- Blocking via "blocked numbers". All telephone numbers entered in the blocked numbers list can
no longer be dialled.
- The parameter "no call blocking" removes all call blockings (factory pre-set).
The "blocked dialling" always refers to outgoing calls. Incoming calls can always be received.
The function "direct dialling" and dialling the emergency telephone number 999 remain possible
even if the call blockings are active.
Call blocking
Delete blocked numbers
P
P
call blocking / charge
blocked dialing
blocked dialing
compl. call blocking
blocked dialing
call blocking active
Select blocked dialling type
blocked numbers
delete entry
call blocking / charge
blocked numbers
blocked numbers
entry deleted
delete entry
0190999
Page 27

27
1. Pick-up the handset and press the button.
2. Scroll the options using the and buttons and select "call
blocking/charge" by the button.
3. Scroll the options using the and buttons and select "charges" via the button.
4. Select "charge total delete" by pressing the button. The current
charge total is displayed. You can delete the entry by pressing the
button. You can retain the accumulated amount by just replacing
the handset.
View and delete accumulated charges
Accumulated charges can be viewed, e. g. in order to compare those to your invoice and deleted.
Charges
Program charge factor
If you want to view and accumulate the incurring charges for outgoing calls, you have to ask for
a charge pulse transfer at your local telecommunications network provider and store this factor
per unit in your tiptel 172.
1. Pick-up the handset and press the button.
2. Scroll the options using the and buttons and select "call
blocking/charge" by the button.
3. Scroll the options using the and buttons and select "charges" via the button.
4. Now, you can enter the charge factor via the numeric keypad and
save the entry by pressing the button.
Remark:
If you use another network provider e. g. for trunk calls, this may affect the correctness of the
accumulated charges as other network providers may have a different charge structure.
call blocking / charge
call blocking / charge
charges
charges
charge factor
0,165
!
P
P
charge total delete
986,00
Page 28

28
1. Pick-up the handset and press the button.
2. Scroll the options using the and buttons and select "call
blocking/charge" by the button.
3. Scroll the options using the and buttons and select "accounts"
via the button.
4. Select "new entry" by pressing the button.
5. Enter the desired PIN. The PIN must have 3 digits and shall not
begin with "9" so that it remains possible to dial an emergency
number.
6. You can save the PIN by pressing .
Charges
Set up an account
Your tiptel 172 provides the option to set up three different accounts e. g. in order to control the
telephone charges for different people separately.
An individual PIN is assigned to each account. An outgoing call to be charged to a specific
account can only be made after entering the correct PIN.
call blocking / charge
accounts
new entry
accounts
entry stored
account 1
PIN_ _ _ GBP 0.00
accounts
P
Change/reset account
1. Pick-up the handset and press the button.
2. Scroll the options using the and buttons and select "call
blocking/charge" by the button.
3. Scroll the options using the and buttons and select "accounts"
via the button.
4. Scroll the options using the and buttons and select "change entry" via the button.
5. View the existing accounts using the and buttons. When
you select the desired account by the button, the total charges
will be deleted.
call blocking / charge
accounts
change entry
account 2
PIN 456 GBP 12.60
accounts
P
Page 29

29
6. If desired, you can also change the PIN.
7. The changes are stored when pressing the button.
account 2
PIN 456 GBP 0.00
Charges
Delete account
1. Pick-up the handset and press the button.
2. Scroll the options using the and buttons and select "call
blocking/charge" by the button.
3. Scroll the options using the and buttons and select "accounts"
via the button.
4. Scroll the options using the and buttons and select "delete
entry" via the button.
5. View the existing accounts using the and buttons and delete the desired account by pressing the button.
call blocking / charge
accounts
delete entry
account 1
PIN 234 GBP 12.00
accounts
P
Page 30

30
Dialling mode/signal key function
1. Pick-up the handset and press the button.
2. Press the button and select "settings" via the button.
3. Scroll the options by the and buttons and select "dialling
mode" via the button.
4. Four combinations which can be scrolled by the and button are at choice:
pulse / earth
tone / earth
tone / flash
tone / hook-flash
5. Select the desired combination by pressing the button in order
to activate the corresponding dialling mode.
Settings
1. Pick-up the handset and press the button.
2. Press the button and select "settings" via the button.
3. Select "date + time" by the button.
4. Now, you can enter the actual date and time via the numeric keypad. You can make out the current position by the blinking cursor.
5. The new data are stored when pressing the button.
Time / date
Every time you pick up the handset or receive an incoming call, the time and date are displayed.
settings
date + time
dialing mode
settings
dialing mode
tone / flash
tone / flash stored!
date + time
01-01-00 00:00
P
P
Page 31

31
Dialling pause
1. Pick-up the handset and press the button.
2. Press the button and select "settings" via the button.
3. Scroll the options by the and buttons and select "PABX operation" via the button.
4. Press the button and select "dialling pause" via the button.
Enter the desired dialling pause duration.
5. The new dialling pause duration is stored when pressing the
button.
Settings
PABX operation
If you want to operate your tiptel 172 within a PABX, you can enter the CO line access number
under this menu item. The CO line access number is the number to be dialled in order to get
access to the public exchange (normally this is "0"). tiptel 172 will automatically make a pause
between the entry of the CO line access number and the entry of the external telephone number. If you also operate a secondary PABX, you can enter an access number for the main PABX.
1. Pick-up the handset and press the button.
2. Press the button and select "settings" via the button.
3. Scroll the options by the and buttons and select "PABX operation" via the button.
4. Select "CO line access" via the button.
5. Select "CO line code" via the button. Enter the desired number.
Press the button in order to store your entry.
6. If you want to enter an additional code for the main PABX, press
the button and select "main PABX access num" via the button. Enter the desired access number.
7. The main PABX access number is stored when pressing the
button.
PABX operation
settings
settings
dialling pause
dialling pause
3s
CO line access
CO line access
CO line code
main PABX access num
number _ _ _ _
PABX operation
P
P
Page 32

32
Settings
PIN
You can assign a personal identification code in order to protect your telephone against unauthorised use and against accidental changes in the most important settings. This PIN must be
entered at any time, when you want to open a programming menu. If the PIN is "0000" (which is
the factory pre-set) an entry of the PIN is not required.
Your tiptel 172 has an automatic dialling tone identification feature and thus shortens the dialling
pause automatically if no dialling tone is identified.
1. Pick-up the handset and press the button.
2. Press the button and select "settings" via the button.
3. Scroll the options by the and buttons and select "PIN" via
the button.
4. Enter a new, four-digit PIN and press the button.
5. Confirm the new PIN by entering the same code again and pressing .
6. The new PIN is now stored and will be valid immediately.
Ringing tone
With your tiptel 172, you will have 100 different ringing tone variants at choice. In addition, you
can set an incremental volume for the ringing tone. The tone will start at a low volume and becomes louder by every single ringing tone.
1. Pick-up the handset and press the button.
2. Press the button and select "settings" via the button.
3. Scroll the options by the and buttons and select "ringing
tone" via the button.
4. Enter a new, four-digit PIN and press the button.
settings
settings
ringing tone
new PIN
_ _ _ _
confirm PIN
_ _ _ _
PIN
PIN
entry stored
P
P
!
Page 33

33
Settings
Melody
1. Select "ringer melody" by the button.
2. The currently set ringer melody is displayed together with its number and the melody is played back. By entering a two-digit number
combination (00 ... 99), you can select another melody which is
then played back.
3. The new ringer melody can be stored by pressing the button.
As of now, your telephone will ring with the selected melody.
Volume
1. Press the button. Select "volume" by the button.
2. The currently set volume is played back.
3. Now, you can adjust the desired volume by entering a number
(level 1 ... 7) and you will hear the ringing tone at the corresponding volume level.
4. Save the selected volume level by pressing the button.
Incremental volume (automatic ringer control)
1. Press the button. Select "auto. ringer control" via the button.
2. Now, you can switch between "auto. ringer control off" and "auto.
ringer control on". Select the desired status by pressing the
button.
ringer melody
level 30
volume
level 5
ringer melody
auto. ringer control
auto. ringer control on
Page 34

34
1. Pick-up the handset and press the button.
2. Press the button and select "settings" via the button.
3. Scroll the options by the and buttons and select "factory
pre-set" via the button.
4. Press the button and confirm the safety dialog by pressing the
button. The factory pre-set is re-established. This process will
take some seconds and is complete as soon as the display "reestablish" is no longer shown.
Settings
Loudspeaker volume
In addition to a temporary loudspeaker adjustment during a telephone conversation (see also
"hands-free mode"), you can also set the basic loudspeaker volume.
1. Pick-up the handset and press the button.
2. Press the button and select "settings" via the button.
3. Scroll the options by the and buttons and select "loudspeaker volume" via the button.
4. The currently set volume (level 1 ... 7) is displayed. You have the
option to enter a new value via the numeric keypad.
5. The newly set loudspeaker volume level will be stored when pressing the button.
Resume factory pre-set
You can resume the original factory pre-set of your tiptel 172 at any time.
loudspeaker volume
settings
settings
factory pre-set
factory pre-set
re-establish?
loudspeaker volume
level 6
P
P
Page 35

35
Miscellaneous
Troubleshooting
Problem Possible cause Solution
You do not hear a dialling Telephone connecting cable, Check all cables, check the
tone after having picked up handset cable, telephone telephone wall socket by using
the handset. wall socket another telephone and contact
your local network provider if
necessary
Charges are not displayed No charge pulse Ask for a charge pulse at your
local network provider
Dialling is not possible Wrong dialling method Set the correct dialling method
PIN code forgotten Contact our hotline
Battery symbol blinks Battery discharged or not Check the batteries and
inserted correctly replace if necessary
Special features do not Special features are not Get in contact with your local
work released network operator
Check the signal key (R)
Check the control codes
Signal key without function The signal key does not Correct the function of the signal
work as hook-flash key (earth/flash)
Redialling does not work Wrong control codes Check the CO line access code
correctly within PABX
operation
Calling line identification The selected function is not
presentation does not supported by the PABX
work.
VIP list without function. CO line access code not
entered
Blocking list without The feature "CLIP" is not
function. supported or not released
No call list available. by your network operator
Your telephone partner Mute function active Press the mute button again
cannot hear you. (LED blinks)
No ringing tone Ringing tone volume is set to 0 Change the setting
The telephone only shows The charge rate is not set Enter the current charge rate
charge units but no
amounts.
The telephone always Direct dialling is active Deactivate the direct dialling
dials the same telephone number
The dialling procedure is One of the call blockings Deactivate call blockings
interrupted. is active
Page 36

36
Miscellaneous
Technical data
Dimensions (W x H x D): About 220 x 60 x 200 mm
Telephone connecting cable:
Length: 3 m
Plug: RJ11
Batteries: 5 batteries type "AAA" (1.5 V microcells)
Lifecycle: > 1 year as an average
Loudspeaker adjustment: 7 levels for the loudspeaker
3 levels for the handset
Display: 2 lines with 20 digits each
Dialling method: Tone / pulse
Dialling pause: 1 - 9 seconds
Signal key: Earth, flash, hook-flash
Speed dialling stations: 13
Operating temperature: 0° C - +40°C
Approval number: 0396 X
Max. telephone number length: 20 digits
Melody variants: 100
Telephone directory: 100 entries, alphanumeric
Call list: Last 10 calls
Appointments: 10
Charge accounts: 3
Hands-free mode: Half-duplex
Redial memory: 4
Blocked numbers list: 10 telephone numbers
VIP list: 10 telephone numbers
Page 37

37
Important information
How to enter a name in the telephone directory?
Three to four different letters are assigned to all numeric keys:
You can select the desired letter by pressing the corresponding
numeric key either one, two, three or four times - depending on the
position of the letter.
Shortly after having pressed the last button, the cursor moves one
digit further and the next letter can be entered. Wrong entries can be
deleted by pressing the button.
Example:
In order to enter "TIPTEL" in your telephone directory, press the following buttons:
1 x no. 8 = T
3 x no. 4 = I
1 x no. 7 = P
1 x no. 8 = T
2 x no. 3 = E
3 x no. 5 = L
1
2
3
45
6
7
8
9
Malfunctions
Use the information provided in chapter "Troubleshooting" or plug another telephone at the corresponding telephone wall socket in order to detect whether the malfunction was caused by your
tiptel 172 or not. Do not open or connect a defective device! Bring the device to your local dealer or service centre or call the TIPTEL hotline.
Cleaning and maintenance
Just use a soft slightly moist cloth to clean your telephone. Never use chemicals, alcohol or abrasive cleaning products. Some furniture lacquers or furniture cleaning products may attack the
rubber at the feet of your tiptel 172.
Ecological information
During the normal use of the telephone you will not have any contact to substances damaging
to your health. When discharged, the batteries from the scope of supply will be hazardous waste.
Please grant appropriate disposal by using local hazardous waste depots. The synthetic material and plastics used for manufacturing this device exclusively consist of partially recycled granules. Our packaging materials exclusively consist of partially recycled cardboard and paper.
Page 38

38
Access to the public exchange . . . . . . . .31
Accounts . . . . . . . . . . . . . . . . . . . . . . . . .28
Accounts (charges) . . . . . . . . . . . . . . . . .28
Activate direct call number . . . . . . . . . . .21
Adjust loudspeaker volume . . . . . . . .14, 34
Answering incoming calls . . . . . . . . . . . . .9
Appointments . . . . . . . . . . . . . . . . . .19, 20
Automatic volume control . . . . . . . . . . . .33
Basic settings . . . . . . . . . . . . . . . . . . . . . .5
Batteries (insert/exchange) . . . . . . . . . . . .4
Blocked dialling . . . . . . . . . . . . . . . . . . . .25
Blocked numbers . . . . . . . . . . . . . . . . . .25
Button functions . . . . . . . . . . . . . . . . . . . .6
Call list . . . . . . . . . . . . . . . . . . . . . . . . . .13
Charge pulse . . . . . . . . . . . . . . . . . . . . .27
Cleaning and maintenance . . . . . . . . . . .37
CO line access code . . . . . . . . . . . . . . . .31
Connection . . . . . . . . . . . . . . . . . . . . . . . .3
Dialling from the call list . . . . . . . . . . . . .13
Dialling from the telephone directory . . . .12
Dialling method . . . . . . . . . . . . . . . . . . . .30
Dialling pause . . . . . . . . . . . . . . . . . . . . .31
Dialling via the speed dialling stations . . .10
Dialling with off-line call preparation . . . .10
Direct call . . . . . . . . . . . . . . . . . . . . . . . .12
Display . . . . . . . . . . . . . . . . . . . . . . . . . . .7
Ecological information . . . . . . . . . . . . . . .37
Enter/change PIN . . . . . . . . . . . . . . . . . .32
Entering letters . . . . . . . . . . . . . . . . . . . .37
Factory pre-set . . . . . . . . . . . . . . . . . . . .34
Features by the network provider . . . . . .16
Flash . . . . . . . . . . . . . . . . . . . . . . . . . . .31
Handset volume . . . . . . . . . . . . . . . . . . .14
Hands-free mode . . . . . . . . . . . . . . . . . .14
Hook-flash . . . . . . . . . . . . . . . . . . . . . . .30
Incremental volume . . . . . . . . . . . . . . . . .33
Information on operation and programming 8
Initial operation . . . . . . . . . . . . . . . . . . . . .5
Loudspeaker . . . . . . . . . . . . . . . . . . . . . .14
Main PABX code number . . . . . . . . . . . .31
Mute function . . . . . . . . . . . . . . . . . . . . .13
Nameplate . . . . . . . . . . . . . . . . . . . . .4, 39
Off-line call preparation . . . . . . . . . . . . . .10
PABX operation . . . . . . . . . . . . . . . . . . . .31
Programming overview . . . . . . . . . . . . . . .8
Programming tree . . . . . . . . . . . . . . . . . . .8
Pulse dialling method . . . . . . . . . . . . . . .30
R button . . . . . . . . . . . . . . . . . . . . . . . . . .5
Redialling . . . . . . . . . . . . . . . . . . . . . . . .11
Ringing tone melodies . . . . . . . . . . . . . . .32
Scope of supply . . . . . . . . . . . . . . . . . . . .3
Setting the charge factor . . . . . . . . . . . . .27
Setting the date . . . . . . . . . . . . . . . . . . . .30
Setting the time . . . . . . . . . . . . . . . . . . . .30
Signal key . . . . . . . . . . . . . . . . . . . . . . . .31
Solving problems . . . . . . . . . . . . . . . . . .35
Store direct call number . . . . . . . . . . . . .21
Store numbers . . . . . . . . . . . . . . . . . . . .17
Store telephone numbers for
speed dialling stations . . . . . . . . . . . . . . .16
Switching between handset and
hands-free mode . . . . . . . . . . . . . . . . . . .15
Technical data . . . . . . . . . . . . . . . . . . . . .36
Telephone calls . . . . . . . . . . . . . . . . . . . . .9
Telephone directory . . . . . . . . . . . . . .12, 17
Telephone number presentation . . . . . . . .9
Templates . . . . . . . . . . . . . . . . . . . . . . . .39
Troubleshooting . . . . . . . . . . . . . . . . . . .35
View accumulated charges . . . . . . . . . . .27
VIP list . . . . . . . . . . . . . . . . . . . .21, 22, 23
Index
Page 39

39
Page 40

(UK) 08/01
EDV 4931546
TIPTEL AG
Halskestrasse 1
40880 Ratingen
Germany
http://www.tiptel.de
e-mail: export@tiptel.de
 Loading...