

Page 1

TINY1 Handbook
Welcome
Page 2
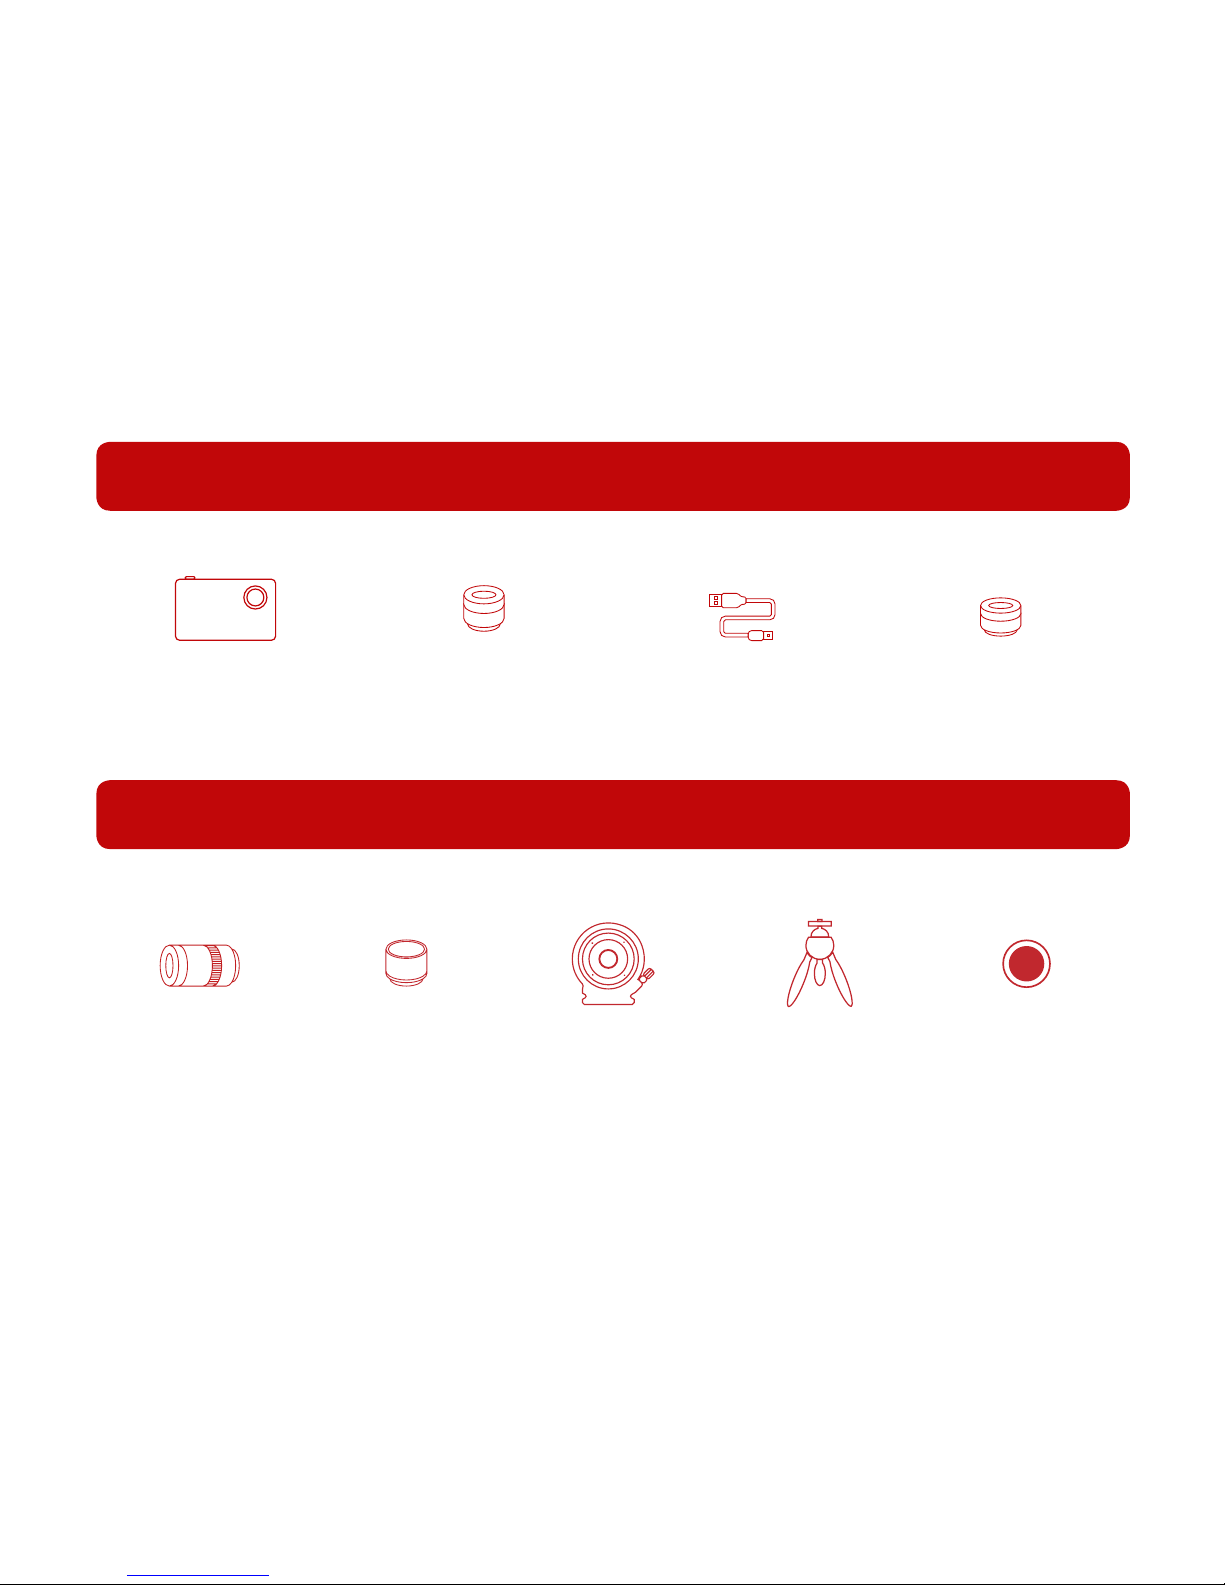
What’s in the box
TINY1 camera
4mm standard lens Micro-USB cable 2.8mm wide-angle lens
(optional)
Optional accessories
solar lter100mm
telephoto lens
telescope
adapter
canon/nikon
adapter
mini tripod
get them from tinymos.com/get-tiny1
Page 3
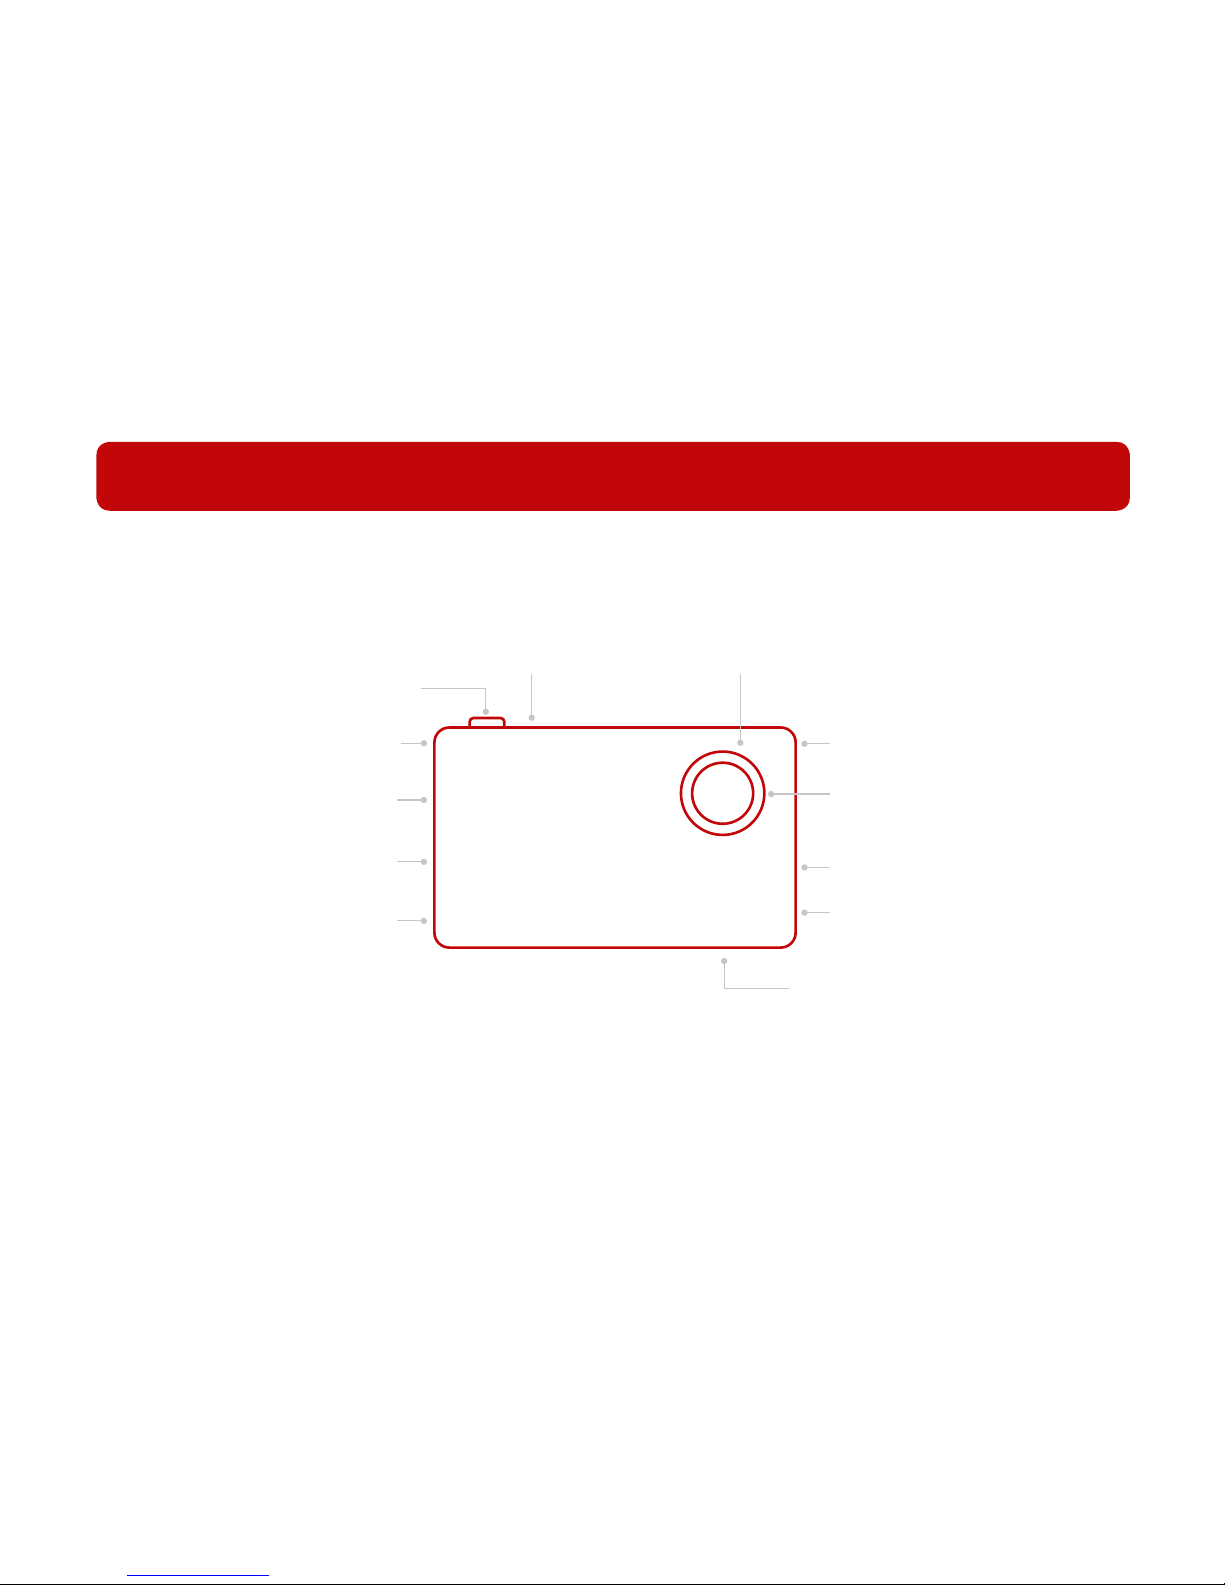
shutter button
on/off button
camera strap hole
1/4” tripod mount
camera strap hole
3.5mm headphone jack
3.5mm microphone jack
microSD slot
micro-usb 2.0 port
accessory port
lens mount
microphone
TINY1 camera body
Page 4

1
Contents
Charging 2
Lenses 3
- 4mm standard lens 4
- 2.8mm wide-angle lens 5
- 100mm telephoto lens 6
- Solar lter 7
- How to attach lenses 8
Turning on the camera 9-10
Onboarding
- Introduction 11
- Remove Sticker 12
- WiFi 13
- Timezones 14
- Search 15
- Auto & Manual Modes 16
- IR Pass 17
- Basics 18
Auto Mode 19-22
Manual Mode 23-25
Swipe-down Menu 26
Overlays 27-28
Taking Photos 29
Transferring les
- via microSD 30
- via USB 31
Settings
- Photo Settings 33
- Video Settings 33
- Imaging Settings 34
- General Settings 35-36
- Wi Settings 37
- Location & Time Settings 37
- Custom Settings 38
Page 5
2
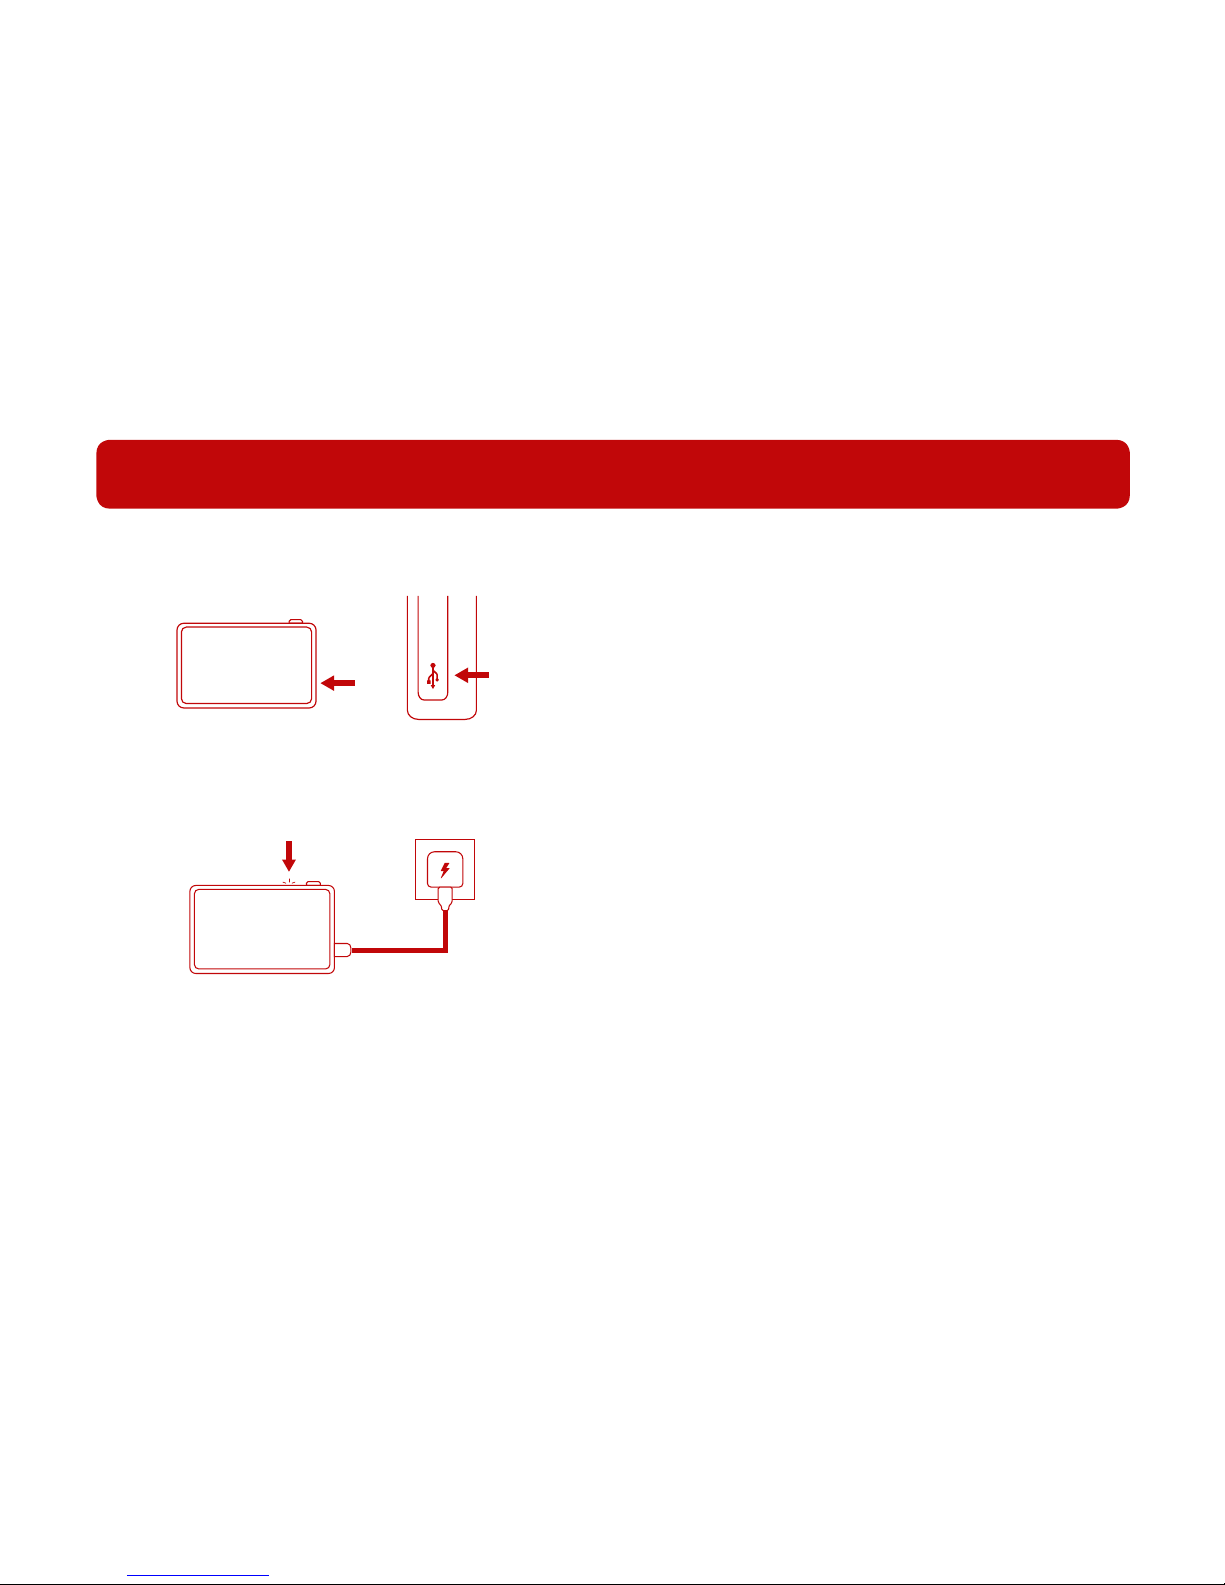
Charging
Connect TINY1 to a power outlet with the included cable and a
USB power adapter (not included)
The on/off button will light red when it is charging
Red light/Flashing Charging
Off Charging completed
*Please use a power adapter that is rated at least 2A at 5V
**Power adapters below 2A may not be able to charge the camera
Please note that most computers are unable to provide the
required power
Locate the micro-USB port on the camera
under the rubber cover
Recommended charging duration before use: 1 to 2 hours
Page 6
3
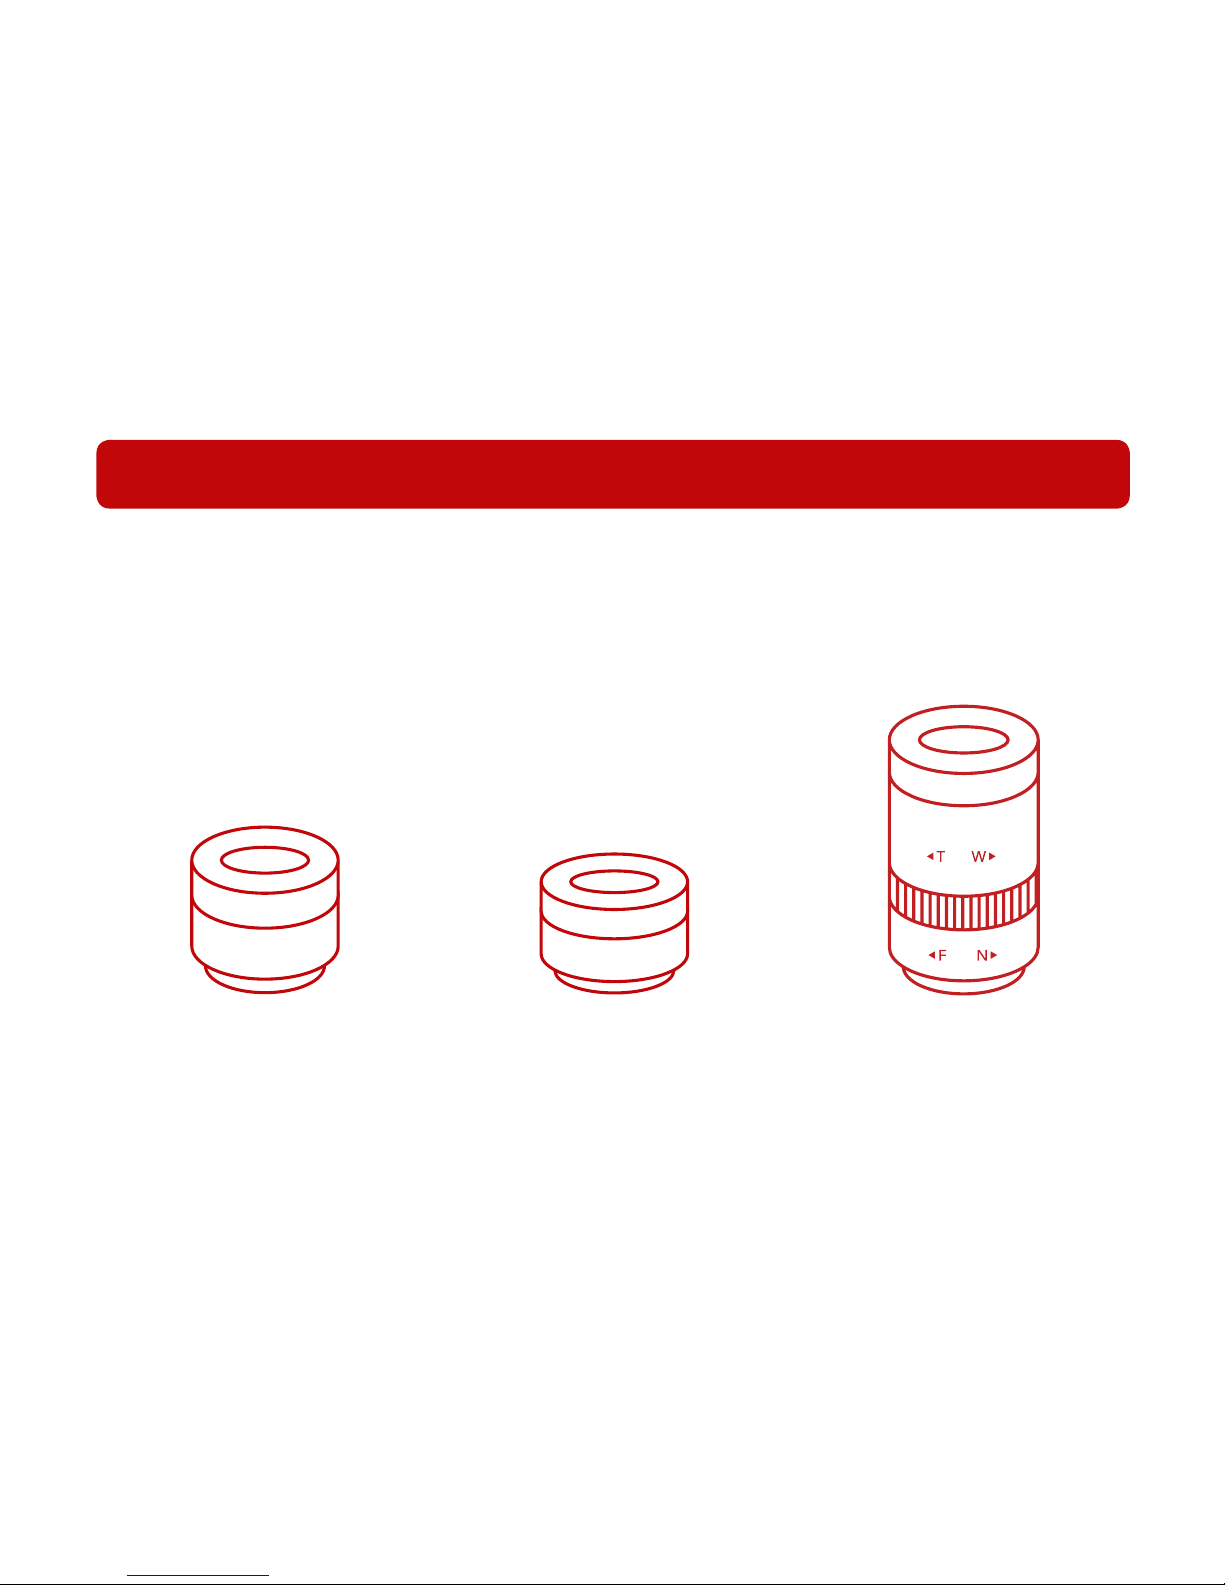
TinyMOS lenses
4mm standard lens 2.8mm wide-angle lens 100mm telephoto lens
These are the lenses that we sell. The 4mm standard lens comes with every TINY1 camera.
All TinyMOS lenses are manual focus only.
Page 7

4
4mm standard lens
TinyMOS 4mm f/1.2 lens
focus ring
lens mount
The standard lens is equivalent to a 28mm lens on a full-frame camera
Page 8

5
2.8mm wide-angle lens
TinyMOS 2.8mm f/1.2 lens
focus ring
lens mount
The wide-angle lens is equivalent to a 20mm lens on a full-frame camera
Page 9
6
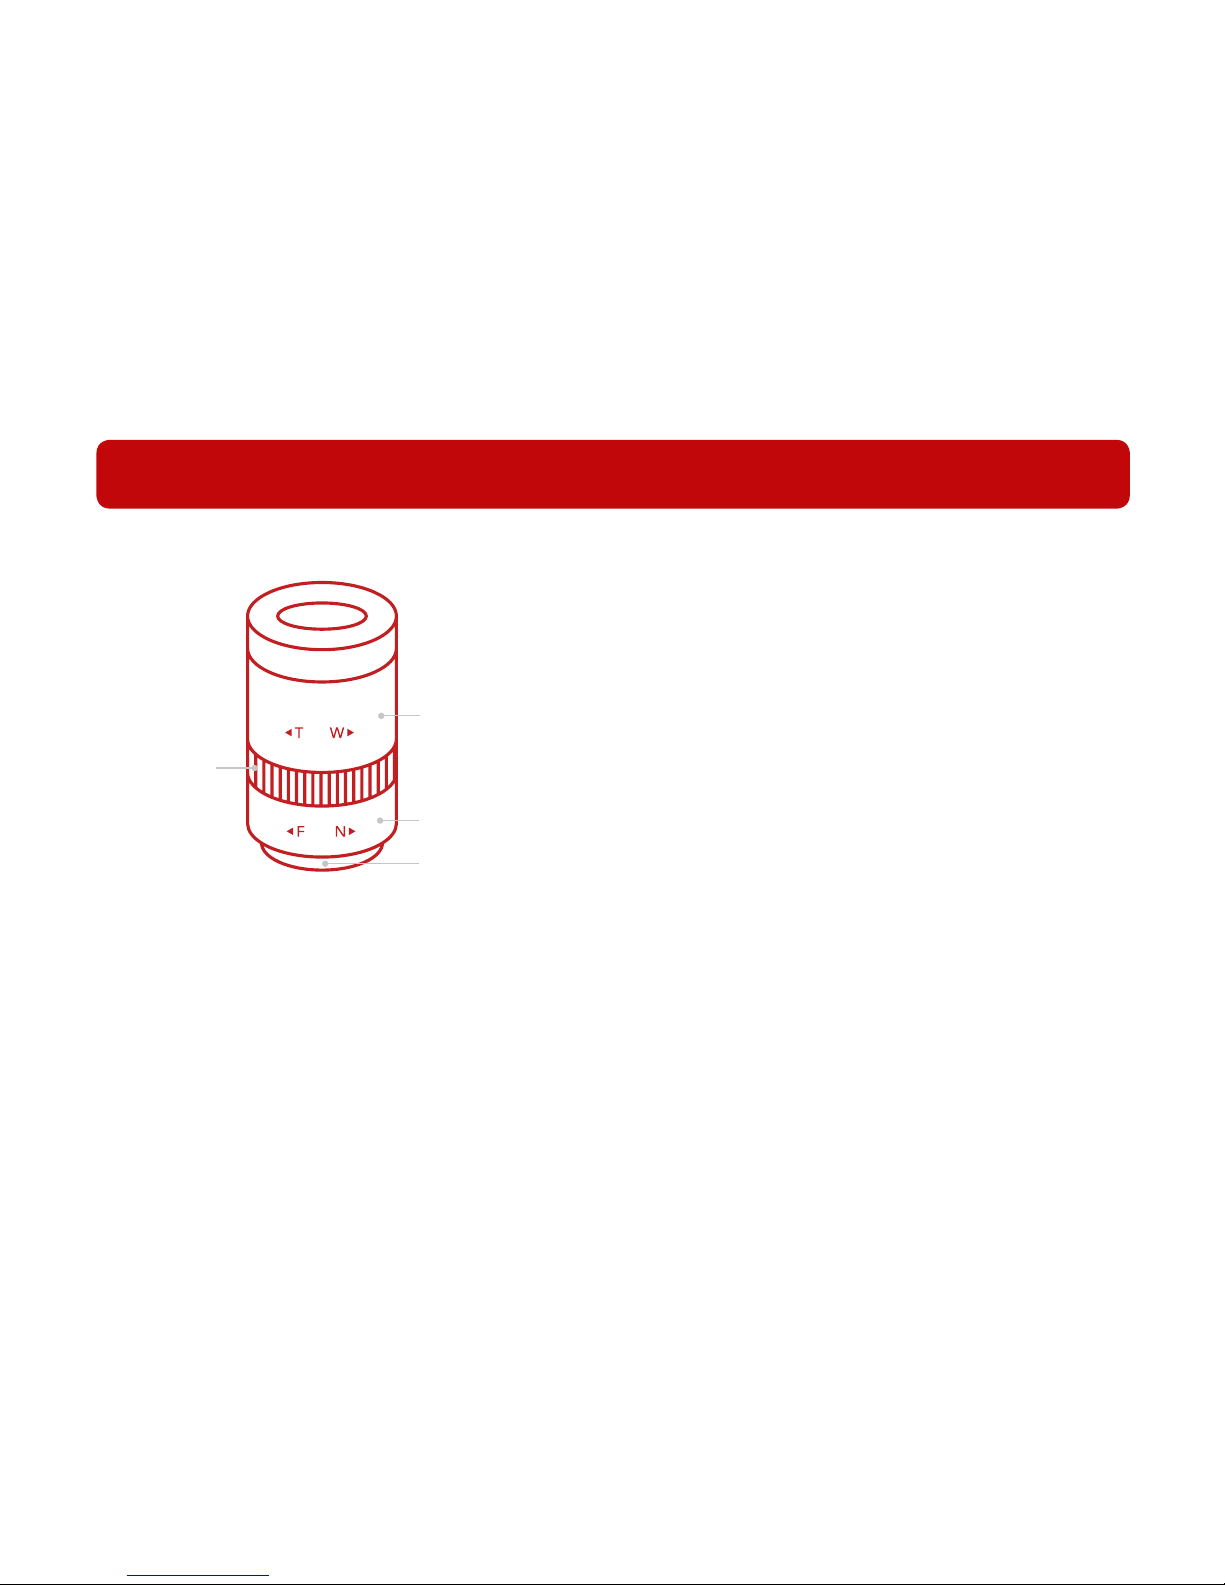
100mm telephoto lens
The telephoto lens is equivalent to a 700mm lens on
a full-frame camera.
The wide end of the lens is meant to search for
objects as it would be difcult to search at the
telephoto end.
Use the maximum telephoto end to take photos as
the rest of the zoom range is unable to focus.
The aperture ring controls the amount of light that
reaches the camera sensor.
TinyMOS 100mm f/2 lens
zoom ring
focus ring
aperture ring
lens mount
T Telephoto
W Wide
F Far
N Near
Solar Filter
The 100mm f/2 lens is compatible with the solar
lter, which allows you to capture images of the sun.
Note:
On newer lenses, when you turn one of the rings
(aperture/zoom/focus), other rings may turn as well.
The effect will be reduced with use.
Page 10
7
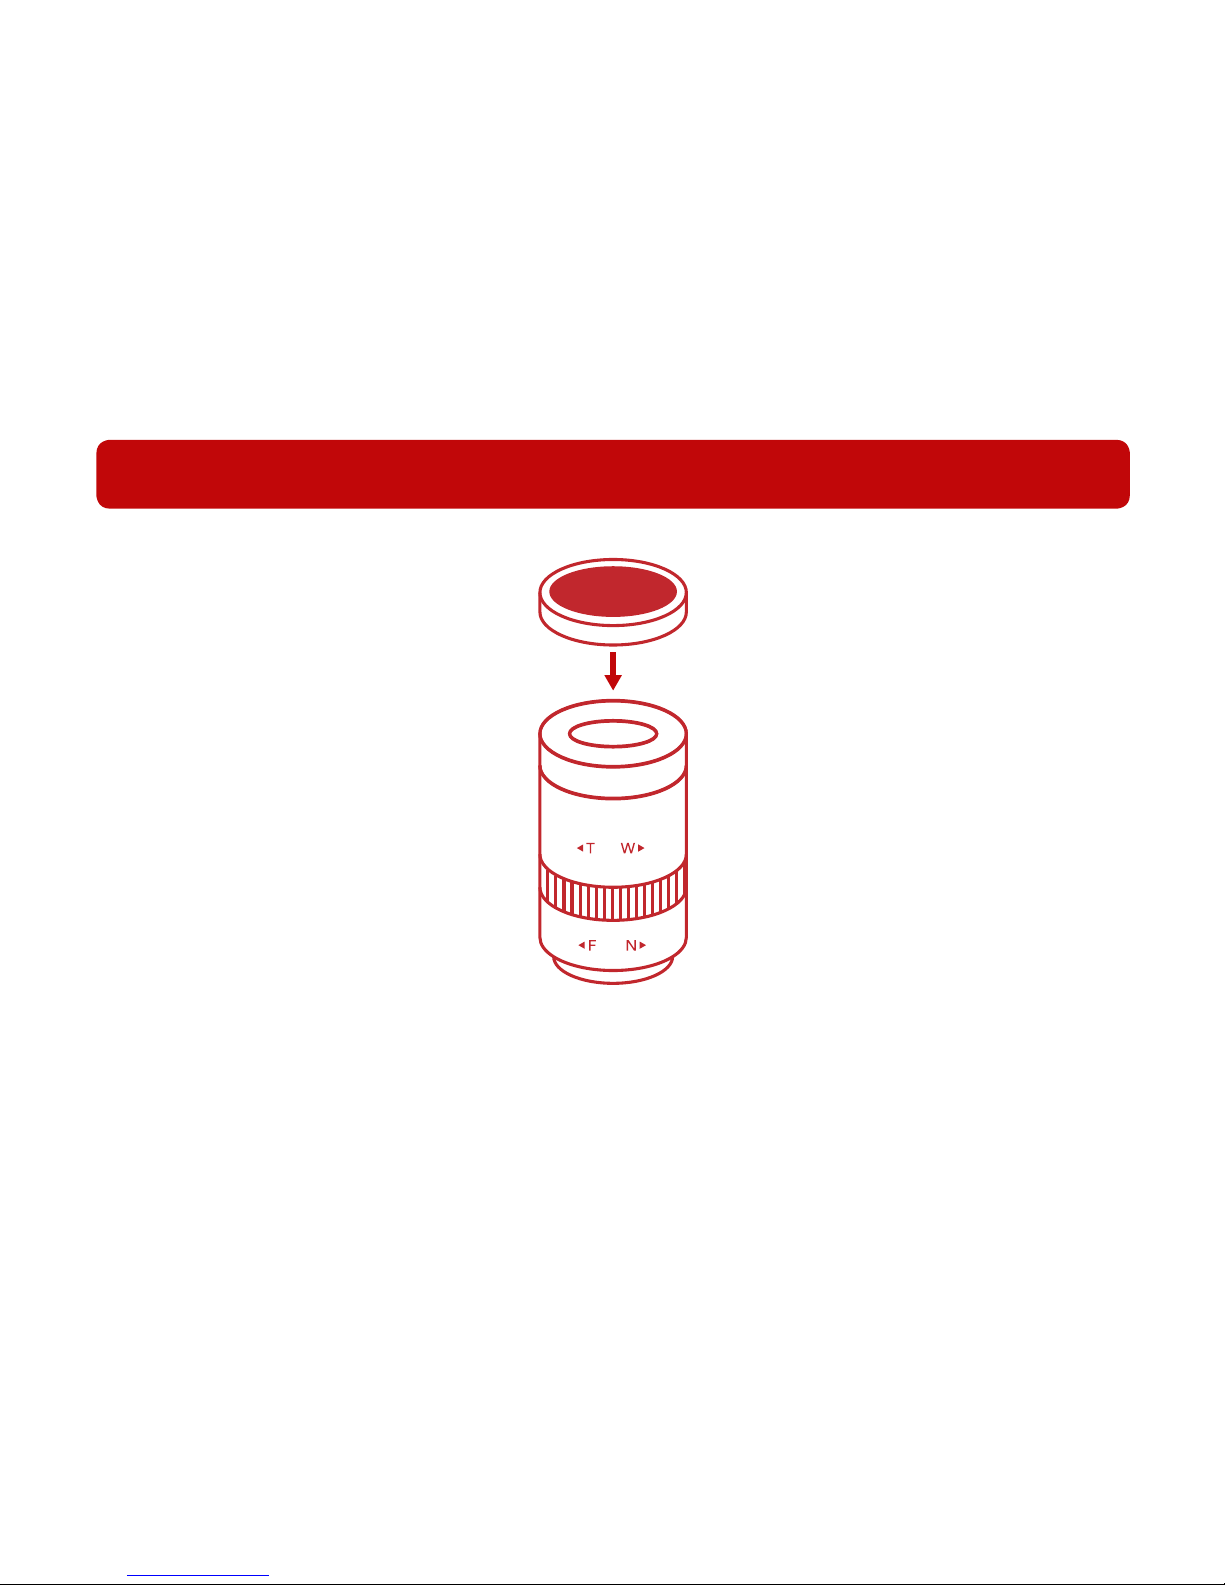
Solar lter
To attach the solar lter to the lens, place it over the front of the lens and press it in.
Newer versions of the 100mm lens will require the use of a 40.5mm UV lter (included) to use the solar lter.
WARNING: Do not look through the solar lter with your eyes as the lter is not eye safe.
Page 11
8
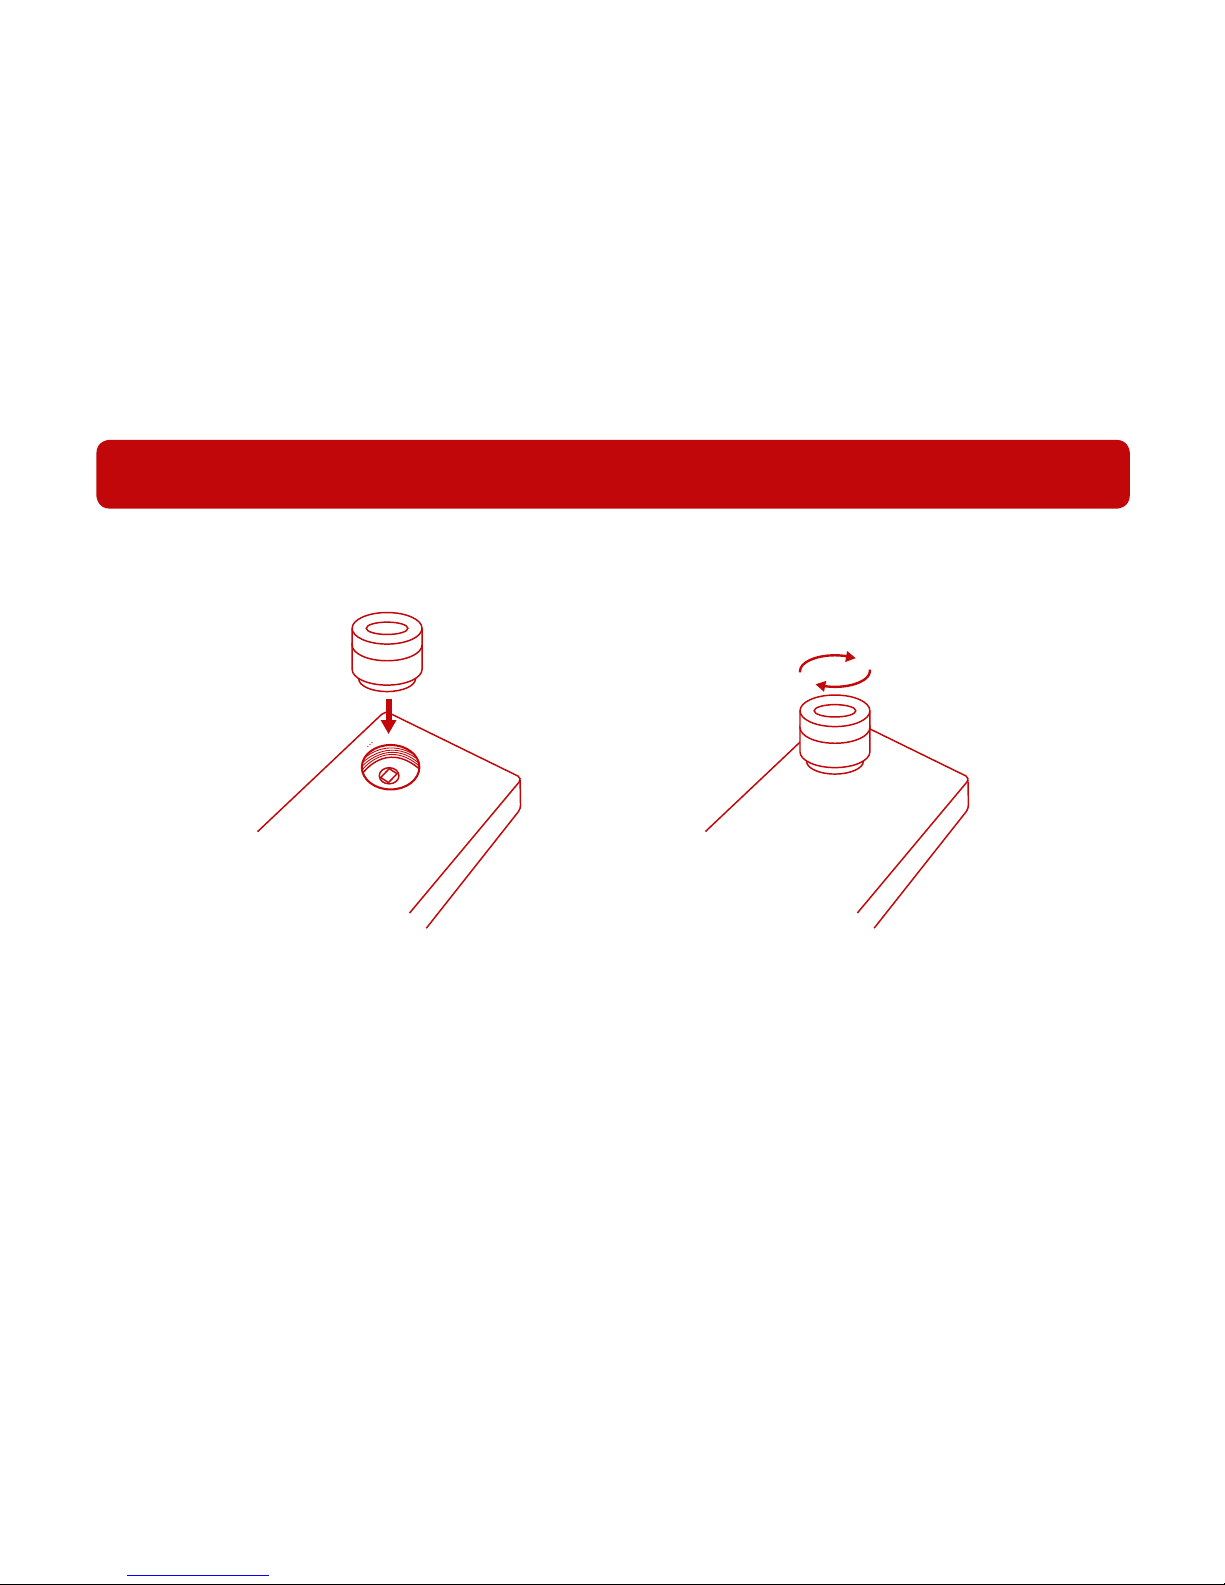
How to attach lenses
To attach a lens to your camera, place the lens on the lens mount and twist it clockwise until it is tight.
To remove the lens, hold the lens rmly and twist it anti-clockwise until it is out.
Do not force the lens in. You may damage the threads on the camera or lens.
Page 12
9
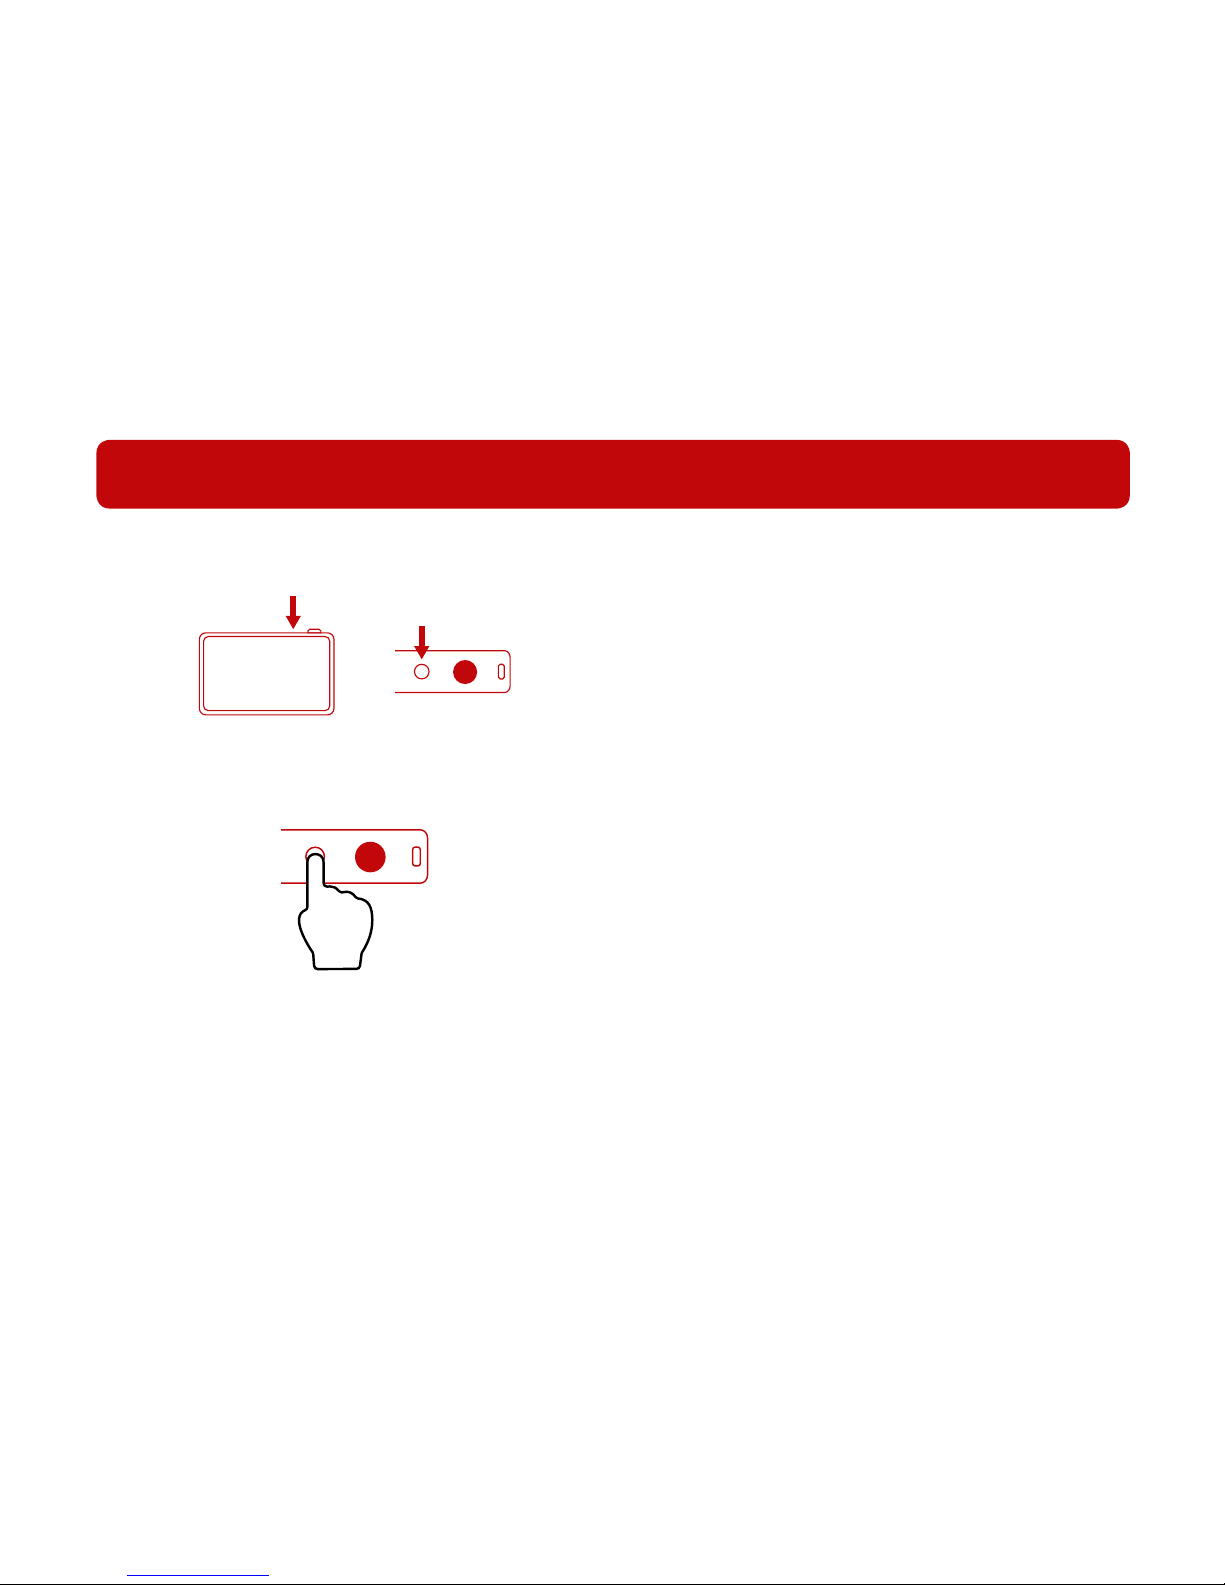
Locate the on/off button on top of the camera.
Press and hold the on/off button for 3 seconds.
The screen will light up, and the boot screen will appear.
During the initial bootup, the screen is very dim, and it will
take approximately 1 minute to completely turn on.
Press the on/off button once to set the camera to sleep.
Press and hold the on/off button for 3 seconds, then select
‘Power Off’ to turn it off.
Turning on the camera
If you are unable to turn on your camera, try charging it for at least 3 hours before powering it on.
Alternatively, try holding the power button down for 40 to 60 seconds before releasing.
Page 13

10
Turning on the camera
This is what the screen should display when the camera is turning on.
For the rst boot up, you will be asked to connect to WiFi and set the timezone.
This step is necessary for the operation of the GPS.
Page 14

11
Onboarding: Introduction
You should see this screen once the camera is turned on. Tap continue to connect to WiFi.
Page 15

12
Onboarding: Remove Sticker
Please remove the sticker over the sensor to allow the camera to capture images properly.
Page 16

13
Onboarding: Wi
Select your WiFi network. You will be prompted for the password if required.
Page 17

14
Onboarding: Timezones
Select your time zone. This step is necessary for GPS operation.
Page 18

15
Onboarding: Search
Using the search function, you can look for planets, stars, messier objects, and more.
GPS is required to use this function.
Page 19

16
Onboarding: Auto & Manual Modes
By default, the camera is set to Auto mode. You may change this setting by bringing down the
swipe-down menu and switching to Manual mode.
Page 20

17
Onboarding: IR Pass
Switch between IR pass and IR cut from the swipe-down menu.
Page 21

18
Onboarding: Basics
The nal onboarding screen shows you the basic features and locations.
Tap anywhere to dismiss.
Page 22

19
Auto Mode
After the onboarding, you should enter the photo mode.
By default, the camera is set to auto mode; you may change this
from the swipe-down menu to access the manual settings/mode.
Page 23

20
Auto Mode
Tap to open menu to access detailed settings
Tap to open Gallery
Tap to switch between modes: Photo, Video, Timelapse
Page 24
21
Auto Mode
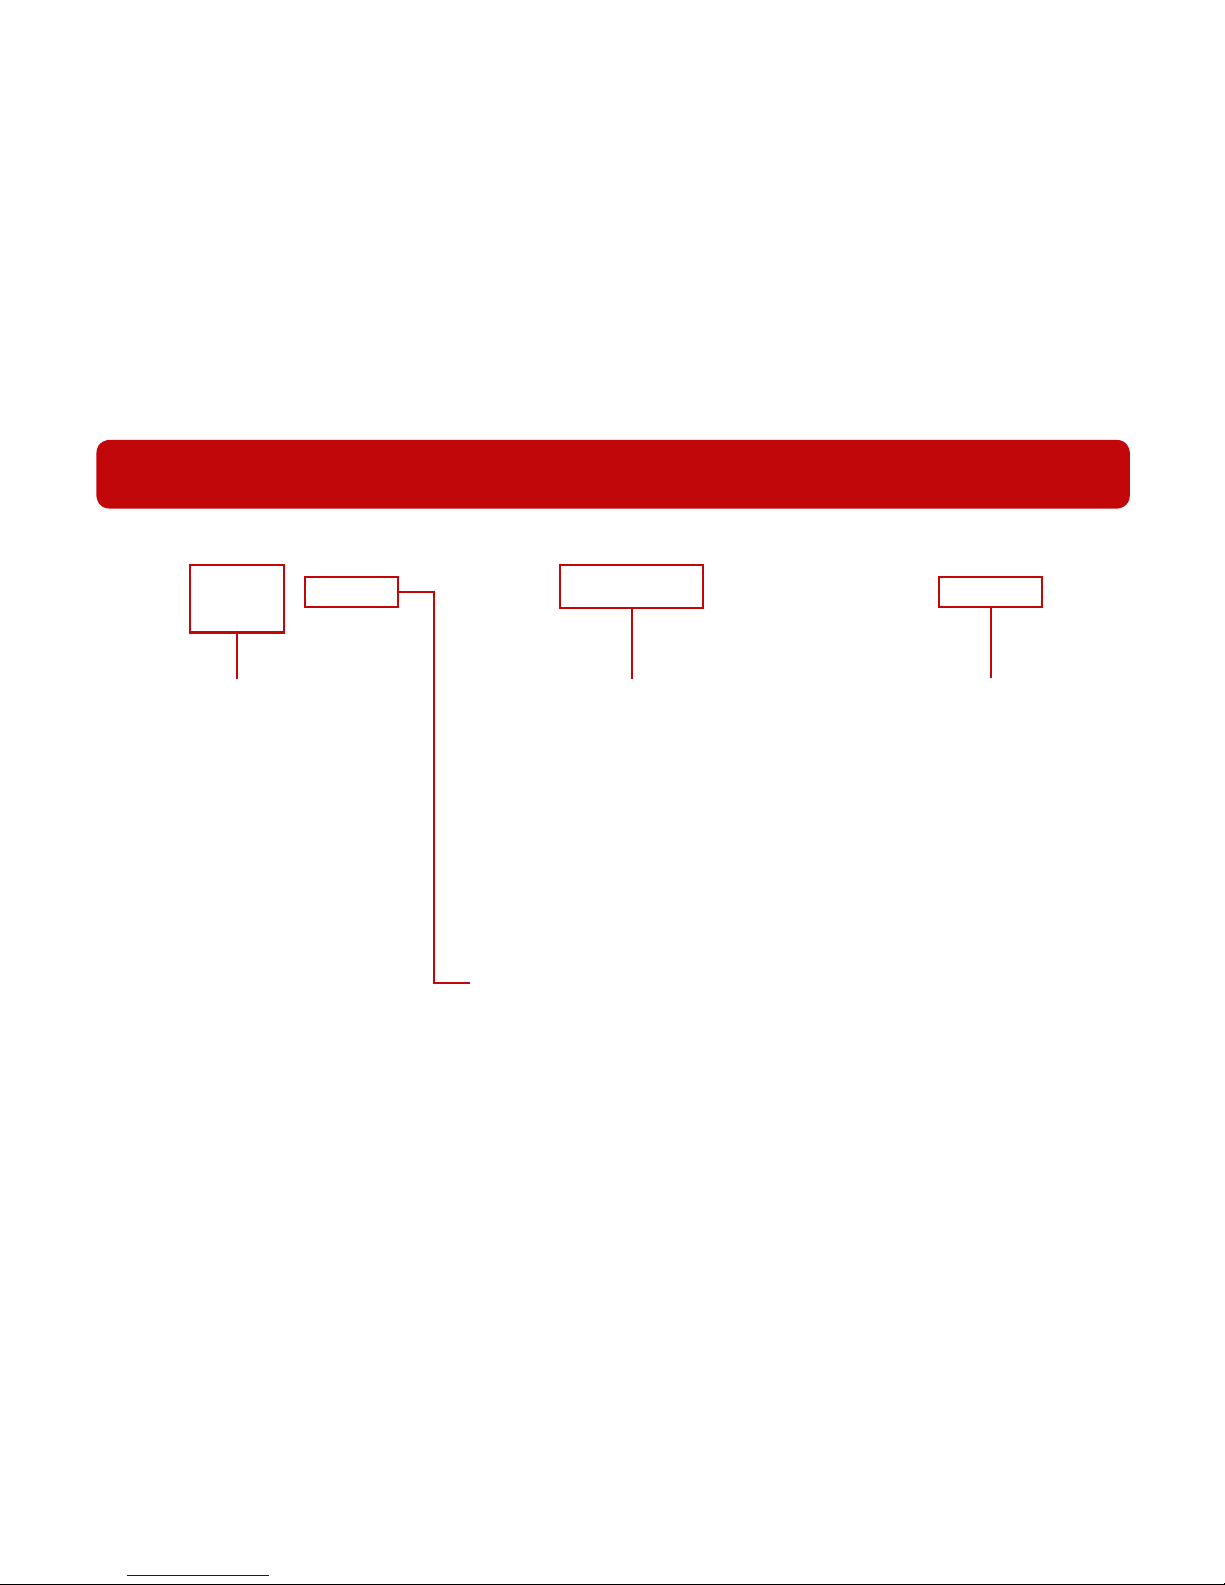
Internal memory and SD card
storage is shown here.
Tap or swipe down to show the
swipe-down menu.
GPS icon will blink when it is
searching. Once it is locked on,
the GPS icon will remain on.
GPS will only work outdoors.
Image format is shown here
To change settings, open settings
menu
Battery percentage
Page 25

22
Auto Mode
Tap to search for stars, planets, and other
celestial objects using the point-to-star guide
Tap to show various overlays on the map,
such as stars, horizon, planets, and more
Tap here to open capture presets:
Auto, Milky Way, Low-light, Moon, Day
Page 26

23
Manual Mode
Manual mode allows you to control various other settings, including the following:
White Balance, Shutter Speed, ISO, Drive Mode and Metering
Page 27

24
Manual Mode
Tap to adjust the slider to desired values
Page 28

25
Manual Mode
Tap to adjust the drive mode: Single, Timer, Continuous Bursts
Tap to adjust metering: Evaluative, Spot, Center
Page 29
26
Swipe down menu
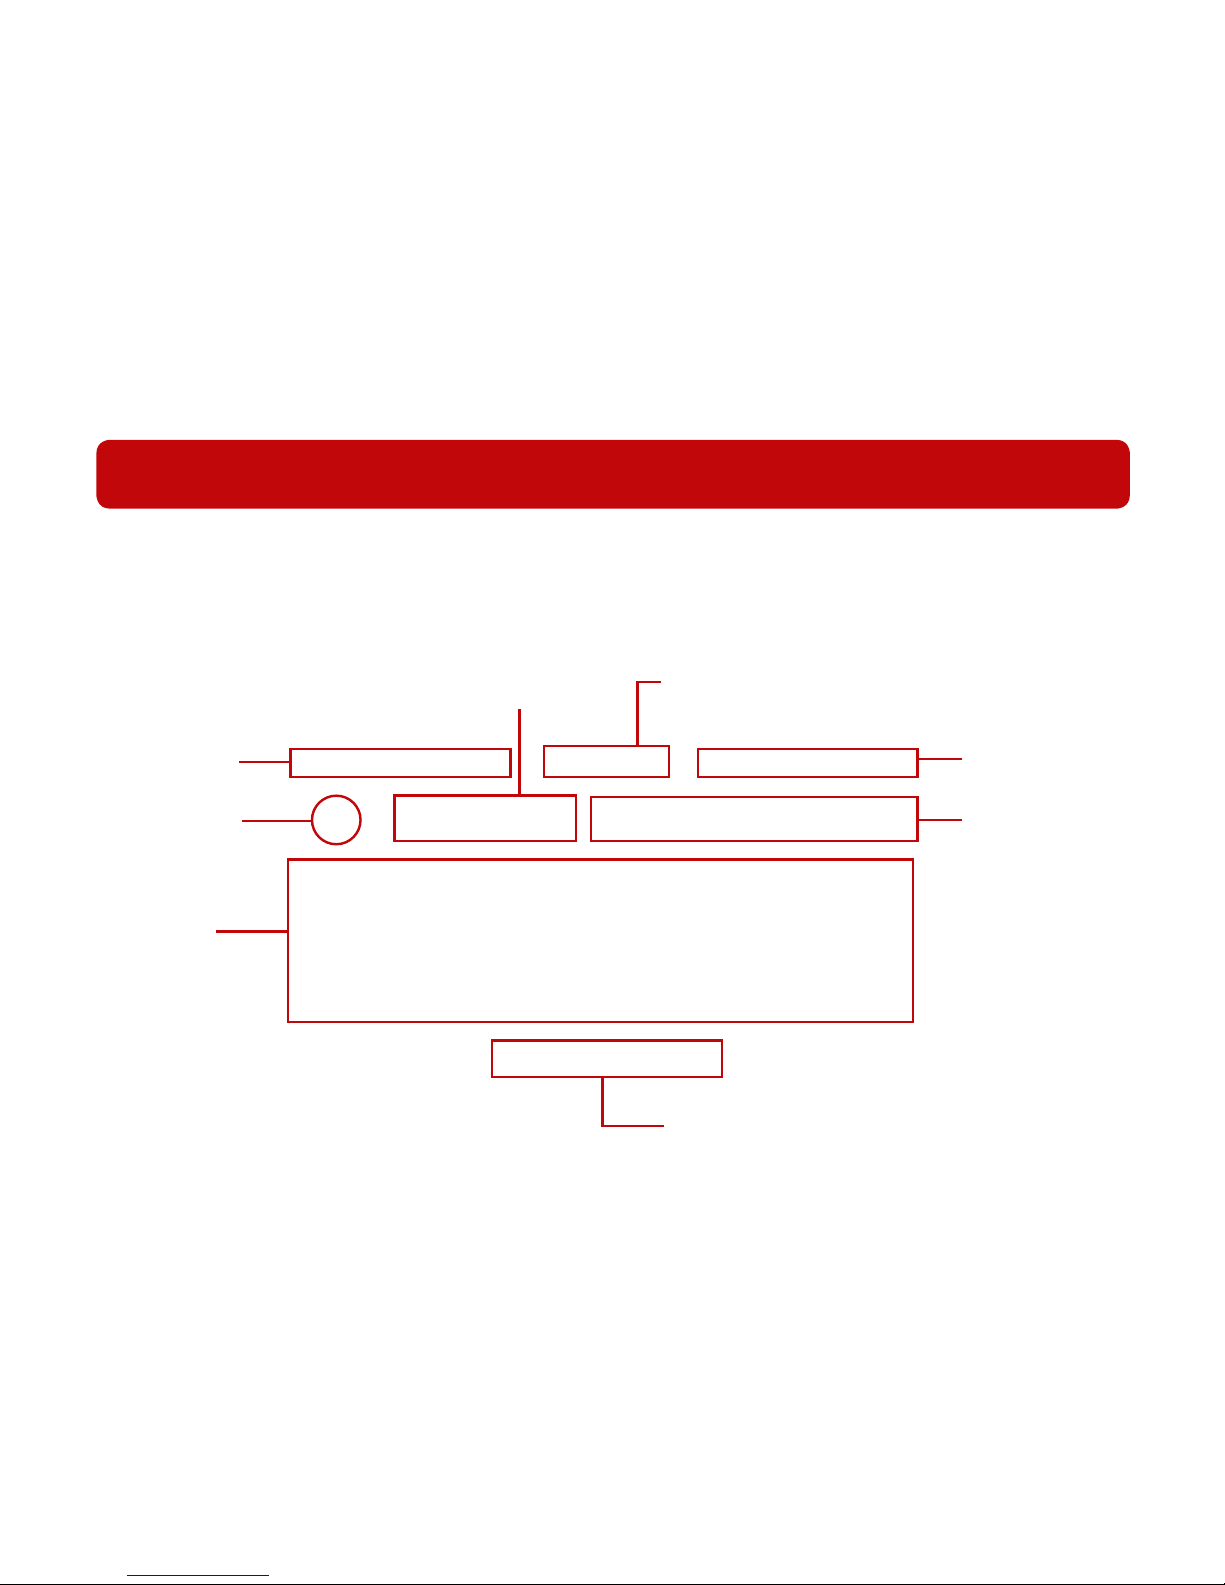
The swipe down menu enables you to quickly turn on and off settings.
Swipe down from any shooting screen to access the swipe down menu.
opens main menu
screen brightness slider
tap to turn on or off
detailed settings can be
accessed in the menu
current set focal length and aperture
adjust according to set focal length for
more accurate calculations
current home time
current location time
toggle between auto and
manual mode
current longitude and lattitude
Page 30

27
Overlays
The overlay menu allows you to select the type of overlay which you would like to display
Tap an icon to turn on and off the overlay. Use the toggle to turn all the overlays on or off.
Page 31

28
Overlays: Explained
Stars
A star is type of astrononomical object consisting of a luminous spheroid of plasma held together by its own
gravity. The nearest star to the Earth is the Sun.
Constellations
A constellation is a group of stars that are considered to form imaginary outlines or meaningful patterns on
the celestial sphere, typically representing animals, mythological people or gods, mythological creatures, or
manufactured devices.
Messier Objects
Messier objects are a collection of deep sky objects such as galaxies, nebulae, and star clusters. There are 110
Messier objects, each starting with the letter ‘M’, followed by a number.
Planets
A planet is a celestial body moving in an elliptical orbit around a star. In our solar system, there are 8 planets,
listed from nearest to the sun to furthest: Mercury, Venus, Earth, Mars, Jupiter, Saturn, Uranus, and Neptune.
Grid
A series of intersecting lines
Horizon
The line that separates the sky from the earth
Page 32
29
Taking photos
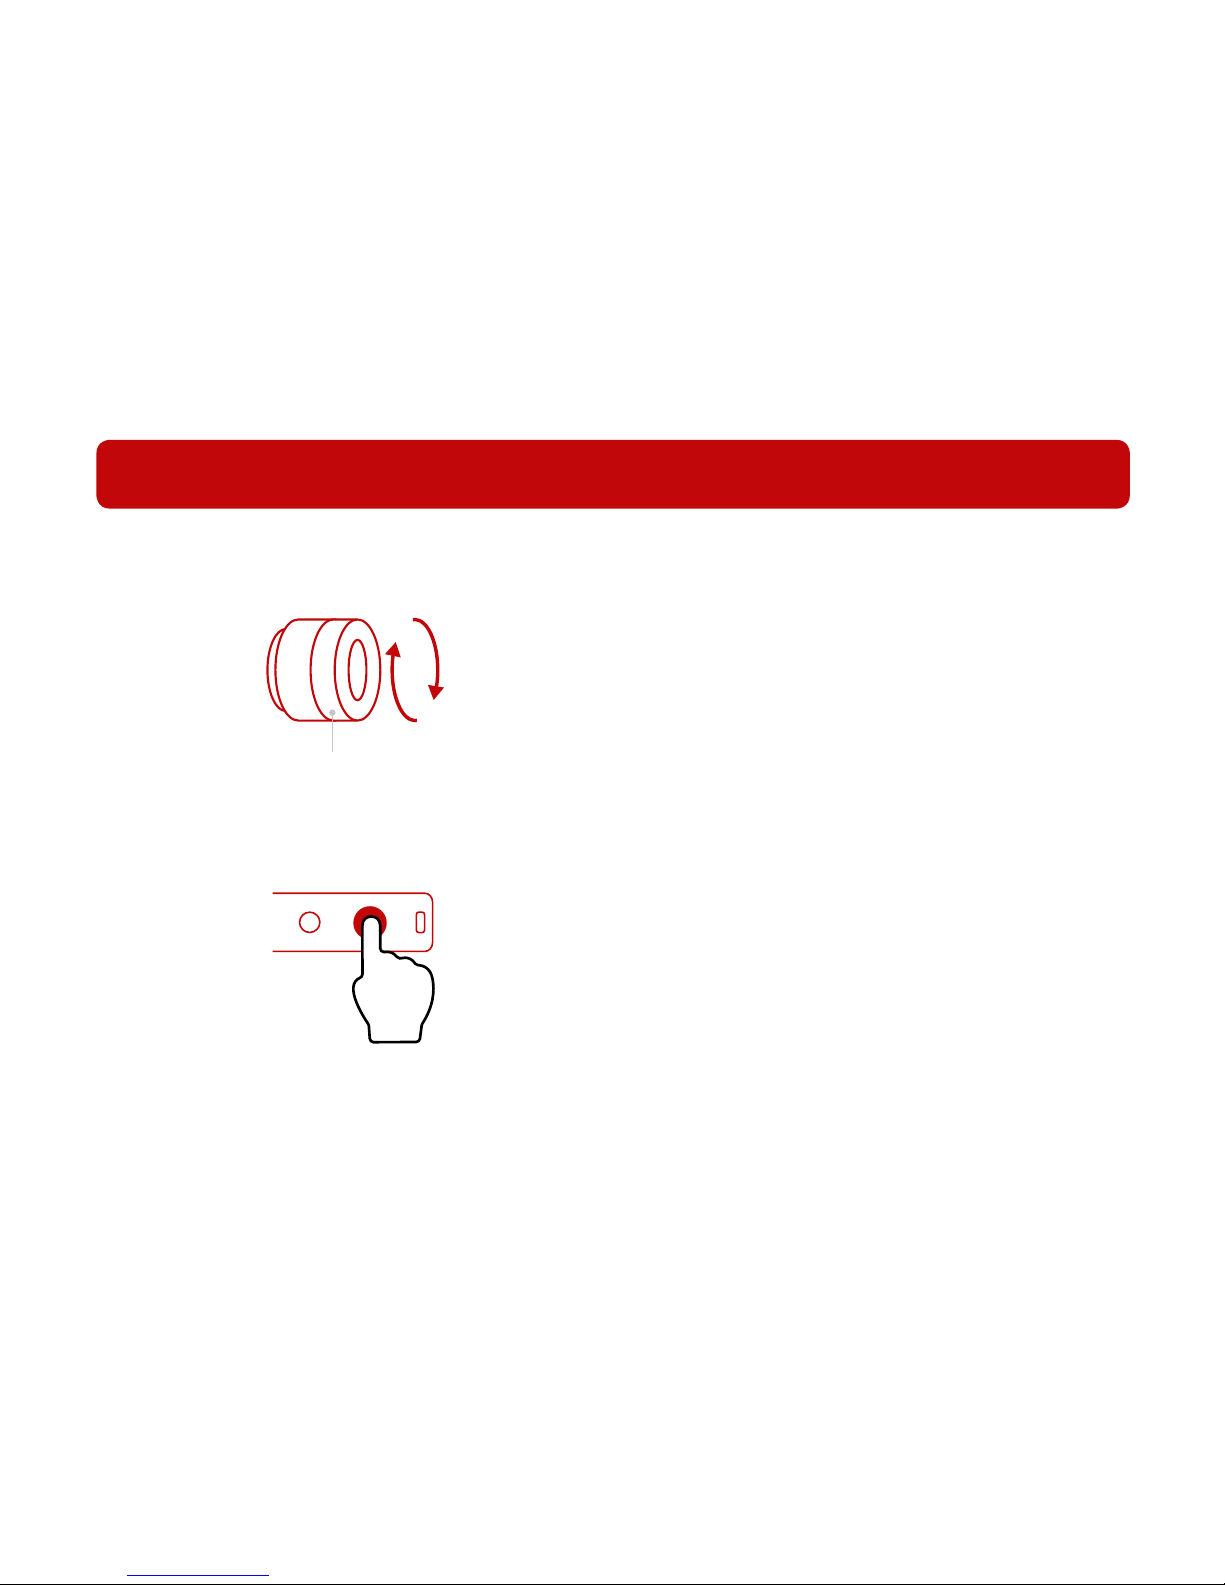
Once the lens is on the camera, look at the screen
and turn the focus ring until the image is sharp.
Press the shutter button rmly to capture the
image.
4
m
m
f
/
1
.
2
focus ring
Page 33
30
Transferring Files via microSD
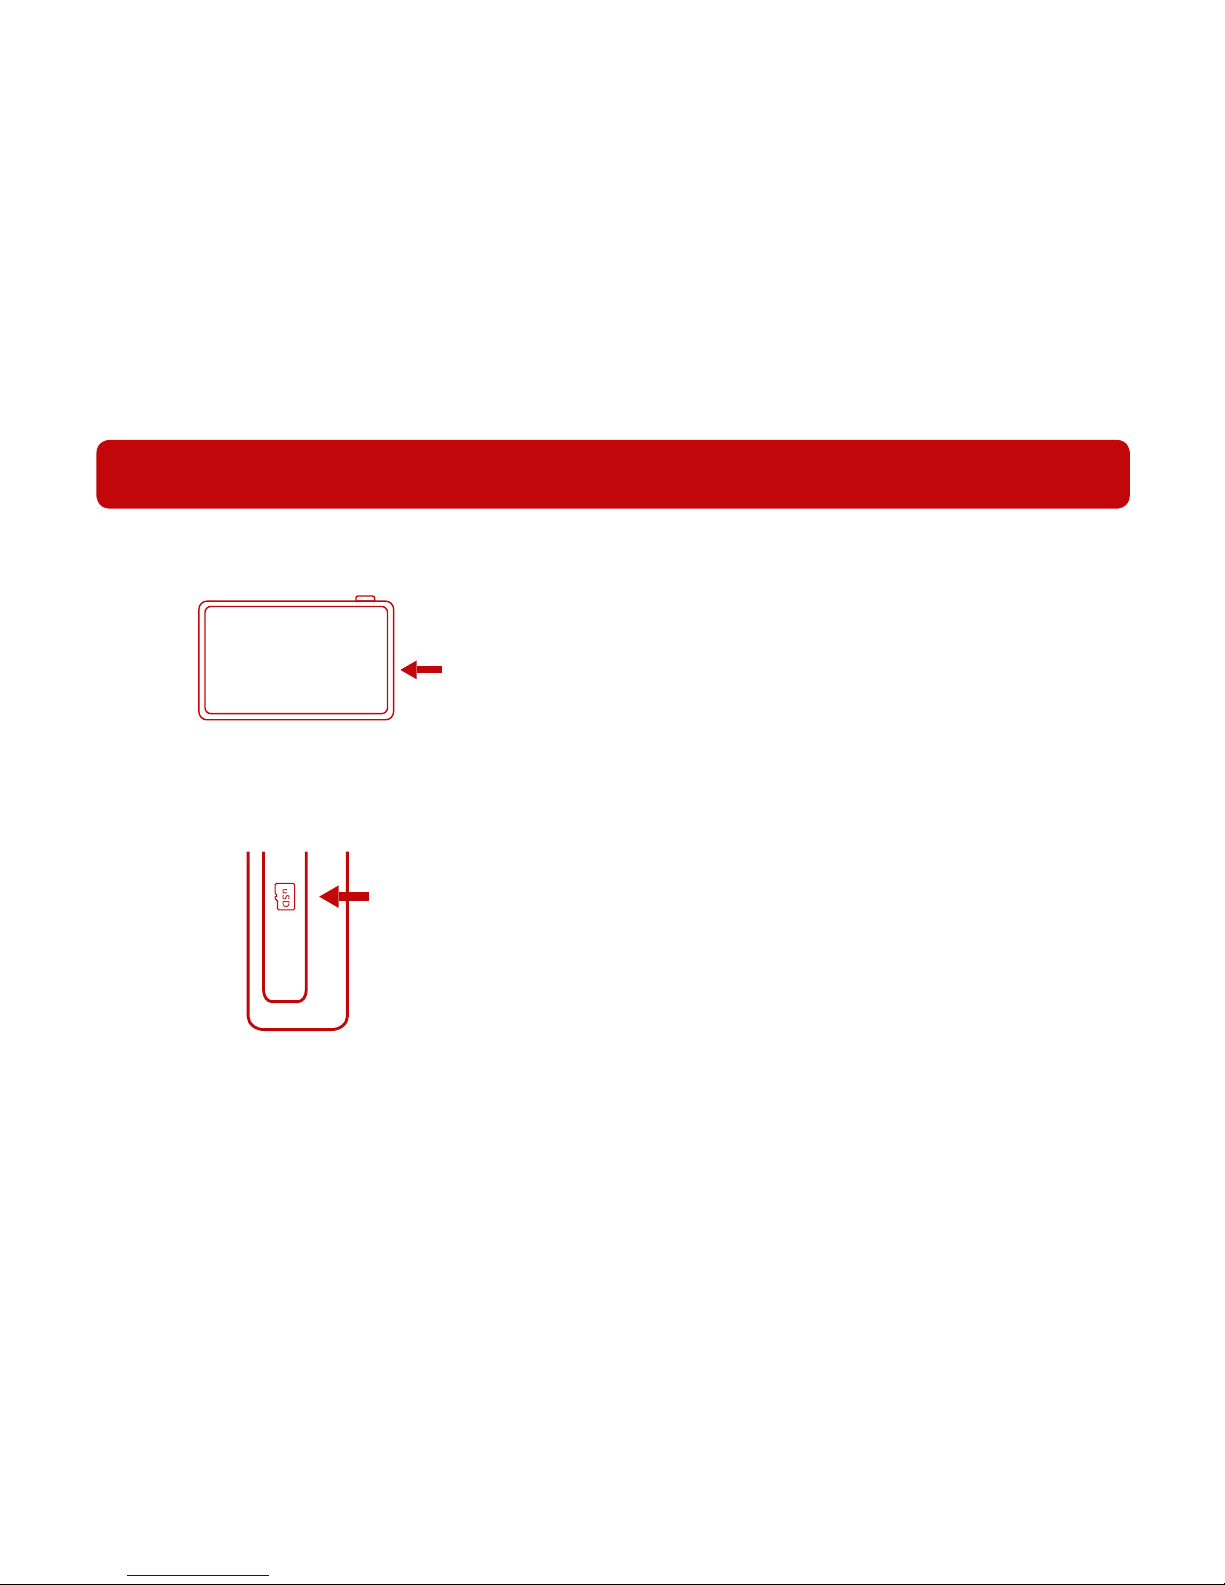
Lift up the rubber cover and press the microSD card, the card
should pop out.
Connect the microSD to a card reader then plug it into your
computer.
You should be able to see the captured les on your computer
now. The various les are catergorized into these 4 folders:
- Photos
- Videos
- Timelapses
- Bursts
Locate the microSD card slot on the camera
under the rubber cover.
Page 34
31
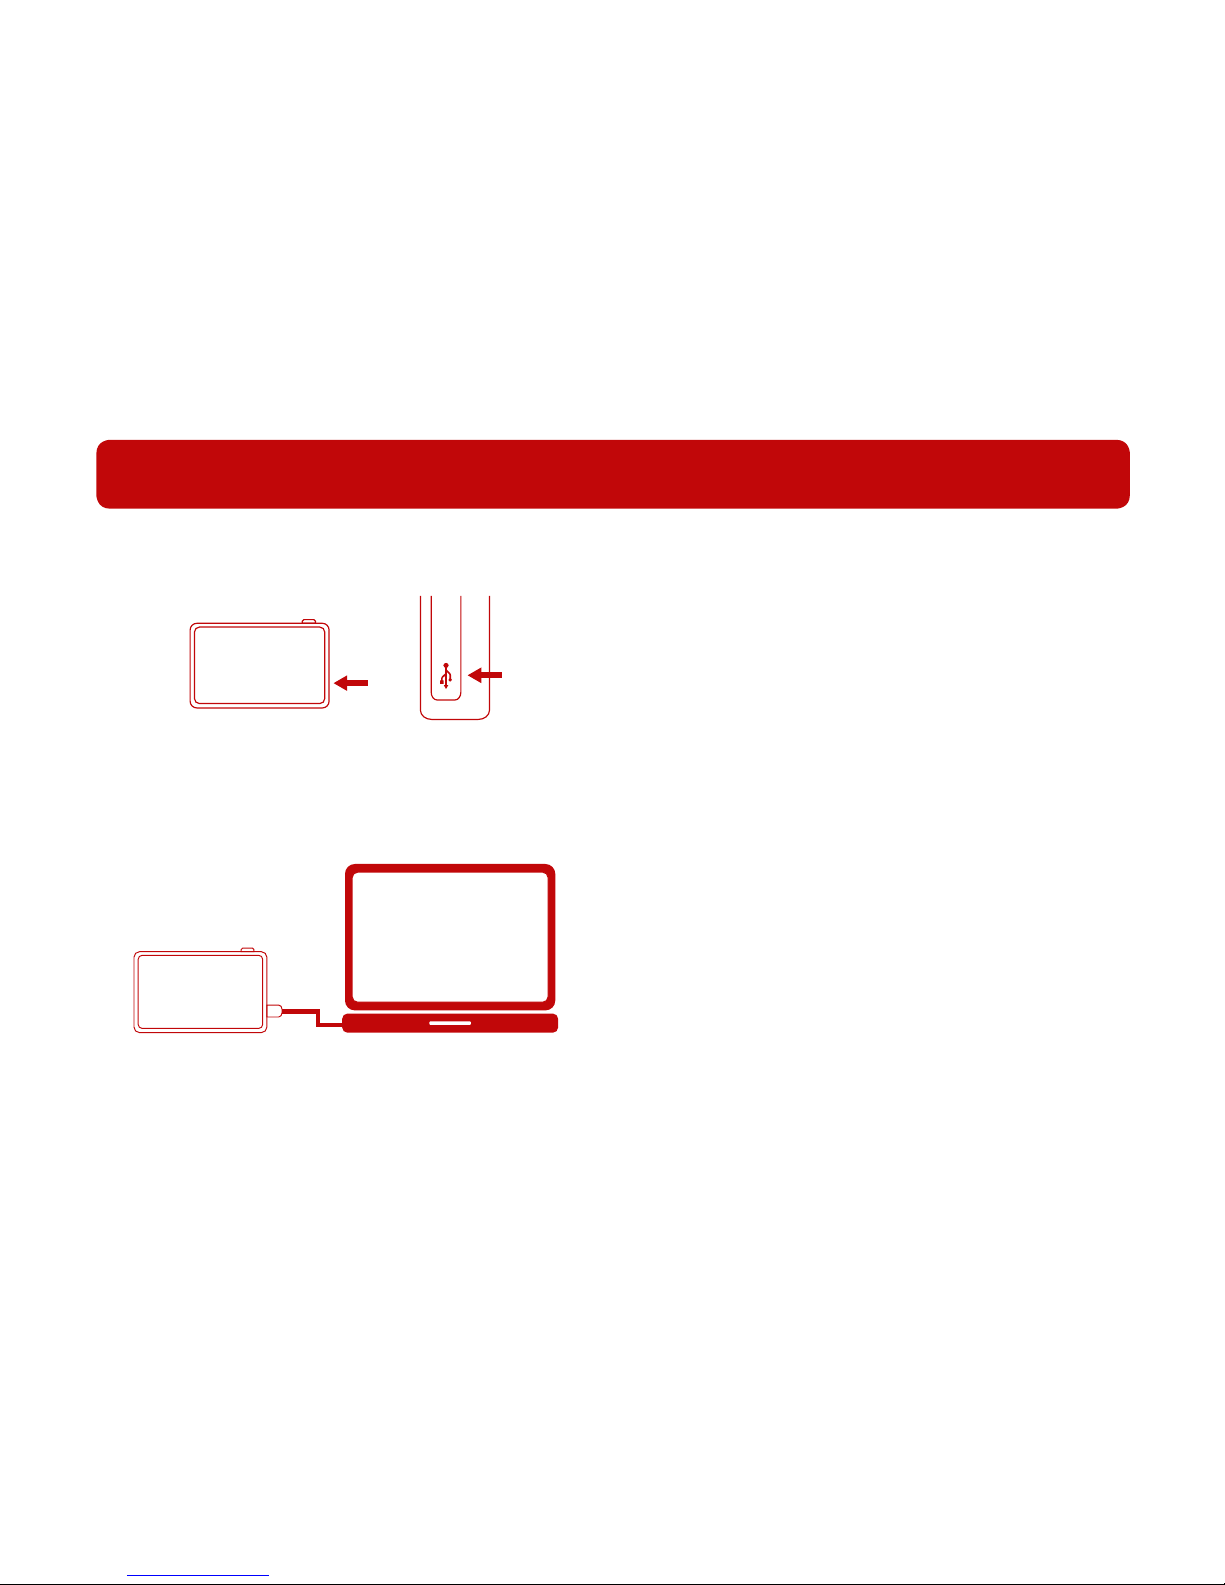
Transferring Files via USB
Locate the micro-USB port on the camera under the
rubber cover.
Connect the micro-USB to your computer to transfer
the les.
Windows
This should appear as an external drive (‘Tiny1’) on
your computer. You will be able to access both the
internal storage and the SD card from the ‘Tiny1’
drive.
Mac
To transfer the les, you will need to use the Android
File Transfer application.
You may download a copy of the application from:
https://www.android.com/letransfer/
You will be able to access both the internal
storage and SD card from the Android File Transfer
application.
Page 35

32
Settings
To change camera settings, tap the menu in the main screen. You should see this screen.
To change a setting, tap on the individual item.
Photo
Settings
Video
Settings
Imaging
Settings
General
Settings
Custom
Settings
Page 36

33
Options: Photo Settings
*FITS, RAW, and DNG captures more data and are larger in size as they are raw camera les.
Resolution 2688 x 1520 / 1920 x 1080 / 1344 x 760
File Format* JPG / JPG + FITS / JPG + RAW / JPG + DNG
Drive Mode Single / 2s timer / 10s timer
Noise Reduction Off / On
JPEG Quality Maximum / High / Medium / Low
Options: Video Settings
Resolution 2688 x 1520 / 1920 x 1080 / 1344 x 760 /1280 x 720 / 672 x 380
Format MP4 / MOV
Frame Rate Frame rate is currently xed at 30 fps
Microphone
Settings
Auto
1 to 20, 1 is least sensitive, 20 is most sensitive
Bitrate Low / Medium / High
Page 37

34
Options: Imaging Settings
Night Mode Off / On / Auto / Shake to turn off
Night Mode changes the camera’s interface to red
to allow you to preserve your night vision.
Shake to turn off allows you to turn off Night
Mode quickly by shaking the camera.
Electronic Level Off / On
Enables you to correct camera tilt
Gridlines Off / On
Makes it easier for you to level out horizontal or
vertical lines
White Balance Auto / Daylight / Shade / Cloudy / Fluorescent /
Tungsten / Custom WB (2500K to 10000K)
Selects the correct white balance to remove
unrealistic colour casts
IR Filter Pass / Cut
Pass allows IR to pass through, causing the image
to look pink in colour. Cut removes IR and the
image will appear normal.
Picture Prole Neutral / Vivid / Portrait / Milky Way /
Northern Lights
Applies contrast, color, tone, saturation, etc to
produce a certain look
Page 38

35
Options: General Settings
WiFi Settings
Access WiFi settings
Location / Time Settings
Access location and time settings
Image Auto
Rotation
Off / On
Automatically rotates portrait images in the gallery
Image Review Time Off / 2s / 4s / 8s
Sets the duration of playback immediately after
capturing an image
Power Save Mode 1 min / 5 min / 10 min / Never
Automatically puts the camera to sleep after set
time
Headphone
Volume
Off / 1 - 5
1 is softest, 5 is loudest
Sets the headphone volume
Screen Brightness Auto / Slider
Sets screen brightness
Page 39

36
Options: General Settings
File Name Settings
Customize your le names
Copyright Information
Add copyright information
Format Card
Permanently deletes all the data on the SD card
Erase All
Erases all les on the card
Reset to Factory
Settings
Resets all settings. Use this if you are having trouble with the
camera.
Reboot to Bootloader
Reboots the camera to bootloader mode to allow ashing of
rmware via PC
Getting Started
Goes to onboarding, provides basics of getting started
Accelerometer
Calibration
Calibrate your accelerometer to allow increased accuracy for star
maps
Reset Accelerometer
Calibration Values
Resets accelerometer values
Allow Internal Storage
Uses the camera internal storage to store les when SD card is
not available
Investigate GPS
Checks GPS Signal
Page 40

37
Options: WiFi Settings
Connect to Wi-Fi
Select an access point to connect the camera to WiFi
Device Name
Edit the name of your camera
MAC Address
Displays MAC address
Turn on Hotspot
Turns on hotspot for transferring images
Set Home Date/Time
Sets your home date and time
Set Overseas Date/Time
Sets your overseas date and time (if you are travelling)
Geotagging
Geotagging Settings
Daylight Time Savings
On/Off
Options: Location Settings
Page 41

38
Options: Custom Settings
Custom settings allow you to add settings that you access frequently to a screen.
Tap the ‘Add or Remove Item’ in the custom settings menu to add items to your custom menu.
To organize the items in your preferred order, tap ‘Organize’ and arrange the items accordingly
 Loading...