

Page 1

w w w . i - t i m e t e c . c o m
SIREN
SET OFF ALARM TO ALERT EVERYONE
User Guide
Page 2
2
w w w . i - t i m e t e c . c o m
TimeTec Smar t Siren
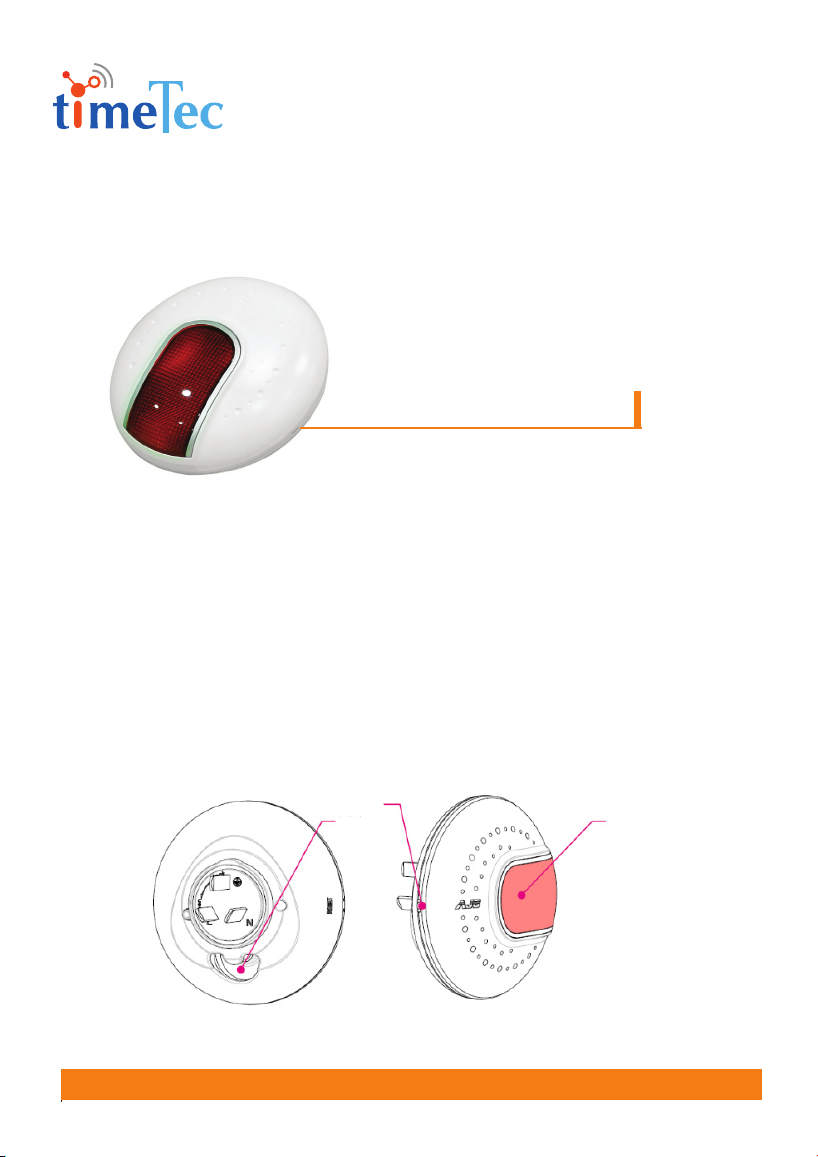
A wireless TimeTec Siren is a device that sends warning signals to people
in the form of sound and light whenever danger is detected. It is equipped
with a bright LED luminous tube and a super buzzer, which can deliver a
stronger warning effect. When the front-end sensors detect abnormal situ-
ations such as intrusion, fire, emergency, etc. The sound and the light siren
will emit a high-decibel alarm warning light after the sound and light siren
is connected. This will deter intruders and remind users
INTRODUCTION
Exit network
alarm button
Soundhole
Strobe light
Page 3
3
w w w . i - t i m e t e c . c o m
TimeTec Smar t Siren
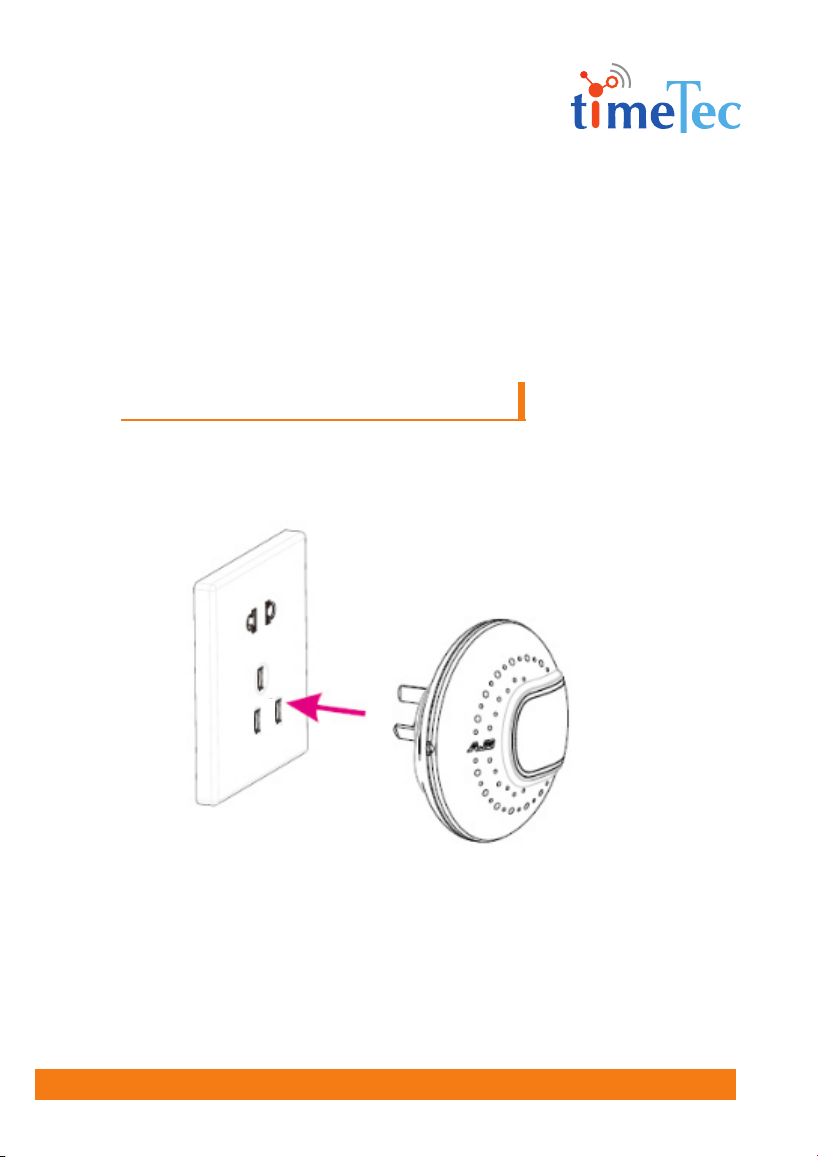
INSTALLATION METHOD
Plug into three-hole socket
Page 4
4
w w w . i - t i m e t e c . c o m
TimeTec Smar t Siren
INSTRUCTIONS
Step 1 • ADD A DEVICE
Please use with TimeTec Gateway Camera.
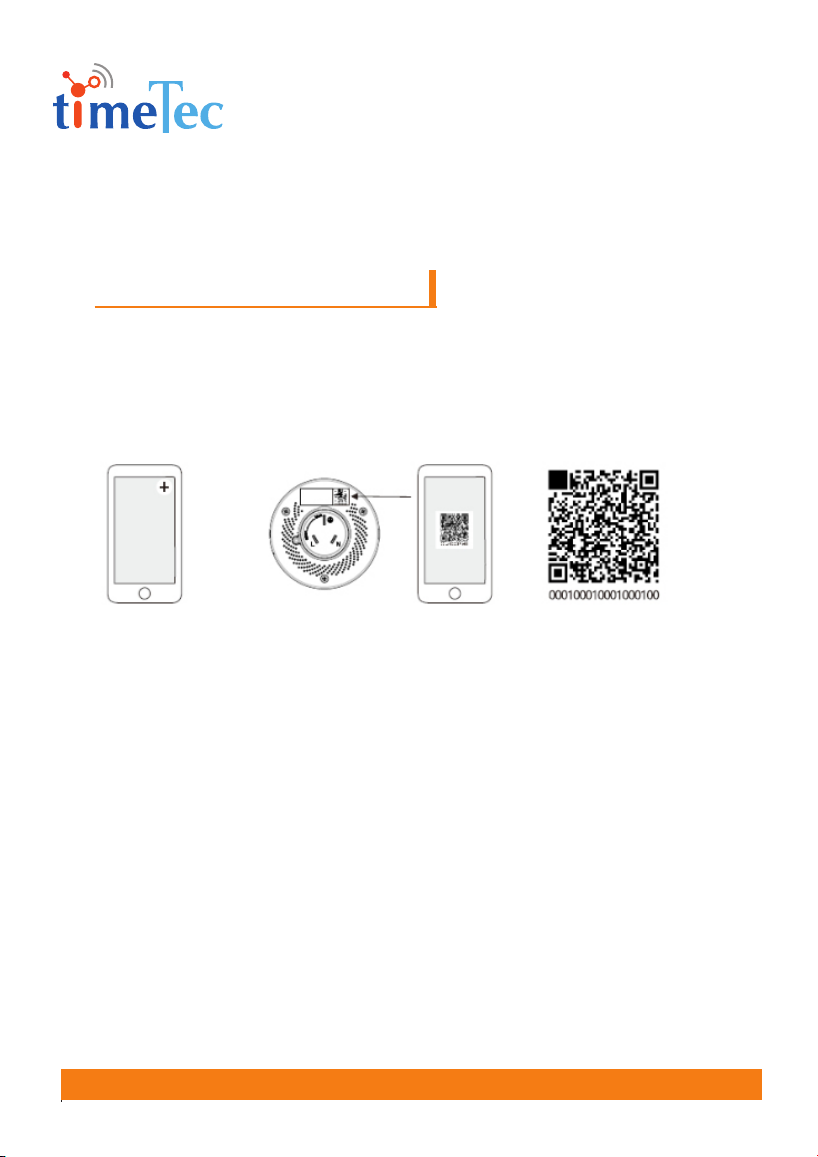
i-TimeTec App Scans the QR code of TimeTec Siren Enter the 18- digit device serial
number below the QR code.
Method 1: Added by QR code scanning:
1. Download and log onto the i-TimeTec APP on your mobile phone. Click “+”
on the Smart Home page to enter the scanning interface;
2. Scan the QR code on the TimeTec Siren cover to add the wireless Siren to the
TimeTec Gateway device according to the prompt (requires network connec-
tion)
Method 2: Added by manual input:
1. Download and log onto the i-TimeTec App on your mobile phone. Click “+”
on the Smart Home page to enter the scanning interface, and then click the
[Enter] button to enter manually the serial number of the front device below
the QR code of the wireless TimeTec Siren.
Page 5

5
w w w . i - t i m e t e c . c o m
TimeTec Smar t Siren
Step 2: CHECK THE NETWORK ACCESS
Network access check:
After adding the TimeTec Siren device, check if the replaceable plug is fastened.
Power on the TimeTec Siren, and it will automatically register for network access
(Click the TimeTec Gateway Camera device interface [Settings]> [Devices]>
[Device List] to ensure the corresponding icon is turned Gray as an indication of
network connection);
Exit network check
After pressing the exit-network alarm button on the side of the TimeTec Siren,
the strobe light will flash once to indicate that the network has been success-
fully disconnected.
Step 3: ALARM ARMED AND CANCELLATION
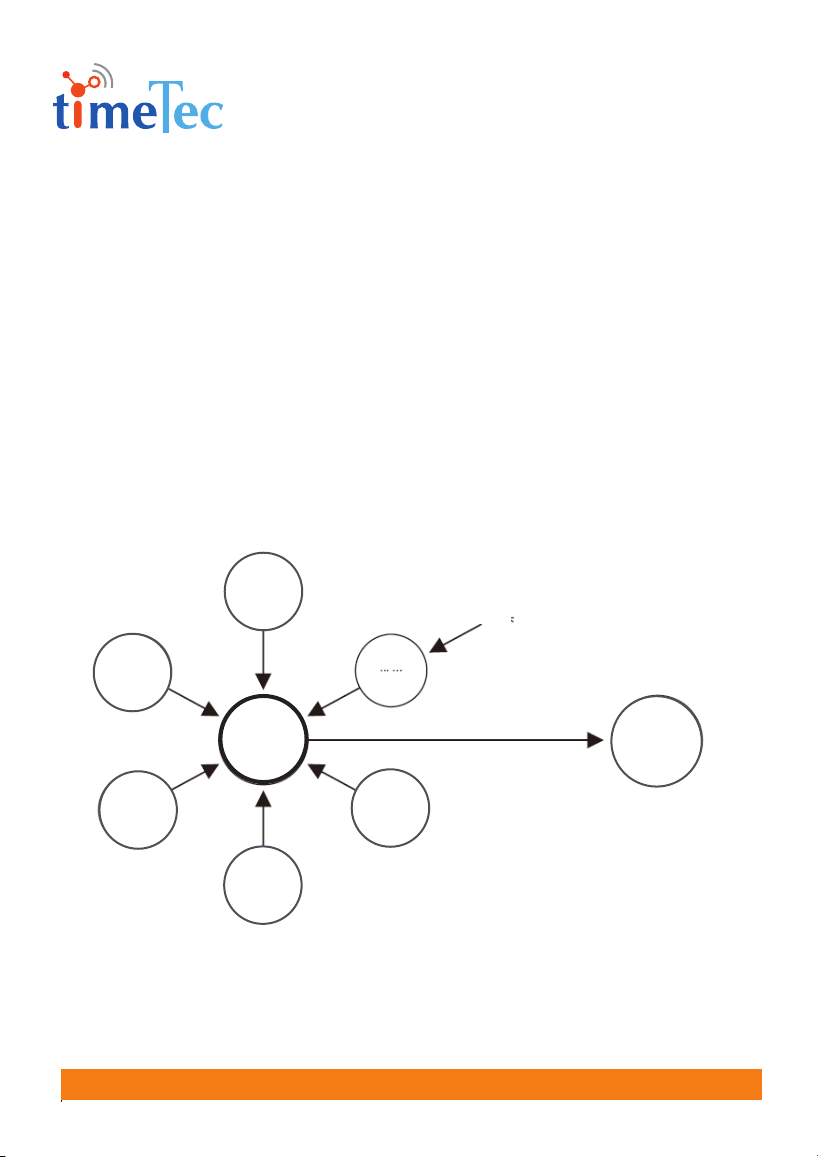
Please use with i-TimeTec probes (such as wireless TimeTec Door/Window
Magnetic Sensors, Wireless TimeTec PIR/Motion Sensor, Wireless TimeTec Panic
Button, Water Leaking Sensors, Smoke sensors, etc.). Add any required probes to
the same TimeTec Smart Gateway device.
1. Alarm arming: Once the TimeTec Siren is connected to the network and the
probe sensor is triggered, the TimeTec Siren alarm will be activated while
Page 6
6
w w w . i - t i m e t e c . c o m
TimeTec Smar t Siren
pushing the alarm information to the i-TimeTec App server. (If the probe type
is: i-TimeTec motion sensor, wireless door/window magnetic sensor, wire-
less smoke sensor and etc., you need to set the arming state on the Gateway
device interface of the i-TimeTec App before you can trigger TimeTec Siren
alarm);
2. Alarm cancellation: The Smart Gateway device interface of the i-TimeTec APP
is set to disarm and to cancel the alarm. If other probe sensors are using a spe-
cial alarm cancellation method, please refer to the alarm cancellation method
in its product manual.
Wireless do or
and window
Motion sen sor
magnetic
sensor
1. Add devi ce
2. Automati c linkage
4. Sound and light alarm
Smart
door lock
TimeTec
Gateway
Human
infra-red
detector
3. Trigger probe sensor
TimeTec Siren
Water sensor
Page 7

7
w w w . i - t i m e t e c . c o m
TimeTec Smar t Siren
Q&A AND TECHNICAL TIPS
1. Q1: TimeTec Siren does not respond when the probe sensor alarm is triggered.
A : TimeTec Siren is not connected properly to the network. Add the device
again in the i-TimeTec App.
2. The device should be installed in a dry place without chemical corrosion.
3. It is strictly forbidden to install under the power-on state during the installation.
The installation place of Smart Siren should be far away from magnetic interfer-
ence.
4. This product can reduce the occurrence of accidents, but there is no foolproof
guarantee. For safety caution and to use this product correctly, it is recommend-
ed that you stay vigilant and strengthen the awareness of safety precautions
practice.
5. Do not frequently disassemble the device, or repair and/or replace its original
components, this can cause serious damage to the product. Any questions or
help required, please contact our support centre at su pport@timt eccloud.c om.
Page 8

w w w . i - t i m e t e c . c o m
© 2 019 Time tec Cloud Sdn Bhd . Al l rig hts rese rved • 12 2019
 Loading...