

Page 1
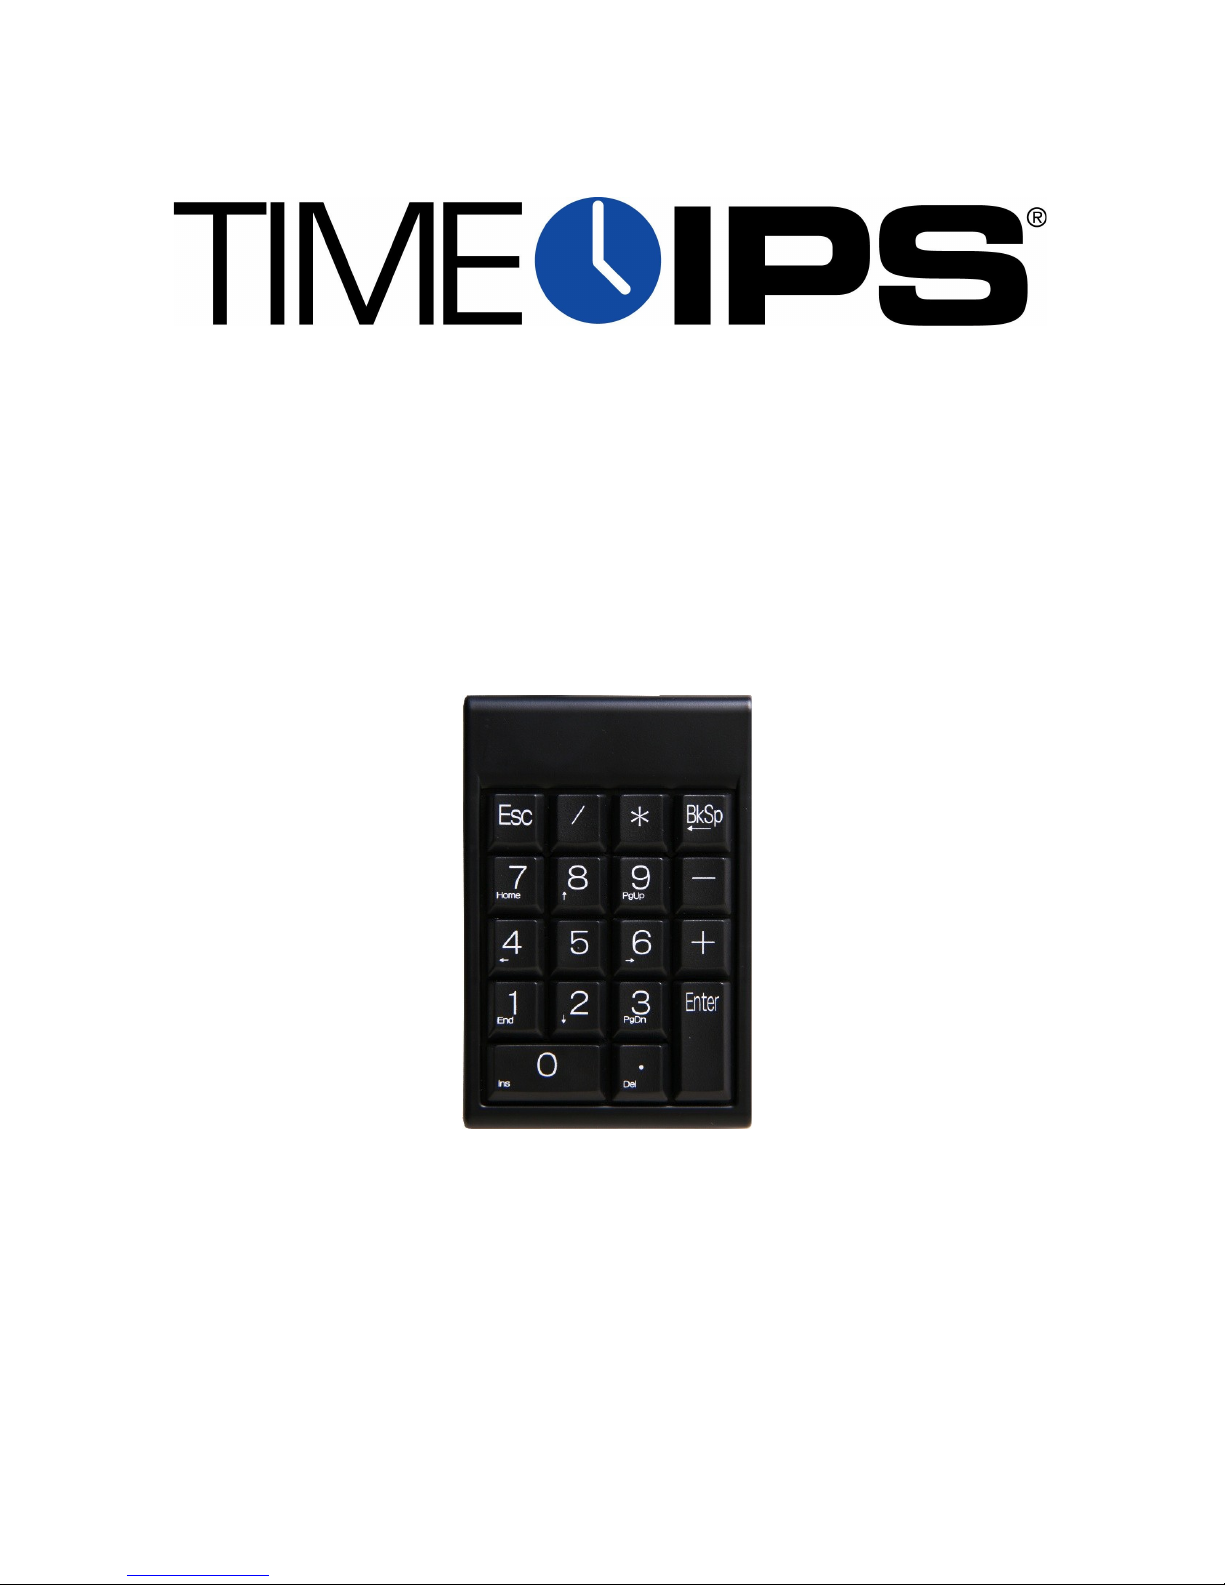
KEY-PAD18
TimeIPS Keypad
Installation Guide
Page 2

FCC Declaration of Conformity (DoC)
Compliance Information (according to FCC 2.1077)
(1) Product: KEY-PAD18
The above device complies with Part 15 of the FCC Rules.
Operation is subject to the following conditions: (1) these devices may not cause harmful
interference, and (2) these devices must accept any interference received, including
interference that may cause undesired operation.
(2) The responsible party is TimeIPS, Inc. 5445 E 85th St N, Valley Center KS, 67226. Phone
316.264.1600
Notice to Users
The components in this system have been tested and found to comply with the limits for a
Class B digital device, pursuant to Part 15 of the FCC Rules. These limits are designed to
provide reasonable protection against harmful interference in a residential installation. The
device generates, uses and can radiate radio frequency energy and, if not installed and used in
accordance with the instructions, may cause harmful interference to radio communications.
However, there is no guarantee that interference will not occur in a particular installation. If this
equipment does cause harmful interference to radio or television reception, which can be
determined by turning the equipment off and on, try to correct the interference by one or more
of the following measures:
• Reorient or relocate the receiving antenna.
• Increase the separation between the equipment and receiver.
• Connect the equipment into an outlet circuit other than the one to which the receiver is
connected.
• Consult the dealer or an experienced radio/TV technician for help.
These devices have been tested to comply with the limits for a Class B computing device,
pursuant to FCC rules. In order to maintain compliance with FCC regulations, shielded cables
must be used with the equipment if not connected directly to the system. Operation with
unshielded cables is likely to result in interference to radio and television reception.
CAUTION: Changes and modifications made to the device without the approval of the
manufacturer could void the user's authority to operate this device.
Page 2 http://support.timeips.com 316.264.1600 TimeIPS
Page 3

Table of Contents
Overview.....................................................................................................................3
Accessing System Menu.............................................................................................3
Mount the Keypad ......................................................................................................4
Connect The Cable......................................................................................................5
Configure Badge Numbers..........................................................................................6
Train Employees .........................................................................................................7
Keypad Commands................................................................................................7
Entering Clock Events...........................................................................................7
Technical Support........................................................................................................8
Specifications..............................................................................................................8
Overview
The KEY-PAD18 provides:
● PIN number employee clocking
● Status check
● Job Codes (on TimeIPS systems with job tracking)
● Numeric Clock Notes
● Access to system menu
Accessing System Menu
To access the system menu, press Enter. You will be prompted for your badge
number and PIN number. If no Badge/PIN is required (default) simply press Enter.
TimeIPS http://support.timeips.com 316.264.1600 Page 3
Page 4
Mount the Keypad
Failure to mount and maintain the KEY-PAD18 unit with the
following guidelines will void your warranty.
● Mount the unit in a dry, indoor location with controlled
temperature and humidity. Do NOT use the unit in any location
where rapid temperature changes may cause condensation.
● The rated operating temperature is between 5C and 35C (41F to
95F).
● Mount the device away from strong magnetic or electro-magnetic
fields, such as those produced by microwave ovens, two-way
radios or industrial equipment.
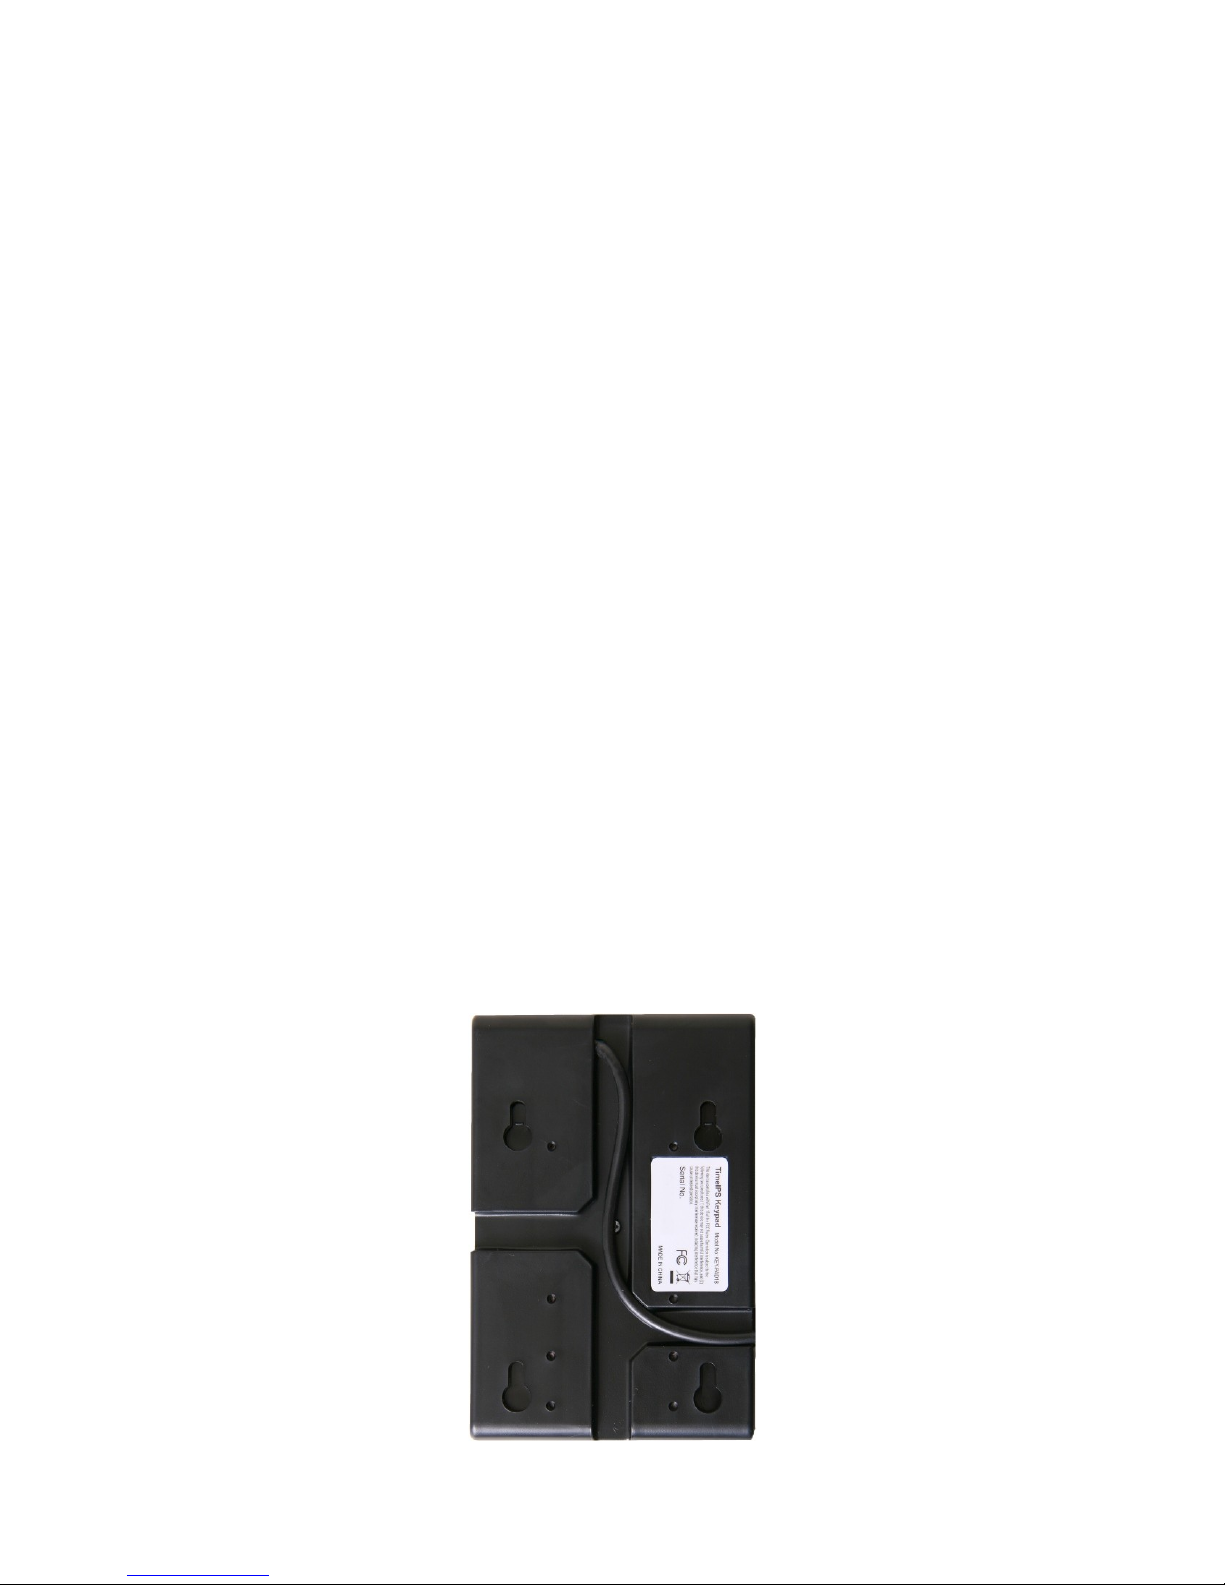
● We recommend mounting the keypad with two #6 pan head screws
and wall anchors. Optionally, for rough environments you may use
four screws and wall anchors. Refer to the included mounting
template for assistance in placing the wall anchors and screws. For
walls that can not support screws, hook-and-loop fasteners, such as
Velcro brand adhesives, can be used.
● The cable routing on the back of the keypad allows the keypad to
be mounted above, below or to either side of your TimeIPS LCD
display or Network Clock.
Page 4 http://support.timeips.com 316.264.1600 TimeIPS
Page 5
Connect The Cable
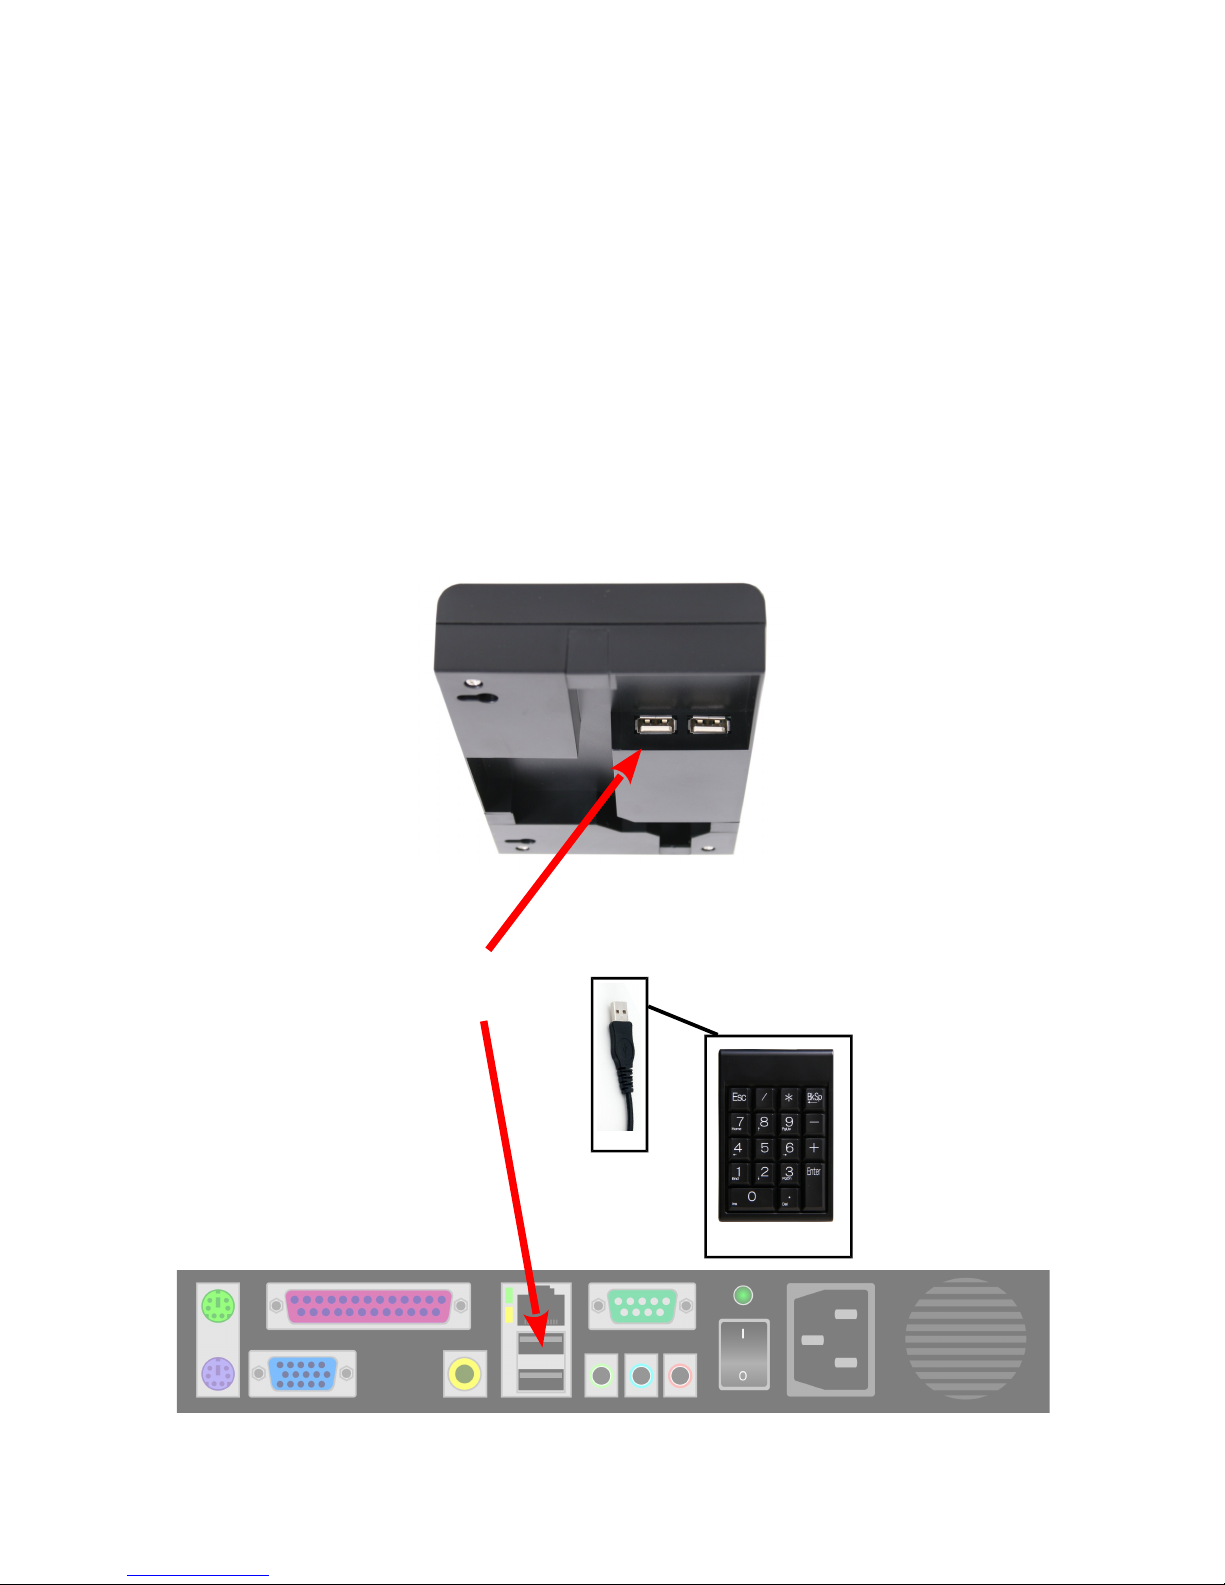
Connect the USB cable to a free USB port on the back of an LCD
display or Network Clock. The keypad can also connect directly to a
USB port on the back of a TimeIPS system.
If needed, a USB extension or USB hub can be used to extend the
cable length. Never use an extension cable if the total cable length
will exceed 10 feet. (USB HID devices are limited to 3M cable
length.)
Note that it takes 10-15 seconds before the keypad will respond if
plugged into a running TimeIPS system. There is no need to
shutdown the system to attach or detach the keypad.
TimeIPS http://support.timeips.com 316.264.1600 Page 5
USB
Connector
DB-9
Connector
Parallel
Port
Connector
Keypad
USB
Connect to an LCD
Display, Network
Clock or directly to
a TimeIPS system
Page 6

Configure Badge Numbers
The employee ID number is set in the “ID / Badge” field by going to
“Administration” > “Employee Management” > “Employees” and
selecting the employee on the list by clicking the “+” next to their
name. You will see that the “ID / Badge” field is set to a default
number (usually a sequence starting with 1000, or the number entered
on the guided setup). This auto-assigned ID / Badge Number can be
changed as needed.
Prior to setting up any new employees, please consider if the default
Employee ID Number of 1000 assigned to the administrative
employee is how you want to begin your Employee ID Number
sequence. If not, please consider the following:
Changing the administrative employee's ID number or setting up
a new employee's Individual Employee ID number can be
handled 2 different ways:
1. Accept the automatically assigned sequential ID / Badge Number
that the system will give to each new employee.
2. Assign a unique number in the ID / Badge Number field as needed.
If you want each employee to have their own custom number (such
as their driver's license number or Social Security Number), you'll
have to override the auto-generated employee ID number
generated by the system on each employee.
Page 6 http://support.timeips.com 316.264.1600 TimeIPS
Page 7
Train Employees
Keypad Commands
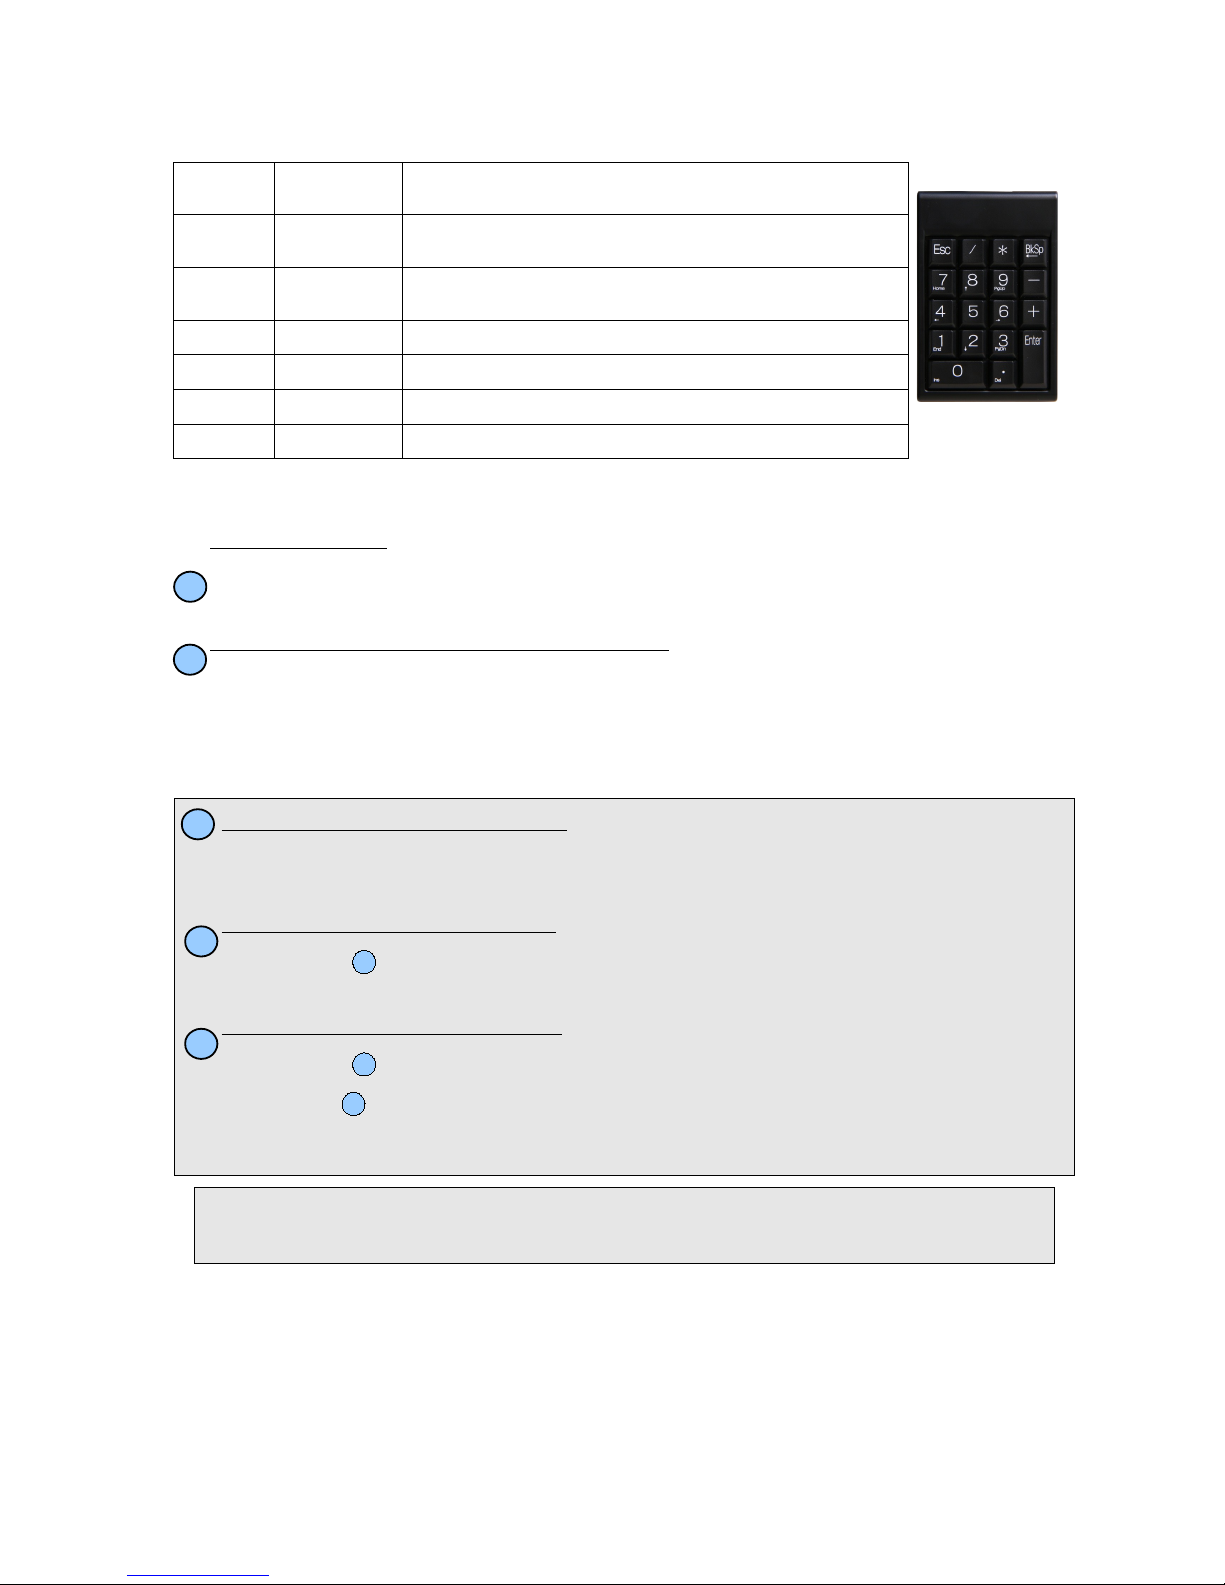
Key Label Key Name Description
/
[Info]
Information
Code
Retrieves clock-in/out status, and hourly time information for an
employee
*
[ID]
Badge Code Denotes that the following number is a badge number and will be
used to clock an employee in or out
Enter
Enter Key
Submits job code, and/or badge number to the system
ESC Escape Key Clears entered text or goes up one level in the menu system.
0-9
Number Keys
Used to enter badge numbers and job codes
BkSp
Backspace
Used to remove last typed character in case of incorrect entry
Entering Clock Events
Clock-In/Clock-Out
1. Type an employee ID/Badge number and press <Enter>.
Example: 111222333 <enter>
Check Clocked In/Out Status and Hours Remaining
1. Type forward slash on keypad followed by an employee ID/Badge number and press <Enter>.
Example: /111222333 <enter>
(Hours remaining only show for hourly employees)
If Your System Includes Job Tracking:
Successful clock in or out will generate “in” or “out” message, and LCD display will indicate current
date, time, employee name and time in or out.
If you mistype when entering any number, use the “BkSp” key or the “ESC” key on the keypad to
clear incorrectly typed numbers.
TimeIPS http://support.timeips.com 316.264.1600 Page 7
A
B
Clock-In to a Job/Change to a New Job
1. Type job code * and an employee ID/Badge number and press <Enter>.
Example: 4567*111222333 <enter>
Clock-Out of a Job and Stop Working
1. Perform above.
(No job code entry required)
Clock-Out of a Job and Keep Working
1. Perform above.
2. Repeat above.
(No job code entry required)
A
A
A
C
D
E
Keypad
Note: Enter job work-order numbers, notes, or any other related information up to 250 characters when
clocking in/out with the following format: WorkOrderOrJobNote++JobNumber*BadgeNumber.
Example with work-order number 12345, job 4567 and badge 111222333: 12345++4567*111222333
Page 8

Technical Support
Technical Support Resources:
1. Our support web site at http://support.timeips.com offers extensive
resources including documentation and our knowledge-base. Please check
our support web site first, as it provides complete answers and instructions
on almost everything. In the "Knowledge Base Search:" box, enter a few
words describing your question. For example, if you have a question on
job codes, type "job codes" and browse the articles listed.
2. If you have a question not answered on our support site, you can call or
email us. A serial number or registration number is required for this
service. Additional support can be purchased by calling TimeIPS, or by
visiting our web site at http://secure.timeips.com.
3. If you have a simple question, or need direction on how to use our support
resources, feel free to email us at [email protected]. If your question
is quick, we'll be happy to help. If it's not, we'll let you know that you
need to purchase additional support.
Support website http://support.timeips.com
Support e-mail [email protected]
Support phone number 316.264.1600
This manual is copyright 2004-2012 TimeIPS, Inc. TimeIPS and the TimeIPS logos are registered
trademarks of TimeIPS, Inc. All other trademarks are the property of their respective owners.
Thank you for reading this manual carefully. If you noticed errors, have any suggestions or found
typographical problems, we want to know! Please send an email with the version code below and your
feedback to [email protected] We appreciate your time.
Version: KEY-PAD18v2_2.0.0 131008
Page 8 http://support.timeips.com 316.264.1600 TimeIPS
Specs:
Approximate dimensions:
3in (75mm ) x 4.5in (113mm) x .5in (12mm)
Approximate weight:
~0.2lb (~100g)
Power:
5VDC, .25W (typical) Supplied via USB
Operating environment:
41° - 95°F (5° - 35°C) non-condensing
System Requirements:
TimeIPS system or LCD display with
open USB port.
 Loading...