

Page 1
Installation & Operating Instructions
7 Day Digital Light Switch
with Optional Dusk Start
Cat No. ZV700B
Page 2

1
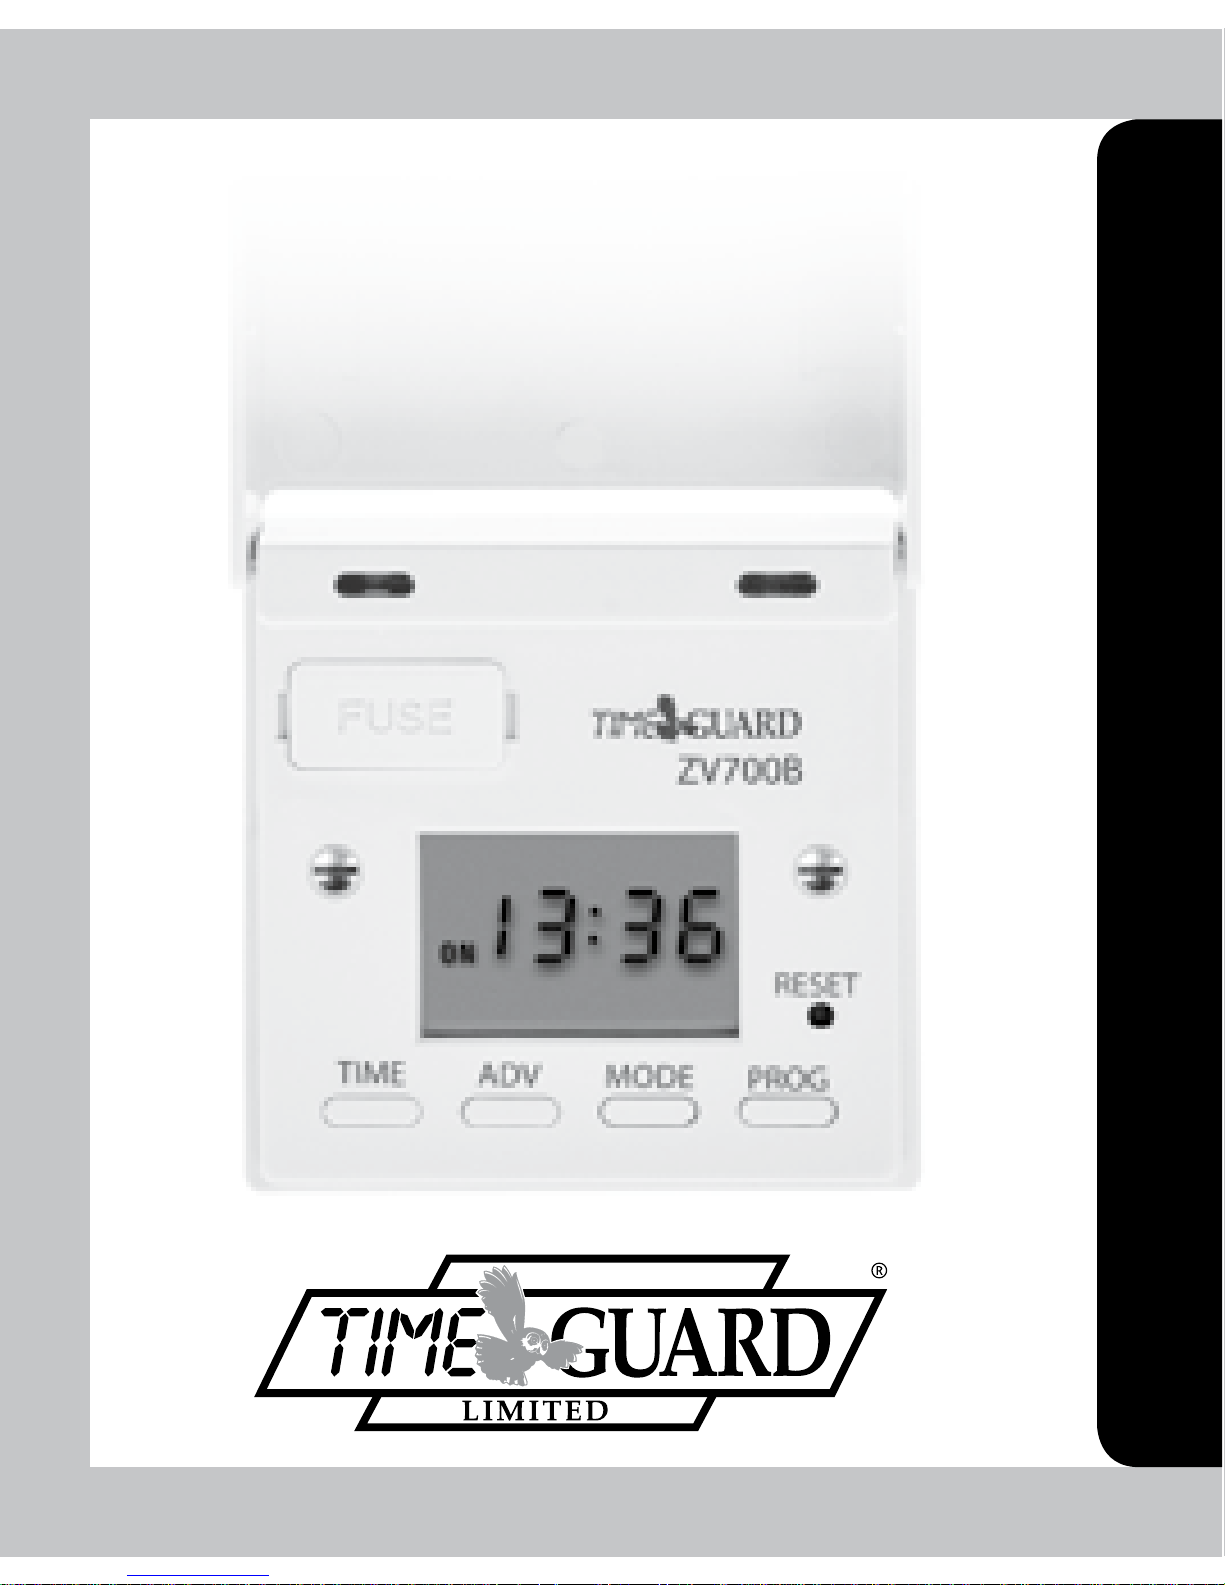
ZV700B – Flap Closed
1. General
The ZV700B combines the function of a manual light switch, with the option
of automatic timed control of lighting on a weekly basis available at the press
of a button. There is a further option of starting an automatic lighting period
at dusk, but ending it with a timed OFF, and a random option, based around
programmed times.
Packed Set:
ZV700B Spare 2A fuse
2x M3.5 x 36mm fixing screws User manual
Press flap to override
output
Output LED
Flap hinges open
Photosensor
Page 3
2
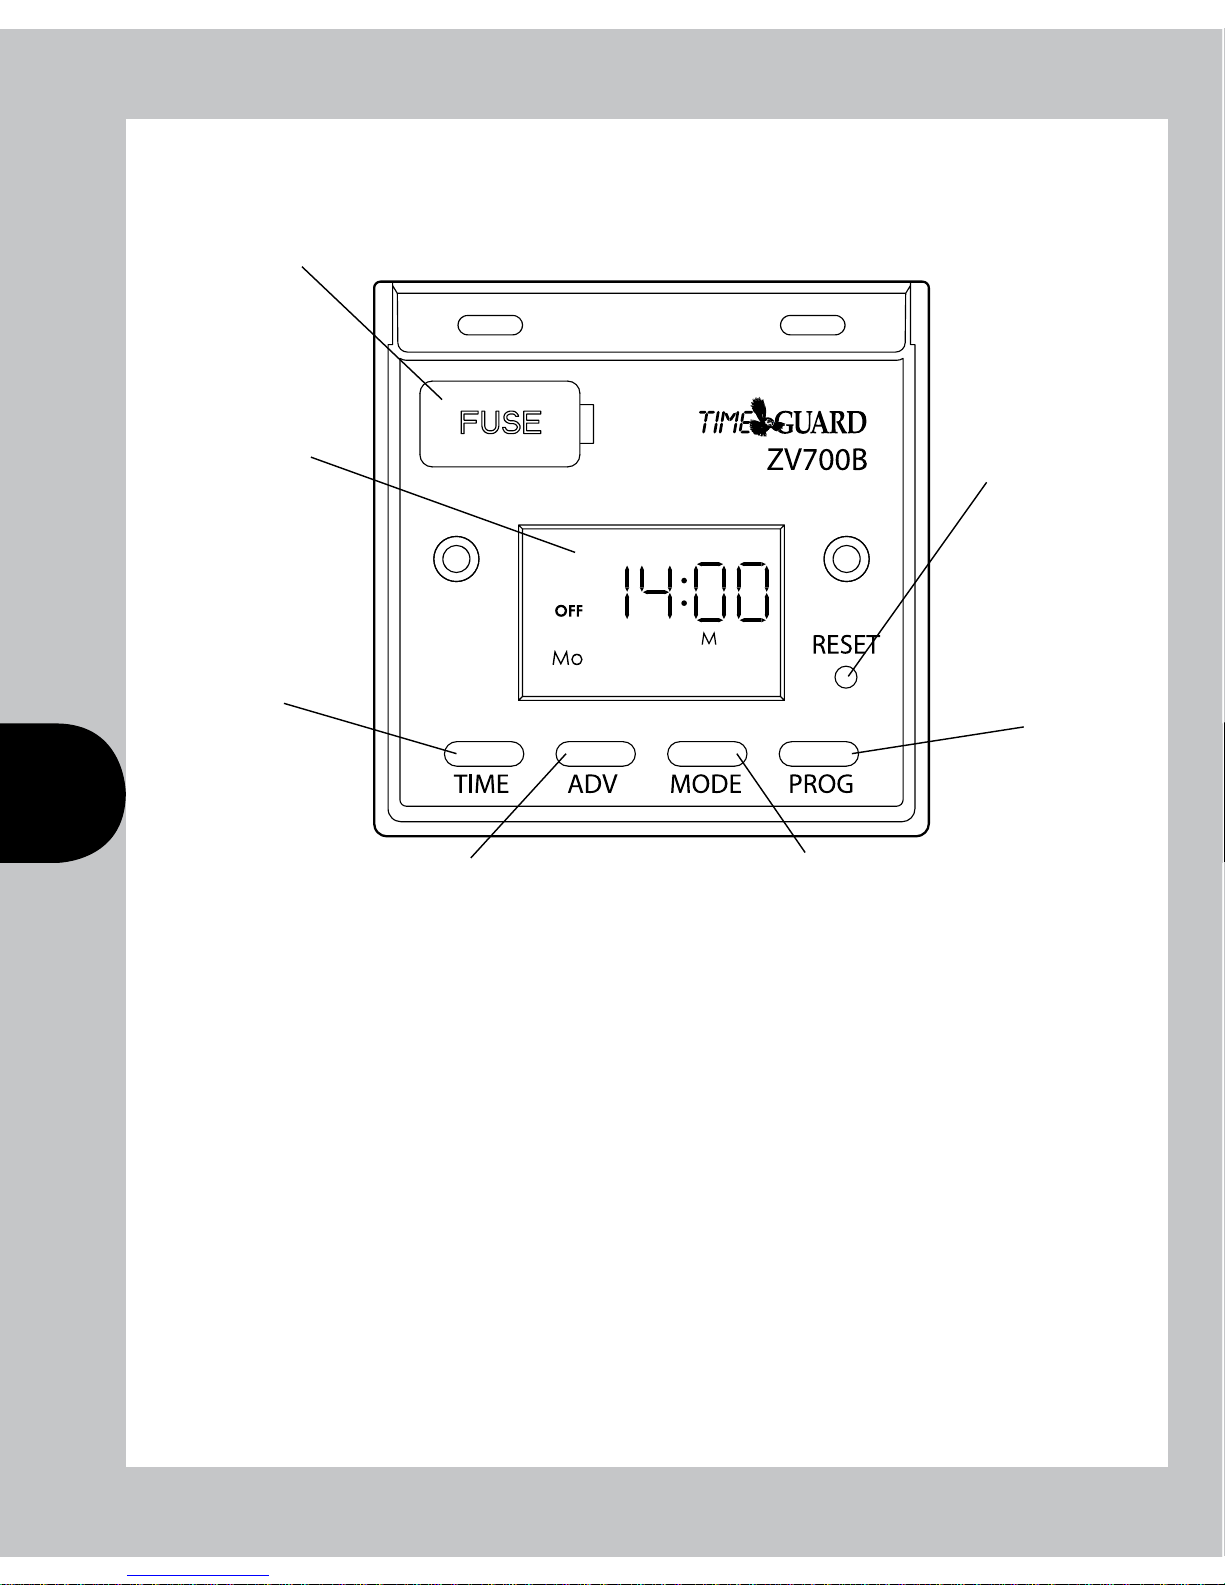
ZV700B – Flap Open
The ZV700B has an internal battery back up for preserving the correct time,
and the programmed times, for a period of one month.
There is an option to set automatic summer/winter change over.
The ZV700B is designed to work with low energy lighting.
Please refer to the specifications for rated loads.
Note, the ZV700B is not designed for use with LED or discharge lighting.
Large
Illuminated
LCD display
BS646 fuse,
rated at 2A
Reset button
Prog button,
used in
conjunction
with adv
and mode
buttons during
programming
Time button,
used in
conjunction
with adv
and mode
buttons to
programme
times
Adv button, used to
change output status
Mode button, used to
change operating mode
Page 4
3
2. Installation and Commissioning
We recommend that this unit
be fitted by a qualified electrician.
Install in accordance to wiring
and current building regulations.
Please read the instructions carefully.
If in any doubt contact the
Timeguard helpline.
Switch off mains electricity.
Remove the existing light switch, and transfer the wires to the ZV700B
according to the following instructions:
If the switch is an ON/OFF type, the supply wire should be inserted into the live
terminal (com), and the live out (L1) to the load terminal. Do not disturb any
earth wires connected to the wall box terminal.
If the switch is a 2-way switch, used in conjunction with a second light switch,
it will have 3 wires. In this case the wire originally connected to COM terminal
must be connected to the live terminal. The remaining two wires connect to the
Load (L1) and the 2 way (L2) terminals in either position.
If two wires are connected to any one terminal on the original switch,
these should be kept together and inserted into the corresponding single
terminal on the ZV700B.
Once mains power has been restored, the ZV700B will require its internal
battery to be charged before programming. Once it is charged sufficiently
(Approximately 4 hours), the display will show “––:––”
Reset must be pressed before commencing programming.
Page 5

SET
SET
Mo Tu We Th Fr Sa Su
SET
MODE
SET
Day
SET
SET
SET
SET
ON
Prog
Mo Tu We Th Fr
SET
Mo Tu We Th Fr Sa Su
SET
MODE
SET
Day
Time
SET
SET
SET
Year
SET
SET
OFF
Mo
ON
Prog
Mo Tu We Th Fr
SET
Mo Tu We Th Fr Sa Su
SET
MODE
OFF
Prog
Mo Tu We Th Fr
SET
SET
Day
Time
SET
SET
SET
Year
Month
SET
SET
SET
OFF
Mo
ON
Prog
Mo Tu We Th Fr
SET
Mo Tu We Th Fr Sa Su
SET
MODE
Sa Su
ON
Prog
SET
OFF
Prog
Mo Tu We Th Fr
SET
SET
Day
Time
4
3. Programming the Time and Date:
From first power up, the screen should show “––:––”
Press ‘Time’ and hold for 3 seconds. Whilst holding, the word hold will show.
Once in time programme mode, the first option is day light saving
(summer/winter changeover), on or off. The screen should show ‘dS:Y’,
and using the ‘Adv’ and ‘Mode’ buttons changes it to ‘dS:n’.
Press ‘Time’ to adjust the year. The default year should show as 2009.
Use ‘Adv’ or ‘Mode’ to change the year to the correct year.
Press ‘Time’ to adjust the month. The second two digits should blink.
Page 6

SET
Mo Tu We Th Fr Sa Su
SET
MODE
SET
Day
SET
SET
ON
Prog
Mo Tu We Th Fr
SET
Mo Tu We Th Fr Sa Su
SET
MODE
SET
Day
Time
SET
SET
OFF
Mo
ON
Prog
Mo Tu We Th Fr
SET
Mo Tu We Th Fr Sa Su
SET
MODE
OFF
Prog
Mo Tu We Th Fr
SET
SET
Day
Time
5
Use ‘Adv’ or ‘Mode’ to set the day.
Press ‘Time’ to set the time. The hour symbol should blink.
Use ‘Adv’ or ‘Mode’ to set the hour. The hour is a 24hr clock.
Use ‘Time’ to move the blinking to the minutes.
Use ‘Adv’ or ‘Mode’ to set the minutes.
Press ‘Time’ to exit the Time/date entry, and return to the operating mode.
The display should
now read.
Use ‘Adv’ or ‘Mode’ to set the month.
Press ‘Time’ to set the day. The first two digits should blink.
Page 7

Mo Tu We Th Fr Sa Su
SET
MODE
ON
Prog
Mo Tu We Th Fr
SET
Mo Tu We Th Fr Sa Su
SET
MODE
6
4. Programming the ON/OFF Times:
Press ‘Prog’ and hold for 3 seconds. Whilst holding, the word hold will show.
The mode screen will show.
Use ‘Adv’ or ‘Mode’ to change the program mode. This will scroll through the
following programming options:
24hr – Mo Tu We Th Fr Sa Su.
5 day – Mo Tu We Th Fr (2 day – Sa Su).
7 day – Mo
Once the desired option is selected, press ‘Prog’ to move onto programming
ON/OFF times.
Display will show
prog 1 ON, and the hour
cursor should be blinking.
Showing correct time/day of the week, and output status OFF.
During programming, when the ‘Adv’ or ‘Mode’ buttons are held down,
the adjusted setting will scroll faster.
Holding down the ‘Time’ button for 3 seconds will exit the programming
time/date mode. This can be done at any time during programming.
Page 8

ON
Prog
Mo Tu We Th Fr
SET
Mo Tu We Th Fr Sa Su
SET
MODE
OFF
Prog
Mo Tu We Th Fr
SET
ON
Prog
Mo Tu We Th Fr
SET
Mo Tu We Th Fr Sa Su
SET
MODE
Sa Su
ON
Prog
SET
OFF
Prog
Mo Tu We Th Fr
SET
7
Use ‘Adv’, ‘Mode’ and ‘Prog’ to set the OFF time.
Press ‘Prog’ twice so that the ON time for programme 2 flashes. Scroll through
programme 2 ON, programme 2 OFF, press ‘Prog’ twice, programme 3 ON,
programme 3 OFF, press ‘Prog’ twice, programme 4 ON, programme 4 OFF,
press ‘Prog’ twice, programme 5 ON, programme 5 OFF, press ‘Prog’ twice,
programme 6 ON, programme 6 OFF, adding in times as required.
At any stage, after programming an off time, if ‘Prog’ is pressed once,
there is the option of changing to the next day, and skipping the remaining
ON/OFF times.
Press ‘Prog’ to move to
next programmed time
mode (in example
shown Sa Su).
(The example shown is for 5 + 2 programme, as screen shows Mo Tu We Th Fr)
For the 24hr mode, Mo Tu We Th Fr Sa Su will remain displayed
during programming.
For 7 day different mode, the default will start with Mo, and when
programming is complete for Mo, it will move on to Tu, We, Th, Fr, Sa, Su in turn
until all are programmed.
Use ‘Adv’ or ‘Mode’ to set the time, using ‘Prog’ to change between hours
and minutes.
Press ‘Prog’ to change
to programme 1 OFF time.
Page 9

ON
Prog
Mo Tu We Th Fr
SET
Mo Tu We Th Fr Sa Su
SET
MODE
OFF
Mo
Sa Su
MODEA
ON
Prog
SET
OFF
Prog
Mo Tu We Th Fr
SET
8
Set ON/OFF times as before.
Once programme 6 OFF has been set, press ‘Prog’ to exit programme mode.
At any time during programming, if the ‘Prog’ button is held down for 3 seconds,
the ZV700B will return to operating mode.
The display will
now show.
Where the time is correct, the day is correct, and the ON/OFF indicator reflects
the current programme. The default mode when leaving programming is ‘Auto’,
depicted by an A on the display.
4a. Reviewing Programmes:
Press and hold ‘Prog’ until the programmed mode shows on the screen. This will
show the mode the ZV700B was programmed in. It is possible at this stage to
change this mode (say from 24 hr to 5+2) using ‘Adv’ or ‘Mode’, but this may blank
any previously entered times. Press ‘Prog’ to confirm the mode you wish to change.
Use ‘Adv’ or ‘Mode’ to scroll to the day(s) that needs reviewing. Press ‘Prog’
to access the entered times, and change as per programming instructions.
Programming Across Midnight:
To programme across midnight, enter the start time of the last period
(say 20:00), and then leave the end time blank ”––:––”.
Start the next days ON period at 00:00 and then enter the OFF time
that is required.
Note: For 24 hour setting the first ON period would be 00:00 for all 7 days.
Page 10

9
5. Operating Mode:
In operating mode, ‘Adv’ advances the programme to the next change. If the
output is OFF, it will change the output to ON until the next programmed
OFF period. If the output is ON, it will turn it OFF until the next programmed
ON period. The plastic flap presses on the ‘Adv’ button to turn the output on.
It is not necessary to open the flap.
The ZV700 has four operating modes. Pressing the mode button scrolls
between modes.
Auto mode (A): The output will be controlled by the programmed times.
Photocell (P): This operates using the programmed ON/OFF times, but the output
only switches on when the light level drops. The output will only
come on if it is within a programmed on period.
Random mode (R): This uses the programmed ON/OFF times. On a random basis,
it can change the ON/OFF times programmed by up to 30 minutes earlier, or
later than programmed.
Manual mode (M): In manual mode the output is controlled by the Adv button,
not the programmed times.
6. Back Light:
The back light will turn on when any button is pressed. It will remain on
for 30 seconds after the last button press.
When scrolling times in programming mode, either from 0 to 24 hours,
or 00 to 59 minutes, there is the option of re-entering ”––”.
Cancelling Programmes:
Programmes can be cancelled by re-entering ”––”. instead of the hour
and minutes. Both ON times, and OFF times need to be blanked out.
Page 11

10
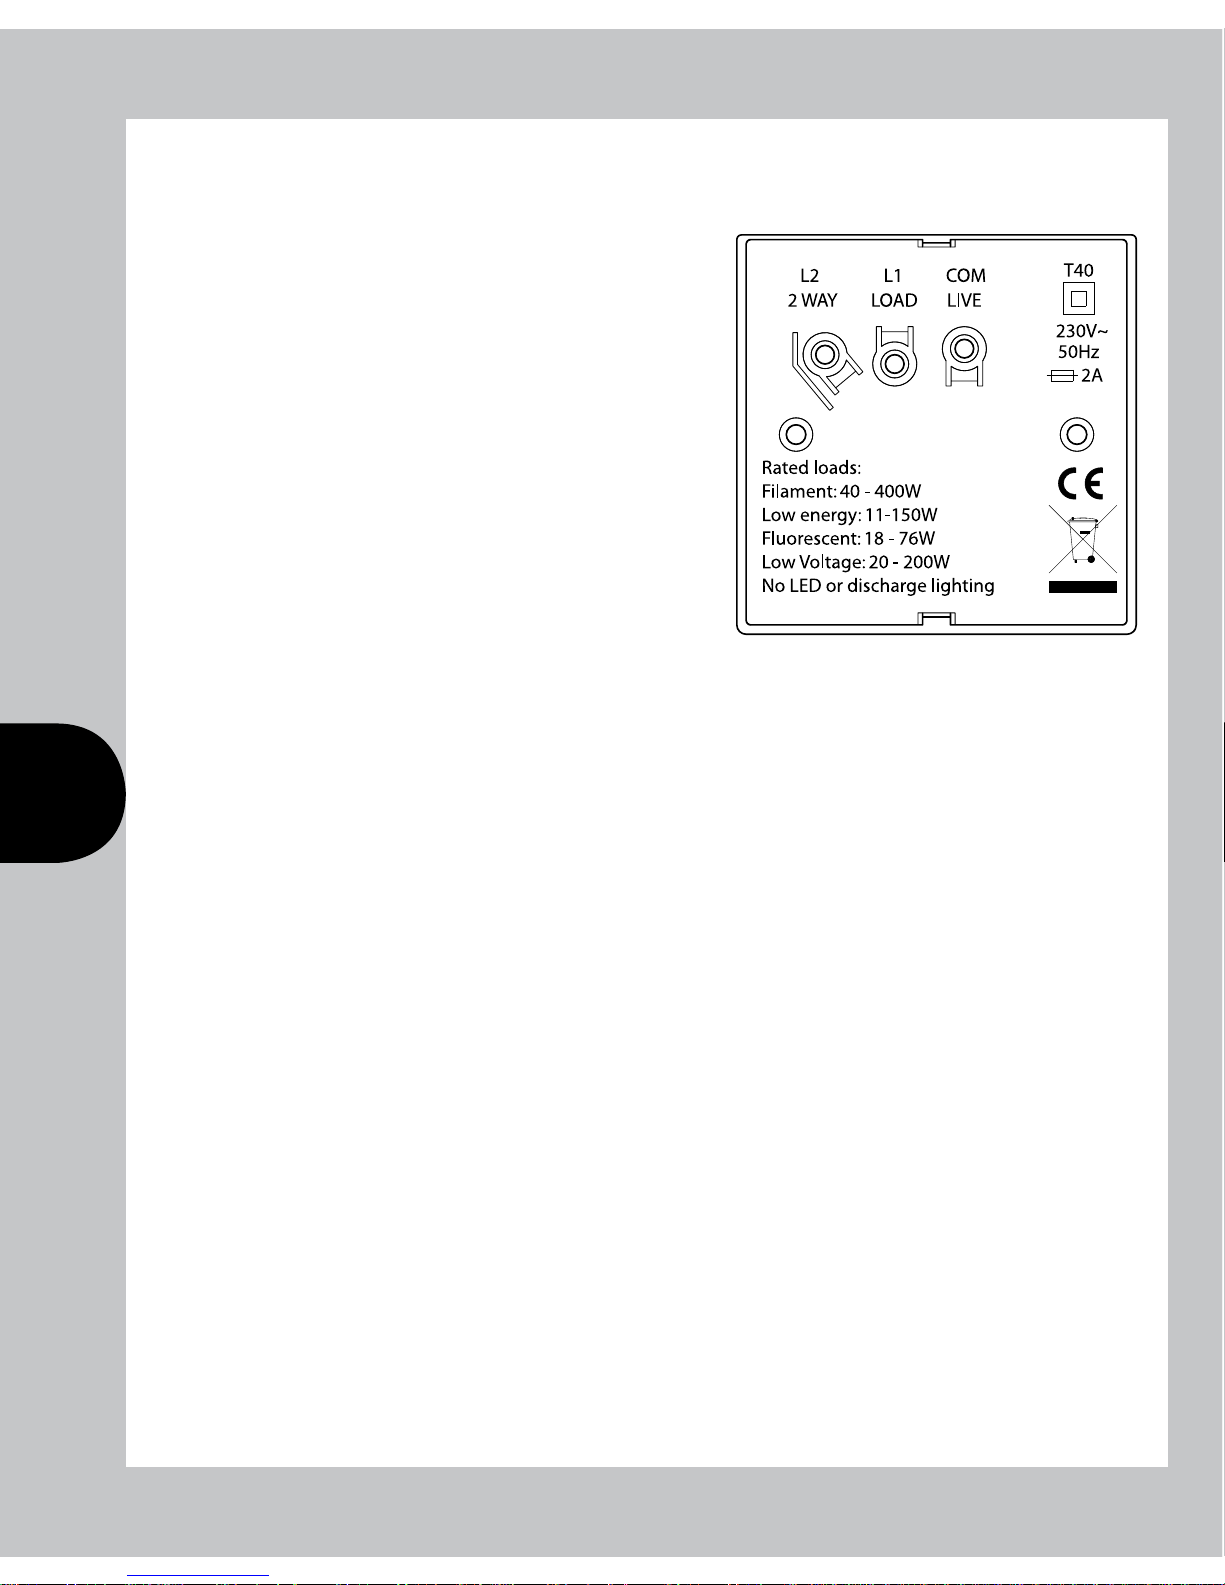
7. Specifications:
Conforms to directives: Conforms to latest directives
Rated loads: Filament 40 – 400W
Low energy 11 – 150W
(minimum individually 11W)
Fluorescent 18 – 76W
Low voltage 20 – 200W
Battery backup: 720 hours by factory fitted internal battery
Operating ambient temperature: -10°C to 40°C
Operating voltage: 220 – 240 VAC
Dusk start: <10 LUX
Terminations: Suitable for 1mm sq. and 1.5mm sq. solid
conductors and stranded equivalents
Fuse: 2A rated BS646 fuse, 5mm x 20mm
Back box: The ZV700B requires a 25mm deep back box
Not suitable for discharge lighting (eg: SON and Metal Halide)
Not suitable for LED lighting
Page 12

Zerofour – July 2014
67.058.507 (Issue 2).
Timeguard Limited.
Victory Park, 400 Edgware Road,
London NW2 6ND
Sales Office: 020 8452 1112
or email csc@timeguard.com
For a product brochure please contact:
or email helpline@timeguard.com
HELPLINE
020 8450 0515
For assistance with the product please contact:
3 Year Guarantee
In the unlikely event of this product becoming faulty, due to defective
material or manufacture, within 3 years of the date of purchase,
please return it to your supplier with proof of purchase and
it will be replaced free of charge.
Note: A proof of purchase is required in all cases. For all eligible
replacements (where agreed by Timeguard) the customer is responsible
for all shipping/postage charges outside the UK. All shipping costs are
to be paid in full, in advance, before a replacement is sent.
 Loading...