

Page 1
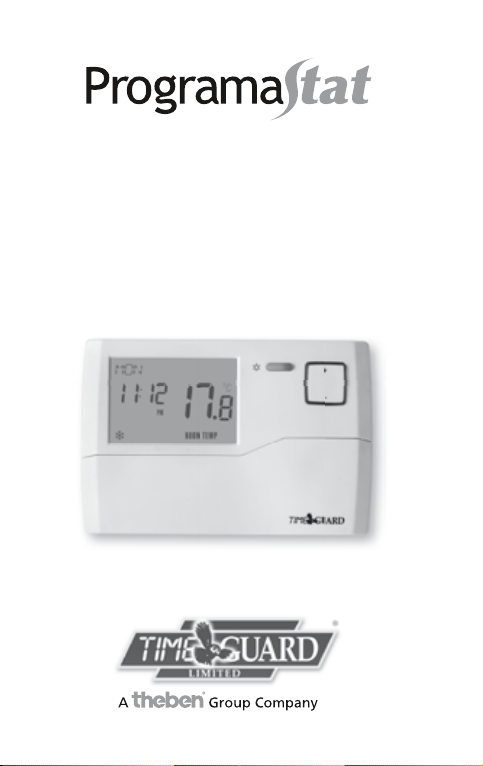
Battery Powered
Electronic
Programmable
Room Thermostat
Cat. No. TRT035
Operating & Installation Instructions
Page 2

What is a programmable room thermostat?
select
set
reset
S ET ROOM TEMP
AM PM
...an explanation for householders
A programmable room thermostat is both a programmer and
a room thermostat. A programmer allows you to set ‘On’ and
‘Off’ time periods to suit your own lifestyle. A room thermostat
works by sensing the air temperature, switching on the heating
when the air temperature falls below the thermostat setting,
and switching it off once this set temperature has been reached.
So, a programmable room thermostat lets you choose what times
you want the heating to be on, and what temperature it should
reach while it is on. It will allow you to select different temperatures in your home at different times of the day (and days of the
week) to meet your particular needs.
Turning a programmable room thermostat to a higher setting
will not make the room heat up any faster. How quickly the
room heats up depends on the design of the heating system,
for example, the size of boiler and radiators.
Neither does the setting affect how quickly the room cools
down. Turning a programmable room thermostat to a lower
setting will result in the room being controlled at a lower
temperature, and saves energy.
The way to set and use your programmable room
thermostat is to find the lowest temperature settings
that you are comfortable with at the different times
you have chosen, and then leave it alone to do its job.
The best way to do this is to set low temperatures first,
say 18ºC, and then turn them up by one degree each day until
you are comfortable with the temperatures. You won’t have to
adjust the thermostat further. Any adjustments above these
settings will waste energy and cost you more money.
If your heating system is a boiler with radiators, there will
usually be only one programmable room thermostat to control
the whole house. But you can have different temperatures in
individual rooms by installing thermostatic radiator valves (TRVs)
on individual radiators. If you don’t have TRVs, you should
choose a temperature that is reasonable for the whole house.
If you do have TRVs, you can choose a slightly higher setting to
make sure that even the coldest room is comfortable, then
prevent any overheating in other rooms by adjusting the TRVs.
The time on the programmer must be correct. Some types have
to be adjusted in spring and autumn at the changes between
Greenwich Mean Time and British Summer Time.
You may be able to temporarily adjust the heating programme,
for example, ‘Override’, ‘Advance’ or ‘Boost’. These are
explained in the manufacturer’s instructions.
®
Programmable room thermostats need a free flow of air
to sense the temperature, so they must not be
covered by curtains or blocked by furniture. Nearby
electric fires, televisions, wall or table lamps may
prevent the thermostat from working properly.
Page 3

1. Introduction
select
set
reset
S ET ROOM TEMP
AM PM
TRT products are a cost effective
comprehensive range of thermostats and
timers designed for internal use only.
The TRT035 is a battery powered
electronic programmable room
thermostat, with 6 different temperature
periods per day, automatic summer/
winter time changeover, weekday/weekend
(5-2) or individual day (7) programming
and a frost mode. It has optimum start
turning on earlier for colder mornings and
adjustable span (difference between
on and off switching temperatures),
from 1ºC to 0.5ºC.
It is designed to be surface mounted
on the wall plate supplied.
The electrical supply must be isolated
before removing the thermostat from
the wall plate.
TRT035 Electronic Thermostat
Day of
week
Flashing
when frost
protection
is on
Fig. 1
Time of day
(programme
time during
setting)
Temperature
override
Shows when
demanded
heat is
Room temperature
display
(set temperature
displayed flashing
during setting)
Flashing symbol,
battery change
required
Selects
current set
temperature
and changes
date, time and
temperature
Operates
frost
protection
TRT035 Electronic Thermostat
Button illuminates
when pressed and
for 5 seconds after
release
AM PM
Initiates programme
setting sequence and in
conjunction with the select
button initiates time and
date setting sequence
Fig. 1a
Border illuminates
when +/- buttons
are pressed
and for 5 seconds
after release
S ET ROOM TEMP
Reset
button
Selects time,
temperature
or date to
be changed
select
set
reset
Programme
access flap
Page 4

Rear View of TRT035
Jumper shown in
optimum start on
position
Fig. 2
Jumper shown in
Span 0.5ºC
position
Wall plate retaining screws
(at bottom of TRT035)
Back Plate Removed
Alternative
fixing holes
Terminal for
maintaining
continuity of
earth
Mount the wall plate in this configuration only
Fig. 3
Jumper shown in
weekday/weekend
(5-2) position
ON OFF
Ost
0.5 1.0
SPAN
5.0 7
PROGRAM
Retaining tab
Live terminal (L)
OFF terminal
(OFF)
Switched live
terminal (SL)
Battery Holder Removal
Lever battery holder outwards using a large flat bladed
screwdriver (shown) or a large coin.
Left hand
side of TRT035
Battery holder
Fig. 4
Contents
TRT035 thermostat
TRT035 wall plate
TRT035 instruction leaflet
2 x wall plugs
2 x screws
2 x AA batteries
2. Siting
The TRT035 must be sited where it would not
be influenced by heat sources, for example,
above a radiator or television or refrigerator/
freezer, or in direct sunlight or subject to
draughts. The product requires air circulation,
so do not position above or below shelving or
other wall mounted obstacles.
It should be mounted approximately 1.5m
above floor level.
3. Installation
This product should be installed by a qualified
installer to current installation standards.
If in any doubt contact the Timeguard Helpline
020 8450 0515.
The TRT035 is designed to be surface mounted
on the supplied wall plate.
Always isolate the mains supply before
removing the unit from its wall plate.
Lever the battery holder out using a large flat
blade screwdriver or large coin (see Fig. 4) and
then pull out fully.
Insert the 2 x AA alkaline batteries supplied into
the battery holder maintaining the correct polarity
as shown in the base of the battery holder.
Push the battery holder back into place until it
clicks shut.
Isolate 230VAC mains supply.
Incoming and outgoing wires should be 1.5mm sq.
Page 5

Remove wall plate from unit, by undoing
retaining screws (see Fig. 2), and pivoting the
bottom of the wall plate outwards. The TRT035
can then be lifted off.
Thread the incoming wires through the hole in the
wall plate, and fix wall plate securely to the wall,
using screws (and wall plugs if necessary) provided.
The screws which secure the TRT033 to the wall
plate should point downwards.
Allow sufficient excess cable to wire up the unit,
but not too much to make it difficult to close the
unit onto the wall plate.
Connect the conductors to the relevant terminal,
according to the wiring diagram below. Ensure
that the curved brass washers grip the conductors.
Wiring Diagram
Note:
Check boiler
instructions
before
connecting.
Heating load
ON COM
This unit is double insulated, and hence does
not need connection to earth. If earth continuity
is required, please use earth terminal on wall
plate, (see Fig. 3).
To reinstall the unit on the wall plate first ensure
the wall plate retaining screws are loosened
enough to clear the TRT035 body then engage
the top of the TRT035 onto the wall plate
retaining tabs (see Fig. 3), and push firmly
downwards and then inwards. There will be
some resistance from the terminals. Once in
place, secure with the retaining screws.
Restore mains to the unit after checking all
system wiring is complete.
Fig. 5
N
L
Page 6

4. Operation
Decide whether weekday/weekend (5-2) or
individual (7) day programming is required
and move the appropriate jumper on the
rear of the product.
The temperature span (difference between
on and off temperatures) can be adjusted
between 1ºC and 0.5ºC using a jumper
found on the rear of the unit.
Optimum start (switching on earlier on colder
mornings) can also be turned on or off using
a jumper on the rear of the unit.
It is important to make these decisions first,
as after any change of jumper position,
reset needs to be pressed, which will return
the unit to default time and programme.
Pressing any button illuminates the screen
automatically.
During time/date and programme setting if
a button is not pressed within 15 seconds the
display will revert to the start of the sequence.
Setting date and time of day
Open programme access flap and press reset,
using a pen or similar object. All of the screen
segments will show briefly, and then the current
room temperature will be displayed.
To programme the date and time of day, open
programme access flap, and simultaneously
press and hold both the select and set buttons
for 3 seconds. The year will flash.
Use the + and - button to set the correct year.
Press select to move on to programming the
month (shown to the left), and then again
to programme the day. Press select again to
programme the hours (am/pm), and again
to programme the minutes (each time using
the +/- button to make the change). Press set
to return to operating mode.
If at any time a button is not pressed for
15 seconds, the unit will return to operating mode.
Programming temperature periods for
7 days option
Notes
1) There are no off periods with this controller.
The programming sequence is:
Start time, temperature, second start time,
second temperature and so on. Setting
temperature to 10ºC is as close to off as can
be achieved (and for most situations will be
off unless the weather is very cold).
2) If you do not want a higher temperature
period in the middle of the day adjust the
temperature for this period downward to
match those of the proceeding and
subsequent period temperatures.
3) The TRT035 comes with a factory installed
(default) programme for both 5-2 and 7 day
options which you use or modify as you
wish. Just pressing the reset button brings
this programme into operation.
Page 7

The default programme for every day is as
follows:-
6:00 AM 21ºC
8:00 AM 17ºC
12:00 PM 21ºC
2:00 PM 17ºC
4:00 PM 21ºC
10:00 PM 17ºC
For both 5-2 and 7 day options.
To programme the temperature periods, press
the set button. Mon will flash. To programme
Mondays time/temperature periods press select
button. Alternatively use the + and - buttons to
change the day, and then select to continue.
The time will then flash. This is the start time
for the first period. Press + or - to set the hour
for the start time for period 1. Press select to
move to the minutes. Use the + and - to set the
minutes. Press select to set the temperature for
this period. Use the + or - keys to set the
desired temperature. Press select again to
programme the next time period. There are
6 time periods per day.
Once the 6 periods for Monday are
programmed, Press set button, and Monday
will start to flash. Use the + and - button to
change the day to Tuesday, and then use select
to programme Tuesdays time periods and
temperatures. For 7 day programming, this will
need to be done for all 7 days. If set is pressed
twice, the unit will return to operating mode.
Omitting Days
Omitting a day can be achieved by selecting
10ºC for every time period for that day
(all times and temperatures must be entered).
The heating will not turn on unless the room
temperature falls below 10ºC (50ºF).
Programming temperature periods for
5-2 days option
For 5-2 day mode, time periods and
temperatures will need to be programmed for
M-F and then for S-S. ie: only 2 sets of times
need to be programmed, not 7 (individual) sets
of times.
Temperature override
In operating mode, the temperature set for the
current period can be overridden. To adjust the
set temperature, press the + or - button once.
The screen will illuminate blue while button
is pressed. Use + and - buttons to set desired
temperature. If the + or - button is held down,
the display will advance rapidly. Once the
desired temperature is set, the unit should
revert to displaying the current room
temperature 5 seconds after the last button
press. The illumination will also turn off after
5 seconds. In manual mode, there will be a
hand symbol displayed on the screen. The new
temperature will remain valid until the next
programmed period starts.
A burner symbol is displayed when
temperature is below desired value, indicating
that the thermostat is calling for heat from
the boiler.
Review set temperature
The set temperature can be reviewed at any
time, by a single press of the + or - button.
5 seconds after this single button push, the unit
will show the current room temperature, and
the screen illumination will turn off.
Frost protection
Frost protection reduces the set temperature to
5ºC. Frost protection is activated by holding
down the frost protection button for 3 seconds.
Page 8

When in frost mode, the frost symbol will
flash on the display. The set temperature
buttons remain non-functional during frost
mode. The unit will remain in frost mode
until the frost button is held down for a
further 3 seconds.
Battery replacement
When the battery needs replacing, a battery
symbol will flash on the display.
Sleep mode
The unit can be put into sleep mode by
simultaneously holding down the + and buttons for 3 seconds. Pressing any button
will exit sleep mode. In sleep mode, all
outputs are suspended and the screen is blank
(useful for longer periods when the house is
unoccupied and frost protection is not required).
To clean use a dry cloth only. Do not use any
liquid cleaners.
5. Specifications
Current rating: 3(1)A
Voltage: 230V, 50Hz
Switch type: Single pole, change-over (SPCO)
Operating
temperature
range: 0ºC to 50ºC
Set temperature
range: 10ºC to 30ºC adjustable in
0.5ºC steps
Complies with: BS EN 60730
Conforms to
directives: Conforms to latest directives
Span: 1ºC or 0.5ºC
Micro
disconnection: Type 1.B control action
Batteries: 2 x AA alkaline
Page 9

For assistance with the product please contact:-
HELPLINE
020 8450 0515
or email helpline@timeguard.com
3 Year Guarantee
In the unlikely event of this product becoming
faulty due to defective material or manufacture
within 3 years of the date of purchase, please
return it to your supplier in the first year with proof
of purchase and it will be replaced free of charge.
For years 2 and 3 or any difficulty in the first year
telephone the helpline on
Note: a proof of purchase is required
in all cases. For all eligible replacements (where agreed by
Timeguard Ltd.) the customer is responsible for all shipping/
postage charges for sending replacements outside the UK.
All shipping costs are to be paid in advance before
a replacement is sent.
For a product brochure please contact:
Timeguard Ltd. Victory Park, 400 Edgware Road,
London NW2 6ND Tel: 020 8452 1112
or email csc@timeguard.com
A Group company
67-058-326 (issue 2)
020 8450 0515.
 Loading...