


MOTION
DETECTOR/ALARM
Cat No. TG115
MOTION
INSTRUCTIONS
DETECTOR/ALARM
WITH REMOTE
CONTROL
INSTALLATION & OPERATING
Cat No. TG115R

TG115 - Motion Detector/Alarm
TG115R - Motion Detector/
Alarm with Remote Control
Please read the instructions before using the
product and retain for future use.
High
intensity
lamp
I.R. detector
100dB
alarm
PIR lens
Fig 1
Arm/
chime/off
switch
TG115
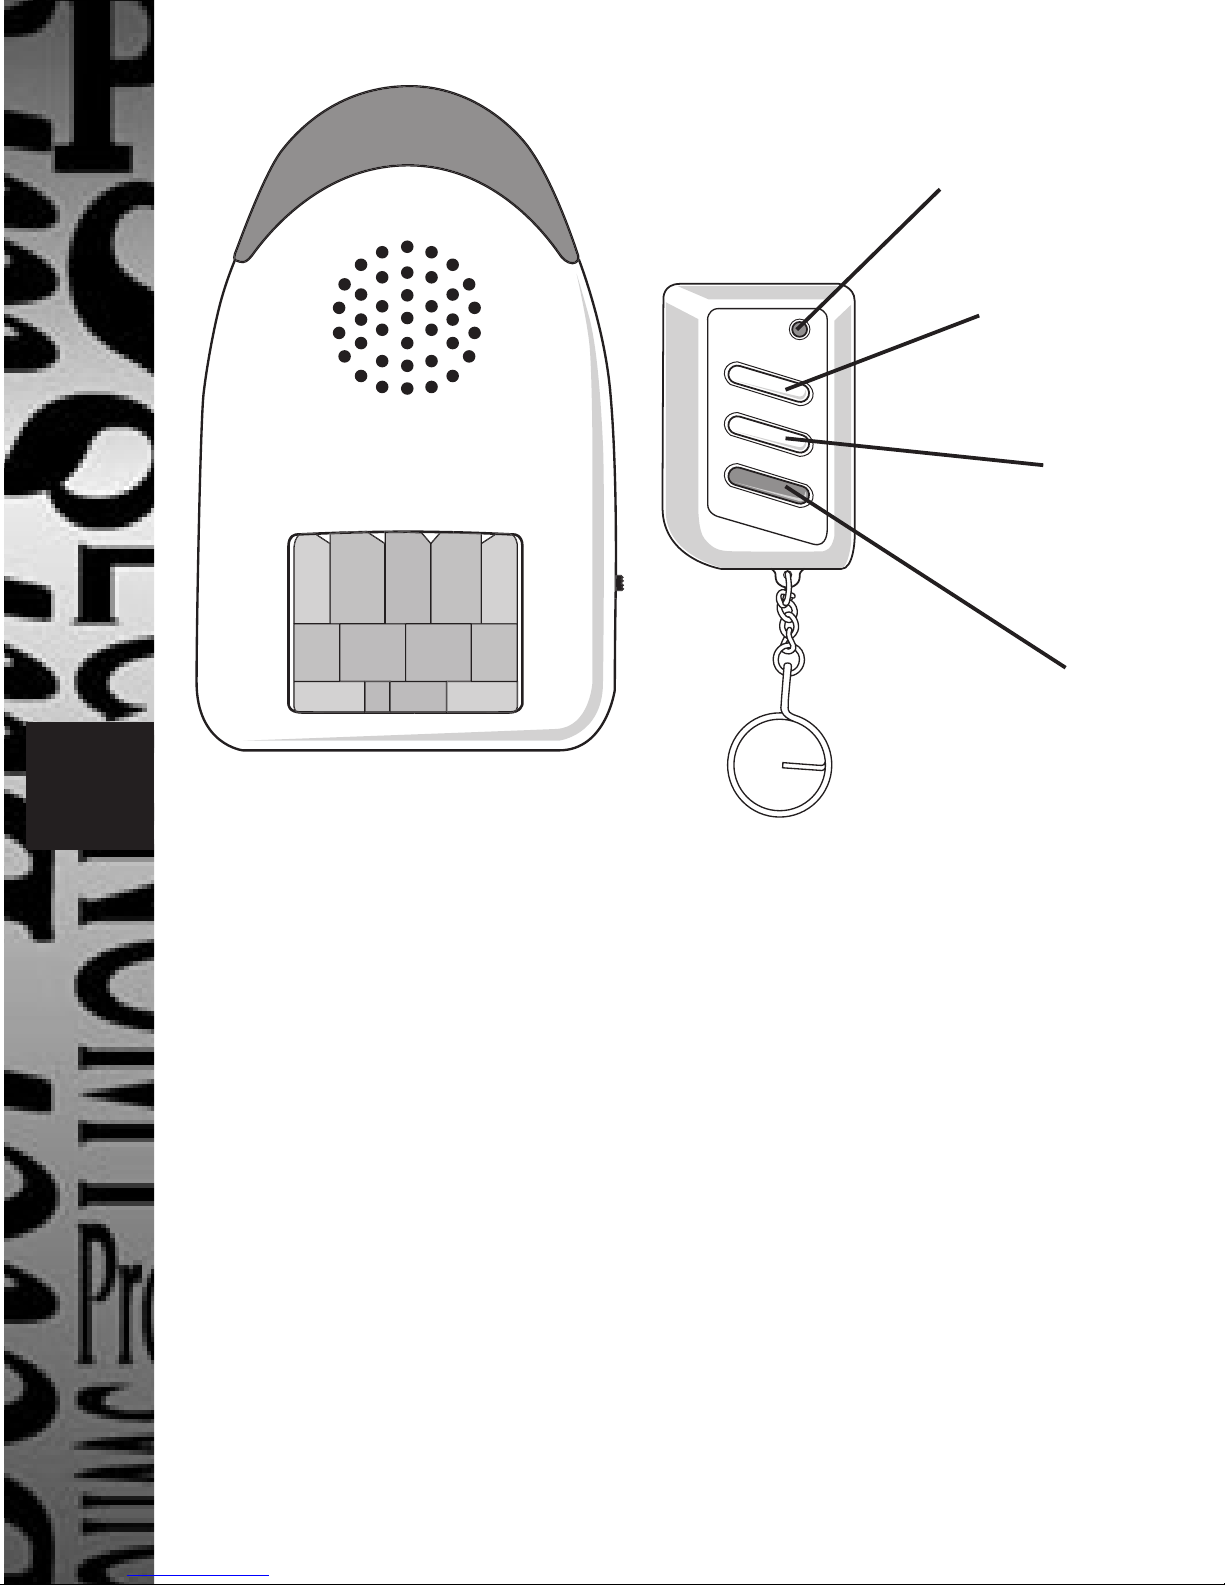
DISARM
ARM
PANIC
Remote control LED
DISARM
button
ARM
button
Red
PANIC
button
TG115R
Introduction
This motion detector/alarm comes in two
variations – with remote control (TG115R)
and without (TG115). The function of the
main unit is the same in either case apart
from a PANIC function available on the
remote control version.
Both versions have a bright flashing light as
well as a 100dB alarm and they also have exit
and entrance delays built in.
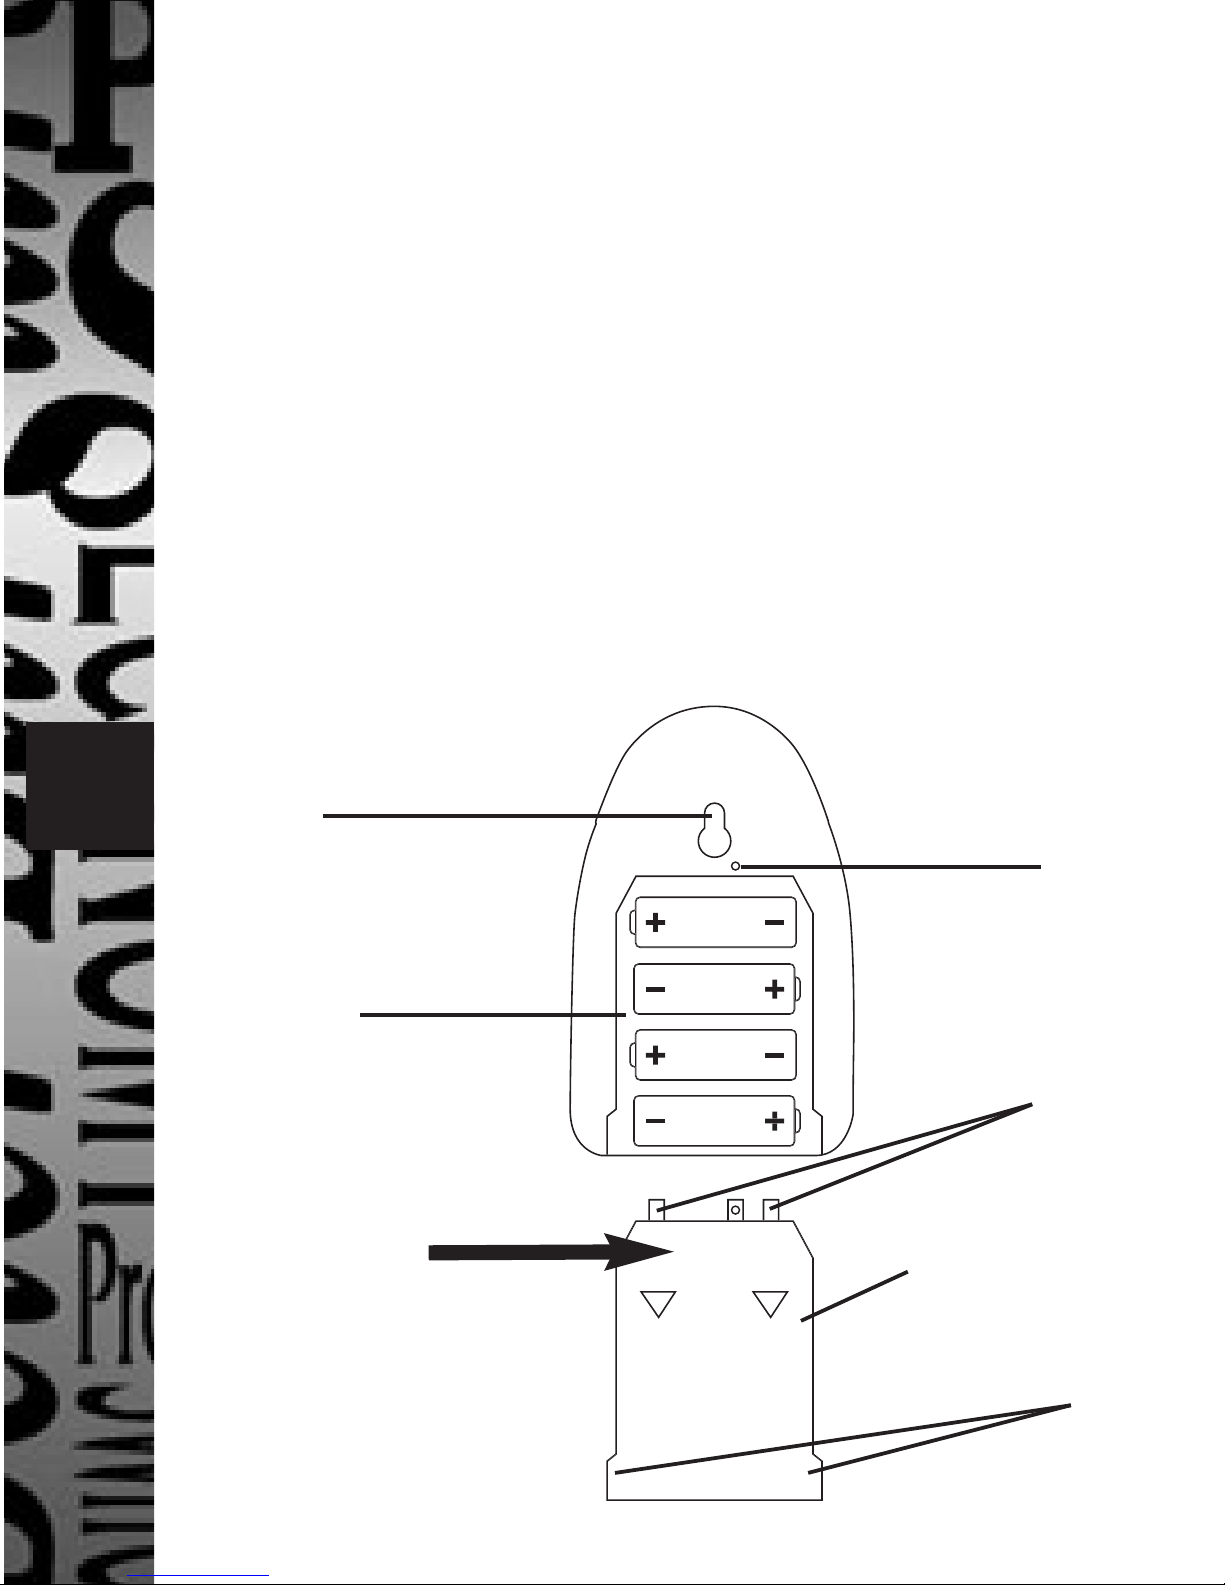
Battery Installation/Change
Main Unit - Remove the cover retention screw
(see fig 2). Press sown on the battery
compartment cover (as shown in fig 2) and
slide outwards in the direction of the arrows.
Remove the old batteries if necessary and
install 4 new alkaline AA batteries. Slide the
cover back into place ensuring the lugs and
catches engage with the case correctly.
Main unit – rear view
Keyhole
fixing
4 x AA
alkaline
batteries
Press down
here
Fig 2
Cover
retention
screw hole
Catch
Battery
compartment
cover
Main unit –
rear view
Lug
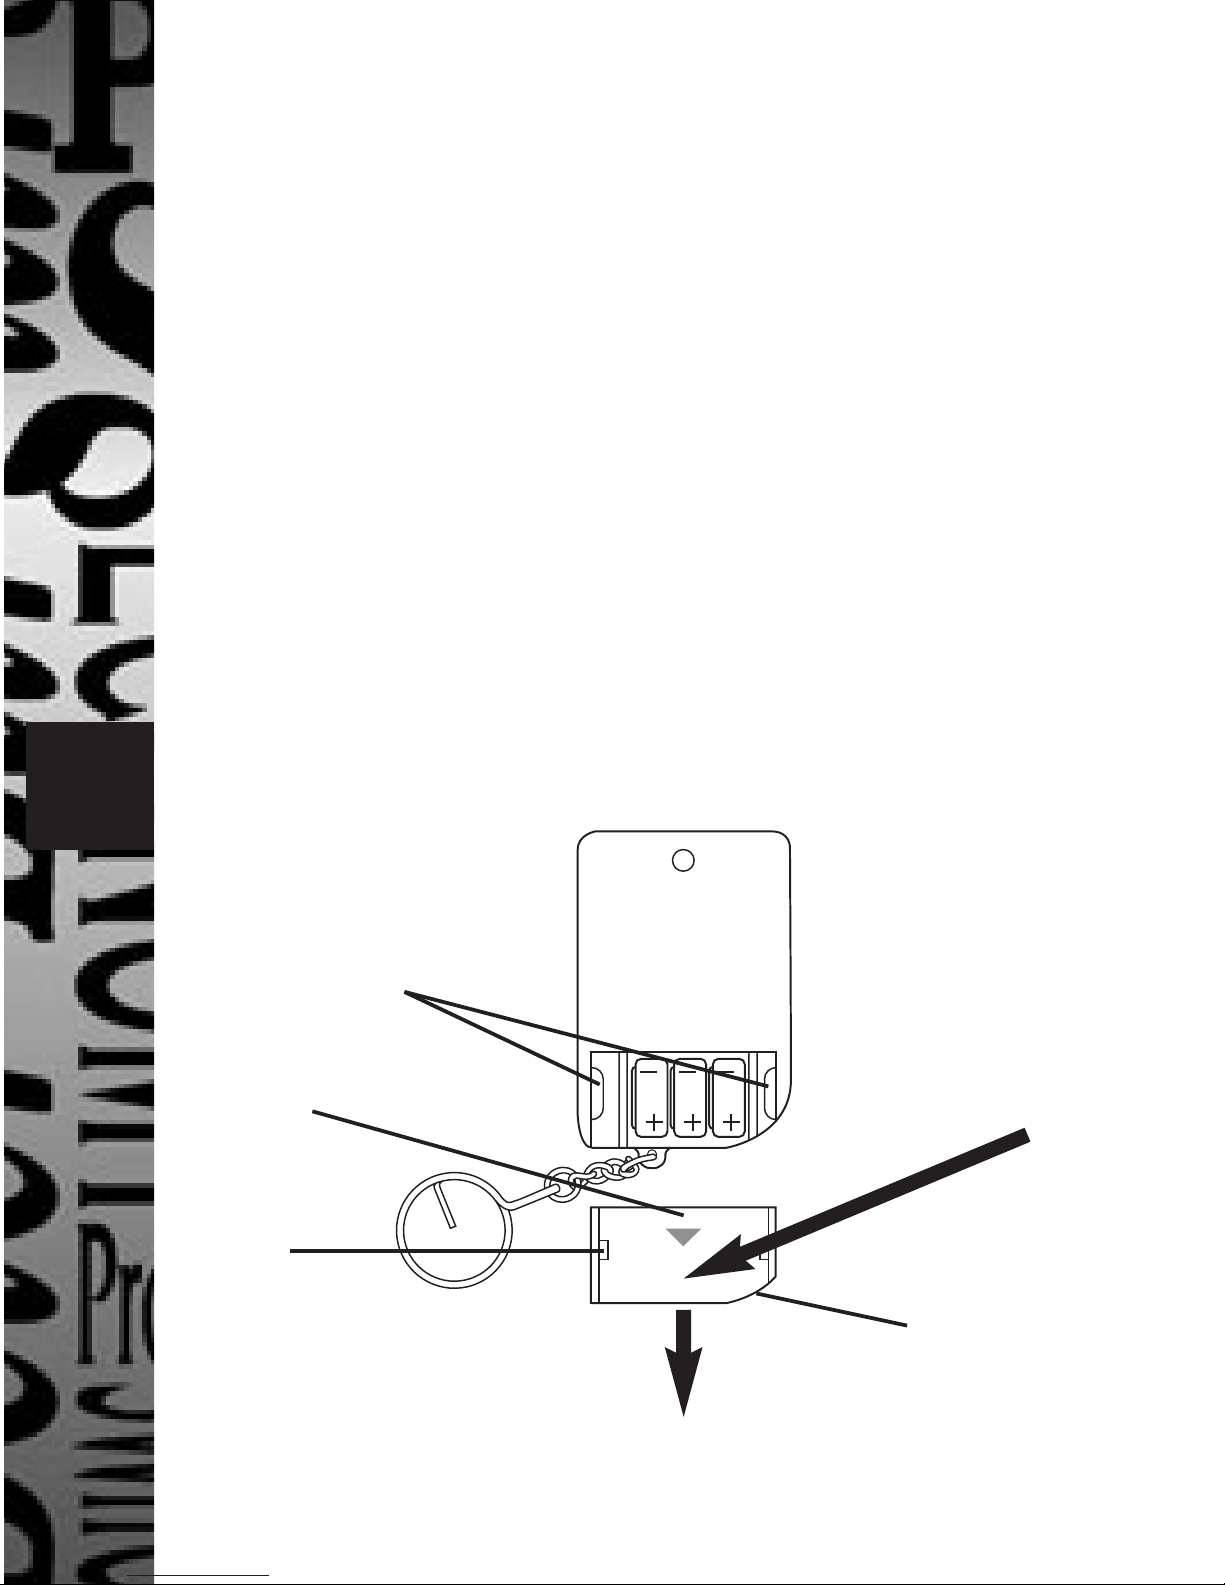
Remote Control - Press down as shown in
fig 3 and then slide out. If necessary remove
the batteries from the compartment and
insert 3 new SR44 silver oxide batteries with
polarities as shown in fig 3. Engage the catch
and the lugs on the battery compartment
cover under the case and case slides
respectively and push the cover home.
Remote control – rear view
Case slides
Catch
Lug
Fig 3
Press down
here
Battery
compartment
cover
Slide out

Points to Note
5-7m 90°
1.5 - 2m
5-7m
• For indoor use only.
• Keep away from direct sunlight.
• Loud alarm – keep away from ears.
• Do not locate near radiators or heaters.
• Do not locate near fans.
Installation
The TG115/TG115R is a wall mounted unit
and has a PIR detection range of between 5
and 7m across a 90° angle (see fig 4). It should
be mounted 1.5 to 2m above floor level.
Fig 4
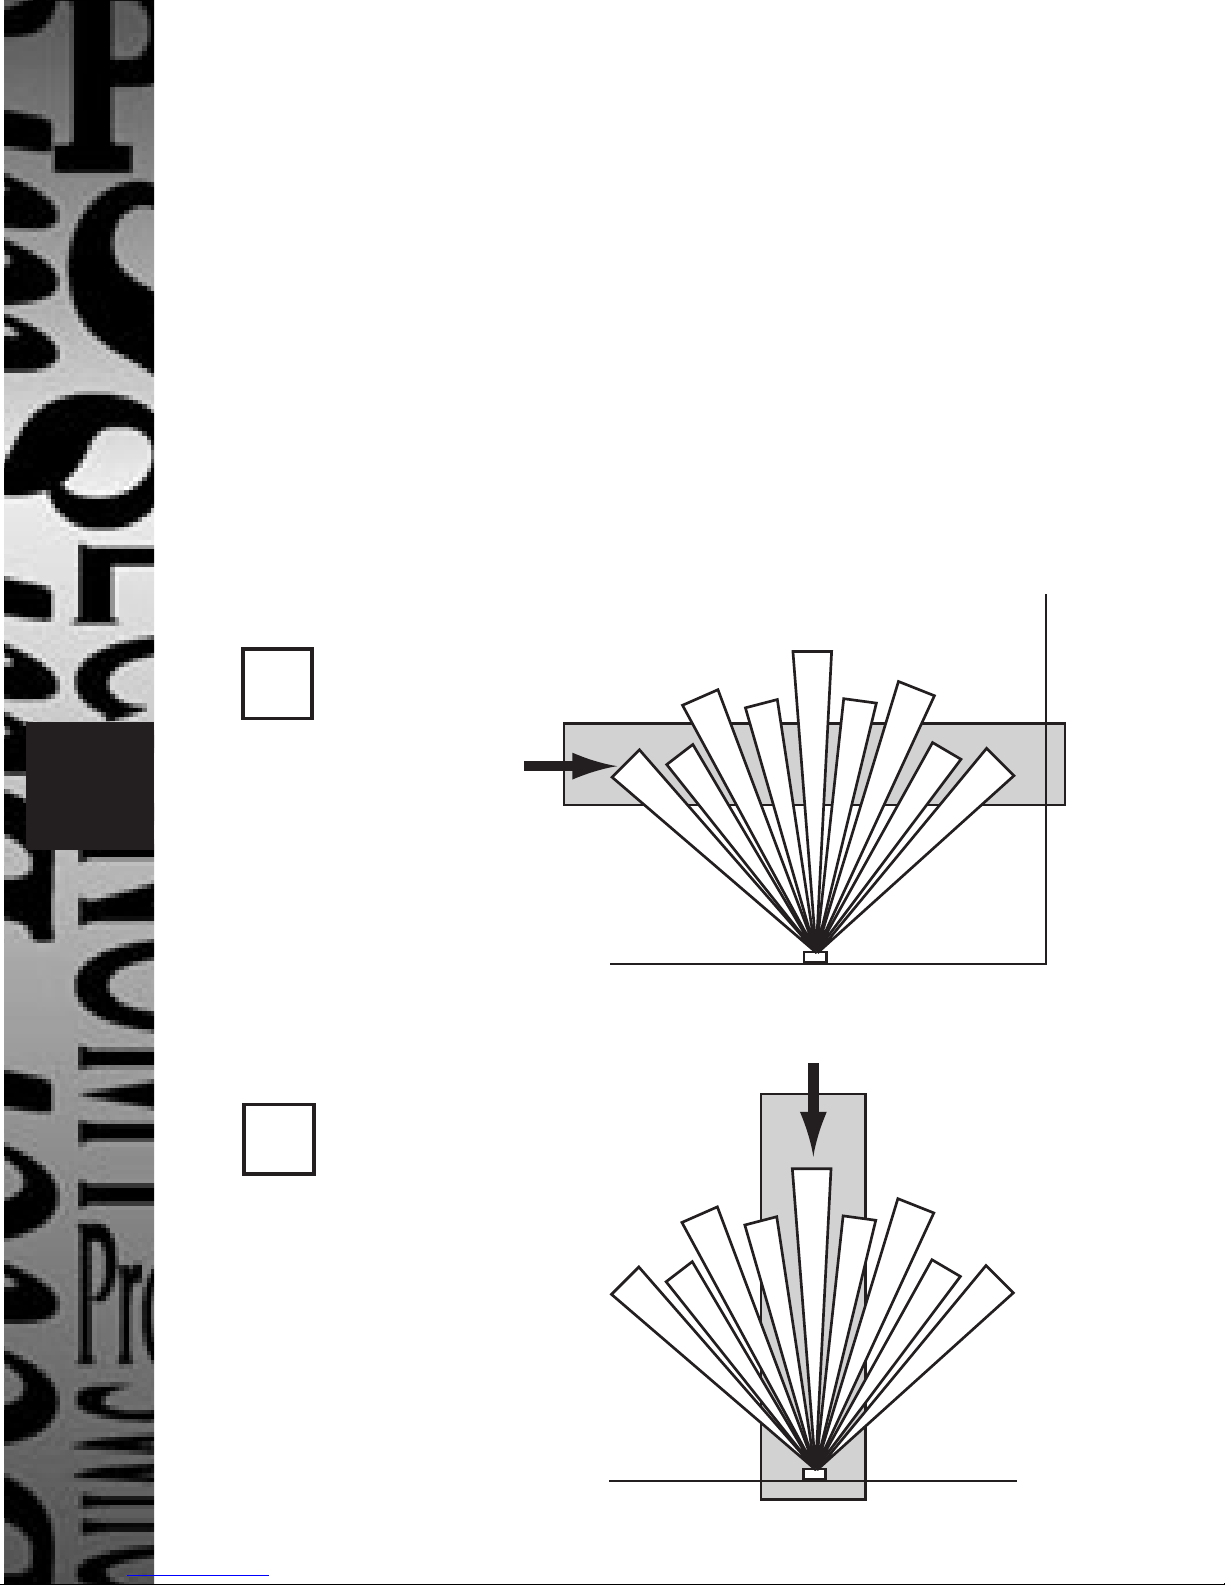
Choose a position where an intruder would
be most likely to pass across the face of the
unit. Having decided on a position mark
and drill a single fixing hole. Fit the plug
(if necessary) and screw provided. The screw
(with head left 2.5mm proud of the fixing
surface) engages with the keyhole fixing on
the back of the case (see fig 2).
6
✓
Best sensitivity
✗
Worst sensitivity

Operation
(Without Remote - TG115)
Arming
Slide switch to ARM and 3 short bleeps will
be heard in confirmation. 60 seconds later
(allowing for PIR stabilisation and user exit)
a single bleep will be heard indicating the
system is ready for detection.
Entry Delay and Alarm Timing
There is a 20 second delay after detection
before the unit sounds the alarm (allowing
users to disarm the unit by switching to OFF
when returning). The alarm sounds for 2
bursts of 30 seconds separated by 30 seconds
of silence. The light flashes continually
during this period and carries on until the
unit is switched to OFF.

Chime
Switch to CHIME and the unit will respond
to detection by sounding a two tone chime
after the 60 second PIR stabilisation period.
This is particularly useful for carrying out a
"walk" test of the detection area prior to
putting the unit into use and periodically
during the unit’s life to maintain confidence.
Operation
(With Remote – TG115R)
8 9
Arming
With slide switch on main unit set to OFF
press the ARM button on the remote and 3
short bleeps will be heard in confirmation
followed by a single bleep after 60 seconds
exit time has elapsed.

Disarming
Press the DISARM button.
Panic Button
Press the PANIC button to summon help in an
emergency and the alarm will sound for a 30
second period and then stop. It may be stopped
before this by pressing the DISARM button.
Trouble-Shooting Guide
Unit will not arm or chime:
Remove the main unit batteries, wait for 3
minutes, replace batteries and try again.
Specifications
PIR detection: 5 – 7m over 90°
Alarm: 100dB
Batteries: 4 x AA alkaline (main unit)
3 x SR44 or similar*
(remote control)
AC mains adaptor: DC6V, 600mA with centre
(not included) female +ve
*357, SR44W, RW42, SG13,
SR1154, V303, A.

3 Year Guarantee
THREE YEAR
GUARANTEE
3
In the unlikely event of this product
becoming faulty due to defective material
or manufacture within 3 years of the date
of purchase, please return it to your supplier
in the first year with proof of purchase and
it will be replaced free of charge.
For the second and third years or any
difficulty in the first year telephone the
helpline on 020 8450 0515.
10

HELPLINE
020-8450-0515
For a product brochure please contact:
Timeguard Ltd.
Victory Park, 400 Edgware Road,
London NW2 6ND
or email csc@timeguard.com
020-8452-1112
 Loading...