

Time Gaurd TG115, TG115R Installation And Operating Instructions Manual

MOTION
DETECTOR/ALARM
Cat No. TG115
MOTION
INSTRUCTIONS
DETECTOR/ALARM
WITH REMOTE
CONTROL
INSTALLATION & OPERATING
Cat No. TG115R

TG115 - Motion Detector/Alarm
TG115R - Motion Detector/
Alarm with Remote Control
Please read the instructions before using the
product and retain for future use.
High
intensity
lamp
I.R. detector
100dB
alarm
PIR lens
Fig 1
Arm/
chime/off
switch
TG115
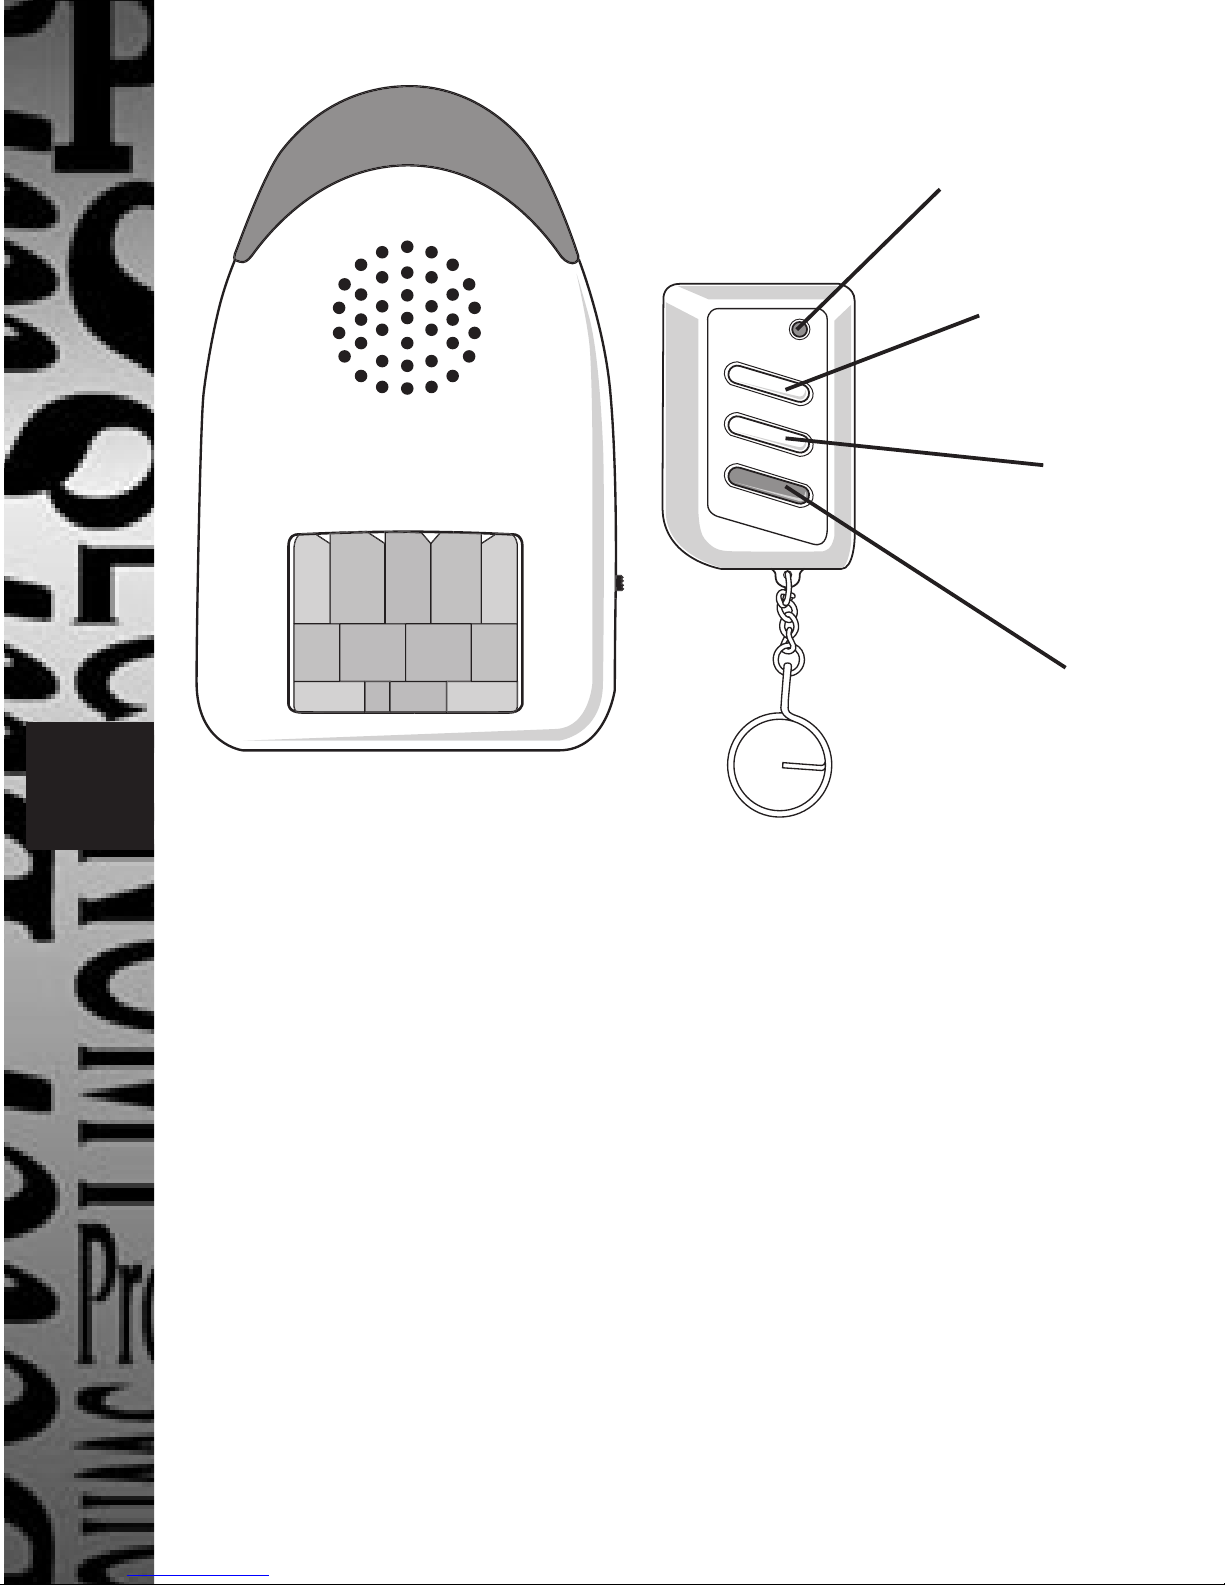
DISARM
ARM
PANIC
Remote control LED
DISARM
button
ARM
button
Red
PANIC
button
TG115R
Introduction
This motion detector/alarm comes in two
variations – with remote control (TG115R)
and without (TG115). The function of the
main unit is the same in either case apart
from a PANIC function available on the
remote control version.
Both versions have a bright flashing light as
well as a 100dB alarm and they also have exit
and entrance delays built in.
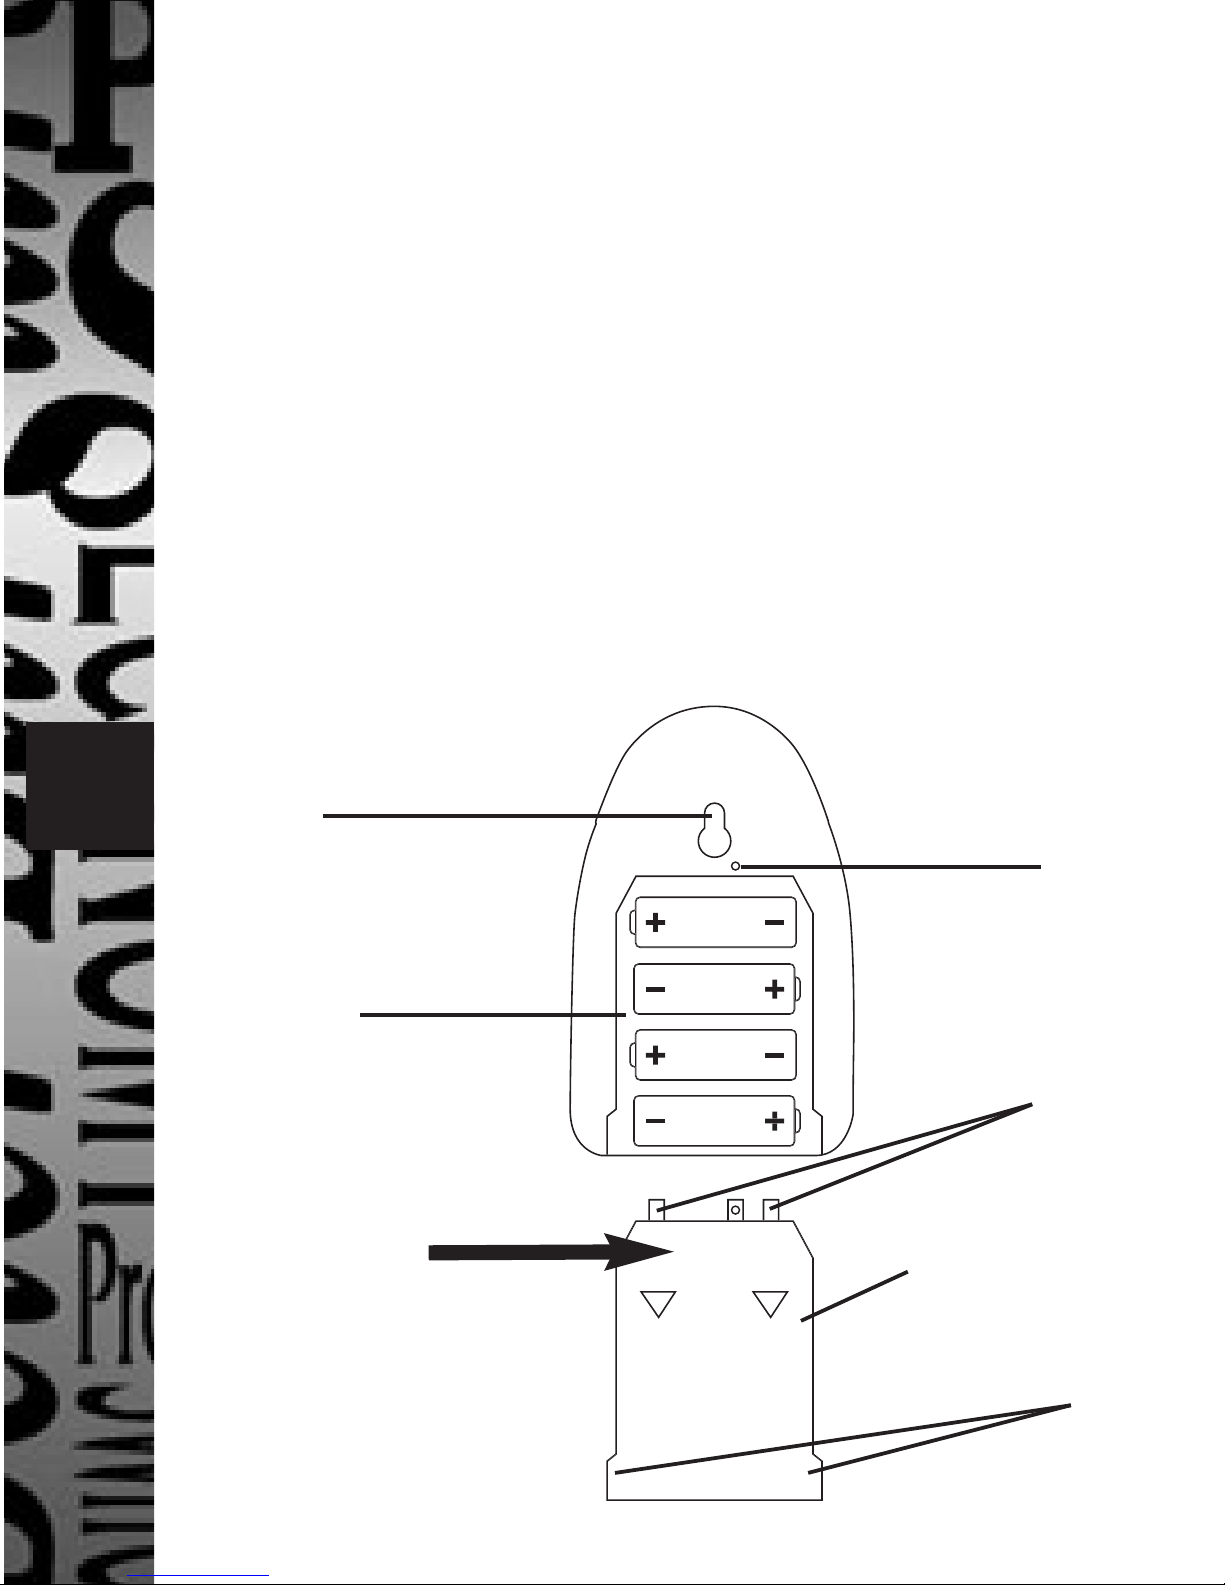
Battery Installation/Change
Main Unit - Remove the cover retention screw
(see fig 2). Press sown on the battery
compartment cover (as shown in fig 2) and
slide outwards in the direction of the arrows.
Remove the old batteries if necessary and
install 4 new alkaline AA batteries. Slide the
cover back into place ensuring the lugs and
catches engage with the case correctly.
Main unit – rear view
Keyhole
fixing
4 x AA
alkaline
batteries
Press down
here
Fig 2
Cover
retention
screw hole
Catch
Battery
compartment
cover
Main unit –
rear view
Lug
 Loading...