

Time Gaurd NTT06, NTT07 Installation & Operating Instructions Manual
Installation & Operating Instructions
Digital Time Switch
Model: NTT06
24 Hour General Purpose
Digital Timer
Model: NTT07
7 Day General Purpose
Digital Timer
1
1. General:
This time switch is an easy to use digital timer,
designed for wall mounting. It can control outputs
of up to 16A which makes it suitable for domestic
immersion heaters.
The NTT06/7 comes with a link in place which
can be removed to provide volt free contacts if
required, making it suitable for a wider range of
switching applications. If volt free is not required,
the link must be left in place.
The NTT06 is a 24 hour programmer only, whilst
with the NTT07 programming can be 7 day,
5 + 2, or 24 hour.
NTT06 – 24 Hour General
Purpose Digital Timer
NTT07 – 7 Day General
Purpose Digital Timer
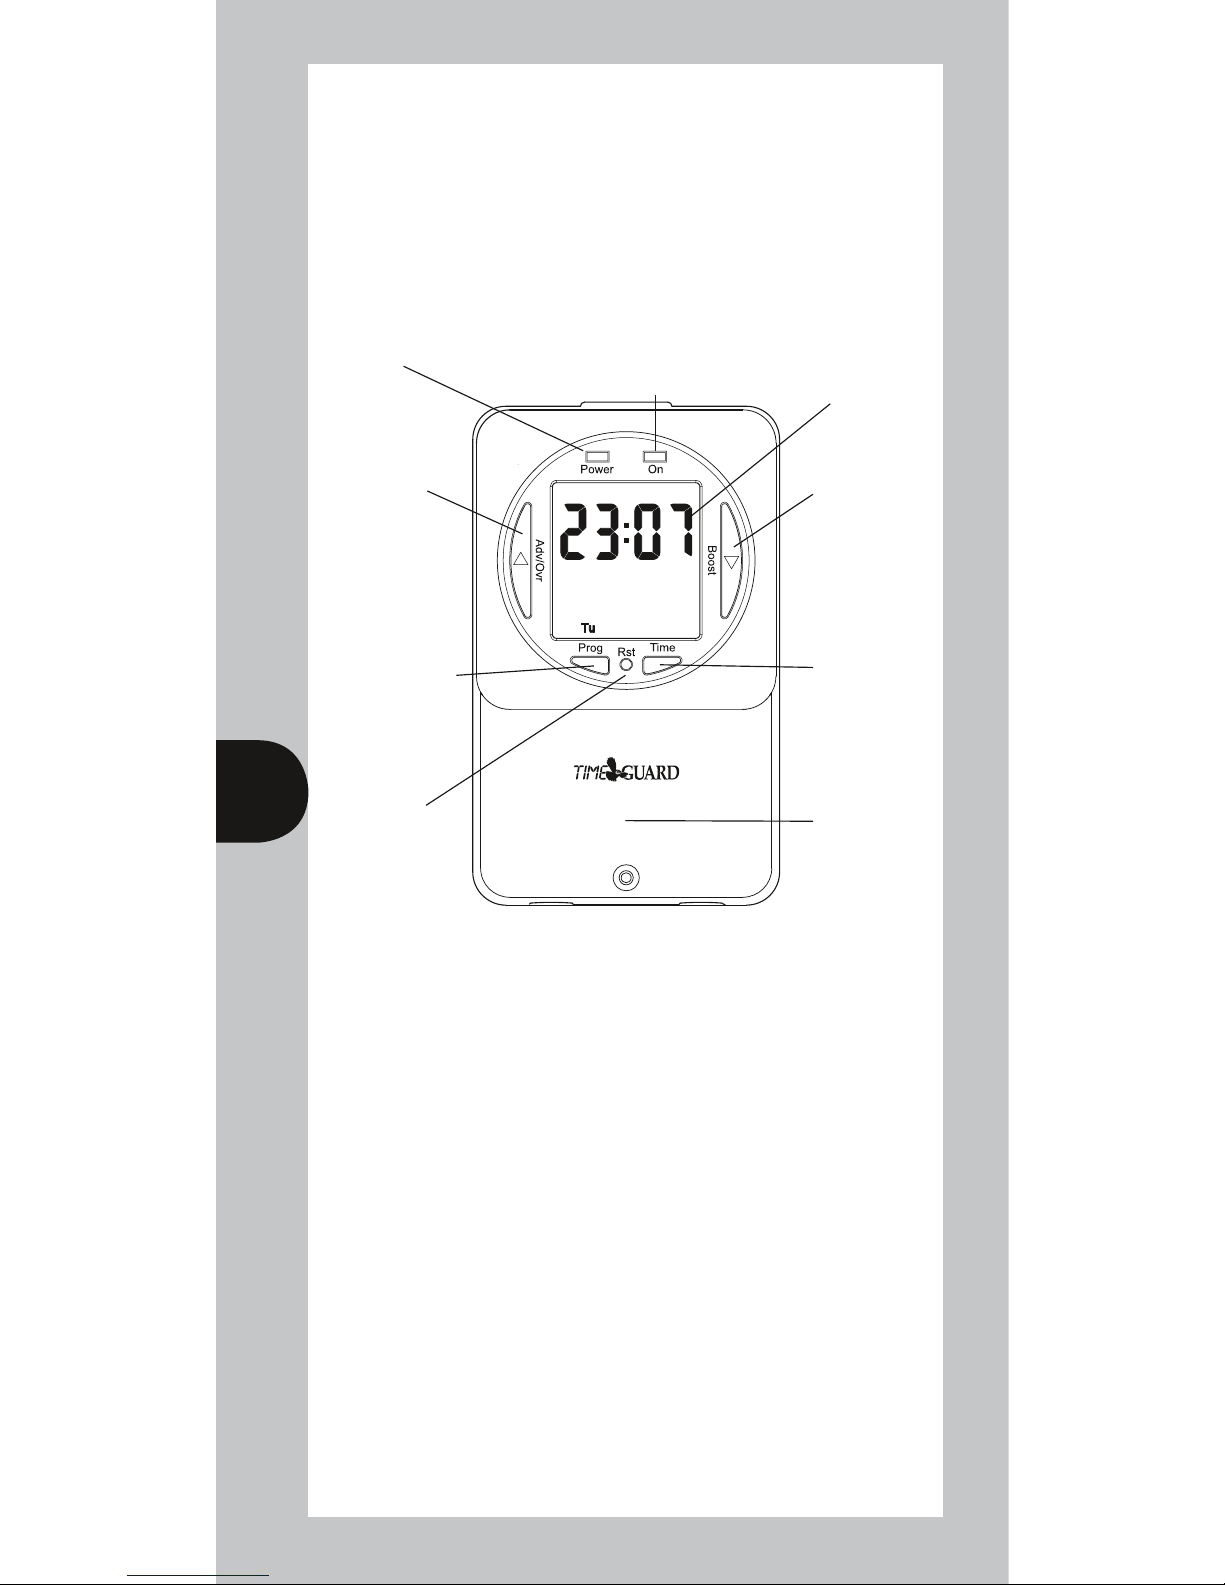
Programme
button
Illuminated
screen
Reset
button
Time
button
Power LED
Terminal
cover
Output
LED
Boost
button
Advance
button

2
2. Features:
4 ON/OFF switching programmes, which for
NTT07 can be made to operate over all 7 days
(24 hour operation), 5 weekdays 2 weekend days,
or any individual day (7 day operation). For the
NTT06, 24 hour programming is the only option.
Advance feature advances to next programmed
operation.
Boost feature provides 1 or 2 hour boost.
Battery back up retains programmes and clock
times during loss of mains.
Option of automatic summer time update (ASCO).
Shortest switching time of 1 minute.
Programme review.
3. Installation:
Important: Switch off mains electricity
before commencing work.
Remove the terminal cover. Fix the unit to the wall
with the mounting screws provided. Fix the top
screw first and leave 2.5mm proud, place the key
hole in the top of the product over the screw head
and slide down. Then mark and drill the lower
fixing. Secure unit to the wall.
The wiring can enter through the rear knock outs
or the cable entry ports provided. If the wiring is
not through the knock outs, use the cable clamps
provided to secure the cables.
Connect the installation wiring to the terminals
provided, according to the legend on the terminal.

3
4. Battery:
The time switch has a factory fitted rechargeable
battery to give clock operation and programme
memory back up during loss of mains supply.
Before programming for the first time, connect the
unit to the mains for at least 15 minutes prior to
pressing the Rst button and programming the unit.
If the display is not visible or very faint, charge for
4 hours prior to pressing Rst and programming.
Note: the NTT06/7 is supplied with a wire link
in place. This should not be removed unless
volt free contacts are required.
The terminals are marked as follows:
E Earth continuity.
N Neutral supply.
L Live supply.
1 Live Input for volt free output (if required,
if not, leave wire link in place).
2 Normally open switch live output to heater
or other appliance.
3 Normally closed switch live output to heater
or other appliance.
 Loading...