

Page 1
For the latest user guide, please visit:
www.support.timecodesystems.com
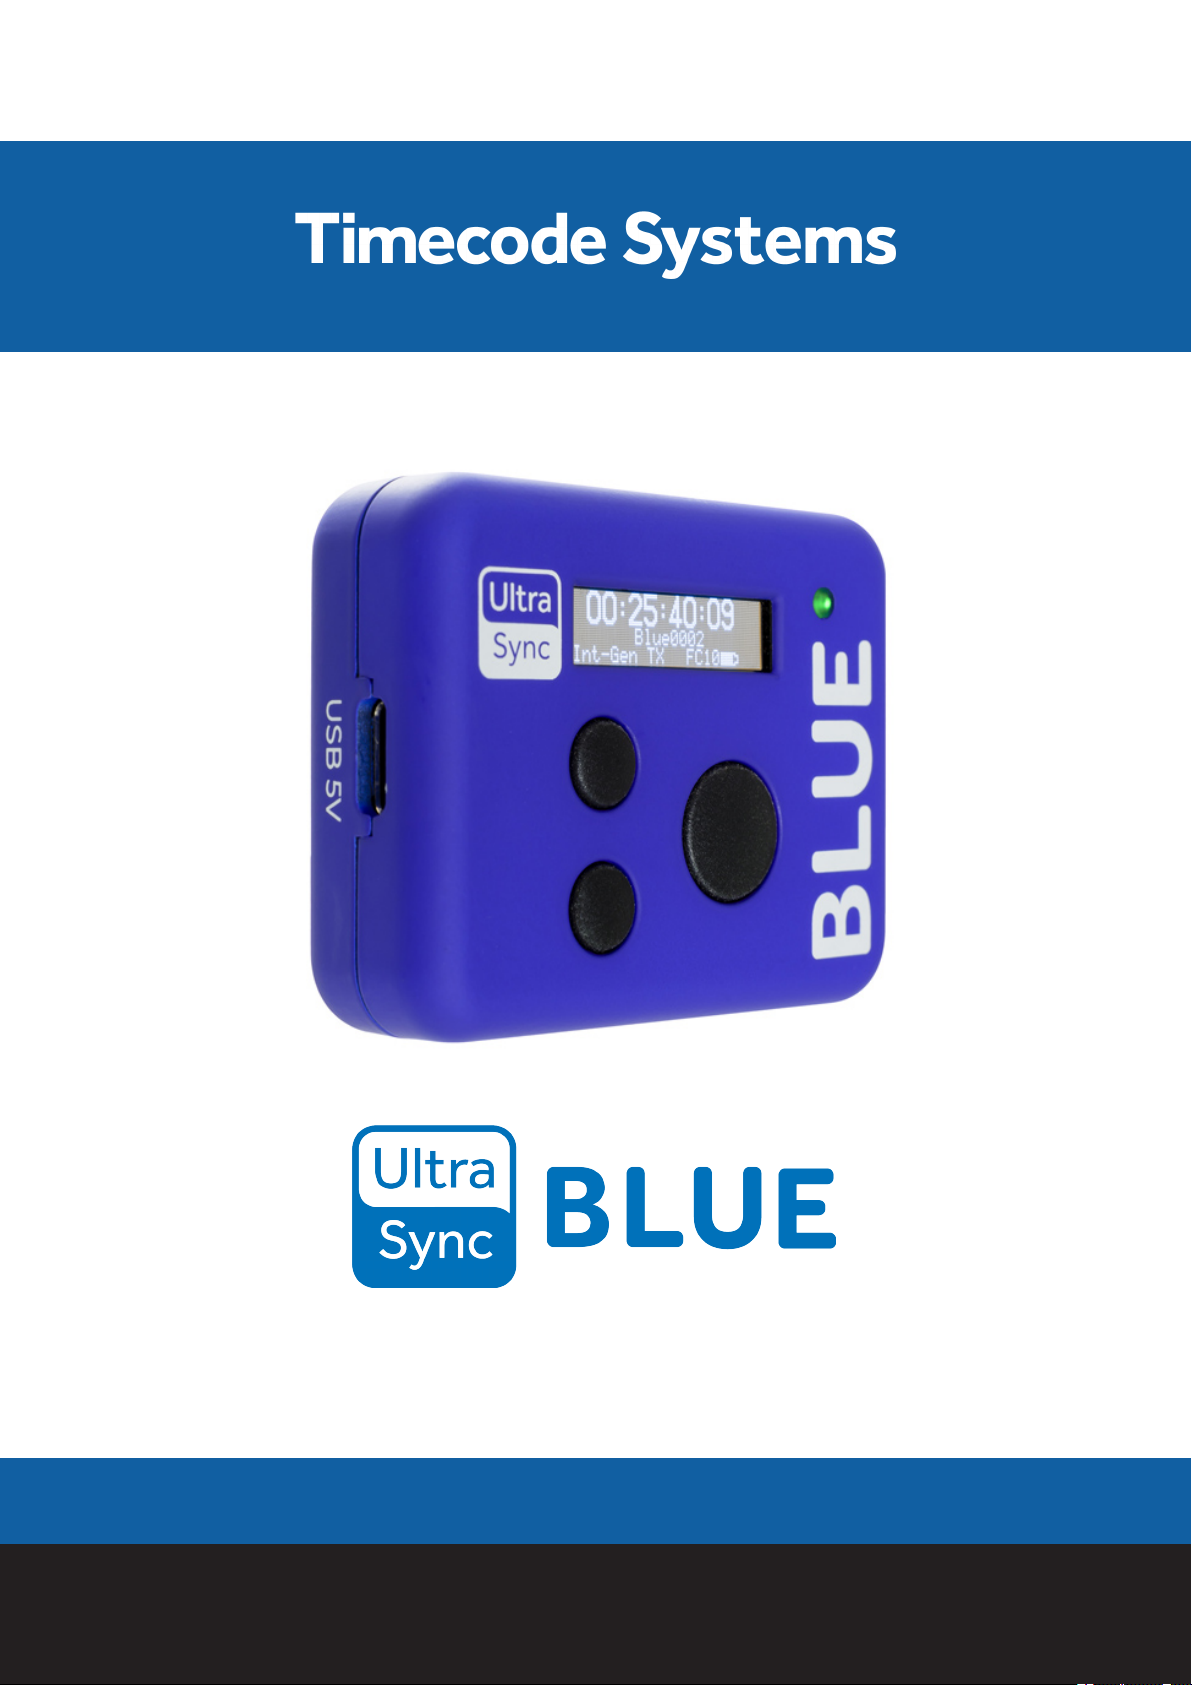
UltraSync BLUE
User Guide
Page 2
The Bluetooth®word mark and logos are registered trademarks
owned by Bluetooth SIG, Inc. and any use of such marks by Timecode
Systems is under license. Other trademarks and trade names are
those of their respective owners.
Copyright Notice - Timecode Systems Limited
All rights reserved. No part of this publication may be reproduced
without the expressed written permission of Timecode Systems Ltd.
Timecode Systems Ltd shall not be liable to the purchaser of this
product or third parties for damages, losses, costs, or expenses
incurred by the purchaser or third parties as a result of accident,
misuse or abuse of this product or unauthorised modifications,
repairs, or alterations to this product, or failure to strictly comply with
Timecode Systems Ltd operating and installation instructions.
UltraSync BLUE User Guide
Page 3
Contents
Welcome to UltraSync BLUE
Chapter 1: Overview
Switch UltraSync BLUE On and Off 8
Display and Controls 10
LED Colours 11
Charging your UltraSync BLUE 12
Mounting your UltraSync BLUE 13
Technical Specification 14
Chapter 2: Quick Set Up
Pair with Recording Devices 18
UltraSync BLUE not Pairing? 19
Sync with other Timecode Devices 20
Set the RF Channel and RF Region 21
Choose a Mode 23
Set the Timecode 25
Set the Frame Rate 27
Chapter 3: Example Setups
UltraSync BLUE Network 30
Pro Network 31
Free Run 34
Chapter 4: Display Settings
Key Lock 36
Screen Brightness 38
Screen Light Timeout 39
LED Brightness 40
Chapter 5: Status Information
Main Screen 42
UltraSync BLUE User Guide iii
Page 4

Version Number and Serial Number 44
Bluetooth® Status 45
Synchronisation Status 46
Chapter 6: Troubleshooting
UltraSync BLUE not Responding to Select button 48
UltraSync BLUE Battery not Charging 48
UltraSync BLUE Slave not Connecting to Master 49
Slave is Connecting to the Wrong Master 49
Update your UltraSync BLUE 50
Reset 51
Restore Factory Settings 52
Chapter 7: Warranty and Conformity
Warranty 54
Free Extended Warranty 54
Quality Declarations 55
RF Exposure Warning Statement: 55
FCC Warning Statement: 55
Industry Canada Statements: 56
EC Declaration of Conformity 57
Chapter 8: Safety and Disposal
Battery Safety and Disposal 60
Battery Safety 60
Disposal and Recycling 61
Index
iv UltraSync BLUE User Guide
Page 5
Welcome to UltraSync BLUE
Thank you for choosing Timecode Systems' UltraSync BLUE, the
device that gives accurate timecode sync via Bluetooth®.
With UltraSync BLUE, you can easily sync recordings on compatible
Bluetooth-enabled smartphones, cameras and sound recorders. Just
pair the device, set the timecode mode, and you're good to go.
UltraSync BLUE
Live it. Film it. Sync it. Share it.
UltraSync BLUE User Guide 5
Page 6

This page is intentionally blank to allow for double-sided printing.
6 UltraSync BLUE User Guide
Page 7

Chapter 1:
Overview
In this chapter, you can learn about the controls, displays, and
technical details of your UltraSync BLUE.
Switch UltraSync BLUE On and Off 8
Display and Controls 10
Charging your UltraSync BLUE 12
Mounting your UltraSync BLUE 13
Technical Specification 14
Overview
UltraSync BLUE User Guide 7
Page 8

Switch UltraSync BLUE On and Off
UltraSync BLUE uses a two-step approach for turning on and off. This
helps to prevent you from accidentally turning the UltraSync BLUE on
or off during recording - you have to choose to power it on or off and
then confirm your choice.
1. Press the Select button.
The UltraSync BLUE screen lights up. If it does not light up, the
UltraSync BLUE has no power and needs to be charged (see
Charging your UltraSync BLUE on page 12).
If your UltraSync BLUE is on and the battery charge is running
low, the LED light turns red.
If the UltraSync BLUE is currently on, the Main Menu appears
(you can ignore the remaining steps).
If the UltraSync BLUE is currently off, the Power menu appears
(continue from step 2).
8 UltraSync BLUE User Guide
Page 9

2. Press the down button to scroll down to the Power option, and
then press the Select button.
3. Press the up or down to scroll to the option you need:
l Run - To turn the UltraSync BLUE on.
l Shut-Down - To turn the UltraSync BLUE off.
l Factory Reset - To return all of the settings to their default
values.
l Back - to return to the main menu.
4. Press the Select button.
5. Choose the Confirm option and press Select (or choose Back to
return to the previous screen).
UltraSync BLUE User Guide 9
Page 10

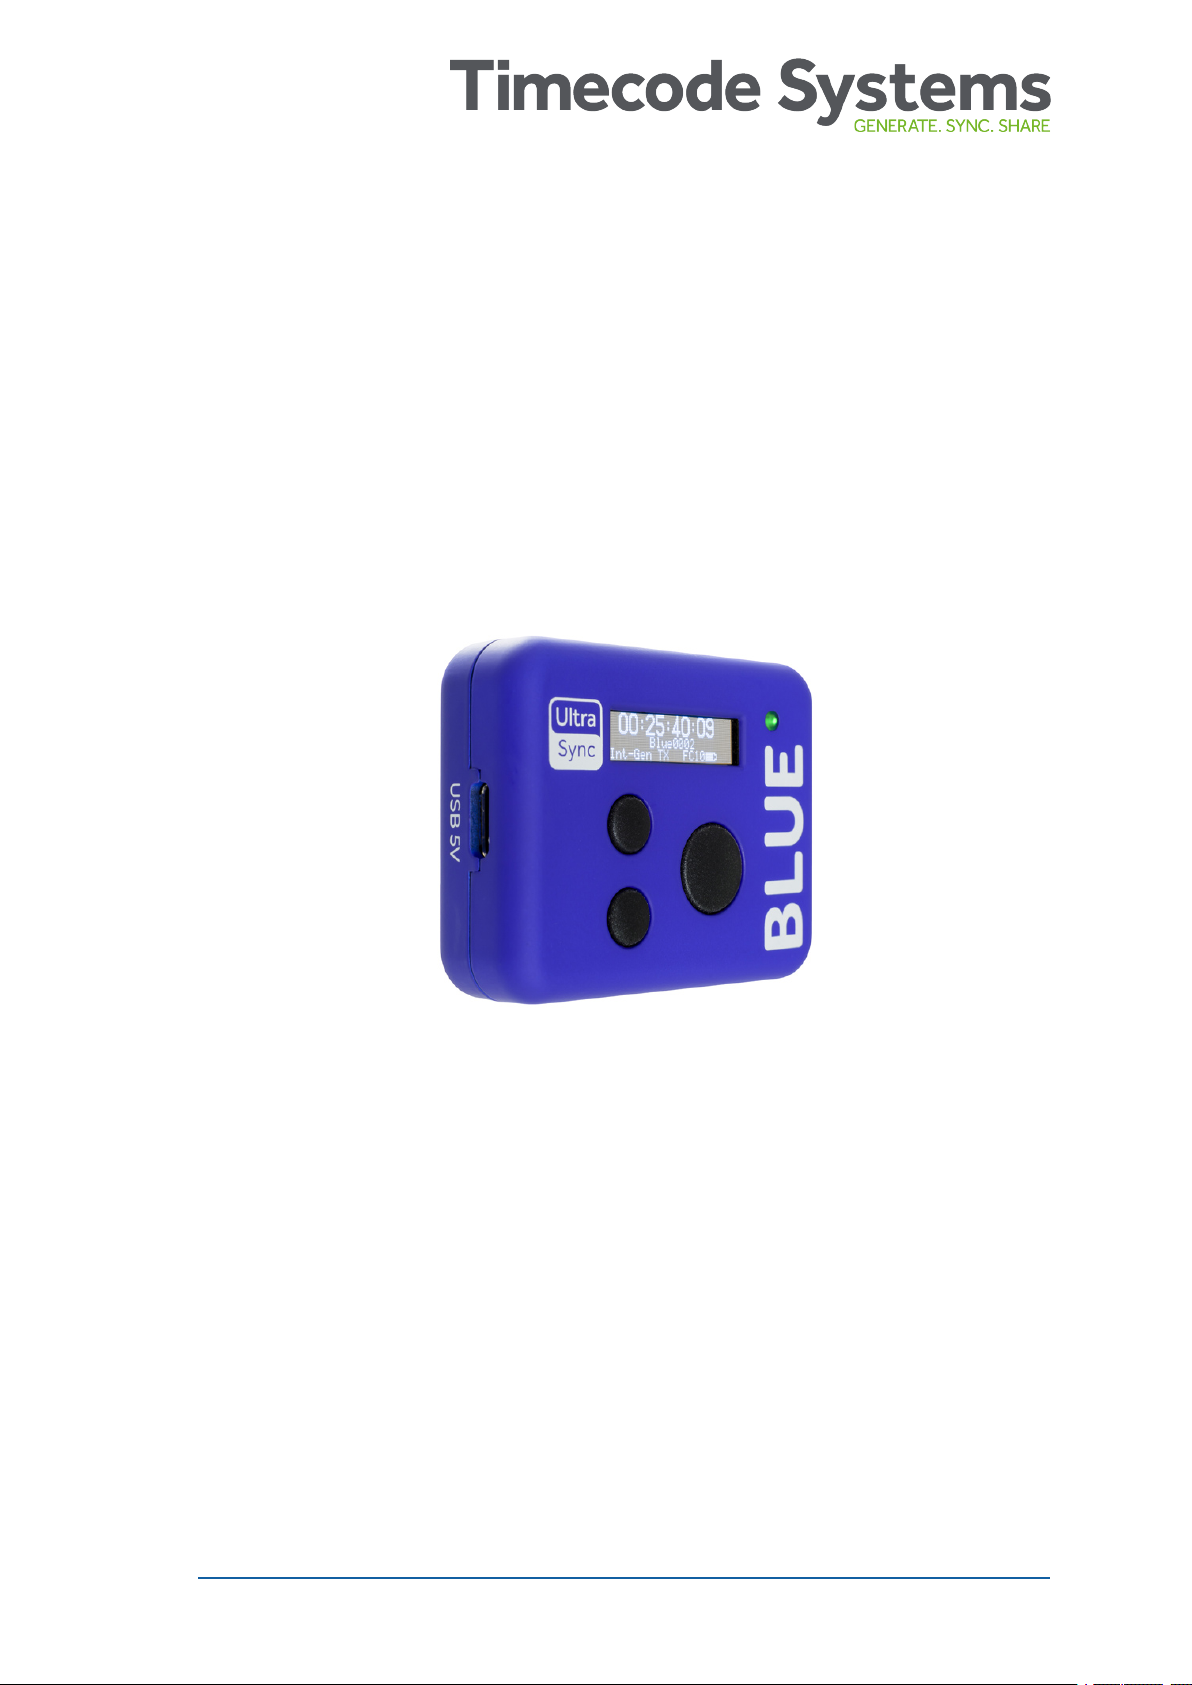
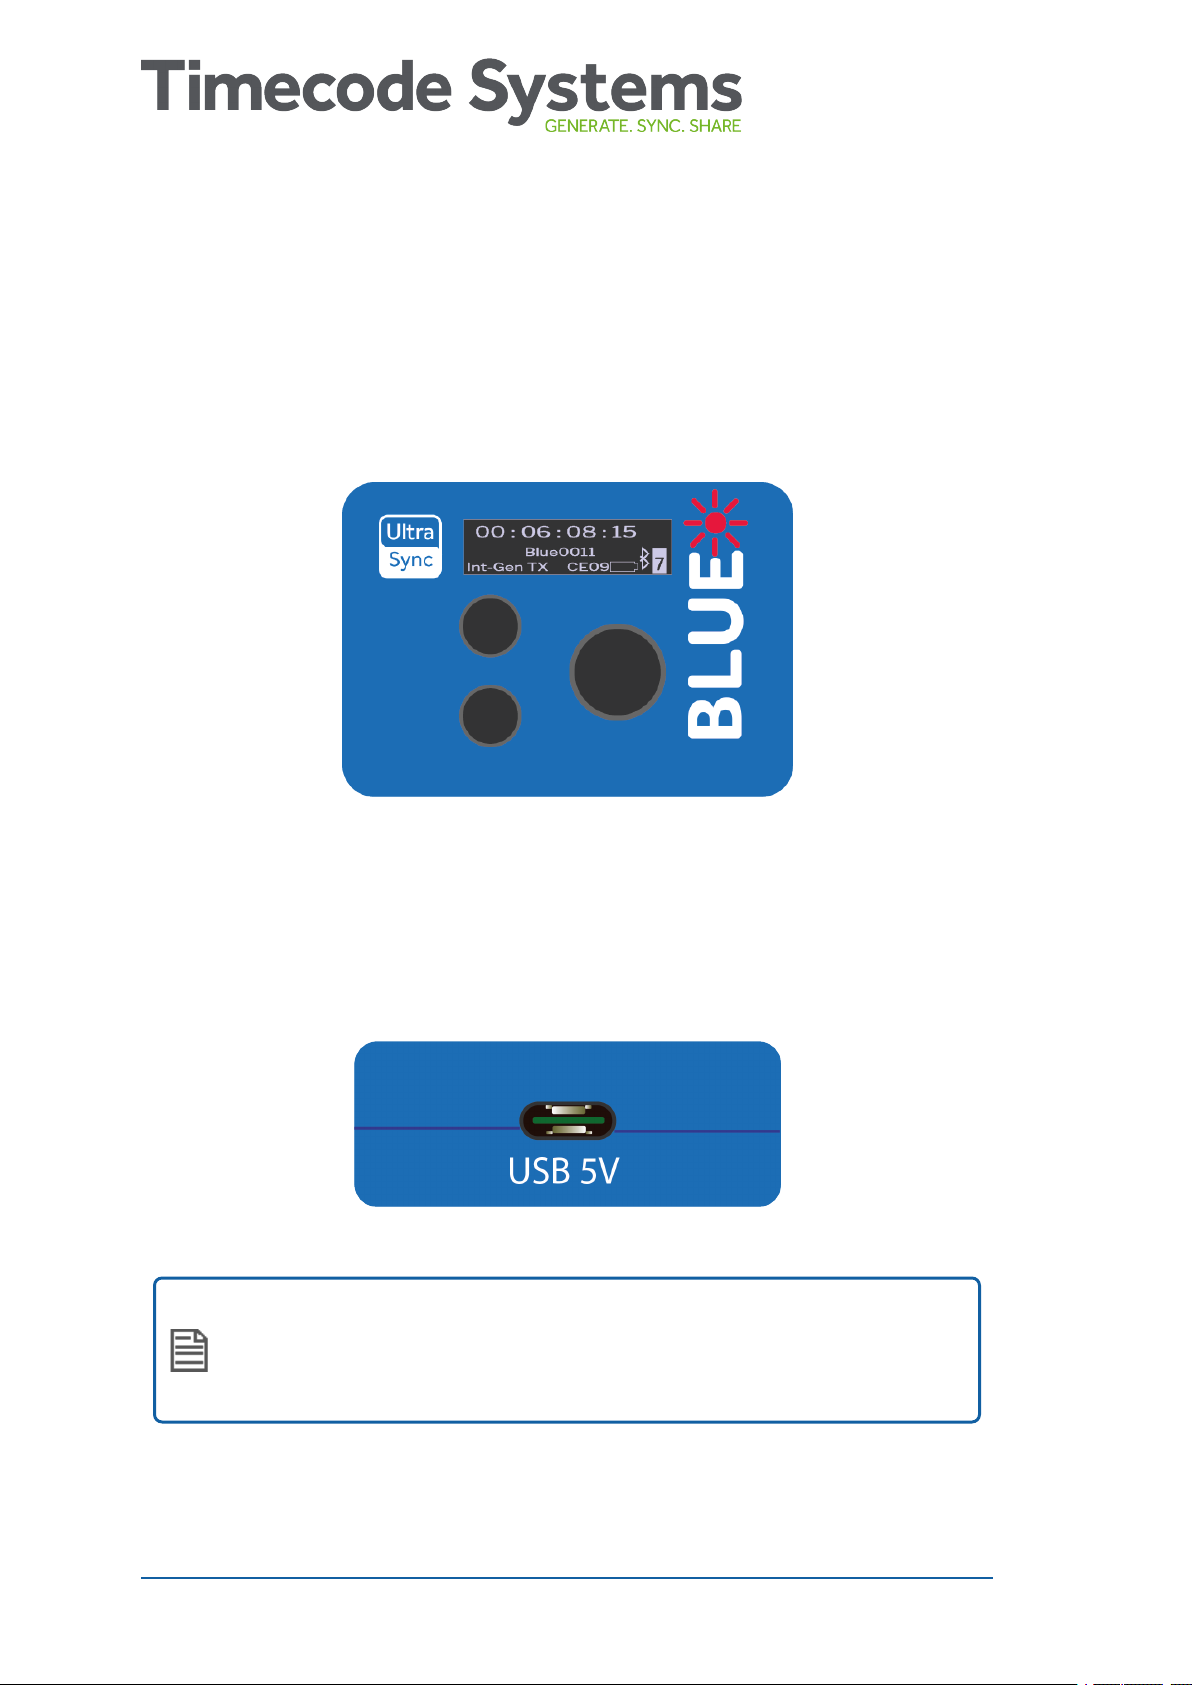
Display and Controls
Number Name Description
1 LED Colour-coded to show different status (see LED
Colours on page 11).
2 Select Use to choose an option and light up the OLED.
3 Down Use to scroll down the menu options and the status
screens.
4 Up Use to scroll up the menu options and the status
screens.
5 OLED Shows status information and the menus for choosing
the settings.
Your UltraSync BLUE is easy to set up and use. It has a simple menu
system for applying the device's settings.
10 UltraSync BLUE User Guide
Page 11

LED Colours
Colour Description
Green The LED flashes green if:
UltraSync BLUE is in Free Run mode.
UltraSync BLUE is in RF Slave mode and is synchronised with the
master.
UltraSync BLUE is in Int Master RF TX mode.
The LED shows a solid green light if the UltraSync BLUE is
switched off and the battery is fully charged.
Blue The LED flashes blue if:
UltraSync BLUE is in RF Slave mode and is not synchronised with
the master.
Red The LED will flash red if:
UltraSync BLUE is powered down and charging. (The LED does
not show red if the UltraSync BLUE is charging while it is
switched on).
UltraSync BLUE has a low battery.
UltraSync BLUE is resynchronising with a master device (LED
flashes red twice, very quickly).
The LED to the right of the OLED acts as a colour-coded status
indicator.
If you are unfamiliar with the concept of master and slave devices,
see Sync with other Timecode Devices on page 20.
UltraSync BLUE User Guide 11
Page 12
Charging your UltraSync BLUE
If your UltraSync BLUE's battery is running out of power, the LED
flashes red and the screen shows 'Battery Power Critical'. The battery
level is also shown on the main screen.
To recharge the battery, use the USB-C to USB cable that is supplied
with your UltraSync BLUE and a compatible charger socket (not
supplied).
Note: Battery life may be reduced if your UltraSync BLUE is
used in extreme temperatures. Very hot and very cold
conditions can affect battery performance.
12 UltraSync BLUE User Guide
Page 13

Mounting your UltraSync BLUE
To mount your UltraSync BLUE, fix a hook-fastening Velcro strap to
the 'MOUNTING' section on the rear side of the unit.
You can then attach the UltraSync BLUE to other equipment.
UltraSync BLUE User Guide 13
Page 14
Technical Specification
Category Specification
Dimensions 55mm × 43mm × 17mm (width ×
height × depth)
OLED Display Blue 128 × 32 Pixels
Timecode generator accuracy TCX0 0.5ppm when free running. In
practice, approximately 1 frame
drift in 24 hours. Zero ppm when
RF locked to a master.
Supported frame rates 23.98
24.00
25.00
30.0D (drop frame)
30.00
29.97D (drop frame)
29.97
External power USB-C (5V DC)
Internal power Built-in Li-Polymer (3.7V battery
800mAh 2.96Wh). The battery
cannot be replaced by users.
Charging Time Approximately 3.5 hours.
Battery Run Time Approximately 20 hours.
Multi Channel Digital Transceiver 865.050MHz to 923.200MHz
Antenna Internal antennas with diversity
reception capability.
14 UltraSync BLUE User Guide
Page 15

Category Specification
RF Range* The typical range for
synchronisation with a master is
approximately 200m (656 feet, 219
yards). This range is based on an
uninterrupted line of sight. If there
are obstacles between a slave and
master, the range can be reduced.
Bluetooth®Range Bluetooth low energy range (BLE)
for lower power consumption.
Designed for use in same room as
other Bluetooth-enabled devices.
*Typical range. The range can vary.
UltraSync BLUE User Guide 15
Page 16

This page is intentionally blank to allow for double-sided printing.
16 UltraSync BLUE User Guide
Page 17
Chapter 2:
Quick Set Up
Let's get you up and running. These sections explain how to pair
your UltraSync BLUE with your recording devices and sync it with
other UltraSync BLUEs (or different Timecode Systems
products).
Pair with Recording Devices 18
Sync with other Timecode Devices 20
Set the Timecode 25
Set the Frame Rate 27
Quick Set Up
UltraSync BLUE User Guide 17
Page 18
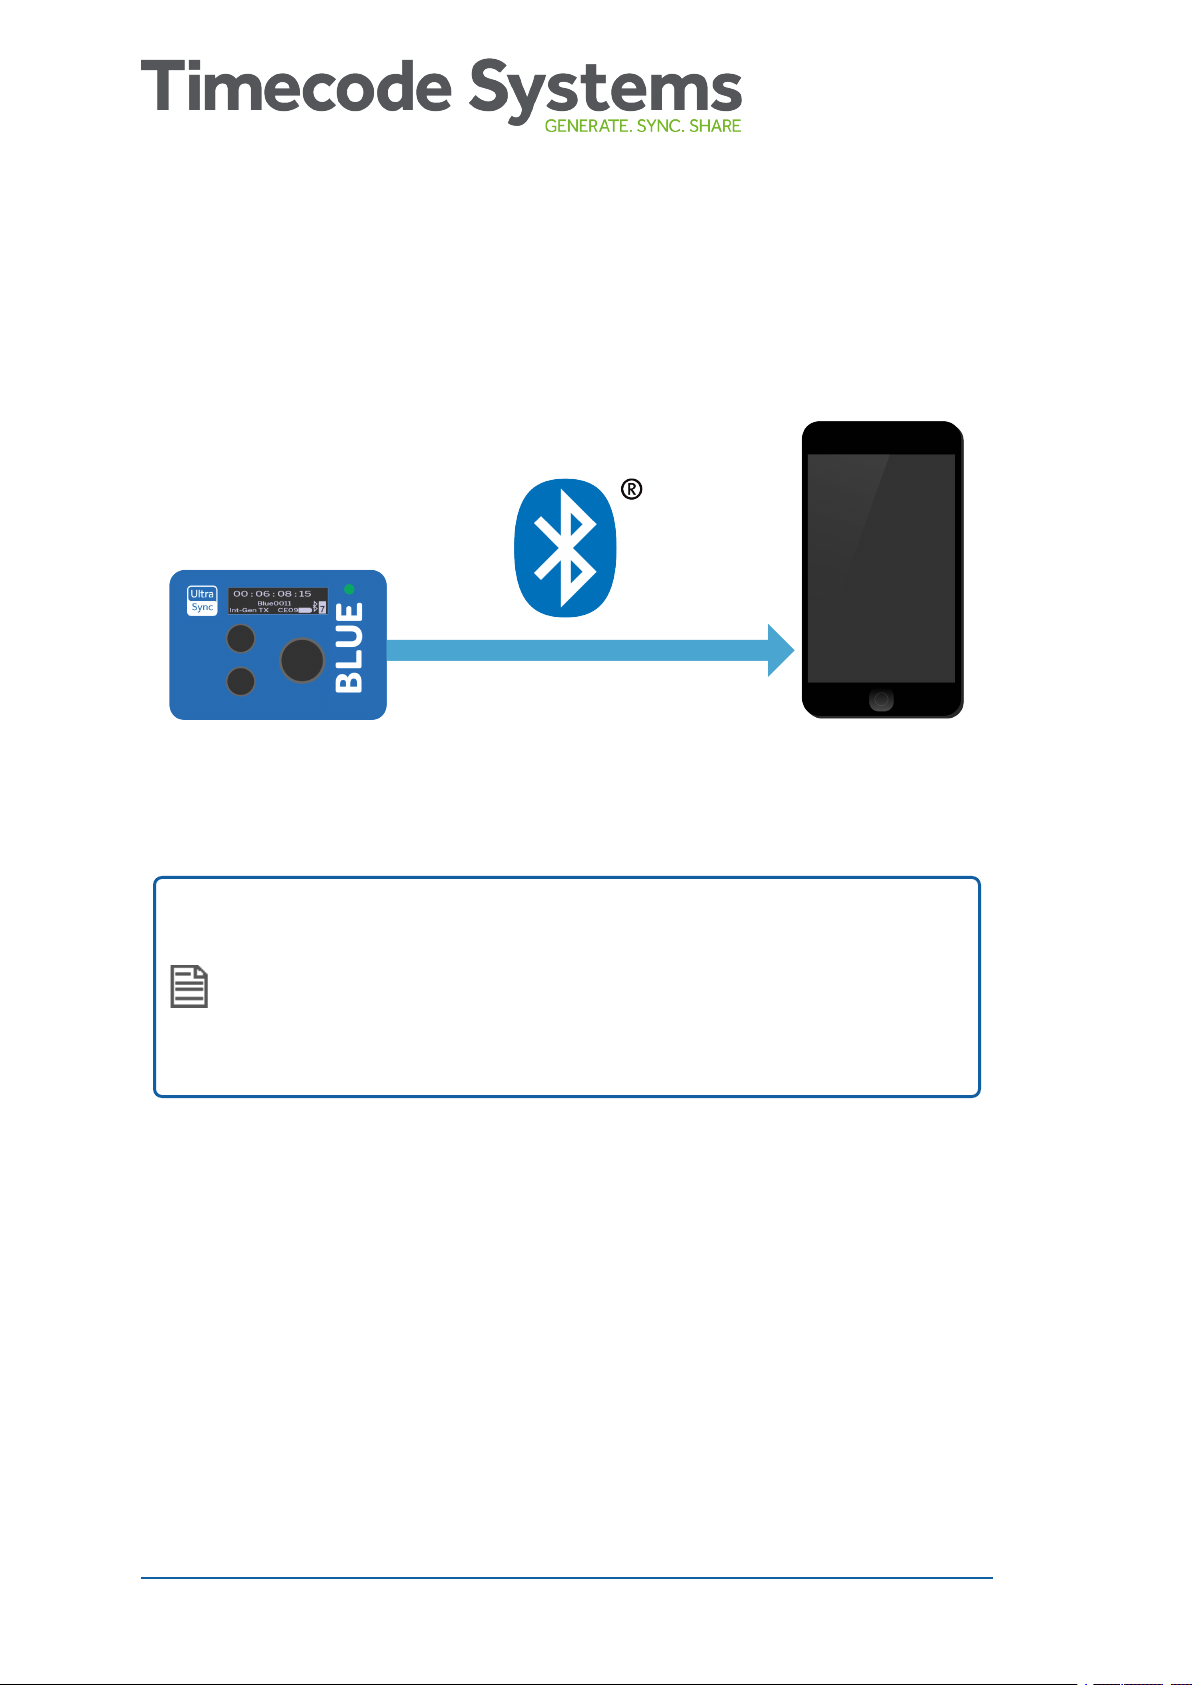
Pair with Recording Devices
To get your UltraSync BLUE to send timecode to your recording
device(s), you need to pair them via Bluetooth®.
UltraSync BLUE can pair with up to four recording devices at the
same time.
Note: If you use a Timecode Systems :pulse as a master, you
can use BLINK Hub to control and monitor your UltraSync
BLUEs and their recording devices remotely. For remote
control you will need to have one UltraSync BLUE for each
recording device.
To pair your UltraSync BLUE with a recording device, such as an
iPhone:
1. Activate Bluetooth on your recording device to enter pairing
mode.
2. Make sure your UltraSync BLUE is switched on (see Switch
UltraSync BLUE On and Off on page 8).
3. Press the Select button to display the main menu.
18 UltraSync BLUE User Guide
Page 19
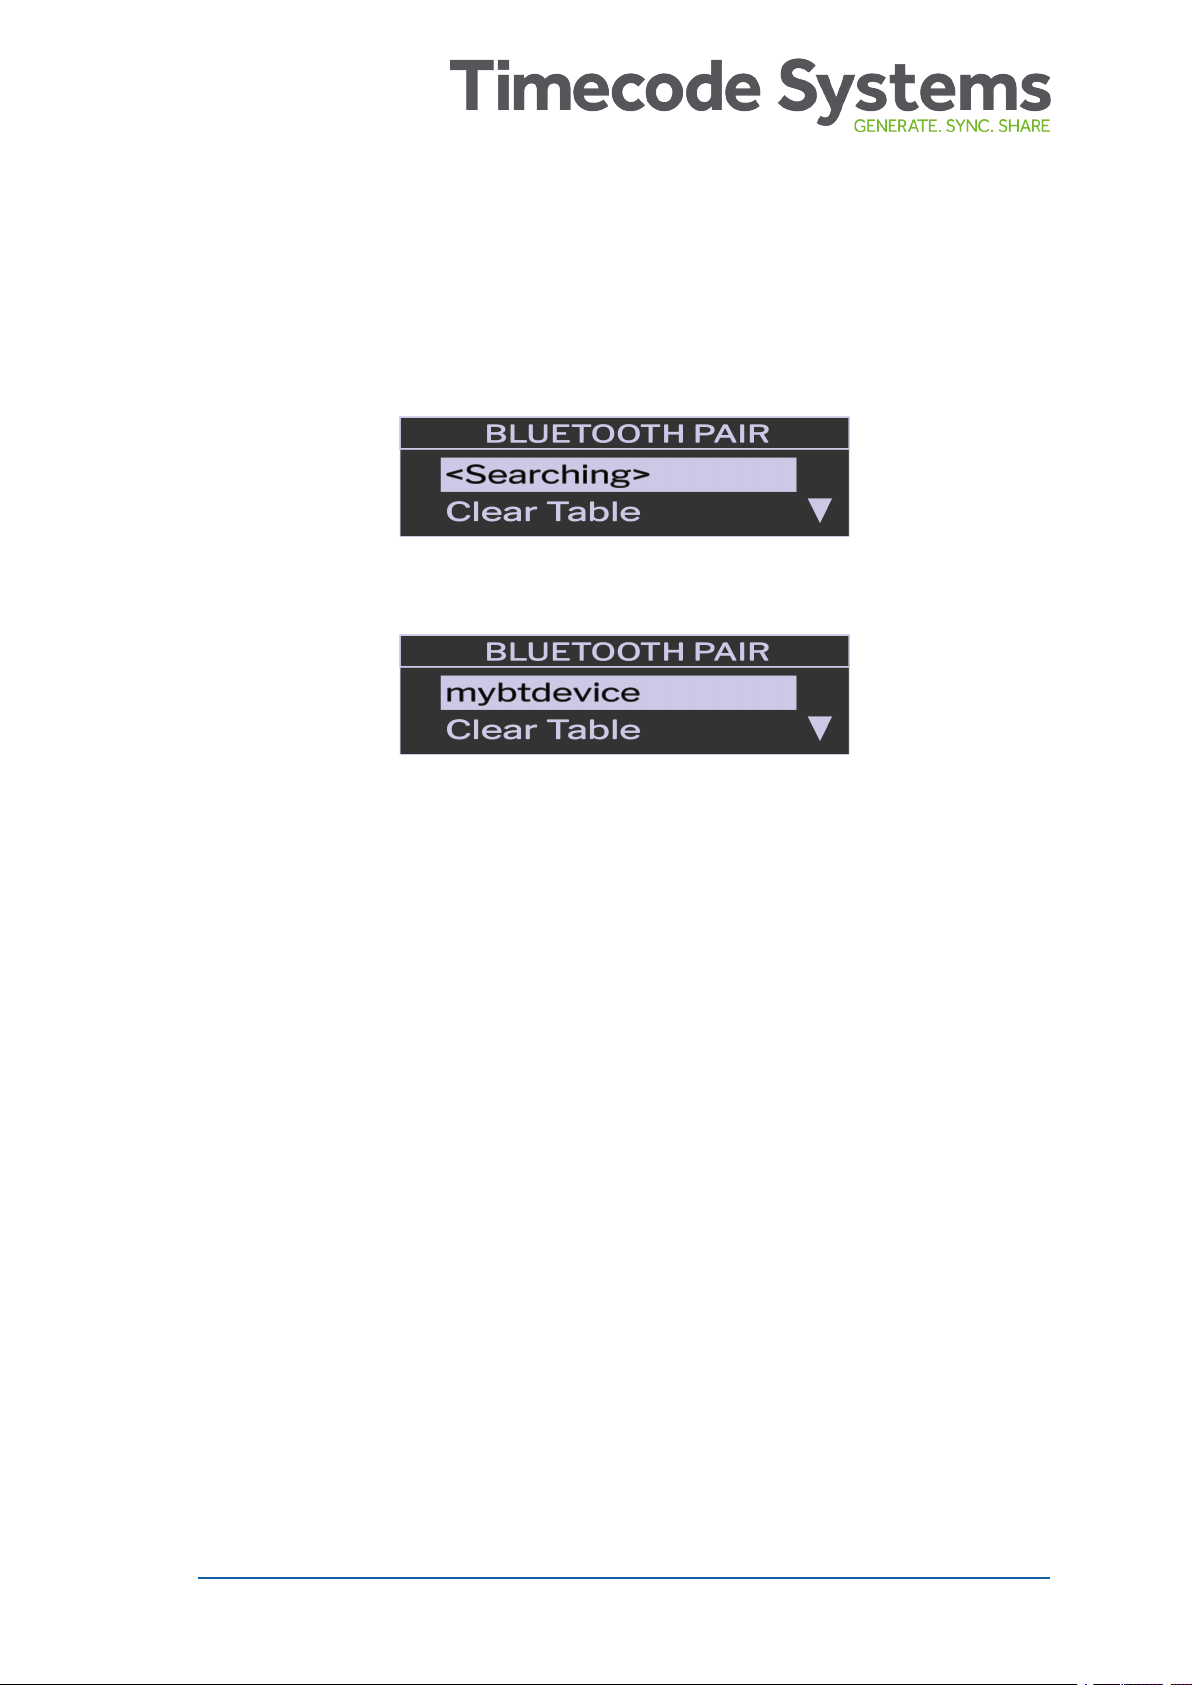
4. Choose Bluetooth Pair and press Select.
The Wait to Pair line changes to <Searching> as the UltraSync
BLUE searches for other Bluetooth devices in range. When it
detects your recording device, it will pair with it.
UltraSync BLUE not Pairing?
If your recording device is within range and the UltraSync BLUE
cannot pair with it, make sure that you have enabled Bluetooth on
your device. If it is already enabled, try disabling Bluetooth and then
re-enabling it. If the UltraSync BLUE is still unable to pair, select the
Bluetooth Pair menu and choose Clear Table, and then Confirm. This
clears the UltraSync BLUE's memory of previous pairings.
If you are still unable to pair the UltraSync BLUE with your recording
device, contact Timecode Systems for advice.
UltraSync BLUE User Guide 19
Page 20
Sync with other Timecode Devices
To get your UltraSync BLUE to synchronise with other UltraSync
BLUEs (or other Timecode Systems timecode sync products):
l Set the RF Channel and RF Region (see page 21)
l Choose a Mode (see page 23).
When the mode and RF settings are in place, the UltraSync BLUE can
connect and sync with other UltraSync BLUEs via radio (RF). This
timecode is then passed on to the recording devices via Bluetooth.
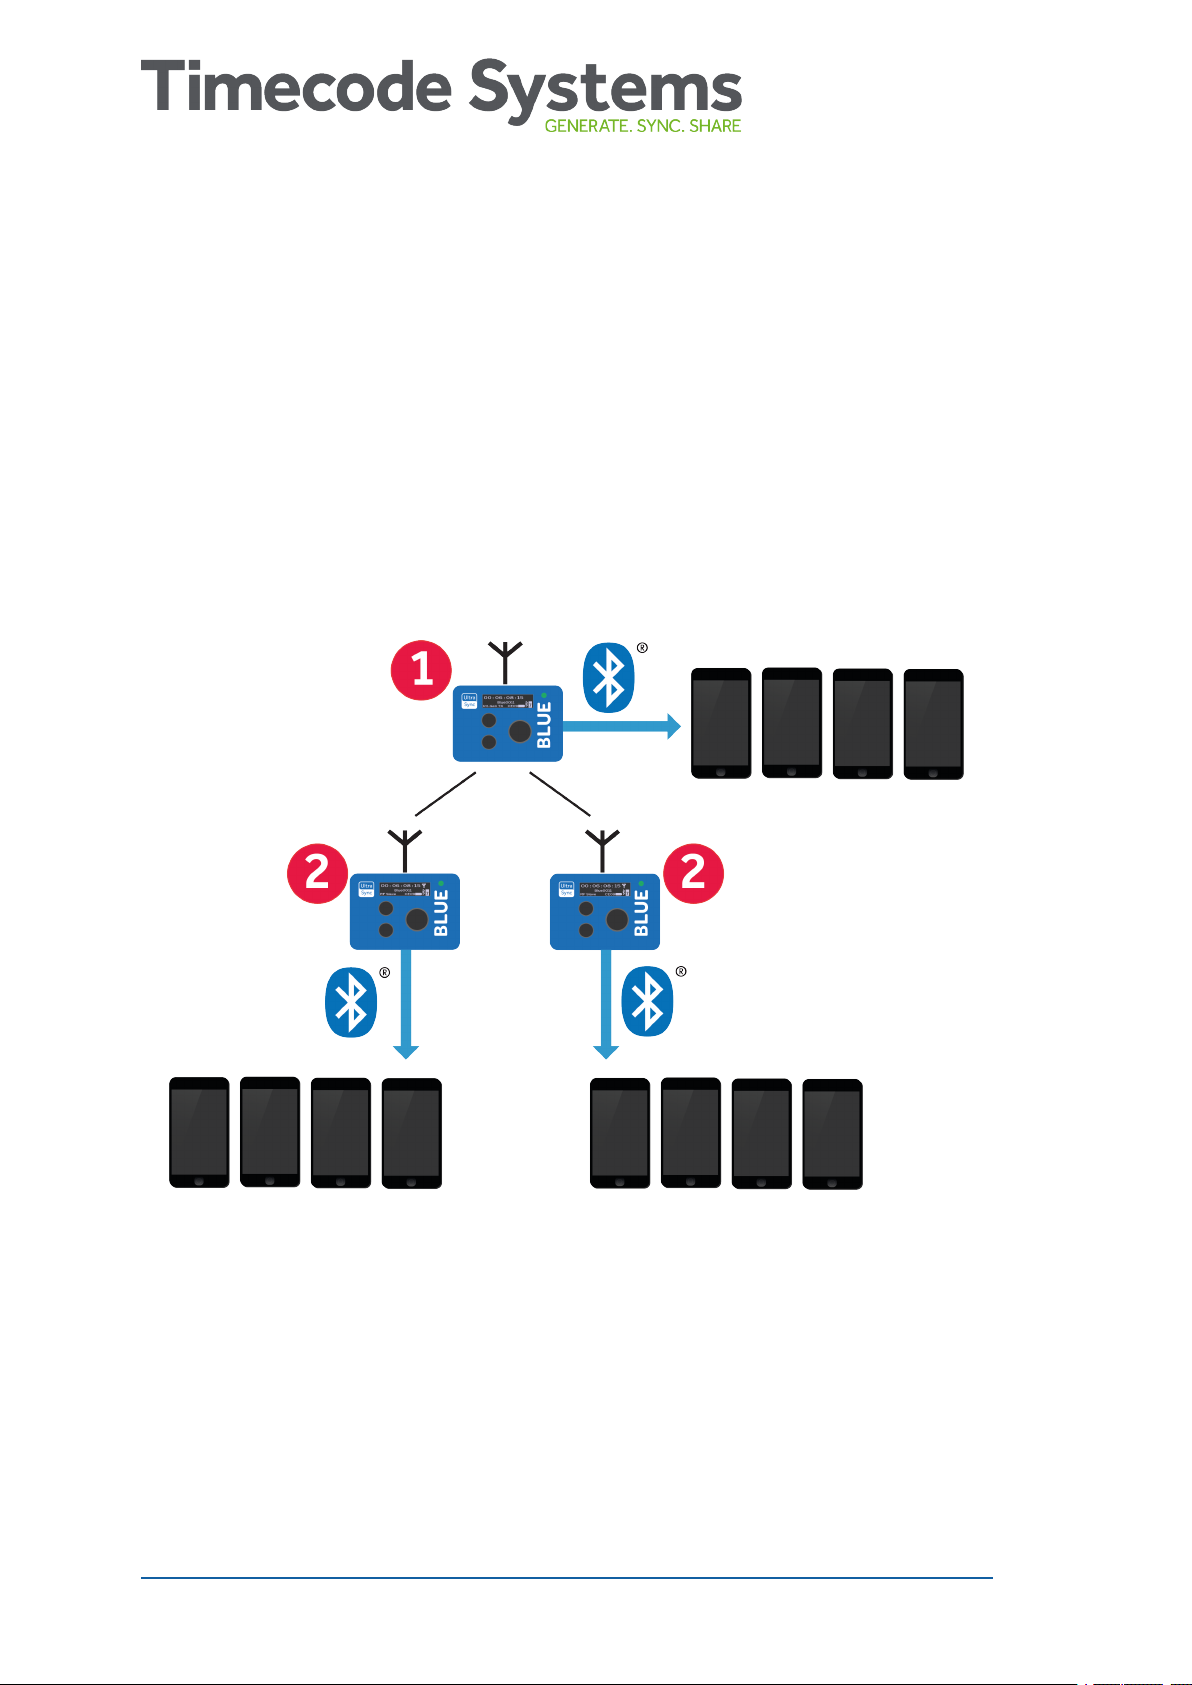
UltraSync BLUE (1) is set to run in Int Master RF TX mode and is the
master in the RF network. The other UltraSync BLUEs (2) are set to
run in RF Slave mode. The slaves sync with the master.
20 UltraSync BLUE User Guide
Page 21

Set the RF Channel and RF Region
Your UltraSync BLUE uses radio (RF) to synchronise with other
Timecode Systems devices. It can only connect with devices that use
the same RF channel and RF region.
Note: The RF region setting may be disabled due to FCC
regulations. If you cannot access the RF region setting and
need to use your UltraSync BLUE in a different country,
please contact Timecode Systems for advice.
To set the RF channel (radio frequency) and RF region:
1. Make sure your UltraSync BLUE is switched on (see Switch
UltraSync BLUE On and Off on page 8).
2. Press the Select button to display the main menu.
3. Scroll down to the RF Settings option and press Select.
4. On the RF Control screen, choose RF Channel and press Select.
5. Change the channel to the appropriate number and press
Select. There are 14 channels available.
UltraSync BLUE User Guide 21
Page 22

6. Choose the Confirm option and press Select (or choose Back to
return to the previous screen).
7. On the RF Control screen, choose RF Region and press Select.
8.1. Use the Up and Down buttons to choose the appropriate area:
l Europe/UK
l Japan/China
l US/CA/AU/NZ (for USA, Canada, Australia, or New
Zealand).
9. Press the Select button.
10. Choose the Confirm option and press Select (or choose Back to
return to the previous screen).
22 UltraSync BLUE User Guide
Page 23

Choose a Mode
Mode Description
Int Master RF TX The UltraSync BLUE is the master in the network. It
uses its own timecode settings and sends them to
slave devices. The slave devices sync with the
UltraSync BLUE master.
RF Slave The UltraSync BLUE is a slave in the network. It
receives timecode and frame rate from the master
device and synchronises to those.
Free Run The UltraSync BLUE does not connect to other
Timecode Systems devices. It uses its own timecode
and frame rate settings.
UltraSync BLUE can run in one of three modes:
To learn more about the modes, see Example Setups on page 29.
To set the mode:
1. Make sure your UltraSync BLUE is switched on (see Switch
UltraSync BLUE On and Off on page 8).
2. Press the Select button to display the main menu.
3. Scroll down to the Device Mode option and press Select.
UltraSync BLUE User Guide 23
Page 24

4. Choose the mode for your UltraSync BLUE.
5. Press the Select button.
6. Choose the Confirm option and press Select (or choose Back to
return to the previous screen).
When you have set the mode, you need to set the RF channel and RF
region so that the UltraSync BLUE uses the correct radio frequency.
If you have set your UltraSync BLUE to run in RF Slave mode, it will
use its own timecode settings until it is in range of a master device.
The radio range is 200m approx. When the UltraSync BLUE is in range,
it will sync to the master device's timecode.
If you set your UltraSync BLUE to run in Int Master RF TX mode or
Free Run mode, you need to Set the Timecode (see page 25).
You may also want to Set the Frame Rate (see page 27).
24 UltraSync BLUE User Guide
Page 25

Set the Timecode
If you're using your UltraSync BLUE in Int Master RF TX mode or Free
Run mode, you need to enter its timecode settings. The UltraSync
BLUE will use the timecode settings that you provide, and will send
the timecode to your recording device via Bluetooth®.
If your UltraSync BLUE is a master, it will also send the timecode to
other Timecode Systems devices via radio, so that they can all
synchronise.
Note: Using an UltraSync BLUE in RF Slave mode? You don't
need to enter the timecode settings as your slave UltraSync
BLUE will synchronise with the master device as soon as the
master is in range.
To enter the timecode settings:
1. Make sure your UltraSync BLUE is switched on (see Switch
UltraSync BLUE On and Off on page 8).
2. Press the Select button to display the main menu.
3. Choose the Timecode option and press Select.
4. Choose the Set Timecode option and press Select.
UltraSync BLUE User Guide 25
Page 26

5. Enter the time you want the UltraSync BLUE to use. The first two
digits are selected automatically and you can use Up and Down
to change them. Press Select to move to the next pair of digits
and use Up and Down to change those. Repeat until you have
set all of the digits.
6. Press the Select button.
7. Choose the Confirm option and press Select (or choose Back to
return to the previous screen).
26 UltraSync BLUE User Guide
Page 27

Set the Frame Rate
Frame rate per second Standard Used in
25, 23.98, 24.00 PAL UK, EU, most other
countries
29.97, 29.97 dropframe, 30.00, 30.00
dropframe
NTSC USA, Canada, Mexico,
Japan
If you are using your UltraSync BLUE for professional broadcasting,
you need to set its frame rate to match the frame rate of your
recording equipment. But if you are using your UltraSync BLUE for
online content, such as a vlog, you can use the default frame rate (or
choose a higher frame rate for a smoother image). Movies and other
cinematic productions are usually filmed at 24 frames per second.
UltraSync BLUE supports these frame rates:
To set the frame rate:
1. Make sure your UltraSync BLUE is switched on (see Switch
UltraSync BLUE On and Off on page 8).
2. Press the Select button.
3. Choose the Timecode option and press Select.
4. Choose the Frame Rate option and press Select.
5. Use the Up and Down buttons to choose a frame rate and press
Select.
6. Choose the Confirm option and press Select (or choose Back to
return to the previous screen).
Note: If your UltraSync BLUE is running in RF slave mode, it
will receive and use the frame rate settings from the master
device in the network. You don't need to set the frame rate
on a slave.
UltraSync BLUE User Guide 27
Page 28

This page is intentionally blank to allow for double-sided printing.
28 UltraSync BLUE User Guide
Page 29

Chapter 3:
Example Setups
UltraSync BLUEs are designed to work in a network of devices.
You could have a network that only contains UltraSync BLUEs
paired to recording devices, or you could have a more complex
'pro' network. In the 'pro' network, the UltraSync BLUEs sync with
other Timecode Systems products, which are connected to pro
recording equipment.
Here, you can find examples of different networks:
UltraSync BLUE Network 30
Pro Network 31
Example Setups
Free Run 34
UltraSync BLUE User Guide 29
Page 30

UltraSync BLUE Network
With UltraSync BLUE you can create a network of synchronised
devices, even if you're not using high-end cameras, sound recorders,
and our pro devices such as the :pulse.
You can sync the UltraSync BLUE with other Timecode Systems
products, such as the SyncBac PRO or other UltraSync BLUEs. The
devices use radio to sync the timecode.
The UltraSync BLUE can then send the timecode to 1-4 recording
devices via Bluetooth.
In this example network, there are three UltraSync BLUEs, where (1) is
the master and (2) are the slaves. The master connects to the slaves
via radio and they all sync to the master's timecode settings. The
master sends its timecode via Bluetooth to 4 smartphones. Each
slave also sends the timecode to smartphones (4 smartphones per
slave).
30 UltraSync BLUE User Guide
Page 31

For this type of network, you need to:
1. Pair the UltraSync BLUEs with the recording devices.
2. Set one UltraSync BLUE to run in Int Master RF TX mode.
3. Set one or more UltraSync BLUEs to run as RF slaves.
Pro Network
You can use the UltraSync BLUE as part of a network that uses other
Timecode Systems products and professional recording devices. This
is useful when you want to use pro cameras and sound recorders for
some scenes, but also want to use smartphones for creative angles.
Any Timecode Systems unit can be a master to an UltraSync BLUE.
The UltraSync BLUE can be paired to up to four recording devices via
Bluetooth.
If you are using a :pulse or :wave as the master, you can use BLINK
Hub for remote monitoring and control of your UltraSync BLUE. BLINK
Hub is a Timecode Systems application, and you can use it to:
l See which recording devices are paired with your UltraSync
BLUE.
l Control and monitor your paired recording devices remotely. For
remote control, you will need to have one UltraSync BLUE for
each recording device.
The following image shows a possible pro network, where the
UltraSync BLUEs are added as RF slaves and the :pulse is the master.
The :pulse, UltraSync BLUEs, and UltraSync ONEs all sync via radio
(RF).
The :pulse supports our BLINK Hub app, which you can use for
remote control and monitoring.
UltraSync BLUE User Guide 31
Page 32

32 UltraSync BLUE User Guide
Page 33

To add your UltraSync BLUEs to a pro network of devices:
1. Pair them with the recording devices.
2. Set them to run as RF slaves.
If you wanted to, you could set one UltraSync BLUE to run as the
master and provide the timecode to all of the devices in the network.
But in a pro network, it is more common to have the UltraSync BLUE
as a slave.
UltraSync BLUE User Guide 33
Page 34

Free Run
If you want to use your UltraSync BLUE as a standalone device, set it
to use Free Run mode. In this mode, your UltraSync BLUE will provide
timecode to your recording devices via Bluetooth, but radio (RF) is
turned off. This means it will not sync with other Timecode Systems
products (and it uses less battery power as RF is not used).
To get your UltraSync BLUE to free run:
1. Set the UltraSync BLUE to run in Free Run mode.
2. Set the timecode and frame rate for the UltraSync BLUE.
3. Pair the UltraSync BLUE with the recording devices.
34 UltraSync BLUE User Guide
Page 35

Chapter 4:
Display Settings
Learn how to change the display settings and lock your UltraSync
BLUE:
Key Lock 36
Screen Brightness 38
Screen Light Timeout 39
LED Brightness 40
Display Settings
UltraSync BLUE User Guide 35
Page 36

Key Lock
You can lock the UltraSync BLUE's menus so that most of the options
are unavailable until the menu is first unlocked. Locking the menus
can be useful when you have set up your UltraSync BLUE and want to
lock it so that other people cannot change the settings without first
unlocking it.
Note: Key lock is on by default.
To use key lock:
1. Make sure your UltraSync BLUE is switched on (see Switch
UltraSync BLUE On and Off on page 8).
2. Press the Select button to display the main menu.
3. Press the Up button to scroll to the Key Lock/Unlock menu (it is
above Timecode in the Main Menu).
4. Press the Select button.
36 UltraSync BLUE User Guide
Page 37

5. Choose a key lock option and press Select.
Option Description
Lock Menus
Now
Lock the menus instantly. Only the Key
Lock/Unlock menu will be available to use.
Unlock Menus Release the lock so that all menus are made
available again. This option is only shown if the
UltraSync BLUE is currently locked.
Timed Lock Lock the menus after a delay.
Never Lock Do not lock the menus.
6. Choose the Confirm option and press Select (or choose Back to
return to the previous screen).
UltraSync BLUE User Guide 37
Page 38

Screen Brightness
You can control how bright the UltraSync BLUE's screen shines. For
example, you might want to decrease the brightness if you are
setting up the UltraSync BLUE for use in dark conditions.
1. Make sure your UltraSync BLUE is switched on (see Switch
UltraSync BLUE On and Off on page 8).
2. Press the Select button to display the main menu.
3. Choose the Display option and press Select.
4. Choose the Brightness option and press Select.
5. Set the brightness level (1 is dimmest, 10 is brightest) and press
Select.
38 UltraSync BLUE User Guide
Page 39

Screen Light Timeout
Option Description
Short The UltraSync BLUE dims the screen after 10
seconds.
Long The UltraSync BLUE dims the screen after 20
seconds.
Never The UltraSync BLUE does not dim the screen
automatically.
To preserve battery life, your UltraSync BLUE automatically dims the
brightness of its screen after a certain amount of time. You can set
this amount of time in the Display menu.
1. Make sure your UltraSync BLUE is switched on (see Switch
UltraSync BLUE On and Off on page 8).
2. Press the Select button to display the main menu.
3. Choose the Display option and press Select.
4. Choose the Timeout option and press Select.
5. Choose a timeout option and press Select.
UltraSync BLUE User Guide 39
Page 40

LED Brightness
You can control how bright the UltraSync BLUE's LED shines.
1. Make sure your UltraSync BLUE is switched on (see Switch
UltraSync BLUE On and Off on page 8).
2. Press the Select button to display the main menu.
3. Choose the Display option and press Select.
4. Choose the LED Level option and press Select.
5. Set the brightness level (01-05, where 01 is dimmest, 05 is
brightest) and press Select.
40 UltraSync BLUE User Guide
Page 41

Chapter 5:
Status Information
Your UltraSync BLUE has a collection of status displays that you
can use to view current information about the unit.
Main Screen 42
Version Number and Serial Number 44
Bluetooth® Status 45
Synchronisation Status 46
Status
UltraSync BLUE User Guide 41
Page 42

Main Screen
Key Description
1 The timecode that is being used by the UltraSync BLUE.
2 The name of the recording device that is paired with the
UltraSync BLUE.
3 The UltraSync BLUE's mode.
4 The country/area and RF channel that is used by the UltraSync
BLUE. Ch. is for channel, and the first two letters after Ch.
indicate the country /area (CE for Europe, JP for Asia, FC for
USA, Canada, Australia, and New Zealand). The two numbers
indicate the RF channel.
5 A battery icon that shows an estimate of the remaining
battery power, based on the settings that are currently in use.
6 Bluetooth icon shows that the UltraSync BLUE is using
Bluetooth to pair with a device.
7 Bluetooth signal. The number represents the signal strength
(0-7 where 7 is the maximum signal strength).
The main screen is displayed when you are not using the UltraSync
BLUE to view other status displays or to access menu options.
42 UltraSync BLUE User Guide
Page 43

Key Description
8 RF icon shows that the UltraSync BLUE is in RF Slave mode
and is currently receiving timecode from a master device. The
timecode is received via radio (RF).
9 RF signal. The number represents the radio signal strength (0-
7 where 7 is the maximum strength).
UltraSync BLUE User Guide 43
Page 44

Version Number and Serial Number
Status Description
Ser.No The serial number of your UltraSync BLUE.
F/W The version of the firmware installed on your UltraSync BLUE.
BLE The version of Bluetooth supported by your UltraSync BLUE.
If you contact Timecode Systems technical support, you may be
asked to provide the serial number of your UltraSync BLUE. You may
also be asked what version of the firmware your UltraSync BLUE is
running. To find this information:
1. Make sure your UltraSync BLUE is switched on (see Switch
UltraSync BLUE On and Off on page 8).
2. Display the Main Status screen.
3. Use the Up and Down buttons to scroll to the screen that shows
UltraSync BLUE at the top.
44 UltraSync BLUE User Guide
Page 45

Bluetooth®Status
You can view the status of the Bluetooth pairing:
1. Make sure your UltraSync BLUE is switched on (see Switch
UltraSync BLUE On and Off on page 8).
2. Display the Main Status screen.
3. Use the Up and Down buttons to scroll to the screen that shows
Bluetooth at the top.
The Bluetooth status shows whether the UltraSync BLUE is
connected to a device via Bluetooth. If it is connected, the name
of the paired device is shown and the RSSI entry shows the
signal strength.
UltraSync BLUE User Guide 45
Page 46

Synchronisation Status
Status Description
TCR or
TCG
TCR (timecode receiving) is shown if your UltraSync
BLUE is a slave.
TCG (timecode generated) is shown if your UltraSync
BLUE is a master.
Next to TCR/TCG is the timecode that your UltraSync
BLUE is using.
User Reserved for use in future updates to the UltraSync
BLUE.
FPS The frame rate that your UltraSync BLUE is using.
Master The name of the master device that the UltraSync BLUE
is synchronised with (only available if your UltraSync
BLUE is in RF Slave mode).
If your UltraSync BLUE is in a master mode, the status
shows the number of slaves connected to the master.
You can use the synchronisation status screen to check if your
UltraSync BLUE is syncing with other UltraSync BLUEs or other
Timecode Systems devices.
1. Make sure your UltraSync BLUE is switched on (see Switch
UltraSync BLUE On and Off on page 8).
2. Display the Main Status screen.
3. Use the Up and Down buttons to scroll to the screen that shows
TCR or TCG at the top.
46 UltraSync BLUE User Guide
Page 47

Chapter 6:
Troubleshooting
In this chapter, you can find troubleshooting information and
instructions on how to reset your UltraSync BLUE. If you are
experiencing problems that are not covered here, please visit
https://support.timecodesystems.com for up-to-date FAQs and
manuals.
UltraSync BLUE not Responding to Select button 48
UltraSync BLUE Battery not Charging 48
UltraSync BLUE Slave not Connecting to Master 49
Slave is Connecting to the Wrong Master 49
Troubleshooting
Update your UltraSync BLUE 50
Reset 51
Restore Factory Settings 52
UltraSync BLUE User Guide 47
Page 48

UltraSync BLUE not Responding to Select button
In the unlikely event that your UltraSync BLUE does not display the
menu when you press the Select button, try a Reset (see page 51).
UltraSync BLUE Battery not Charging
If the UltraSync BLUE battery is not re-charging when you use a USBC charger:
1. Switch your UltraSync BLUE off (see Switch UltraSync BLUE On
and Off on page 8).
2. Check that the USB-C port on the UltraSync BLUE is clear. USBC ports can get clogged with lint from pockets or dirt and dust
from the environment.
3. Try using a different charger.
4. Try using a different cable.
If the problem persists, contact Timecode Systems for advice.
48 UltraSync BLUE User Guide
Page 49

UltraSync BLUE Slave not Connecting to Master
If your UltraSync BLUE is not receiving timecode from a master
device, it could be due to:
l The master device being switched off. Make sure the master
device is on and has sufficient battery power.
l UltraSync BLUE is set to Int Master RF TX mode. The UltraSync
BLUE can only connect with a master device if the UltraSync
BLUE is running in RF Slave mode (see Sync with other
Timecode Devices on page 20).
l The master is out of range. The UltraSync BLUE will use its own
timecode settings until a master is back in range.
l The UltraSync BLUE is not set to use the same RF Channel as
the master (see Sync with other Timecode Devices on page 20).
l The UltraSync BLUE and/or the master are not set to the correct
country/area. You need to set the UltraSync BLUE and master to
the country/area in which they are being used (see Sync with
other Timecode Devices on page 20).
Slave is Connecting to the Wrong Master
If your UltraSync BLUE is running in slave mode and connects to the
wrong master device, it is likely that there are multiple masters in the
same RF network. An RF network should only have one master
device (one master using the specific RF channel for the network (see
Sync with other Timecode Devices on page 20).
UltraSync BLUE User Guide 49
Page 50

Update your UltraSync BLUE
You can keep your UltraSync BLUE up-to-date with the latest
features by using the Timecode Systems USB updater app. You can
download the USB updater from our firmware page and it can be
used on Mac or Windows:
https://www.timecodesystems.com/support/firmware/
Instructions are provided on the firmware page.
The USB updater app scans for firmware updates and installs them to
your UltraSync BLUE automatically.
Note: Do not turn off your UltraSync BLUE during the update
process.
50 UltraSync BLUE User Guide
Page 51

Reset
In the highly unlikely event that your UltraSync BLUE becomes
unresponsive and you cannot access the menus, you should try a
reset:
1. Press and hold the Up and Down buttons at the same time for
10 seconds . Do not worry if the screen flickers a little as you hold
the buttons down - this is normal.’.
2. Keep the Up and Down buttons pressed down until the
UltraSync BLUE appears to switch off.
3. Release the Up and Down buttons. The UltraSync BLUE restarts.
When the UltraSync BLUE restarts, it still has all of the settings that
were in place before you reset it. If it is still unresponsive, try
performing a factory reset. A factory reset will restore your UltraSync
BLUE's original settings so any existing settings will be lost (see
Restore Factory Settings on page 52).
UltraSync BLUE User Guide 51
Page 52

Restore Factory Settings
You can reset your UltraSync BLUE to its original state. This can be
useful if you want to start with a completely fresh UltraSync BLUE, for
example, when moving the UltraSync BLUE into another network.
Note: If you want to reset the UltraSync BLUE without losing
the existing settings, see Reset on page 51.
To restore the factory settings of your UltraSync BLUE:
1. Make sure your UltraSync BLUE is switched on (see Switch
UltraSync BLUE On and Off on page 8).
2. Press the Select button.
3. Choose Power and press Select.
4. Choose Factory Reset and press Select.
5. Choose the Confirm option and press Select (or choose Back to
return to the previous screen).
52 UltraSync BLUE User Guide
Page 53

Chapter 7: Warranty and Conformity
To learn about the warranty and the conformity declarations,
see:
Warranty 54
Free Extended Warranty 54
Quality Declarations 55
Warranty and Conformity
EC Declaration of Conformity 57
UltraSync BLUE User Guide 53
Page 54

Warranty
All products sold by Timecode Systems Limited are warranted to the
original purchaser against defects in materials and workmanship for
(one) year from the date of original purchase.
However, this warranty excludes accessories, batteries and cables.
Also, this warranty does not apply to any instrument determined by
Timecode Systems Limited to have been subjected to customer
alteration, modification, negligence or misuse.
In the event of any defects determined to be covered by this
warranty, Timecode Systems Limited will, at its sole option, repair or
replace the defective instrument without charge. To obtain warranty
service the defective instrument must be returned within one year
from purchase to:
TIMECODE SYSTEMS LIMITED
ATTN: Repair Department
Unit 6, Elgar Business Centre
Moseley Road, Hallow
Worcester, WR2 6NJ, UK
Telephone +44 (0) 1700 808 600
All transportation and shipping costs are the responsibility of the
purchaser.
Free Extended Warranty
You can extend your UltraSync BLUE warranty to 18 months for free!
All you need to do is register your UltraSync BLUE with us.
Register your UltraSync BLUE at:
https://www.timecodesystems.com/products-home/register/
54 UltraSync BLUE User Guide
Page 55

Quality Declarations
RF Exposure Warning Statement:
To comply with FCC/IC RF exposure limits for general population /
uncontrolled exposure, the external antenna(s) used for this
transmitter must be installed to provide a separation distance of at
least 20 cm from all persons and must not be co-located or operating
in conjunction with any other antenna or transmitter.
FCC Warning Statement:
This device complies with Part 15 of the FCC Rules.
Operation is subject to the following two conditions:
(1) This device may not cause harmful interference, and
(2) This device must accept any interference received, including
interference that may cause undesired operation.
This equipment complies with FCC radiation exposure limits set forth
for an uncontrolled environment. End users must follow the specific
operating instructions for satisfying RF exposure compliance. This
transmitter must not be co-located or operating in conjunction with
any other antenna or transmitter.
Changes or modifications not expressly approved by the party
responsible for compliance could void the user's authority to operate
the equipment.
UltraSync BLUE User Guide 55
Page 56

Industry Canada Statements:
This device complies with Industry Canada licence-exempt RSS
standard(s). Operation is subject to the following two conditions: (1)
This device may not cause interference, and (2) This device must
accept any interference, including interference that may cause
undesired operation of the device.
Le présent appareil est conforme aux CNR d'Industrie Canada
applicables aux appareils radio exempts de licence. L'exploitation est
autorisée aux deux conditions suivantes : (1) l'appareil ne doit pas
produire de brouillage, et (2) l'utilisateur de l'appareil doit accepter
tout brouillage radioélectrique subi, même si le brouillage est
susceptible d'en compromettre le fonctionnement.
Industry Canada - Class B This digital apparatus does not exceed the
Class B limits for radio noise emissions from digital apparatus as set
out in the interference-causing equipment standard entitled “Digital
Apparatus,” ICES-003 of Industry Canada.
Cet appareil numérique respecte les limites de bruits
radioélectriques applicables aux appareils numériques de Classe B
prescrites dans la norme sur le matérial brouilleur: “Appareils
Numériques,” NMB-003 édictée par l’Industrie.
Under Industry Canada regulations, this radio transmitter may only
operate using an antenna of a type and maximum (or lesser) gain
approved for the transmitter by Industry Canada. To reduce potential
radio interference to other users, the antenna type and its gain should
be so chosen that the equivalent isotropically radiated power (e.i.r.p.)
is not more than that necessary for successful communication.
56 UltraSync BLUE User Guide
Page 57

EC Declaration of Conformity
Type of Product Wireless timecode sync accessory
Model UltraSync BLUE
FCC ID AYV- USYNBL
IC ID 10427A- USYNBL
We,
Timecode Systems Ltd.
Unit 6 Elgar Business Centre
Moseley Road
Hallow
Worcester
WR2 6NJ
UK
declare that the Declaration of Conformity is issued under our sole
responsibility and belongs to the following product(s):
Object of the declaration:
UltraSync BLUE User Guide 57
Page 58

The object of the declaration described above is in conformity with
EN 300 328 V2.1.1:2016
EN 301 489-17 V3.1.1:2017
EN 301 489-1 V2.1.1:2017
EN 300 220-2 V3.1.1:2017
EN 300 220-1 V3.1.1:2017
DRAFT EN 301 489-3 V2.1.1:2017
EN 301 489-1 V2.1.1:2017
the relevant Union harmonization legislation:
l To demonstrate compliance with Article 3.2 of the RED
l To demonstrate compliance with Article 3.1(b) of the RED
The following harmonized standards and technical specifications
have been applied:
Paul Scurrell
Timecode Systems
58 UltraSync BLUE User Guide
Page 59

Chapter 8: Safety and Disposal
Please read the important safety and recycling information
regarding your UltraSync BLUE and its battery:
Battery Safety and Disposal 60
Safety and Disposal
UltraSync BLUE User Guide 59
Page 60

Battery Safety and Disposal
DANGER - Risk of burns, injury, battery damage
Do not attempt to remove or disassemble the battery.
Do not expose the battery to heat or liquid.
Do not use or charge the battery in temperatures above
60°C.
Do not bend, pierce, or crush the battery.
Do not allow the battery to come into contact with metal
objects.
Do not weld the battery.
Only use the product and charge the battery as described in
the user guide. Incorrect use could result in fire, explosion,
smoke, heat, and battery leakage.
Do not use a damaged battery.
Do not put product or battery into a microwave oven, dryer,
or high-pressure container.
If the battery does not charge in the expected time, stop
charging and contact Timecode Systems for advice.
Inside the UltraSync BLUE there is a battery that may contain toxic
heavy metals and is subject to hazardous waste regulations. Please
follow the battery safety instructions and use and dispose of your
battery safely and responsibly.
Battery Safety
60 UltraSync BLUE User Guide
Page 61

DANGER - Risk of burns, injury, battery damage
Stop using the product if there is abnormal heat, odour,
discoloration, or deformation when in use, charging or in
storage.
If the battery leaks on to your skin or clothes, wash with
fresh water immediately.
If liquid from the battery gets into your eyes, do not rub
them. Wash your eyes with fresh water and seek medical
attention immediately.
Disposal and Recycling
Please do not dispose of your UltraSync BLUE, its battery, or
accessories such as chargers, with your household waste. Make sure
you follow the local legal requirements for battery disposal and
recycling.
By disposing of the battery in the proper manner, you help to avoid
possible hazards to the environment and public health that could
otherwise be caused by improper treatment of batteries. The
recycling of materials contributes to the conservation of natural
resources.
UltraSync BLUE User Guide 61
Page 62

This page is intentionally blank to allow for double-sided printing.
62 UltraSync BLUE User Guide
Page 63

Index
Diversity 14
Drift 14
A
Accuracy 14
Antenna 14
Australia 22
B
Battery
Cold conditions 12
Hot conditions 12
Blue LED 11
Brightness 38, 40
C
E
EC declaration of
conformity 57
Europe 22
Europe/UK 22
Extreme temperatures 12
F
Factory settings 52
FCC warning 55
FPS master 27
FPS modes 14
Frame drift 14
Canada 22
Charging 12
Charging time 14
China 22
Cold conditions - battery 12
Controls 10
D
Digital transceiver 14
Dimensions 14
Display 10
Disposal 59
Frame Rate 27
Frame rate per second 27
Free Run 23, 34
Free running 34
G
Getting Started 17
Green LED 11
H
Hot conditions - battery 12
UltraSync BLUE User Guide 63
Page 64

I
Industry Canada
Multi-channel digital
transceiver 14
statements 56
Int Master RF TX 23
J
Japan 22
Japan/China 22
K
Key Lock 36
L
LED 11
Blue 11
N
Networks 29
New Zealand 22
O
OLED 14
P
Power 14
Charging time 14
External 14
Internal 14
Green 11
Red 12
LED Brightness 40
M
Main screen 42
Master FPS 27
Master frame rate per
second 27
Mode 23
Modes 29
Mounting 13
Q
Quality declarations 55
Quick Setup 17
R
Range 15
Recycling 59
Red LED 11
Reset 51
RF Channel 21
RF exposure 55
RF Region 21
64 UltraSync BLUE User Guide
Page 65

RF Slave 23
V
S
Safety 59
Screen Brightness 38-39
Screen Light Timeout 39
Serial number 44
Signal strength 42
Specification 14
Status indicator LED 11
Status information 41
Synchronisation Status 46
T
TCG 46
Version number 44
W
Warranty 54
TCR 46
Technical specification 14
Timecode 25
Timecode Systems address 54
Timeout 39
U
UK 22
United States of America 22
Update 50
US/CA/AU/NZ 22
USB updater app 50
UltraSync BLUE User Guide 65
Page 66

Timecode Systems
Unit 6, Elgar Business Centre
Hallow
Worcester
WR2 6NJ
UK
+44 (0) 1700 808 600
contact@timecodesystems.com
www.timecodesystems.com
 Loading...