

Page 1
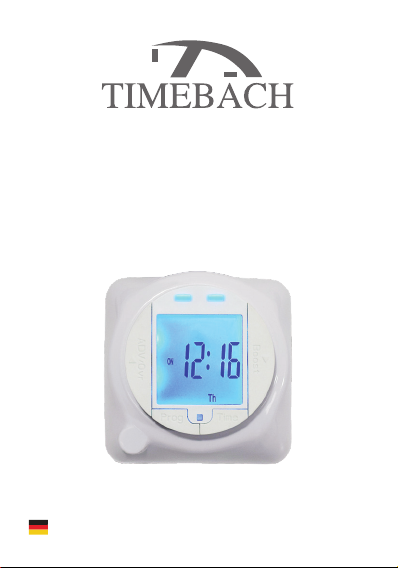
Round - D1
Digital timer
Engineered in Germany
www.timebach.com
Page 2

1. DESCRIPTION
D1 is a reliable 24-hour Digital timer for flush mount installation
in the Round box. The timer combines Countdown timer with
advanced programmable timer which enables you to schedule
very accurate ON/OFF events for connected devices &
appliances.
Scheduling options
- Weekly program set 4 ON/OFF events for all the days in a week.
- Weekend program set 4 ON/OFF events for Monday-Friday and 4
ON/OFF events for Saturday-Sunday.
- Weekend program set 4 ON/OFF events for Sunday-Thursday and 4
ON/OFF events for Friday - Saturday.
- Daily program set 4 ON/OFF events for each day differently in a week.
: - 2 hour countdown timer
2. SPECIFICATIONS
•
Mechanism Brand: TIMEBACH
•
Mechanism Approvals:
• Supply voltage: 220–240VAC 50Hz
• Max Load: 16A (6A, 0.55 HP)
• Operating temperature: 0°C to 45°C
• Product dimensions: - Length 8.7 cm
• Installation data: Suitable for
• Minimum depth of wall box: 32mm
- Width 8.7 cm
- Height 4.2 cm
Round
box
• Installation cables (cross section): 0.5mm² -2.5mm²
• Modes: - MANUAL ON/OFF
- 4 OPERATING PROGRAMS
• Minimum
• Backup battery that operates a week
2
-
COUNTDOWN TIMER
ON/OFF
event: 1 minute
(up to 120 minutes)
Page 3
3. PRODUCT SAFETY INFORMATION
Warning
Prior to use, please examine and verify that the product
is not defective. Please do not use or operate if there is
a defect of any kind.
4. INSTALLATION
Warning
Installation of an electrical wiring device should be
done by a professional person only.
4.1 Switch off supply to socket box.
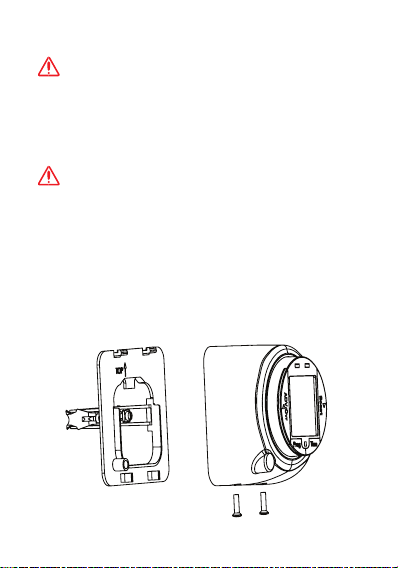
4.2 Unscrew two screws (A) - please see Assembly
diagram - secure timeswitch to backplate, remove
cover, and gently pull module from backplate.
Fig. A
backplate
module
screws (A)
3
Page 4
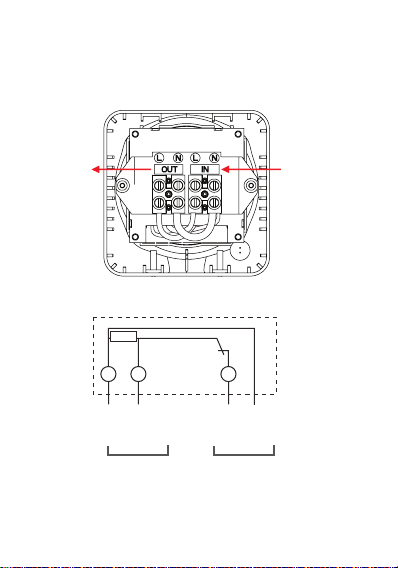
4.3 Connect wiring in accordance with wiring diagram.
Do not combine solid and flexible conductors at the
same terminal. When connecting flexible conductors
conductors, use terminal ends.
APPLIANCE
PCBA
Supply
145
N NL L
Appliance
SUPPLY
IN OUT
4.4 Fix backplate to socket box.
Fit cover over module and reassemble to backplate.
4.5
4.6 Re-fit and tighten two screws (A).
4
Page 5
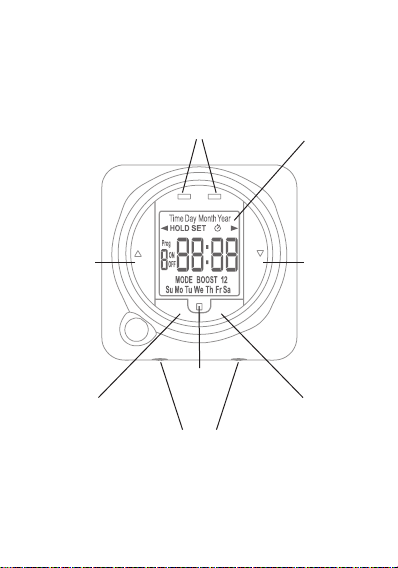
Fig. 1
Manual
Overide/
Advance
Button
Programme
button
ADV/Ovr
Prog
Power On
indication
Time
Reset
Button
Bezel
fixing
screws
illuminated
Boost
screen
Boost
Button
Time
Button
5
Page 6
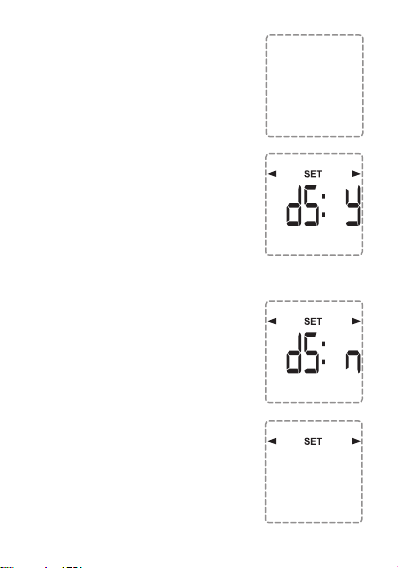
5. INITIALIZATION
To initialize the Timer, press the reset
button inwards using a pointed tool
such as a pin until the screen is
displayed as shown in the illustration
6. DATE & TIME SETTING
To set the current time, Press and hold
the "TIME" button for 3 seconds until
the screen is displayed as shown in
the illustration Note: During the press,
HOLD will appear on the screen
6.1. DAYLIGHT SAVING TIME SETTING
To automatically change the time
according to daylight saving time,
select the ADV button if you want to
enable automatic daylight-saving time
change dS:y or disable dS:n.
When finished, press the TIME button
to proceed to the year setting.
6.2 YEAR SETTING
Select by pressing the Boost or
Adv/Ovr button the current year.
When finished, press the TIME
button to proceed to the Month
setting.
6
OFF
--:--
Year
20: 1 6
Page 7
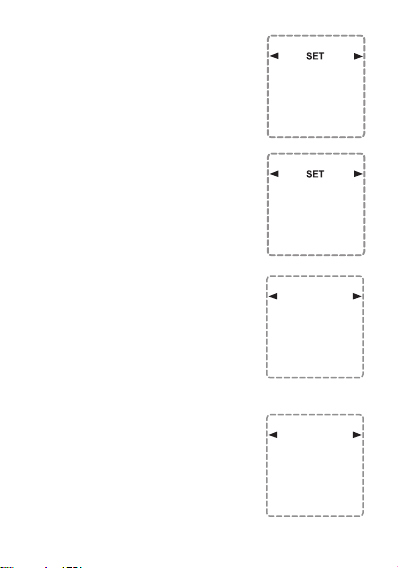
6.3 MONTH SETTING
Select by pressing the Boost or
Adv/Ovr button the current Month.
When finished, press the TIME
button to proceed to the Day setting.
6.4 DAY SETTING
Select by pressing the Boost or
Adv/Ovr button the current Day.
When finished, press the TIME
button to proceed to the Hour
setting.
6.5 HOUR SETTING
Select by pressing the Boost or
Adv/Ovr button the current Hour
(Note- The timer is 24-hour format;
therefore, you must choose the exact
hour of the day). When finished,
press the TIME button to proceed to
the Minute setting.
6.6 MINUTE SETTING
Select by pressing the Boost or
Adv/Ovr button the current Minute).
When finished, press the TIME
button to finish the DATE & TIME
SETTING procedure.
Month
01
Day
01
Time
SET
--:--
Time
SET
--:--
7
Page 8

7. OPERATING MODES
There are 3 operating modes to choose from.
7.1 ON/OFF Manually
by pressing Adv/Ovr button
7.2 Countdown Timer
You can add 15 minutes to 2 hours
by pressing the Boost button. At the
end of the countdown the timer will
turn off.
7.3 Activation programs:
There are 4 programs to choose from:
Weekly program (7days)
- set 4 ON/OFF events for all the days in a week.
Weekend program (5+2)
- set 4 ON/OFF events for Monday-Friday and 4
ON/OFF events for Saturday-Sunday.
Weekend program (5+2)
- set 4 ON/OFF events for Sunday-Thursday and 4
ON/OFF events for Friday - Saturday.
Daily program (each day)
- set 4 ON/OFF events for each day differently
in a week.
8
ON
0:15
MODE
BOOST
Page 9
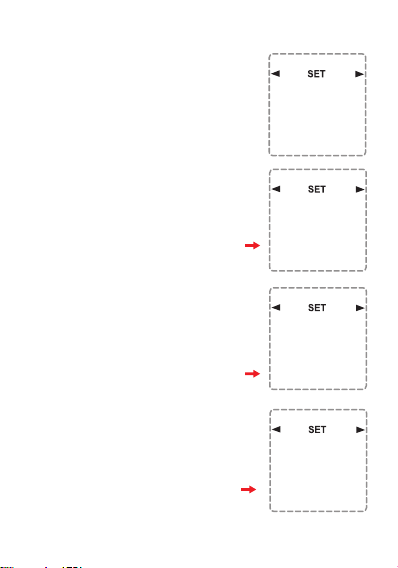
8. SELECTING OPERATING MODE
To select a program, press and hold
the Prog button for 3 seconds until
the screen displays as shown.
To switch between the four
programs, press the
Adv/Ovr
button
Su Mo
Weekly program (7days)
setting up to 4 ON/OFF events for
all the days in a week.
Su Mo
Weekend program (5+2)
setting up to 4 ON/OFF events for
Monday-Friday and 4 ON/OFF
events for Saturday-Sunday.
Mo
Weekend program (5+2)
setting up to 4 ON/OFF events for
Sunday-Thursday and 4 ON/OFF
events for Friday - Saturday.
Su Mo
Tu We
Tu We
Tu We
Tu We
Th Fr Sa
Th Fr Sa
Th Fr
Th
9
Page 10
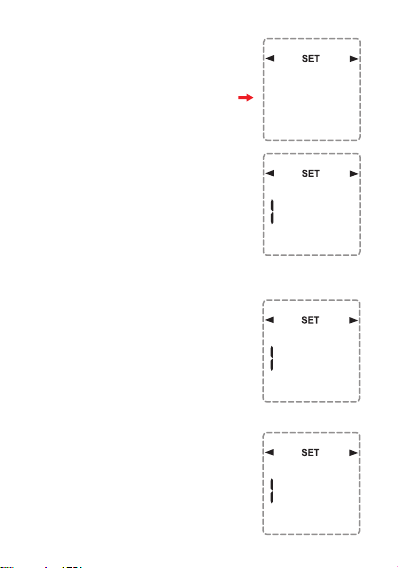
Daily program (each day)
setting up to 4 ON/OFF events for
each day differently in a week.
Mo
When you have finished selecting
the desired program, press the
Prog button. The screen will
display as shown.
9. SET THE ON/OFF EVENTS IN THE
PROGRAM YOU SELECTED
9.1 FIRST ON EVENT SETTING:
Press the ADV or BOOST buttons
to select the Hour that the ON event
will be performed. When finished,
press the Prog button to proceed to
the setting of Minute that the ON
event will be performed.
Press the ADV or BOOST buttons to
select the Minute that the ON event
will be performed. When finished,
press the Prog button to proceed to
the setting of the OFF event.
10
Prog
Prog
Prog
ON
--:--
ON
--:--
Su Mo
Tu We
Th Fr Sa
ON
1 0:--
Su Mo
Tu We
Th Fr Sa
Page 11
9.2 FIRST OFF EVENT SETTING:
Press the ADV or BOOST buttons to
select the Hour that the OFF event
will be performed. When finished,
press the Prog button to proceed to
the setting of Minute that the OFF
event will be performed.
Prog
OFF
--:--
Su Mo
Tu We
Th Fr Sa
Press the ADV or BOOST buttons to
select the Minute that the OFF event
will be performed. When finished,
press the Prog button.
The additional ON/OFF events setting
should be preformed in the same way.
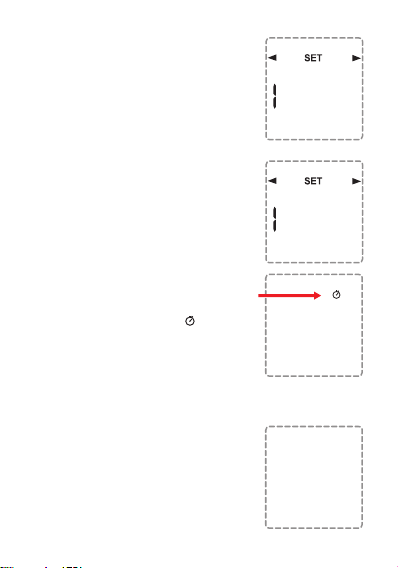
When finished. the mark " " will be
shown on the screen.
10. PROGRAM CANCELLING
For Canceling a specific ON/OFF
event The hours and minutes must be
set until the screen is displayed ”--:--".
10.1 cancelling all the programs
To cancel all programs at once, press
the Adv / Ovr and Boost buttons
simultaneously for 5 seconds.
When the operation is complete, the
clock mark on the screen will disappear
Prog
OFF
Su Mo
OFF
OFF
1 2:--
Tu We
Th Fr Sa
23:07
Tu
23:07
Tu
11
Page 12

Manufacturer
:
OFFENHEIMERTEC GmbH
Address: Westendstrasse 28,
D-60325 Fr ankfurt am Main,
Germany
Made in: P.R.C
Engineered in Germany
www.timebach.com
 Loading...