

Timberland 15517J Instruction Manual
Size: 170 x 55mm
Color: PMS 448c
J
INSTRUCTIONMANUAL
and are trademarks of TBL Licensing LLC.
2016 © TBL Licensing LLC. All rights reserved.
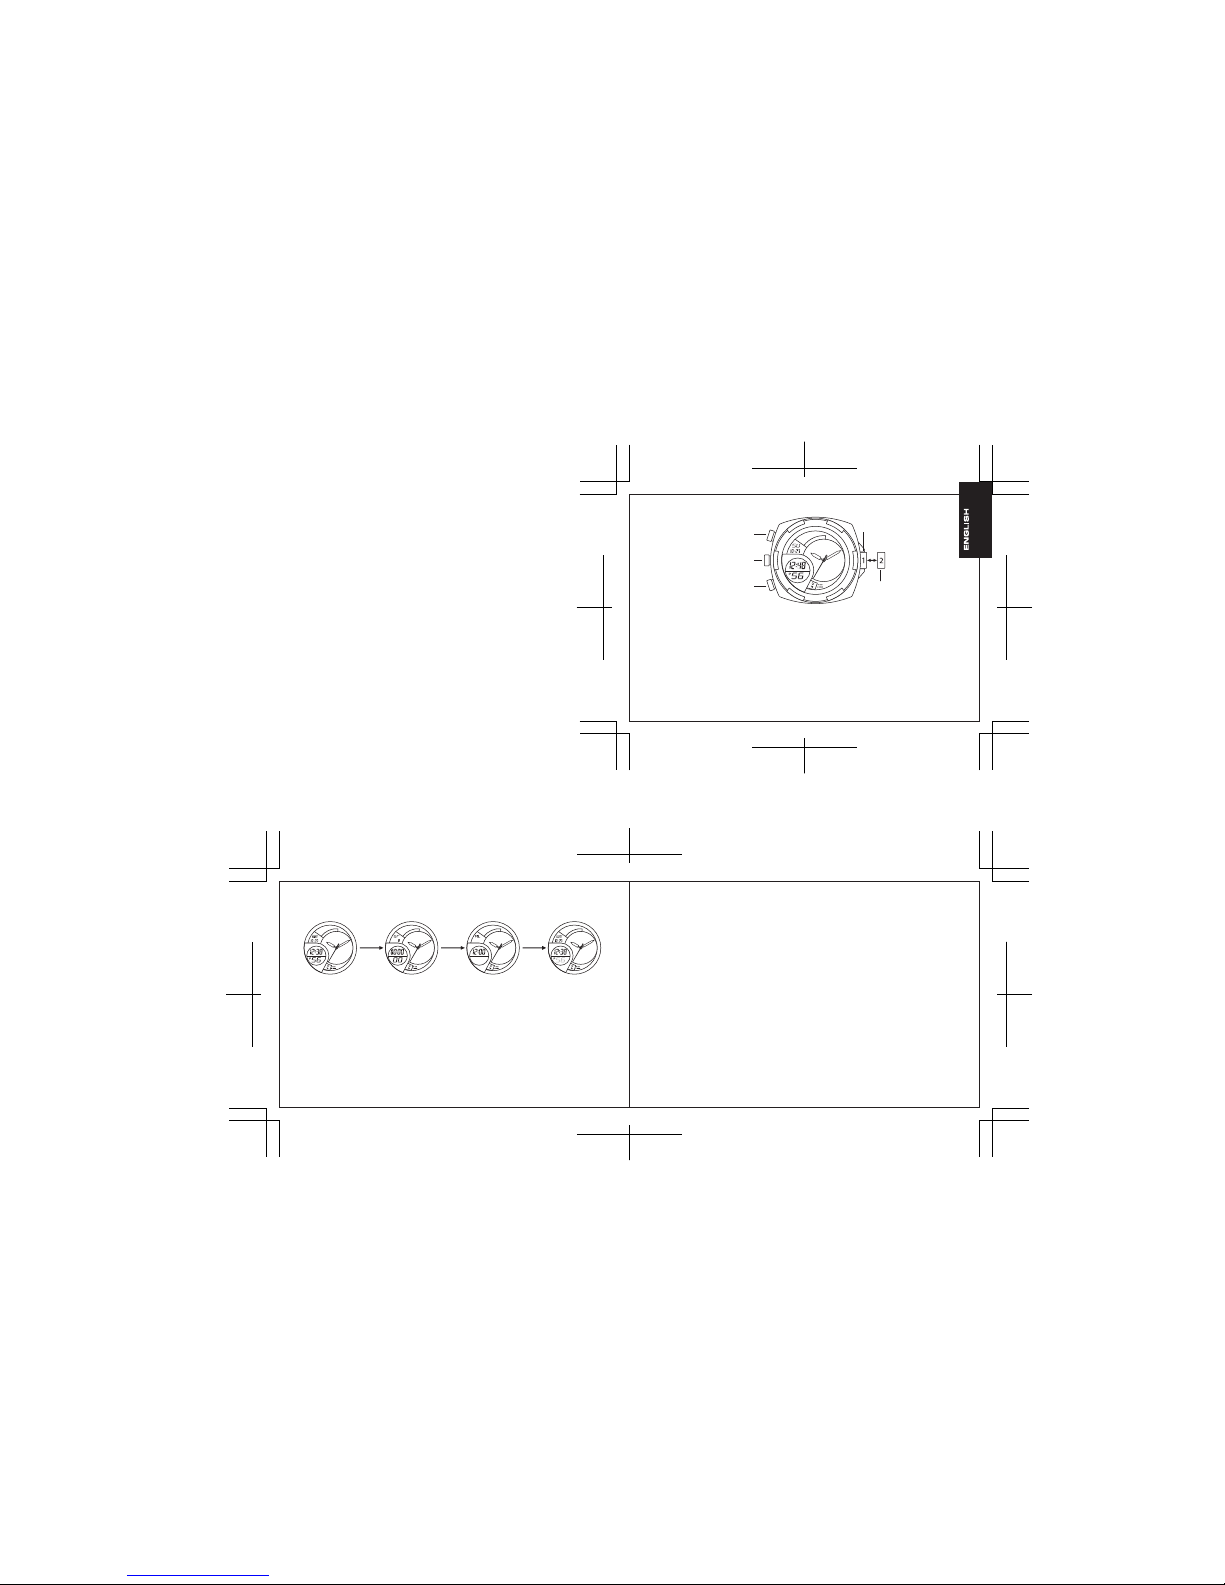
Normal position, watch runs
Time setting:
Set to the correct time.
Push crown back to
position 1.
LIGHT / START / STOP (button A)
SPLIT / RESET (button B)
MODE (button C)
A. Features
- 12 digits display which shows: hour, minute, second, date, month, day of week
- Alarm and chime
- With snooze function
- With 12/24 time format
- 1/100 second stopwatch
- EL backlight
B. Function Modes
C Key C Key C Key
Stopwatch mode Time setting mode
Alarm mode
Real time mode
1. Press button C to change mode (except in setting mode), Press button A to turn on the EL backlight
for 3 seconds.
2. Stopwatch mode
- In Stopwatch mode, press button A to start and stop the counting. When the stopwatch is stopped,
press button B to reset the counter.
- When the stopwatch is counting, press button B to take the Split time (“ SP” will be displayed),
after take the first lap time, press button B to resume the counting. Press button A to stop the counter
and take the final time, press button B to reset the counter.
3. Alarm and chime mode
- In Alarm mode, press button A to toggle the Alarm and chime, the sequence is : Alarm ON, both ON,
Chime ON, both OFF. The related icons will be displayed accordingly. When the alarm is ringing, the icon
will flash and the sound will ring for 20 seconds.
- Alarm setting : press button B, the “HOUR” will being flashed for editing, press button A to advance the
figure, after finished then press button B again to edit the “MINUTE”, press button B to finish the whole
setting, press button C to return to Real Time mode.
- When the alarm is ringing, press button C to turn on the “Snooze” function, the alarm will ring for
20 seconds in next 5 minutes. Press button A or B to stop the ringing.
4. Time Setting mode
- In the Time Setting mode, the “Second” digits will flash for editing, press button A to reset the digits to
zero if necessary, press button B to edit the other value; the setting sequence is : Second, Hour, Minute,
Month, Date, Day of week. When the value is flashing, press button A to advance the figure, press button B
to confirm and edit the next value. After finished the setting, press button C to return to Real time mode.
- When setting the “Hour”, press button A to advance figure, A/P will be displayed in 12-hour format, “H”
will be displayed when in 21-hour format.
- When setting the “Second”, if the current value is in between 30-59 second, the value will be set to zero
and the “Minute” will be advanced by 1; if the value is in between 00-29 second, the “Minute” value will not
be changed when the “Second “ is reset.
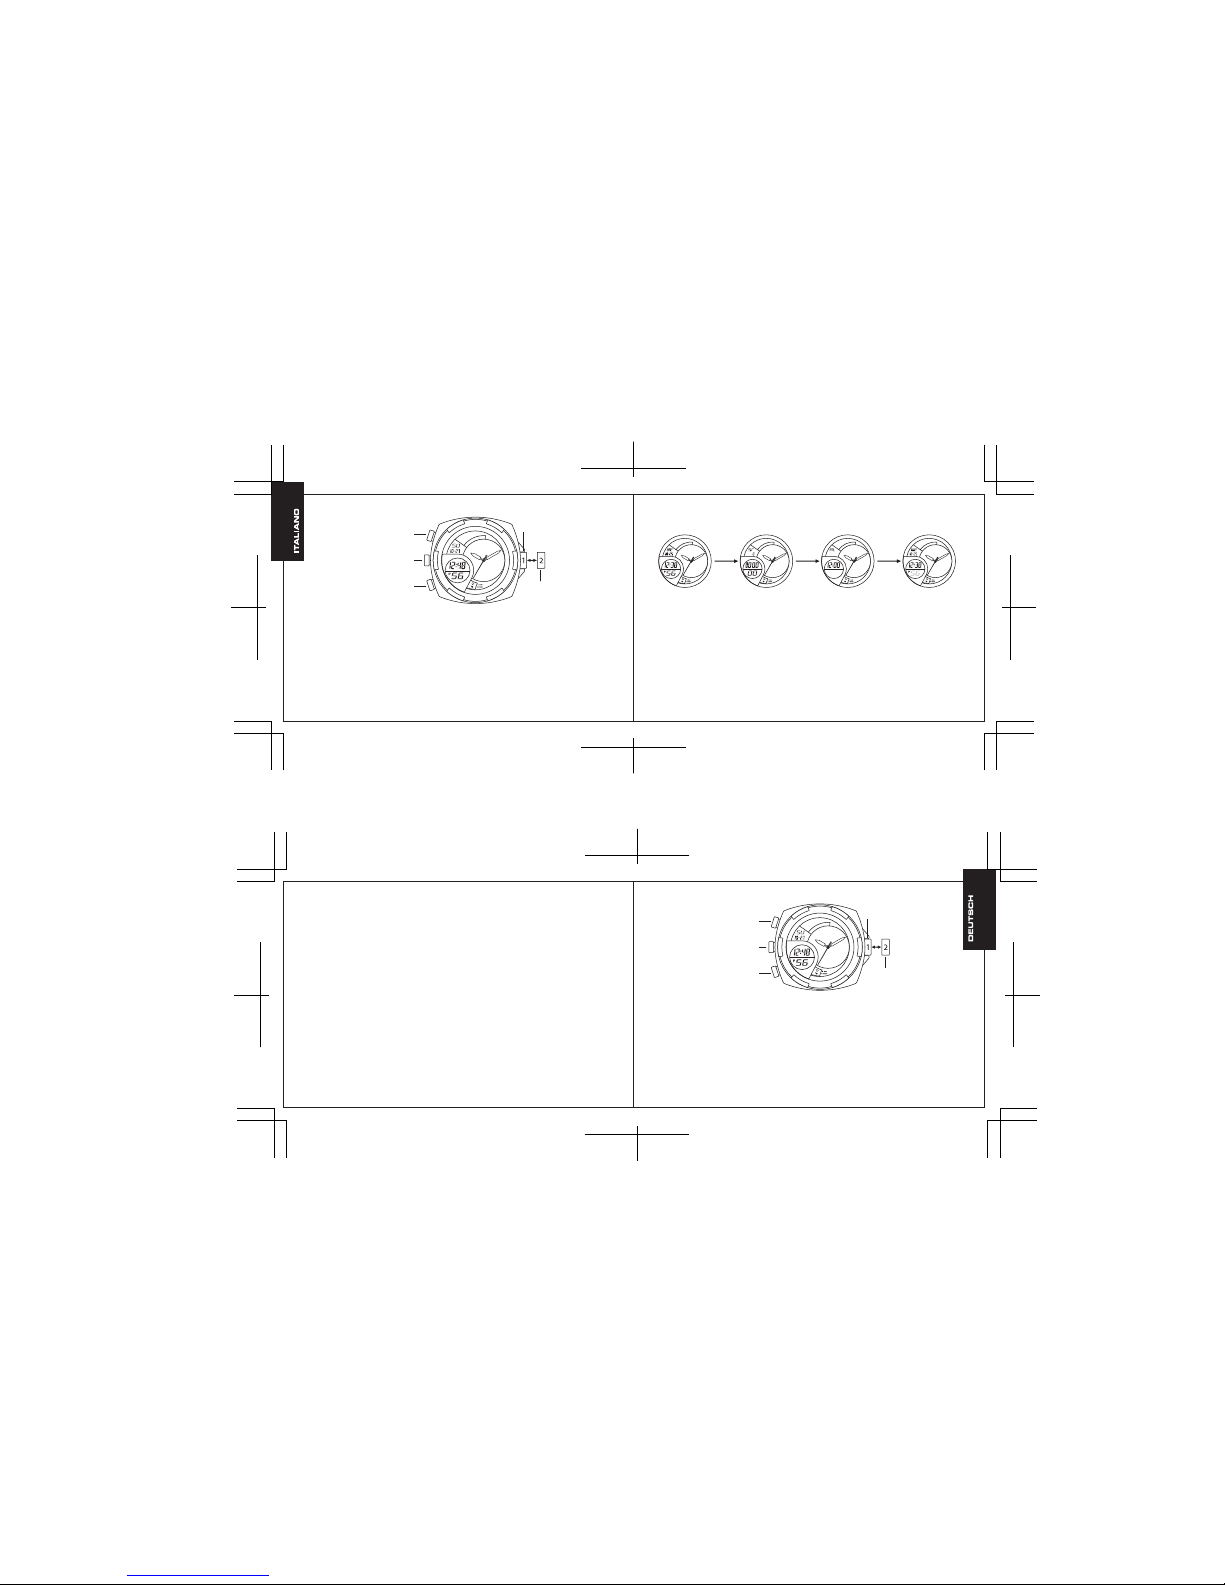
Posizione normale, l'orologio
funziona.
Impostazione dell'ora:
Per impostare l'ora corretta.
Spingere la corona di nuovo
sulla posizione I.
ILLUMINAZIONE / AVVIO / STOP
(tasto A)
TEMPO INTERMEDIO /
RESETTAGGIO (tasto B)
MODO (tasto C)
A. Caratteristiche:
- Il display a 12 digitazioni mostra nell'ordine: ore, minuti, secondi, data, mese, giorno della settimana
- Allarme e suoneria dell'allarme
- Con funzione di ritardo allarme
- Con formato dell'ora di 12/24 ore
- Cronometro al centesimo di secondo 1/100
- Retro illuminazione EL
Normalstellung, Uhr läuft
Zeiteinstellung:
Einstellen der korrekten Uhrzeit.
Drücken Sie die Krone wieder in
Position I zurück.
LICHT / START / STOPP (Taste A)
ZWISCHENZEIT /
RÜCKSETZEN (Taste B)
MODUS (Taste C)
A. Funktionsmerkmale
- 12-stellige Anzeige für: Stunde, Minute, Sekunde, Datum, Monat und Wochentag
- Alarm und Stundenläuten
- Schlummern-Funktion
- 12/24-Stunden Zeitanzeigeformat wählbar
- 1/100-Sekunden Stoppuhr
- EL-Anzeigebeleuchtung
B. Modi di funzione
Tasto C Tasto C Tasto C
Modo cronometro Modo impostazione dell'ora
Modo allarme
Modo ora reale
1. Premere il tasto C per cambiare modo (eccetto nel modo impostazione). Premere il tasto A per avviare
la retroilluminazione EL per tre secondi.
2. Modo Cronometro
- In modo Cronometro, premere il tasto A per avviare ed interrompere il conteggio. Quando il cronometro
è arrestato, premere il tasto B per resettare il contatore.
- Quando il cronometro sta effettuando il conteggio, premere il tasto B per prendere il tempo intermedio
(si visualizza “SP”); dopo aver preso il tempo del primo giro, premere il tasto B per continuare il conteggio.
Premere il tasto A per interrompere il contatore e prendere il tempo finale, premere il tasto B per
resettare il contatore.
3. Allarme e modo suoneria oraria
- In modo Allarme, premere il tasto A per commutare tra Allarme e Suoneria oraria, la sequenza è: allarme
attivato, entrambi attivati, suoneria oraria attivata, entrambi disattivati. Le relative icone saranno visualizzate
di conseguenza. Quando l'allarme suona, l'icona lampeggia e il suono si attiva per 20 secondi.
- Impostazioni dell'allarme: premere il tasto B, e “ORA” lampeggerà per essere modificata. Premere il tasto A
per far avanzare le cifre; una volta terminato, premere il tasto B per modificare i “MINUTI”. Premere il tasto
di B di nuovo per completare le impostazioni. Premere il tasto C per tornare a Modo ora reale.
- Quando l'allarme suona, premere il tasto C per attivare la funzione di “Snooze” (ritardo allarme). L'allarme
suona per 20 secondi nei cinque minuti successivi. Premere i tasti A o B per interrompere la suoneria.
4. Modo impostazione dell'ora
- In modo impostazione dell'ora, le digitazioni dei secondi lampeggeranno per essere modificate. Se
necessario, premere il tasto A per resettare le digitazioni. Premere il tasto B per modificare l'altro valore.
La sequenza di impostazione è: secondi, ore, minuti, mese, data, giorno della settimana. Quando le
digitazioni stanno lampeggiando, premere il tasto A per far avanzare le digitazioni, e premere il tasto B per
confermare e modificare il valore successivo. Quando si è terminato, premere il tasto C per tornare a
Modo ora reale.
- Quando s'imposta l'“ora”, premere il tasto A per far avanzare le digitazioni; si visualizza A/P in formato di
12 ore, e si visualizza “H” in formato 24 ore.
- Quando si impostano i “secondi”, il valore attuale è fra 30-59 secondi; il valore sarà presentato su zero e
le digitazioni dei “minuti” saranno avanzate di 1. Se il valore è fra 00-29 secondi, le digitazioni dei “minuti”
non saranno modificate quando si resettano i “secondi".
 Loading...