

Page 1
Size: 170 x 55mm
Color: PMS 497c
Size: 170 x 55mm
13673
INSTRUCTION MANUAL
Page 2
Size: 170 x 55mm
Color: Blk
Size: 85 x 55mm
Color: Blk
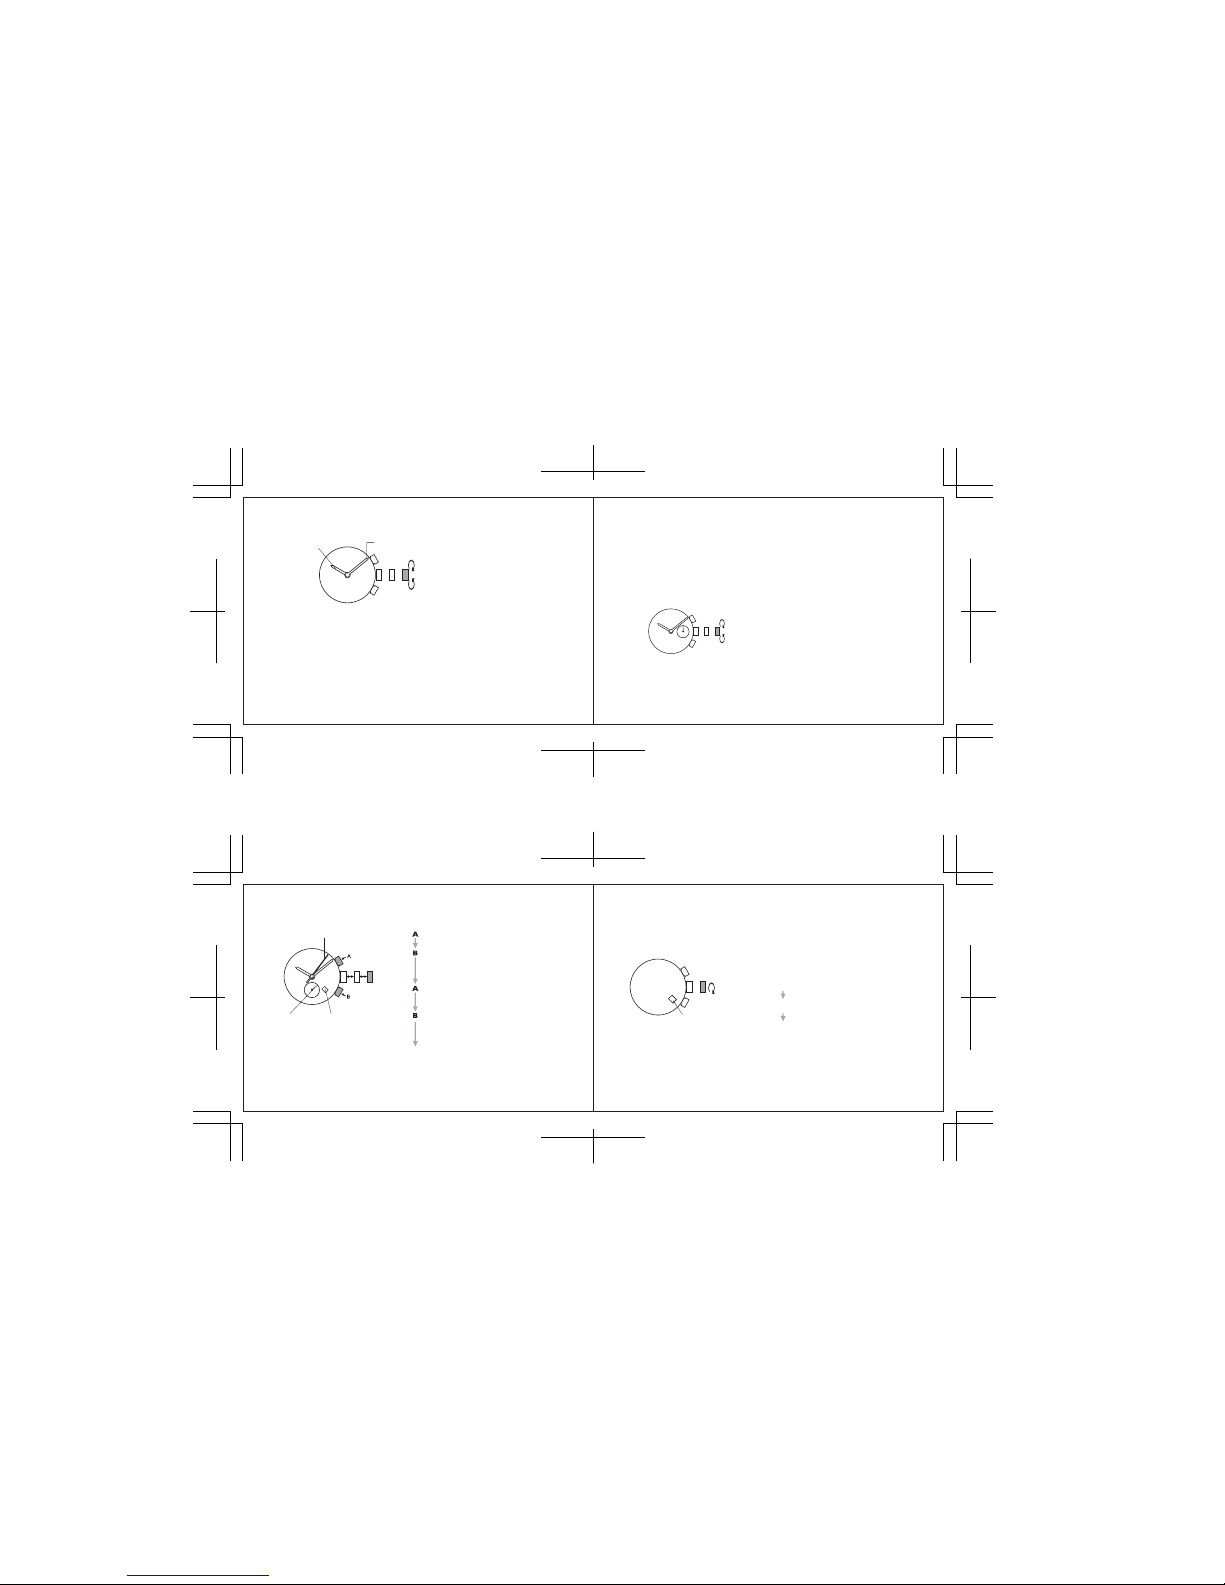
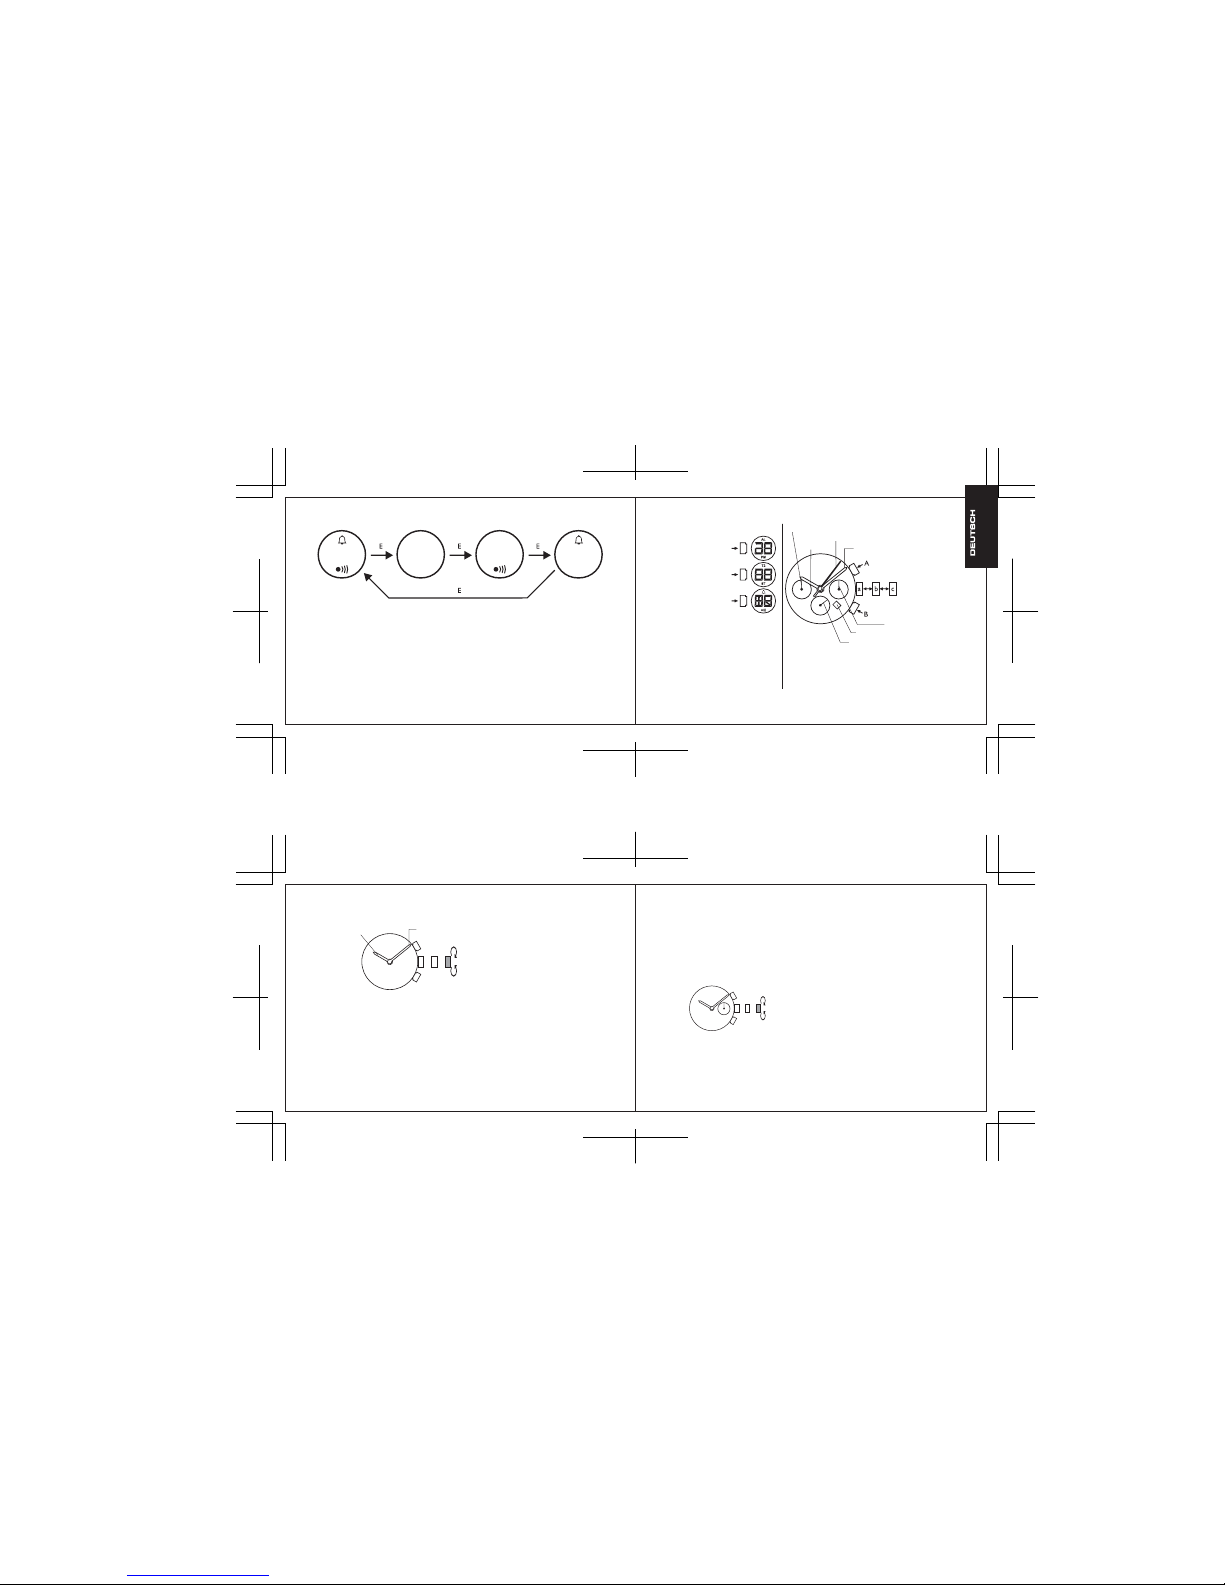
• TIME / CALENDAR
• STOPWATCH
Measures up to 60 minutes in 1/5 second increments.
Split time measurement is possible.
Minute hand
(Light) D
(Set) C
(Mode) E
STOPWATCH 1/5-second hand
24 hour hand
a: Normal position
b: First click
c: Second click
Date
STOPWATCH minute hand
Small second hand
Hour hand
• Display: Hour, minute,
second, day, date, month.
• Alarm, hourly chime
• 12/24 hours selection,
automatic calendar
• 1/100 second stopwatch
• second time zone
• EL illumination
SETTING THE TIME AND ADJUSTING THE STOPWATCH
HAND POSITION
• This watch is so designed that the following are all made with the crown at the second
click position
1) main time setting
2) stopwatch hand position adjustment
Once the crown is pulled out to the second click, be sure to check and adjust 1) and 2) at the
same time.
CROWN: Pull out to second click when the second hand is at the 12 o’clock position.
Hour hand
Minute hand
CROWN: Turn to set the hour and minute hands.
1. MAIN TIME SETTING
2. STOPWATCH HAND POSITION ADJUSTMENT
v If the STOPWATCH hands are not in the
“0” position, follow the procedure below to
set them to the “0” position.
1. When the stopwatch is or has been measuring or is stopped, if the crown is pulled out to the second
click, it will automatically reset the STOPWATCH hands to “0”.
2. It is recommended that the hands be set to the time a few minutes ahead of the current time, taking
into consideration the time required to adjust the STOPWATCH hand position if necessary.
3. When setting the hour hand, be sure to check that AM/PM is correctly set. The watch is so designed
that the date changes once in 24 hours.
4. when setting the minute hand, first advance it 4 to 5 minutes ahead of the desired time and then turn
it back to the exact minute.
24-HOUR SUB-DIAL SETTING:
The 24-hour hand moves correspondingly with the hour
and minute hands. When setting the time be sure to
check that the 24-hour hand is set properly.
Page 3
Size: 170 x 55mm
Color: Blk
Size: 170 x 55mm
Color: Blk
Press for 2 second.
* STOPWATCH minute hand turns a full circle.
Press repeatedly to set STOPWATCH
minute hand to the “0” position.
* The hand moves quickly if button B is kept
pressed.
Press for 2 second.
* STOPWATCH 1/5-second hand turns a full
circle.
Press repeatedly to set STOPWATCH
1/5-second hand to the “0” position.
* The hand moves quickly if button B is kept
pressed.
CROWN
Push back in to normal position in
accordance with a time signal
STOPWATCH
minute hand
STOPWATCH 1/5-second hand
CROWN
Date
SETTING THE DATE
• Before setting the date, be sure to set the main time.
Date
CROWN
Pull out to first click.
Turn clockwise until the desired
date appears.
Push back in to normal position.
1. It is necessary to adjust the date at the end of february and 30-day months.
2. do not set the date between 9:00 p.m. and 3:00 a.m.
STOPWATCH
• The stopwatch can measure up to 60 minutes in 1/5-second increments.
• After 60 minutes, it will start counting again from “0” repeatedly up to 12 hours.
STOPWATCH minute hand
STOPWATCH 1/5-second hand
v Before using the stopwatch, be sure to check that the crown is set at the normal position and
that the STOPWATCH hands are reset to the “0” position.
* If the STOPWATCH hands do not return to the “0” position when the stopwatch is reset to “0”, follow
the procedure in “SETTING THE TIME AND ADJUSTING THE STOPWATCH HAND POSITION”.
Standard measurement
START STOP RESET
Accumulated elapsed time measurement
START STOP RESTART
STOP RESET
* Restart and stop of the stopwatch can be repeated by pressing button A.
Split time measurement
START SPLIT SPLIT RELEASE
STOP RESET
* Measrement and release of split time can be repeated by pressing button B.
Measurement of two competitors
START FINISH TIME OF
1ST COMPETITOR
2ND COMPETITOR
FINISHES
RESET
FINISH TIME OF
2ND COMPETITOR
Page 4
Size: 170 x 55mm
Color: Blk
Size: 170 x 55mm
Color: Blk
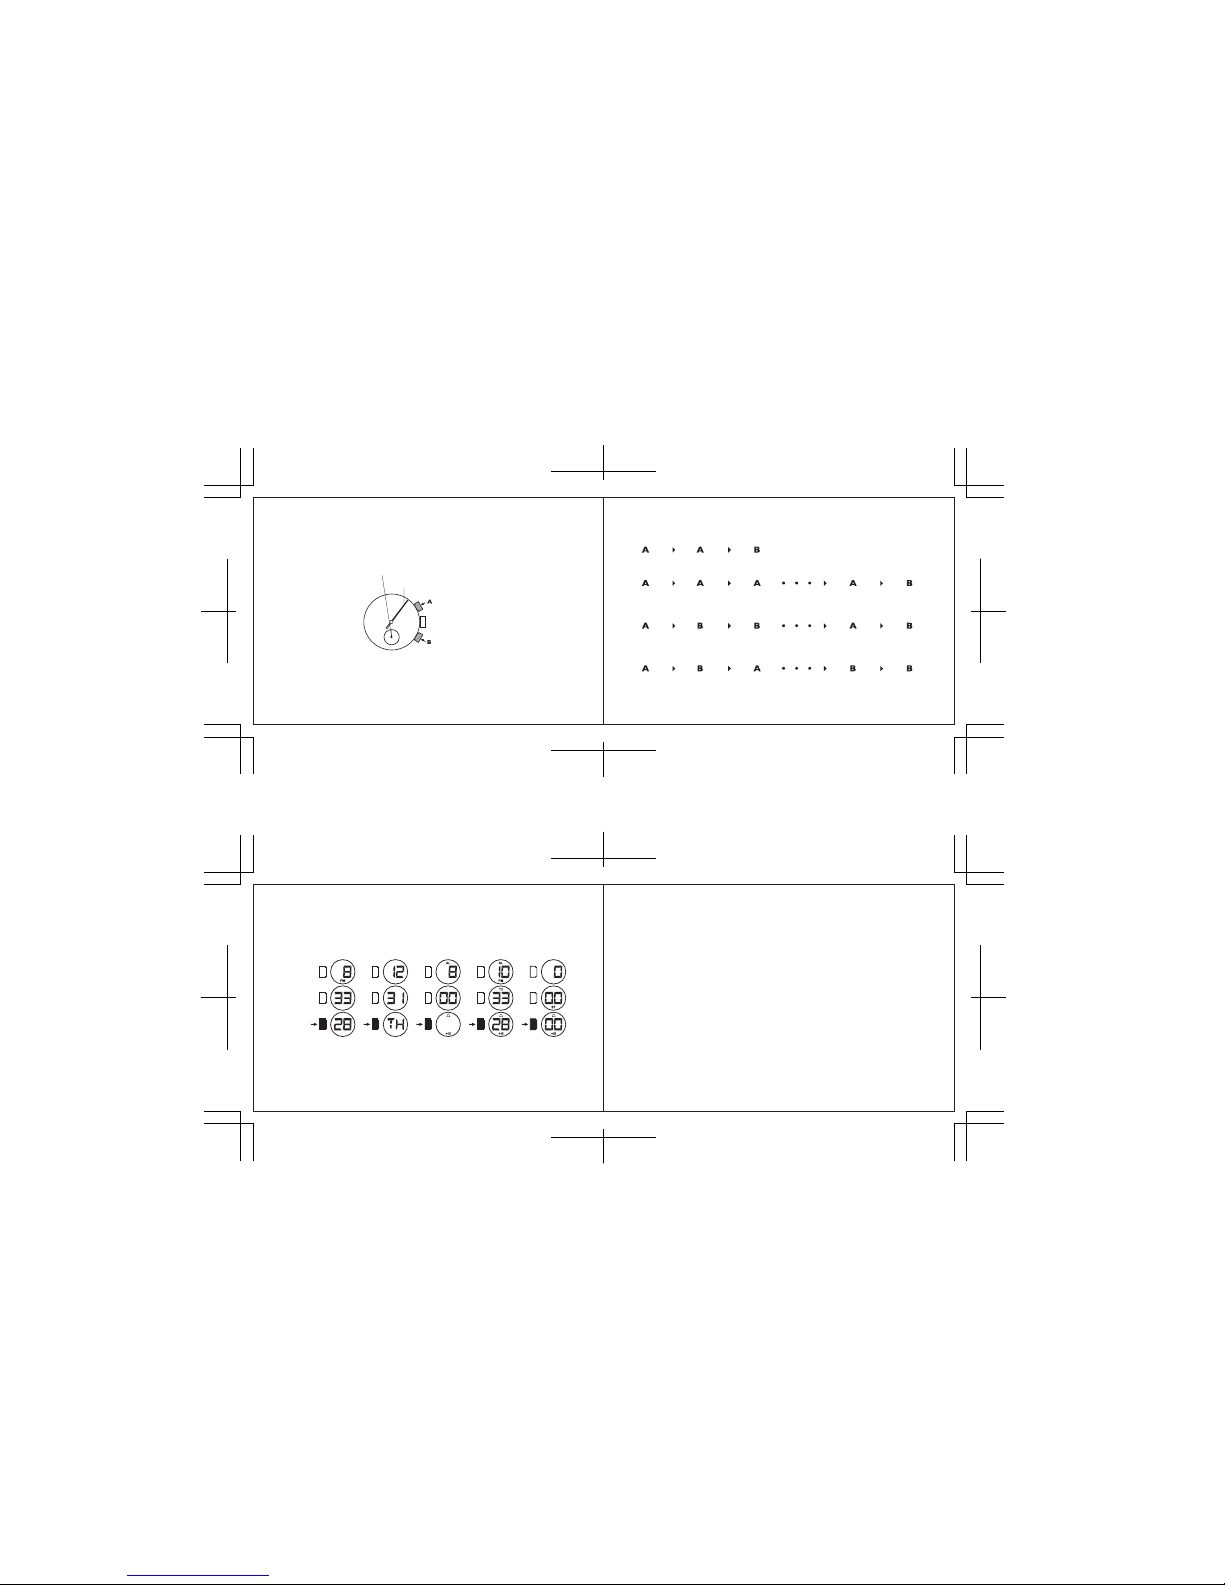
(Mode) E
TIME
MODE
CALENDAR
MODE
ALARM
MODE
2ND TIME ZONE
MODE
STOPWATCH
MODE
LCD - MODE SELECTION
1. EL - Press button D will activate EL illumination for 3 seconds in any mode.
2. Time Setting - Press E to enter the time mode. Press C for 2 seconds will enter the time setting
mode, second will flash, press E to reset second to zero. Press C will flash the hour, press E to set
the correct hour. Press C will flash the minute, press E to set the minute. Press C to flash the 12/24
selection, press E to select.
* When setting the second, less than 30 seconds will reset to zero, more than 30 seconds will advance 1
minute.
* When setting the time, press and hold E will activate the fast advance of numbers.
* If no button is pressed for 60 seconds, the time setting mode will return to normal time mode.
3. Calendar Setting - Press E to enter the calendar mode. Press C for 2 seconds will enter the
calendar setting mode, month will flash, press E to select the month. Press C will flash the date, press
E to select the date. Press C to flash the day, press E to select the day.
* When setting the date, press and hold E will activate the fast advance of numbers.
* If no button is pressed for 60 seconds, the calendar setting mode will return to normal calendar mode.
4. Alarm Setting - Press E to enter the alarm mode. Press C for 2 seconds will enter the alarm
setting mode, hour will flash, press E to select the hour. Press C will flash the minute, press E to
select the minute. Press C to flash the alarm/chime selection, press E to select the on or off.
* When alarm is on, it will beep for 20 seconds when reaching the set time.
* When setting the alarm time, press and hold E will activate the fast advance of numbers.
* If no button is pressed for 60 seconds, the alarm setting mode will return to normal alarm mode.
5. Second Time Zone Setting - Press E to enter the 2nd time zone mode. Press C for 2 seconds will
enter the second time zone setting mode, hour will flash, press E to select the hour. Press C will flash
the minute, press E to select the minute. Press C to flash the 12/24 selection, press E to select.
* When setting the time, press and hold E will activate the fast advance of numbers.
* If no button is pressed for 60 seconds, the 2nd time zone setting mode will return to normal 2nd time
zone mode.
6. Stopwatch Operation - Press E to enter the stopwatch mode. Press C to start the counting. Press
again C to stop the counting. Press and hold C for 2 seconds will reset to zero.
chime on chime off chime off chime on
alarm on alarm off alarm on alarm off
• ORA E CALENDARIO
• SUONERIA SINGOLA
La suoneria può essere predisposta per entrare
in funzione una sola volta ad una certa ora designata,
entro le 12 ore successive all'ora di predisposizione.
Lancetta dei minuti
(Illuminazione) D
(Imposta) C
(Modo) E
Lancetta dei quinti di
secondo del CRONOMETRO
COME REGOLARE IL
SUB-DIAL 24 ORE
a: Posizione normale
b: Primo scatto
c: Secondo scatto
Date
Lancetta dei minuti del
CRONOMETRO
Piccola lancetta
dei secondi
Lancetta
delle ore
• Display: ora, minuti,
secondi, giorno, data,
mese.
• Allarme, suoneria oraria
• Selezione del formato
dell'ora 12/24 ore,
calendario automatico
• Cronometro al centesimo
di secondo 1/100
• Secondo fuso orario
• Illuminazione EL
Page 5
Size: 170 x 55mm
Color: Blk
Size: 170 x 55mm
Color: Blk
Lancetta delle ore
Lancetta dei minuti
CORONA: Ruotarla opportunamente sino a
predisporre le lancette delle ore
a dei minuti come desiderato.
1. PREDISPOSIZIONE DELL'ORA PRINCIPALE
2. REGOLAZIONE DELLA POSIZIONE DELLE LANCETTE DEL CRONOMETRO
v Se le lancette del CRONOMETRO non si
trovano sulla posizione iniziale "0",
ricondurvele agendo come segue.
COME REGOLARE IL SUB-DIAL 24 ORE:
La lancetta delle 24 ore si sposta insieme a quelle dell’ora
e dei minuti. Quando si regola l’ora, accertarsi che la
lancetta delle 24 ore sia regolata correttamente.
Premerlo per 2 secondi.
* La lancetta dei minuti del CRONOMETRO compie un
giro completo.
Agire ripetutamente su questo tasto sino a portare la lancetta
dei minuti del CRONOMETRO alla posizione inizale "0".
* Tenendo premuto il tasto B le lancette si spostano
rapidamente.
Premerlo per 2 secondi.
* La lancetta dei quinti di secondo dei CRONOMETRO
compie un giro completo.
Agire repetutamente su questo tasto sino a portare la
lancetta dei quinti di secondo del CRONOMETRO alla
posizione iniziale "0".
* Tenendo premuto il tasto B le lancette si spostano
rapidamente.
CORONA
Rispingerla in dentro nella sua posizione
normale in concomitanza con un segnale
orario.
Lancetta dei minuti
del CRONOMETRO
Lancetta dei quinti di secondo
del CRONOMETRO
CORONA
Date
PREDISPOSIZIONE DELLA DATA
• Prima di predisporre la data si deve procedere alla regolazione dell'ora principale.
Date
CORONA
Estrarla sino al primo scatto.
Ruotarla in senso orario sino alla
comparsa della data desiderata.
Rispingerla in dentro nella sua
posizione normale.
1. La data dve essere riregolata alla fine del mese di febbraio e dei mesi di 30 giorni.
2. Non procedere alla regolazione della data nell'intervllo di tempo compreso fra le
9:00 di sera e1' 3:00 del mattino del giorno successivo.
PREDISPOSIZIONE DELL'ORA E REGOLAZIONE
DELLA POSIZIONE DELLE LANCETTE DEL CRONOMETRO
• L'orologio è stato studiato in mode che le seguenti operazioni vengano tutte eseguite con la
corona nella posizione estratte sino al secondo scatto:
1) predisposizione dell'ora principale
2) regolazione della posizione delle lancette del cronometro
Una volta che la corona sia stata estratta al secondo scatto, i precedenti punti 1) e 2) devono
essere regolati nella stessa sessione, uno dopo 1'altro.
CORONA: Estrarla al secondo scatto nel momento in cui la lancetta dei second viene a trovarsi
in corrispondenza dell'indicazione delle ore 12.
1. Se il cronometro si trova, o si trovava, in corso di misurazione, o se è in posizone di arresto, estraendo la
corona sino al secondo scatto le lancette del CRONOMETRO vengono automaticamente riazzerate
alla posizione iniziale "0".
2. Si consiglia di predisporre le lancette di alcuni minuti in anticipo rispetto all'ora correntz reale del
momento, per tenere in considerazione il tempo necessario a regolare la posizione delle lancette del
CRONOMETRO, qualora necessario.
3. Predisponendo la lancetta delle ore, controllare che la posizione sia quella corretta per le ore
antimeridiane o pomeridiane desiderate. L'orologio è costruito in modo che la data cambi ogni 24 ore.
4. Predisponendo la lancetta dei minuti, farla avanzare di 4 o 5 minuti rispetto all'ora voluta, e farla poi
retrocedere sino all'esatto minuto desiderato.
Page 6
Size: 170 x 55mm
Color: Blk
Size: 170 x 55mm
Color: Blk
Lancetta dei minuti del CRONOMETRO
Lancetta dei quinti di secondo del CRONOMETRO
Misurazione normale
AVVIO ARRESTO AZZERAMENTO
Misurazione del tempo trascorso, in accumulazione
AVVIO ARRESTO RIPRESA
ARRESTO
AZZERAMENTO
* La ripresa e 1'arresto del cronometro possono essere effettuati ripetutamente, sempre agendo sui tasto A.
Misurazione di un tempo parziale
AVVIO TEMPO PARZIALE RIPRESA
ARRESTO DEFINITIVO AZZERAMENTO
* La misurazione e la ripresa dopo la misurazione del tempo parziale possono essere effettuati ripetutamente,
sempre agendo sul tasto B.
Misurazione dei tempi di due concorrenti
AVVIO TEMPO FINALE
DEL 1
CONCORRENTE
IL2 CONCORRENTE
GINUGE AL
TRAGUARDO
AZZERAMENTO
VISUALIZZAZIONE
DEL TEMPO FINALE
DEL 2 CONCORRENTE
(Modo) E
MODO
ORA
MODO
CALENDARIO
MODO
ALLARME
MODO DEL SECONDO
FUSO ORARIO
MODO
CRONOMETRO
LCD – SELEZIONE DEL MODO
CRONOMETRO
• II cronometro puo misurare sino a 60 minuti, in unita di quinti di secondo.
• Terminata la misurazione dei primi 60 miniuti, il conteggio ricomincia di nuova da "0", per sino
ad un totale cumulato di 12 ore.
v Prima di passare all'uso del cronometro, verificare che la corona si trovi nella sua posizione
normale, e che le lancette del CRONOMETRO si trovino sulla posizione inizale"0".
* Se le lancette del CRONOMETRO non ritornano alla posizione iniziale "0" quando il cronometro
viene riazzerato, eseguire la procedura descritta al paragrafo "PREDISPOSIZIONE DELL'ORA E
REGOLAZIONE DELLA POSIZIONE DELLE LANCETTE DEL CRONOMETRO".
1. EL – Premendo il tasto D si attiva l'illuminazione EL per tre secondi, in un modo qualsiasi.
2. Impostazione dell'ora – Premere il tasto E per entrare nel modo ora. Premendo il tasto C per 2 secondi si
entra nel modo impostazione dell'ora, i secondi lampeggiano, e premere il tasto E per resettare i secondi.
Premendo il tasto C le ore lampeggiano; premere il tasto E per impostare l'ora corretta. Premendo il tasto C
i minuti lampeggiano; premere il tasto E per impostare i minuti. Premendo il tasto C la selezione del formato
12/24 ore lampeggia, e premere il tasto E per selezionare.
* Quando si impostano i secondi, con meno di trenta secondi si resetta su zero, con più di trenta secondi si avanza di
un minuto.
* Quando si imposta l'ora, tenendo premuto il tasto E si attiva l'avanzamento veloce delle digitazioni.
* Se non si preme alcun tasto per 60 secondi, dall'impostazione dell'ora si torna a modo ora normale.
3. Impostazione del calendario – Premere il tasto E per entrare nel modo calendario. Premendo il tasto C per
due secondi si entra nel modo Impostazione calendario, le digitazioni del mese lampeggiano; premere il tasto E
per selezionare il mese. Premendo il tasto C la data lampeggia; premere il tasto E per selezionare la data.
Premendo il tasto C il giorno lampeggia; premere il tasto E per selezionare il giorno.
* Quando si imposta la data, tenendo premuto il tasto E si attiva l'avanzamento veloce delle digitazioni.
* Se non si preme alcun tasto per 60 secondi, dall'impostazione del calendario si torna a modo ora normale.
4. Impostazione dell'allarme – Premere il tasto E per entrare nel modo allarme. Premendo il tasto C per due
secondi si entra nel modo Impostazione dell'allarme; le digitazioni dell'ora lampeggiano; premere il tasto E per
selezionare l'ora dell'allarme desiderata. Premendo il tasto C i minuti lampeggiano; premere il tasto E per
impostare i minuti. Premere il tasto C per far lampeggiare la selezione tra allarme/suoneria oraria; premere
il tasto E per selezionare l'attivazione o la disattivazione.
Page 7
Size: 170 x 55mm
Color: Blk
Size: 170 x 55mm
Color: Blk
EINSTELLEN DER UHRZEIT UND DER
STOPPUHR-ZEIGERPOSITION
• Diese Uhr ist so konstruiert, dass die folgenden Einstellungen durchgeführt werden, während die
Krone in der2. Einrastposition ist:
1) Einstellen der Uhrzeit
2) Einstellen der Stoppuhr-Zeigerposition
Nachdem Sie die Krone zur 2. Einrastposition herausgezogen haben, mussen 1) und 2) gleichzeitig
gepruft und eingestellt werden.
KRONE: Zur 2. Einrastposition herausziehen, wenn der Sedundenzeiger sich an der
12-Uhr-Position befindet.
Stundenzeiger Minutenzeiger
KRONE: Drehen, um den Stunden-und
Minutenzeiger einzustellen.
1. EINSTELLEN DER UHRZEIT
2. EINSTELLEN DER STOPPUHR-ZEIGERPOSITION
v Wenn die STOPPUHR-Zeiger nicht in der
Position "0" sind, stellen Sie sie wie folgt auf
die Position "0" ein.
EINSTELLEN DER 24-STUNDENANZEIGE:
Der Zeiger der 24-Stunden-anzeige bewegt sich gemeinsam
mit dem Stunden u. Minutenzeiger. Bei richtiger Einstellung
können sie ablesen, ob es gerade 14 oder 2 Uhr ist und so
auch sicherstellen, dass das Datum um 24 Uhr umspringt
und nicht schon um 12 Uhr mittags.
suoneria
oraria attivata
suoneria
oraria attivata
suoneria
oraria disattivata
suoneria
oraria disattivata
allarme attivato allarme attivatoallarme disattivato allarme disattivato
• UHRZEIT/KALENDER
• STOPPUHR
Misst bis zu 60 Minuten in Schritten von
1/5 Sekunden. Zwischenzeitmessung
ist auch möglich.
Minutenzeiger
(Licht) D
(Einstellen) C
(Modus) E
STOPPUHR-1/5-Sekunden-Zeiger
EINSTELLEN DER
24-STUNDENANZEIGE:
a: Normalposition
b: 1. Einrastposition
c: 2. Einrastposition
Datum
STOPPUHR-Minutenzeiger
kleiner Sekundenzeiger
Stundenzeiger
• Anzeige: Stunde, Minute,
Sekunde, Wochentag,
Datum, Monat.
• Alarm, Stundenläuten
•12/24-Stundenanzeige
wählbar, automatischer
Kalender
• 1/100 Sekunde Stoppuhr
• Zweite Weltzeitzone
• EL Anzeigebeleuchtung
1. Wenn die Stoppuhr eine Messung durchführt oder durchführte oder gestoppt wurde und die Krone
zur 2. Einrastposition herausgezogen wird, werden die STOPPUHR-Zeiger automatisch auf "0"
zuruckgestellt.
2. Es wird empfohlen, die Zeiger einige Minuten weiter als die Uhrzeit einzustellen, um die Zeit zu
berücksichtigen, die gegebenenfalls zum Einstellen der STOPPUHR- Zeiger erforderlich ist.
3. Beim Einstellen des Stundenzeigers muss darauf geachtet werden, dass vor/nach Mittag richtig
eingestellt wird. Die Uhr ist so konstruiert, dass das Datum einmal in 24 Stunden weiterruckt.
4. Der Minutenzeiger muss zum Einstellen 4 bis 5 Minuten weiter als die Uhrzeit und dann zurück auf
die genaue Minute gedreht werden.
* Quando l'allarme è attivato, l'apparecchio e mette un dì per circa 20 secondi, quando ha raggiunto l'ora è impostata.
* Quando si imposta l'ora dell'allarme, tenendo premuto il tasto E si attiva l'avanzamento veloce delle digitazioni.
* Se non si preme alcun tasto per 60 secondi, dall'impostazione del calendario si torna a modo allarme normale.
5. Impostazione del secondo fuso orario – Premere il tasto E per entrare nel modo del secondo fuso orario. Premendo
il tasto C per due secondi si entra nel modo Impostazione del fuso orario; le digitazioni dell'ora lampeggiano; premere il
tasto E per selezionare l'ora desiderata. Premendo il tasto C i minuti lampeggiano; premere il tasto E per impostare i
minuti. Premendo il tasto C la selezione del formato 12/24 ore lampeggia, e premere il tasto E per selezionare.
* Quando si imposta l'ora, tenendo premuto il tasto E si attiva l'avanzamento veloce delle digitazioni.
* Se non si preme alcun tasto per 60 secondi , il modo impostazione del secondo fuso orario torna a modo normale del secondo
fuso orario.
6. Funzionamento del cronometro – Premere il tasto E per entrare nel modo cronometro. Premere il tasto C per iniziare
il conteggio. Premere di nuovo il tasto C per interrompere il conteggio. Tenendo premuto il tasto C per due secondi si
resetta su zero.
Page 8

Size: 170 x 55mm
Color: Blk
Size: 170 x 55mm
Color: Blk
2 Sekunden drücken.
*
Der STOPPUHR-Minutenzeiger vollführt eine volle Umdrehung.
Mehrfach drucken, um den STOPPUHRMinutenzeiger auf die Position "0" einzustellen.
* Der Zeiger lauft schnell, wenn die
Taste B gedrückt gehalten wird.
2 Sekunden drücken.
* Der STOPPUHR-1/5-Sekunden-Zeiger
vollführt eine volle Umdrehung.
Mehrfach drücken, um den
STOPPUHR-1/5-Sekunden-Zeiger auf die
Position "0" einzustellen.
* Der Seiger lauft schnell, wenn die
Taste B gedrückt gehalten wird.
KRONE
Bei einem Zeitzeichen zurück in die
Normalposition drücken.
STOPPUHR
-Minutenzeiger
STOPPUHR-1/5-Sekunden-Zeiger
KRONE
Datum
Datum
KRONE
Zur 1. Einrastposition herausziehen.
1m Uhrzeigersinn drehen, bis das
gewünschte Datum erscheint.
Zurück in die Normalposition drücken.
1. Am Ende des Februars und am Ende von Monaten mit 30 Tagen muss das Datum eingestellt werden.
2. Stellen Sie das Datum nicht zwischen 21:00 und 3:00 Uhr ein.
STOPPUHR
• Die Stoppuhr kann bis zu 60 Minuten in Schritten von 1/5 Sekunden messen.
• Nach 60 Minuten beginnt sie erneut von "0" zu zählen und wiederholt dies für bis zu 12 Stunden.
STOPPUHR-Minutenzeiger
STOPPUHR-1/5-Sekunden-Zeiger
v Vergewissern Sie sich vor Verwendung der Stoppuhr, dass die Krone sich in der
Normalposition befindet und dass die STOPPUHR-Zeiger auf die Position "0" zuruckgestellt wurden.
* Wenn die STOPPUHR-Zeiger bei der Ruckstellung der Stoppuhr auf "0" nicht zur Position "0"
zuruckkehren, fuhren Sie das Verfahren in "EINSTELLEN DER UHRZEIT UND DER STOPPUHR ZEIGERPOSITION" aus.
Standardmessung
START STOP RÜCKSTELLUNG
Aufaddierende Zeitmessung
START STOP FORTSETZUNG
STOP
STOP
RÜCKSTELLUNG
* Fortsetzung und Stop der Stoppuhr konnen durch Drücken der Taste A wiederholt werden.
Zwischenzeitmessung
START
ZWISCHENZEIT ZWISCHENZEIT
-FREIGABE
RÜCKSTELLUNG
* Messung und Freigabe der Zwischenzeit können durch Drücken der Taste B wiederholt werden.
Messung von zwei Wettbewerbern
START
ENDZEIT DES 1.
WETTBEWERBERS
2. WETTBEWERBER
ERREICHT ZIEL
RÜCKSTELLUNG
ENDZEIT DES 2.
WETTBEWERBERS
EINSTELLEN DES DATUMS
• Vor dem Einstellen des Datums muss die Uhrzeit eingestellt werden.
Page 9

Size: 170 x 55mm
Color: Blk
Size: 170 x 55mm
Color: Blk
(Modus) E
ZEIT-
MODUS
KALENDER-
MODUS
ALARMMODUS
ZWEITE
WELTZEITZONE
ANZEIGE-MODUS
STOPPUHR-
MODUS
LCD - MODUS-AUSWAHL
Stundenläuten "Ein" Stundenläuten "Ein"Stundenläuten "Aus" Stundenläuten "Aus"
Alarm "Ein" Alarm "Ein"Alarm "Aus" Alarm "Aus"
• HEURE/CALENDRIER
• CHRONOGRAPHE
ll peut mesurer jusqu'à 60 minutes en unites de 1/5e de
seconde. La mesure du temps intermédiaire est possible.
Aiguille des minutes
(Eclairage) D
(Réglage) C
(Mode) E
Aiguille 1/5e seconde du CHRONO
REGLAGE DE
L’AIGUILLE DES 24 HEURES
a: Position normale
b: Premier déclic
c: Second déclic
Date
Aiguille des minutes du CHRONO
Petite trotteuse
Aiguille
des heures
• Affichage: Heures, minutes,
secondes, jour de la semaine,
jour, mois.
• Alarme, carillon
• Sélection du format 12/24H,
calendrier automatique
• Chronographe 1/100e s
• Deuxième fuseau horaire
• Rétroéclairage EL
1. EL – Betätigen Sie Taste "D", um die EL-Anzeigebeleuchtung 3 Sekunden lang zu aktivieren.
2. Zeiteinstellung – Betätigen Sie Taste "E", um den Zeitmodus aufzurufen. Betätigen Sie C ca. 2 Sekunden lang, um den
Zeit-Einstellmodus aufzurufen, und die Sekundenanzeige blinkt nun. Betätigen Sie nun Taste "E", um die Sekundenanzeige
auf Null zurück zu setzen. Betätigen Sie Taste "C", und die Stundenanzeige blinkt nun, und betätigen Sie Taste "E", um die
Stundenanzeige einzustellen. Betätigen Sie Taste "C" nochmals, und die Minutenanzeige blinkt nun, und stellen Sie die
Minutenanzeige mittels Taste "E" ein. Betätigen Sie Taste "C", und die Auswahl für den 12/24-Stundenanzeigemodus
erscheint; betätigen Sie Taste "E", um die gewünschte Einstellung auszuwählen.
* Bei der Einstellung der Sekundenanzeige springt die Anzeige bei weniger als 30 Sekunden auf Null, und wenn eine Anzeige von
mehr als 30 Sekunden erscheint, dann erfolgt eine Rücksetzung der Anzeige auf Null, und die Minutenanzeige wird 1 Minute
aufwärts eingestellt.
* Bei der Einstellung der Zeit wird die Anzeige schnell aufwärts eingestellt, wenn Sie Taste "E" gedrückt halten.
* Wenn 60 Sekunden lang keine Tastenbetätigung erfolgt, dann verlässt die Uhr den Einstellmodus, und die Normalzeitanzeige
erscheint wieder.
3. Kalender-Einstellungen – Betätigen Sie Taste "E", um den Kalender-Modus aufzurufen. Betätigen Sie Taste "C" ca. 2
Sekunden lang, um den Kalender-Einstellmodus zu aktivieren, und die Monatsanzeige blinkt nun; betätigen Sie Taste "E",
um die Monatsanzeige auszuwählen. Betätigen Sie Taste "C", und die Datumsanzeige blinkt nun; betätigen Sie Taste "E",
um das gewünschte Datum einzustellen. Betätigen Sie Taste "C", und die Anzeige für den Wochentag blinkt, und stellen
Sie die Anzeige mittels Taste "E" ein.
* Bei der Einstellung der Zeit wird die Anzeige schnell aufwärts eingestellt, wenn Sie Taste „E“ gedrückt halten.
* Wenn 60 Sekunden lang keine Tastenbetätigung erfolgt, dann verlässt die Uhr den Einstellmodus, und die Normalzeitanzeige
erscheint wieder.
4. Alarm-Einstellung – Betätigen Sie Taste "E", um die Anzeige für den Alarm-Modus aufzurufen. Betätigen Sie Taste "C"
ca. 2 Sekunden lang, um den Einstellmodus für den Alarm mit blinkender Stundenanzeige zu aktivieren; betätigen Sie Taste
"E", um die Stundenanzeige einzustellen. Betätigen Sie Taste "C", und die Minutenanzeige blinkt nun, und stellen Sie die
Minutenanzeige mittels Taste "E" ein. Betätigen Sie Taste "C", und die Einstellung für die Alarm/Stundenläuten-Auswahl
blinkt nun; betätigen Sie Taste "E", um die Funktion "ein" oder "aus" zu schalten.
* Wenn die Alarmfunktion aktiviert ist, dann ertönt 20 Sekunden lang ein Alarmton sobald die eingestellte Alarmzeit erreicht ist.
* Halten Sie Taste "E" bei der Einstellung der Alarmzeit gedrückt, um die Einstellung schnell aufwärts auszuführen.
* Wenn ca. 60 Sekunden lang keine Tastenbetätigung erfolgt, dann schaltet die Uhr automatisch vom Alarm-Einstellmodus
wieder in den Alarm-Modus zurück.
5. Zweite Zeitzone einstellen – Betätigen Sie Taste "E", um den Einstellmodus für die 2. Zeitzone aufzurufen. Betätigen
Sie Taste "C" ca. 2 Sekunden lang, um den Einstellmodus für die 2. Zeitzone zu aktivieren, und die Stundenanzeige
blinkt nun; betätigen Sie Taste "E", um die Stundenanzeige auszuwählen. Betätigen Sie Taste "C", und die Minutenanzeige
blinkt; stellen Sie die Minutenanzeige nun mittels Taste "E" ein. Betätigen Sie Taste "C", und die Auswahl für 12/24Stundenanzeigemodus blinkt; betätigen Sie Taste "E", um den gewünschten Modus auszuwählen.
* Halten Sie Taste "E" bei der Einstellung der Zeit gedrückt, um die Einstellung schnell aufwärts auszuführen.
* Wenn ca. 60 Sekunden lang keine Tastenbetätigung erfolgt, dann schaltet die Uhr automatisch vom Alarm-Einstellmodus
wieder in den Alarmmodus zurück.
6. Einsatz der Stoppuhr – Betätigen Sie Taste "E", um den Stoppuhrmodus aufzurufen. Betätigen Sie Taste "C", um eine
Zeitmessung zu starten. Betätigen Sie Taste "C" nochmals, um die Zeitmessung anzuhalten. Halten Sie Taste "C" ca.
2 Sekunden lang gedrückt, um eine Rücksetzung der Anzeige auf Null auszuführen.
Page 10

Size: 170 x 55mm
Color: Blk
Size: 170 x 55mm
Color: Blk
Aiguille des heures
Aiguille des minutes
1. RÉGLAGE DE L'HEURE PRINCIPALE
2.RÉGLAGE DE LA POSITION DES AIGUILLES DU CHRONOGRAPHE
v Si les aiguilles du CHRONOGRAPHE ne
sont pas à la position "0", procédez comme
suit pour les y ramener.
Appuyez pendant 2 secondes.
*
L'aiguille des minutes du CHRONO effectue un tour complet.
Appuyez de façon répétée pour ramener 1'aiguille
des minutes du CHRONO à la position "0".
* L'aiguille tourne rapidement si le bouton B est
maintenu enfoncé.
Appuyez pendant 2 secondes.
* L'aiguille 1/5e seconde du CHRONO
effectue un tour complet.
Appuyez de façon répétée pour ramener 1'aiguille
1/5e seconde du CHRONO à la position "0".
* L'aiguille tourne rapidement si le
bouton B est maintenu enfoncé.
COURONNE
Repoussez-la à sa position normale en
accord avec un top horaire officiel.
Aiguille des minutes
du CHRONO
Aiguille 1/5e seconde du CHRONO
CROWN
Date
RÉGLAGE DE LA DATE
• Prenez soin d'adjuster 1'heure principale avant d'ajuster la date.
Date
COURONNE
Retirez-la au premier déclic.
Tournez dans le sens horaire jusqu'à ce que
la date souhaitée apparaisse.
Repoussez-la à sa position normale.
1. II est nécessaire d'ajuster la date à la fin de février et des mois de 30 jours.
2. N'ajustez pas la date entre 9:00 du soir et 3:00 du matin.
RÉGLAGE DE L'HEURE ET DE LA POSITION DES AIGUILLES DU
CHRONOGRAPHE
• Cette montre est concue de manière à permettre tous les réglages suivants lorsque la couronne
est retirée au second déclic:
1) Réglage de 1'heure principale
2) Réglage de la position des aiguilles du chronographe
Une fois que la couronne est retirée au second déclic, veillez à effectuer en même temps les réglages
1) et 2).
COURONNE Retirez-la au second déclic lorsque la trotteuse est à la position 12 heures.
COURONNE: Tournez-la pour ajuster les aiguilles
des heures et des minutes.
1. Si la couronne est retirée au second déclic, les aiguilles du CHRONOGRAPHE seront automatiquement
ramenées à "0" sie le chronographe fonctionne,s’il fonctionnait ou s’il a été arrêté.
2. II est conseillé d'ajuster les aiguilles à quelques minuts avant le moment actuel, car il faut tenir compte
de la duré nécessaire á l’ajustement de la position des aiguilles du CHRONOGRAPHE.
3. Lors du réglage de 1'aiguille des heures, assurez-vous que le réglage AM/PM (matin/soir) est correct
La montre est conçue de telle sorte que la date change toutes les 24 heures.
4. Lors du réglage de 1'aiguille des minutes, dépassez de 4 à 5 minutes le moment voulu, puis revenez en
arrière à la minute exacte.
REGLAGE DE L’AIGUILLE DES 24 HEURES :
L’aiguille des 24 heures se déplace en fonction des aiguilles
des heures et des minutes. Lorsque vous réglez l’heure,
vérifiez que l’aiguille des 24 heures est correctement réglée.
Page 11

Size: 170 x 55mm
Color: Blk
Size: 170 x 55mm
Color: Blk
Aiguille des minutes du CHRONO
Aiguille de 1/5 seconde du CHRONO
Chronométrage standard
MARCHE ARRÊT R.A.Z.
Mesure par accumulation du temps écoulé
MARCHE ARRÊT
REMISE EN MARCHE
ARRÊT R.A.Z.
* La remise en marche et 1'arrêt du chronographe peuvent être répétés par poussées sur le bouton A.
Mesure du temps intermédiaire
MARCHE TEMS
INTERMÉDIAIRE
LIBÉRATION TEMPS
INTERMÉDIAIRE
ARRÊT R.A.Z.
* La mesure et la libération du temps intermédiaire peuvent être répétées par poussées sur le bouton B.
Mesure du temps de deux concurrents
MARCHE
TEMPS D'ARRIVÉE
1er CONCURRENT
ARRIVÉE 2e
CONCURRENT
R.A.Z.
TEMPS D'ARRIVÉE
2e CONCURRENT
(Mode) E
MODE
HEURE
MODE
CALENDRIER
MODE
ALARME
MODE
2e FUSEAU
MODE
CHRONOGRAPHE
ECRAN LCD - SELECTION DU MODE
CHRONOGRAPHE
• Le chronographe peut mesurer jusqu'à 60 minutes en uités de 1/5e de seconde.
• Après 60 minutes, le chronographe recommence la mesure à partir de "0" et, pendant 12 heures au
maximum.
v Avant d'utiliser le chronographe, assurez-vous que la couronne est à sa position normale et que
les aiguilles du CHRONO sont ramenees à leur position "0".
* Si les aigulles du CHRONO ne reviennent pas à leur position "0" repective lors de la réinitialisation du
chronographe, effectuez les démarches énoncées sous "RÉGLAGE DE L'HEURE ET DE LA POSITION
DES AIGULLES DU CHRONOGRAPHE".
1. Rétroéclairage EL: Appuyez sur le bouton D pour activer le rétroéclairage EL pendant 3 secondes
quel que soit le mode.
2. Réglage de l’heure - Appuyez sur E pour passer en mode Heure. Appuyez sur C pendant 2 secondes
pour passer en mode Réglage de l’heure: le chiffre des secondes clignote. Appuyez sur E pour remettre
les secondes à zéro. Appuyez sur C: le chiffre des heures clignote. Appuyez sur E pour régler les heures.
Appuyez de nouveau sur C: le chiffre des minutes clignote. Appuyez sur E pour régler les minutes.
Appuyez encore pour C: le format 12/24H clignote. Appuyez sur E pour sélectionner le format d’affichage.
* Lors du réglage des secondes, si le chiffre est inférieur ou égal à 30 secondes, les secondes sont remises à zéro;
dans le cas contraire, une minute est ajoutée.
* Lors du réglage de l’heure, maintenez le bouton E enfoncé pour accélérer le défilement.
* L’écran revient automatiquement en mode normal après 60 secondes d’inactivité.
3. Réglage de la date- Appuyez sur E pour passer en mode Calendrier. Appuyez sur C pendant 2 secondes
pour passer en mode Réglage de la date: le mois clignote. Appuyez sur E pour régler le mois. Appuyez sur
C: le jour clignote. Appuyez sur E pour régler le jour. Appuyez de nouveau sur C: le jour de la semaine
clignote. Appuyez sur E pour régler le jour de la semaine.
* Lors du réglage de la date, maintenez le bouton E enfoncé pour accélérer le défilement.
* L’écran revient automatiquement en mode normal après 60 secondes d’inactivité.
4. Réglage de l’alarme- Appuyez sur E pour passer en mode Alarme. Appuyez sur C pendant 2 secondes
pour passer en mode Réglage de l’alarme: le chiffre des heures clignote. Appuyez sur E pour régler les
heures. Appuyez sur C: le chiffre des minutes clignote. Appuyez sur E pour régler les minutes. Appuyez
de nouveau sur C: l’icône alarme/carillon clignote. Appuyez sur E pour activer ou désactiver l’alarme
et/ou le carillon.
Page 12

Size: 170 x 55mm
Color: Blk
Size: 170 x 55mm
Color: Blk
Manecilla de hora
Manecilla de minuto
1. FIJACIÓN DE HORA PRINCIPAL
2. AJUSTE DE POSICIÓN DE MANECILLA DE CRONÓMETRO
v Si las manecillas de CRONÓMETRO no
están en la posicion "0", siga el procedimiento
de abajo para fijarlas a la posición "0".
AJUSTE DEL SUB DIAL DE 24 HORAS:
La aguja de 24 horas se mueve de manera
correspondiente a las agujas de la hora y de los minutos.
Cuando ajuste la hora, asegúrese de revisar que la aguja
de 24 horas haya sido ajustada correctamente.
Carillon activé Carillon activéCarillon désactivé Carillon désactivé
Alarme activée Alarme activéeAlarme désactivée Alarme désactivée
• HORA/CALENDARIO
• CRONÓMETRO
Mide hasta 60 minutos a incrementos de 1/5 de
segundo. Es posible medición de tiempo intermedio.
Manecilla de minuto
(Luz) D
(Ajuste) C
(Modo) E
Manecilla de 1/5 de segundo CRONÓMERO
AJUSTE DEL SUB
DIAL DE 24 HORAS
a: Posición normal
b: Primer chasquido
c: Segundo chasquido
Fecha
Manecilla de minuto CRONÓMETRO
Manecilla de segundo pequeña
Manecilla
de hora
• DPantalla: Hora, minuto,
segundo, día, fecha, mes.
• Alarma, señal horaria
• Elección de calendario
automático de 12/ 24 horas
• Cronómetro de 1 /100
segundos
• Segundo huso horario
• Iluminación EL
FIJACIÓN DE LA HORA Y AJUSTE DE LA POSICIÓN DE
MANECILLA DE CRONÓMETRO
• Este reloj está de tal manera diseñado que lo siguiente se efectúa todo con la corona en la
posición del segundo chasquido:
1) fijación de hora principal
2) ajuste de posición de manecilla de cronómetro
Una vez se saca la corona al segundos chasquido, no se olvide de ajustar 1) y 2) al mismo tiempo.
CORONA: Saque al segundo chasquido cuando la manecilla de segundo está en la posición de las
12.
CORONA: Gire para fijar las manecillas
de hora y minuto.
1. Cuando el cronómetro esta o ha estado midiendo o está parado, si la corona se saca al segundo chasquido,
automáticamente las manecillas de CRONOMETRO se repondrán en "0".
2. Se recomienda que las manecillas se fijen a la hora unos minutos por delante de la hora actual, teniendo
en consideración el tiempo requerido para ajustar la posición de manecilla de cronómetro si fuera
necesario.
3. Al fijar la manecilla de hora, no se olvide de comprobar que AM/PM está fijado correctamente. El reloj está
de tal manera diseñado que la fecha cambia una vez cada 24 horas.
4. Al fijar la manceilla de munuto, primero aváncela 4 a 5 minutos por delante de la hora deseada y, luego,
retrocédala de nuevo al minuto exacto.
* Lorsque l’alarme est activée, la sonnerie sonnera pendant 20 secondes à l’heure programmée.
* Lors du réglage de l’alarme, maintenez le bouton E enfoncé pour accélérer le défilement.
* L’écran revient automatiquement en mode normal après 60 secondes d’inactivité.
5. Réglage du deuxième fuseau horaire- Appuyez sur E pour passer en mode 2e fuseau horaire. Appuyez
sur C pendant 2 secondes pour passer en mode Réglage du 2e fuseau horaire: le chiffre des heures
clignote. Appuyez sur E pour régler les heures. Appuyez de nouveau sur C: le chiffre des minutes
clignote. Appuyez sur E pour régler les minutes. Appuyez encore pour C: le format 12/24H clignote.
Appuyez sur E pour sélectionner le format d’affichage.
* Lors du réglage de l’heure, maintenez le bouton E enfoncé pour accélérer le défilement.
* L’écran revient automatiquement en mode normal après 60 secondes d’inactivité.
6. Fonctionnement du chronographe - Appuyez sur E pour passer en mode Chronographe. Appuyez sur
C pour démarrer le chronométrage. Appuyez de nouveau sur C pour arrêter le chronométrage.
Appuyez sur C pendant 2 secondes pour remettre le chronographe à zéro.
Page 13

Size: 170 x 55mm
Color: Blk
Size: 170 x 55mm
Color: Blk
Pulse por 2 segundos.
*
La manecilla de minuto CRONÓMETRO gira un circulo completo.
Pulse repetidamente para fijar la manecilla de
minuto CRONÓMETRO a la posición "0".
* La manecilla se mueve rápidamente
si el botón B se mantiene pulsado.
Pulse por 2 segundos.
* La manecilla de 1/5 de segundo
CRONÓMETRO gira un circulo completo.
Pulse repetidamente para fijar la manecilla de 1/5
de segundo CRONÓMETRO a la posición "0".
* La manecilla se mueve rapidamente si el
botón B se mantiene pulsado.
CORONA
Presione de nuevo a la posicion
normal de acuerdo a una señal
horaria.
Manecilla de minuto
CRONÓMETRO
Mancecilla de 1/5 de
segundo CRONÓMETRO
CORONA
Fecha
FIJACIÓN DE LA FECHA
• Antes de fijar la fecha, no se olvide de fijar la hora principal.
Fecha
CORONA
Saque al primer chasquido.
Gire a la derecha hasta que aparezca la
fecha deseada.
Presione de nuevo a la posición normal.
STOPWATCH
• El cronómetro puede medir hasta 60 minutos en incrementos de 1/5 de segundo.
• Después de 60 minutos, comenzará a contar de nuevo desde "0" repetidamente hasta 12 horas.
Manecilla de minuto CRONÓMETRO
Manecilla de 1/5 de segundo CRONÓMETRO
Medición estándar
INICIO PARADA REPOSICION
Medición de tiempo transcurrido acumulado
INICIO PARADA REINICIO
PARADA REPOSICIÓN
* El reinicio y parada del cronómetro puede repetirse pulsando el botón A.
Medición de tiempo intermedio
INICIO INTERMEDIO
LIBERACIÓN
INTERMEDIO
PARADA REPOSICIÓN
* La medición y liberación de tiempo intermedio puede repetirse pulsando el botón B.
Medición de dos competidores
INICIO
TIEMPO FINAL DE
1ER COMPETIDOR
2DO. COMPETIDOR
TERMINA
REPOSICIÓN
TIEMPO FINAL DE
2DO. COMPETIDOR
1. Es necesario ajustar la fecha al final de Febrero y meses de 30 dias.
2. No fije la fecha entre las 9:00 p.m. y la 3:00 a.m.
v Antes de utilizar el cronómetro, no se olvide de comprobar que la corona está fijade en la
posición normal y que las mnecillas de CRONÓMETRO están reajustadas en la posición "0".
* Si las manecillas de CRONÓMETRO no retornan a la posición "0" cuando el cronometro está
reajustado a "0", siga el procedimiento en "JIJACIÓN DE LA HORA Y AJUSTE DE LA POSICIÓN DE
MANECILLA DE CRONÓMETRO".
Page 14

Size: 170 x 55mm
Color: Blk
Size: 170 x 55mm
Color: Blk
(MODO) E
MODO DE
HORA
MODO DE
CALENDARIO
MODO DE
CRONOMETRO
MODO DE
HUSO HORARIO
SECUNDARIO
MODO DE
ALARMA
LCD- ELECCION DE MODO
campana activada campana activadacampana desactivada campana desactivada
alarma activada alarma activadaalarma desactivada alarma desactivada
* 显示:时、分、秒、星期、
日期、月
* 闹钟,点钟报时
* 12/24小时选项,自动日历
* 1/100 秒表
* 第二时区
* EL背光
(灯) D
(设置) C
(模式) E
1. EL- Presione el botón D para activar la iluminación EL por 3 segundos en cualquier modo.
2. Ajuste de Hora - Presione E para ingresar el modo de hora. Presione C por 2 segundos para entrar
al modo de ajuste de hora, los segundos titilarán, presione E para reajustar los segundos a cero.
Presionar C por 2 segundos hará que la hora titile, presione E para ajustar la hora correcta. Presionar
C hará titilar los minutos, presione E para elegir los minutos.Presione C para hacer titilar la elección
de 12/24 horas, presione E para seleccionar.
* Cuando ajuste los segundos, menos de 30 segundos los reajustarán a cero, más de 30 segundos harán que
avance 1 minuto.
* Cuando ajuste la hora, presione y mantenga E para activar el avance rápido de los números.
* Si no se presiona ningún botón por 60 segundos, el modo de juste de hora volverá al modo de calendario
normal.
3. Ajuste del calendario - Presione E para ingresar al modo de calendario. Presione C por 2 segundos
para ingresar al modo de ajuste de calendario, el mes titilará, presione E para elegir el mes. Presionar
C hará titilar la fecha, presione E para elegir la fecha. Presionar C hará titilar el día, presione E para
elegir el día.
* Cuando ajuste la fecha, presione y mantenga E para activar el avance rápido de los números.
* Si no se presiona ningún botón por 60 segundos, el modo de ajuste de calendario volverá al modo
de calendario normal.
4. Ajuste de Alarma - Presione E para ingresar al modo de Ajuste de Alarma. Presione C por 2 segundos
para ingresar a modo de ajuste de alarma, la hora titilará, presione E para elegir la hora. Presionar C
hará titilar los minutos, presione E para elegir los minutos. Presionar C hará titilar la elección alarma /
llamada, presione E para elegir activado o desactivado.
* Cuando la alarma está activada, sonará por 20 segundos al llegar a la hora ajustada.
* Cuando ajuste la hora de alarma, presionar y mantener E activará el avance rápido de los números.
* Si no se presiona ningún botón por 60 segundos el modo de ajuste de alarma volverá automáticamente al
modo normal de alarma.
5. Ajuste de Huso Horario Secundario – Presione E para ingresar al modo de huso horario secundario.
Presionar C por 2 segundos ingresará al modo de ajuste de huso horario secundario, la hora titilará,
presione E para elegir la hora. Presionar C hará titilar los minutos, presione E para elegir los minutos.
Presionar C hará titilar la elección de 12/24 horas, presionar E para elegir.
* Cuando ajuste la hora , presionar y mantener E activará el avance rápido de los números.
* Si no se presiona ningún botón por 60 segundos el modo de ajuste de huso horario secundario volverá
automáticamente al modo normal de huso horario secundario.
6. Uso del Cronómetro – Presione E para ingresar al modo de cronómetro. Presione C para comenzar la
cuenta. Presione C para detener la cuenta. Presione y mantenga C por 2 segundos para reajustar a cero.
小秒针
秒表1/5-秒针
时针
分针
a:正常位置
b:位置1
c:位置2
24小时时针
日期
秒表分针
• 时间/日历
• 秒表
以1/5秒为增量,最多测量达60分钟。
可分段测量时间。
Page 15

Size: 170 x 55mm
Color: Blk
Size: 170 x 55mm
Color: Blk
如果秒表指针没有指向“0”的位置,
可按照以下步骤将它们调到“0”。
2. 调整秒表指针位置
24小时子表盘设置:
24小时指针会随着时针和分针的移动而
作出相应移动。在设置时间时,确保24
小时指针的位置正确。
1. 当秒表正在进行测量或已停止时,如果把表冠拉出到第二位置,则秒表指针会自动
回到“0”。
2. 建议把指针调至比当前快几分钟的位置。因为如果需要调整秒表指针位置的话,会
需要一定的 时间。
3. 在调整时针位置时,确保检查上午/下午设置正确。本手表每24小时转换日期一次。
4. 在调整分针位置时,首先调到比预定时间快4-5分钟的位置,然后再调回准确的时间。
设置时间,调整秒表指针位置
• 根据本手表的设计,可在表冠处于第二位置时进行下列调整:
1)主时间设置
2)调整秒表指针位置
表冠一旦被拉出到第二位置,务必要同时进行上述1)和2)两项调整。
表冠:在秒针指到12点钟位置时拉出到第二位置。
时针
分针
表冠:转动表冠可调整时针和分针
1. 主时间设置
秒表分针 日期
日期
表冠
秒表1/5秒针
拉出到第一位置。
按顺时方向旋转到预定日期。
按回到正常位置。
表冠
1. 在2月和有30天的月份的月末,需要调整日期。
2. 不要在晚上9:00到凌晨3:00之间调整日期。
按下此按钮2秒。
* 秒表分针将旋转1整圈。
设定日期
*设定日期前,务必要先设定主时间。
表冠 按照点钟报时信号把表冠按回到
正常位置。
反复按下此按钮以把秒表1/5秒针设
定在“0”位置。
* 如果長按B,指针将快速移动。
按下此按钮2秒。
* 秒表1/5秒针将旋转1整圈。
反复按下此按钮以把秒表分针设定
在“0”位置。
* 如果長按B,指针将快速移动。
Page 16

Size: 170 x 55mm
Color: Blk
Size: 170 x 55mm
Color: Blk
* 在重置秒表后,如果秒表指针尚未返回“0”,请按“设定时间,调整秒表指针
位置”的步骤进行操作。
在使用秒表前,务必检查表冠是否在正常位置,以及秒表指针是否归到“0”位置。
秒表分针
秒表1/5秒针
秒表
*秒表能以1/5秒为增量,测量長达60分钟。
*当计时达到60分钟时,秒表会再由“0”开始测量,反复进行测量至12小时。
标准计时
经过时间积累测量
分段时间计时
两个竞赛者的计时
*反复按下按钮A可使秒表再开始及停止。
*反复按下按钮B可使分段时间计时开始及解除。
开始 停止
停止 停止 重置
停止 重置
重置
重置
再开始开始
开始 分段 分段解除
开始 第一竞赛者
的结束时间
第二 竞赛者
结束
第二 竞赛者
的结束时间
时间模式 日历模式 闹钟模式 第二时区模式 秒表模式
(模式) E
LCD – 模式选择
1. EL — 按下按钮D可在任何模式启动EL光3秒。
2. 时间设置 — 按E进入时间模式设置,按下C約2秒进入时间设置模式,秒数位闪动,
按E可重置秒数位到“0”。按C,时数位闪动,按E可调整时数位。按C,分数位闪
动,按E可调整分数位。再按C,12/24小时选项闪动,按E进行选择。
* 在调整秒数位时,少于30秒时会重置到“0”,多于30秒时时间会向前进1分钟。
* 在设置时间的时候,长按E可以加快时间调整。
* 在60秒內,如果没有任何按钮被按下,时间设置模式将返回正常时间模式。
3. 日历设置 — 按E进入日历模式,长按C兩秒进入日历模式,月数位闪动,按E可选择
月份。按C,日期数位闪动,按E可选择日期。按C,星期数位闪动,按E可选择星期。
* 在设置时间的时候,长按E可以加快时间调整。
* 在60秒钟內,如果没有任何按钮被按下,日历设置模式将返回正常日历模式。
4. 闹钟设置 — 按E进入闹钟模式,长按C兩秒进入闹钟设置模式,时数位闪动,按E可
调整小时。按C,分数位闪动,按E可调整分钟。按C,闹钟/点钟报时选项闪动,按E
可选择闹铃的开关。
Page 17

Size: 170 x 55mm
Color: Blk
Size: 170 x 55mm
Color: Blk
AJUSTE DA HORA E DA POSIÇÃO DOS PONTEIROS DO
CRONÔMETRO
• Este relógio está desenhado para que os seguintes sejam feitos com a coroa na posição do
segundo clique
1) ajuste da hora principal
2) ajuste da posição dos ponteiros do cronômetro
Quando a coroa estiver na posição do segundo clique, verifique e ajuste 1) e 2) ao mesmo tempo.
COROA: Puxe para o segundo clique quando o ponteiro dos segundos estiver na posição de 12
horas.
Ponteiro da hora
Ponteiro dos minutos
COROA: Gire para ajustar os ponteiros da hora e
dos minutos
1. AJUSTE PRINCIPAL DA HORA
2. AJUSTE DA POSIÇÃO DO PONTEIRO DO CRONÔMETRO
v Se os ponteiros do CRONÔMETRO não
estiverem na posição “0”, siga o procedimento
abaixo para ajustá-los à posição “0”.
1. Quando o cronômetro está medindo, tiver medido ou tiver sido parado, se a coroa é puxada para fora para o
segundo clique, os ponteiros do CRONÔMETRO se ajustarão automáticamente em “0”.
2. IRecomenda-se que os ponteiros sejam ajustados à hora uns minutos antes da hora atual, considerando-se o
tempo requerido para ajustar a posição dos ponteiros do CRONÔMETRO caso seja necessário.
3. Ao ajustar o ponteiro das hora, verifique que AM/PM estejam ajustados corretamente. O relógio está
desenhado para que a data mude uma vez à cada 24 horas.
4. Ao ajustar o pontiero dos minutos, primeiro adiante 4 ou 5 minutos além da hora desejada e depois volte
para os minutos exatos.
AJUSTE DO SUB-DIAL DE 24-HORAS:
O ponteiro de 24-horas se move de acordo com os
ponteiros das horas e dos minutos. Ao ajustar a hora,
verifique que o ponteiro das 24-horas esteja
corretamente ajustado.
• HORA / CALENDÁRIO
• CRONÔMETRO
Mede até 60 minutos em incrementos de 1/5 segundos.
A medição do tempo compartilhado é possível.
Ponteiro de 1/5 segundos do
cronômetro
(Luz) D
(Ajuste) C
(Modo) E
Ponteiro de 1/5 segundos do cronômetro
Ponteiro 24 horas
a: Posição normal
b: Primeiro clique
c: Segundo clique
Data
Ponteiro dos minutos do CRONÔMETRO
Ponteiro pequeno dos segundos
Ponteiro das horas
• Display: Hora, minuto,
segundo, dia, data, mês.
• Alarme, sinal a cada hora
• Seleção 12/24 horas,
calendário automático
• cronômetro 1/100 segundos
• segundo fuso horário
• Iluminação EL
* 如果闹钟是开着的,到预设时间后,闹钟会响20秒。
* 在设置闹钟时间时。长按E可以加快时间调整。
*在60秒钟內,如果没有任何按钮被按下,闹钟设置模式将返回正常闹钟模式。
5. 第二时区设置模式 - 按E进入第二时区模式。长按C兩秒进入第二时区设置模式,时数
位闪动,按E可调整时数位。按C,分数位闪动,按E可调整分数位。再按C,12/24小时
选项闪动,按E进行选择。
* 设置时间时,长按E可以加快时间调整。
* 在60秒钟內,如果没有任何按钮被按下,第二时区设置模式将返回正常第二时区模式。
6. 秒表操作 — 按E进入秒表模式,按C开始计时,再按C可停止计时。长按C兩秒,
秒表指针会重置为0.
闹钟关
闹钟开
闹钟关
闹钟开
点钟报时开 点钟报时开点钟报时关 点钟报时关
Page 18

Size: 170 x 55mm
Color: Blk
Size: 170 x 55mm
Color: Blk
Pressione por 2 segundos.
* O ponteiro dos segundos do CRONÔMETRO fará
uma voltar completa
Pressione repetidamente para ajustar o ponteiro
dos minutos CRONÔMETRO à posição “0”.
* O ponteiro se move rapidamente se a tecla B se
mantem pressionada.
Pressione por 2 segundos.
* O ponteiro de 1/5 segundos do CRONÔMETRO faz
uma volta completa.
Pressione repetidamente para ajustar o ponteiro
de 1/5 segundos do CRONÔMETRO.
* O ponteiro se move rapidamente se a tecla B se
mantem pressionada.
COROA
Antes de ajustar a data, verifique que a
hora principal esteja ajustada
Ponteiro dos minutos
do CRONÔMETRO
Ponteiro de 1/5 segundos
do CRONÔMETRO
COROA
Data
AJUSTE DA DATA
• Antes de ajustar a data, verifique que a hora principal esteja ajustada.
Data
COROA
Puxe para o primeiro clique.
Gire no sentido horário até que a data
desejada apareça.
Coloque novamente na posição normal.
1. É necessário ajustar a data no final de fevereiro e dos meses de 30 dias.
* Não ajuste a data entre as 9:00 pm e a 3:00 am.
CRONÔMETRO
• O cronômetro pode medir até 60 minutos em incrementos de 1/5 segundos.
• Após 60 minutos, começará a contagem novamente de “0” repetidamente até por 12 horas.
Ponteiro dos minutos do CRONÔMETRO
Ponteiro de 1/5 segundos do CRONÔMETRO
v Antes de utilizar o cronômetro, verifique que a coroa esteja ajustada na posição normal e que
os ponteiros do CRONÔMETRO estejam ajustados na posição “0”.
* Se os ponteiros do CRONÔMETRO não voltarem à posição “0” quando o cronômetro for ajustado
em “0”, siga o procedimento em “AJUSTE DA HORA E DA POSIÇÃO DOS PONTEIROS DO
CRONÔMETRO”.
Medição padrão
COMEÇAR PARAR REAJUSTAR
Medição acumulada do tempo decorrido
COMEÇAR PARAR RECOMEÇAR
PARAR REAJUSTAR
* Pode-se repetir o recomeçar e parar o cronômetro pressionando-se a tecla A.
Medição do tempo compartilhado
COMEÇAR
COMPARTILHADO SOLTAR COMPARTILHADO
PARAR REAJUSTAR
* Pode-se repetir e parar o tempo compartilhado repetidamente pressionando a tecla B.
Medição de dois competidores
COMEÇAR TEMPO FINAL DO
1º COMPETIDOR
2º COMPETIDOR
ACABA
REAJUSTAR
TEMPO FINAL DO
2º COMPETIDOR
Page 19

Size: 170 x 55mm
Color: Blk
Size: 170 x 55mm
Color: Blk
(Modo) E
MODO
TEMPO
MODO
CALENDÁRIO
MODO
ALARME
MODO 2º FUSO
HORÁRIO
MODO
CRONÔMETRO
SELEÇÃO DO MODO LCD
1. EL – Pressionar a tecla D ativará a iluminação EL por 3 segundos em qualquer modo.
2. Ajuste da hora - Pressione E para entrar no modo tempo. Pressione C por 2 segundos para entrar
no modo de ajuste da hora. Os segundos vão piscar. Pressione E para reajustar os segundos à zero.
Pressionar C fará a hora piscar, pressionar E para ajustar corretamente a hora. Pressionar C fará piscar
os minutos. Pressione E para ajustar os minutos. Pressione C para fazer piscar a seleção de 12/24 horas,
pressione E para selecionar.
* Ao ajustar os segundos, menos de 30 segundos serão resjustados em zero, mais de 30 segundos adiantarão 1
minuto.
* Ao ajustar a hora, mantenha pressionada a tecla E para ativar o adiantamente rápido dos números.
* Se nenhuma tecla for pressionada por 60 segundos, o modo de ajuste da hora voltará ao modo da hora
normal.
3. Ajuste do Calendário - pressione E para entrar no modo do calendário. Pressione C por 2 segundos
para entrar no modo de ajuste do calendário. O mês vai piscar, pressione E para selecionar o mês.
Pressionar C fará piscar a data, pressione E para selecionar a data. Pressionar C fará piscar o dia,
pressione E para selecionar o dia.
* Ao ajustar a data, mantenha pressionada a tecla E para ativar o adiantamento rápido dos números.
* Se nenhuma tecla for pressionada por 60 segundos, o modo de ajuste do calendário voltará ao modo do
calendário normal.
4. Ajuste do alarme – Pressione E para entrar no modo alarme. Pressione C por 2 segundos para entrar
no modo de ajuste do alarme. A hora vai piscar, pressione E para selecionar a hora. Pressionar C fará
piscar os minutos, pressione E para selecionar o minuto. Pressionar C fará piscar a seleção alarme/som
do alarme, pressione E para selecionar ativar ou desativar.
* Quando o alarme estiver ligado, vai fazer bipe por 20 segundos quando for a hora ajustada.
* Quando ajustar a hora do alarme, mantenha a tecla E pressionada para adiantar rápidamente os números.
* Se nenhuma tecla for pressionada por 60 segundos, o modo de ajuste do alarme voltará ao modo do alarme
normal.
5. juste do Segundo Fuso Horário – Pressione E para entrar no modo do 2º fuso horário. Pressione C por 2 segundos
para entrar no modo de ajuste do segundo fuso horário, a hora vai piscar. Pressione E para selecionar a hora.
Pressionar C fará piscar os minutos, pressione E para selecionar os minutos. Pressionar C fará piscar a seleção 12/24,
pressione E para selecionar.
* Ao ajustar a hora, mantenha pressionada a tecla E para ativar o adiantamento rápido dos números.
* Se nenhuma tecla for pressionada por 60 segundos, o modo de ajuste do 2º fuso horário voltará ao modo normal
do 2º fuso horário.
6. Funcionamento do Cronômetro - Pressione E para entrar no modo cronômetro. Pressione C para
começar a contagem. Pressione C novamente para parar a contagem. Mantenha C pressionada por 2
segundos para reajustar em zero.
som ligado som desligado som desligado som ligado
alarme ligado alarme desligado alarme ligado alarme desligado
(ライト)D
(設定)C
( モ ー ド )E
•表示:時、分、秒、日付、曜日、月。
•アラーム、時報
•12/24時表示選択、自動カレンダー
•1/100秒ストップウォッチ
•海外タイムゾーン
•バックライト
Page 20

Size: 170 x 55mm
Color: Blk
Size: 170 x 55mm
Color: Blk
2:午後9時から翌朝3時までの間は日付を合わせないで下さい。
Page 21

Size: 170 x 55mm
Color: Blk
Size: 170 x 55mm
Color: Blk
( モ ー ド )E
時刻 モード
1.バックライト:ボタンDを押すと、どのモードでもバックライトが3秒間点灯します。
2.時刻設定:Eを押すと時刻モードになります。Cを2秒間押すと、時刻設定モードになり、秒が点滅
します。Eを押すと、秒をゼロにリセットします。Cを押すと、時が点滅します。Eを押して、時を正しく設
定します。Cを押すと、分が点滅します。Eを押して、分を設定します。Cを押すと、12/24時表示選択が
点滅しま す。E を押して、選びま す。
*秒の設定時、30秒未満はゼロにリセットし、30秒以上は1分進みます。
*時刻の設定時、Eを長押しすると、数字を早送りします。
*ボタン操作のないまま60秒が経過すると、時刻設定モードは、通常の時刻モードに戻ります。
3.カレンダー設定:Eを押すとカレンダーモードになります。Cを2秒間押すと、カレンダー設定モー
ドになり、月の数字が点滅します。Eを押して、月を選びます。Cを押すと、日付が点滅します。Eを押し
て、日付を選びます。Cを押 すと、曜日が点 滅します。Eを押して、曜日を選びます。
*日付の設定時、Eを長押しすると、数字を早送りします。
*ボタン操作のないまま60秒が経過すると、カレンダー設定モードは、通常のカレンダーモードに
戻ります。
4.アラーム設定:Eを押すとアラームモードになります。Cを2秒間押すと、アラーム設定モードにな
り、時が点滅します。Eを押して、時を選びます。Cを押すと、分が点滅します。Eを押して、分を選びま
す。Cを押すと、アラーム/時報の選択が点滅します。Eを押して、オンまたはオフを選びます。
カレンダー
モード
アラーム
モード
海外タイムゾ ーン
モード
ストップウ ォッチ
モード
LCD -モードの選択
Page 22

• When the watch is underwater or wet, never use the pushers/ bezels, or set the time. Watch cases and
metal bracelets should be rinsed throughly in fresh water after being in salt water.
• Non utilizzare mai pulsanti/ corone né impostare l’ora quando l’orologio è sott’acqua a bagnato. Si
consiglia di sciacquare con acqua di rubinetto cassa e bracciale dell’orologio nel caso in cui siano stati
immersi in acqua salata
• Betätigen Sie niemals die Druckknöpfe/ Einstellringe und stellen Sie niemals die Zeit ein, wenn sich die
Uhr unter Wasser befindet oder naß ist. Uhrengehäuse und Metallambänder sollten, nachdem sie
Salzwasser ausgesetzt waren, gründlich abgespült werden.
• Quand la montre est sous l’eau ou qu’elle est mouillée, n’actionnez jamais les boutons ou la couronne, ne
réglez pas l’heure. Il est recommandé de rincer abondamment la montre á l’eau courante si les boîtiers et
les bracelets métalliques ont été au contact de l’eau de mer.
• Cuando el reloj esté bajo el agua o se encuentre mojado, nunca oprima los botones ni ajuste la hora. Los
relojes y brazaletes de metal deberán enjuagarse con abundante agua del grifo después de usarse en agua
salada.
• Quando o relógio estiver submergido ou molhado, nunca utilize os puxadores / biséis, nem ajuste a hora.
As caixas dos relógios e as correias de metal devem ser enxaguadas completamente em agua doce depois
de terem estado em agua salgada.
•
•
當手表在水中或沾濕時,切勿使用按的或表圈,或設定時間。表殼和金屬表帶接觸海水後,應用清水徹底洗干淨。
Size: 170 x 55mm
Color: Blk
Size: 170 x 55mm
Color: Blk
without any
water resistant
marking
• Always set the crown in the normal position /
Tighten screw-lock crown completely.
• Riposizionare sempre la corona in posisizione
normale / Stringere completamente la corona a vite
• Die Krone nach Handhabungen immer auf die
Normalposition zurückdrücken und niemals unter
Wasser herausziehen. Schraubkronen: nach jeder
Handhabung die Krone unbedingt wieder
festschrauben.
• La couronne doit toujours ètre en position normale
/ Serrer à fond la vis de blocage de la couronne
• Coloque la corona en su posicion habitual / Apriete
por completo el cierre de la corona
• Sempre ajuste a coroa na posição normal / Aperte a
rosca da coroa completamente.
•
•
務必把表把設定在正常位置/完�扭緊螺絲鎖入式表把。
*アラームがオンになっていると、設定された時刻に20秒間鳴ります。
*アラーム時刻の設定時、Eを長押しすると、数字を早送りします。
*ボタン操作のないまま60秒が経過すると、アラーム設定モードは、通常のアラームモードに戻ります。
5.海外タイムゾーン設定:Eを押すと海外タイムゾーンモードになります。Cを2秒間押すと、海外タイムゾ
ーン設定モードになり、時が点滅します。Eを押して、時を選びます。Cを押すと、分が点滅します。Eを押し
て、分を設定します。Cを押すと、12/24時表示選択が点滅します。Eを押して、選びます。
*時刻の設定時、Eを長押しすると、数字を早送りします。
*ボタン操作のないまま60秒が経過すると、海外タイムゾーン設定モードは、通常の海外タイムゾーンモ
ードに戻りま す。
6.ストップウォッチ操作:Eを押すとストップウォッチモードになります。Cを押すと、計測をスタートします。
Cをもう一度押すと、計測をストップします。Cを2秒間押すと、ゼロにリセットします。
時報オン
アラームオン アラームオン
時報オン時報オフ
アラームオフ アラーム オフ
時報オフ
Page 23

Size: 85 x 55mm
 Loading...