

Page 1
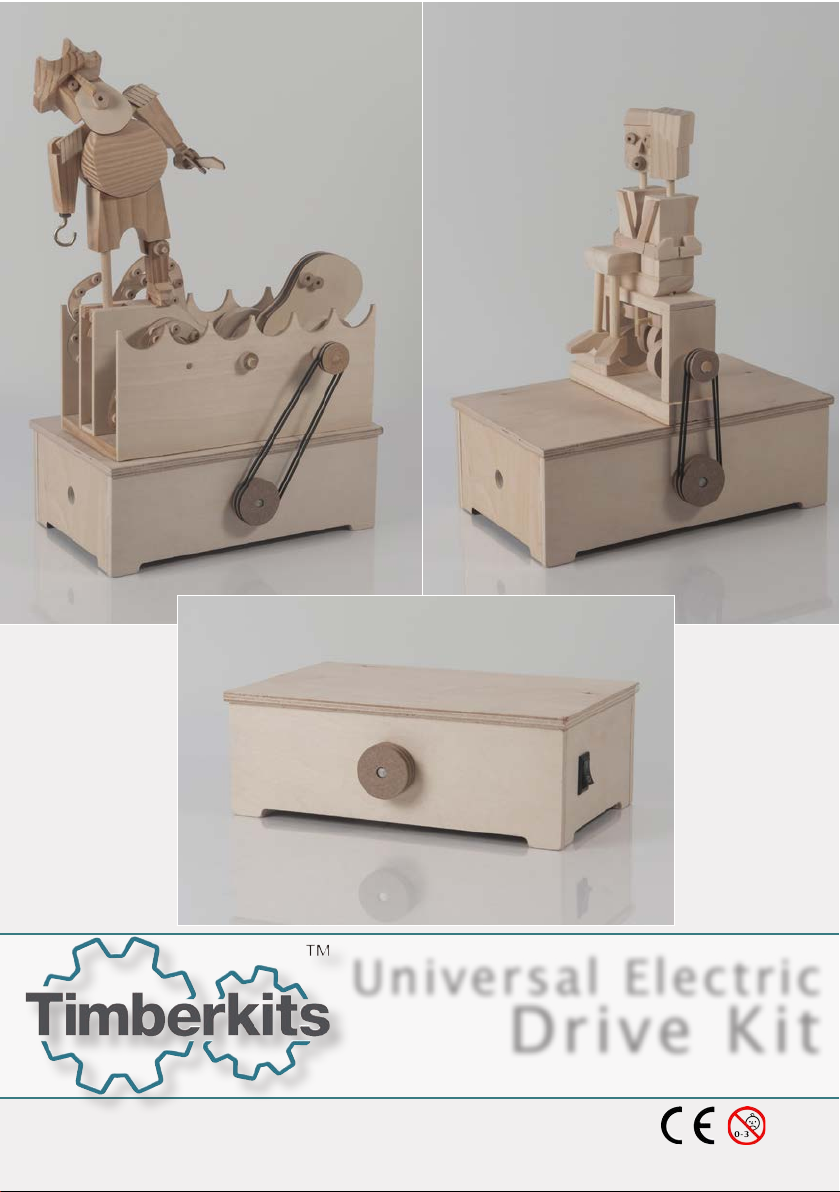
Universal Electric
Drive Kit
Models shown mounted on Electric Drive are not
included
Page 2
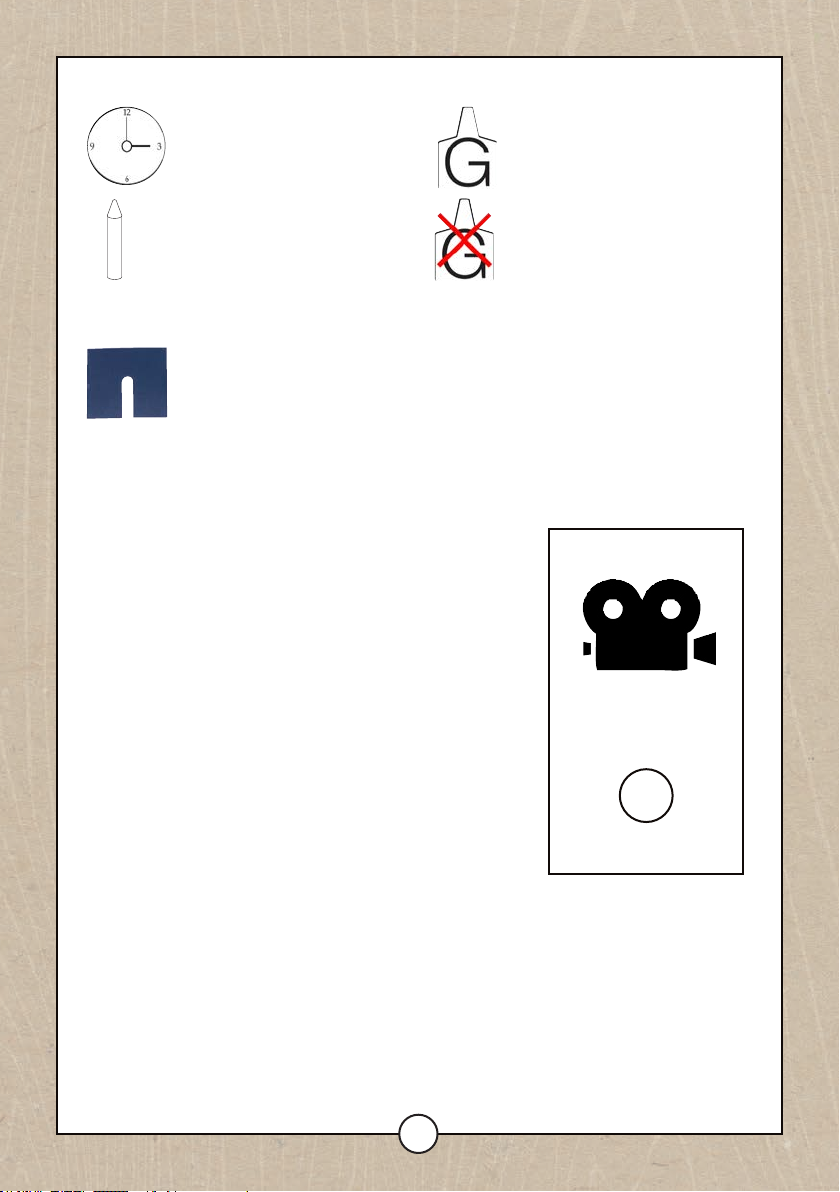
(UK) Symbols in these instructions. (FR) Symboles des instructions. (ESP) Simbolos en estas instrucciones. (IT) Simboli
in queste istruzioni. (Ger) Symbole in dieser anleitung
Helpful hints/conseils utiles/consejos utiles/suggerimentutili/nützliche tipps
(UK) Check all parts present in trays
(FR) Vérier que toutes les pièces soient présentes dans les bacs
(ESP) Controlar que hay todas la partes en la caja
(IT) Controllare tutte le parti presenti nel kit
(DE) Bitte prüfen sie, ob alle benötigten teile vorhanden sind
(UK) Read all instructions and look at all diagrams
(FR) Lire toutes les instructions et regarder toutes les gures
(ESP) Leer las intrucciones y guardar a los diagrames
(IT) Leggere tutte le istruzioni e guardare i diagrammi
(DE) Lesen sie alle anweisungen und betrachten sie die schaubilder
(UK) Check assembly before gluing
(FR) Vérier le montage avant collage
(ESP) Controlar el montaje antes de empezar a pegar
(IT) Controllare l’assemblaggio prima di incollare
(DE) Montage prüfen vor dem einklebern
(UK) Some parts may need sanding
(FR) Certaines pièces nécessiteront d’être poncées.
(ESP) Algunas parte necesitan de ser suavizadas
(IT) Alcune parti potrebbero aver bisogno di levigatura
(DE) Möglicherweise müssen manche teile geschlien werden
Colouring tips/conseils concernant l’application de peinture/ consejos para Pintar/ suggerimenti per colorare/
lackiertipps
(UK) Do not apply paint to parts which move against one another. It is easier to paint some parts before
assembling
(FR) Ne pas appliquer de peinture sur les parties qui se déplacent l’une contre l’autre. Il est conseillé de pein
dre avant assemblage
(ESP) No aplique la pintura sobre las partes que se tocaran. Resulta mas facil pintar las partes antes de montar.
(IT) Non applicare la pittura su quelle parti dove ce attrito con un’altra parte. è piu semplice pitturare alcune
parti prima della fase di assemblaggio.
(DE) Teile, die aneinander reiben, sollten nicht lackiert werden. Fertig lackierte teile sind o leichter zu
montieren
(UK) Waiting time.
(FR) Temps d’attente.
(ESP) Tiempo de espera.
(IT) Tempo d’attesa.
(DE) Wartezeit.
(UK) Wax surface to lubricate.
(FR) Appliquer la cire sur cette
surface.
(ESP) Aplica la cera sobre esta su-
percie.
(IT) Applicare la cera su questa
supercie
(DE) Wax Oberäche zu schmieren.
(UK) Glue guard. Prevents glue getting between moving parts during build. Remove after 2
minutes.
(FR) Piece de protection contre la colle. Pendant l’assemblage, eviter tout depôt de colle sur les
pieces en mouvement. Enlever apres 2 minutes.
(ESP) Parte de protection de el pegamento. Durante la fase de esambalje, evitar que el pegamento
se ponga sobre partes que se mueven. Quitar despues de dos minutos .
(IT) Pezzo di protezione della colla. Durante l’assemblaggio evitare che la colla vada su parti non
statiche . Imuovere dopo due minuti.
(DE) Karton. Verhindert das eindringen von leim zwischen die bewegliche teile während der
montage. Zwischen die beweglichen Teile.
(UK) Glue.
(FR) Coller.
(ESP) Pegar.
(IT) Incollare.
(DE) Leimen
(UK) Don’t glue.
(FR) Ne pas coller.
(ESP) No pegar.
(IT) Non incollare.
(DE) Nicht leimen.
New Symbols in our
Instructions
Visit our website to view
instructional videos where you
see this symbol.
www.timberkits.com
!
Pay special attention to this
section.
1
Page 3

Or visit our website for tips, advice and our
instructional videos.
2
Page 4
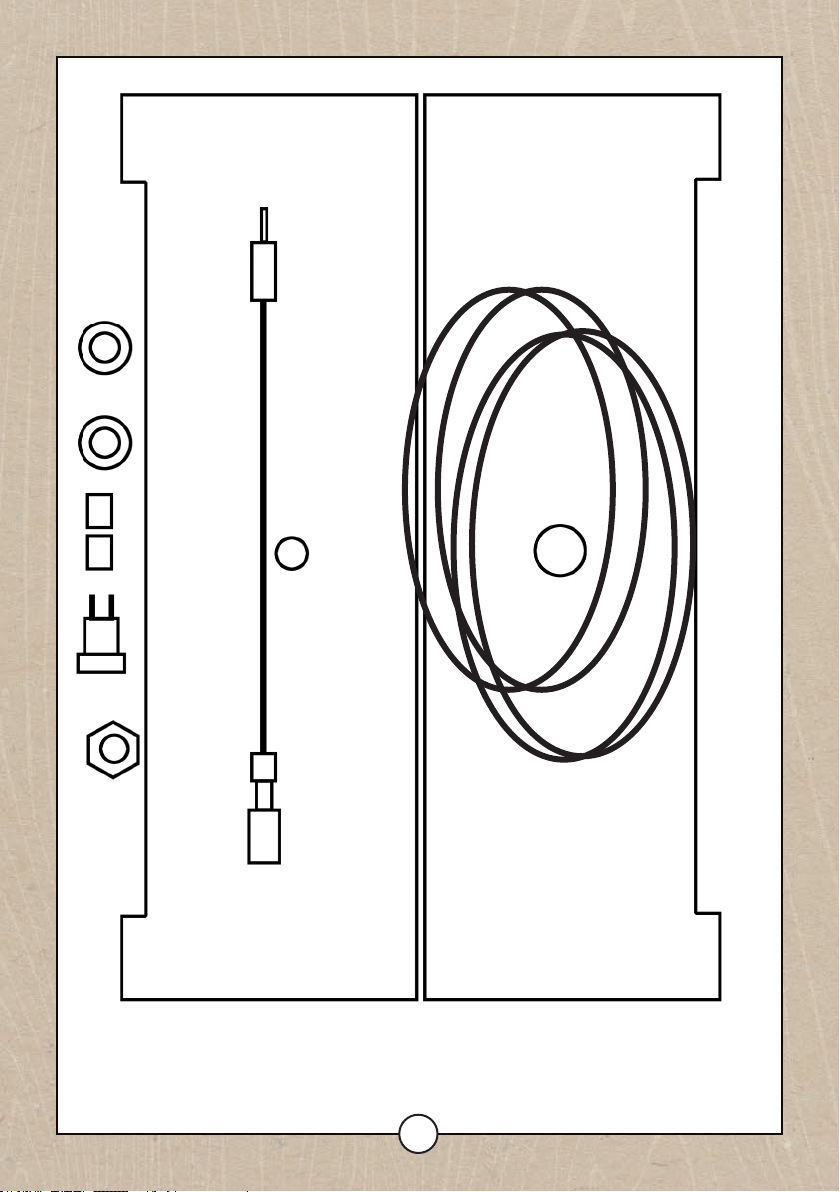
6 (Under)
5
4
16
16
19
19
8
9
20
Cable for connecting
socket to switch
17
18
3
Page 5
15 15 15
2 and 3
14
1 x2
7
10
10
1 x2
12
11
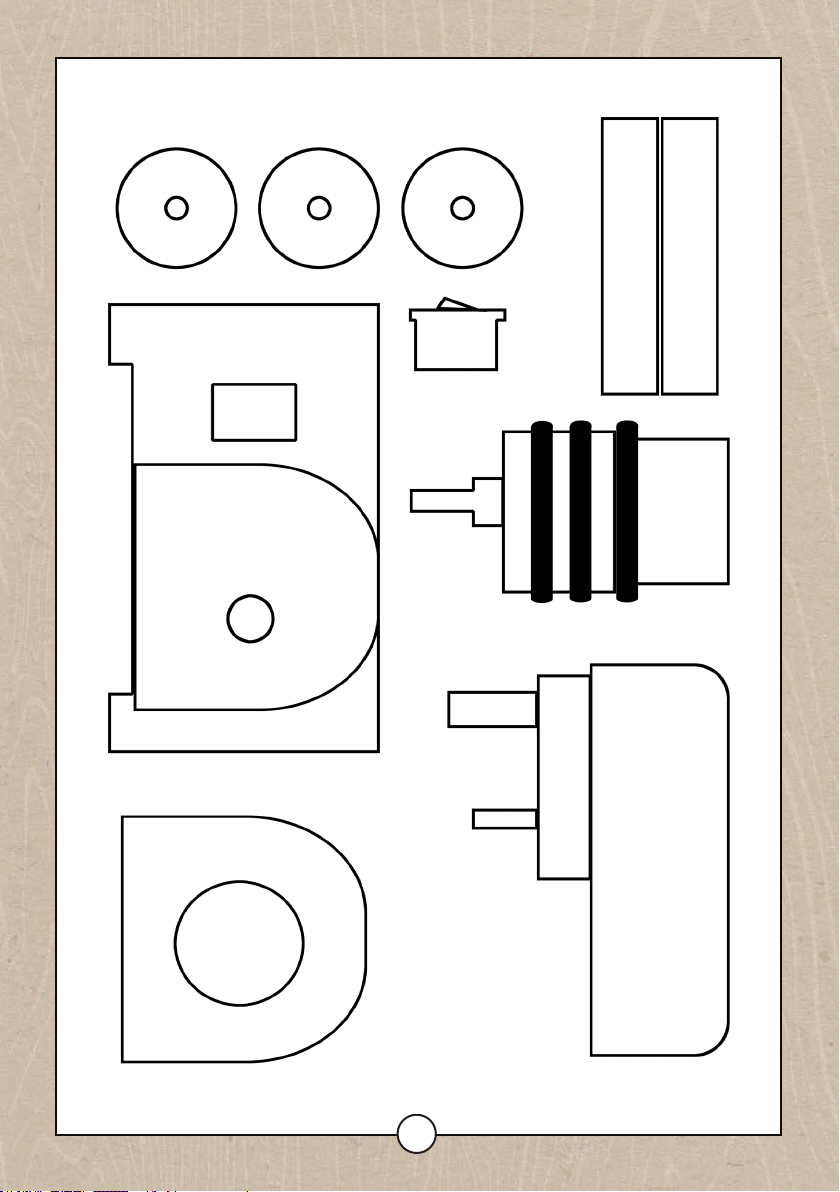
Mains adapter
(Wire not shown)
7
13
4
Page 6
1
1
2
1
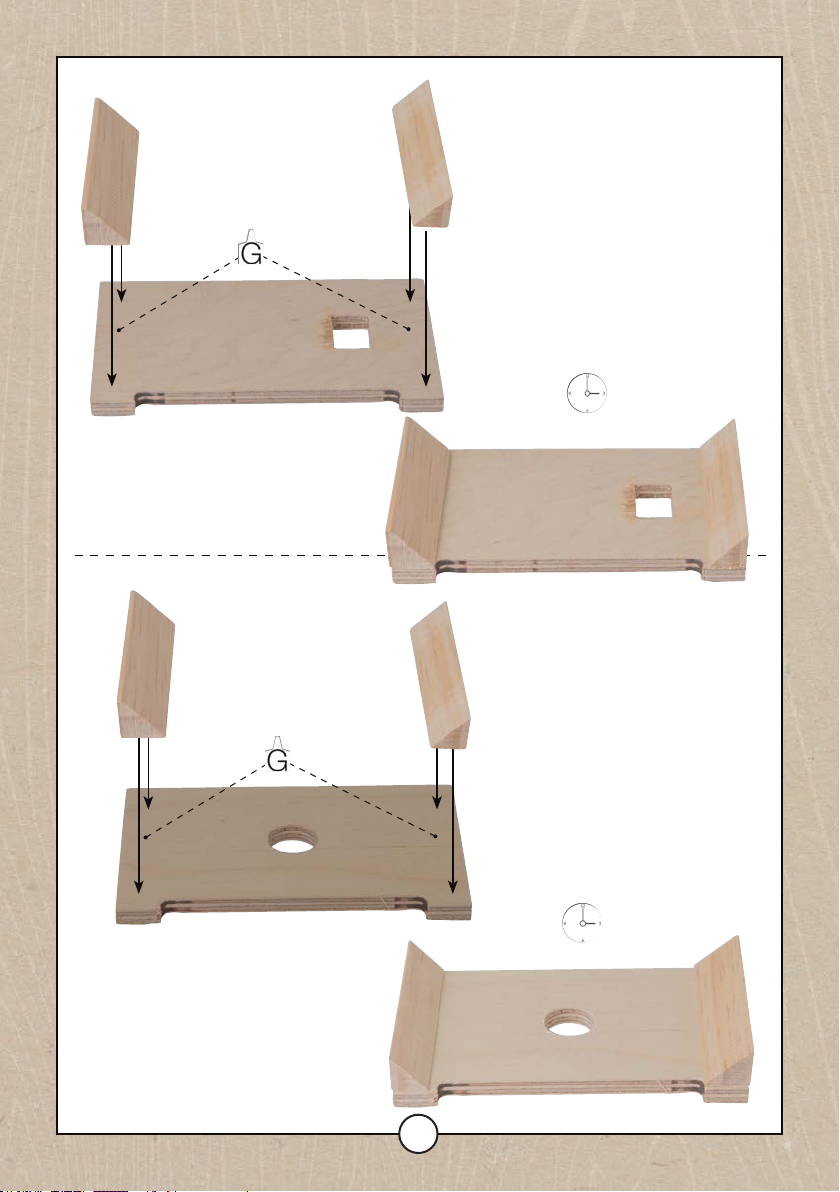
Read the instructions carefully before
starting. If possible, build the model
alongside the electric drive kit but
don’t worry if you have already
built the model. The handle can be
removed and we will show you how
later in the instructions. Any model in
the Timberkits Range can be tted to
this electric drive kit apart from the
Ballista, Chuy Train and Trebuchet.
10mins
2
1
3
1
10mins
5
Page 7
3
4
4
5
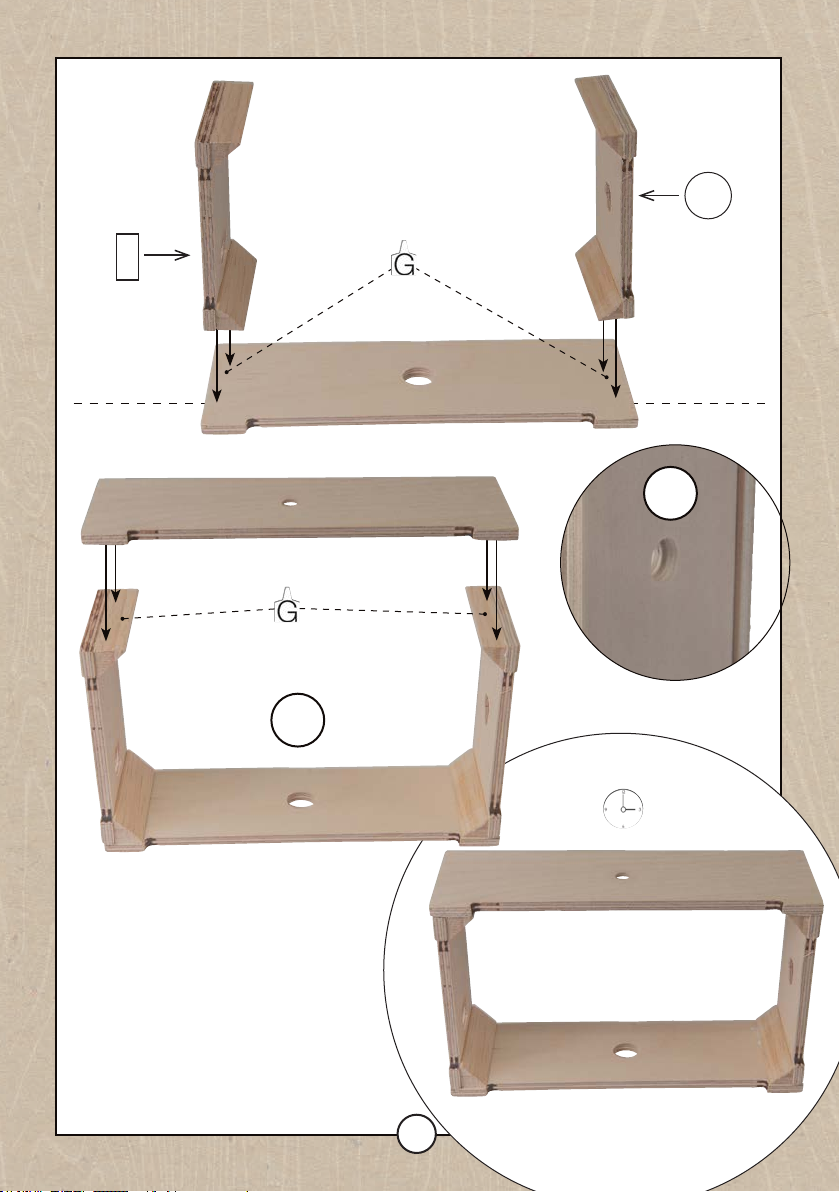
The hole in part #5 has a slight step to
accomodate the shape of the socket.
Please ensure this is facing outwards.
!
!
10mins
6
Page 8
5
6
6
10mins
7
7
Page 9
7
8
8
9
12
9
10
10
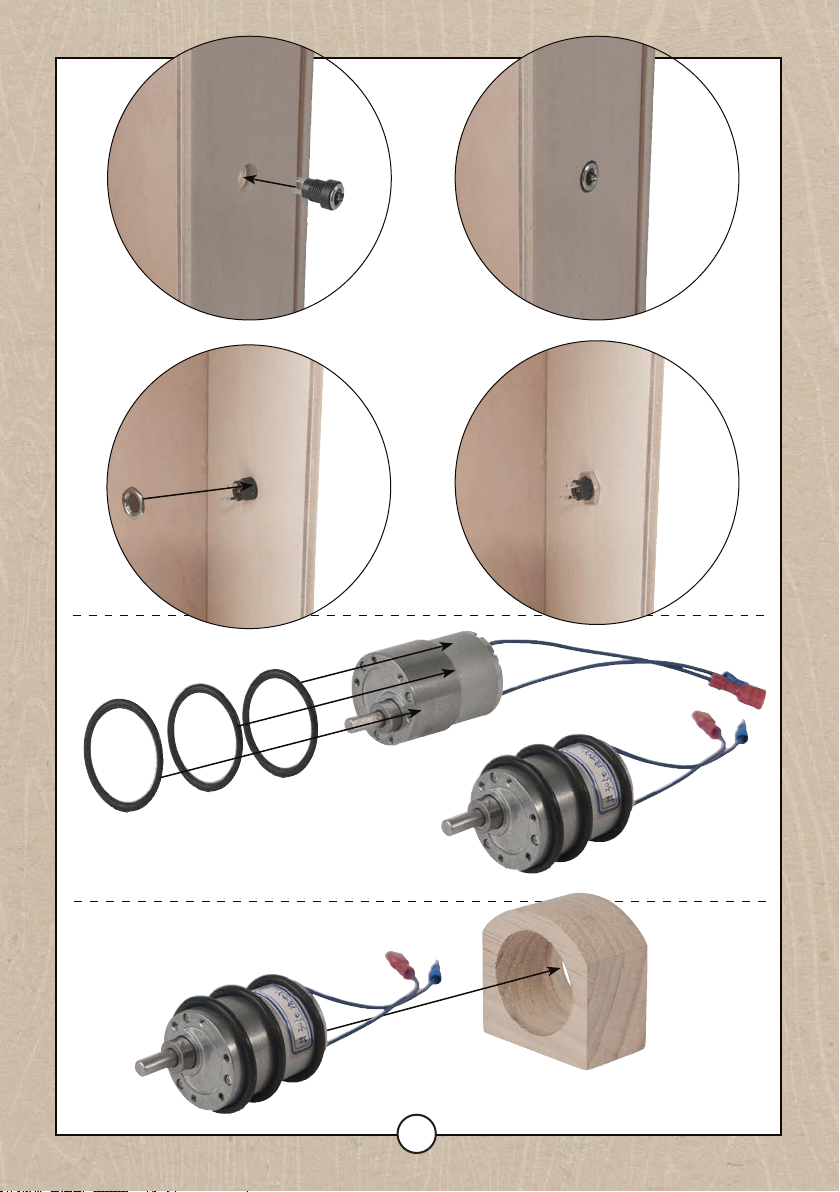
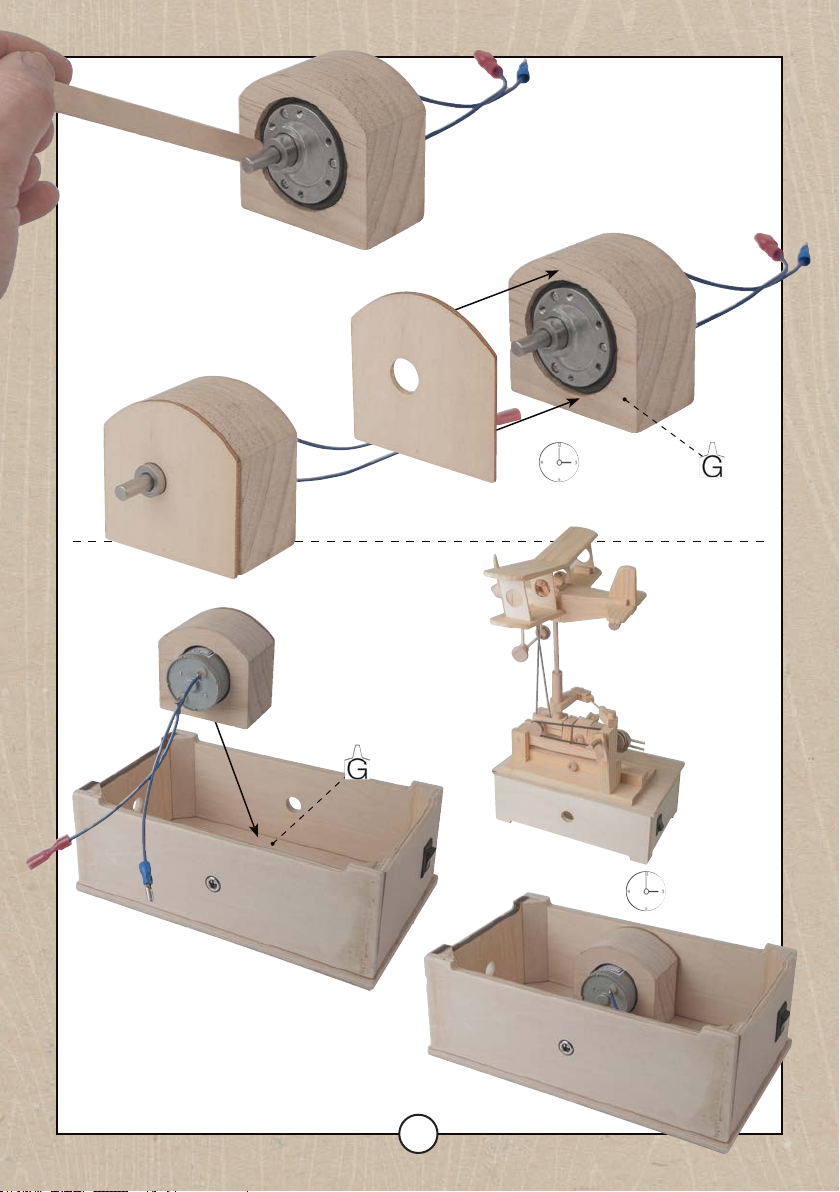
When sliding bands over motor ensure
they are put on in the order shown.
Band # 11 is slightly smaller to t the
narrow part of the motor.
11
9a
13
8
Page 10
10
9b
Use lolly stick provided to push the
bands into place as shown.
Ensure the spindle of the motor is
correctly aligned before inserting fully
as it is hard to turn when in. It should
align with the cover part #14
14
10mins
Example of a model with
a side handle location.
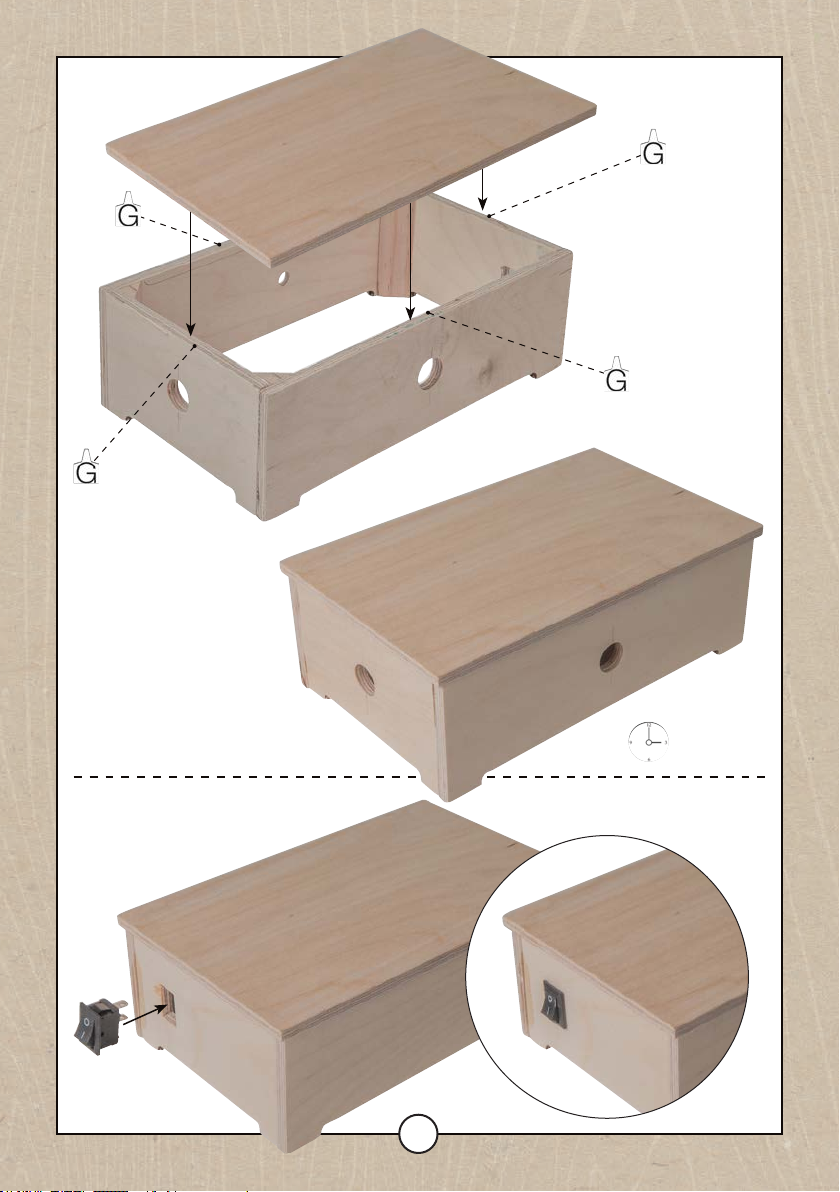
Do not glue the model to
the base at this point.
Option 1 Front motor mount
Assemble base this way if
Timberkits model requires the
motor mounted on the side.
15mins
9
Page 11
11
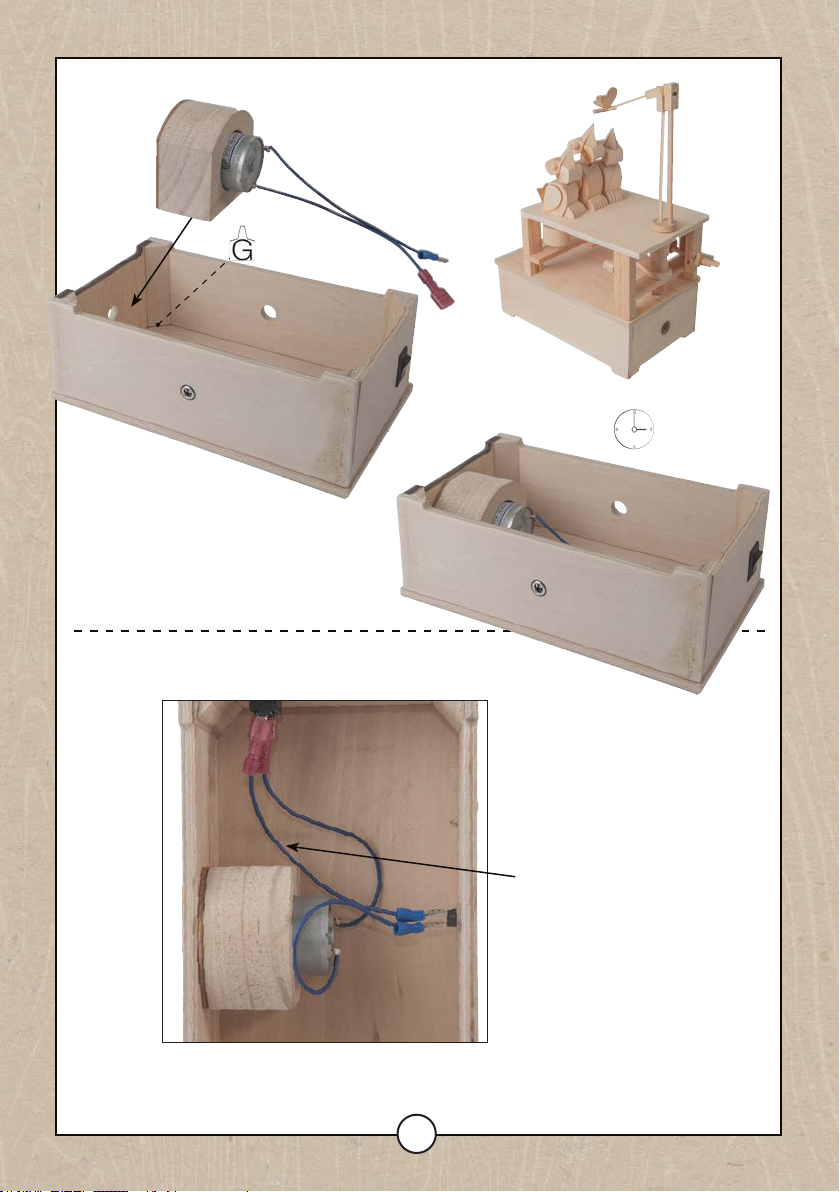
Option 2 End motor mount
Assemble base this way if
Timberkits model requires the
motor mounted on the end.
12
Example of a model with an
end handle location. Do not
glue model to base at this
point.
15mins
10
Connect blue wires to back of socket
and the red to the switch.
20
Page 12
13
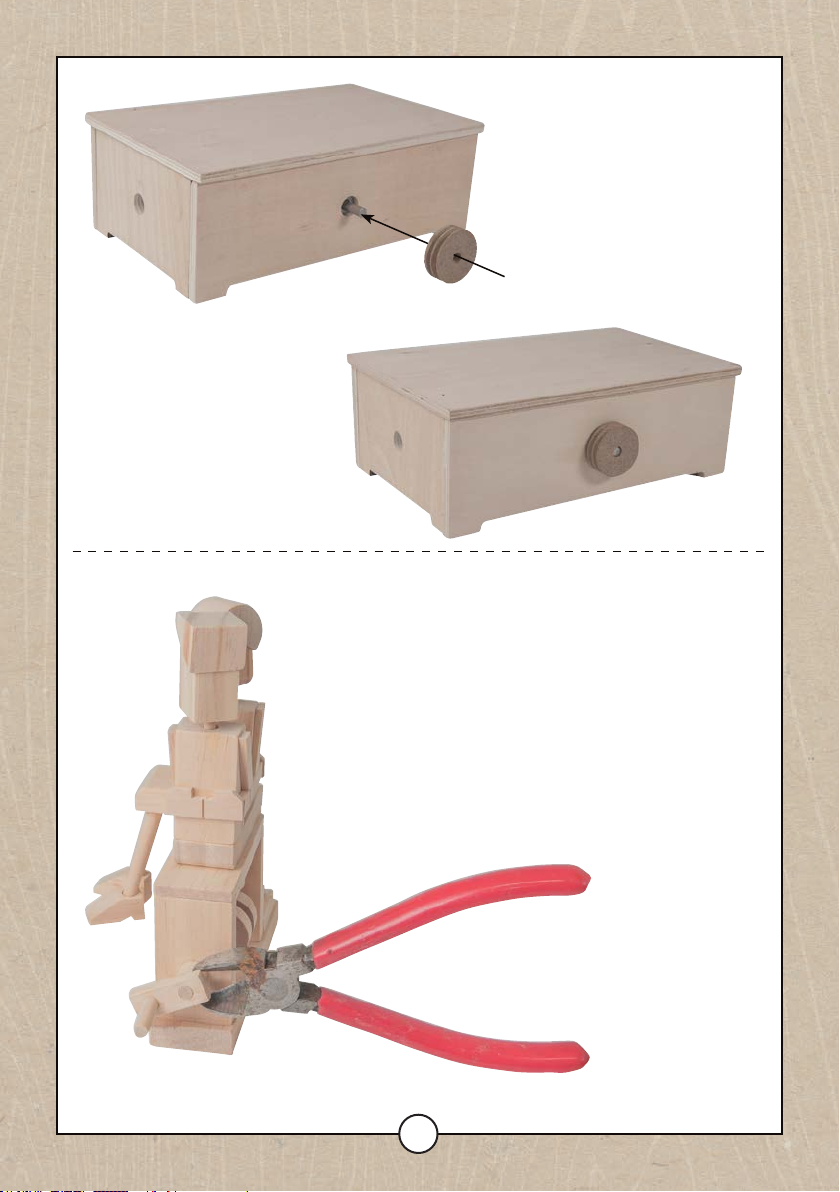
When tting the pulley wheel (part 15) use a
small dot of superglue on the metal spindle
before pushing into place. Do not push too
tight against the side of the box
15
(Superglue not supplied)
13a
To convert a manually operated model you will need to replace the
handle with a pulley wheel that will take the drive belts.
If you have already built the model, carefully remove the
handle crank and the spacer behind it with side cutters (or
similar) as shown. Be careful not to cut through the main
drive shaft. Then proceed as shown on the next page.
11
Page 13
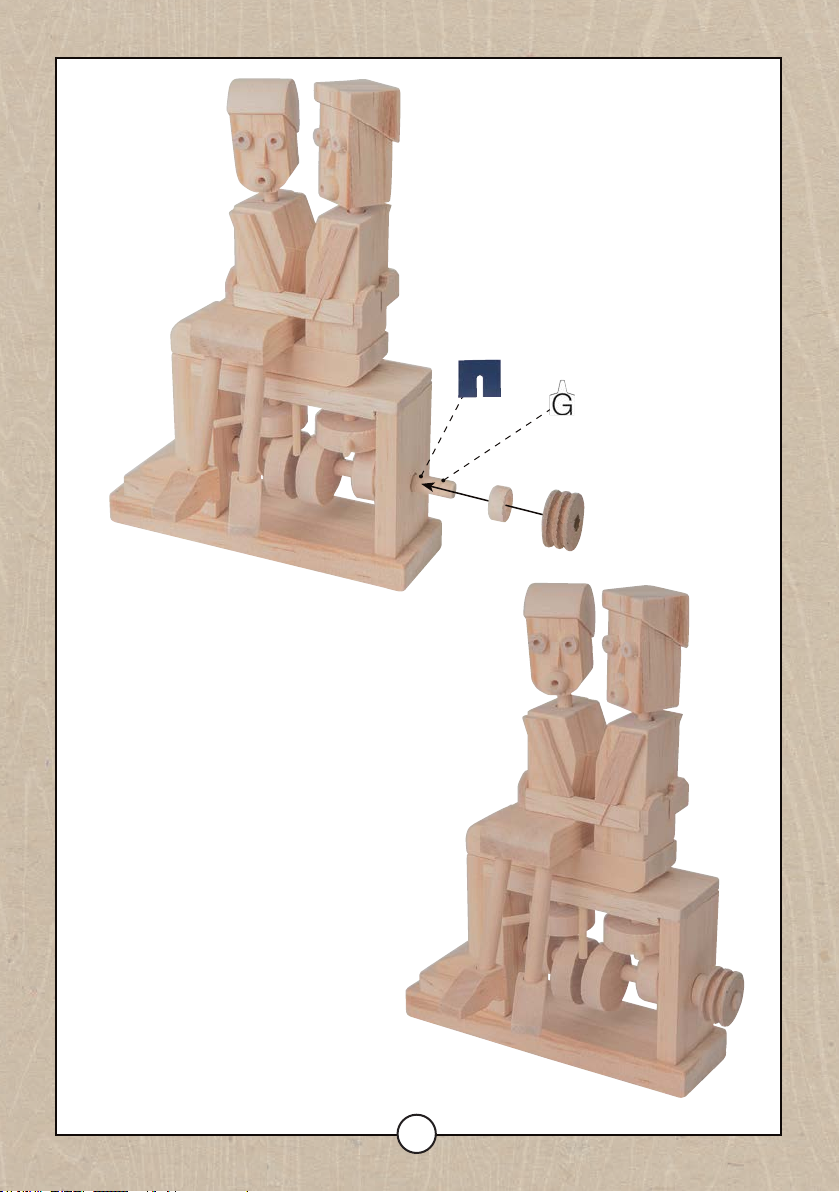
13b
This method is the same for all models with a single drive
For models with two drive mechanisims, such as the
Vintage Car or Stephensons Rocket, follow the steps on
mechanisim.
page 14.
16
15
12
Page 14
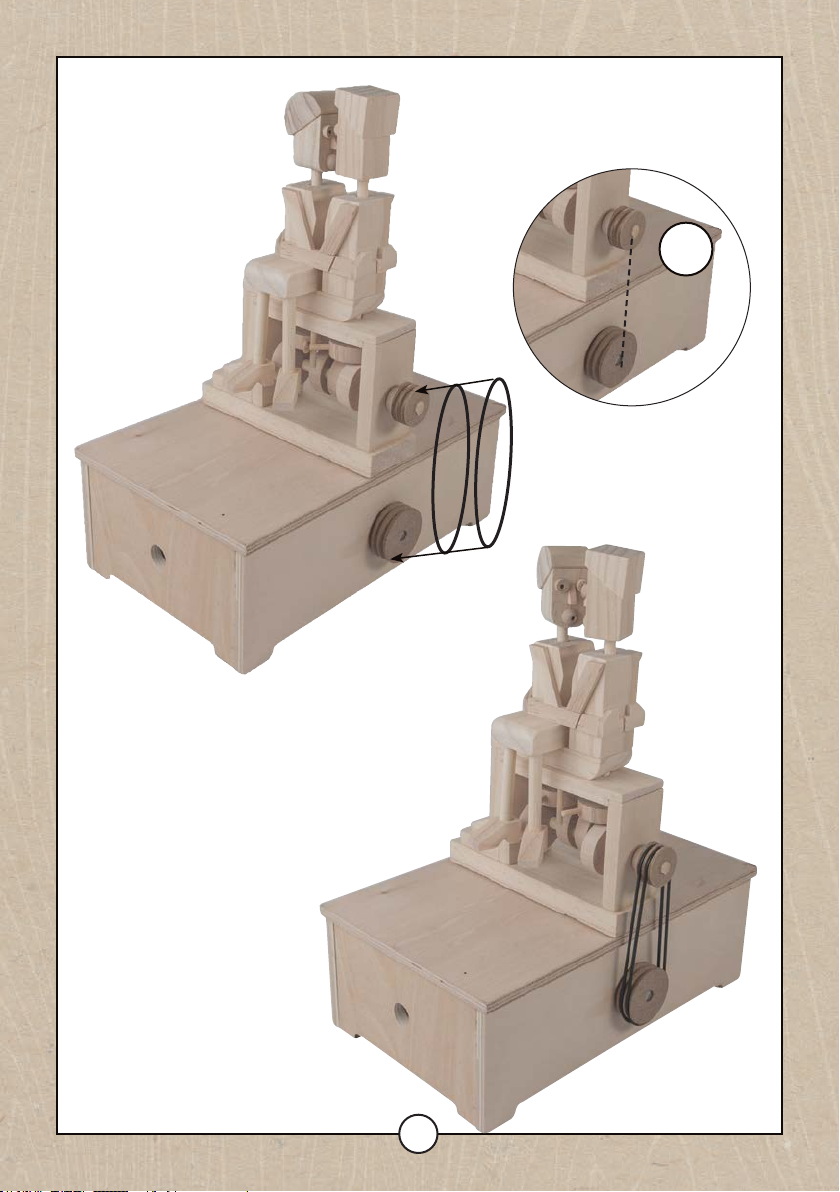
13c
Fix the model to the base using either glue or strong double
sided tape (if you would like to use dierent models on the
Ensure correct alignment
base).
!
17 or 18
Select the most suitable
length of drive belts for
your model.
17 or 18
13
Page 15
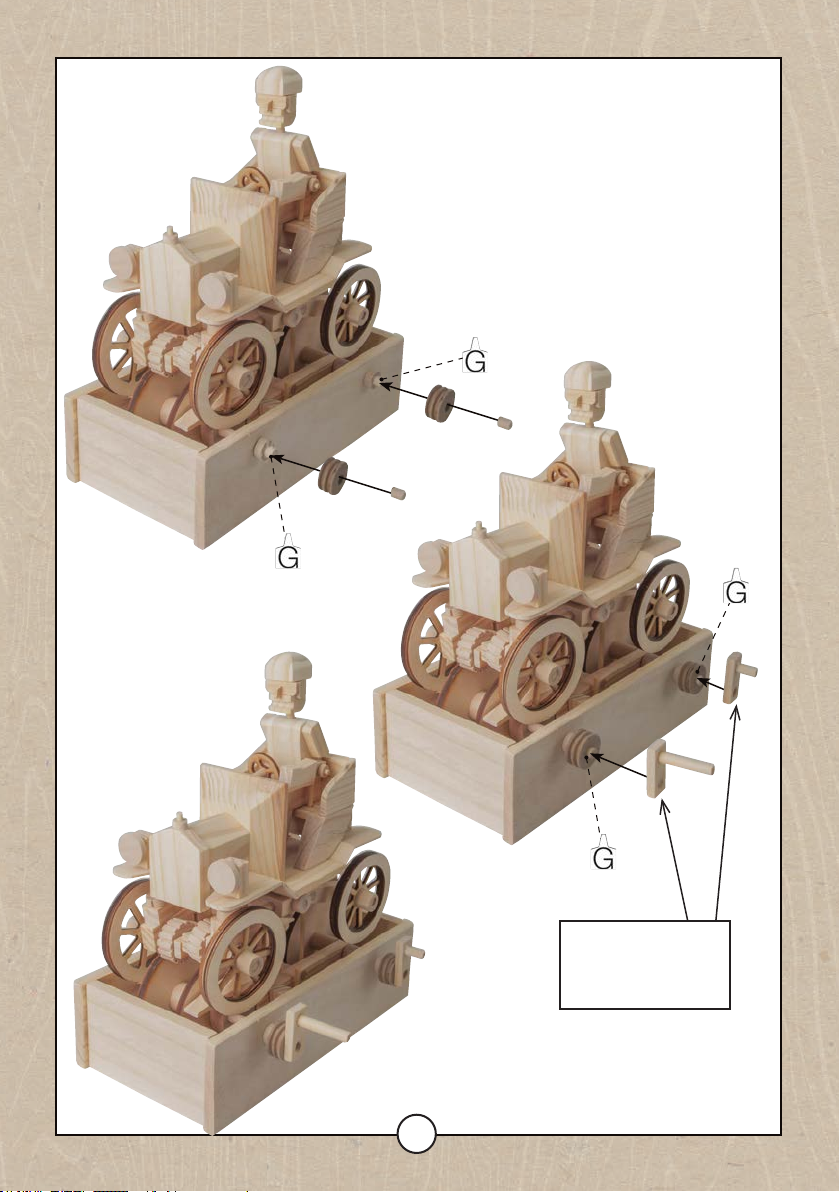
14
14a
Stephenson’s Rocket and Vintage Car: The pulley wheels
cannot be tted retrospectively on these two kits.
Follow the colour photo instructions for making the
hand-operated Rocket up to Stage 18 and the Vintage Car
You now need to extend the two drive axles to
accommodate the two pulley wheels needed to drive the
model. To do this follow the photos shown below. These
photos show the extension being done on a nished
model but you will be doing this before you push the main
12
up to Stage 35/36.
drive shafts through the model bases.
14
12
14
These parts are found
in the Vintage Car and
Stephenson’s Rocket kits.
Align as shown in the
main kit instructions
14b
14
Page 16
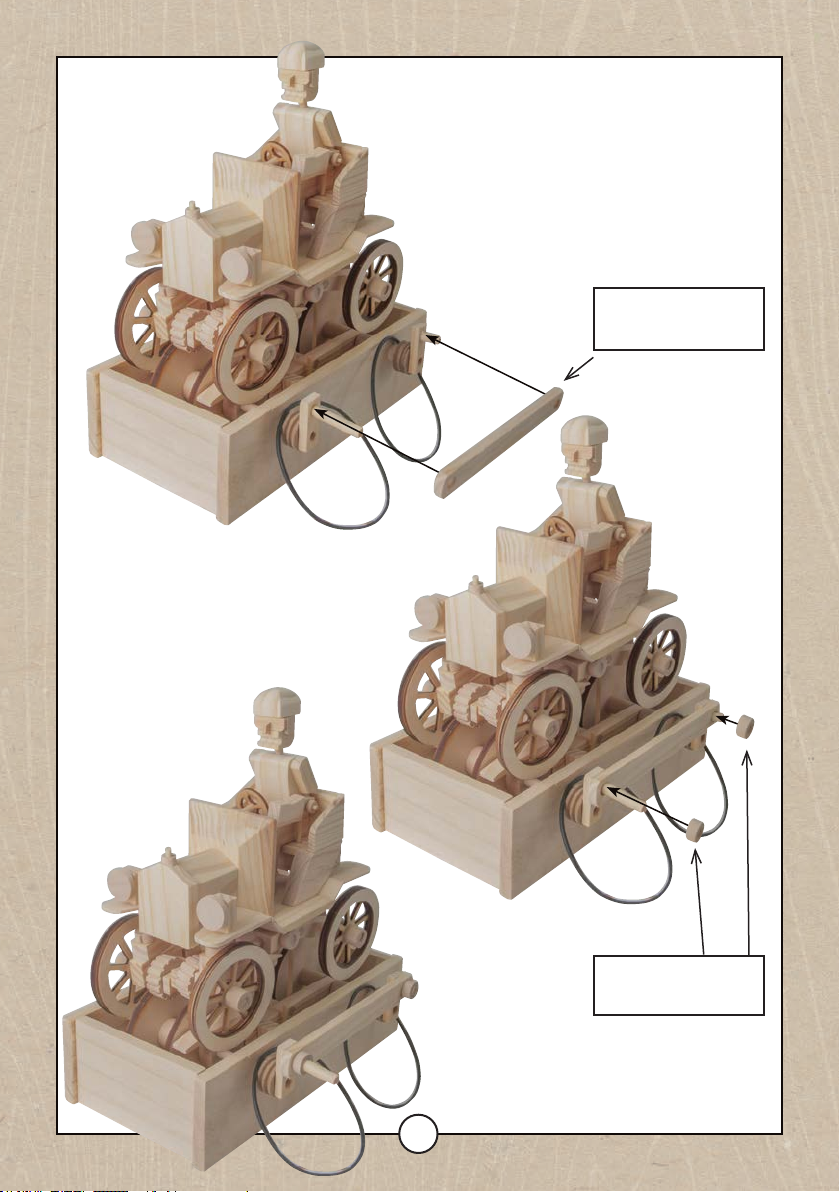
14c
Place the 2 drive belts onto the model at
Select the shortest pair of bands provided
this stage,
for your model.
These parts are found in
the Vintage Car and
Stephenson’s Rocket kits.
14d
15
These parts are found in
the Vintage Car and
Stephenson’s Rocket kits.
Page 17
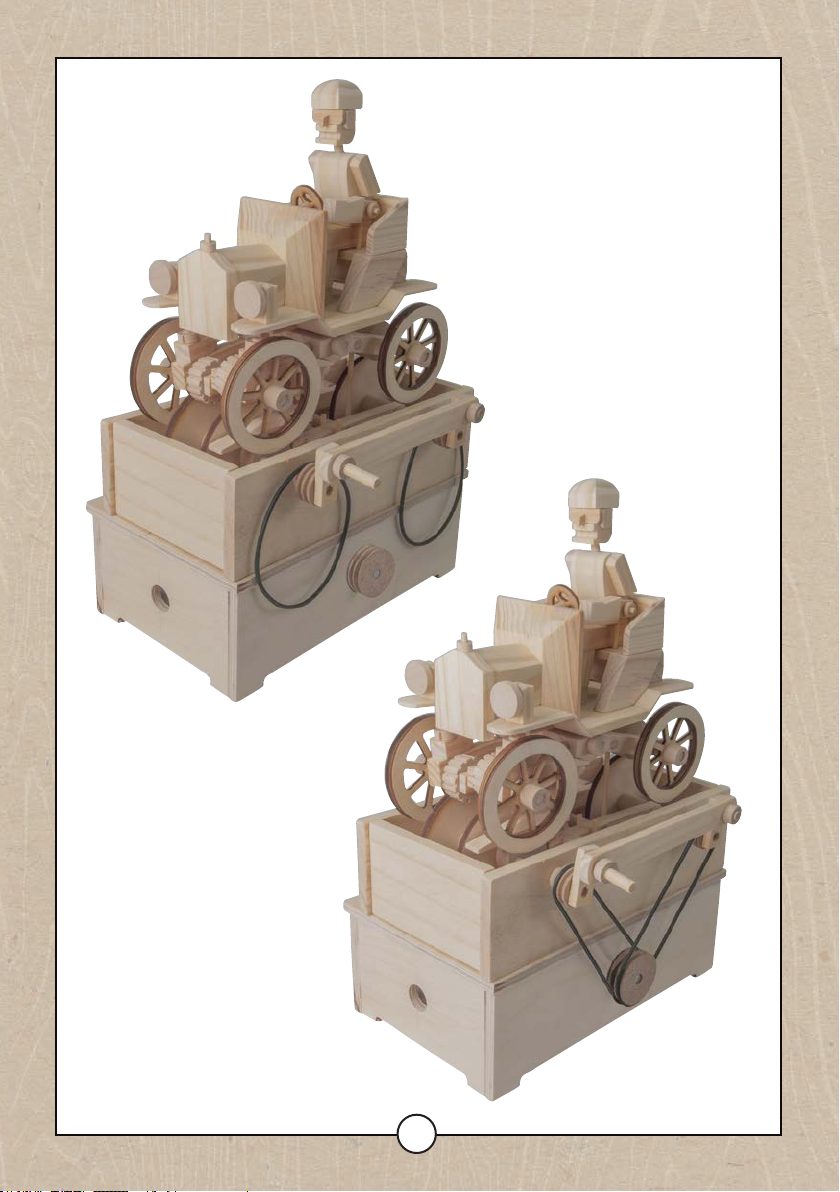
14e
Fix the model to the base using either glue or strong
double sided tape (if you would like to use dierent
models on the base).
16
Page 18
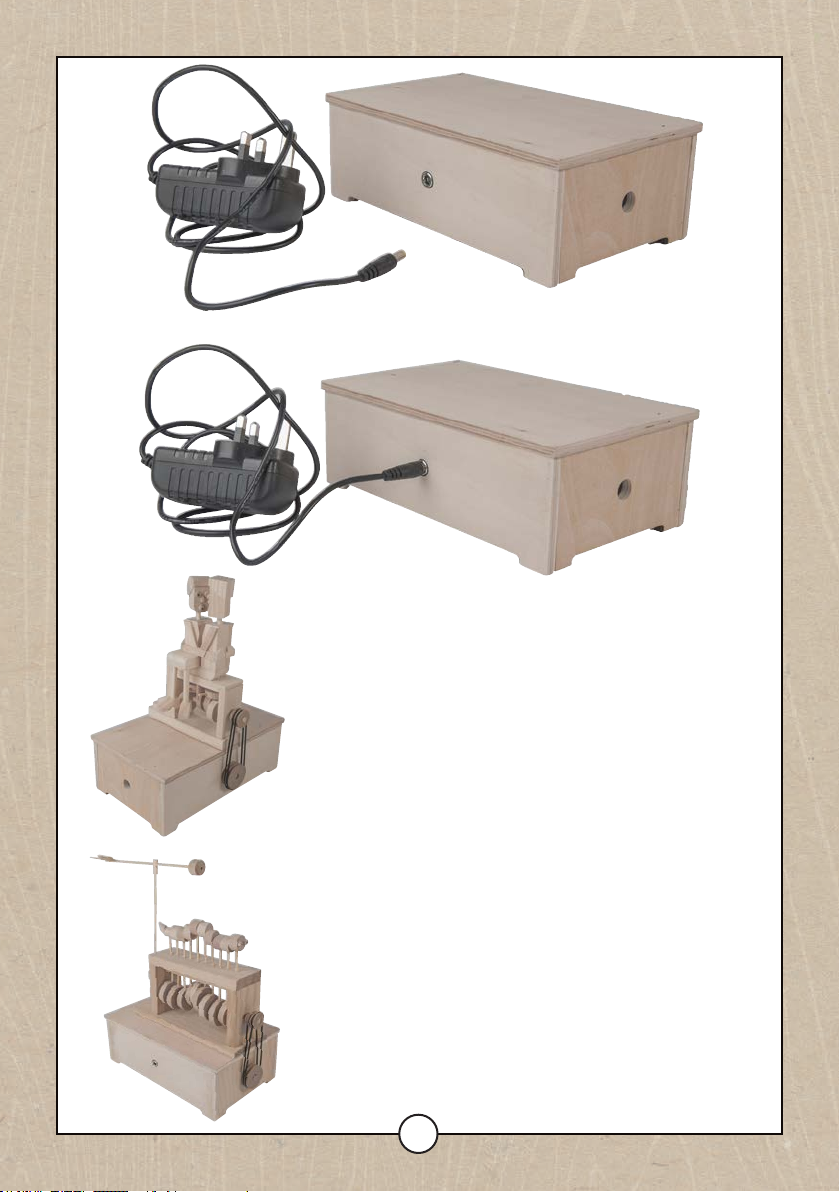
Plug the adapter into the socket on the base. Do this before plugging into the mains.
The following models require the motor to be mounted on the
• Skateboarder
• T-Rex
• Fish
• Pirate Panic
• Rower
• Beam Engine
• Bi-Plane
• London City Scape
• Salty Sailor
• Ocean Motion
The following models require the motor to be mounted on the
• Accordion Player
• Caterpillar
• Double Bass Player
• Cheeky Monkey
• Chirpy Chicks
• Xylophone
side of the base
• Dragon
• Drummer
• Guitarist
• Pianist
• Magician
• Vintage Car
• Stephensons Rocket
• Uni-Cyclist
• Kissing Couple
• Medieval Mayhem
end of the base
17
Page 19
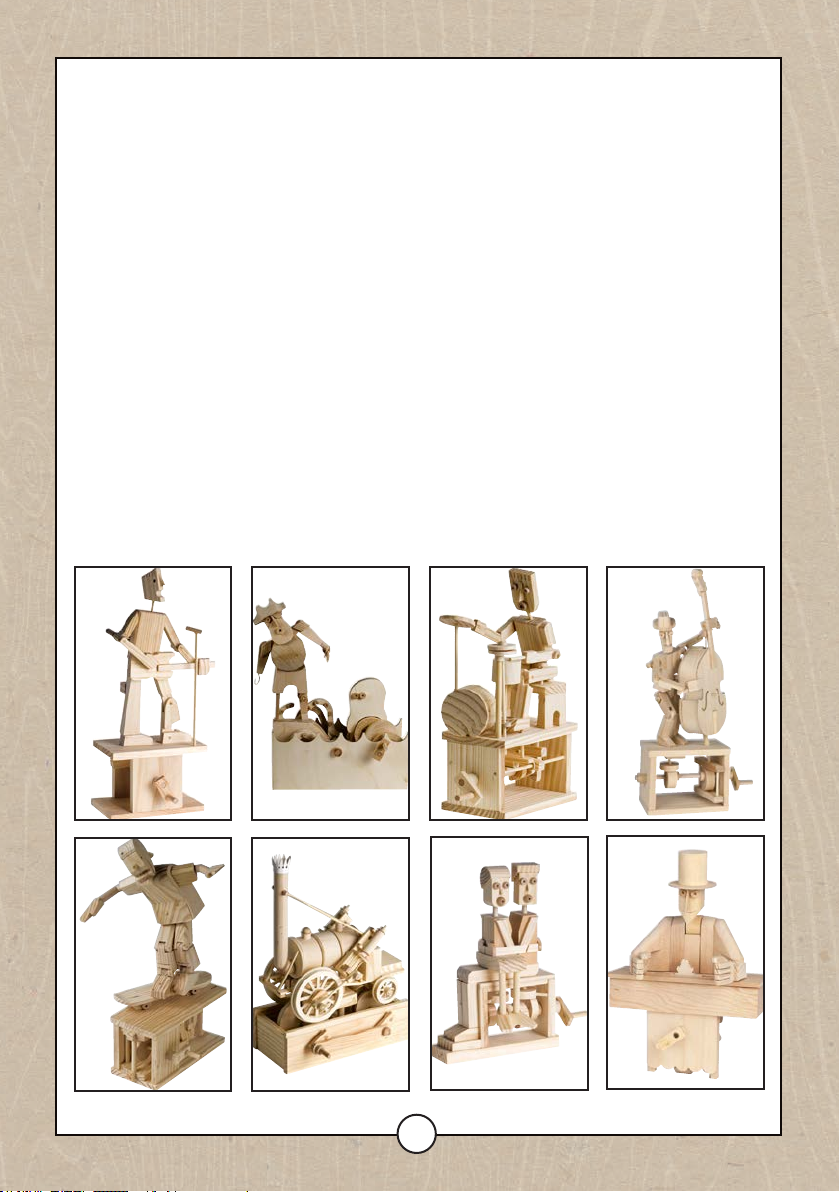
(UK) If you enjoyed building this model why not try our others. Available
directly from Timberkits Ltd or from our UK, European or worldwide retail
partners. Check our website to nd your nearest stockist.
(FR) Si vous avez apprecie construire ce modele, pourquoi ne pas en essayer
d’autres. Ils sont disponibles chez Timberkits Ltd ou chez nos partenaires
detaillants au Royaume Uni, en Europe et plus largement dans le monde.
(SP) Si te has divertido con este modelo, porque no pruebas los ademas. Estan
todos disponibles directamente desde Timberkit Ltd o desde las nuestra
tiendas en Reino Unido, Europa o en otros continentes. Visita el nuestro
sitio web para conocer el punto vendida mas cercano.
(IT) Se ti sei entusiasmato a costruire questo modello, perche non provare gli
altri. Sono disponibili direttamente dalla Timberkits Ltd oppure dai nostri
rivenditori in Gran Bretagna, Europa e altri continenti. Visita il nostro sito
web per trovare il più vicino punto vendita.
(DE) Wenn sie freude daran hatten, dieses modell zu bauen, wieso nicht die
anderen ausprobieren. Sie können direkt bei Timberkits Ltd bestellen oder
bei unseren handelspartnern in Großbritannien, Europa und weltweit.
Besuchen sie unsere webseite für ihren nächstgelegenen händ-ler.
www.timberkits.com
18
Page 20
Timberkits Limited
Old Village Hall
Llanbrynmair
Powys, SY19 7AA
00 (44) (0) 1650 521635
www.timberkits.com
Timberkits logo and all Timberkits designs are Copyright (©) 2014 all rights
reserved.
 Loading...