

TigerStop Ethernet-to-Serial, ESC 4.1 Installation & User Manual
E2 / 2009 ESC 4.1
TigerStop® Ethernet-to-Serial Converter
Installation & User’s Guide v4.1
June 2009 TigerStop Version 5.03+
CONTACT:
TigerStop LLC, Assembly Plant, 12909 NE 95
Tel: 360 448-6102 ● Fax: 360 260-0755 ● Website: www.tigerstop.com ● Email: service@tigerstop.com
© 2009 TigerStop LLC
th
St., Vancouver, WA 98682 U.S.A.

Ethernet to Serial Converter
Description and Use
The ESC is an Ethernet-RS232 adapter that lets
you plug TigerStop into an ethernet network,
eliminating the need for a serial port on your
computer or a short haul modem, and permitting
communication with TigerStop across your
network.
Fig. 1
System Specification
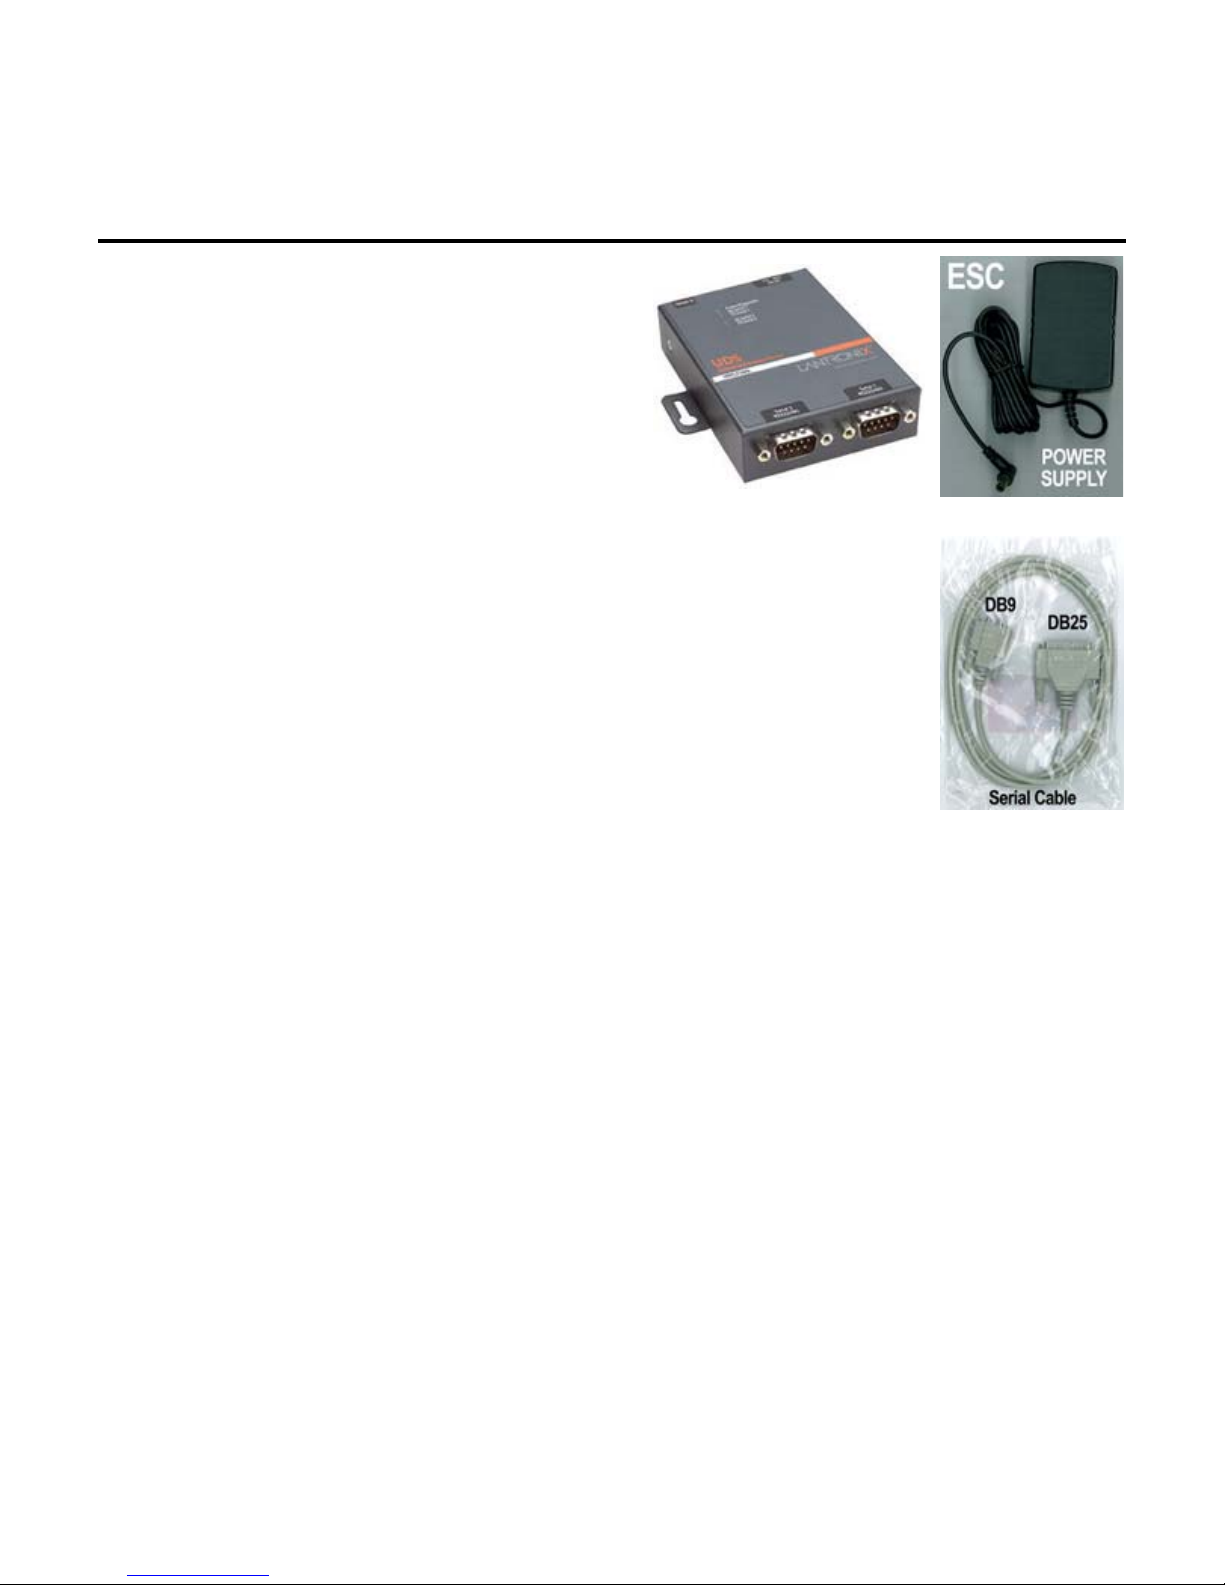
The ESC consists of the adapter (Fig. 1) and its power cord (Fig. 2). The
adapter has two DB25 serial ports, allowing one ESC to connect to two
TigerStops. One serial cable is included (Fig. 3).
The ESC is compatible with…
any Ethernet network
any TigerStop enabled with the TigerSet, Optimizer, or Download
software packages.
Workflow Manager 5.4 (or TigerLink version 5.0 or higher)
The connection to the TigerStop requires a straight-through serial cable with
a male DB25 connector on one end, and a female DB9 connector on the
other end.
The connection to the network requires a standard straight-through CAT5
Ethernet cable with standard RJ45 connectors on each end. This is also
available at any electronics or computer store.
ESC
Fig. 2
Fig. 3
1
Installation and Setup
Controller Setup
On the TigerStop side of the installation, the controller has no specific setup requirements, but
the user must know the controller’s baud rate. The default setting is 115200, but this can be
checked or changed in the System Menu.
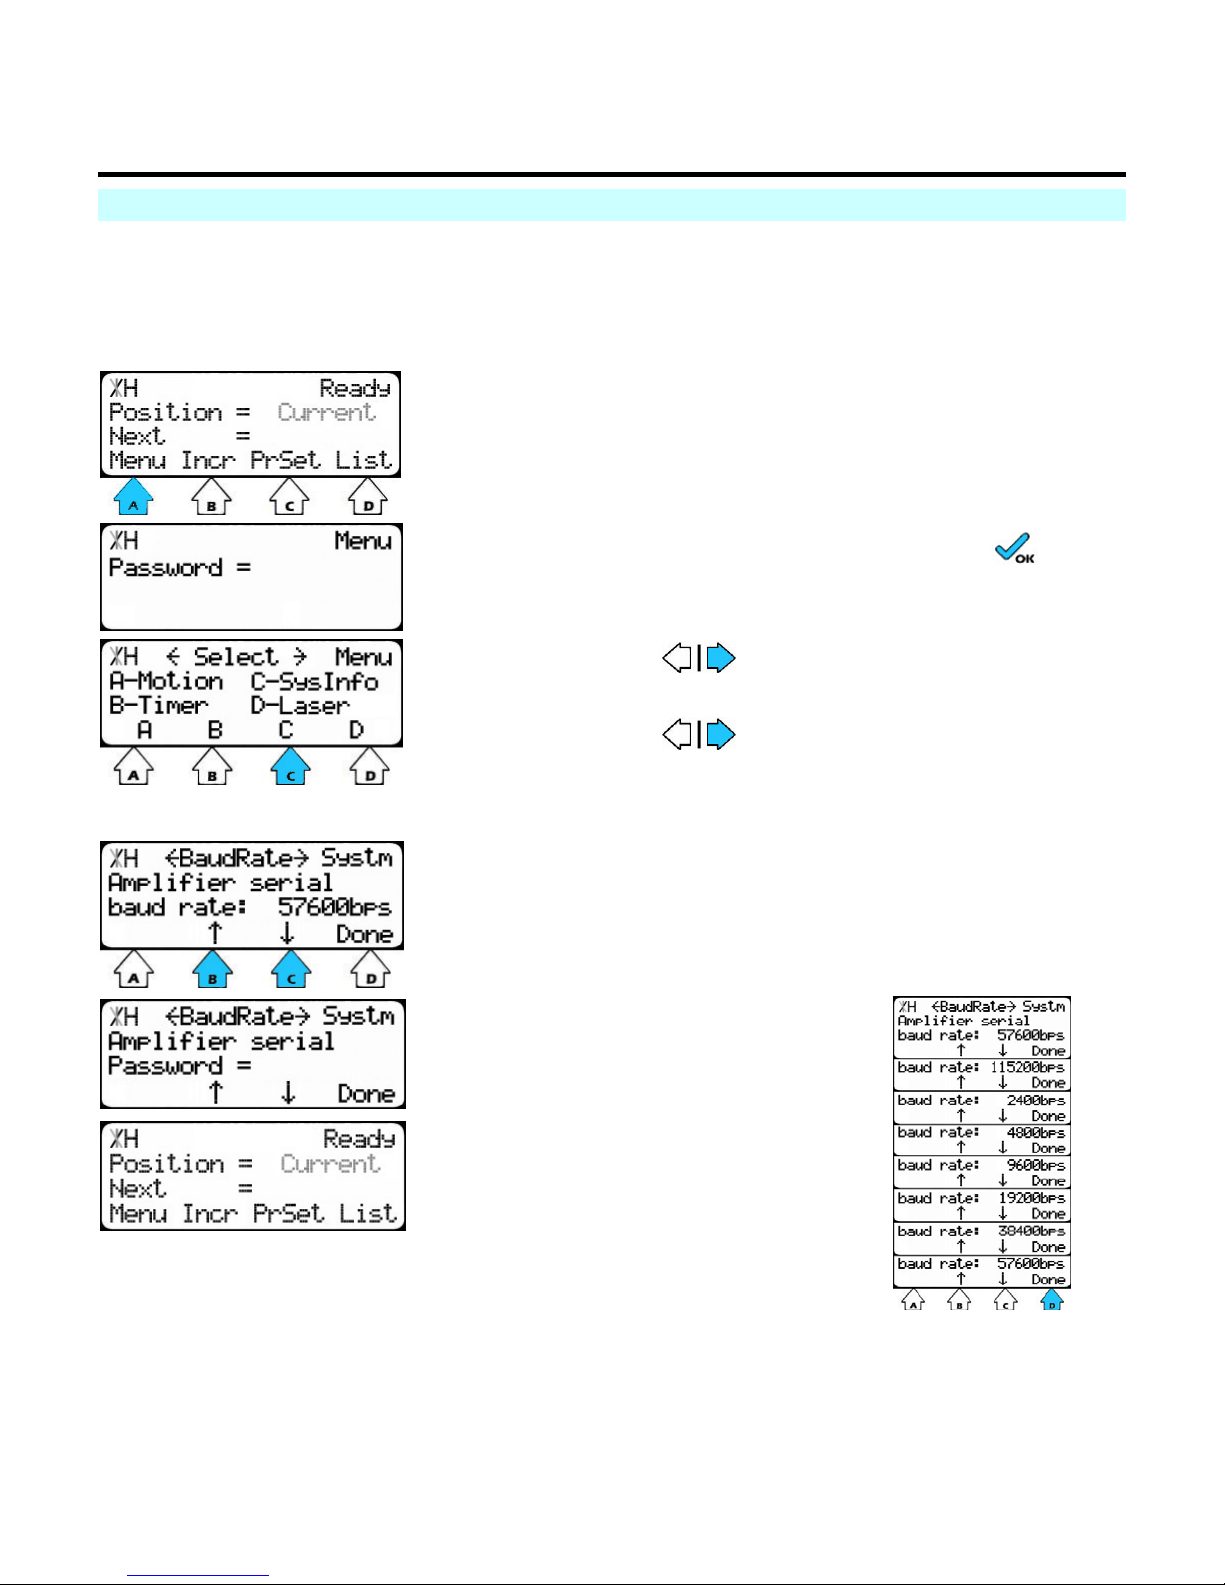
Access the System Menu
At the Ready Screen…
1. press [A] to select Menu
2. Enter the password and press .
3. for Menu screen 2.
4. press [C] to access System Information
Check or change the baud rate
5. to scroll through the screens of the
system menu until you get to Baud rate.
The current baud rate is displayed at this screen.
1. Press [B] or [C] to trigger password prompt.
Baud rate is a list parameter.
2. Enter the password, and
press [=].
3. Press [B] or [C] to scroll
through the baud rates.
4. Press [D] to save
selection and exit to the
Ready Screen.
2
Installation and Setup
Hardware Setup
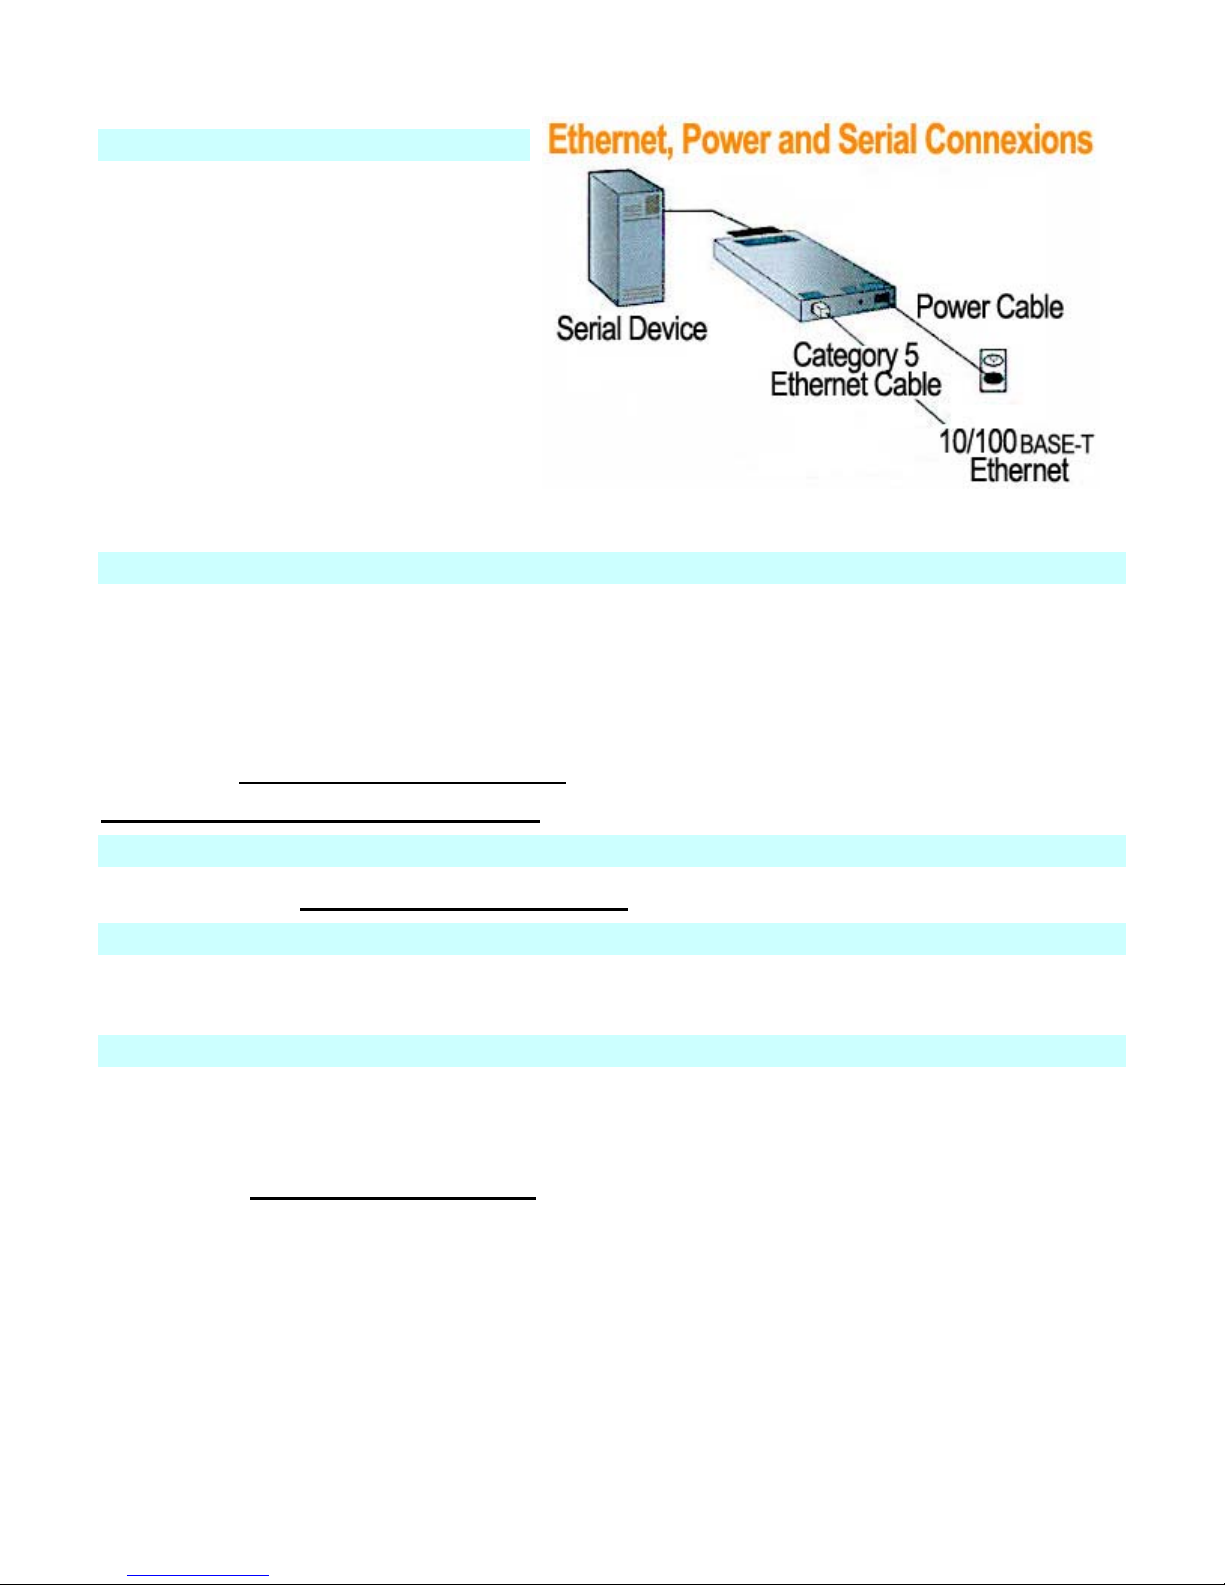
1. Connect a serial device to your
ESC unit with the serial cable
provided.
2. Connect a category 5 ethernet
cable to the RJ45 port.
3. For units provided by TigerStop,
use the power supply that is
included in the packaging.
Note
The required input voltage is 9-30 VDC
(center +) or 9-24 VAC (1.5W maximum
power required).
Software Setup
This is done through the Ethernet Device Installer.
The ESC comes with a default IP of 0.0.0.0, which sets it to DHCP.
It is also possible to change the device’s settings if the IP address is known by typing that
address into the address bar of a web browser and using the Java utility found there. Don’t
forget to click Update Settings to affect any changes desired.
Install the Ethernet Device Installer
Run the Ethernet Device Installer
Computer Setup
Install and run The Ethernet Re-director
Maintenance
The ESC should never need any maintenance. If a problem does develop, pulling out the power
cord for 10 seconds should resolve it.
Use
Ensure that the re-director service is functioning, then connect to the virtual port normally (Hyper
Term, Workflow Manager, custom program, etc). Everything should happen normally after this
point.
See also… ESC Troubleshooting
3
Ethernet Device Installer
To use the ESC Ethernet-to-Serial Converter, some software on
the accompanying CD must first be installed and run on your
computer.
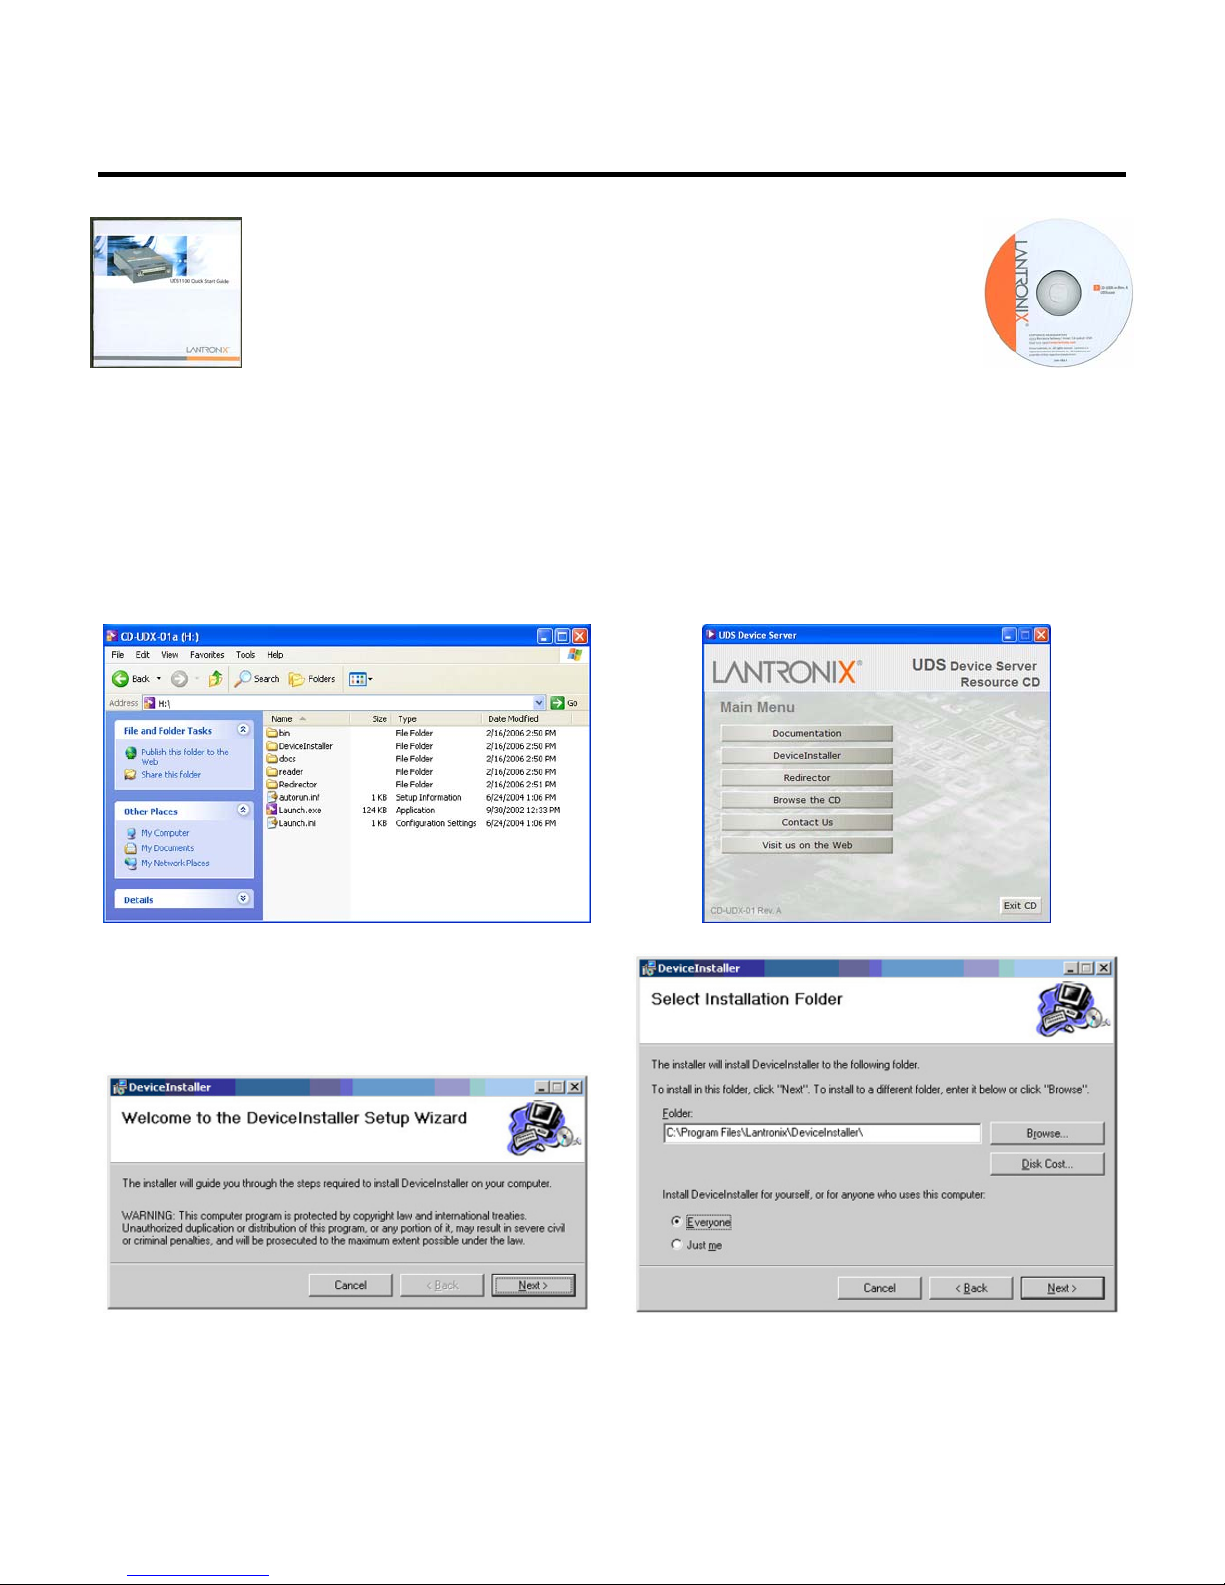
The ESC comes with a Quick Start Guide from Lantronix (Fig. 1)
and a CD (Fig. 2). Everything you need to know about the
Ethernet-to-Serial Converter can be found in the TigerStop
Fig. 1
Manual. The Lantronix guide is for additional reference.
Insert the CD into your CD-ROM drive.
If the CD launches automatically, continue at the Setup Wizard (Fig. 5). If the CD does not launch
automatically…
1. Click the START button on your computer task bar, and click Run.
2. Click Browse and select the CD-ROM drive. The Browse screen (Fig. 3) displays.
3. Click Launch.exe. The UDS Device Server window (Fig. 4) displays.
Fig. 2
Fig. 3
Fig. 4
Fig. 5
Fig. 6
4. Click Device Installer button. The Device Installer Setup Wizard (Fig. 5) displays.
5. Click Next. The wizard creates a folder (Fig. 6) in which to install Device Installer.
6. Set permissions to "Everyone." You can browse for a different folder, or set the permissions
4
 Loading...