

Tiffin Motorhomes Allegro Bus 2016 Owner's Manual
2016
OWNER’S MANUAL
105 2nd St. NW • Red Bay, AL 35582
Email: info@tinmotorhomes.com
Tin Motorhomes, Inc.
Phone: 256-356-8661

105 2nd St. NW • Red Bay, AL 35582
Phone: 256-356-8661
Email: info@tinmotorhomes.com
www.tinmotorhomes.com
To view or download a full color, printable
version of this owner’s manual, visit
www.tinmotorhomes.com

DISCLAIMER
any of the features and appliances described in this manual may or may not be
M
reected in the actual motorhome purchased, depending on the options and models selected by the motorhome owner. All items, materials, instructions, and guidance
described in this manual are as accurate as possible at the time of printing. However,
due to Tin Motorhomes’ ongoing and dedicated commitment to excellence, improvement of Tin’s motor homes is a continuing process. Consequently, Tin Motorhomes
reserves the right to make substitutions and improvements in its makes and models of
motor homes without prior notication. Substitutions of comparable or better materials, nishes, appliances, instrumentation, and instruction may be made at any time it is
deemed prudent to provide the customer with the best possible motorhome meeting the
customer’s requirements.
Copyright © by Tin Motorhomes, Inc. - all rights reserved
Tin Motorhomes, Inc. ©
105 2nd St. NW • Red Bay, AL 35582
Phone: 256-356-8661
Fax: 256-356-8219
Email: info@tinmotorhomes.com
www.tinmotorhomes.com

TABLE OF CONTENTS
1 General Information
Welcome ........................................................................................ 2
About This Manual ........................................................................ 2
Delivery ......................................................................................... 3
Dealer Responsibilities ................................................................. 3
Customer Responsibilities ............................................................ 3
TifnMotorhomesLimitedWarranty............................................4
MajorEquipmentManufacturers..................................................4
Warranty Ser vice .......................................................................... 5
Owner’s Information Package ...................................................... 5
Customer Relations ...................................................................... 6
SpecicationLabels.....................................................................6
WeighingProcedures.....................................................................8
WeightDistribution.......................................................................8
Safety Messages ........................................................................... 9
2 Safety Instructions
SafetyConsiderations..................................................................11
General Warnings ......................................................................... 11
Pre-departureCheckList.............................................................12
Driving Safety ............................................................................... 13
Carbonmonoxidewarning...........................................................14
CO/LP Gas Detector ..................................................................... 15
Fire Safety .................................................................................... 17
Fire Extinguisher .......................................................................... 17
SmokeDetector...........................................................................18
Electrical......................................................................................18
Loading.........................................................................................18
Maintenance.................................................................................18
ParkingProcedures......................................................................19
Towing Hitch ................................................................................. 20
3HeatingandAIrConditioning
Aqua Hot System .......................................................................... 22
AirConditioningSystem..............................................................24
Thermostat Controls .................................................................... 25
Heat Pump Controls ..................................................................... 25

TABLE OF CONTENTS
4MajorAppliances
ResidentialRefrigerator..............................................................27
Ice Maker ..................................................................................... 27
MicrowaveOven...........................................................................28
AirFiltrationFan..........................................................................28
Cook Top .................................................................................... 29
Dishwasher .................................................................................. 31
Washer/dryer...............................................................................32
6 Entertainment
TelevisionAntenna.......................................................................34
TelevisionSatellite.......................................................................34
Television Sets ............................................................................. 35
InfraredRepeater.........................................................................36
SurroundSystem..........................................................................36
Bluray/DVD Player ........................................................................ 36
7 Cabinets & Furniture
Cabinets........................................................................................38
Furniture.......................................................................................40
BedroomArea...............................................................................41
8StructuralFeatures
ChassisStatement.......................................................................43
9 Electrical Features
GeneralInformation.....................................................................45
ElectricalCautions.......................................................................46
CircuitBreakerBoxes..................................................................46
AuxiliaryStartSwitch..................................................................47
BatteryInspection&Care............................................................48
12-Volt DC Receptacles .............................................................. 52
USB Receptacles ......................................................................... 52
Converter/Inverter ....................................................................... 52
GFCIReceptacles........................................................................54
Electrical Generator .................................................................... 55
Energy Management System ....................................................... 55
Automatic Transfer Switch ......................................................... 56
Circuit Breakers .......................................................................... 57
Fuse Blocks ................................................................................. 57
Seven-PinTowingConnector......................................................58

TABLE OF CONTENTS
10Slide-outFeatures
Slide-outOverview.......................................................................60
GeneralConsiderations..............................................................60
Operating Precautions ................................................................ 61
ExtendingtheSlide-outRoom.......................................................61
RetractingtheSlide-outRoom....................................................62
11 Exterior Features
TowingHitch................................................................................64
ExteriorSides...............................................................................64
Security Lights ............................................................................. 65
Roof&Ladder..............................................................................65
Electric Steps ............................................................................... 66
Mirrors..........................................................................................68
12 Interior Features
Bedspread....................................................................................70
Flooring ........................................................................................ 70
Ceiling ........................................................................................... 71
WindowTreatments.....................................................................72
13 Plumbing & Bath Features
MonitorPanel................................................................................74
KitchenSink.................................................................................74
Bath,SinkandShowerAccessories.............................................75
Water Pump ................................................................................... 75
City Water Connection .................................................................. 76
Filling the Freshwater Tank .......................................................... 77
Sanitizing ..................................................................................... 77
Water Filter .................................................................................. 77
WaterHeaterBypassSystem......................................................78
FreshwaterLines.........................................................................78
Wastewater General Information ................................................ 79
Toilet............................................................................................80
BlackWaterHoldingTank...........................................................80
GrayWaterHoldingTank..............................................................80
P-Traps.........................................................................................81
WastewaterDisposal...................................................................81
SewerConnectionandCamping..................................................82
NoFussFlush..............................................................................83
ExteriorShower............................................................................83
AquaHotSystem..........................................................................84

TABLE OF CONTENTS
14Windows,Awnings,Vents&Doors
Windows.......................................................................................87
Awnings.......................................................................................87
Vents...........................................................................................89
Doors...........................................................................................89
Keyless lock .............................................................................. 90
15 Driving Your Motorhome
Triple Vision Camera Monitor System ......................................... 92
SideMountCamera......................................................................92
CBRadioSystemAntennaConnection.......................................93
AM/FM/CD Stereo System ............................................................. 93
DashboardHeating/CoolingControls...........................................93
AutomaticLevelingSystem.........................................................94
16 Routine Maintenance
WashingYourMotorhome...........................................................98
Seals ........................................................................................... 99
Proper Sealants for Application ................................................. 100
Wheel Care ................................................................................. 101
Roof Care & Maintenance .......................................................... 101
Moisture Management ................................................................ 102
Tire & Safety Information ........................................................... 105
Tire Pressure .............................................................................. 117
Interior Care ............................................................................... 122
Fabrics ........................................................................................ 123
Walls&Ceiling..........................................................................124
Dashboard.................................................................................124
Woodwork&Floors...................................................................125
Countertops ............................................................................... 125
Accessories ............................................................................... 126
Detectors ................................................................................... 127
Condensation.............................................................................127
RoutineMaintenanceSchedules...............................................127
Winterizing ................................................................................ 129
De-Winterizing ........................................................................... 131
17 Maintenance & Data Charts
RV Owner’s Data Sheet .............................................................. 133
RVOwner’sMaintenanceRecords.............................................134

GENERAL INFORMATION
Chapter
1
To print a color copy, visit www.tinmotorhomes.com
1
WELCOME TO A LIFE OF “ROUGHING IT SMOOTHLY”
Tin Motorhomes is excited that
you have entered the world of motorhome travel and we believe that you
and your family will enjoy this way of
life for years to come.Your Tin built
motorhome provides all the luxuries
and comforts of home while allowing
you to travel freely as you choose.
But before heading out on the open
roads, please make yourself familiar with this owner’s manual to learn
more about the operations of your
motorhome. Also, please work with
your dealer to learn as much as possi-
ble about the functionality and features of your coach. And remember - “wherever you go, we go.”
ABOUT THIS MANUAL
is operator/owner’s manual was prepared with you in mind.
We want to provide you with the information you need to properly care for and use your vehicle and
equipment. Please carefully read through this manual to help you understand how everything in your
motorhome works.
NOTE: is operator’s manual describes many features of your Allegro Bus and includes instructions
for its safe use. e manual, however, including its photography and illustrations, is of a general nature. Some equipment and features described in this manual may be optional or unavailable on your
model.
e instructions included are meant to serve as a guide and in no way extend the responsibilities of
Tin Motorhomes beyond the standard written warranty. e descriptions, illustrations, and specications in this manual were correct at the time of printing and Tin Motorhomes reserves the right
to change specications or design without notice, and without incurring obligation to install the same
on products previously manufactured.
Many of the instruction sheets and manuals for the various appliances inside your motorhome have
been incorporated into this manual for your convenience.
2

GENERAL INFORMATION
DELIVERY
roughout the entire manufacturing process, your Tin motorhome has been regularly inspected by
our qualied personnel to assure you of the nest product of the highest quality, without exception.
However, the nal inspection at our factory is not to be the last one. e pre-delivery inspection and
system check that your dealer performs are the nal inspections done to your particular motorhome
prior to you actually receiving your new Allegro Bus. Your dealer is also available to assist you in understanding the warranties and completing the necessary forms to activate the warranties for the various
appliances and accessories installed in your motorhome.
DEALER RESPONSIBILITIES
1. A pre-delivery inspection and systems check is performed to assure a thorough inspection of the
motorhome and to assure the proper operation of all factory-installed components.
2. A customer walk-through is performed to familiarize the new customer with the motorhome, its
systems and components, and their proper and safe operation.
3. Delivery of the Owner’s Information Package which contains warranty cards and registrations
for the vehicle and all factory-installed components from other vendors and suppliers to Tin Motorhomes. e detailed operation instructions and maintenance instructions on these components are
also included in this package.
4. Assisting the customer in completing the registration forms to avoid loss of warranty coverage.
e dealer should review the limited-warranty provisions with the customer to stress the importance of
completing the warranty cards and registration forms for the components in the motorhome to enable
the manufacturers to receive them within the prescribed time limits.
5. Providing the customer with information regarding warranty and non-warranty work on the
vehicle and its separately warranted components.
CUSTOMER RESPONSIBILITIES
e customer is responsible for regular and proper maintenance of the motorhome. Properly maintaining your motorhome will prevent conditions arising from neglect that are not covered by your Tin
Motorhomes limited warranty. e maintenance guidelines in this manual and any other, applicable
manual(s) should be followed. It is your responsibility to return the vehicle to an authorized dealer for
repairs and service.
To assist you in avoiding problems with your motorhome, it is recommended that you do the following:
3

GENERAL INFORMATION
1. Read the warranty. Go over it thoroughly with your dealer to make sure you understand all the
terms and conditions of the warranty.
2. Inspect the motorhome; do not accept delivery until aer you have gone through the motorhome
with the authorized Tin Motorhomes dealer.
3. Please ask questions about anything you don’t fully understand about your Allegro Bus. Tin Mo-
torhomes is here to serve you and assure that you have all the information necessary for your safe and
enjoyable use of your new motor home.
4. When you are taking delivery, set an appointment for adjustments. is appointment should be
within two weeks aer you accept delivery.
5. You are responsible for and are expected to use your Allegro Bus in a responsible, safe manner.
Please take the time to familiarize yourself with the proper operation of the motor home and all its
features before you attempt to use your motor home.
TIFFIN MOTORHOMES LIMITED WARRANTY
e Tin Motorhomes limited warranty was provided to you by your authorized Tin Motorhomes
dealer during the pre-delivery inspection. When you inquire about your Tin Motorhomes warranty, please refer to this document. Should you need or desire an additional copy or other information,
please contact:
Tin Motorhomes, Inc.
105 2nd St. NW Red Bay, AL 35582
Phone: 256-356-8661
Email: info@tinmotorhomes.com
Tin Motorhomes will be pleased to send you an additional copy or any other information requested,
as may be warranted. Visit www.tinmotorhomes.com for access to related materials.
MAJOR EQUIPMENT MANUFACTURERS
e following list is a compilation of the vendors and suppliers of the major subsystems and components of your Allegro Bus. is list is provided for your convenience and is not meant as a complete
substitution of the literature and accompanying “how to contact us” information supplied by those
vendors and suppliers in your Owner’s Information Package. Where appropriate, website information
is provided as well.
4

GENERAL INFORMATION
• Atwood Mobile Products (800) 646-8557 atwoodmobile.com
• LP Gas Water Heater (815) 877-5700 atwoodmobile.com
• Denso Corporation (248) 350-7500 globaldenso.com
• Flexsteel Industries (319) 556-7730 exsteel.com
• HWH Corporation (800) 321-3494 hwhcorp.com
• Kwikee (541) 942-3888 kwikee.com
• Norcold, Inc. (800) 543-1219 norcold.com
• Onan Corporation (612) 574-5944 onanindiana.com
• Power Gear (800) 334-4712 powergear.com
• RV Products (Coleman A/C) (316) 832-3400 airxcel.com
• Precision Circuits Inc. (630-240-9832 precisioncircuitsinc.com
• Saf-T-Alert (CO/LP Alarm) (800) 383-0269 safetalert.com
• Sharp Corporation (800) 237-4277 sharp-usa.com
• Suburban Manufacturing Co. (423) 775-2131 suburbanmanufacturing.com
• e Dometic Corporation (219) 294-2017 dometic.com
• Whirlpool (866) 698-2538 whirlpool.com
• Winegard (800) 788-4417 winegard.com
For those looking for more information (e.g., locations of authorized subsidiaries), the following web
site, www.rvamerica.com/data/s_alist.htm, should be helpful. is site provides complete, alphabetic
listings of all suppliers and vendors for all contemporary recreational vehicles and motor homes.
WARRANTY SERVICE
If any warranty service may be required, that service needs to be completed during the warranty period
(basic warranty: 12 months or 12,000 miles). Tin Motorhomes warrants its unitized construction for
10 years and its laminations for ve years. Any service work performed aer the expiration of the Tin
Motorhomes warranties WILL NOT be covered by those warranties.
Exceptions may be made, on an individual basis, to this deadline on account of the unavailability of
parts and/or service appointment time where work is to be performed. However, don’t rely on the possibility of an exception; please schedule any desired in-warranty work before your warranty expires.
OWNER’S INFORMATION PACKAGE
e Owner’s Information Package includes valuable documents about your Allegro Bus and its components and systems. By consulting the booklets and instruction manuals included in the Owner’s
Information Package, you will learn how to operate, maintain, and troubleshoot these items safely and
eectively. e Tin Motorhomes Allegro Bus Owner’s Manual does not cover every possible detail of
equipment—standard and/or optional—installed on or in your vehicle.
As with all valuable documentation, please keep them in a safe, secure place for your later use and
consultation. When you complete and mail to the respective manufacturer(s) any warranty/guaranty
registration card(s), make a photocopy of both sides of each card prior to mailing and keep the photocopy in your permanent records for your Allegro RED motorhome.
5
GENERAL INFORMATION
CUSTOMER RELATIONS
If you wish to schedule maintenance or service or wish to order parts, you should notify your local
authorized Tin Motorhomes dealership to set up an appointment. If you are unsure of the location
of your nearest authorized Tin Motorhomes dealership, please access the Tin Motorhomes website
at www.tinmotorhomes.com and then click on the “Locate Dealer” button, then enter in the appropriate search criteria such as state and retail sales, then click on the red ball located on the map to nd
dealer information in that area.
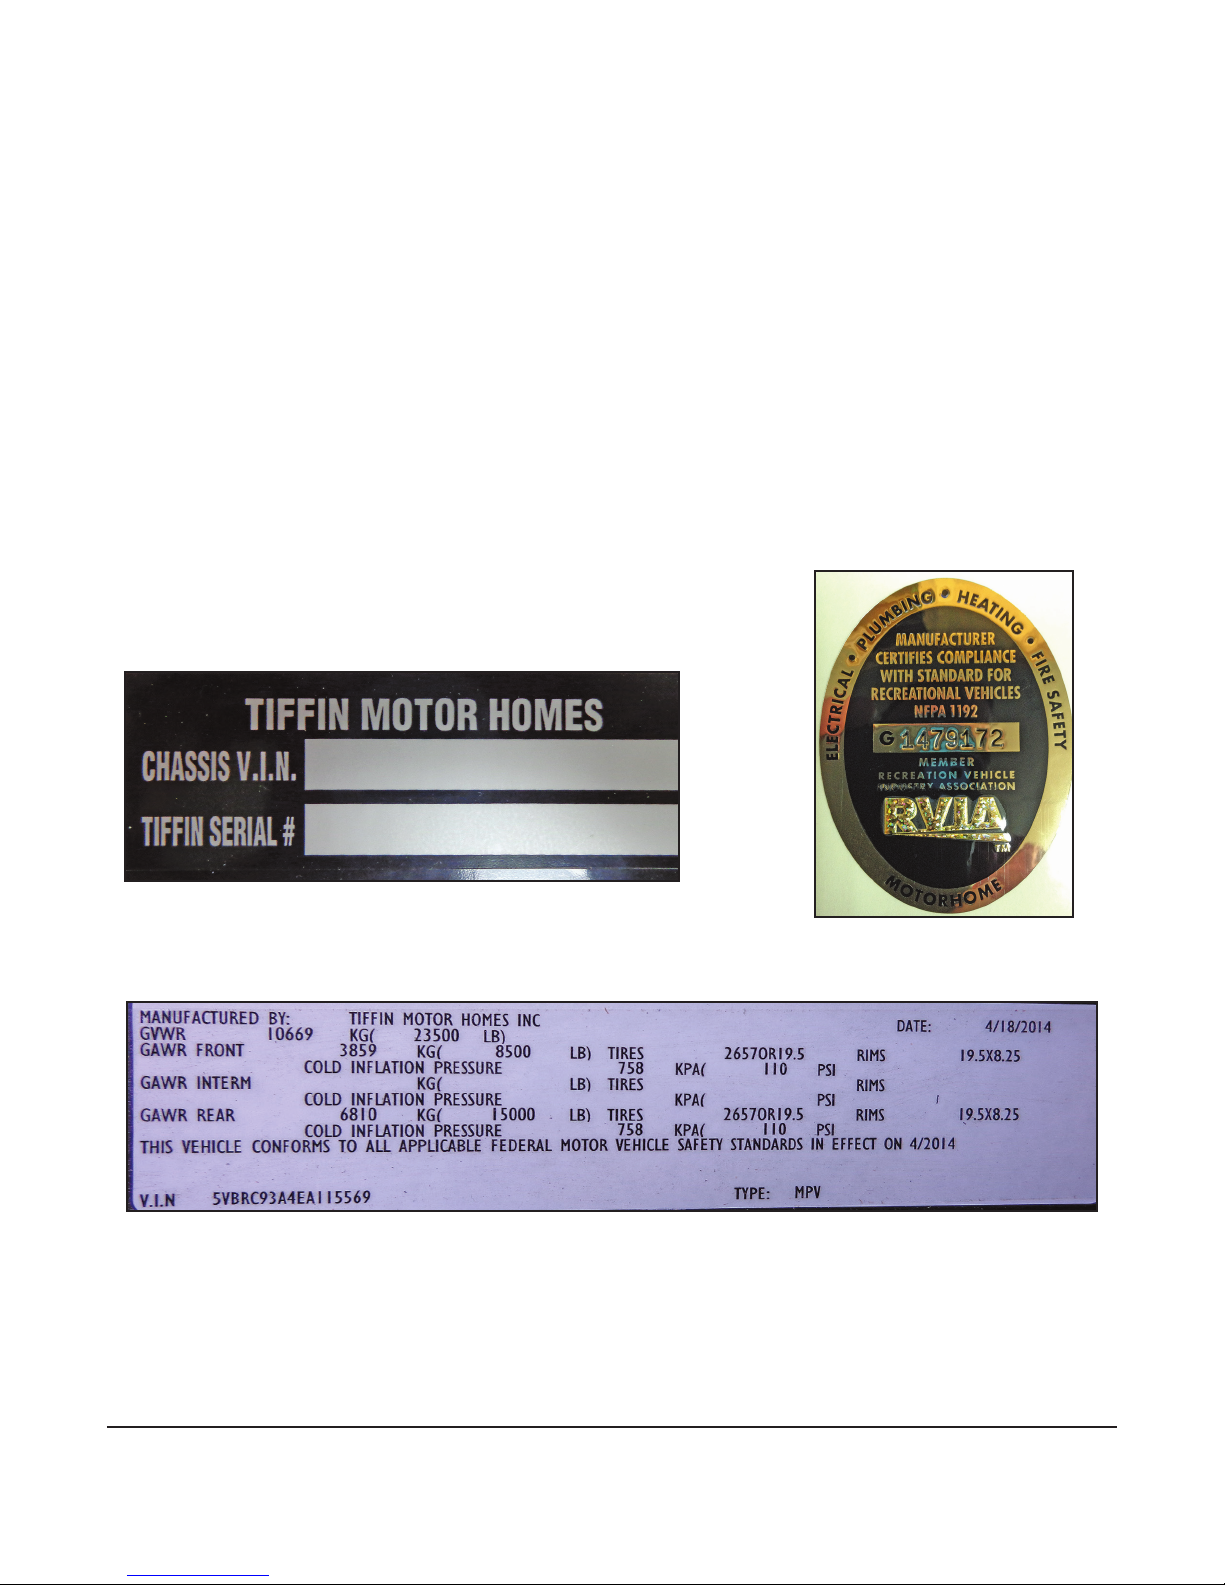
SPECIFICATION LABELS
ere are two main numbers used to identify your Allegro Bus. e Vehicle Identication Number
(VIN) is the legal identication of the completed vehicle. e VIN is the number used by the state for
vehicle identication and registration. Additionally, there is a Tin serial number (Figure 1-1). is
number can be found on the side of the dashboard. A typical sample of this identication label is shown
below.
Figure 1-1: Tifn serial number
Figure 1-2: RVIA Label located on
the outside of the motorhome
Figure 1-3: Federal Motor Vehicle Standards label located inside the doorway of the coach.
Another label axed to your Allegro Bus is the Recreational Vehicle Industrial Association (RVIA)
Weight Label (Figure 1-2) which is a required label for your vehicle. Tin Motorhomes, a manufacturer-member of RVIA, has the obligation to disclose the following information, at minimum, to the
purchaser of the motor home:
6
• An indication of the contents
of the motorhome weight label
axed to the motorhome.
• A concise explanation of
the following items: Vehicle
Weight (VW) distribution and
Proper weighing techniques to
be used to weigh the vehicle.
••Specic denitions for
the following terminology:
Gross Vehicle-Weight Rating
(GVWR) – is is the max-
imum permissible weight of
the motor home when it is fully loaded.
Unloaded Vehicle Weight
(UVW) – is is the weight of
the motor home, as built at the
factory, with full fuel, engine
oil, and coolants. e UVW
does not include cargo, fresh
water, LP gas, or any dealer-installed accessories.
GENERAL INFORMATION
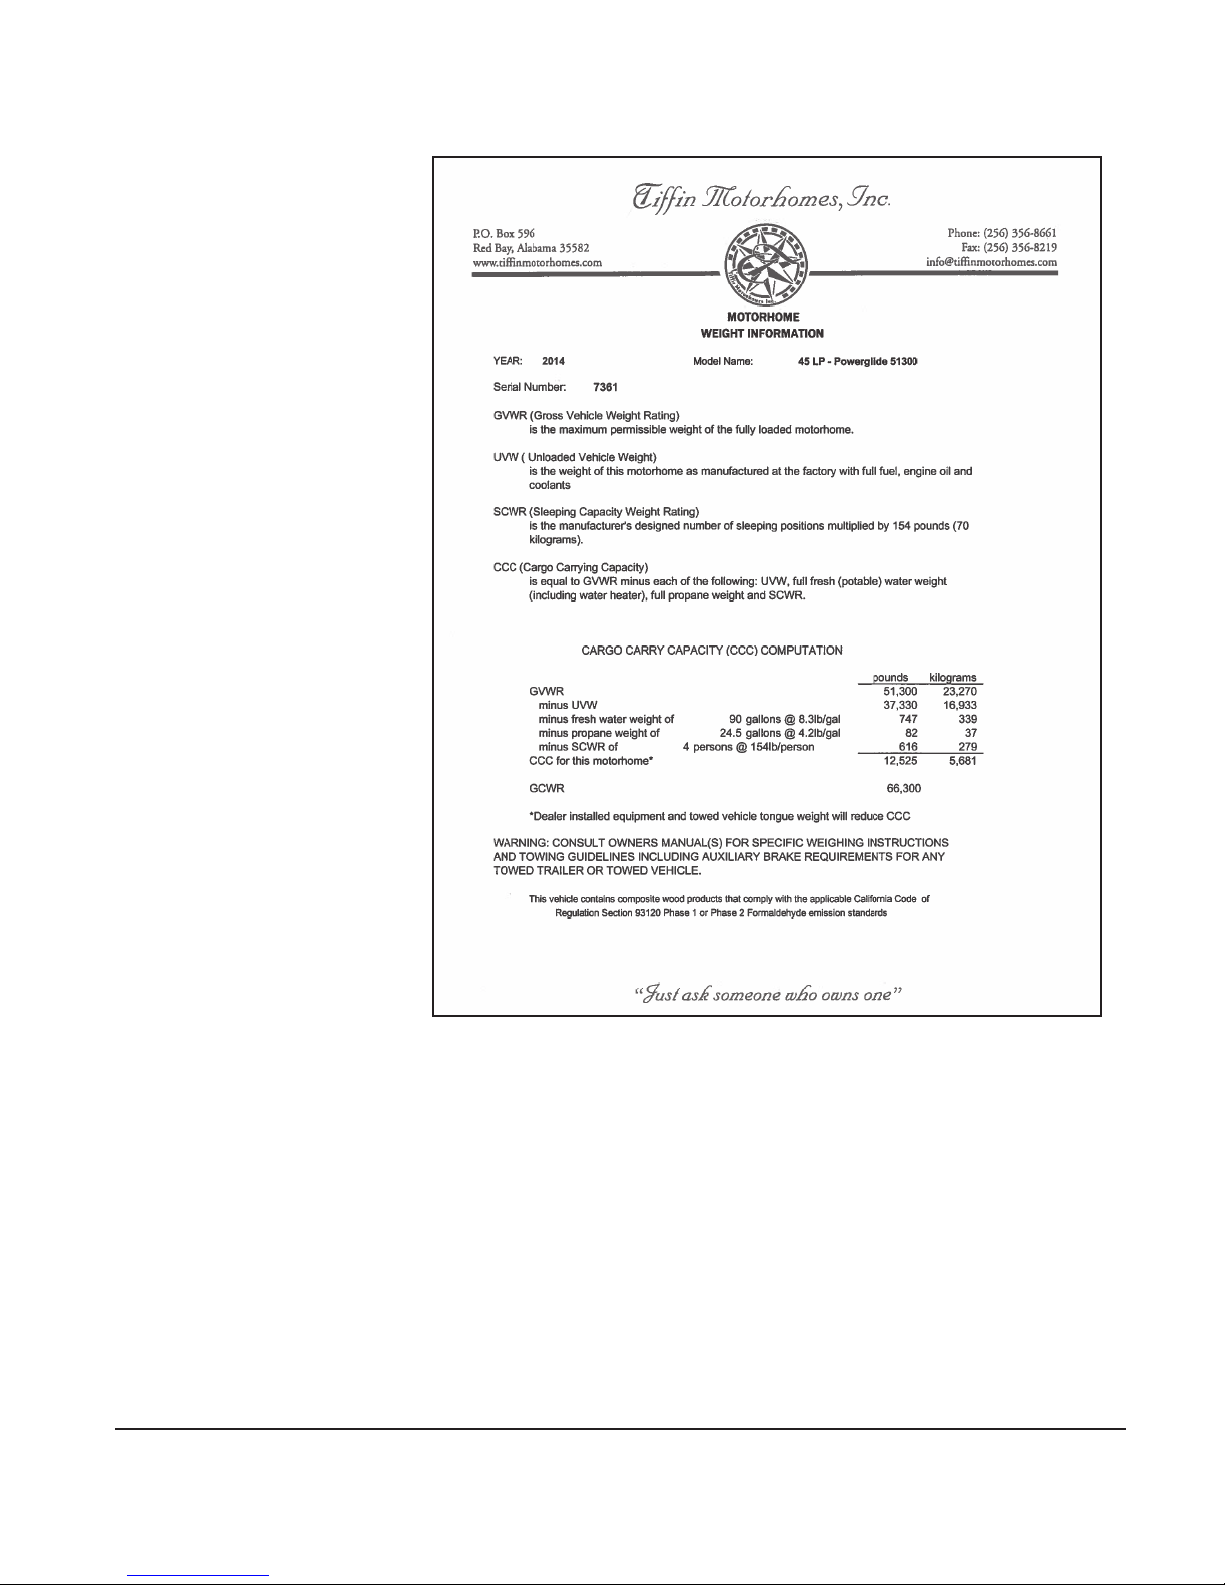
Cargo-Carrying Capacity
(CCC) – is is the maxi-
mum weight of all occupants
including the driver, personal
belongings, food, fresh water, waste water, LP gas, tools,
tongue weight of towed vehicle
Figure 1-4: Sample Motorhome Weight Label which can be
found in the bedroom closet
[if any], dealer-installed accessories, and the like. e CCC
is equal to or less than the GVWR minus the UVW.
Gross Combination-Weight Rating (GCWR) – is is the value specied by the chassis manufacturer as
the maximum allowable loaded weight of the motor home with a towed trailer and/or vehicle [if any].
Sleeping-Capacity Weight Rating (SCWR) – is is the maximum weight capacity of the combined
number of persons (i.e., number of people multiplied by 154 pounds per person) permitted to sleep
within the vehicle.
7

GENERAL INFORMATION
Gross Axle-Weight Rating (GAWR) – is is the maximum allowable weight for an axle; the GAWR
considers the weakest link in the tire, wheel, brakes, hubs, axle, springs, and attaching parts. To illustrate, if the axle is rated at 15,000 pounds and the tires are rated at 3,200 pounds each as a dual installation; then the maximum GAWR would be 12,800 pounds for a four-tire vehicle.
WEIGHING PROCEDURES
To weigh the motorhome properly, the motorhome should be level when the weighing process is performed. Your Allegro Bus has been designed and built in compliance with the recommended limits of
the major-component/system suppliers to provide a realistic CCC. It is up to the nal user to provide
even distribution of the loads brought into the motor home to prevent uneven loading. Once the vehicle is loaded, it can be taken to any certied drive-on scales or individual-wheel scales to determine
that the nal weight is within specied limits for the motorhome. e procedure that can be used is as
follows:
First, drive the motorhome onto the scales so that all wheels are on the scales; this provides the gross
vehicle weight (GVW) of the vehicle and can be recorded as such. e GVW should not exceed the
GVWR specied for the vehicle.
Second, drive the motorhome so that the front wheels are o the scales and only the rear wheels remain
on the scales; this provides the total weight of the vehicle, save for the front axle. is weight should
not exceed the total rating of the axles remaining on the scales. e front axle weight is determined by
subtracting the weight from the GVW that was obtained in the rst step which was performed earlier.
e result should not exceed the listed front-axle weight rating.
WEIGHT DISTRIBUTION
To assure the maximum stability of the motorhome under static (i.e., parked) and dynamic (i.e., moving) conditions, the distribution of the items to be carried and stored within the motorhome and in
the storage bays underneath the motorhome should be performed in such a manner to strive for reasonably even side-to-side and front-to-rear dispersion of the weight of the stored items. is process
will assure that the motorhome is not “lop-sided” in weight distribution (i.e., all the stored weight on
one side and/or mainly towards the front or the rear)—keeping a center of mass of the motorhome
essentially centered on a front-to-rear and side-to-side basis will also provide better control of the motorhome when it is in motion.
8
GENERAL INFORMATION
SAFETY MESSAGES
Please note that several labels listed in this manual represent items that need your attention. e Danger, Warning, Caution, and Notice labels alert you to precautions that may help you avoid damage to
your motorhome, its equipment or your personal safety. Please read and follow them carefully.
NOTICE
NOTICE is used to address practices not related to personal injury.
CAUTION
CAUTION indicates a hazardous situation,
which, if not avoided, could result in minor
or moderate personal injury.
WARNING
WARNING indicates a hazardous situation,
which, if not avoided, could result in death or
serious personal injury.
DANGER
DANGER indicates a hazardous situation,
which, if not avoided, will result in death or
serious personal injury.
9

SAFETY INSTRUCTIONS
Chapter
2
To print a color copy, visit www.tinmotorhomes.com
10
SAFETY
SAFETY CONSIDERATIONS
Prior to using your motorhome, especially for the rst time or aer a long period of non-use, please
read thoroughly all the instructions in the Owner’s Manual and the chassis-manufacturer’s manual before attempting to operate your motorhome. ere are several safety considerations which you should
realize and follow while your Allegro Bus is in motion. ese safety considerations, as well as others
meant to preclude any damage to the motorhome, are listed in this chapter. Besides the driver, it would
be helpful for the passengers to be familiar with these safety considerations and precautions, too.
WARNING
Before your motorhome is to be towed, be sure that you
have read the entire Owner’s Manual and that you fully
understand the equipment on your motorhome and
how to use that equipment safely.
GENERAL WARNINGS
In general, there are several “common-sense” safety precautions that should be taken every time the
motorhome is to be used on the road. ese precautions include:
• Only seats with seat belts should be used while the motorhome is in motion; those seat belts
should be worn by all people (driver, passengers) in the motorhome at that time.
• While the motorhome is moving, lock all seats in the forward-facing position to provide max imum safety for the users.
• While the motorhome is moving, no one inside should ever stand or kneel on seats (e.g., young
children).
• In the majority of states, it is the law that seat belts must be used (fastened snugly about the chest
and hip areas), anytime the motorhome is in motion, to provide desired protection in the event
of a crash.
• Any re extinguisher(s) should be inspected on a monthly basis to assure that each extinguisher
is properly charged and ready for operation.
• Any smoke and/or carbon-monoxide (CO)/liquid propane (LP) alarm(s) should be regularly in
spected and tested. If being used for the rst time, the smoke and/or CO/LP alarm should be
properly activated and fresh batteries installed before the motorhome is placed into service. Never
sleep in a motorhome not having functional smoke and/or CO/LP alarm(s).
• While the motorhome is moving, the sleeping facilities are not to be used.
• In the event of an emergency, be sure to be familiar with all escape exits (doors, escape window)
Do not use the emergency window as a routine exit; this is strictly to be used for emergency pur
poses only.
• Movement inside the motorhome should be minimized while the motorhome is in motion.
• Never leave the driver’s seat unattended while the motorhome is in motion.
11
SAFETY
YOUR PRE-DEPARTURE CHECKLIST
For your continued safety and convenience, the following is a representative “check list” designed to
assure your safety while driving:
√ Clean all windows, mirrors, and light lenses (front, back, side) to assure
that you can “see” and “be seen.” Reposition any mirrors or other
xtures to provide an unobstructed view (front, sides,
and back) from the driver’s seat.
√ Remove or secure all loose xtures (e.g., awnings,
ags, antennas, portable lights) to keep them from
falling from the motorhome when the vehicle is in
motion.
√ Make a “walk-around” visual inspection of the
motorhome to note any irregularities (e.g., loose
trim) or problems (e.g., low tires); correct noted
problems accordingly
√ Check all exterior storage-compartment
and generator-compartment doors to make sure
they are properly latched. If need be, check inside all exterior compartments to make sure that all cargo and equipment are
properly secured so they won’t work loose and become hazards during sudden
starts and stops.
√ Check tires for proper ination (i.e., cold ination pressure: 100 psig). If the motorhome has not
been used, make sure that the “cold ination” pressure is maintained. If the motorhome has recently
been used, make sure that the “hot ination” pressure (see the tire-manufacturer’s literature to determine appropriate “hot ination” pressure) is maintained. All tire pressures should be within 1-2
pounds (psig) of each other.
√ Examine wheel lug nuts to assure their proper tightness. If any lug nuts were found to be loose, rst
check the t of the wheel to the hub to make sure the wheel is not mis-mounted which would produce
a “wobbly” wheel when the motorhome is in motion, then tighten the lug nuts.
√ Check all uid levels (e.g., engine oil, transmission uid, coolant, power-steering uid, brake uid,
battery uid [if applicable], windshield-washer solvent) to assure correct levels are maintained. Fill any
low reservoirs, as needed.
√ DO NOT SUBSTITUTE any other uids for specied oils, transmission uid, brake uid, or other
hydraulic uids—in most instances, substitutions are not acceptable and may void warranties.
√ Prior to starting the motorhome engine, make sure all lines (e.g., water, sewer) and electrical power
cords are disconnected and properly stowed.
√ Assure the leveling jacks are in the “travel” position.
√ Aer entering the motorhome, make sure that the electrically-actuated, retractable step has properly operated to retract the step fully before starting the engine of the motorhome.
12
SAFETY
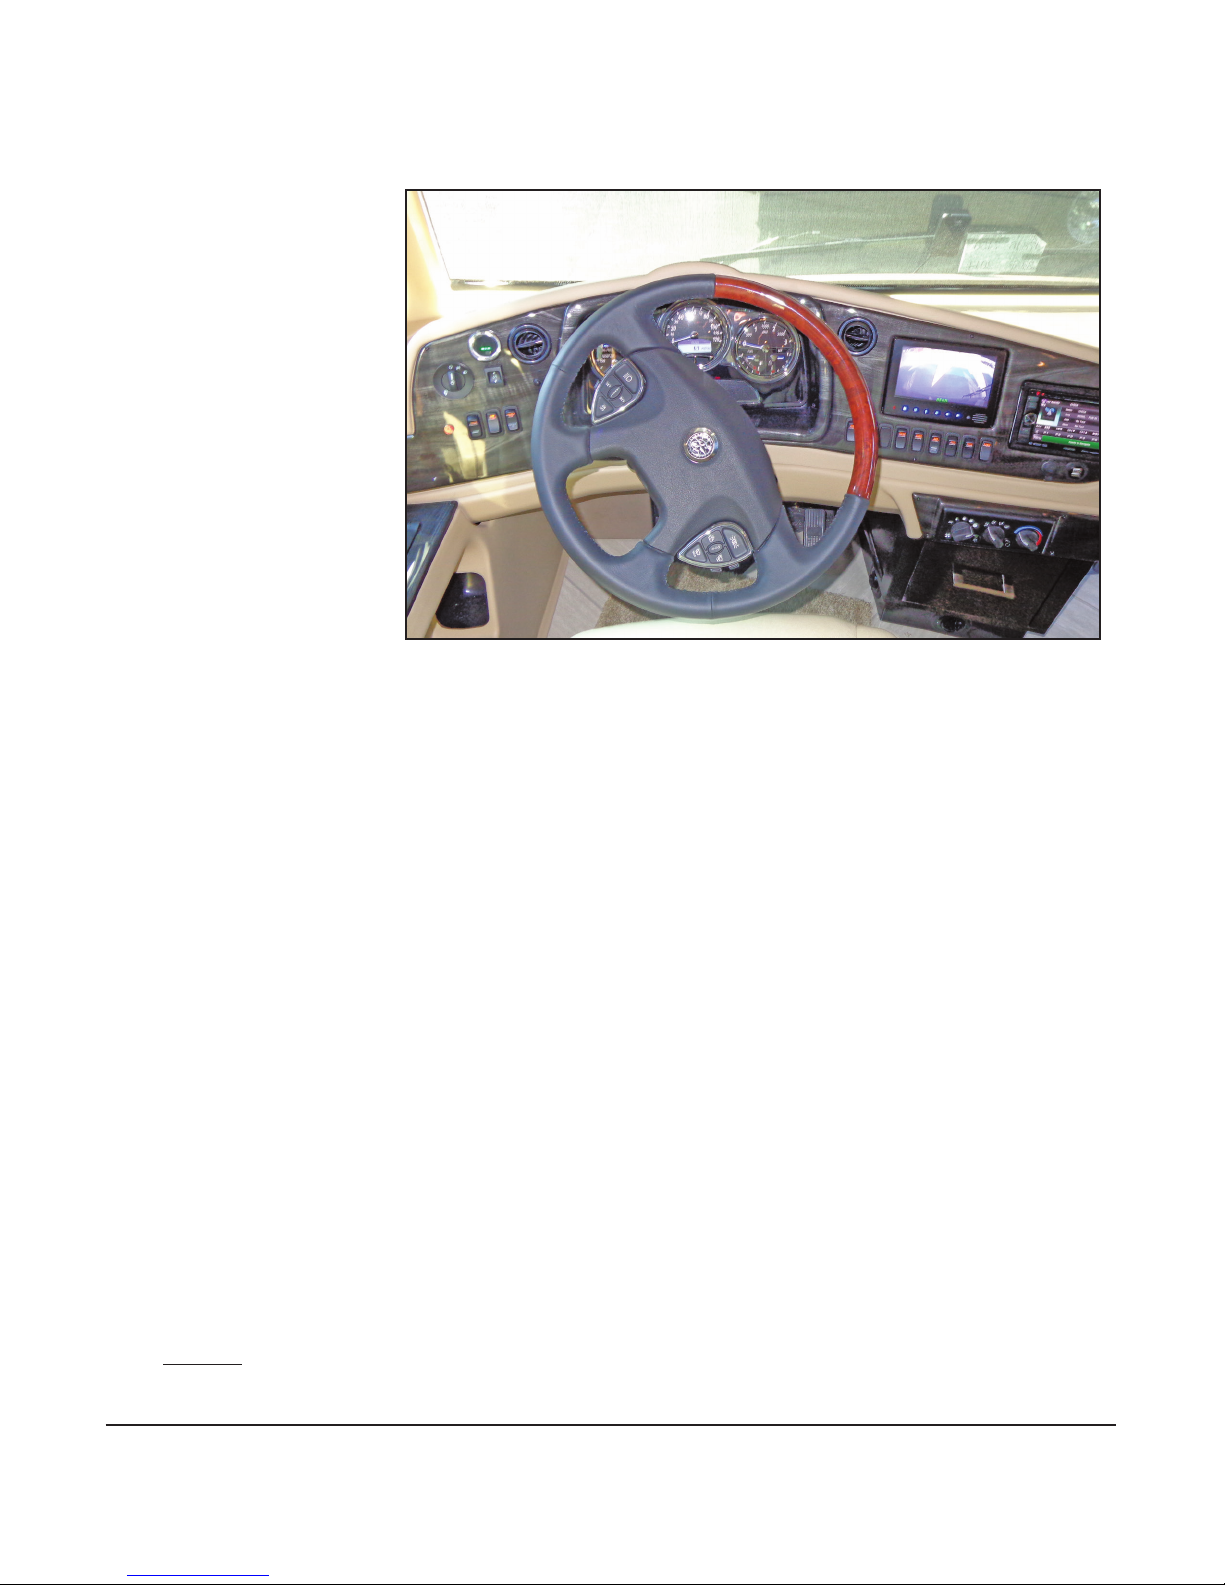
DRIVING SAFETY
Various adjustments need
to be made to assure the
driver’s comfort and the
safety of the motorhome
before starting and moving
the motorhome; these include:
• Do not attempt to adjust the driver’s seat while
the vehicle is moving.
• Do not adjust the tilt
steering while the vehicle is
moving.
• e driver should be
familiar with all gauges,
instruments, switches, and
indicators on the instrument panel prior to driving.
• Do not operate the cruise-control function during any extreme weather situations (e.g., snow, ice,
sleet, heavy rain) or when road conditions are hazardous (icy, snowy, winding roads, city trac) or
when a constant speed of the motorhome is not possible or if trac conditions don’t warrant such.
• Avoid driving the motorhome through any standing water. If deep enough, such water can wet the
brake pads and cause fading of the brakes (i.e., loss of braking power) and lead to excessive sliding or
pulling to one side or another.
• Know the limits of operation of the motorhome. Don’t try to achieve excessive speeds, climb overly
steep hills, traverse overly long grades, attempt to use the motorhome as an “o-the-road” (OTR) motorhome, rapidly switch lanes, or rapidly accelerate or decelerate the motorhome. When in doubt about
the handling characteristics of the motorhome, consult your chassis manual for information.
• e solar or blackout shade is operated by a switch located on the driver’s console. Depress the
switch to lower or raise the shade. e switch will be labeled “SOLAR SHADE or NIGHT SHADE.” e
time delay switch must be held a few seconds before it is activated.
CAUTION: DO NOT over extend either shade as this may block the view of the road.
• NEVER drive the vehicle with a slideout room extended.
Figure 2-1: Driver’s side dashboard and instrument console.
13
SAFETY
Your motorhome is designed to use diesel fuel
only.
DANGER
• Anytime the motor fuel is to be
lled, the motorhome engine
is to be turned OFF and all pilot lights and
appliances should be turned OFF.
• A NO SMOKING policy should always be
observed when relling the fuel tank.
• NEVER use any other “burning” equipment
(e.g., charcoal grills, wood stoves, butane lights,
propane lights) inside the motorhome. Doing so may cause res and/or asphyxiation.
All pilot lights, appliances, and their ignitors
must be turned off before refueling of motor
fuel tanks or propane containers. A failure
to comply, could result in serious injury or
death.
WARNING
Any portable, fuel-burning equipment (e.g., charcoal, propane, butane, wood)
must not be used inside the motorhome. Any use of such equipment inside
the motorhome may readily cause fires and/or asphyxiation by carbon-monoxide poisoning.
Further, such unauthorized use would probably invalidate your motorhome insurance policy.
CARBON MONOXIDE WARNING
A properly maintained engine exhaust
and ventilation system is the best way
to protect against carbon monoxide’s
entry into the vehicle. We recommend
that the exhaust system and body be inspected by a qualied motorhome service center:
• Each time the vehicle is serviced for
an oil change.
• Whenever a change in the sound of
the exhaust system is noticed.
• Whenever the exhaust system, underbody, or rear of the vehicle is damaged.
To allow proper operation of the vehicle’s ventilation system, keep front ventilation inlet grill clear of obstructions
at all times.
Do not occupy a parked vehicle with
engine running for an extended time
and do not run engine in conned areas, such as a garage.
Your motorhome is
equipped with a Carbon
Monoxide alarm, which
has a sensor that is designed to detect carbon
monoxide gas fumes resulting from incomplete
combustion of fuel.
It will detect carbon
monoxide gas from any
combustion source such
as from the furnace, oven/
range, water heater, refrigerator, chassis engine and generator engine.
Avoid inhaling exhaust gases as they contain carbon
monoxide, which is a colorless, odorless and poisonous gas. Serious illness, injury or death can result.
Figure 2-5:
Carbon Monoxide alarm
WARNING
14
SAFETY
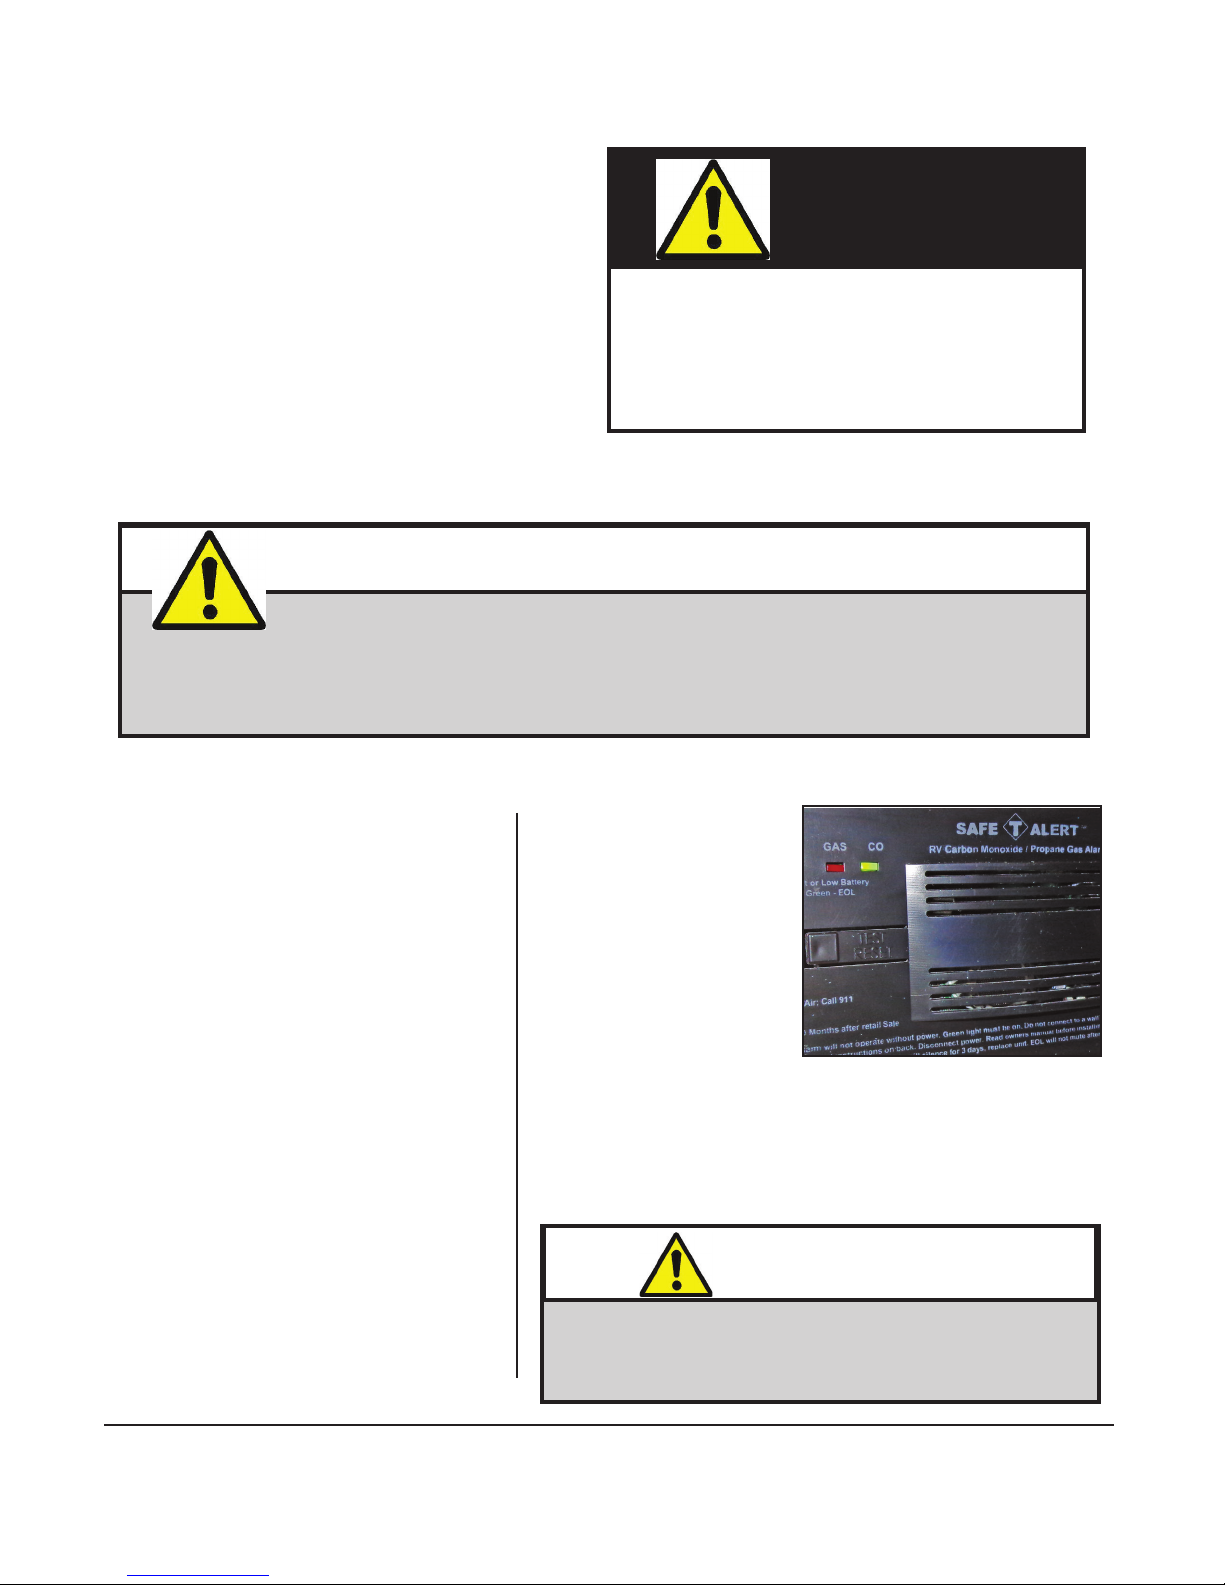
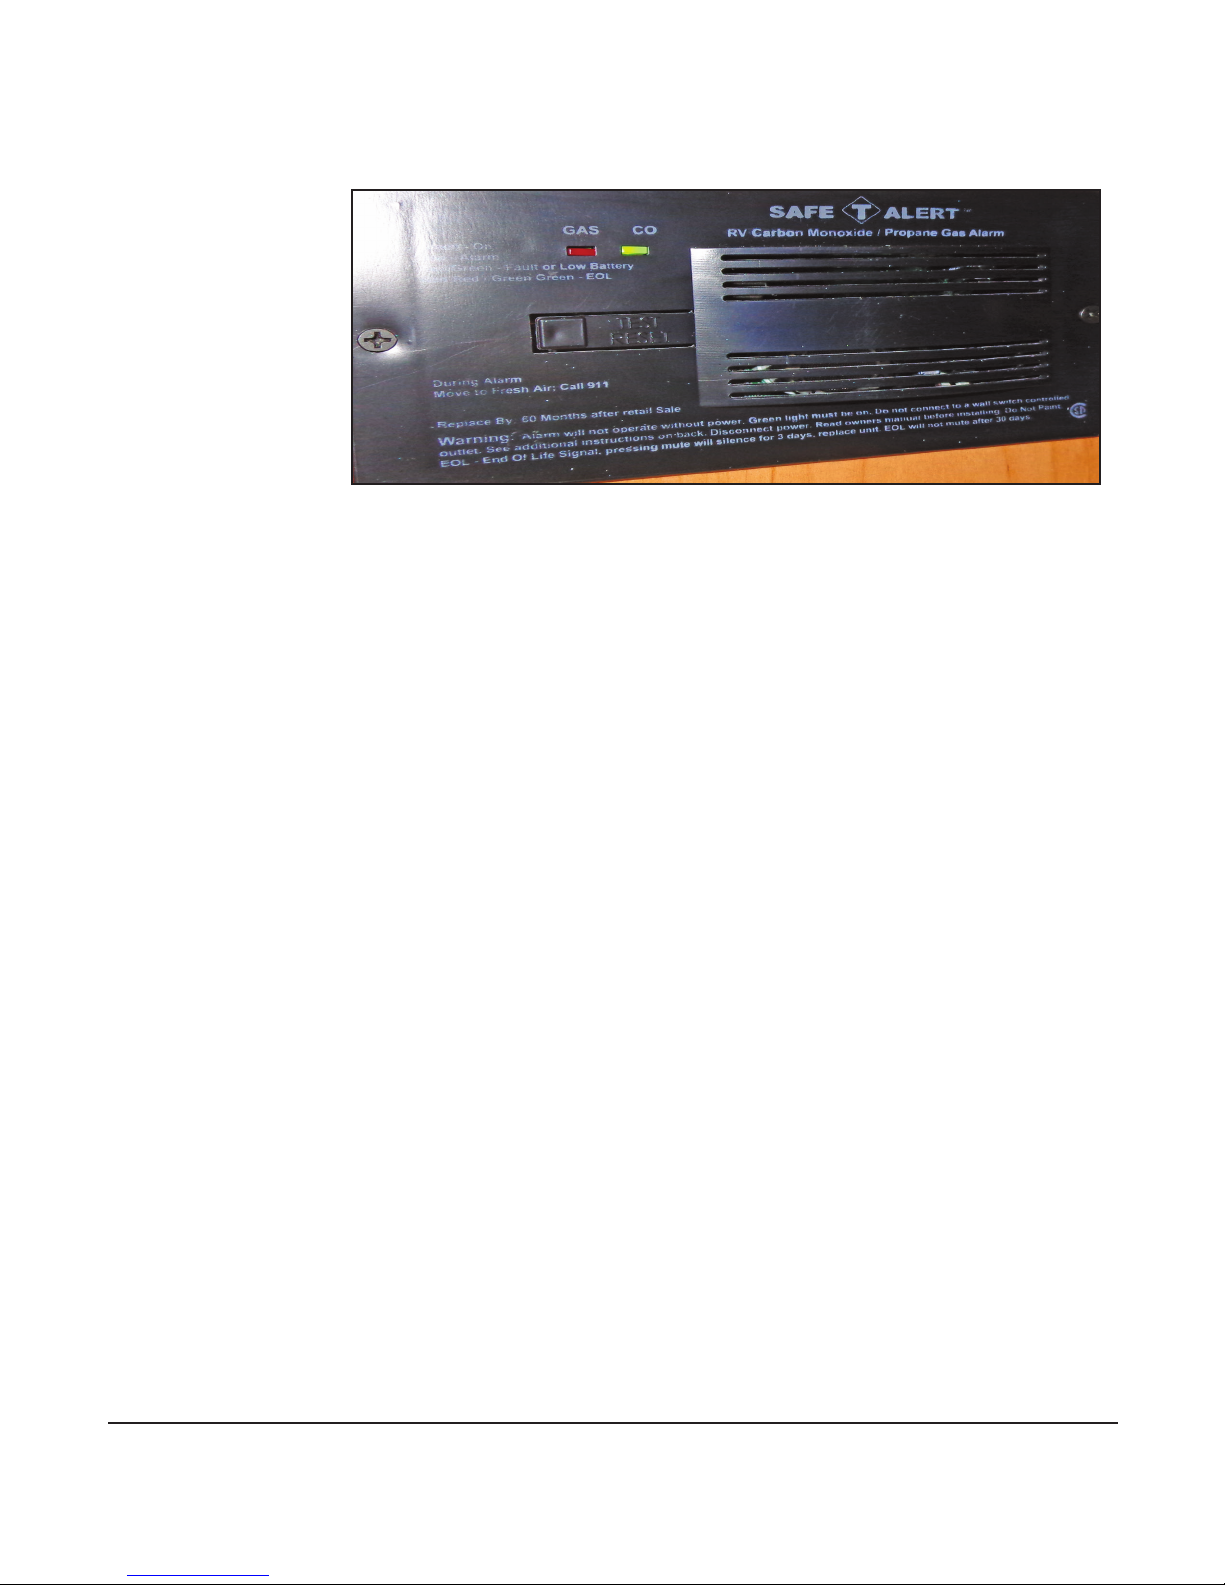
CO/LP GAS DETECTOR
Since LP gas is more
dense than air, the
LP gas will naturally
settle to the lowest
point in an enclosed
space. In the motorhome, this would be
the oor.
Because of this, the
CO/LP gas detector
(Figure 2-6) is necessarily mounted close
to the oor. To acti-
Carbon Monoxide alarm
vate the CO/LP-gas
sensor on this detector for the rst time, remove the sensor activation strip, if such was not performed
during the pre-delivery inspection.
Figure 2-6:
If the alarm persists in re-arming and giving further alarms, ventilate the motorhome by opening doors
and windows and then check for possible LP gas leaks. If the leak cannot be readily found, then close
the main valve to the LP tank and turn “o” all gas appliances and then take the motorhome to a quali-
ed service technician aer the ventilation process is concluded and the doors and windows again shut.
is single compact system provides a powerful combined alarm that detects both Carbon Monoxide
(CO) and explosive gases Propane (LPG) and Methane (Natural Gas). is detector uses the latest
microprocessor technology combined with two electronic self-cleaning sensors that operate independently of each other. e combined unit can detect both CO and explosive gases simultaneously.
Carbon monoxide (CO) is a colorless, odorless, tasteless gas which, when breathed, bonds to the hemoglobin in the red blood cells and, thus, drastically reduces or blocks the transfer of oxygen from the
lungs to the rest of the body.
In sucient concentrations, CO kills by asphyxiation. In lesser amounts, CO makes the victim groggy,
lethargic, and unable to think clearly or quickly.
CO is one of the products of combustion for many materials including petroleum-based products (e.g.,
gasoline, diesel fuel, propane, butane; among others). Since many of the appliances and the engines
associated with the motorhome produce CO in their normal operations, it is necessary to assure that
CO levels do not rise to dangerous levels within the motor home. In suciently high concentrations,
CO can kill in minutes.
e most susceptible people to CO poisoning are unborn babies, small children, pregnant women,
15
SAFETY
senior citizens, and people with cardiovascular or respiratory problems.
Consequently, it is prudent to check the CO monitor regularly for normal operation and to remain
aware of the symptoms of CO poisoning which include dizziness, nausea, vomiting, muscular twitching, throbbing in the temples, incoherent thinking and speech, weakness, sleepiness, and intense headaches.
Should any of these symptoms be experienced in the motorhome, you should IMMEDIATELY evacuate the motorhome and seek medical help. Shut down the motorhome and do not attempt to operate
it again until the source(s) of the CO are located and xed.
DANGER
Carbon monoxide gas—derived from products of combustion of diesel fuel, LP gas,
and other petroleum-based products—is a deadly gas which can kill motorhome occupants, if allowed to accumulate in sufficient concentration. Assure that all engine
operations are not restricted—tailpipes and exhaust ports should not be blocked or
restricted in any way. Additionally, any accumulation of exhaust gases outside or underneath the vehicle should be avoided as such may enter the motor home through
windows or vents—be careful how and where the motor home is parked to avoid such
conditions. Regularly monitor outside conditions to assure that all exhaust gases can
readily be dissipated and not enter the motor home inadvertently.
Never sleep in a motorhome when the engine is running—engine exhaust fumes
could enter the motorhome and cause disability or death. Regularly check the exhaust system to note any leakage sites and, if found, discontinue use of the motor
home until they are repaired by a competent, qualified service technician. Do not attempt repairs on the exhaust system yourself and do not modify (temporarily or permanently) the exhaust system at all.
DANGER
16
SAFETY
FIRE SAFETY
As with any enclosed system containing the three required conditions for re (i.e., combustible materials, oxygen, ignition sources), there will exist the possibility of re.
Tin Motorhomes has taken every precaution and design practice to minimize or negate this possibility, but the nal determination rests with the owner and user of the motorhome.
Accordingly, it is in the best interests of the owners, users, and their guests to be aware of basic re-safe-
ty practices and procedures and those particular features that Tin Motorhomes has provided for re
safety.
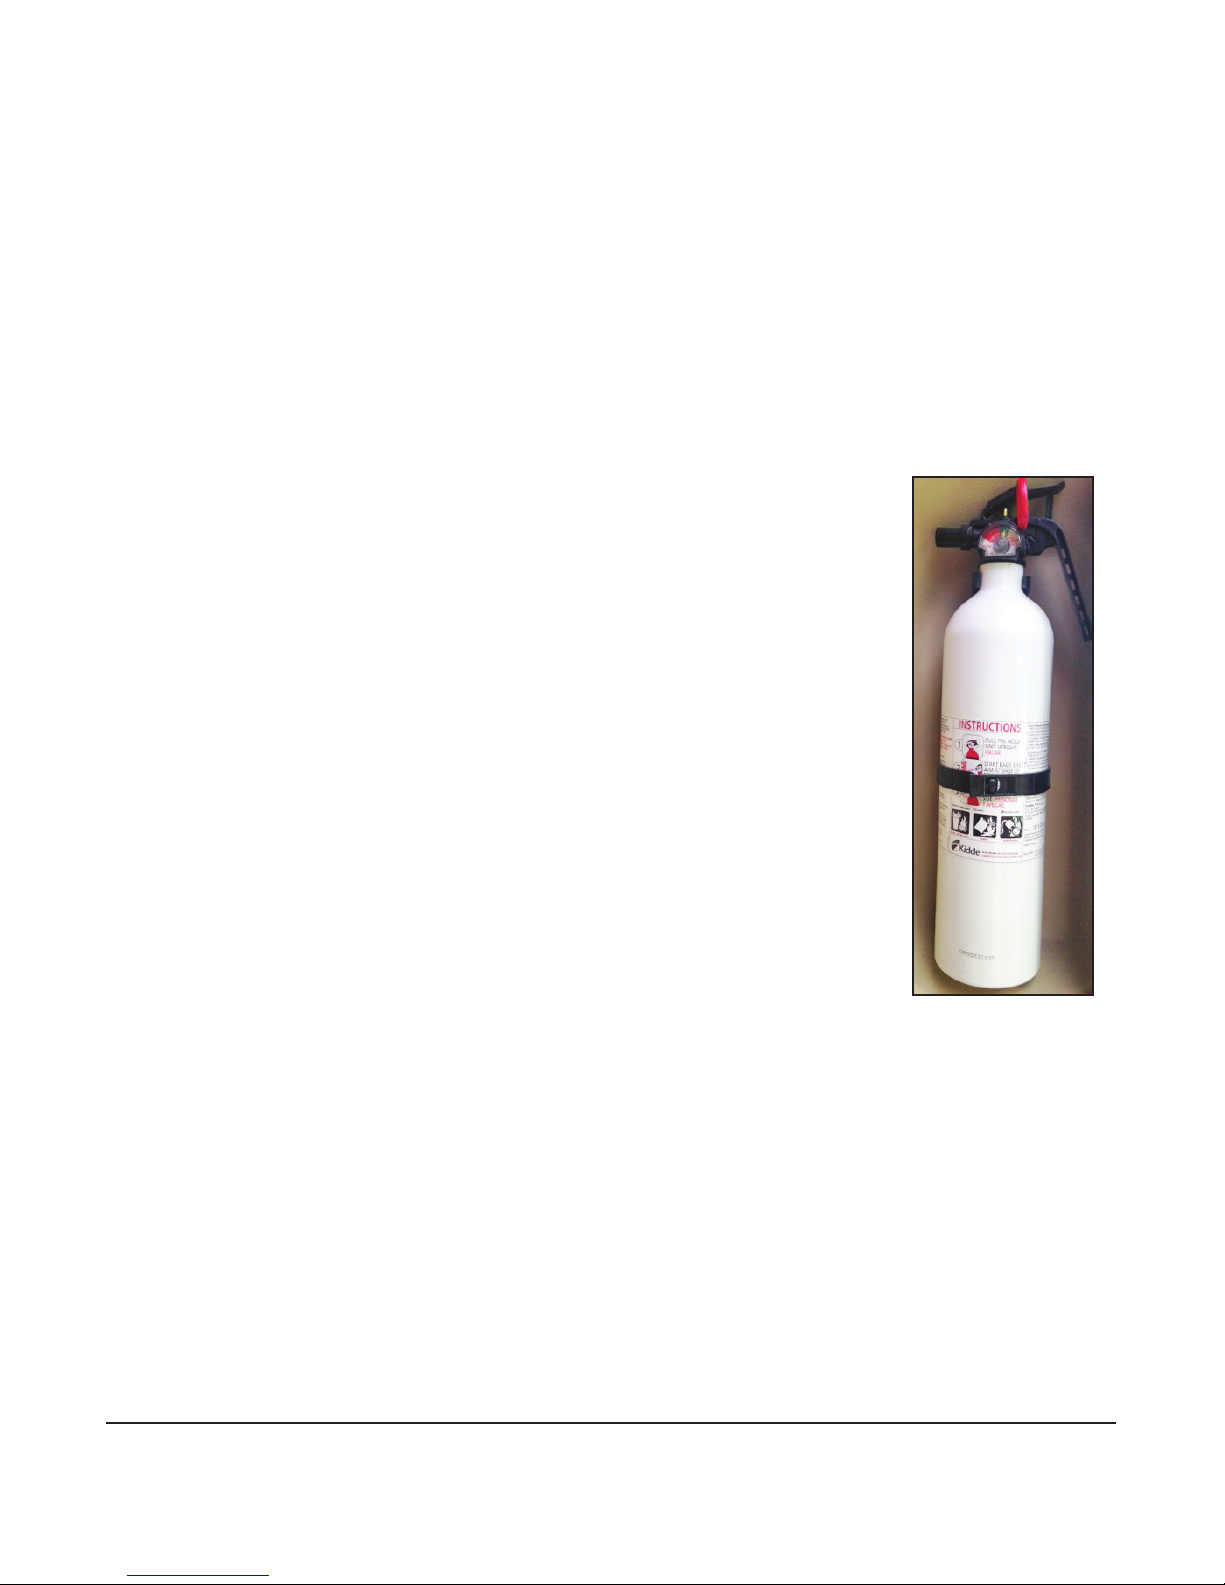
FIRE EXTINGUISHER
e Allegro Bus is equipped with a re extinguisher located in the entrance door
stairwell (Figure 2-7). e extinguisher is rated for both Class B (i.e., grease, gasoline, diesel fuel, ammable liquids) and Class C (i.e., electrical) services.
Read and understand the accompanying owner’s manual on that extinguisher
(found in your Owner’s Information Package) and remember the location of the
extinguisher.
ese types of re extinguishers are pressurized, mechanical devices and require
that appropriate care be used in their safe storage and use. e owner’s manual
will provide necessary guidance for the proper storage, handling, and use of the
extinguishers.
Prudent preventive maintenance suggests monthly inspection of any re extinguisher to assure that it is suciently pressurized (i.e., the needle on the gauge
is in the “normal” zone) and that the mechanical components are not blocked in
any way.
Do not test a re extinguisher by partially discharging the unit—this will cause a
loss of pressure and may lodge some re-retardant materials in the valve mechanism and cause the extinguisher to continue to vent slowly down to zero pressure. If an extinguisher is ever partially used; continue its use until the unit is
completely discharged then have the re extinguisher fully recharged at an appropriate service center (one can call any re department for information on
having an extinguisher recharged in that particular locality).
DO NOT wait a long time to recharge an empty re extinguisher; you’ll never
know when it may be needed.
Should a re occur inside or around the motorhome, evacuate the motorhome
quickly and calmly—do not panic. In the event of heavy smoke or extensive ames, keep low (crawl
if you must) and make your way to the nearest exit (door, emergency window) and leave. If the re
involves a fuel source (e.g., diesel fuel, LP gas); consider the probability of an explosion and move
suciently far away to minimize personal harm. If such is available, immediately place a call to the
local re department (or ask someone nearby to do so) to report the re. Consider the cause and the
consequences of the re and the risks associated with possibly ghting the re yourself before trying
to extinguish it.
DO NOT expose yourself or others to unnecessary danger.
Figure 2-7:
Fire extinguisher
17
SAFETY
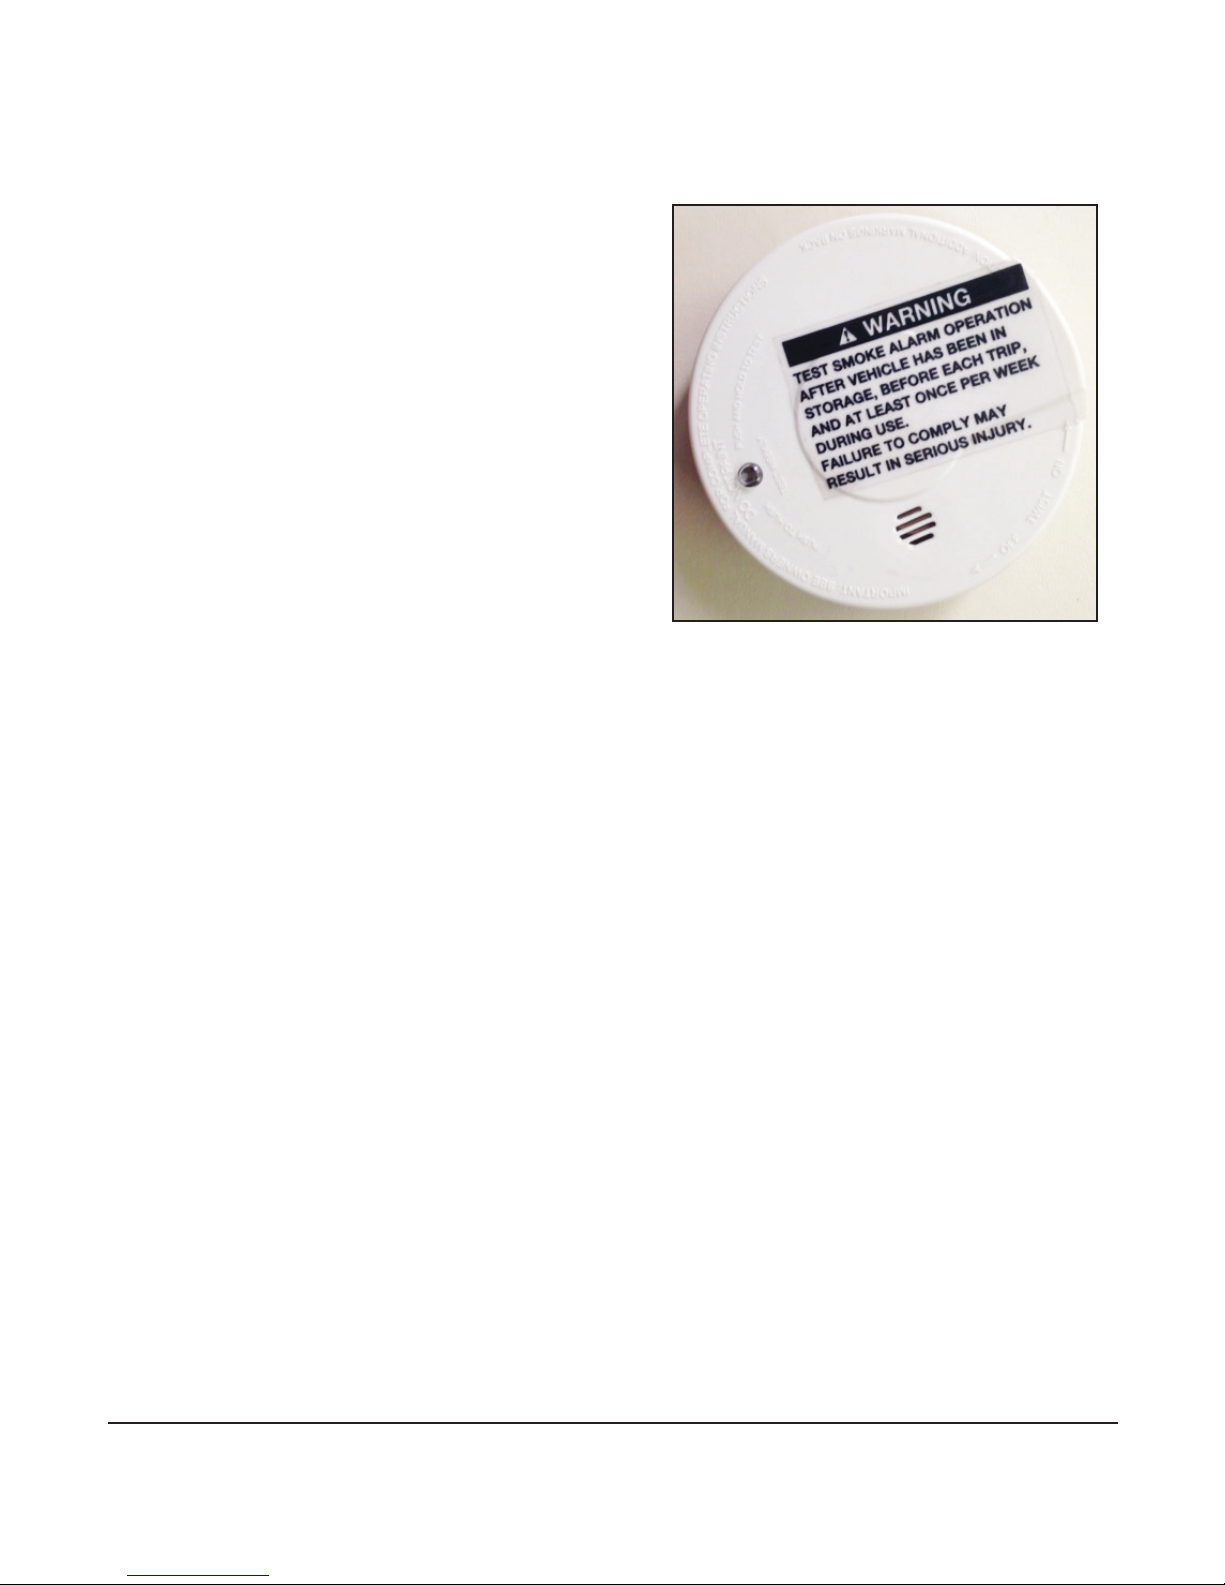
SMOKE DETECTOR
e Allegro Bus motorhome is equipped with a battery-operated smoke detector (Figure 2-8) located on
the ceiling in the living area of the motorhome.
e smoke detector should be tested on a weekly basis,
before each trip, and aer any period of storage of the
motorhome.
If a low-battery condition is noted or the alarm “chirps”
to indicate a low-battery condition, immediately replace the battery. It is suggested that you keep replacement batteries in the motorhome for any in-transit replacements so that the smoke-alarm capability is never
compromised.
DO NOT disable the smoke detector for any transient,
false alarm (e.g., cooking smoke, dusty furnace, tobacco smoke). Ventilate the motorhome with fresh air and
the alarm will reset.
Figure 2-8: Smoke detector.
ELECTRICAL
• Careless handling of electrical components can be fatal. Never touch or use electrical components or
appliances while feet are bare, while hands are wet or while standing in water.
• Improper grounding of the vehicle can cause personal injury.
• Do not attach an extension cord to the utility power cord.
• Do not use any electrical device that has had the ground pin removed.
• Avoid overloading electrical circuits. Replace fuses or circuit breakers with those of the same size and
amperage rating only. NEVER use a higher rated fuse or breaker.
LOADING
• Store or secure all loose items inside the motorhome before traveling. Possible overlooked items such
as canned goods or small appliances on the countertop, cooking pans on the range, or free-standing
furniture can become dangerous projectiles during a sudden stop.
• Be aware of GVWR, GAWR, and individual load limit on each tire or set of duals.
• Never load the motorhome in excess of the gross vehicle weight rating or the gross axle weight rating
for either axle.
MAINTENANCE
• Do not remove the radiator cap while engine and radiator are still hot. Always check coolant level
visually at the see-through coolant reservoir.
• NEVER get beneath a vehicle that is held up by a jack only.
• Do not mix dierent construction types of tires on the vehicle. Replace tires with exact size, type, and
load range.
18
SAFETY
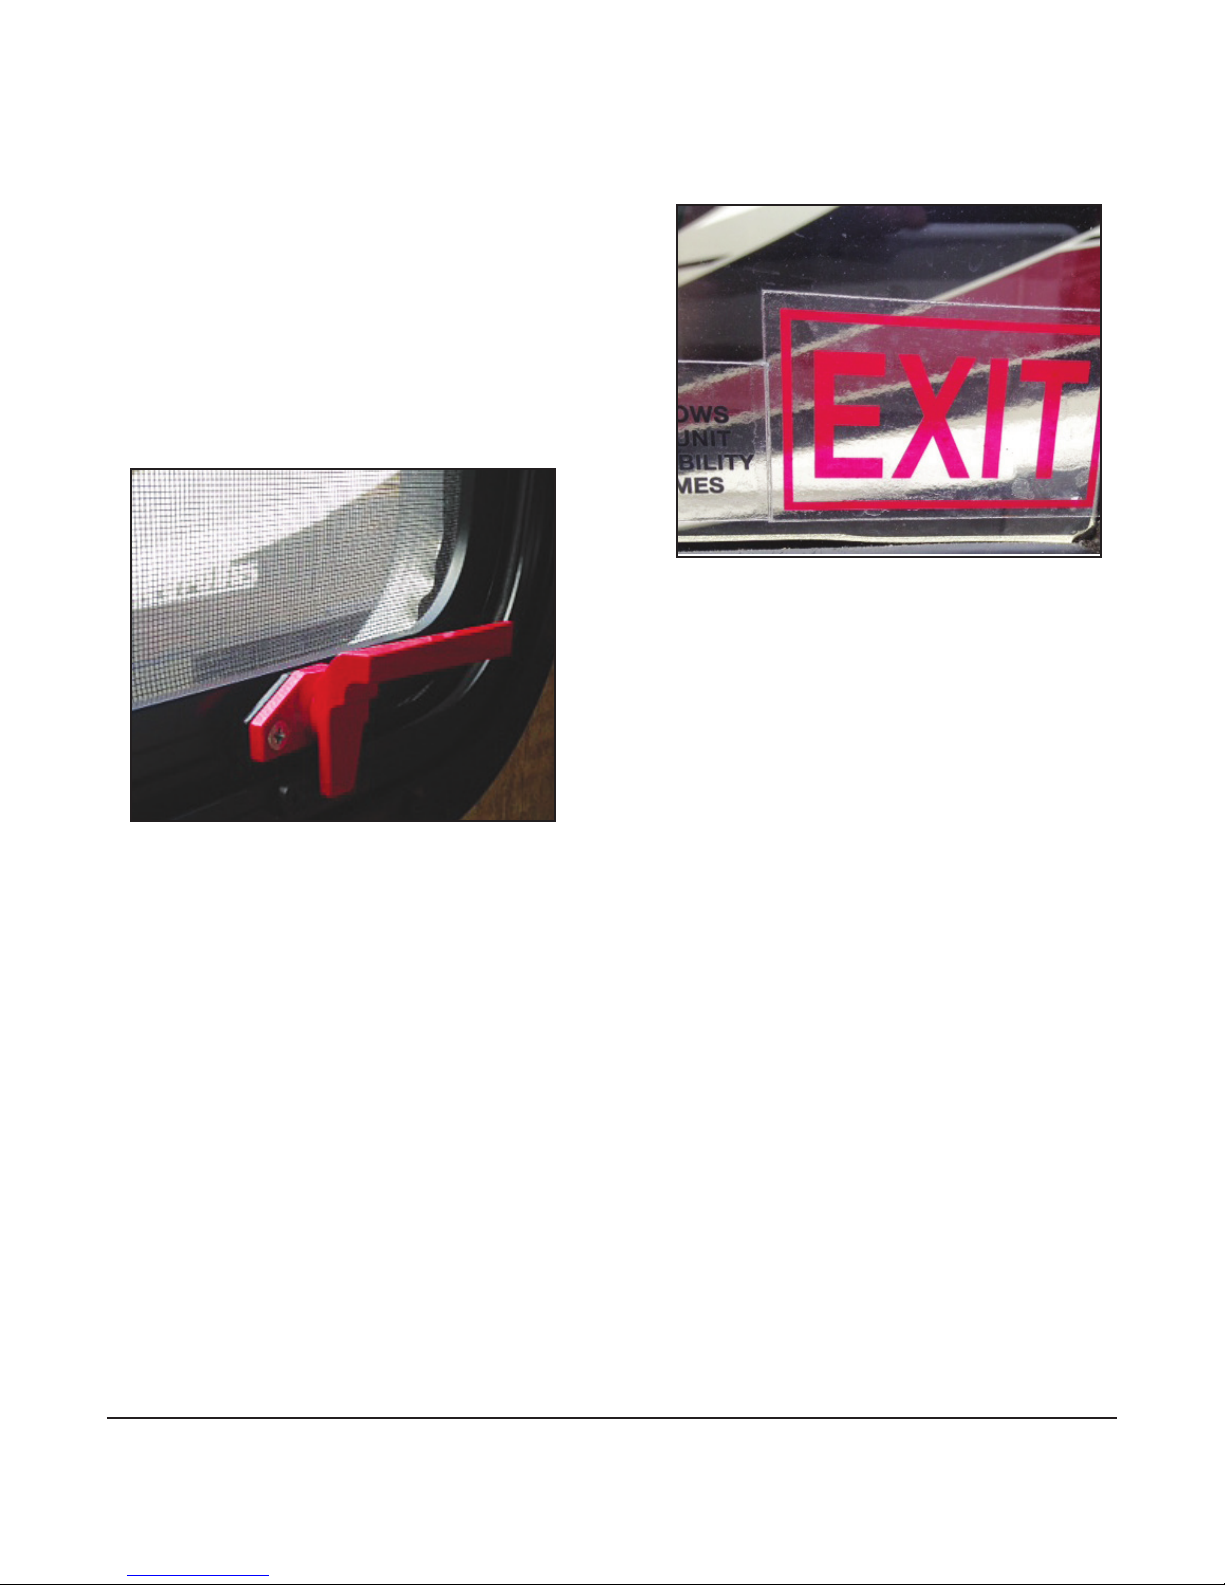
EMERGENCY EXITS
In the living areas of the motorhome, there are emergency exit windows (Figure 2-9 and 2-10). ese windows are designed for emergency exits when it is not
practical to exit by the door, which also is an emergency
exit - in the front of the motorhome. ese windows
are readily noticeable by their red handles and the red
“EXIT” label on the windows.
To use
these windows as emergency exits, li the handle and
push outward on the window. As required, the window
can be closed by pulling the window inwards and then
lowering the handle to latch the window back in place.
When the motorhome is to be parked, it would be wise
to note where these windows will be so the exits won’t
Figure 2-10: Emergency exit latch
be blocked (e.g., against a tree, pole, or wall).
Figure 2-9: Emergency exit window
PARKING PROCEDURES
To park the motorhome in any unfamiliar terrain, examine the site for surface irregularities, slopes or
inclines, and other items such as stumps, rocks, external connections for power/water/sewage and also
examine the area immediately above the parking site for obstructions like tree branches and limbs,
signs, overhead wiring.
If the motorhome is to be backed into the parking site, try to have that site be on the driver’s le-hand
side, as this will allow the driver to watch the rear of the motorhome. Back up slowly and use the side
mirrors and the back-up camera as a guide or, better yet, have another person outside providing guidance to help park the motorhome.
When the motorhome is nally situated, shi the transmission into park, set the foot-operated park
brake, and then turn “o ” the engine. Activate the hydraulic leveling system to level and stabilize the
motorhome.
If the motorhome is to be powered externally, connect the 120 VAC power to the motorhome. Turn
19
SAFETY
“on” the LP gas valve at the LP tank. Connect the fresh-water supply and sanitize the water systems
as needed. Connect the waste drain hose to the external sewer hook-up. Start the refrigerator, water
heater, and furnace; as warranted. Light the oven pilot light, as needed. Certain appliances, such as the
refrigerator, will not work properly, if the motorhome is not level, so be sure to complete the motorhome-leveling process before activating any of the appliances.
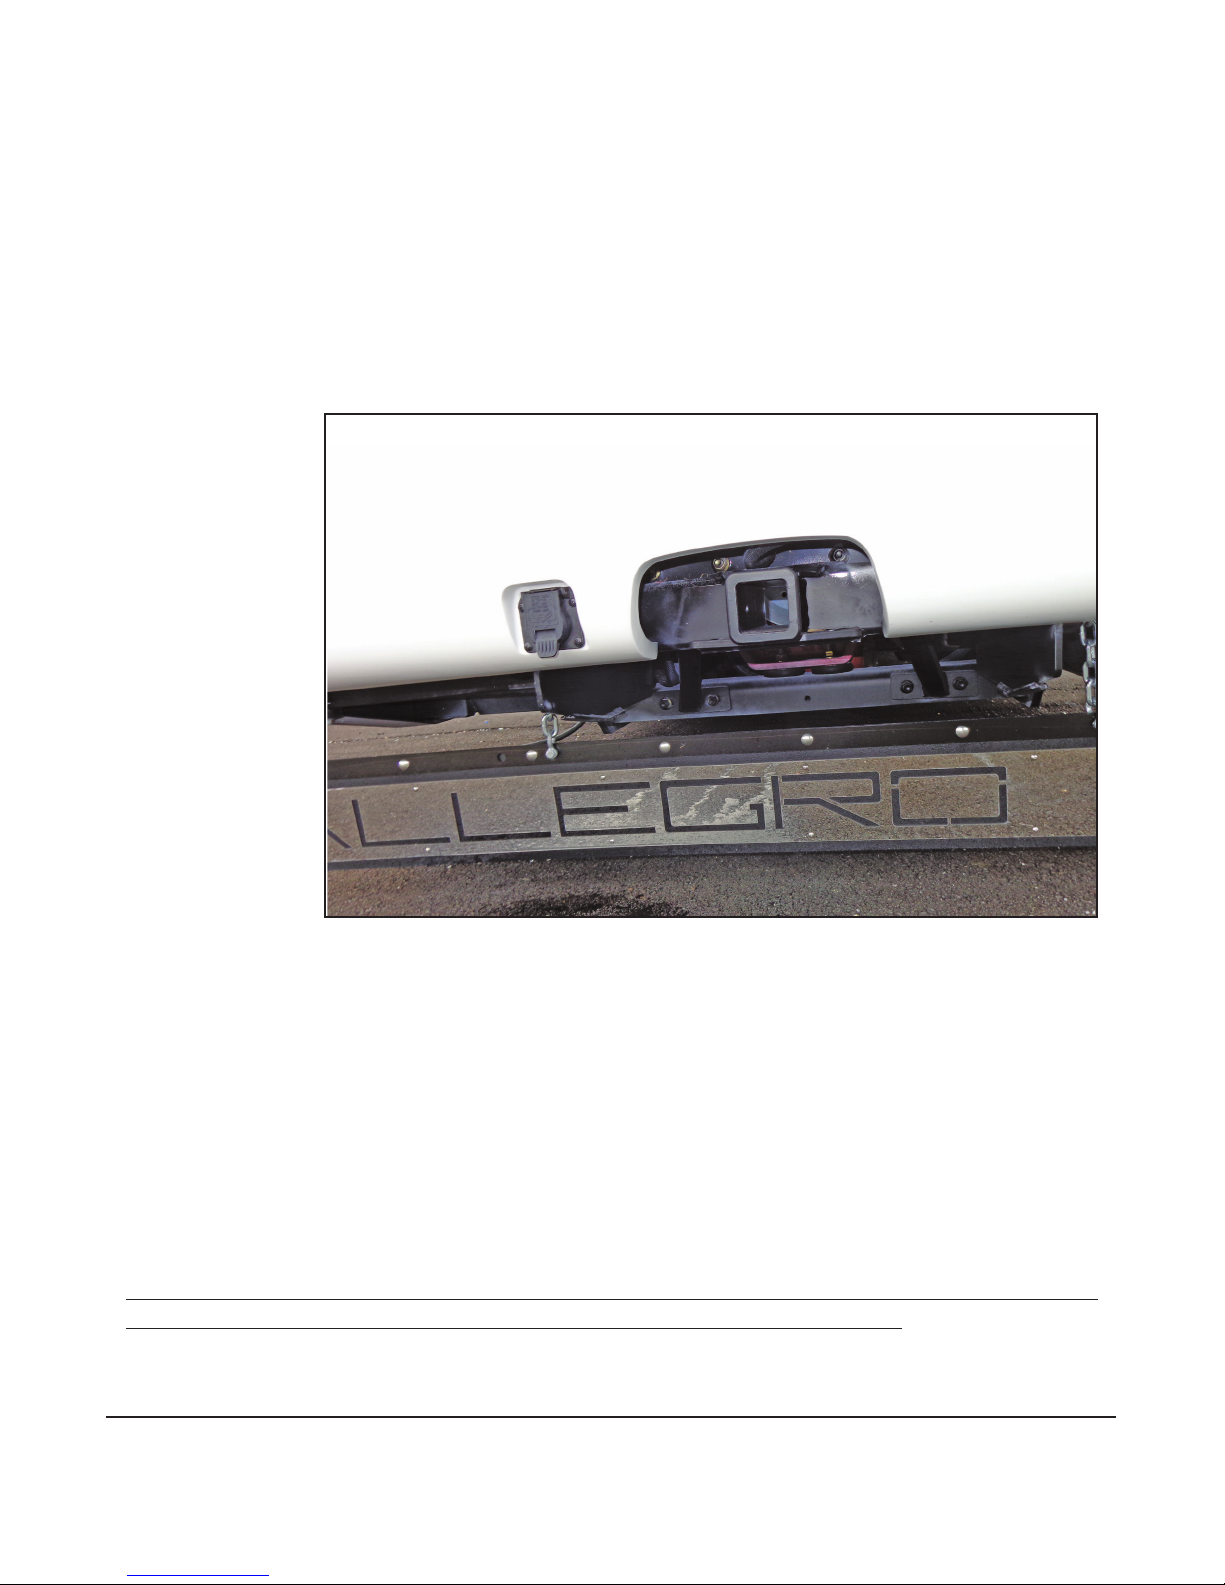
TOWING HITCH
e Allegro Bus
is fully capable
of towing typical motor vehicles. e motorhome is equipped
with a Class 3;
15,000-pound
towing hitch (Figure 2-11) and associated connector.
e towing hitch
features a 7-pin
wiring connector.
If desired, a trailer
brake actuator can
be added. e plug
Figure 2-11: Towing hitch
for the actuator is
located to the le
of the steering column underneath the dash.
e motorhome is capable of towing light loads. e total weight of the motorhome and any vehicle
towed by that motorhome must not exceed the Gross Combined Weight Rating (GCWR). e tongue
weight is not to exceed 10 percent of the towing capacity. Information related to the motorhome weight
and GCWR can be found on a sticker inside the motorhome closet.
Any vehicles to be towed by the motorhome should have adequate active braking.
Tin Motorhomes does not recommend using any type of hydraulic towing li that attaches to the
rear of the motorhome designed to carry motorcycles, scooters, golf carts, etc.
20

HEATING & AIR CONDITIONING
Chapter
3
To print a color copy, visit www.tinmotorhomes.com
21
HEATING & AIR CONDITIONING
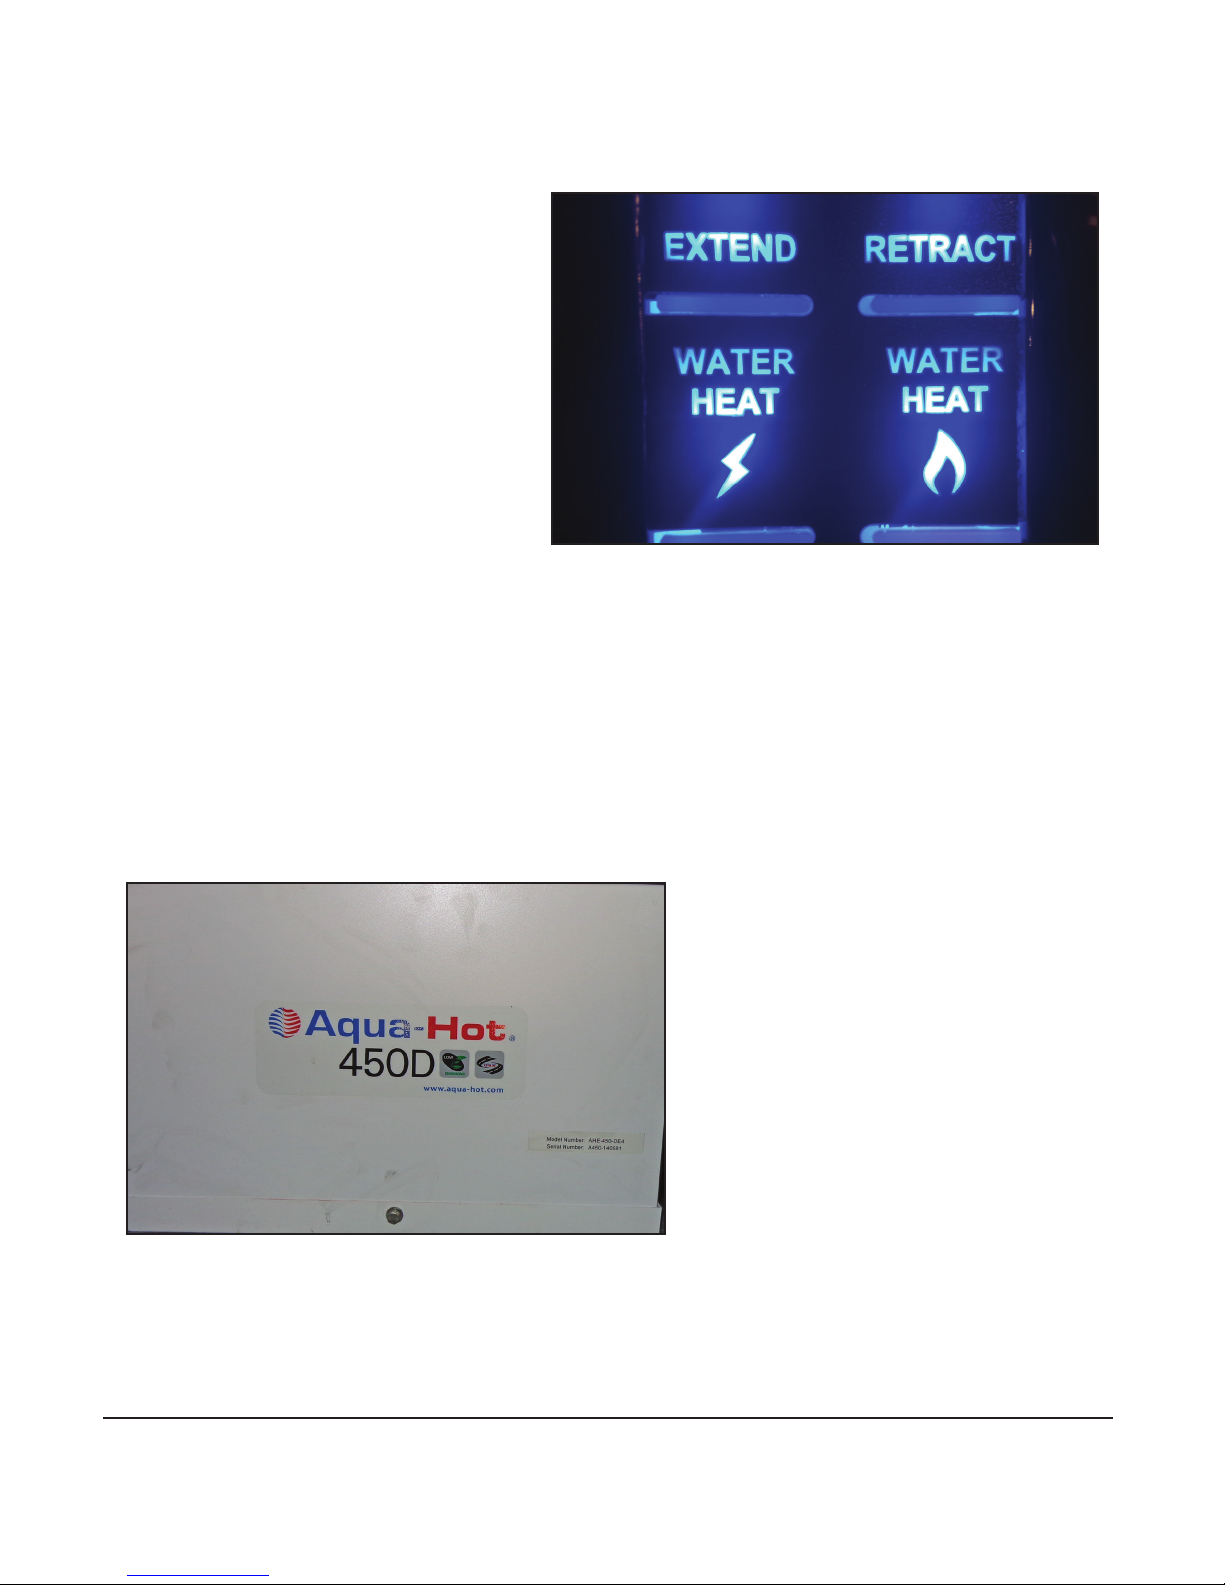
AQUA-HOT HEATING SYSTEM
e Allegro Bus features an Aqua-Hot
heating system (Figure 3-1) that provides
a continuous, on-demand supply of domestic hot water, as well as interior zone
heating when and where it is needed.
Both heating features are accompanied
by a unique VDC-powered diesel-red
burner and a VAC-powered electric heating element (120 VAC). ese two heating sources maintain the temperature of
the Aqua-Hot’s solution of water and anti-freeze.
Figure 3-1: Hydraunic heating system
If interior heat and hot water are both needed at the same time, the hot water will take
precedence over the interior heat, causing the interior heat to shut down and turn o until the water
ow is turned o from water sources.
e surge tank (Figure 3-2), which is located in the basement, should be routinely inspected to make
sure the anti-freeze ll line stays in the acceptable zone. If the anti-freeze becomes low, you must add
the recommended anti-freeze stated in the Aqua-Hot’s owner’s manual.
If anti-freeze is totally depleted from the
surge tank, a switch will be released inside
the main Aqua-Hot tank, disabling the system from operating. Anti-freeze will then
have to be added to the tank to reactivate
the switch and allow the system to operate.
If batteries become discharged and the
Aqua-Hot system is activated, the system
will automatically shut down before batteries are totally discharged. Once power is restored to the batteries, the system must be
reset by depressing the reset button on the
black panel of the surge tank (Figure 3-3).
Figure 3-2: Surge tank
For detailed operations on using the AquaHot Heating System, refer to the owner’s
manual in your Tin Owner’s Information Package.
22

HEATING & AIR CONDITIONING
NOTICE
Yearly maintenance is required on the burner portion of the
Aqua-Hot heating system.
CAUTION
The Aqua-Hot heating system operates off
the coach’s diesel tank. Keep in mind that
the Aqua-Hot fuel tube is located higher in
the diesel tank than the coach’s engine fuel
in order to prevent complete depletion of the
diesel fuel tank. BE SURE AN ADEQUATE
AMOUNT OF FUEL IS IN THE TANK BEFORE
DRY CAMPING.
CAUTION
DO NOT operate the diesel burner and/or the
electric heating element without the water
and anti-freeze solution in the Aqua-Hot’s
boiler tank. Failure to do so will cause SERIOUS DAMAGE to the heater.
23
 Loading...