

Page 1
Lowel GL-1 Instructions
Page 2
Operating Lowel GL-1
Warnings
The Lowel GL-1™Power LED
is a professional AC/DC powered
lighting fixture. Read these
instructions before operating.
n Not for house hold use,
use only for professional imaging
purposes.
n Do not immerse unit in water
or use in damp locations.
n Do not obstruct heat ventilation
for unit.
n Do not stare directly into LED’s.
n Always remove batteries
or AC supply, and make sure unit
is powered Off, when not in use,
or being stored
Battery Warnings
n Improper use can cause
explosion
n Do Not charge battery
unattended
n Do Not reverse-charge or
reverse-connect
n Do Not short circuit
n Stop using if battery expands
n Do not use in temperatures
over 70°C/160°F
n Do Not expose battery to direct
sunlight
n The user is fully responsible
for the result of using this battery
.
Focusing
Flood
Spot
Dimming
1. Dimming by Trigger
2. Trigger Lock Dimming
Intensity Wheel
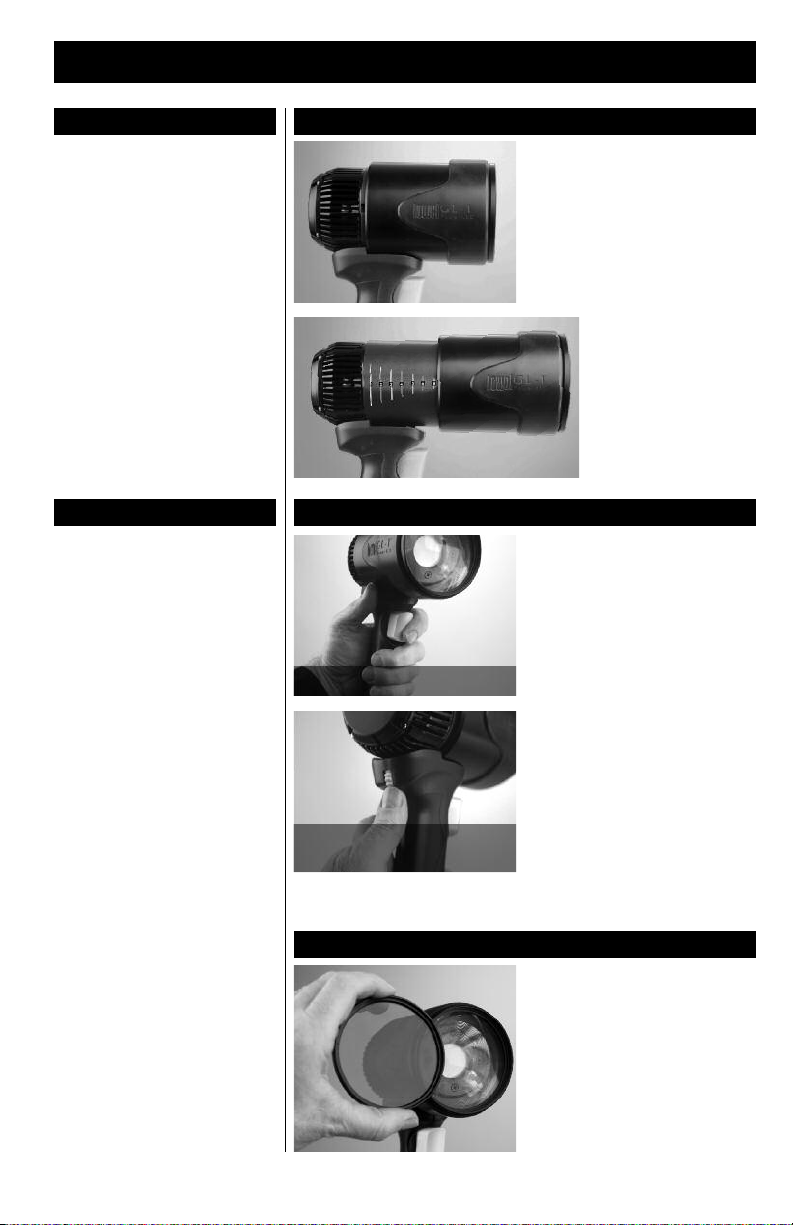
GL-1 is a focusing LED fixture with
a ratio of 5:1, spot to flood.
To focus the unit, grasp the front of
lighthead and slide it forward to spot,
or backward to flood the beam.
As you slide the lamphead
forward, you will see markings on the
side of the focus barrel that will give
reference points to help
quickly reset the light to a
previous focus setting.
The markings do not
have any direct numerical
correlation to focus or output
settings, they are for visual
reference.
When powered ON,
the GL-1 can be
dimmed 2 ways.
On the fly, by squeezing
1.
the spring-loaded trigger, to find and
temporarily hold at the desired output
level setting.
2. For longer term lighting
where you want to set the dimming level
and leave it, first squeeze the trigger all
the way in to lock it. Once this is done,
GL-1's level can be adjusted using the
dimming Intensity Wheel on the back
at the top of the handle. This level stays
even if the unit's power switch is turned
off. Squeeze trigger again to release
the lock.
82mm Accessory Screw Thread
The screw thread on the front of GL-1's
fresnel lens as for adding color changing filters, such as an 82B tungsten to
daylight filter for lighting in daylight
color conditions.
You can also add an 82 mm lens shade
to help prevent direct light spills into
the camera lens during timelapse light
painting situations.
Page 3

Operating Lowel GL-1
Features
Focusable LED Head
Silent Diaphragm
Cooling
Intensity Wheel
Lockable Dimming
Trigger
Battery Warning
Indicator
Power Switch
AC Input
Rechargable Battery
Tripod Mounting
GL-1 can be mounted on a tripod using
the tripod screw thread hole on the
bottom of the unit. Exercise caution
when moving the light & tripod.
The light will be top heavy and require
tight tripod locking of all tilt/pan con-
trols to prevent
slipping or
drooping.
1/4-20 Screw
Tripod Mount
Power indicator LED
1.
Steady Green
Unit is ON and has sufficient power
(battery or AC)
2. Slowly Flashing Green
Unit has sufficient battery power to run
for aprox. 10 minutes at full brightness
3. Fast Flashing Green
Unit has battery power to run for aprox.
2-3 minutes at full brightness.
4. Flashing Red
Unit is overheating and is about to shut
down. Turn Power Switch OFF and let
unit cool for 10-15 minutes.
Page 4

Lowel GL-1 Power
Battery Change/Charge
To remove the GL-1 battery, grasp it at its top side corners and pinch in slightly to release. Slide the battery out and orient it for
access to its top rear plug jack. Plug battery wire conector from charger into the battery jack until it locks firmly. Plug in the
charger to an AC outlet. Average battery charging time is 2-3 hrs for a drained battery. To power GL-1 by AC, plug the AC adaptor's cord connector into the rear jack at the base of GL-1's handle, and its other plug into an AC outlet. Use the power switch
just above the AC jack on the handle, to turn unit on & off. Always keep power switched off when not in use, with battery or AC.
Important: Do Not store the GL-1 with its battery installed. Also, remove the battery for travel.
Battery Removal Battery Charge Connection AC Adaptor Connection
GL-1 Accessories
& Codes
n Tiffen 82B Daylight Conversion Filter
8280B
n Lens Shade G1-20
n Spare Battery G1-15
n Spare Battery Charger G1-16
n Spare AC Adaptor G1-80
n Accessory Hard Case G1-60
n Accessory Hard Case w/ foam G1-61
Lowel-Light Manufacturing, Inc.
90 Oser Avenue,
Hauppauge, NY, 11788
Call: 800 645-2522
631 273-2500
www.lowel.com
Accessory Hard Case
The GL-1 ships in a carboard box with a
rigid foam insert, containing cutouts
that hold the light, batteries, AC supply
and battery charger. Do not discard the
insert. The accessory GL-1 Hard Case
(G1-60) accepts the insert to allow more
protected storage and traveling for the
light.
Ver. 1.0 © 2013 Lowel-Light Mfg, Inc. 905
Problems, Info,
Repairs, etc.
Lowel equipment and kits are sold
through authorized Lowel Dealers and,
in some countries, Authorized Lowel
Distributors. Repairs, problems, suggestions, and requests for brochures,
instructions, parts lists may be handled
by your authorized Lowel Dealer
(Distributor) or directly with Lowel.
Electrical repairs should be made only
by Lowel or a qualified electrician.
 Loading...