

Ticonium Premium 100 Technique Manual
TM
TM
premium 100
TECHNIQUE MANUAL
TICONIUM COMPANY
DIVISION OF CMP INDUSTRIES LLC
Albany, New York
USA

TTAABBLLEEOOFFCCOONNTTEENNTTS
S
P
remium 100
Ticonium Technique Manual
ith pictures and clear, concise instructions, you will find this Technique Manual
W
For best results, follow these instructions carefully. Thank you for your support of
Ticonium Company.
DUPLICATION ..............................................................................................2-8
MODEL PREPARATION...............................................................................9-10
SPRUING .................................................................................................11-16
METAL MIZER & INGOT ALLOY .............................................................17-19
PAINTING & FLASKING...........................................................................20-23
easy to understand. Please keep it in a handy place for quick reference.
BURNOUT.....................................................................................................24
CASTING .................................................................................................25-26
FINISHING ..............................................................................................27-30
REPAIR ....................................................................................................31-34
TECHNIQUE AT A GLANCE...........................................................................35
PROCEDURES & PRECAUTIONS....................................................................35
INDEX...........................................................................................................36
PREPARED BY: Ticonium Company • Division of CMP Industries LLC • P.O. Box 350 • Albany, NY 12201
Copyright 2003
• All Rights Reserved
1

DUPL I CAT ION
DDUUPPLLIICCAATTIIOON
N
Ticonium Premium 100
Ticonium duplicating material normally does not
require dilution, however, you should be familiar
with the strength of the duplicating material. The
duplicating material cannot be too stiff, this will
decrease the setting expansion of the investment
when poured into the duplicating material.
After removing the master model from the
colloid, you should check the strength of the
walls of the duplicating material. If they are
more rigid than usual, distilled water should
be added to the material and remelted.
(see figure 1)
Figure 1:
DIONIZER WATER
DISTILLER #61750
Ticonium Dionizer
Cartridges produce
water equivalent to
single distilled water,
removing all ionized
particles except free
carbon dioxide and
silica. They deliver
water hat is ideal for
duplicators, mixing
investments and many
other uses within the
laboratory. Resin color
change shows when to replace cartridges. Comes
complete with cartridge, mounting bracket and
accessories.
refractory model.
The Ticonium Technique provides three methods
to achieve this:
1. Hygroscopic Expansion – is directly
related to the percentage of water existing
in the duplicating material. The hygroscopic
expansion should be approximately 0.3%.
2. Setting Expansion – is achieved when the
Ticonium Investment is mixed according to ratios
indicated later in this chapter, and vibrated into
the duplicating material. During the setting of
the investment in contact with the duplicating
material, the setting expansion should be
approximately 0.4%. It is easy to understand
that if the duplicating material is too strong
the investment cannot expand properly.
3. Thermal Expansion – the average
thermal expansion is 1% and is achieved
when the flasks are placed in the oven and
burned out at 1350° F (732° C).
AUTO-DUPLICATOR INSTRUCTIONS
The use of a Ticonium 2 or 3 1/2 gallon
Auto-Duplicator will simplify the melting of the
duplicating material. Ticonium Auto-Duplicators
will perform melting and cooling operations
automatically and maintain correct pouring
temperature at all times. (see figure 2)
Because of weather conditions and shipping
distances, it is possible that the same material
will present different characteristics. The quantity
of distilled water added to the material will
vary for each specific situation. It could be
rated from100 cc’s per each four pounds of
material to 300 cc’s per each four pounds.
We believe this information is important due
to the shrinkage of Ticonium alloy after casting,
which on an average represents 1.7%, and
will be compensated for by oversizing the
Figure 2:
2 Gallon #405811 & 3-1/2 Gallon
2
AUTO-DUPLICATORS
#405711 Auto Digitals
DDUUPPLLIICCAATTIIOON
N
Ticonium Premium 100
Place small chunks of material inside the
Auto-Duplicator and follow the detailed
information provided in the Auto-Duplicator
Operating Instructions
Periodic maintenance of the Auto-Duplicators
is necessary. The inside tank should be cleaned
once a week. The inside cover and blades of
the Auto-Duplicators should also be cleaned
and all the stainless steel parts should be
sprayed with a silicone lubricant periodically.
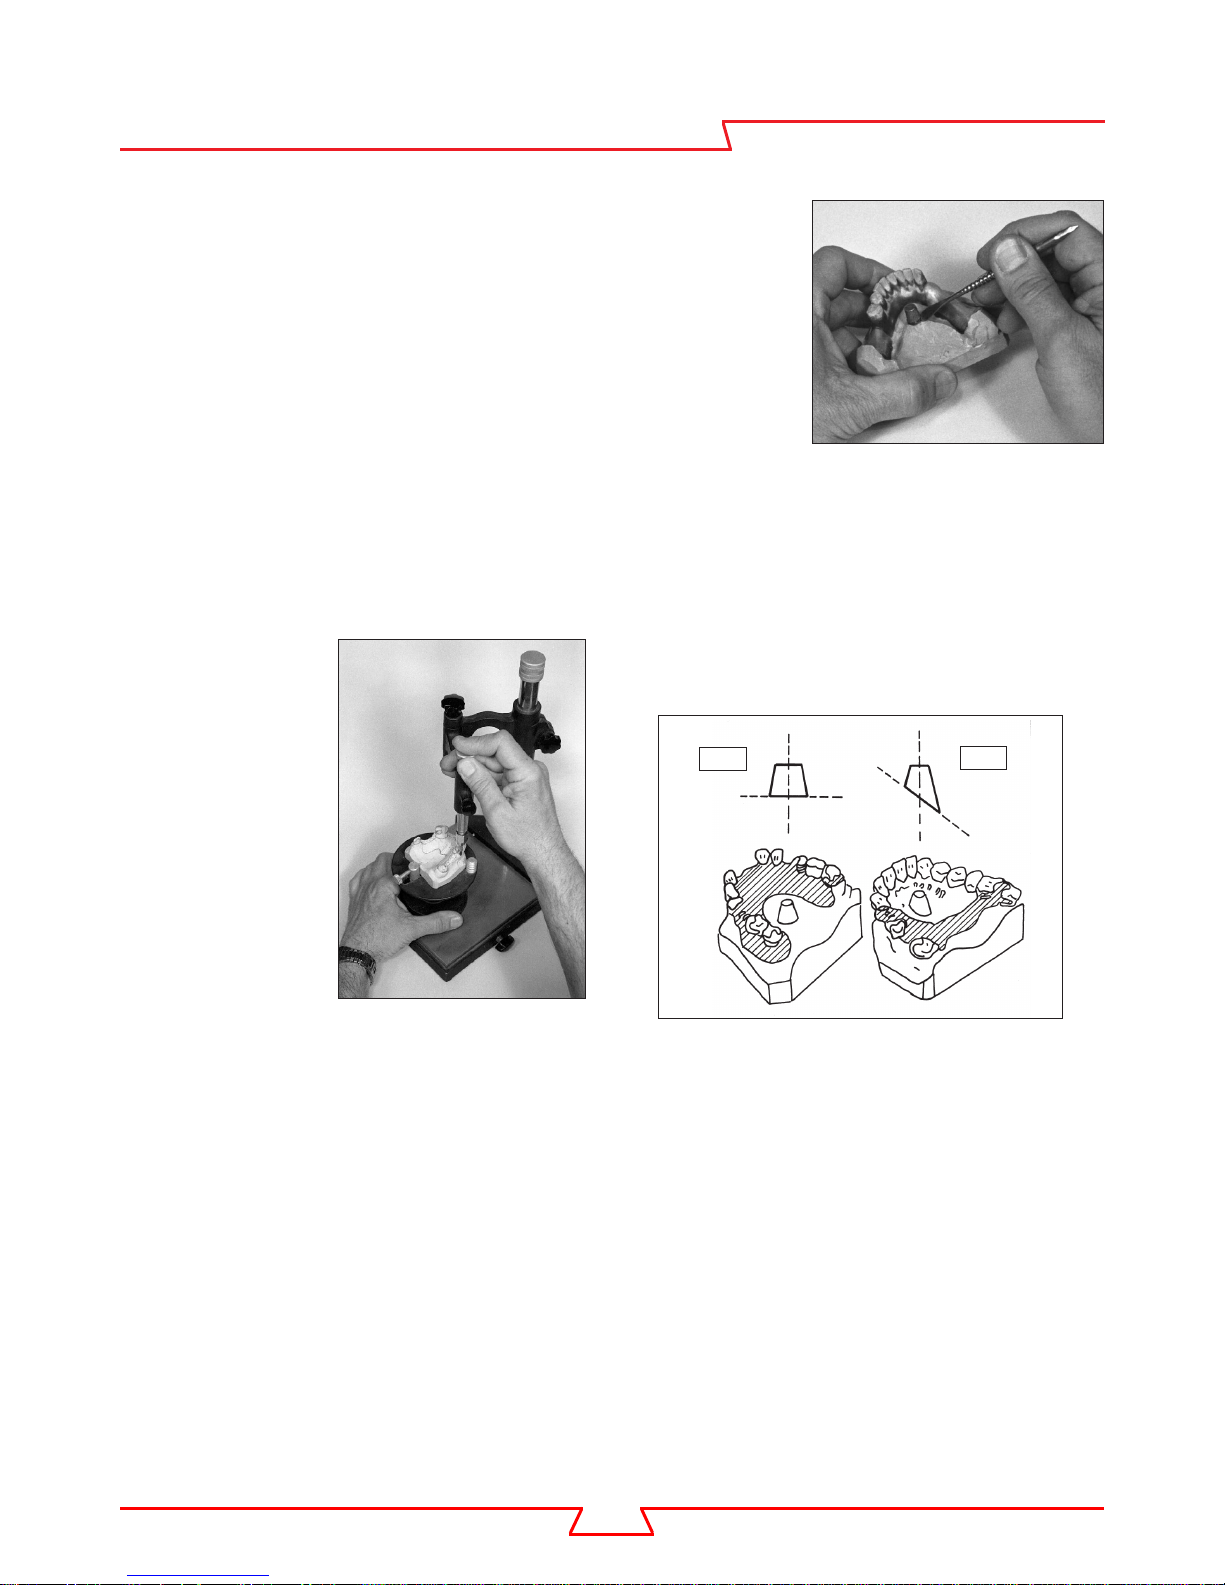
PREPARING MASTER MODEL FOR
DUPLICATION
After designing,
surveying
(see figure 3) and
blocking-out of the
undercut areas,
relieve tissue
undercuts with
TICENE or WAX.
(see figure 4)
Remove TICENE
from model after
duplication and
store for reuse.
Choose the sprue
cone to be used
with each master
model. The sprue
cones are 7 mm high.
Correct placement on the lower cases should
be 7 mm from the lower part of the lingual bar.
Figure 3: SURVEYING
Figure 4: RELIEF
of unnecessary
undercuts and
sprue placement
For upper cases the sprue cone should be
placed approximately 4 mm from palatal
bars or from horseshoes. It is also important
that with uppers the criteria of placing the
sprue cone perpendicular to the occlusal
plane be followed.
A
Figure 5: MOUNTING
of “A” & “D” Sprue Cones
D
An easy way to place the cone in the correct
position is as follows:
1. Place the cone in a lying down position
so that the edge of the sprue cone touches the
design of the lingual bar.
2. Tilt back to vertical position and seal.
Always be sure that the cone is placed
perpendicular to the occlusal plane.
“A” Sprue Cone (#TD-1475A) is used for flat
surfaces.“D” Sprue Cone (#TD-1475D) for
inclined surfaces – (see figure 5) refer to Sprue
Cones on page 12. Secure sprue cones to the
master model with wax. If the case will not be
sprued through the investment model, no sprue
cone will be needed at the point.
3
TWO METHODS OF
DDUUPPLLIICCAATTIIOON
N
T
iconium Premium 100
SOAKING STONE MODELS
There are three parts to the duplicating flask:
(see figure 7)
1. Soak model
approximately
20 minutes in
tepid, slurry
water. (see figure
6) Slurry water is
the liquid resulting
from storing large
pieces of stone in
a bottle of water
and using the
resulting solution.
This solution will
Figure 6: SOAKING MODEL
to be duplicated in slurr y water
not etch the model
whereas tap water will. (If large areas of model
are relieved with sheet wax, soak model with
teeth pointed down.)
Some technicians prefer to use slurry water
from model trimmers. The idea is good,
although, special precautions must be taken.
The slurry water from model trimmers has a
milkish appearance and a large content of
powdered stone. Prior to using this slurry water
the container should be left aside for a couple
of days to allow the sediment to settle. Then,
the liquid should be filtered and transferred
to a new container. If this procedure is not
followed, a residue of stone will deposit on the
master model, including areas at the tips of the
clasps, and rest preparations, changing the
configuration of the master model, which will
result in a poor fitting casting.
2. Another method of soaking the model
is to stand the model in about 1/4” of water
and let the model soak by capillary action.
This is the preferred method, but will take
slightly longer.
After the model has been soaked, blow off
excess water and duplicate.
1. The base
2. The body
3. Pouring spout
Two flask sizes are
provided. Use the
one which provides
at least 1/2”
clearance between
the edge of the cast
Figure 7 :
DUPLICATING FLASK
and the rim of the
base. Place TICENE Blocking
Clay (#14) in the rim of the base.
This serves two important purposes:
1. It forms a seal between the base
and body so that there will be no leakage
of duplicating material during the duplication
process.
2. It will also act as an insulator when the
cooling process is begun.
Secure master cast to base of flask with
TICENE. Place flask body on the base and seat
firmly. Position a ball of TICENE behind each
venthole on the shoulder of body. Place pouring
spout into flask body.
Center duplicating
flask under pouring
spout. (see figure
8) Open valve
until the duplicating
material flows in a
stream about the
diameter of a lead
pencil. When the
duplicating material
reaches the level of
Figure 8: POURING
the 2 ventholes,
place the TICENE
over the vents and
continue filling the flask until at least 2/3 of
the pouring spout is full.
4
DDUUPPLLIICCAATTIIOON
N
Ticonium Premium 100
Place the flask in circulating tap water.
(see Figure 8) The temperature of the running
water used for chilling is directly related to the
temperature of the room in which the chilling is
being done. If the temperature of the water is
lower than the temperature of the room, a desirable pattern of cooling will result. Regulate depth
of water so it covers only the base of the flask.
The water should not be below 55°F (13° C).
30 minutes is
required to chill
small duplicating
flasks.
45 minutes is
required to chill
large duplicating
flasks.
After proper
cooling time has
elapsed, you will
note a dimple in
Figure 9: CHILLING
DUPLICATING FLASK
the colloid in the
pouring spout. This indicates that colloid has
been pulled toward the chilling base, assuring
you that the duplicating material is fixed firmly
against the surface of the model inside the flask.
NOTE: DO NOT lift one side of model before
the other.
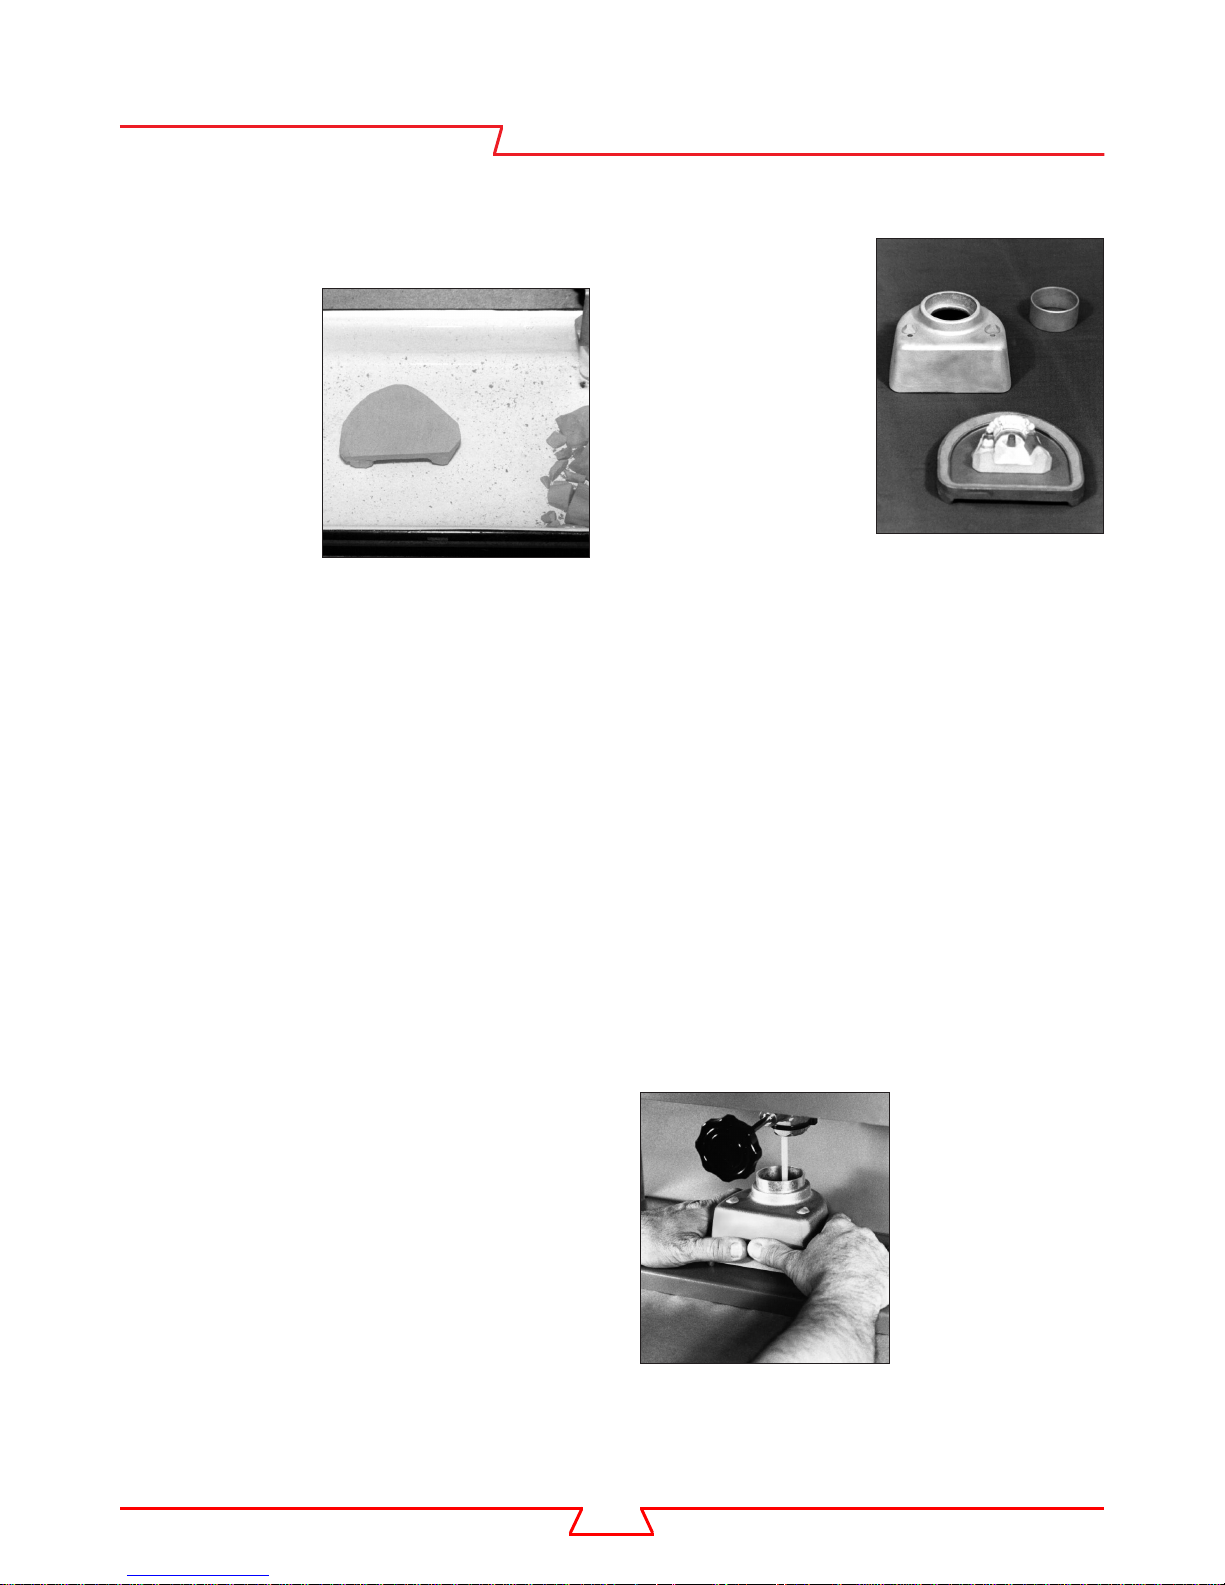
If sprue cone remains in duplicating material,
it can now be removed. (see figure 11)
Figure 11:
IMPRESSION
with sprue con
e
Use Ticonium
TM
INVESTIC
WARNING: INVESTIC
for refractory or investment models.
M
T
is harmful when inhaled
repeatedly over a long period of time. Care
should be taken to avoid breathing dust caused
by use of this product. This product contains a
blend of silica and plaster. Symptoms may not
appear until permanent lung injury (silicosis)
has occurred. Immediate clean-up of spills is
highly recommended.
EFFECT OF WATER
Remove the pouring spout by twisting it slightly.
Cut off excess duplicating material projecting
from the body of the flask. Remove the base by
prying with a knife between the base and body
of the flask.
Insert two knives in depression made by the dabs of
TICENE. The model is removed with a quick snap. Pry
up, using the walls of the body of the flask as a fulcrum.
(see figure 10)
Figure 10:
REMOVING
MASTER
MODEL
Most communities are chlorinating and/or
fluoridating the water supply. It is becoming
more and more essential to use distilled
water for mixing investment and duplicating
material. Laboratories have noticed a
pronounced difference in the behavior
both of the investment and duplicating
material during different seasons. Hence,
the recommendation is that only distilled
water be used in mixing both investment
and duplicating material.
The recommended proportion is 29 cc of
distilled water to 100 grams of Ticonium
investment. (Always use room temperature
water. Hot or cold water will accelerate or
retard setting time of investment.)
Use 28 cc of water to 100 grams of
investment for large horseshoe or full bases.
5

NOTE: Use an accurate scale and syringe
DDUUPPLLIICCAATTIIOON
N
Ticonium Premium 100
for measuring. (see figure 12)
The Dionizer Distiller (#61750) will eliminate
variables in water such as chlorination,
fluorination and deposits of mineral salts
in hard water. (see figure 1 on page 2)
Figure 12:
CAREFULLY WEIGH
inve stment and mea sure
wate r for accuracy
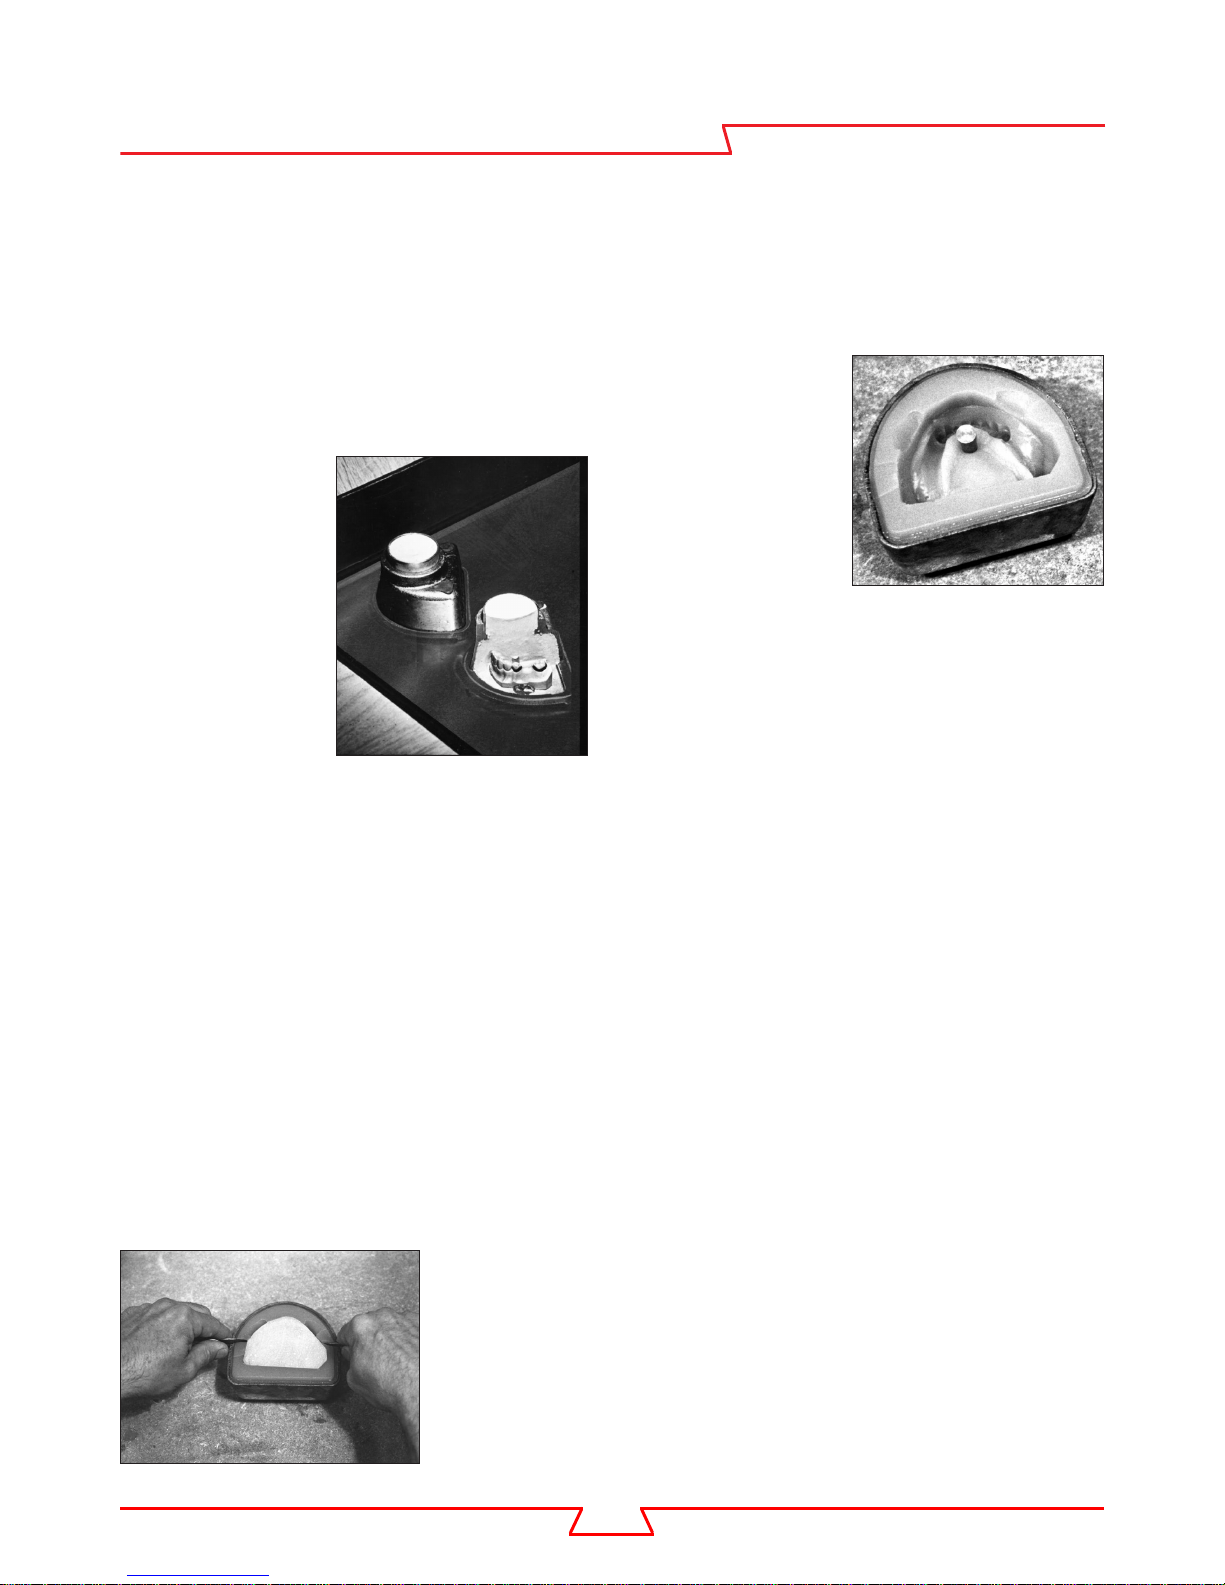
Before vibrating the investment into the
duplicating material, blow out any “free water”
left in the impression, after the master model is
removed from the colloid.
NOTE: The above recommendation is important
to avoid a powdery investment model.
Vibrate directly into the mold. Place a little
investment in the teeth and along the ridges
and vibrate to displace all trapped air. Then
add enough to fill the mold. DO NOT make
it flow around the mold as this may cause
inaccuracies where salts are removed from the
duplicating material by the flow of investment.
Vibrate a small amount of investment around
the sprue cone to form a seal. Now remaining
vibration can be accomplished without holding
sprue cone. (see figure 13)
Mechanical spatulation of a mix used for
models is highly desirable. The expansion
obtained with the investment when it has
been mechanically spatulated can be
controlled much more closely than is possible
with hand spatulation. The investment has been
compounded to provide a combined setting
and hygroscopic expansion of 0.7% when
mechanically spatulated for 30 seconds at a
water/powder ratio of 29 cc to 100 grams and
then poured into Ticonium duplicating material.
If the water/powder ratio is dropped to
26 cc to 100 grams, the combined setting and
hygro-scopic expansion can be forced upward
to 1.1%. Thus a very wide control range has
been built into the investment.
Excessive spatulation will tend to break down
the crystalline structure of the investment whereas
insufficient spatulation will cause a weak model.
If spatulation is by hand, 60 seconds is needed.
Figure 13: VIBRATION
NOTE: By vibrating investment around the steel
sprue cone, the sprue hole produced is smooth
and dense.
After pouring the refractory model the
duplicating flask should be placed in a
location which it will not be subjected to
continued vibration while other cases are
being poured.
Effect of Vibration
If the impressions are placed on the bench
alongside the vibrator as additional refractory
models are poured, the continued effect of
vibration will bring moisture to the interface
between the colloid and the model. This
water layer will result in a powdery surface
on the model.
DO NOT ALLOW TICONIUM INVESTMENT
6
DDUUPPLLIICCAATTIIOON
N
Ticonium Premium 100
TO EXTEND TO THE BODY OF THE FLASK
AS THIS WILL RESTRICT THE AMOUNT OF
SETTING-EXPANSION OBTAINED.
Allow investment model to set 60 minutes,
minimum, before separating from colloid.
SPECIAL NOTES
Occasionally it is a good idea to check your
operating procedures. Many minor deviations
can occur. These deviations add up and can
cause real difficulty.
The following is a list of the problems which
may occur and the errors that cause them.
M
T
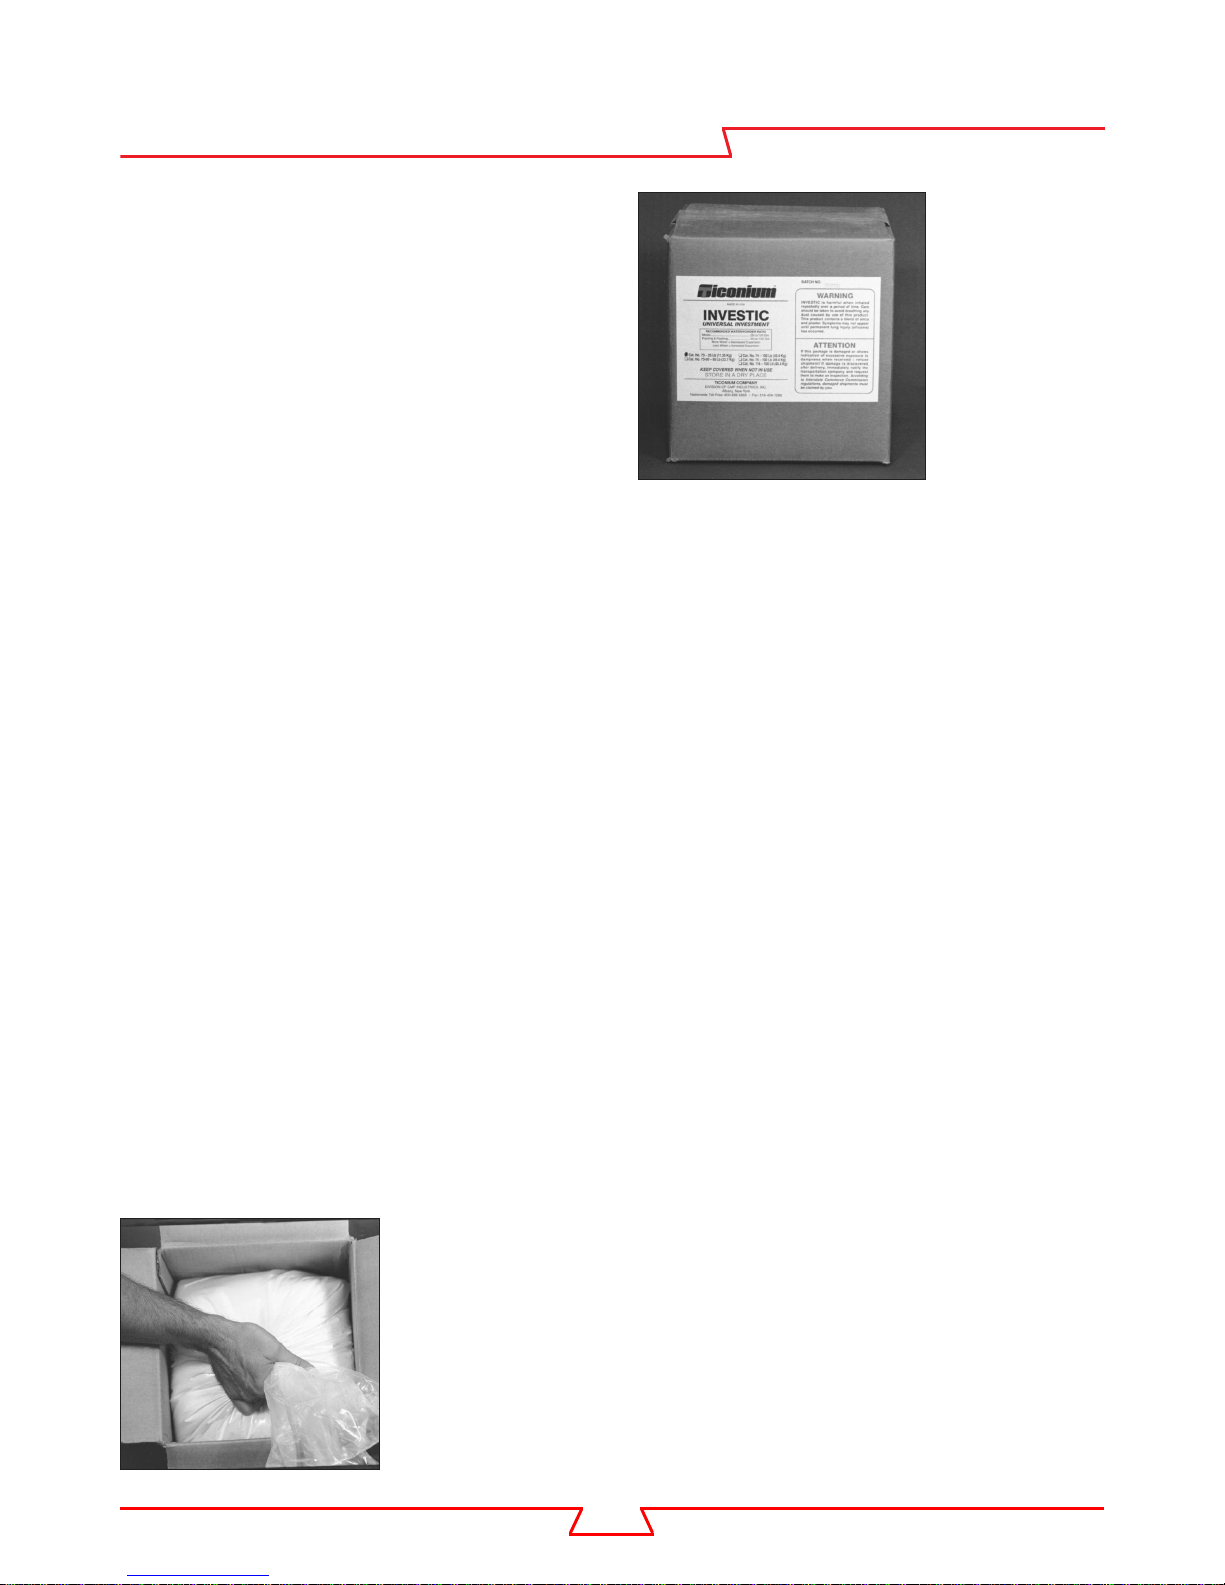
1. STORAGE OF INVESTIC
Investment material will pick up moisture if
exposed to humid air. Therefore, it should
be kept in a tightly closed container and in
a cool, dry place.
Investic is doubly protected in a water
resistant carton and a polyethylene bag.
To prevent prolonged exposure after
the package is opened, the material is
packaged in 25 pound containers.
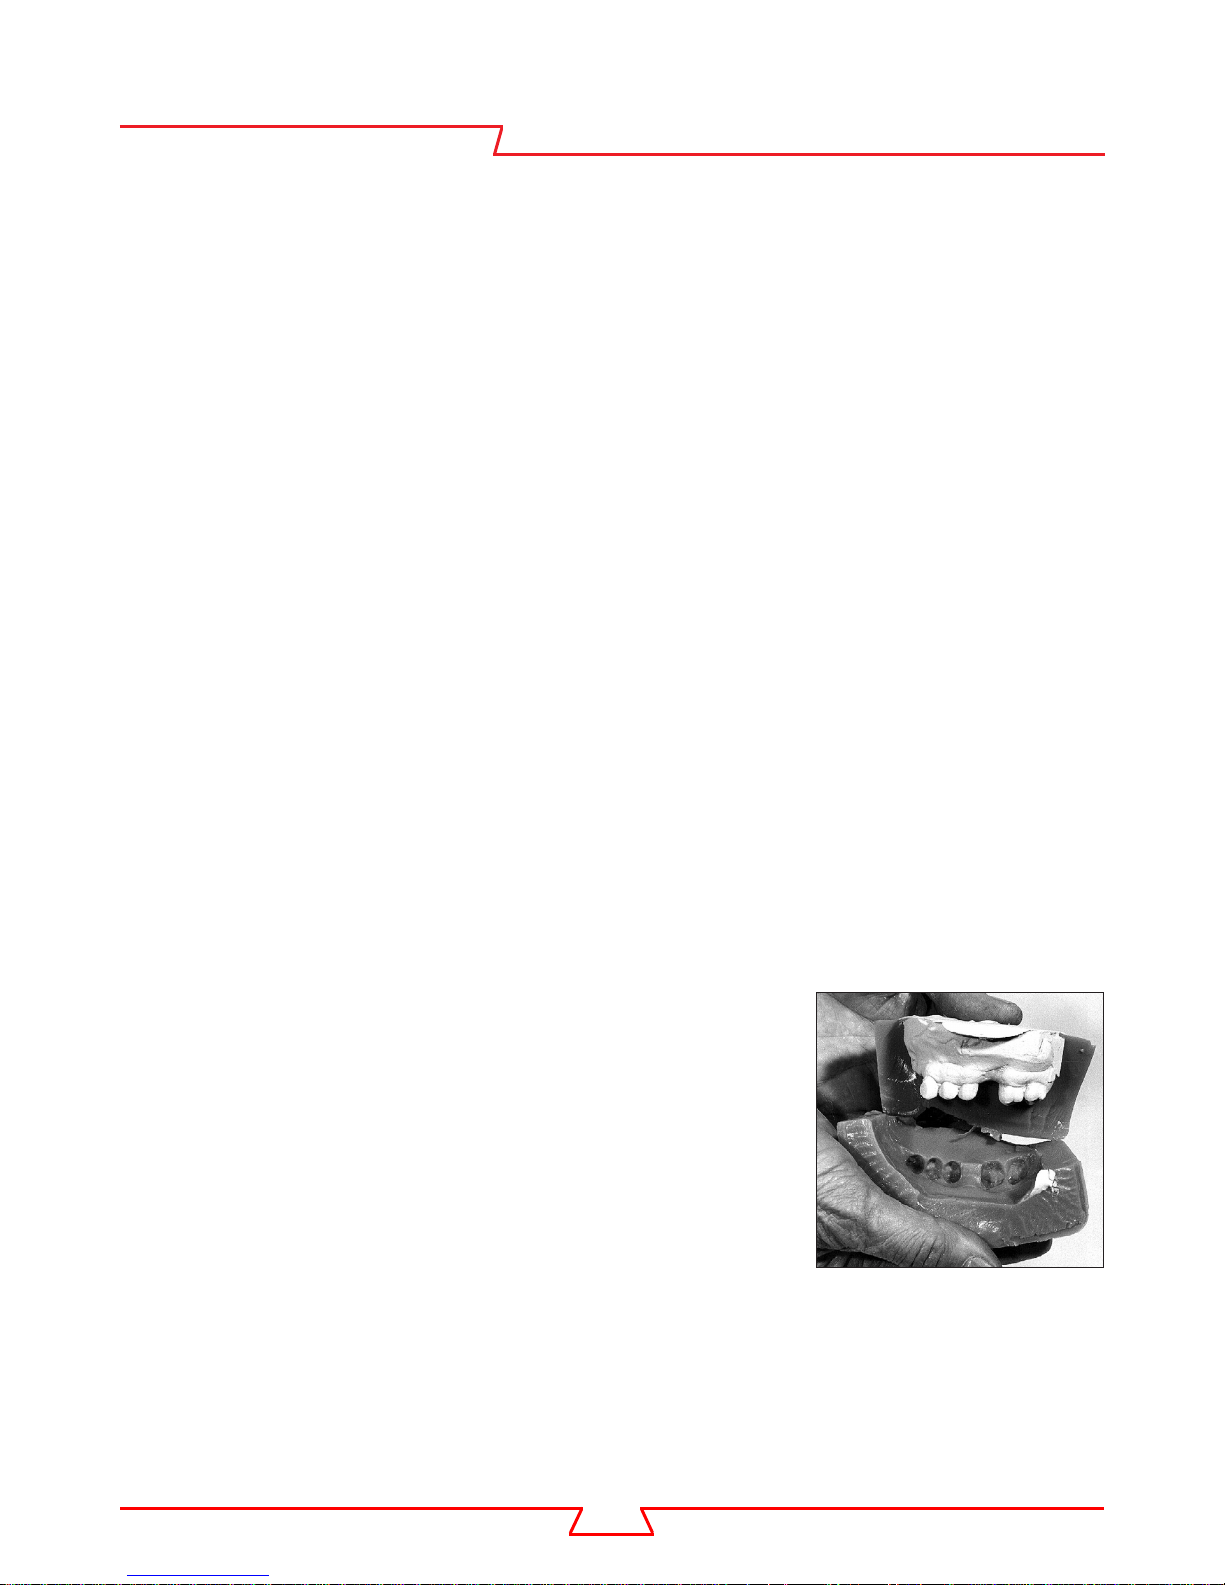
To get the maximum protection, we recommend
that after you have removed investment from the
polyethylene bag you squeeze the bag down
snugly against the surface of the investment,
thus squeezing out any air (see figure 14)
and preventing prolonged contact between
the investment and air.
:
Figure 14:
SQUEEZE AIR
out of investment
bag to prevent
cont amination
The 25 pound pack is a convenient unit to
use right at the bench and many labs now
use it instead of the wall mounted plaster
bin. However, if you are still working with
the plaster bin, check its location. In many
instances the bin is located alongside a
boil-out tank where steam is given off and
allowed to come in continual contact with
the investment. This will cause difficulty.
TM
2. PROPER HANDLING OF INVESTIC
:
Attention must be given not only to the
investment, but also to the materials used
in conjunction with it.
3. TESTING: Ticonium INVESTIC
TM
can absorb moisture from the air which
will affect accuracy. Investments may be
checked as follows:
When a new package of investment is opened,
mix 30 cc of distilled water with 100 grams
of investment for 30 seconds, mechanically, or
one minute by hand. Then check the time from
the start of spatulation until the surface of the
investment appears to be dry. To check the
batch later, repeat this operation to see if
the time corresponds. If moisture has been
absorbed, the setting time will have increased.
4. SLOW SETTING: Slow setting
investment can cause difficulty. Slow setting
is usually caused by severe hydration of
the investment. To avoid trouble, keep the
investment in a tightly sealed container.
RAPID SETTING CAN RESULT IF HYDRATED
7
NVESTMENT IS MIXED WITH NORMAL INVESTMENT.
DDUUPPLLIICCAATTIIOON
N
Ticonium Premium 100
I
INVE S TMENT MO D EL
The most common ways this may occur are:
A. Old investment clinging to the blades
of a mechanical spatulator.
B. Investment trapped in worn areas of
a plaster bowl.
C. Investment which has caked on the
weighing scoop.
Duplicating material which has been used
during the day should be:
A. Rinsed off in cool tap water.
(Preferably giving final rinse in distilled water.)
B. Cut into small pieces.
C. Returned to a cool air tight container
and covered with a damp towel.
PREPARATIO N
IMPORTANT
Always allow the investment to set in
the duplicating material for a 1 hour
minimum. Premature separation of the
refractory model is a potential cause
for loose, powdery investment deposits.
Look for a change in investment setting
time, particularly during the summer months
(when humidity is high), as hydration of
the investment may occur. Originally the
hydration will cause a speed up in the setting
time, but this will later reverse, and result in a
retarding action. If the normal setting time of
the investment, which is about 8 to 9 minutes
initial setting, starts to increase, the refractory
model may not be completely set and hard in
the normal one hour.
Usually the moisture that remains on the surface
of the colloid during rinsing is sufficient to
replace lost water in the duplicating process.
However, it may be necessary to add additional
water to maintain proper consistency.
NOTE: Never store duplicating material
by immersing in water. This will cause the
duplicating material to absorb water and
rapidly lose accuracy and strength.
Also, never store the colloid near a heat source,
such as sunny windows or boil-out tanks as this
may result in water loss.
Following these simple rules, Ticonium
Duplicating Material can be used effectively
and with the greatest degree of accuracy for
approximately 200 duplications or two to four
weeks of normal use.
TECHNICAL INFORMATION
Remove duplicating material from duplicating
flask and break duplicating material away from
investment model. (see figure 15)
Figure 15:
SEPARATE
inve stment mode l
from collo id
As soon as model is removed from mold,
outline with a pencil approximately 1/4”from
extremities of proposed pattern and trim with
knife or wet model trimmer. (see figure 16)
8

Keep fingers off of abutment teeth, regardless
MMOODDEELLPPRREEAARRAATTIIOON
N
Ticonium Premium 100
of how model is trimmed.
Figure 16:
WET GRIND
inve stment mode l
to outline
Immediately after trimming, the refractory model
should be carefully rinsed under running water
to rinse off any slurry adhering to it.
Dry model in the Ticonium Model Drying
Oven (#40551) for approximately one hour
at 190°-200° F (88°-93° C). (see figure 17)
Be sure to check the temperature of the Model
Drying Oven to prevent the temperature from
going above 190°-200° F (88°-93° C).
Over-drying the model will result in the
breakdown of the investment. It is best
not to exceed a temperature of 200° F (93° C).
It is important not to obstruct the vents on
the top of the unit, except the center one
where the thermometer should be placed.
Melt beeswax in a pan or
thermostatically-controlled pot.
Only refined beeswax should be used.
Check temperature of the wax occasionally
until 280°-300° F (138°-149° C) is reached.
If a thermometer is not available, you should
dip just as the beeswax begins to smoke.
Figure 18:
BEESWAX HEATER
#62133
Figure 17:
MODEL DRYING
OVEN #40551 with
a large drying area
Thermostatically-controlled pots, such as
Ticonium’s Beeswax Heater (#62133), are
available to prevent over-heating of the wax.
(see figure 18) These units are recommended to
maintain proper control of beeswax temperature.
NOTE: Temperature of the beeswax is
approximately 100° F (38° C) above the
temperature of the investment model.
9
When the beeswax has reached the proper
MMOODDEELLPPRREEAARRAATTIIOON
N
Ticonium Premium 100
temperature, immerse the dehydrated model.
After a few seconds, a foaming action will be
observed. The model should remain immersed
for 15 seconds after foaming starts. It should
then be removed and placed on a piece of
absorbent paper so excess beeswax will drain
off. (see figure 19) After a few seconds, move it
to another position on the absorbent paper so
that a pool is not allowed to collect at the base
of the model and solidify. Allow model to cool
and then begin waxing.
Figure 19:
MODEL DIPPED
in beeswax and
set to dry
Excessive heat during drying or immersing the
refractory model in the beeswax for too long
will alter the subsequent thermal expansion
of the investment.
SPECIAL NOTE
If you encounter difficulties with soft or powdery
investment surfaces, follow the special notes
described in the Duplication Chapter.
In order to use refractory models with
these symptoms, leave the case on the bench
over-night prior to drying and beeswax dipping.
This overnight setting will allow the investment
to improve in surface hardness.
The next day, place the refractory
models in the Model Drying Oven and dry at
190°-200° F (88°-93° C) for 45 minutes. This
drying process is fifteen minutes less than the
normal recommended procedure because a
large percentage of the water has already
evaporated during the overnight setting and
the model will be much easier to dry.
Next, dip in beeswax per normal
recommendations in this manual.
Some advantages of beeswax
dip over spraying are:
SPECIAL CARE IS NEEDED IN THIS STEP!
Contaminated Beeswax
After extensive use, the beeswax can pick up
an appreciable amount of investment residue.
Unless the beeswax is cleaned periodically, this
residue may attach itself to the surface of the
model during the beeswax operation.
PURE TICONIUM
BEESWAX #65
1. Eliminates soaking investment
model prior to applying the painting
layer of investment.
2. Assures a smooth, dense surface on
which to wax.
3. The action of the beeswax during
dipping drives out any excess moisture in
the model. Transfer the design from the master
cast to the investment model with a wax crayon
pencil. Use of a graphite pencil may cause pits
in the final casting.
10
WAXING
SSPPRRUUIINNG
G
Ticonium Premium 100
One of the most important considerations in
being an effective waxer is: ALWAYS USE WAX
OF KNOWN GAUGE OR THICKNESS.
Clean wax is essential. Wax containing debris
will certainly result in pits in the finished case.
Use preform plastic patterns to aid you further
in waxing uniformity. This will give your finished
case maximum strength and minimum bulk.
TYPICAL
TICONIUM
WAX-UP
SPRU I NG
SPRUE PIN CLEANLINESS
If the sprue pins are not kept perfectly clean,
the remaining investment will harden to the
surface and can become bonded to the new
investment. This will then loosely attach to the
surface of the mold. If sodium citrate solution
is used to soften the old investment and keep
the pins clean, it is essential that they be
thoroughly washed and rinsed before use.
Since the sodium citrate solution is a drastic
retarder, it will prevent the investment coming
in contact with the pin, coated with sodium
citrate, from setting.
First it is necessary to establish some basic facts
on spruing.
1. All metals shrink during solidification.
We cannot eliminate this shrinkage. We can,
however, compensate for the shrinkage
of Ticonium.
The following gauges are suggested for either
sheet wax or plastic stipple sheet:
1. Full upper palates – 26 gauge.
2. Narrow upper horseshoes – 24 gauge.
3. Broad upper horseshoes – 24 gauge.
4. Lower lingual plates – 24 or 26 gauge.
5. Saddle relief – 24 gauge.
6. Lingual bar relief – 28 to 30 gauge.
NOTE: Stippled TI-FORM patterns are
suggested for simulating tissue detail.
2. Never feed a thick section through
a thin section – ALWAYS SPRUE TO THE BULKY
SECTION OF YOUR PATTERN.
The ideal casting is one that gets progressively
smaller in volume from the point of attachment
of the sprue to the extremities of the casting.
(see figure 20) It is impossible, however, to
maintain this ideal situation since all dental
castings vary.
Figu re 20 :
TY PI CA L S IN GL E
SP RU IN G f ro m
bulk y to small er
volu me ar ea s
11
 Loading...