

Page 1
WS1040
User Manual
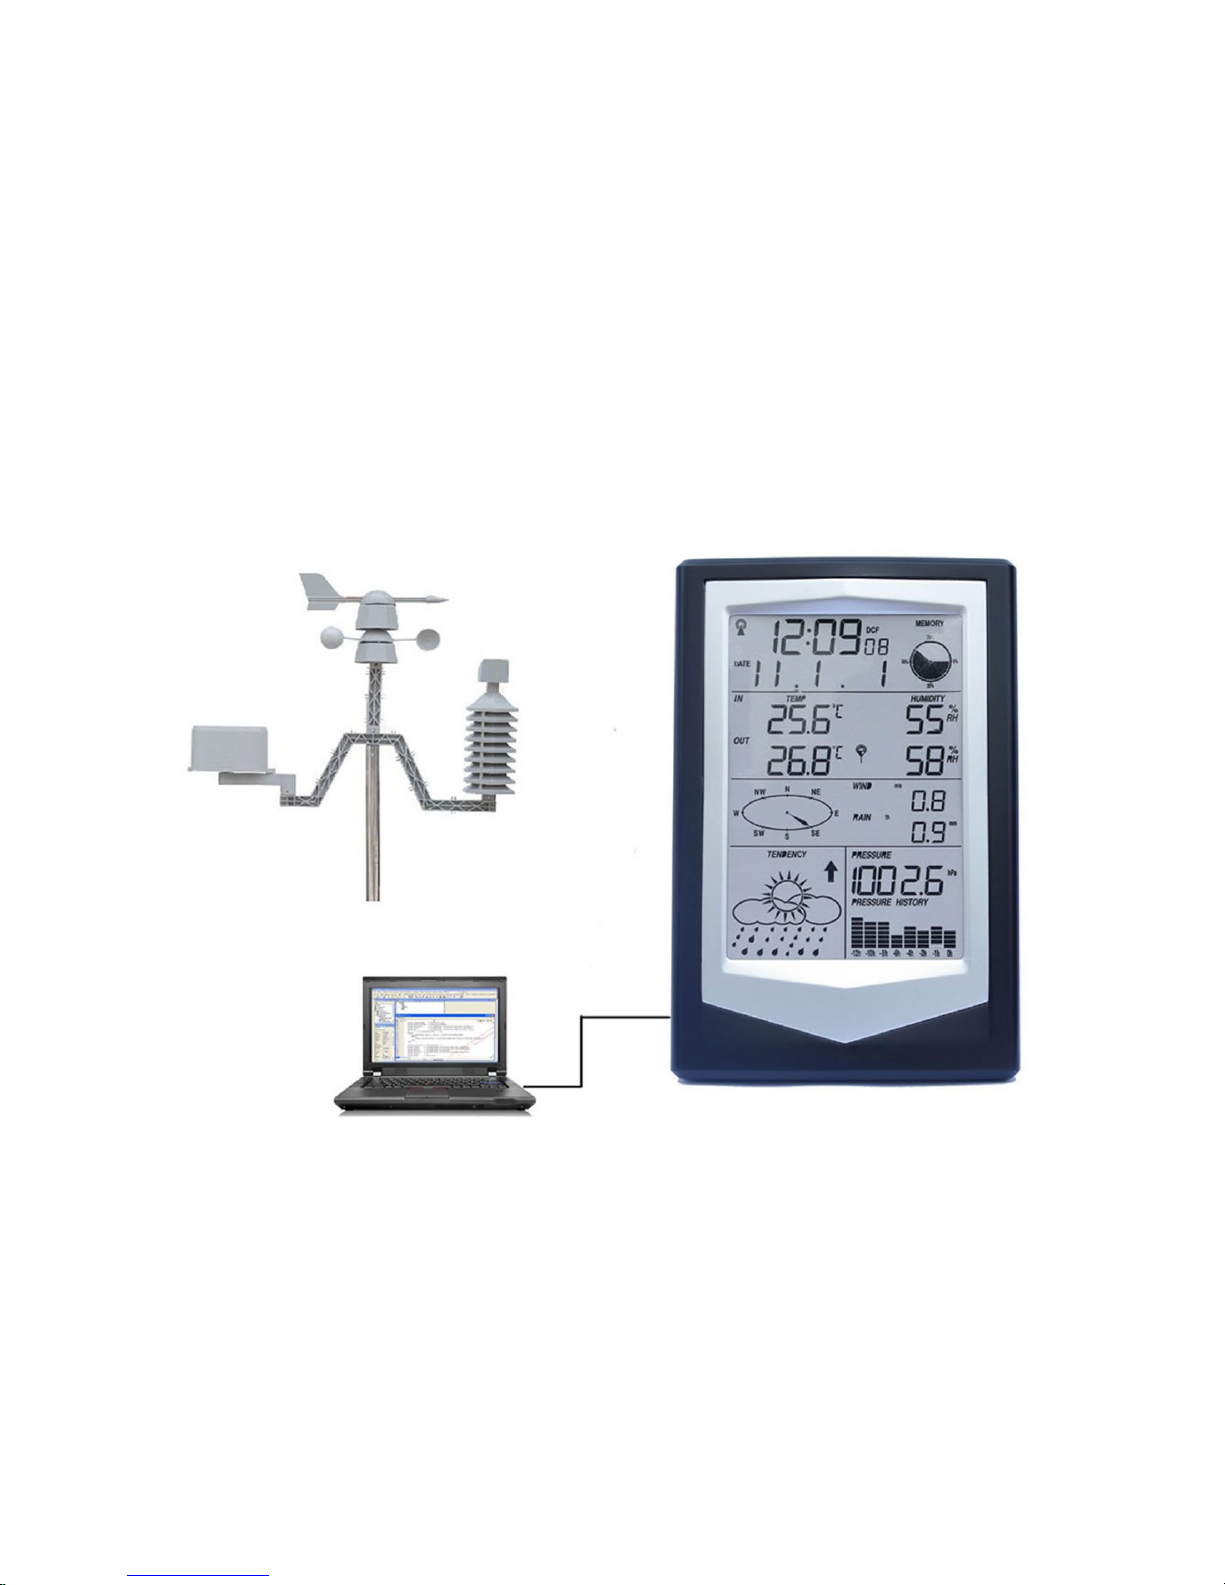
Professioanl Wireless Weather Station with solar Power &PC Link
Page 2

Contents
Descriptions: ……………………………………………………………...1
Operations: ………………………………………………………………..2
1. RCC ..…………………………………………………………….....2
2. Clock Mode ………………………………………………………...3
3. Date Mode ………………………………………………………….4
4. Wind speed Mode ………………………………………………....5
5. Historical record mode ……………………………………………...6
6. Rainfall Mode ………………………………………………………..6
7. Indoor Temperature Mode …………………………………………..6
8. Indoor Humidity Mode ……………………………………………....7
9. Outdoor Temperature Mode ………………………………………...8
10.Outdoor Humidity Mode……………………………………………...8
11.Weather Forecast Mode …………………………………………….9
12.Barometric Pressure Mode …………………………………………9
13.Pressure Histogram Mode ………………………………………….10
14.
Smart Weather software ……………………………………………….11
Specification:………………………………………………………………13
1. Receiver …………………………………………………………13
2. Outdoor transmitter …………………………………………….14
3. Setting Up Guide ………………………………………………..14
Page 3

WS1040 is a professional weather station with data save function can be stored up to two years of
meteorological information, supporting computer software, the user can downloaded all data to PC to
save at any time for queries, very convenient and practical.
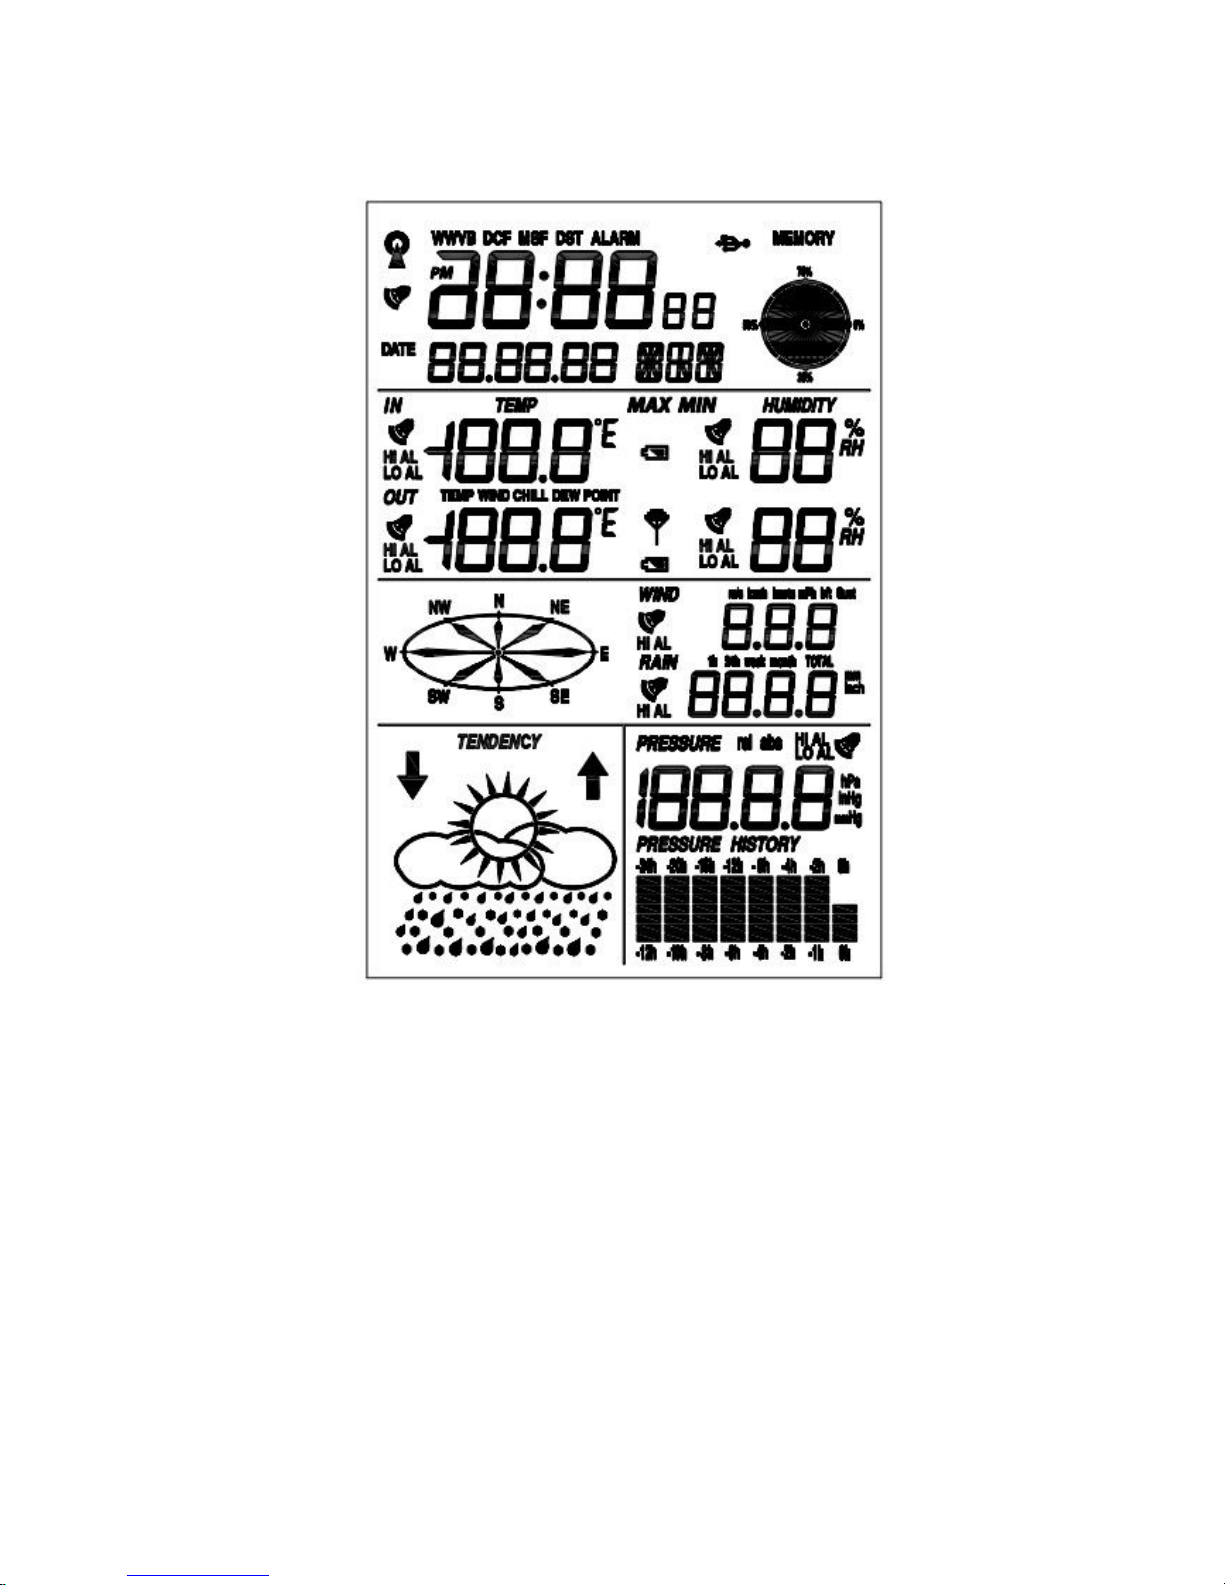
Descriptions:
1. The date display format can be set as: YYYY-MM-DD, MM-DD- YYYY,DD-MM-YYYY( user
setting)
2. The hour display format can be set between 12 hour format or 24 hour format. The time zone can
be set from-12 to +12 (user setting);
3. The RCC time function can be set as WWVB; Wireless 433 MHZ receiving. Available distance:
100 meters in open field
4. Alarm function: alarm sound gradually enhanced to remind user, alarm time is 2 minutes;
5. Indoor humidity: relative humidity display, high humidity alarm value and low humidity alarm
value can be set independently, you can query the maximum humidity value and the minimum
humidity values;
6. Indoor temperature: relative temperature display, high temperature alarm value and low
temperature alarm value can be set independently, you can query the maximum temperature
value and the minimum temperature values, ℃/℉(user setting);
7. Outdoor humidity: relative humidity display, high humidity alarm value and low humidity alarm
value can be set independently, you can query the maximum humidity value and the minimum
humidity values;
8. Outdoor temperature: relative temperature display, high temperature alarm value and low
temperature alarm value can be set independently, you can query the maximum temperature
value and the minimum temperature values, ℃/℉(user setting);
9. Wind speed: user can set average wind speed or gust wind speed, the wind speed high alarm
value can be set independently, you can query the corresponding maximum value, the display
unit can be set to m/s, km/h, mph, knots or bft;
10. Rainfall: the user can set as time period shows hours, 24 hours, week, month rainfall or total
rainfall, hours and 24 hours of heavy rainfall alarm value can be set independently, you can
query the corresponding maximum display, units mm or inch;
11. Wind direction: N, NE, E, SE, S-, SW, W, NW eight wind direction can be displayed, setting up a
wind as the alarm direction;
12. Air pressure: the user can set to show the absolute pressure or relative pressure, can
independently set high pressure alarm values and low pressure alarm value, the display unit
can be set to Hpa or Inhg or mmhg;
13. Barometric pressure changing trends: the user can set to show 12 hours or 24 hours of changing
trend;
14. Weather forecast can be sunny, cloudy, overcast, rainy, snowy, storms six states icons and
weather trends;
15. Low-voltage detection: If the receiver and transmitter battery voltage is low, it reminds user to
replace the batteries as soon as possible;
16. Backlight: press any key or the top touch light, the backlight will be lit and duration 10 seconds;
17. Buzzer: alarm duration of two minutes, the alarm clock alarm sound intensity gradually increased
of 30 seconds as units;
18. Data storage: user can store up to two years of meteorological data, user can also adjust PC
data recording cycle;
Page 4
Operations:
Ⅰ. Power-on LCD Fully display two seconds into the normal operating mode.
1. RCC Mode
Ⅱ.Radio control clock signal: support DCF, WWVB, MSF, three wireless control clock signal mode, as
follows:
(1). DCF is German wireless control clock signal standard, location of the transmitting station in Frankfurt,
the transmit power is 30 kilowatts, it can cover most areas of Europe within the range of 2000 km; DCF
(2).WWVB is America wireless control clock signal standard, location of the transmitting station in
Colorado, the transmit power is 50 kilowatts, it can cover most areas of America within the range of 2000
km;
(3).MSF is Britain wireless control clock signal standard, location of the transmitting station in middle of
Britain, the transmit power is 17 kilowatts, it can cover Britain within the range of 1000 km, also part of
western Europe and northern Europe area;
Ⅲ. RF signal receiver: means this unit is able to receive outdoor sensor data sent via RF as follows:
User insert the battery, the unit completed initialization, immediately began to search for the outdoor
Page 5
sensor, if in three minutes no signal receiving then search fails, once receive singal the unit will only work
with the sensor establishing a data link, 48 seconds of cycle synchronization to receive the sensor data,
so in order to ensure that machine can work, be sure to install outdoor sensor fistly, then mount the
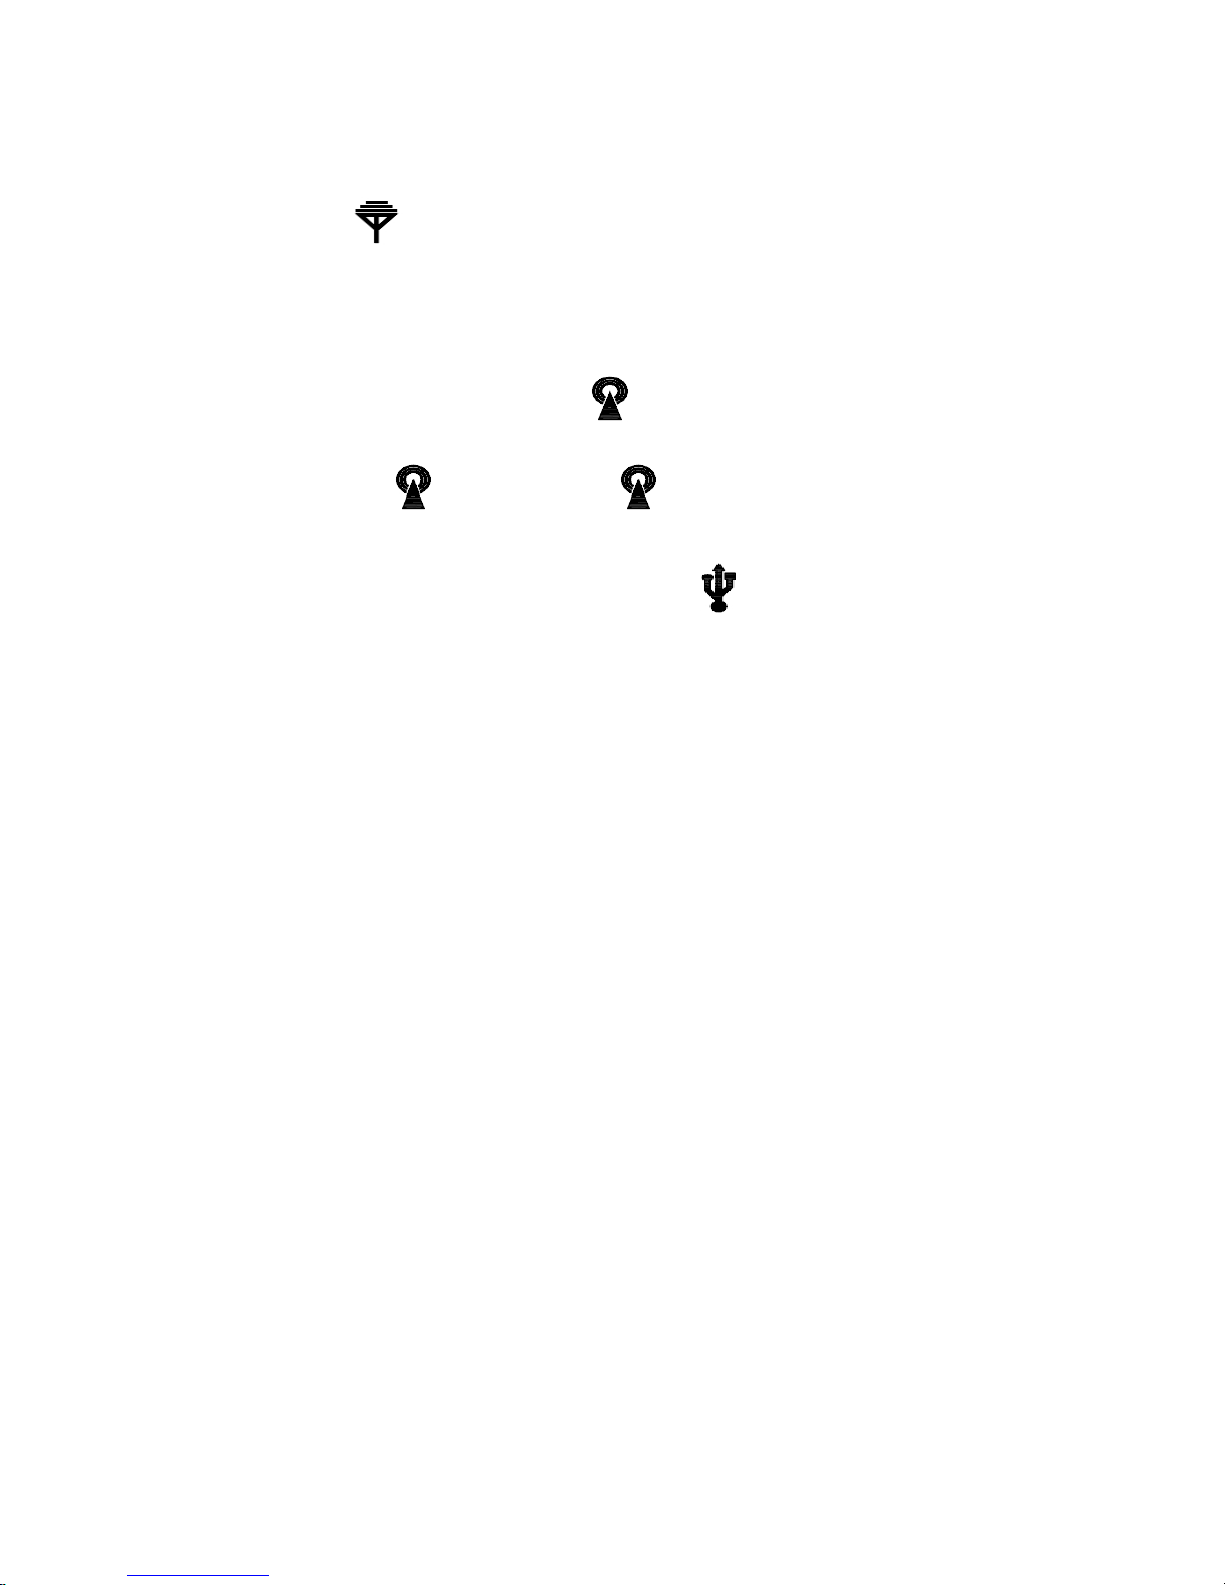
receiver battery, icon in the search process will remain flashing until search the outdoor sensor or
search fails, the search process, please do not carry out any operation of this machine;
Ⅳ. Automatic Calibration time: by receiving radio control clock signal (RCC) to achieve the automatic
Calibration time function, the unit will in 2:00:00 and 12:00:00 in the daily timing receiving radio
controlled clock signal, in receiving procession icon will remain flashing until the completion of
reception at the receiver, please do not carry out any operation of this machine. If you receive
successfully, then Display icon, otherwise the icon will disappear, the longest time to receive
is 8 minutes.
Ⅴ. Data storage: user via USB cable connect to the PC, the icon is displayed, indicating that the
USB is ready, users can query maximum/minimum on the computer, setting the alarm value, set all
corresponding kinds of parameters, the user via the computer in 5 minutes to 240 minutes to set up data
logging cycle, you can save up to two years of meteorological data, users can also download
meteorological data to the computer to save.
Keys operation
The Machine has MODE, NEXT, SET, INC/+, DEC/- five buttons, In addition to normal mode, time
mode, date mode, wind speed mode, memory historical data mode, rainfall patterns, indoor temperature
patterns. Indoor humidity mode, outdoor temperature mode, outdoor humidity mode, weather forecast
patterns, Air pressure mode, pressure histogram mode, in any operating mode, short press MODE
button to enter next work mode, short press NEXT button to enter next work item, if pressing key it is
alarming, or outdoor sensor data is being received or is receiving the wireless control clock signal, then
pressing key just close the corresponding function and will not implement the key functions. the detailed
operation of the various operating modes are described as follows:
2. Clock Mode
In normal mode, press MODE button to enter time mode, the user can carry out time-related settings in
this mode, press the NEXT button to enter the next item:
(1) Time zone setting:
Users according to their geographical location to adjust time zone settings, short press INC/+ button
to increase the value of the time zone setting, short press the DEC/- button to decrease the time
zone setting, press and hold INC/+ button more than 3seconds can quickly increase the time zone
setting values, press and hold the DEC/- buttons more than 3 seconds can quickly decrease the
time zone setting value;
(2) Hour display format setting:
User can adjust hour display format for 12 hours or 24 hours, short press INC/+ or DEC/- buttons to
switch;
(3) Daylight Saving Time setting:
Page 6

Daylight Saving Time set in short-circuit point selection for Europe automatically skip, only
short-circuit point selection for U.S version valid, according to the actual situation, short press INC/+
or DEC/- button to enable or disable daylight saving time automatically adjust function;
(4) hour setting:
In this mode user can adjust the current hours time and short press INC/+ button to increase the
hours, short press DEC/- buttons to decrease the hours, press and hold the INC/+ button over 3
seconds you can quickly increase the hours, press and hold DEC/- buttons more than 3 seconds
you can quickly decrease the hours;
(5) Minutes setting:
In this mode user can adjust the current minutes time and short press INC/+ button to increase the
minutes, short press DEC/- buttons to decrease the minutes, press and hold the INC/+ button over 3
seconds you can quickly increase the minutes, press and hold DEC/- buttons more than 3 seconds
you can quickly decrease the minutes;
(6) Alarm clock hours setting:
User to adjust the hour setting of the alarm clock in this mode, short press SET button to enable or
disable the alarm clock, short press INC/+ button to increase the hour setting, press the DEC/-
button to decrease hours set, press and hold INC/+ button over 3 seconds you can quickly increase
the hour setting, press and hold the DEC/- button more than 3 seconds can quickly decrease the
hours set;
(7) Alarm clock minutes setting:
User to adjust the minutes setting of the alarm clock in this mode, short press SET button to enable
or disable the alarm clock, short press INC/+ button to increase the minutes setting, press the DEC/-
button to decrease minutes set, press and hold INC/+ button over 3 seconds you can quickly
increase the minutes setting, press and hold the DEC/- button more than 3 seconds can quickly
decrease the minutes set;
3. Date Mode
In time mode, short press MODE button to enter date mode, users can be date-related settings, press
the NEXT button to enter the next item:
(1) Contrast setting
In this mode user can adjust the display contrast, press INC/+ button to increase contrast, press the
DEC/- button to decrease contrast;
(2) Date display format settings
Users can adjust Date display format settings in this mode, press INC/+ or DEC/- button to adjust
the date display format, instruction as follows:
INC/+ INC/+ INC/+
YYYY-MM-DD MM-DD-YYYY DD-MM-YYYY
DEC/- DEC/- DEC/-
YYYY-MM-DD DD-MM-YYYY MM-DD-YYYY
;
(3) Year setting
User can adjust the year in this mode, short press the INC/+ button to increase the year, short press
the DEC/- button to decrease the year, hold down INC/+ button over 3 seconds you can quickly
Page 7

increase the year, press and hold the DEC/- button over 3 seconds you can quickly decrease the
year;
(4) Month setting
User can adjust the month in this mode, short press the INC/+ button to increase the month, short
press the DEC/- button to decrease the month, hold down INC/+ button over 3 seconds you can
quickly increase the month, press and hold the DEC/- button over 3 seconds you can quickly
decrease the month;
(5) Date setting
User can adjust the date in this mode, short press the INC/+ button to increase the date, short press
the DEC/- button to decrease the date, hold down INC/+ button over 3 seconds you can quickly
increase the date, press and hold the DEC/- button over 3 seconds you can quickly decrease the
date;
4. Wind Speed Mode
In date mode, short press MODE button to enter wind speed mode, User can be related setting of wind
speed, press the NEXT button to enter the next item:
(1) Wind speed display setting
Users can adjust wind speed display setting in this mode, press INC/+ or DEC/- button can switch
between average and gust wind speed;
(2) Wind speed unit setting
Users can adjust wind speed unit setting in this mode, press INC/+ increase wind speed unit value,
press DEC/- button decrease wind speed unit value, instruction as follows;
INC/+ INC/+ INC/+ INC/+ INC/+
m/s km/h mph knots beaufort
DEC/- DEC/- DEC/- DEC/- DEC/-
m/s beaufort knots mph km/h
(3) High wind speed alarm setting
Users can adjust the high wind speed alarm set in this mode, press the SET button to allow or
prohibit the high wind speed alarm, press the INC/+ button to increase the high wind speed alarm
value, press the DEC/- button to decrease the high wind speed alarm value, Press and hold INC/+
button over 3 seconds you can quickly increase the wind speed high alarm value, press and hold
the DEC/- button more than 3 seconds you can quickly decrease the wind speed high alarm value;
(4) Wind direction alarm setting
Users can adjust wind direction in this mode, press the SET button to allow or prohibit wind direction
alarm, INC/+ button to increase the wind direction alarm value, press the DEC/- button to decrease
the wind direction alarm value;
INC/+ INC/+ INC/+ INC/+ INC/+
N NE E SE S
NW W SW
INC/+ INC/+ INC/+
DEC/- DEC/- DEC/- DEC/- DEC/-
N NW W SW S
Page 8

NE E SE
DEC/- DEC/- DEC/-
(5) Maximum wind speed display
In this mode you can view the maximum wind speed and time records, press and hold the SET
button over 3 seconds to clear the maximum record;
5. Historical record mode
In Wind speed mode, short press MODE button to enter the storage of historical data mode, user can
proceed related operation of data memory, press the NEXT button to enter the next item:
(1) Storage of historical data view
In this mode, users can view the memory of historical data records, press the INC/+ button to view a
recent historical data records, press the DEC/- button to view older historical data records;
(2) Memory historical data clear
In this mode, user can clear all the historical data records in the data memory, press and hold the
SET button over 3 seconds to clear all the historical data records;
6. Rainfall Mode
Mode of memory historical data, press the MODE button to enter the rainfall pattern, user can be
rainfall-related settings, press the NEXT button to enter the next item:
(1) Rainfall display setting
Users can adjust the rainfall display setting in this mode, short press the INC/+ button to increase
rainfall display settings, press DEC/- button to decrease rainfall display settings, instruction as
follow:
INC/+ INC/+ INC/+ INC/+ INC/+
1h 24h week month total
DEC/- DEC/- DEC/- DEC/- DEC/-
1h total month week 24h
(2) Rainfall unit setting
Users can adjust rainfall unit in this mode, press the INC/+ or DEC/- button to switch between mm
and inch;
(3) high Rainfall alarm setting
In this mode user can adjust 1 hour or 24 hours high rainfall alarm set, if rainfall display is set for the
week, month, total, then the high rainfall alarm for 1 hour high rainfall alarm settings, press the SET
button to allow or prohibit high rainfall alarm, press the INC/+ button to increase the high rainfall
alarm value, press the DEC/- button to decrease high rainfall alarm value, press and hold INC/+
button over 3 seconds you can quickly increase high rainfall alarm value, press and hold the DEC/-
button more than 3 seconds you can quickly decrease high rainfall alarm value;
(4) Maximum rainfall display
In this mode user can view maximum rainfall and time records, press and hold the SET button over
3 seconds to clear the maximum record;
Page 9

(5) Rainfall full reset
In this mode, clear all the rainfall data from the current time, recalculated 1h, 24h, week, month, total
rainfall;
7. Indoor Temperature Mode
Rainfall mode, short press MODE button to enter indoor temperature mode, user can be related indoor
temperature setting, press the NEXT button to enter the next item:
(1) Indoor temperature setting
In this mode to adjust the indoor temperature units, press the INC/+ or DEC/- button to switch
between ℃ and ℉;
(2) Indoor temperature high alarm setting
In this mode user can adjust high indoor temperature alarm set, press the SET button to allow or
prohibit high indoor temperature alarm, short press the INC/+ button to increase the high indoor
temperature alarm values, short press the DEC/- buttons to decrease high indoor temperature alarm
value, press and hold the INC/+ button over 3 seconds you can quickly increase the high indoor
temperature alarm value, press and hold the DEC/- button more than 3 seconds you can quickly
decrease high indoor temperature alarm values;
(3) Low Indoor temperature alarm setting
In this mode user can adjust low indoor temperature alarm set, press the SET button to allow or
prohibit low indoor temperature alarm, short press the INC/+ button to increase the low indoor
temperature alarm values , short press the DEC/- buttons to decrease indoor low temperature
alarm value, press and hold the INC/+ button over 3 seconds you can quickly increase the low
indoor temperature alarm value, press and hold the DEC/- button more than 3 seconds you can
quickly decrease low indoor temperature alarm values;
(4) Maximum indoor temperature display
In this mode, user can view the maximum indoor temperature and time records, press and hold the
SET button over 3 seconds to clear the maximum record;
(5) Minimum indoor temperature display
In this mode, user can view the minimum indoor temperature and time records, press and hold the
SET button over 3 seconds to clear the maximum record;
8. Indoor Humidity Mode
Indoor temperature mode, short press MODE button to enter indoor humidity mode, user can be related
indoor humidity settings, press the NEXT button to enter the next item:
(1) High indoor humidity alarm setting
In this mode user can adjust high indoor humidity alarm set, press the SET button to allow or
prohibit high indoor humidity alarm, short press the INC/+ button to increase the high indoor
humidity alarm values , short press the DEC/- buttons to decrease high indoor humidity alarm
value, press and hold the INC/+ button over 3 seconds you can quickly increase the high indoor
humidity alarm value, press and hold the DEC/- button more than 3 seconds you can quickly
decrease high indoor humidity alarm values;
(2) Low indoor humidity alarm setting
In this mode user can adjust low indoor humidity alarm set, press the SET button to allow or prohibit
low indoor humidity alarm, short press the INC/+ button to increase the low indoor humidity alarm
values , short press the DEC/- buttons to decrease low indoor humidity alarm value, press and
hold the INC/+ button over 3 seconds you can quickly increase the low indoor humidity alarm value,
Page 10

press and hold the DEC/- button more than 3 seconds you can quickly decrease low indoor humidity
alarm values;
(3) Maximum Indoor humidity display
In this mode, user can view maximum indoor humidity and time records, press and hold the SET
button over 3 seconds to clear the maximum record;
(4) Minimum Indoor humidity display
In this mode, user can view minimum indoor humidity and time records, press and hold the SET
button over 3 seconds to clear the minimum record;
9. Outdoor Temperature Mode
Outdoor temperature mode, short press MODE button to enter Outdoor temperature mode, user can be
related Outdoor temperature settings, press the NEXT button to enter the next item:
(1) Outdoor temperature setting
In this mode user can adjust outdoor temperature display settings, press the INC/+ button to
increase the value of outdoor temperature display , press the DEC/- button to decrease the value of
outdoor temperature display, instruction as follows:
INC/+ INC/+ INC/+
TEMPERATURE WIND CHILL DEW POINT
DEC/- DEC/- DEC/-
TEMPERATURE DEW POINT WIND CHILL
;
(2) Outdoor temperature units setting
In this mode to adjust the outdoor temperature units, press INC/+ or DEC/- buttons to switch
between ℃ and ℉;
(3) High outdoor temperature alarm setting
In this mode user can adjust the high outdoor temperature alarm setting, press SET button to allow
or prohibit the high outdoor temperature alarm, press the INC/+ button to increase the high
outdoor temperature alarm values , short press the DEC/- button to reduce high outdoor
temperature alarm value, press and hold INC/+ button over 3 seconds you can quickly increase the
high outdoor temperature alarm value, press and hold the DEC/- button more than 3 seconds you
can quickly reduce the high outdoor temperature alarm values;
(4) Low outdoor temperature alarm setting
In this mode user can adjust the Low outdoor temperature alarm setting, press SET button to allow
or prohibit the Low outdoor temperature alarm, press the INC/+ button to increase the Low outdoor
temperature alarm values, short press the DEC/- button to reduce Low outdoor temperature alarm
value, press and hold INC/+ button over 3 seconds you can quickly increase the Low outdoor
temperature alarm value, press and hold the DEC/- button more than 3 seconds you can quickly
reduce the Low outdoor temperature alarm values;
(5) Maximum outdoor temperature display
In this mode, user can view maximum outdoor temperature and time records, press and hold the
SET button over 3 seconds to clear the maximum record;
Page 11

(6) Minimum outdoor temperature display
In this mode, user can view minimum outdoor temperature and time records, press and hold the
SET button over 3 seconds to clear the minimum record;
10. Outdoor Humidity Mode
Outdoor humidity mode, short press MODE button to enter Outdoor humidity mode, user can be related
humidity temperature settings, press the NEXT button to enter the next item:
(1) High outdoor humidity alarm setting
In this mode user can adjust the high outdoor humidity alarm setting, press SET button to allow or
prohibit the high outdoor humidity alarm, press the INC/+ button to increase the high outdoor
humidity alarm values, short press the DEC/- button to reduce high outdoor humidity alarm value,
press and hold INC/+ button over 3 seconds you can quickly increase the high outdoor humidity
alarm value, press and hold the DEC/- button more than 3 seconds you can quickly reduce the high
outdoor humidity alarm values;
(2) Low outdoor humidity alarm setting
In this mode user can adjust the Low outdoor humidity alarm setting, press SET button to allow or
prohibit the Low outdoor humidity alarm, press the INC/+ button to increase the Low outdoor
humidity alarm values, short press the DEC/- button to reduce Low outdoor humidity alarm value,
press and hold INC/+ button over 3 seconds you can quickly increase the Low outdoor humidity
alarm value, press and hold the DEC/- button more than 3 seconds you can quickly reduce the Low
outdoor humidity alarm values;
(3) Maximum Outdoor humidity display
In this mode, user can view maximum outdoor humidity and time records, press and hold the SET
button over 3 seconds to clear the maximum record;
(4) Minimum Outdoor humidity display
In this mode, user can view minimum outdoor humidity and time records, press and hold the SET
button over 3 seconds to clear the minimum record;
11. Weather Forecast Mode
In Outdoor humidity mode, short press MODE key to enter the weather prediction mode, user can be
related weather conditions setting in this mode, press the NEXT button to enter the next item:
(1) Weather conditions setting
In this mode to adjust the current weather conditions, instruction as follows:
INC/+ INC/+ INC/+ INC/+
Sunny Cloudy Overcast Rainy
DEC/- DEC/- DEC/- DEC/-
Sunny Cloudy Overcast Rainy
(2) Weather forecast threshold value setting
In this mode to adjust the current weather conditions changing threshold settings, press INC/+
button to increase the weather forecast threshold value, press DEC/- buttons to decrease the
weather forecast threshold value, hold down INC/+ button more than 3seconds can quickly increase
the weather forecast threshold value, press and hold the DEC/- more than 3 seconds can quickly
decrease the weather forecast threshold value;
(3) Storm alarm threshold value settings
Page 12

In this mode, adjustable storm alarm threshold value settings, press the INC/+ button to increase
the storm alarm threshold value, according to the DEC/- button to decrease the storm alarm
threshold value, hold down the INC/+ button more than 3 seconds to quickly increase the storm
alarm threshold value press and hold the DEC/- button over 3 seconds you can quickly decrease
storm alarm threshold value;
12. Barometric Pressure Mode
In air pressure mode, short press MODE key to enter the air pressure mode, user can be related
pressure setting in this mode, press the NEXT button to enter the next item:
(1) Air pressure display setting
In this mode, user can adjust the air pressure settings, press INC/+ or the DEC/- button to switch
between absolute pressure and relative pressure;
(2) Air pressure units setting
Users can adjust the air pressure unit in this mode, short press the INC/+ button to increase the
pressure unit setting value, press the DEC/- button to decrease the set value of the pressure unit,
instruction as following:
INC/+ INC/+ INC/+
hpa inhg mmhg
DEC/- DEC/- DEC/-
hpa mmhg inhg
(3) Relative pressure value setting
Relative pressure value set in the pressure display settings is absolute air pressure automatically
skipped, relative pressure can be adjusted in this mode, press INC/+ button to increase the relative
pressure, press the DEC/- button to decrease the relative pressure, press and hold INC/+ button
over 3 seconds you can quickly increase the relative pressure, press and hold the DEC/- buttons
more than 3 seconds you can quickly decrease the relative air pressure;
(4) High air pressure alarm setting
In this mode, adjust high air pressure alarm settings, press SET button to allow or prohibit high
pressure alarm, press INC/+ button to increase high pressure alarm value, press the DEC/- button
to decrease high pressure alarm value, Press and hold INC/+ button you can quickly increase the
high pressure alarm value, press and hold the DEC/- button more than 3 seconds you can quickly
decrease high pressure alarm value;
(5) Low air pressure alarm setting
In this mode, adjust low air pressure alarm settings, press SET button to allow or prohibit Low
pressure alarm, press INC/+ button to increase low pressure alarm value, press the DEC/- button to
decrease low pressure alarm value, Press and hold INC/+ button you can quickly increase the low
pressure alarm value, press and hold the DEC/- button more than 3 seconds you can quickly
decrease low pressure alarm value;
(6) Maximum air pressure display
In this mode, user can view maximum air pressure and time records, press and hold SET button
over 3 seconds to clear the maximum record;
(7) Minimum air pressure display
In this mode, user can view minimum air pressure and time records, press and hold SET button over
3 seconds to clear the minimum record;
Page 13

13. Pressure Histogram Mode
In pressure mode, press MODE button to enter the pressure histogram mode, in this modet user can
proceed pressure histogram timeline set:
In this mode user can adjust pressure histogram timeline settings, press INC/+ or DEC/- button can
switch in 12 hours display and 24 hours display;
14. SmartWeather software
SmartWeather software is no installation of green software, users just need to copy it to your PC,
double-click the package SmartWeather.exe file can start SmartWeather software.
SmartWeather software starts as follows:;
If base station connect failure through USB cable to your computer, then right corner display ,
if connecting successfully, you can hear computer issued a “drip” sound and right corner display
indicating communication successfully, software will read current data from base station and display on
software screen, also automatically download all historical data records, the bottom of the screen display
Page 14

the download time of historical data and number of records historical data downloading, as following.
Click the icon of , user can enter the restore default parameters confirmation screen, as shown
below:
Page 15

Note: this function only use in receiver appear abnormal conditions. After clicking ok button to choose
restore default value, continue to put receiver connected to computer, waiting for two minutes later
restore default completed, receiver will remove previous history data.
Specification:
1. Receiver:
(1) Temperature range: 0℃~50℃(32℉~122℉);
Temperature accuracy:±1℃
Temperature resolution: 0.1℃;
(2) Humidity range: 20%~99%;
Humidity accuracy:±5%
Humidity resolution:1%(condition: temperature 25℃, humidity 50%);
(3) Pressure range: 920~1080hPa;
Pressure accuracy:±5hPa
Pressure resolution: 0.1 hPa;
(4) Transmission data update: 48s;
(5) Alarm: 2 minutes
(6) Power: 3*1.5V AA battery;
Page 16

(7) Battery life: about 12 months
(8) Low battery check: power-on check, 00:00 check every day.
(9) Work temperature:0℃ to 50℃
2. Outdoor transmitter:
(1) Temperature range: -40℃~60℃(-104℉~140℉);
Temperature accuracy:±1℃
Temperature resolution: 0.1℃;
(2) Humidity range: 20%~99%;
Humidity accuracy:±5%
Humidity resolution: 1%
(3) Wind speed range: 0~50m/s;
Wind speed resolution: 0.1 m/s;
(4) Rain range: 0~9999mm;
Rain resolution: 0.1mm(rainfall<1000 mm);
1 mm(rainfall>1000 mm);
(5) Data update: 48s;
(6) Power: 2*1.5V AA battery;
(7) Battery life: about 24months;
(8) Low battery check: power-on check, 00:00 check evey day.
(9) Work temperature:-40℃~60℃(-104℉~140℉);
(10) Anti-rainy
Setting Up Guide:
1.Insert the stainless steel pipe into the base, press a M3 screw nut into the nut slot, and then establish
them with a PM3.0*25mm screw:
2.Insert the transmitter holder into the stainless steel pipe, establish them with a PM3.0*22mm screw
and a M3 screw nut:
3 . Insert the rain gauge holder onto the short side of the transmitter holder, establish them via a
PM3.0*25mm screw and a M3 screw nut. Then install the rain gauge onto the rain gauge holder, and
establish them with two PA3.0*8mm screws:
Page 17

4.Press a M3 screw nut into the nut slot of the small side of the wind sensor holder, insert wind sensor
holder onto the transmitter holder, establish them with a PM3.0*22mm screw:
5.Insert the wind direction component into the wind speed component, and then insert the wind direction
RJ45 into the 623K hole of the wind speed component. Insert a M3 screw nut into the big side of the
wind sensor holder, and then install the whole wind sensor onto the holder, establish them with a
PM0.3*22mm:
6.Open the battery compartment, install the rechargeable batteries, then cover the battery door. Insert
the whole transmitter onto the long side of the transmitter holder, and establish them with a
PM3.0*18mm screw. At last, insert the wind speed wire RJ45 into the "WIND" 623K hole of the
transmitter:
7.① Put the rain gauge wire across the waterproof tower case, and then insert the RJ45 into the 623K
hole of the solar component;
② Put the solar wire across the waterproof tower case, and then insert the RJ45 into the "RAIN" 623K
hole of the transmitter;
③ Insert a M3 screw nut into the top nut slot of the waterproof tower case, then insert the solar
component into the top of the waterproof tower case, establish them with a PM3.0*8mm screw (Note:
insert the screw from the screw nut side of the solar component):
Page 18

8.Suit the assembled waterproof tower case onto the assembled transmitter, and then suit the wires onto
the slots of the transmitter holder:
9.Suit four green plastic screw nuts into the base, and then establish the base and ground with four
KA4.0*40mm screws:
Note:
1. Dew point temperature display -40 ℃, indicating dew point temperature is already very low and do
not represent the actual dew point temperature;
2. When battery low voltage warning, in order to protect the system, some features may not be normal
use, to prevent the system crash please replace new battery timely;
3. When the battery low voltage warning, avoid connecting the unit to the PC to prevent the memory
data loss, user can replace the new battery and then connect again to guarantee reliable
communication;
4. Data communication is completed, disconnect the PC connection, in order to avoid data
communications may be influence normal working.
FCC Statement
Changes or modifications not expressly approved by the party
responsible for compliance could void the user's authority to
operate the equipment.
This equipment has been tested and found to comply with the
limits for a Class B digital device, pursuant to Part 15 of the
FCC Rules. These limits are designed to provide reasonable
protection against harmful interference in a residential
installation. This equipment generates uses and can radiate
radio frequency energy and, if not installed and used in
accordance with the instructions, may cause harmful interference
to radio communications. However, there is no guarantee
that interference will not occur in a particular installation. If
this equipment does cause harmful interference to radio or
television reception, which can be determined by turning the
equipment off and on, the user is encouraged to try to correct
the interference by one or more of the following measures:
-- Reorient or relocate the receiving antenna.
-- Increase the separation between the equipment and receiver.
-- Connect the equipment into an outlet on a circuit different from that to which the receiver is connected.
-- Consult the dealer or an experienced radio/TV technician for
help
This device complies with part 15 of the FCC rules. Operation is
subject to the following two conditions (1)this device may not
cause harmful interference, and (2) this device must accept any
interference received, including interference that may cause
undesired operation.
 Loading...