

Page 1

usE
R
TC-G159
Please
Please
read
this
manual
before
use
keep
this
manual
for
future
reference
((
ROHS
Page 2

Section
1
Section
2
Section
3
Section
4
Section
5
Section
6
CONTENTS
Safety
information
.........1
General
information
......
3
Technical
information
......7
Installation.
........8
Maintenance
information
Trouble
shooting
..
.
... ...15
Page 3
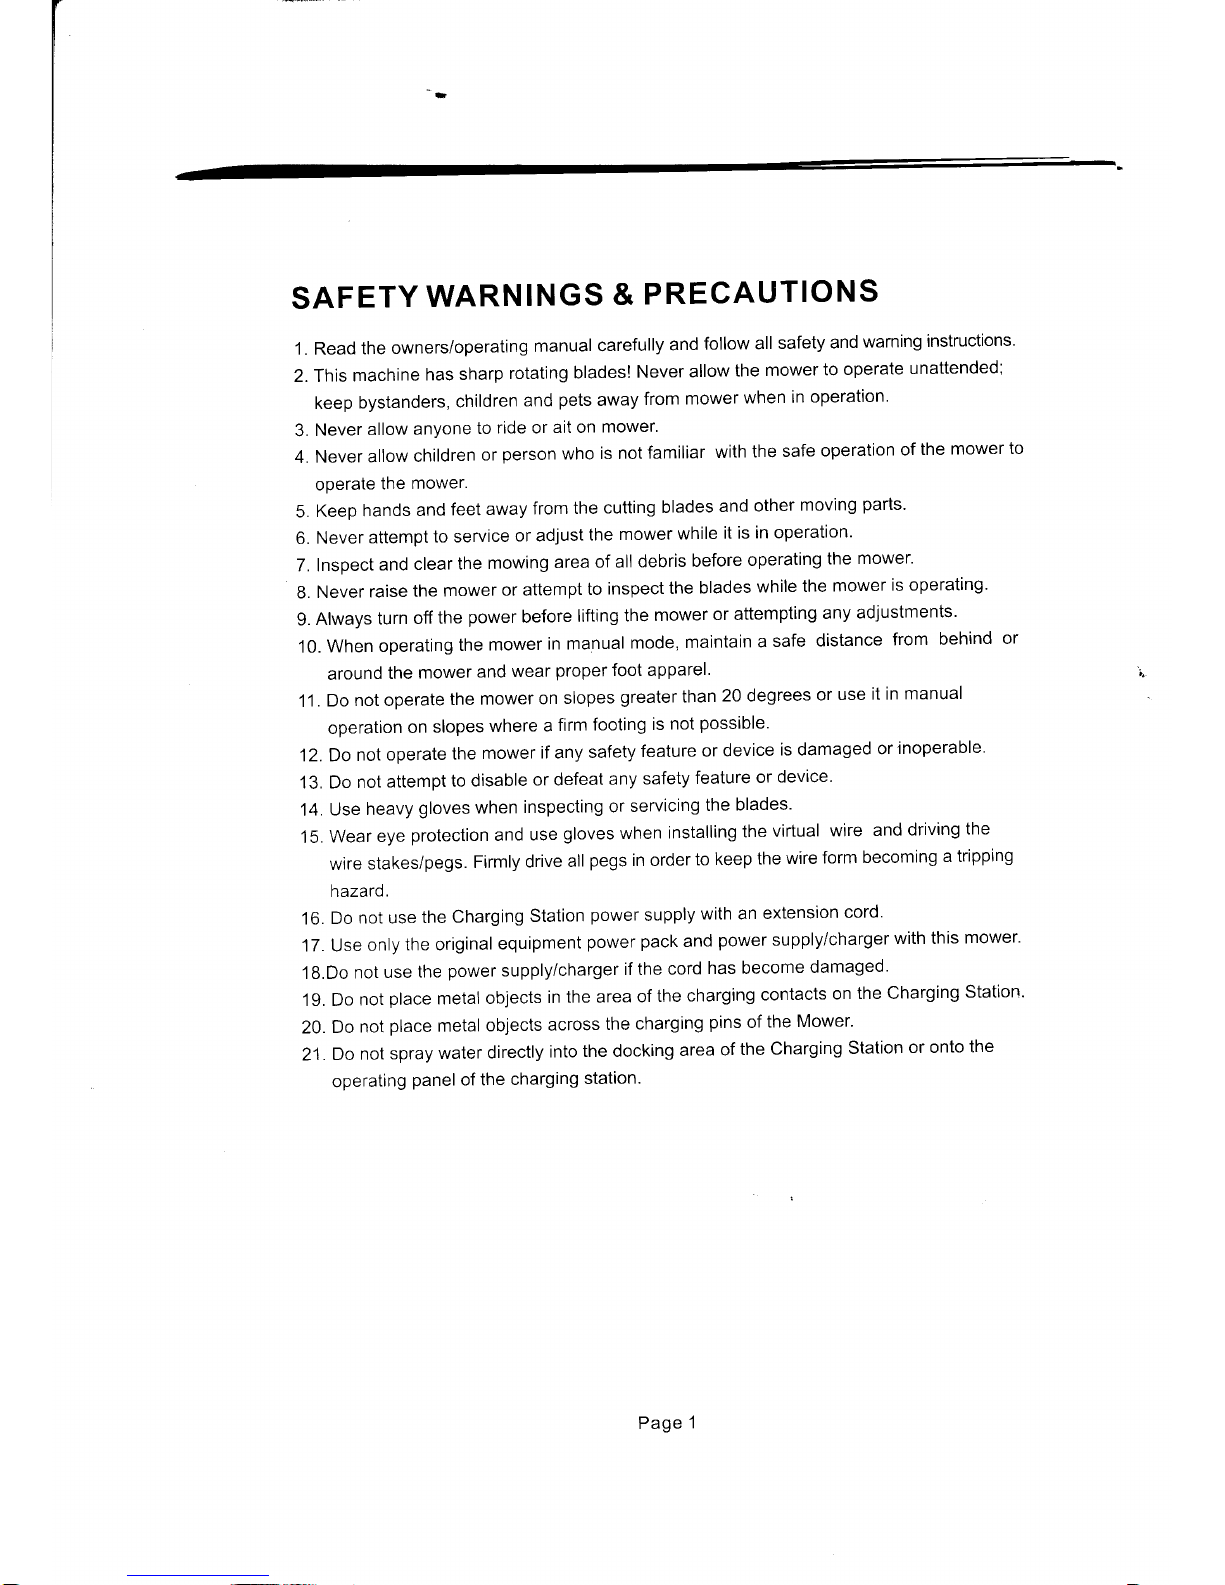
SAFETY
WARNINGS
&
PRECAUTIONS
1. Read
the
owners/operating
manual
carefully
and
follow
all
safety
and
warning
instructions.
2. This
machine
has
sharp
rotating
bladesl
Never
allow
the
mower
to
operate
unattended;
keep
bystanders,
children
and
pets
away
from
mower
when
in
operation.
3.
Never
allow
anyone
to
ride or
ait on
mower
4.
Never
allow
children
or
person
who
is not
familiar
with
the
safe
operation
of
the
mower
to
ooerate
the
mower.
5.
Keep
hands
and
feet
away
from
the
cutting
blades
and
other
moving
parts.
6.
Never
attempt
to service
or adjust
the
mower
while
it is
in operation.
7. Inspect
and
clear
the
mowing
area
of all
debris
before
operating
the
mower'
8.
Never
raise
the
mower
or attempt
to
inspect
the
blades
while
the
mower
is operating'
9.
Always
turn
off
the
power
before
lifting
the
mower
or attempting
any
adjustments.
10.
When
operating
the
mower
in manual
mode,
maintain
a
safe
distance
from
behind
or
around
the
mower
and
wear
proper foot apparel.
11.
Do
not operate
the
mower
on
slopes
greater than
20 degrees
or
use
it in
manual
operation
on
slopes
where
a
firm
footing
is
not
possible'
12. Do
not
operate
the
mower
if any
safety
feature
or
device
is damaged
or
inoperable'
13. Do
not
attempt
to
disable
or defeat
any safety
feature
or
device.
14.
Use
heavy
gloves
when
inspecting
or
servicing
the
blades'
1 5.
Wear
eye
protection and
use
gloves when
installing
the
virtual
wire
and
driving
the
wire
stakes/pegs.
Firmly
drive
all
pegs
in order
to
keep
the
wire
form
becoming
a tripping
hazard.
16.
Do
not use
the
charging
Station
power
supply
with an
extension
cord.
17. Use
only
the original
equipment
power
pack
and
power supply/charger
with this
mower'
18.Do
not
use
the
power
supply/charger
if the
cord
has become
damaged.
19. Do
not
place
metal
objects
in
the area
of
the
charging
contacts
on
the Charging
Station'
20.Do
not
place
metal
objects
across
the
charging
pins
of
the
Mower.
21
. Do
not
spray
water
directly
into
the docking
area
of
the
Charging
Station
or onto
the
operating
panel
of the
charging
station.
Page
1
Page 4
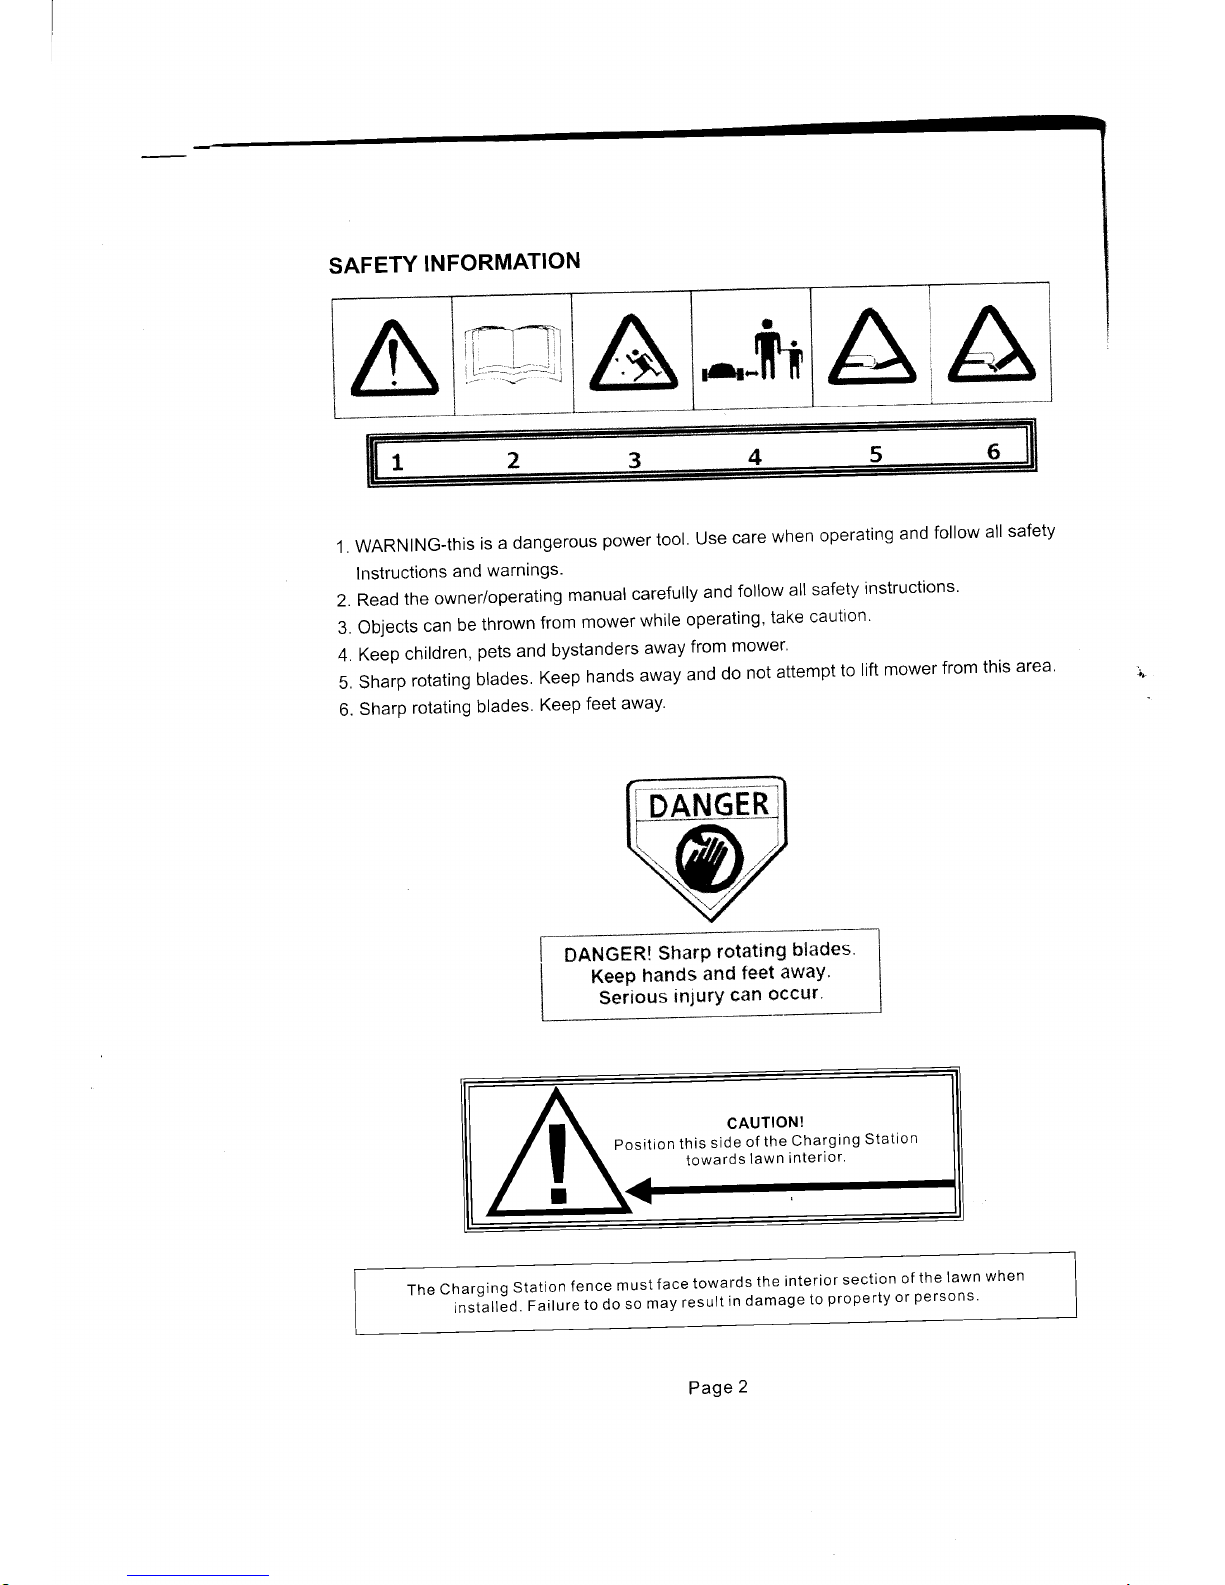
SAFETY
INFORMATION
r-r-Tl
li--
l-l:i
I
L-'.--.'-,--*_;
l
,-.-
..t'
1.WARNINc-thisisadangerouspowertool.Usecarewhenoperatingandfo||owa|lsafety
lnstructions
and
warnlngs'
2.Readtheowner/operatingmanua|carefu|lyandfo||owa|lsafetyinstructions.
3.
Objects
can
be
thrown
from
mower
while
operating'
take
caution
4.
Keep
children,
pets
and
bystanders
away
from
mower'
5.Sharprotatingb|ades.Keephandsawayanddonotattempttoliftmowerfromthisarea.
6.
Sharp
rotating
blades.
Keep
feet
away'
OANGERI
SharP
rotating
blades
KeeP
hands
and
feet
away'
Serious
in.lurY
ean
occur'
I
I
CAUTION!
Position
this
side
of
the
Charging
Station
towards
lawn
interior'
v
TheChargingstationfencemustfacetowardstheinteriorsectionofthelawnwhen
installed.
Failure
to do
so
may
result
in
damage
to
property
or
persons'
Page
2
Page 5
F
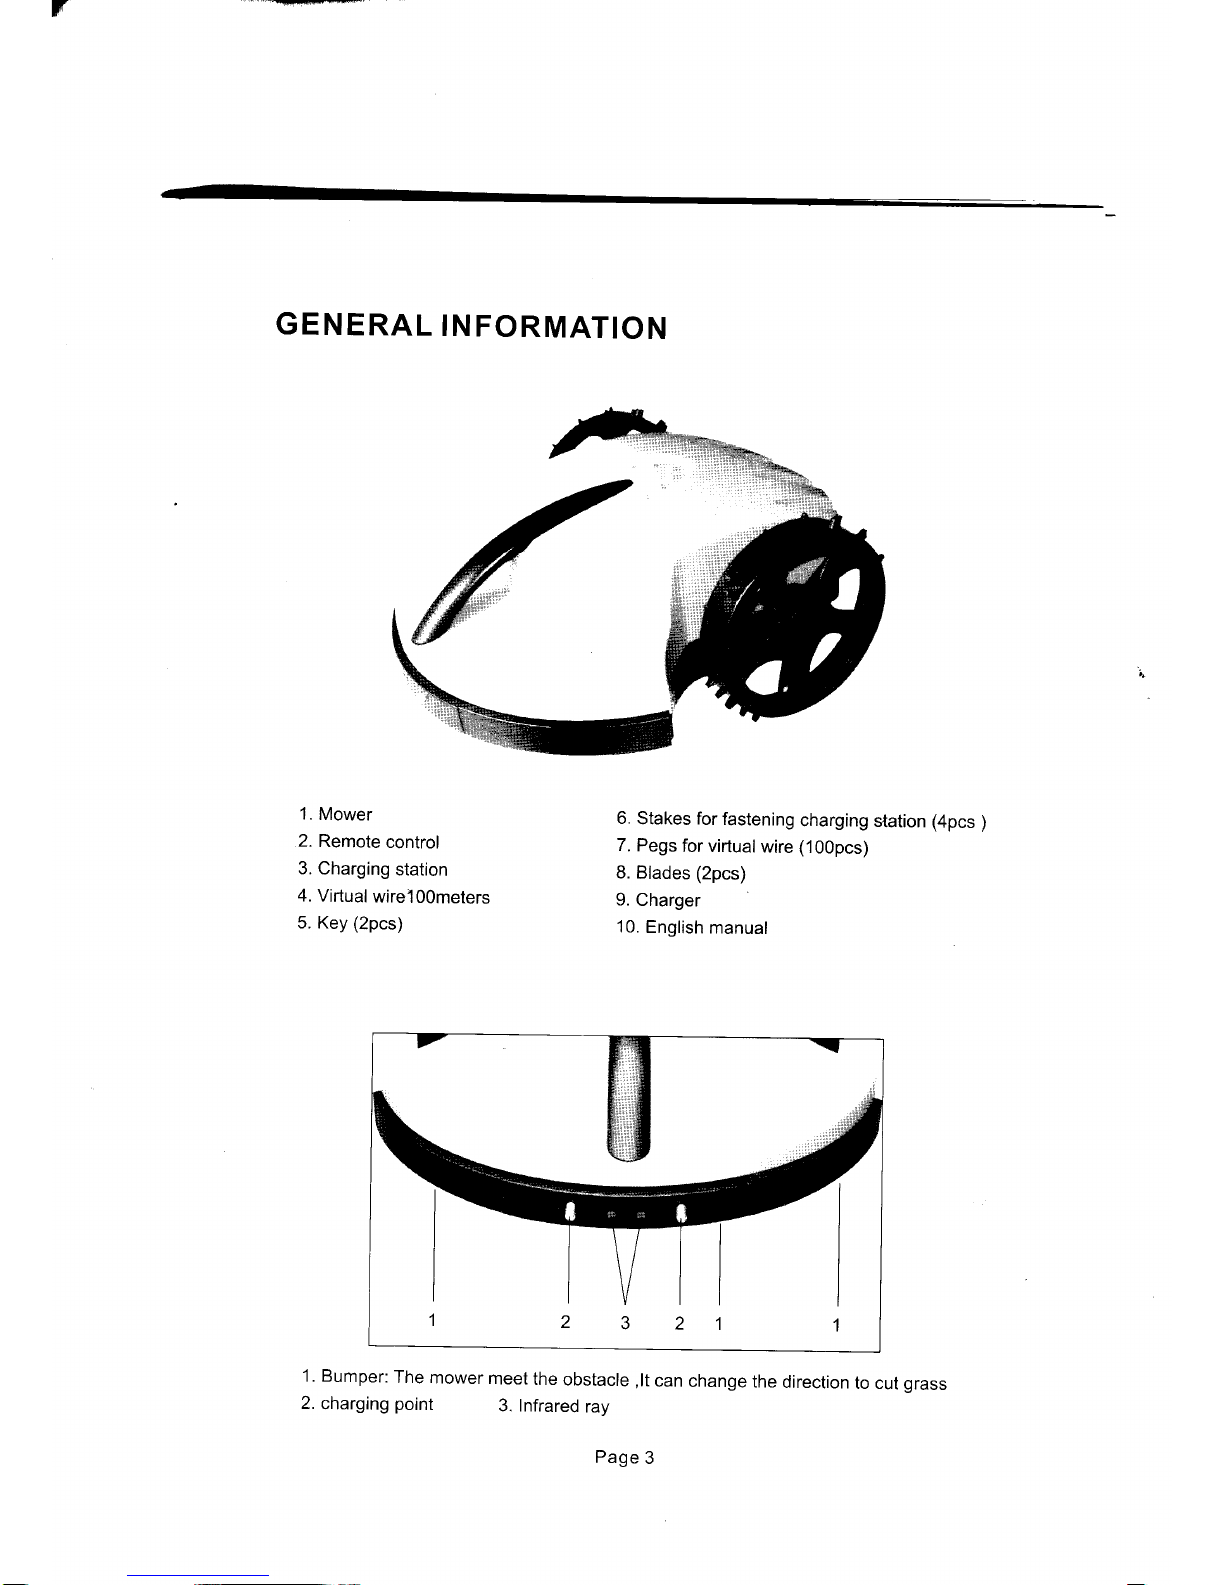
GENERAL
INFORMATION
1.
Mower
2.
Remote
control
3.
Charging
station
4. Vifiual
wirel
O0meters
5. Key
(2pcs)
6.
Stakes for
fastening
charging
station (4pcs
)
7.
Pegs
for virtualwire (100pcs)
8.
Blades
(2pcs)
9.
Charger
10.
English
manual
1. Bumper:
The
mower
meet
the
obstacle
,lt
can
change
the
direction
to cut
grass
2.
charging
point
3. Infrared
rav
Page
3
Page 6
n
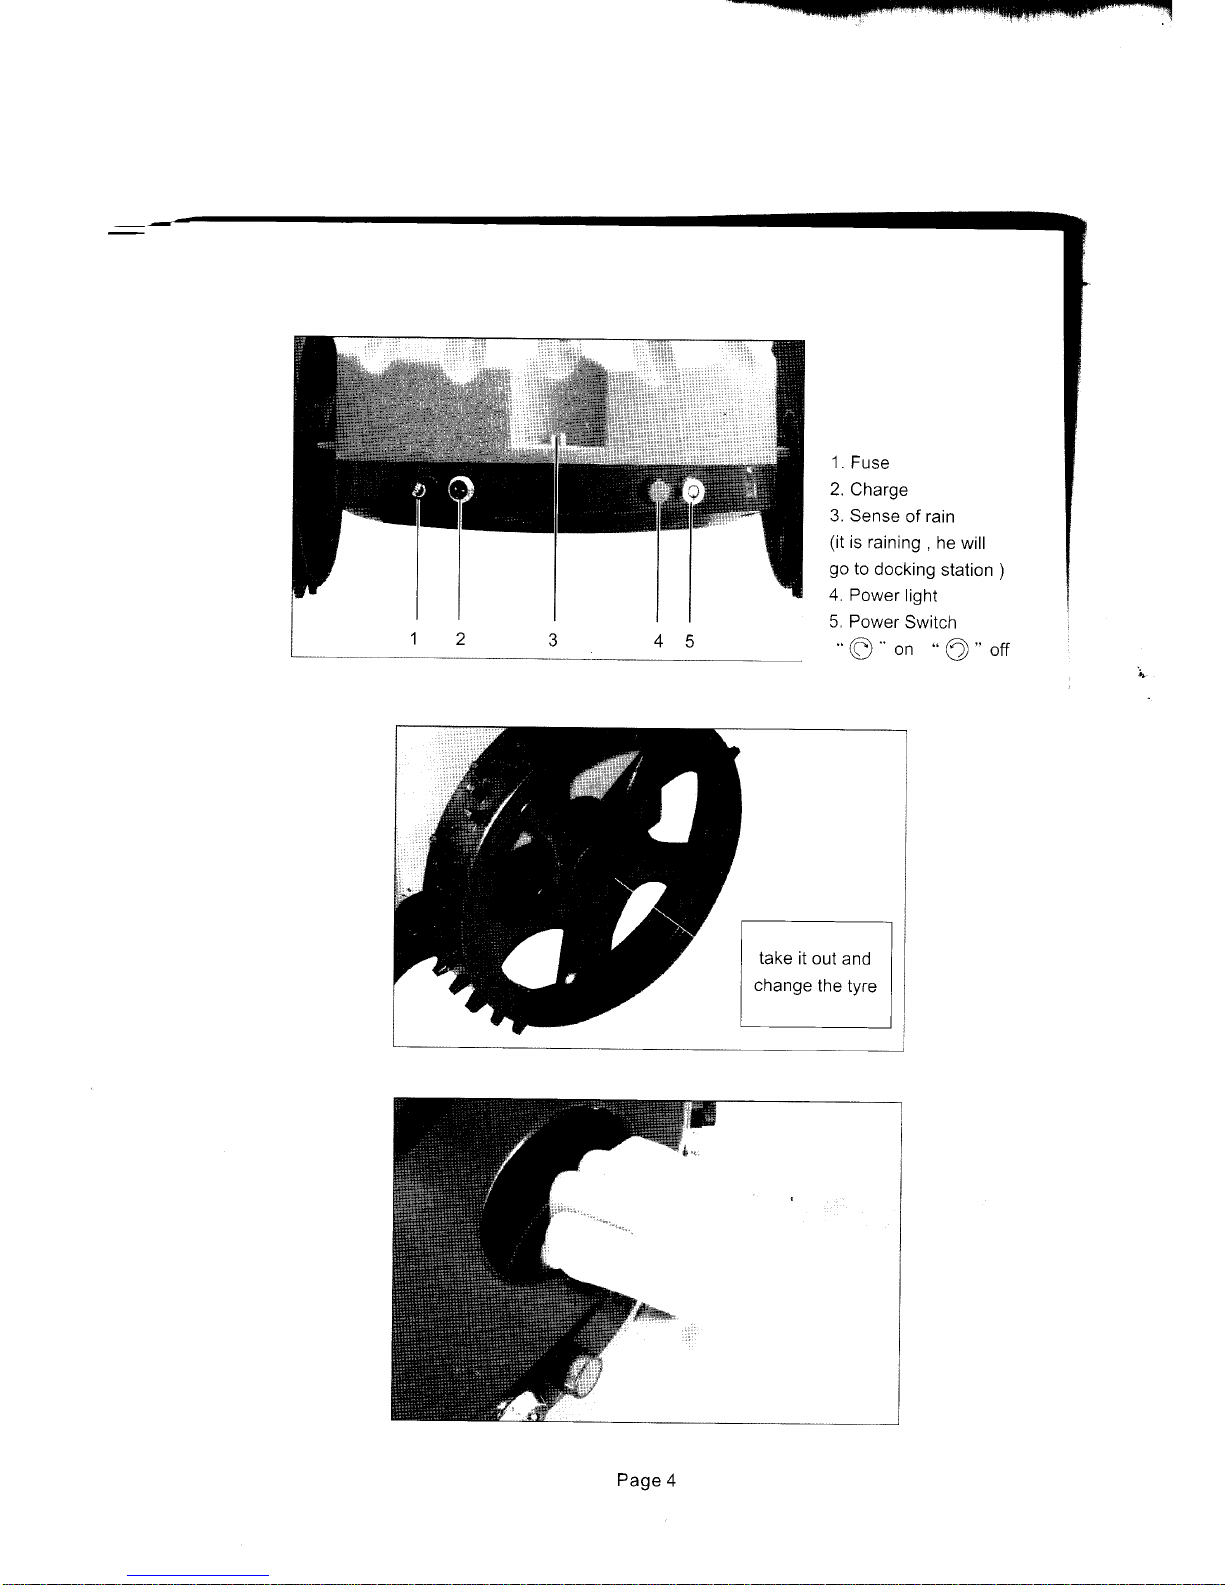
1.
Fuse
2. Charge
3. Sense
of
rain
(it
is raining
,
he
will
go
to
docking
station
)
4. Power
light
5, Power
Switch
"O"on
"O"off
take
it
out and
change
the
tyre
Page
4
Page 7

F
I
l
il
Safety
hence
,
keep
off
the
foot
and
hand
Charge
light
red:
charging
green:
full
charge
/idle
Virtualwire
light
red:
broken
wire
/idle
Patch
jack,
connect
the
virtual
wire
randomlv
.
no positive
and
negative poles
CIRCLE
GO
STRAIGHT
L:
GO
LEFT
R;
GO
RIGHT
MOW:
Mowing
switch
HOME
:
go
charging
station
'l
H:
working
for
one
hour
3H.
working
for
three
hours
Page
5
Page 8

1.The battery
is low when he cuts
grass
,
he will
recharge and
then he will cut again
2.Only when the
mower
finish
charging,
he drop back
and buzzing
(call
the owner
to turn
it
off)
Two
kinds of charge as above
pictures
Charging
red
charged OK
green
Page 6
Page 9

TECHNICAL
INFORMATION
Power supply
input:
100-240V 50/60H2
Output: 24V
Robot mower technical
information
Coverage
area lper
S u
g geslsO,,trea:
t{pei
Cutting
Power
Fully autonomous
Self design
Rain sensor
Wireless remote control
Auto
recharge
Blade adjustment
Antitheft
Hill
capability
G.WN.W
.-
Cut size
Mower size
Battery
(be
changed)
Security
Waterproof
Charging
time for battery
Mow rotate speed
Average
working time
::.
..,:::iiiiiittii:t]],,:tl
warranty
Battery
600m'?+20%
,a$Qii:800me
82W
4i.l,ll.1.i:i
.:.
',:.';,',,,,,111:.l:ll.l..:.l
Yes
Y*ti''ll:iii]llll:lll::::iil]lll.:]]lill,::::i:]:i:]l],]:
i.l]i]::iiiilll::::::l:tit,.:l
Within
l0meters
*;,'::].1:1,]],,i,,:,:]llll:i.:]:ii]ll:ll]:tll:.::',
,,..l::]].'l]::.:t]:,,l],::l]
2pcs blade,
14cm/L'1
pc
Vesi'rtcs:key.,..,.::;l,:tll:ttl,...,..ll:.ll:.,,'.,.::.,,'..:.:
:1;,1'::...
30degree
Max slope
2OKG]
17 .sKG
with Lead-acid
batteries
171145KG
with lithium batteries
3CM/4CM
ADJUST
56iSi?5Ca:titt,.
.:'lir1;,'..1'-,,:.:.',,,,,,'..''......,',
.,.,,,'....
lead-acid
/ lithium
battery24Y,
7 .2AH
Llft.serxoti..b{r
*ieir,',,:,:11:;',;;1;;;;,.:.'.,..li..l.',i,.:.,
.',,,.,.i.:
Yes
,':,13ra
hw€,:::,:rr1r
t;11t.l;;;;',:.;l::t1l:t:itt:i:::
:l:,l
6000
rpm
*10o/o
2-3 hours
,,.GAr€:::,::i::l:::::l
1
years
Page 7
Page 10

IN STALLATION
Charging
station
&
Virtual
wire set up
1. Charging
station
Charging
station
with stakes
Notice
'
Before
fix the
station
on
the lawn
,
you
should
examine
your
lawn and
decide
the
best
location.
it is easv
for the
mower
to find
the station
to
recharge
. check
the
following
pictures
:
'1
. Ensure
the
charging
station
is
placed
in
a level
station
that
is easy
to recharge
2.
Ensure
there
is
no obstacle
in the
front
of charging
station.
3.
Ensure
keeping
2-2.5
meters of
the straight-line
distance
in front
of the
charging
station.
Page
8
Page 11

ir-
ti
lnside
lawn
24
Volts
Charging
station
and
plug
receptacle
Receptacle
110V
240V
Power
Supply
A minimum
distances
from
the charging
station
and any
obstacle
is 2 meters.
Make
sure
the
distance
from corner
to
charging
station
is at
least
2 meters.
Make
sure
the minimum
distance
from
charging
station
and
virtual
wire
is at least
2.5
meters.
Greater
than
2.5m
reater
than
2m
Greater
than
2m
Greater
than
2.5m
Page 9
Page 12

w-'"wswFiFEtFn--
---:
Greater
than
2.5m
The distance
between
charging
station
and
virtual
loop
should
at
least
2.5 meters
Please
fix the
charging
station
in the
level
place.
Please
keep the
charging
station
away
from
water.
Relatively
Level-OK
Page
'10
Page 13

Hard or dry
ground
may cause
Pegs
to
break
when driving
them
in. In extreme
cases,
watering
the lawn
where
the
pegs
will be driven
Pay attention
to the short
distance
and
long distance
.
Because the
lawn is anomalistic
in
general
.
30cm
Short
distance:
area outside
is same
level or the
virtual
wire
is straight
50cm
Long distance:
area
outside
is an obstacle or
the
virtual
wire is
greater
than 90".
Corner,angel
Area outside
virtual,
same
basic
level and
free of
obstacles.
Virtual
wtre
position
O:I]
|<-_->|
Short distance
Area
outside
virtual.
Bas a
wall
as
an
obstacle.
e\
Virtual
wrre
position
o:-l
l<--------------- l
Long distance
Page
11
Page 14

Virtual
wire
Add
pegs
in to
pullthe
virtualwire
down
to the
ground
surface,
below
the
grass tips
Bury
the
virtual
wire below
the
grass
,
possible fasten
on
the
ground . The mower
can
not cut
the
wire
and
when
the
grass
grow
up
,
we
can
keep
the
virtual
wire Station
as
before.
Correct
corner
setuP,
using
Virtual
wire
Proper
Setup
in SharP
Corners
lncorrect
corner
setup
--q
/l
/l
90
degrees
Care
must
be taken
not
to create
a corner
sharper
than
90
degrees
when setting
up
the
virtual
wire.
A corner
sharper
than
90 degrees
can
cause
the
Mower
to
lose track
of the
virtual
wire.
we can
make
greater than
90
degrees
corner
to avoid
this
situation
Redundant
virtual
wire must
be
cut
A maximum
virtual
wire
length
of 300m
is recommended
'
Areas
requiring
longer
lengths
should
be broken
into
separate
zones
Lawn area
Page
12
Page 15

Follows
are
some
situations
,how
to
bury
the
virtual
wire
.
Min
distanc
0.Scm
Bury
the
virtual
wire
according
to
actual
lawn.
Starting
point
Position
the
mower
towards
the
wire
after
the
charging
station.
Page
13
Page 16

MAINTENANCE
INFORMATION
BATTERY
Attentions
for
Lead
Acid
Batteries
1. Please
don't
remove
the
batteries
privately
2.
Storage
(1
)Charge
the
batteries
at
least
once
every
six months
of they
are
at
25"C.
The
interval
of this
charge
should
be reduced
to
50%
by
each
1
0"C rise
in
temperature
above
25 C
.
The
self-discharger
rate
doubles
for
each
10C
in
temperature.
lf
tney
are
stored
for
a
long
time
in
a
discharged
state,
their
capacity
may
not
recover
even
after
charge.
lf
the
batteries
are
stored
for
more
than a year
at room
temperature,
the
life
of
the
batteries
may
be
shortened.
(2')
Store
the
batteries
starting
from
the
fully
charged
state
to
prevent
the
life
of
the
batteries
being
shortened.
Use
the
batteries
as
quickry
as
possibre
after
receiving
them
as
they
graduaily
deteriorate
even
under
proper
storage
conditions.
Attentions
for
Lithium
batteries
1. Please
charge
the
rithium
batteries
in
accordance
with
standard
time
and
procedures.
2.
When
the
power
is
too
low,
it
should
be
started
charging
as
soon
as
possible.
3 Activation-The
lithium
batteries
should
be
normal
charged-discharged
for
3-5
times
to
activate
electricity
back
to
normal
capacity.
4.
storage-we
suggest
the
optimum
storage
of rithium
battery
is
with
40% power
and
keep
in
the
shade.
Page
14
Page 17

TROUBLING
SHOOTING
TROU
BLESHOOTI
N G
The
mower
moves
out
of the
The
virtual
wire fails
to
area rounded
by
the Virtual send
signals.
wire
or moves
in
circle
The virtual
wore
ts
searching
for
the
Virtual
wire
broken
bv the
mower
2.lt moves
to
the
area wfr€re
The
mower
does
not
work
the
grass
is
thick;
3. The
frpnt
wheel is
tifted
up.
'
i
"""
ill:"
1 .The
"
power"
button
on
the
remote
control
is
{ar rnha-l
ruuut
tEu
2.Front
wheel
is
lifted
up
3.Blades
are
plugged
up
The
mower
buzzed
seriously
and
the
power
becomes
inefficient
4.The
mower
stop
when
he
can
not
meet
the
grass
in
5minutes.
The remote
control
does
not
work
The
batteries
can
not
recharge
Large
patches
of uncut
grass
remain
after
Mower
has
completed
mowing
The
electricity
power:
is low
Change
batteri&
PoweL is,l1ot,
fu
lty
cha
rged.,,
for operation
Power
nearing
natural
end
of life
Check
the virtualwire
light.
Be
sure
the
virtualwire
is
connected
to
the
base
station
that
is in
motion,
and there
is
no loose
place
',....,.
Clear the
lawn,whefel
the,
:
'
rnower is trapped
or iestart,
,ttie
mower in
another:rplaca,:
iThen
:the
mowsr
will,SCI.k,in:
A,ne1i41,Cif9te.,
'
.
''
':,"i
:"
i.rlii
1 .
Press
"
power
on
&
off"
button
again.
2.
Restart
the
mower.
3.
Turn
off the
mower,
and
charge
it
manually.
Check
whether
the
charger
is
well
connected
, ,
: : :
r : .
. . ,
:
.
I I
.
, : I
:
. . .
. .
, :
.
I
i
,
I I
.
:
, ' , ,
.
I I
'
,
, l I
I .
i :
r ,
, .
,
:
i
.
. I I
I
,
:
'
Replace
the
battery
and
follow
the
maintenance
Page
1
5
Page 18

Thg,bumper
does
not
activate when
meeting
obstacle
Mower
gets
stuck
frequently
when traveling
optimal terrain
1.
Grass
is extremely
overgrown
or very
wet
Jigrgle switch
is broken
, I,1t11t.l...'',,ii1:1;1:
..
.
:r:r:t:::::i:.:ri::rrrrir:
Low
ground
Cuttino heioht too
low
Terrain
needs
landscaping
repairs
Obstacle alono the oath
Faulty
power
lamp
Mow on RC has
been
turned
off
r
I,
Power is not
fully charged
for operation
Power nearino natural end
of life
1. Grass
is
extremely
overgrown
or very
wet
Power
supply
is
not
plugged
inp'lhe,main
power
suptl1,
l
1. Cut the
grass
appropriate
height
.t....,:
,,Send
the
mower to
providei'
and repair
Raise
ground
clearance
to
the uppermost
position
Raise
cutting
height
Fill in all holes , cover
or
exclude all exposed
roots
ln order to smooth
the terrain
Watch
the fulloperation of
edqe and confirm
no
obstiacle are
present
Replace operating
lamp
Turn on the mower
button
Charge
again until the
power
light
"green
"
Replace the battery
and
follow the maintenance
1.
Cut
the
grass
appropriate
height
Confirm
power
supply
is
plugged
into the main
power
supply
Check
the charging station
Contact
your
provider
id
the
contacts
is replaced
Mower does
not
complete the edge
Mower
lamp not flashing
when the blades
are
in
operation
Mower drives but
blades
willnot
mow
Short
run time , operates
less time
than normal
Mower does
not detect
the
charoino station contacts
No
power
to
plug
receptacle
Check the
power
or
main
power
is
shut
off
Check
the
plug
Charging
station
/the
virtual
wire corrosion
Page
16
Page 19

Mower
is operated in
the
zone
with the
charging
station but stopped
No
power
turn off the
power
by keys
and takes it to
charge
.
Page 17
Page 20

15
,1
L?
I'F=---
l''r' r /
./
-
o
/
-ryi
a'7
1
,1,
--4'f\
.j
l.Upper
cover
2.Bottom
cover
3.Wheels
4.Shell
5.Batteries
6.DC
motor
T.Slowdown
motor
8.Axle
9.Bumper
10.Motor
gasket
11.Gear
2l
1
2.Motor pressure
plate
1
3.Bearing pressure
plate
14.Batten
of
battery
15.Handle
16.Rain
sensor
copper
head
1
T.Springs
copper
sheet
lB.Bearing
19.Blades
20.Blades
post
2 1 .Omni-directional
wheels
22.Charging
copper
head
Page
18
16
".:r.:.'-
J
''
,l
*t--S*=tt
8\
.'ll
-1
-
:
 Loading...