

Page 1
USER GUIDE
V. 1.6
Page 2

Contents
FCC SAR Compliance Statement 1
FCC RF Interference Statement 3
For your safety 4
Battery Information 5
Taking Care of your Thuraya Mobile Phone 5
Certification information (SAR) 6
SG-2520 Unpacking 7
SG-2520 Accessories 7
Your SG-2520 8
The function of the keys 9
SG-2520 01 Before you start
Introduction 10
HPA (High-Penetration Alerting) 11
Initial steps
Inserting SIM card 12
Attaching the ferrite core 12
Connect the charger and charge the battery 13
Switch the mobile phone ON / OFF 14
Enter your PIN 14
Emergency call (SOS) 15
Setup Wizard 16
Lock/Unlock in Idle Screen 16
Display
Display layout 17
Display symbols 18
Using softkey and menu 19
Softkey action 19
Menu navigation 20
Quick access 21
Step back one menu level 22
Exit the menu 22
Making and receiving call
Dial using the keypad 23
Receiving a call 24
Silent a call 25
High-Penetration Alerting 26
Options during call 27
Handling more than one call simultaneously
New Message 29
Select message type 29
Edit mode 29
Change Input mode 30
Input symbol 31
Input number 33
Change language 34
eZitxt ON / OFF 35
Dictionary 36
To clear text 38
SG-2520 02 Getting started
Page 3

1. Media center 40
1.1. Image Box 54
1.2. Sound Box 54
1.3. Video Box 55
1.4. MP3 Box 55
1.5. Memory status 57
2. Contacts 58
2.1. Contacts List 59
2.1.1. Contacts List 59
2.1.2. Contact group list 62
2.1.3. Message group list 63
2.2. Special List 64
2.3. Speed Dial 64
2.4. SIM list 65
2.5. My Info. 65
2.6. Helper 66
3. Organizer 67
3.1. Monthly Schedule 70
3.2. Weekly schedule 72
3.3. Daily schedule 72
3.4. Alarm 73
3.5. Planner 74
3.6. Notes 75
4. Navigation 76
4.1. Current position 76
4.2. Continuous Position 77
4.3. Waypoint 78
4.4. Route 79
4.5. Location Track 80
4.6. Settings 81
4.7. Qiblah & Prayer 83
5. Messaging 84
5.1. New 84
5.1.1. New (SMS) 84
5.1.2. New (MMS) 87
5.1.3. New (Email) 89
5.2. Inbox 91
5.2.1. Inbox (SMS) 92
5.2.2. Inbox (MMS) 94
5.2.3. Inbox (Email) 96
5.2.4. Inbox (Cell Broadcast) 97
5.2.5. Inbox (Spam message) 97
5.3. Drafts 98
5.4. Sent 98
5.5. Unsent 99
5.6. Reports 99
5.7. SIM message 100
5.8. Settings 101
5.8.1. SMS 101
5.8.2. MMS 102
5.8.3. Email 105
5.8.4. Cell broadcast 108
5.8.5. Spam message 109
6. Network 110
6.1. SAT registration 110
6.2. System preference 111
6.3. Search mode 112
6.4. Preferred list 113
SG-2520 03 Using the menu
Page 4

SG-2520 03 Using the menu
7. Call log 114
7.1. Voice call 114
7.1.1. Recent call 114
7.1.2. Received call 114
7.1.3. Dialled call 114
7.1.4. Missed call 115
7.2. Packet data 116
7.3. Durations 116
7.4. Cost 117
7.5. Settings 118
8. Camera 119
8.1. Still capture 119
8.2. Video Capture 121
8.3. Image box 124
8.4. Video box 124
8.5. Setting 125
8.5.1. Still capture 125
8.5.2. Video capture 125
9. Connectivity 126
9.1. IrDA 126
9.1.1. Receive mode 126
9.1.2. File send 126
9.1.3. Contact send 126
9.2. Bluetooth 127
9.3. FTP 129
9.3.1. FTP server 129
9.3.2. FTP connect 129
9.4. Web browser 130
9.4.1. Features 131
9.4.2. Browsing 132
9.4.3. Favorites 133
9.4.4. Settings 135
9.4.4.1. New Connection Profile 137
9.5. Received file 138
10. Setting 139
10.1. Profile 139
10.2. Phone 140
10.2.1. Wallpaper 141
10.2.2. Screen saver 141
10.2.3. Menu style 142
10.2.4. Greeting message 142
10.2.5. Theme 143
10.2.6. LCD adjust 143
10.3. Calls 144
10.3.1. Voice calls 144
10.3.2. Call diverts 145
10.3.3. Call barring 146
10.3.4. Call waitings 147
10.3.5. External device 147
10.3.6. Send own number 148
10.3.7. Cost 148
10.4. Shortcut 149
10.4.1. Favorite key 149
10.4.2. My menu 150
10.5. GmPRS/GPRS 151
10.5.1. Access point 151
10.5.2. Auto reject 155
10.6. Security 156
10.6.1. Security settings 156
Page 5

10.6.2. Change codes 157
10.6.3. Fixed dial 159
10.6.4. Closed User Group 160
10.6.5. Soft reset 160
10.6.6. Factory reset 160
10.7. Language 161
10.7.1. Language 161
10.7.2. Auto text 162
10.7.3. Dictionary 162
10.8. System 163
10.8.1. System version 163
10.8.2. Time & Date format 163
10.8.3. Time Auto update 163
10.8.4. Setup wizard 163
10.8.5. Default memory 164
10.8.6. External connect 164
10.8.7. Connect speed 164
11. Extra 165
11.1. Calculator 165
11.2. Converter 166
11.3. Recorder 168
11.4. Stopwatch 171
11.5. Timer 172
11.6. Lullaby 172
11.7. World time 173
12. Application 174
12.1. User program 174
12.1.1. DuiAdventure 174
12.1.2. SpicyBoys 174
12.1.3. TimeRider 174
12.1.4. JAM (Java Application Manager) 175
12.1.5. About the JAM icon 175
12.1.6. Java Application Installation 175
12.1.7.
Getting to Know the Java Application Manager(JAM)
177
12.2. Memory manager 180
12.3. File browser 181
12.4. SIM tool 188
SG-2520 03 Using the menu
SG-2520 04 Additional
Troubleshooting 190
Quick access codes 191
Access codes 197
Security code 197
PIN & PUK 197
PIN2 & PUK2 198
Barring code 198
Limited Warranty 199
Page 6

The Federal Communications Commission (FCC) has adopted a safety standard for human exposure to Radio Frequency
(RF) electromagnetic energy emitted by FCC-certified equipment. This wireless mobile phone has been evaluated under FCC
Bulletin OET 65C (01-01) and found to be compliant to the requirements of uncontrolled environmental limits as set forth in
CFR 47 Sections 2.1091, 2.1093 addressing RF Exposure from radio frequency devices when operated in accordance with
the operation guidelines described in this manual. Proper operation of this radio device according to the instructions in this
publication will result in user exposure substantially below the FCC recommended limits.
Your wireless phone SG-2520 is a radio transmitter and receiver. It is designed and manufactured not to exceed the emission
limits for exposure to radio frequency (RF) energy set by the Federal Communications Commission of the U.S. Government.
These limits are part of comprehensive guidelines and establish permitted levels of RF energy for the general population. The
guidelines are based on standards that were developed by independent scientific organizations through periodic and thorough
evaluation of scientific studies. The standards include a substantial safety margin designed to assure the safety of all persons,
regardless of age and health.
The exposure standard for wireless mobile phones employs a unit of measurement known as the Specific Absorption Rate, or SAR.
The SAR limit set by the FCC is 1.6W/kg.* Tests for SAR are conducted using standard operating positions accepted by the FCC
with the phone transmitting at its highest certified power level in all tested frequency bands. Although the SAR is determined at
the highest certified power level, the actual SAR level of the phone while operating can be well below the maximum value. This is
because the phone is designed to operate at multiple power levels so as to use only the power required to reach the network.
In general, the closer you are to a wireless base station antenna, the lower the power output.
Before a phone model is available for sale to the public, it must be tested and certified to the FCC that it does not exceed the limit
established by the government-adopted requirement for safe exposure. The tests are performed in positions and locations (for
example, at the ear and worn on the body) as required by the FCC for each model. The highest SAR value for this model phone as
reported to the FCC when tested for use at the ear is 0.32 W/kg (For SAT operations, this mobile phone cannot be used in a body
worn position because in this position the phone cannot properly receive and transmit the satellite signal and the operation is not
practicable). The body-worn operation is restricted to GSM/BT operations only.
FCC SAR Compliance Statement
Before you start
01
1
Page 7

Before you start
2
01
This phone has been tested and meets FCC RF exposure guidelines when used with an accessory that contains no metal
and that positions the handset a minimum of 15 mm from the body. Use of other accessories may not ensure compliance with
FCC RF exposure guidelines.
Highest reported SAR value for Body-worn is: 0.65 W/kg
While there may be differences between the SAR levels of various phones and at various positions, they all meet the government
requirement.
The FCC has granted an Equipment Authorization for this wireless mobile phone with all reported SAR levels evaluated as in
compliance with the FCC RF exposure guidelines. SAR information on this phone is on file with the FCC and can be found
under the Display Grant section of http://www.fcc.gov/oet/fccid after searching on FCC ID:TZ5SG-2520.
In the United States and Canada, the SAR limit for mobile phones used by the public is 1.6 watts/kilogram (W/kg) averaged
over one gram of tissue. The standard incorporates a substantial margin of safety to give additional protection for the public
and to account for any variations in measurements. SAR values may vary depending on national reporting requirements and
the network band.
Page 8

Before you start
01
3
Thuraya is always improving the user interface to ensure the user has the best experience.
This device complies with Part 15 of the FCC Rules.
Operation is subject to the following two conditions:
1. This device may not cause harmful interference, and
2. This device must accept any interference received, including interference that may cause undesired operation.
This equipment has been tested and found to comply with the limits of a Class B digital device, pursuant to Part 15 of the
FCC Rules.
These limits are designed to provide reasonable protection against harmful interference when the equipment is operated in a
residential environment. This equipment generates, uses, and radiates radio frequency energy, and if not installed and used
in accordance with the instructions, may cause harmful interference. However, there is no guarantee that interference will not
occur.
If this equipment does cause interference to radio or television reception, which can be determined by turning the equipment
off and on, the user is encouraged to correct the interference by one of the following measures:
Reorient or relocate the receiving antenna.
Increase separation between the equipment and receiver.
Connect the equipment to an outlet on a circuit different from which the receiver is connected.
Consult the dealer or an experienced radio/TV technician.
Caution
This equipment generates or uses radio frequency energy. Changes or modifications to this equipment may cause harmful
interference unless the modifications are expressly approved in the instruction manual.
The user could lose the authority to operate this equipment if an unauthorized change or modification is made.
RoHS
This product is in compliance with EU RoHS Directives and manufactured using lead-free solder paste and parts.
•
•
•
•
FCC RF Interference Statement
Page 9
Before you start
4
01
Read the below guidelines to help you get the most out of your Thuraya Phone:
For more detailed explanations please refer to the complete user guide.
For your safety
SWITCH ON SAFELY
Do not switch the phone on when wireless phone use is
prohibited or when it may cause interference or danger.
ROAD SAFETY COMES FIRST
Obey all local laws.
Always keep your hands free to operate the vehicle
while driving. Your first consideration while driving
should be road safety.
SWITCH OFF IN HOSPITALS
Follow all restrictions instructed by the hospital authorities.
Switch the phone off near medical equipment.
SWITCH OFF IN AIRCRAFT
Follow all restrictions instructed by the airlines.
Wireless devices can cause interference in aircraft.
SWITCH OFF WHEN REFUELING
Do not use the phone at a refueling point.
Do not use near fuel or chemicals.
SWITCH OFF NEAR BLASTING
Follow any restrictions.
Do not use the phone where blasting is in progress.
Please read carefully and make yourself familiar with the safety measures and user instructions in this Manual before you
start to use your SG-2520. Thuraya is always improving the user interface to ensure the user has the best experience.
Page 10

Before you start
01
5
Use only Thuraya approved battery pack and Thuraya approved chargers for your phone.
Do not short-circuit the battery. Short-circuiting the terminals may damage the battery or the connecting object.
Do not expose to high temperatures.
Please dispose the battery in accordance with local regulations.
•
•
•
Battery Information
Your device is a product of superior design and craftsmanship and should be treated with care.
The suggestions below will help you protect your warranty coverage.
Keep the device dry. Liquids or moisture can contain minerals that will damage electronic circuits.
If your device does get wet, remove the battery and allow the device to dry completely before replacing it.
Do not use or store the device in dusty, dirty areas. Its moving parts and electronic components can be damaged.
Do not store the device in hot areas. High temperatures can shorten the life of electronic devices and damage batteries.
Do not store the device in cold areas. When the device returns to its normal temperature, moisture can form inside the device
and damage electronic circuit boards.
Do not attempt to open the device other than as instructed in this guide.
Do not drop, knock, or shake the device. Rough handling can break internal circuit boards and fine mechanics.
Use only the supplied or an approved replacement antenna.
Unauthorized antennas, modifications, or attachments could damage the device and may violate regulations governing radio devices.
Always create a backup of data you want to keep (such as contacts and calendar notes) before sending your device to a service facility.
•
•
•
•
•
•
•
•
Taking Care of your Thuraya Mobile Phone
Page 11

Before you start
6
01
THIS DEVICE MEETS INTERNATIONAL GUIDELINES FOR EXPOSURE TO RADIO WAVES.
Your mobile device is a radio transmitter and receiver. It is designed and manufactured not to exceed the limits for exposure
to radio frequency (RF) recommended by international guidelines (ICNIRP). These limits are part of comprehensive
guidelines and establish permitted levels of RF energy for the general population. The guidelines include a substantial safety
margin designed to assure the safety of all persons, regardless of age and health.
Certification information (SAR)
The Thuraya terminal / product SG-2520 complies with EN 50360:2001 and EN 50361:2001 standards.
The highest SAR value for this model phone when tested for use at the ear is 0.32 W/kg.”
Page 12
Before you start
01
7
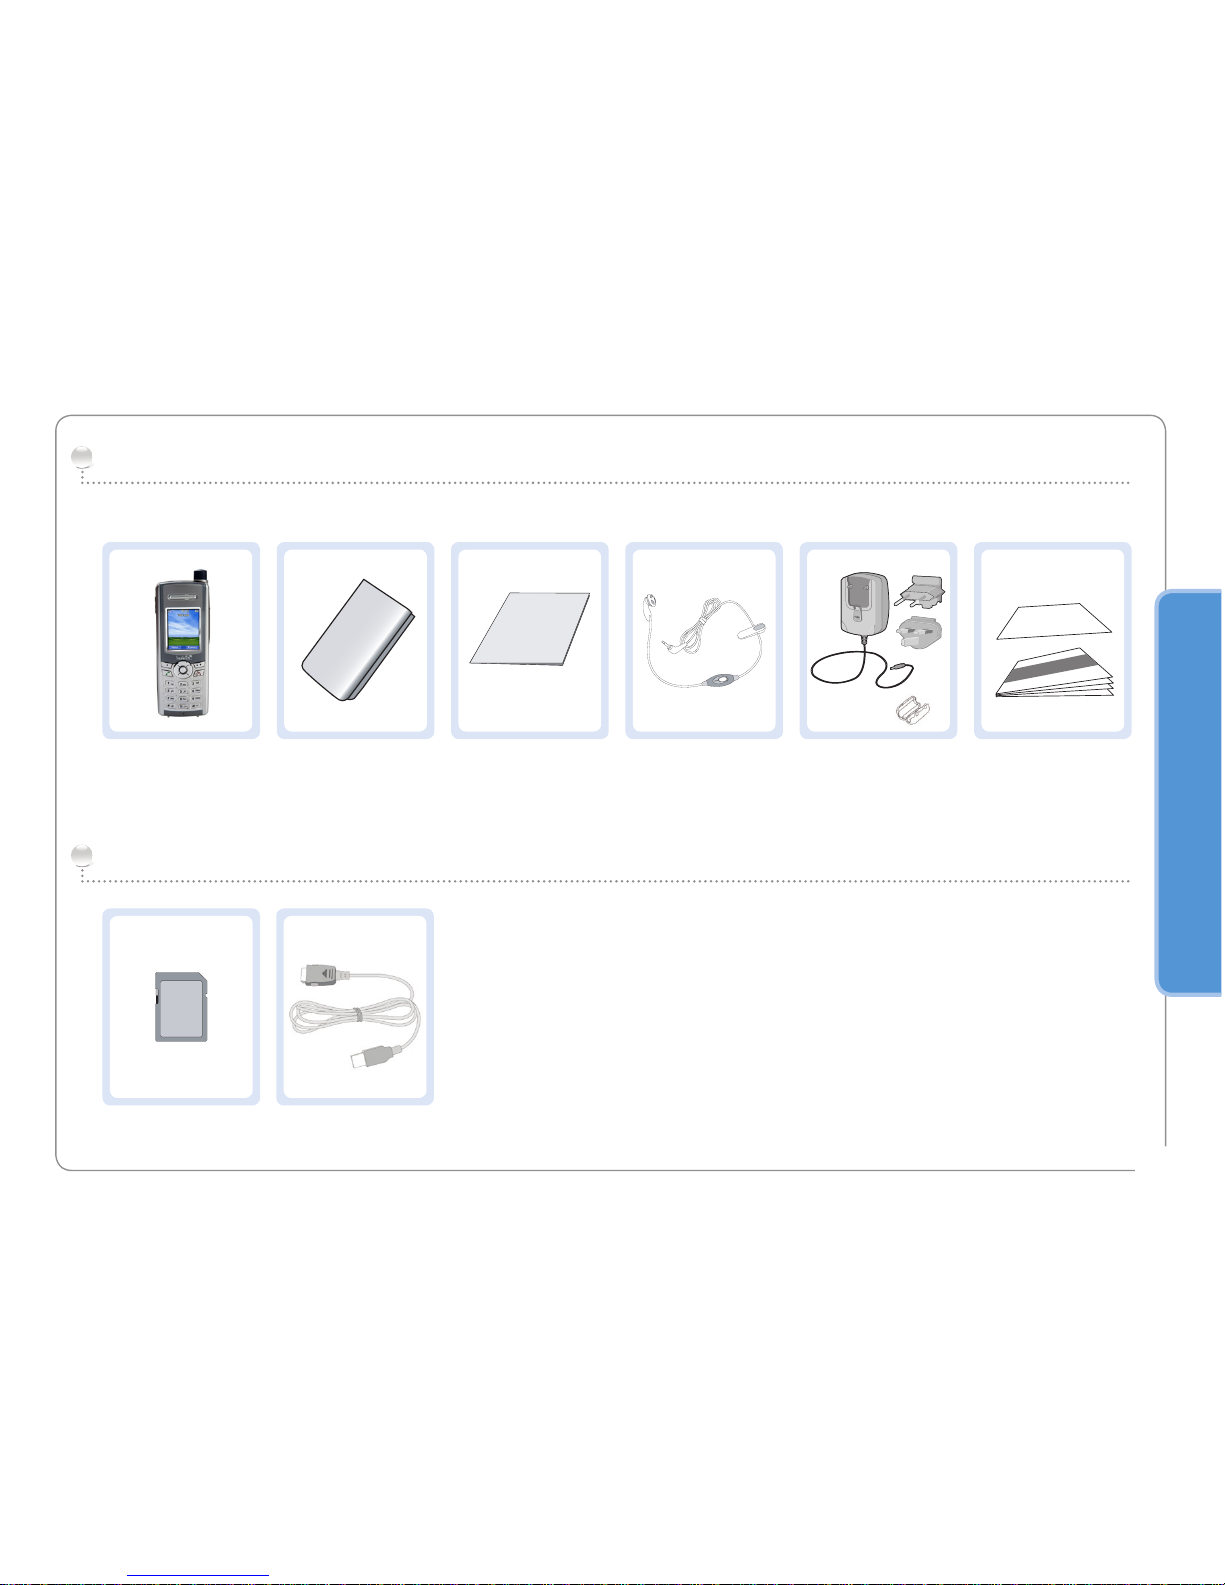
Your package contains the following items:
SG-2520 Unpacking
Handset Battery Quick Start Guide Ear Set Travel Charger
with Ferrite Core
Warranty Card &
User’s Guide
SG-2520 Accessories
SD Card USB Cable
Page 13
Before you start
8
01
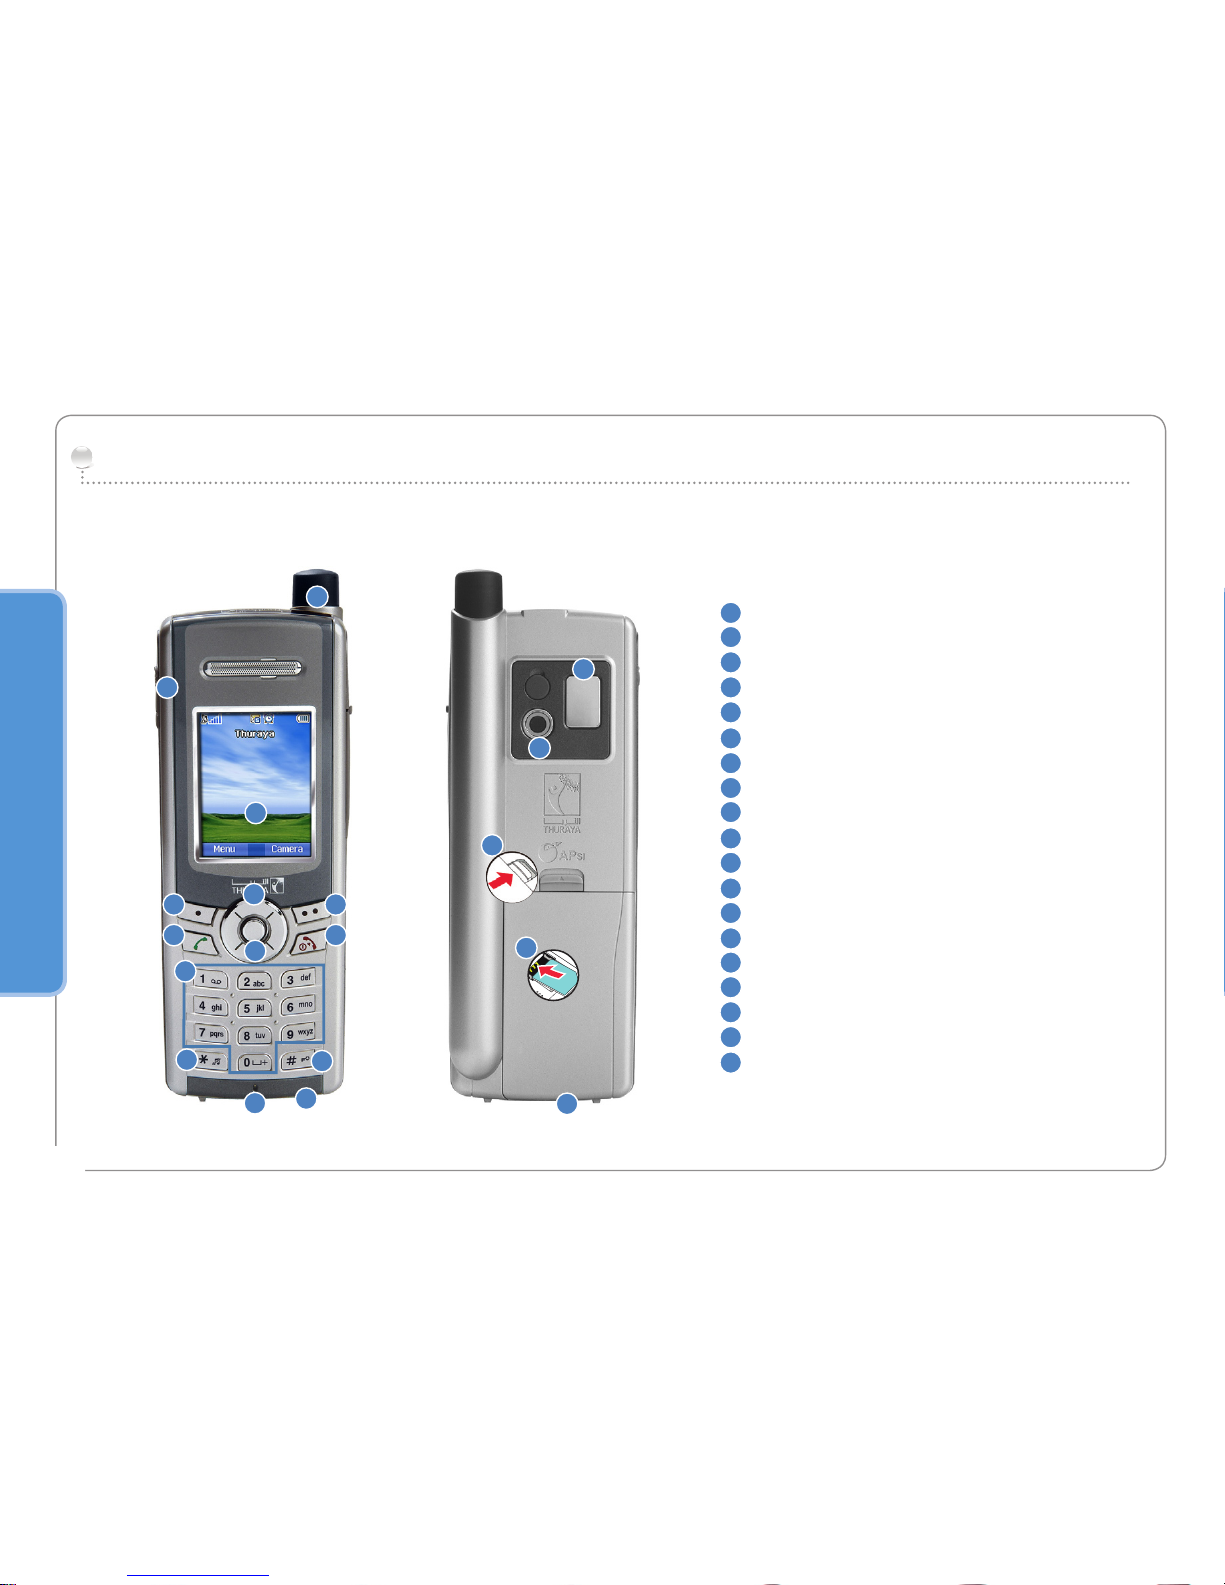
Your SG-2520
An overview of your Thuraya phone
SAT antenna
Ear-set jack
Display
Left Softkey
Right Softkey
Send key
End key
4 ways navigation key
Ok key
Alphanumeric keypad
Star key
Hash key
Microphone
Battery release
Charger socket
SIM card holder
USB/Data cable connector
Camera
Mirror
1
2
3
4 5
6 7
8
9
10
11
12
13
15
14
16
17
18
19
1
2
3
4
5
6
7
8
9
10
11
12
13
14
15
16
17
18
19
Page 14
Before you start
01
9
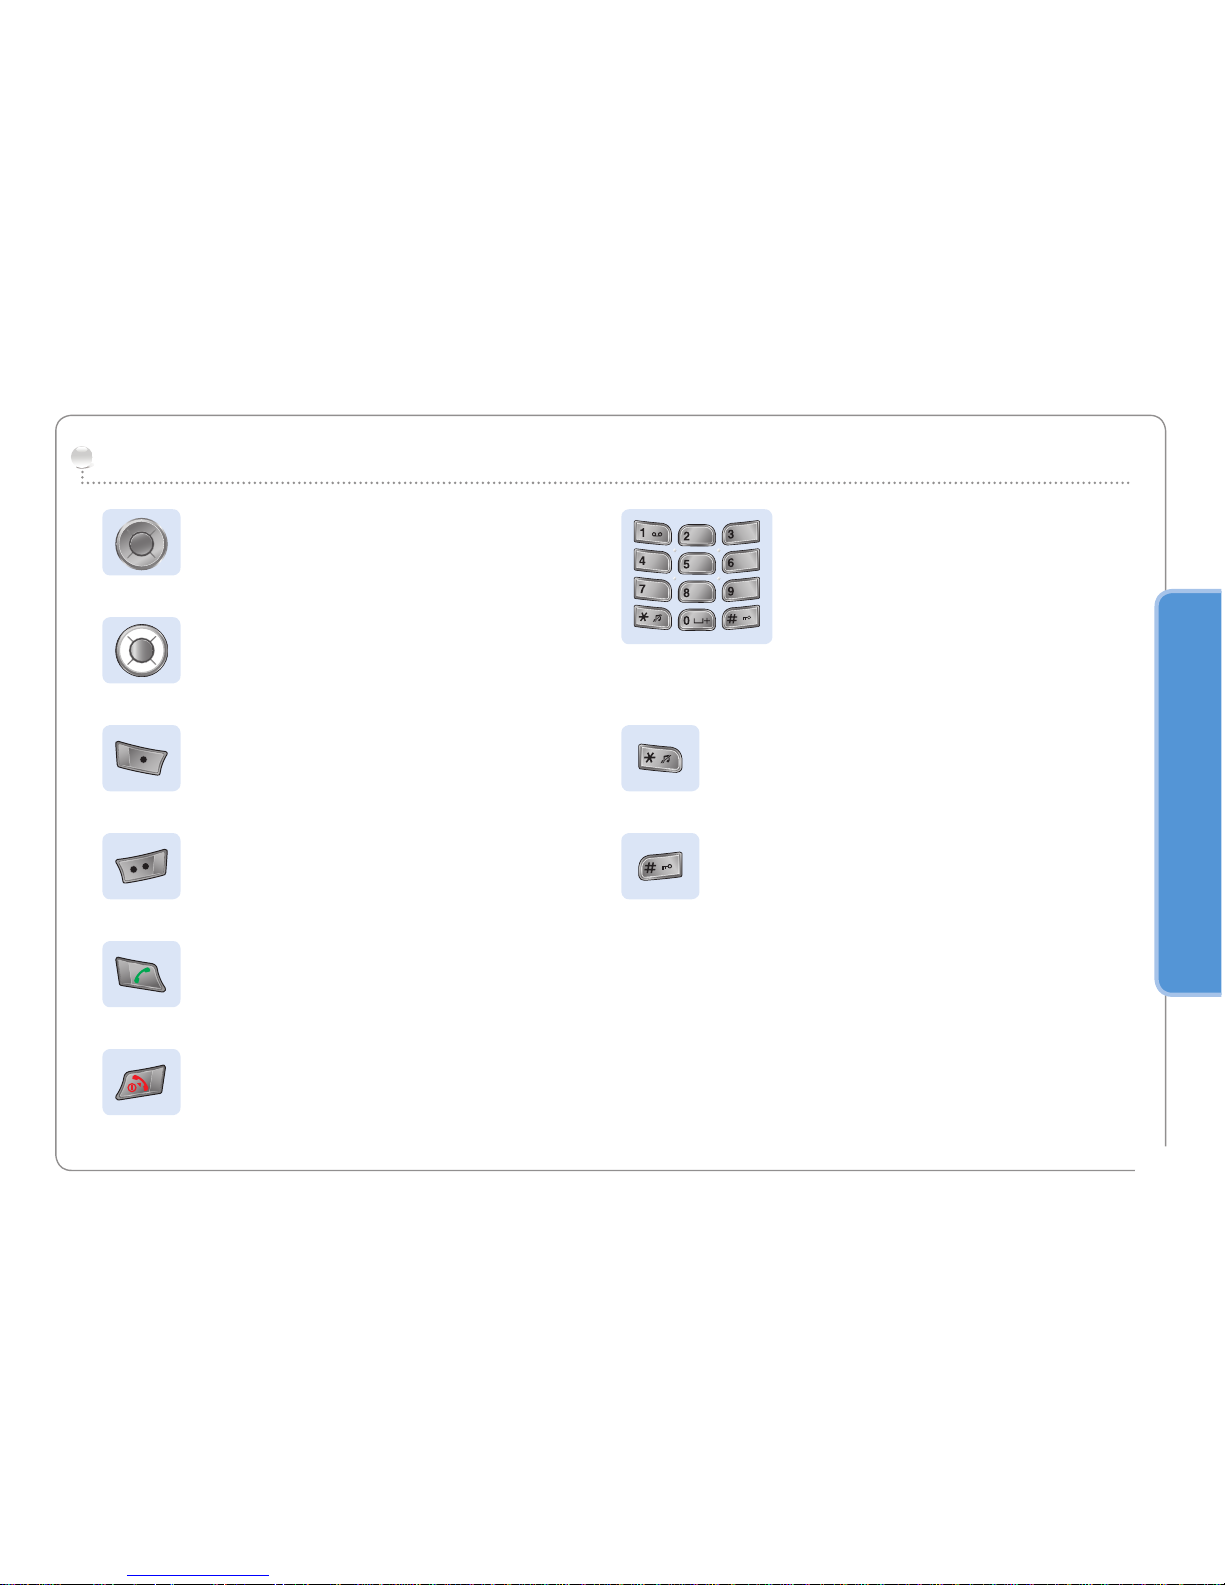
The function of the keys
Navigation Key
4-way direction key for moving focus in menu
screen.
Center Key
This key is used to select/unselect and confirm
menu options.
Left Softkey
The function of the key depends on the text
shown on the display above the key
Right Softkey
The function of the key depends on the text
shown on the display above the key.
Send Key
To accept or initiate a call, access the list of
numbers you last called or attempted to call.
End Key
To end the current connection, or to reject an
incoming call.
Press and hold to turn the phone on or off.
Keypad
Used to enter numbers and characters.
Long press on 0 key will display a ‘+’.
* Key
Long press will switch between Silent & Normal
mode. Enters special characters in SMS editor.
# Key
Press and hold to lock the keypad.
Toggles between numbers and characters in
SMS editor.
abc
jkl
tuv
ghi
pqrs
def
mno
wxyz
Page 15
Getting started
02
10
Your Thuraya SG-2520 SmartPhone is an advanced smart phone
using cutting edge technology. Its superiority is reflected in having
three integrated technologies in one handset: satellite (SAT),
GSM and GPS offering you an unmatched combination of quality
and performance.
Thuraya SG-2520 is the only tri-band phone that allows
operations on three different GSM networks : 900, 1800, 1900
MHz offering greater flexibility in high traffic GSM environments
with increased phone usability and voice quality in Asia, Africa,
Europe, Australia, and North America.
However, in order to establish communication on SAT mode,
here are few points to be considered.
- The antenna should be pulled out to make or receive SAT calls.
- While observing the indicator for SAT signal strength,
move around to achieve the best connection quality for the
mobile phone.
- SAT communication requires clear space without obstructions
such as buildings, trees or mountains.
- It is important to direct the antenna of the Thuraya SG-2520
towards Thuraya satellites.
Introduction
Page 16

Getting started
02
11
HPA (High-Penetration Alerting)
The Thuraya system features a ‘High-Penetration Alerting’ capability
that allows you to be notified of incoming calls even when your mobile
phone has poor signal coverage. When the mobile phone receives a
High-Penetration Alerting signal it will alert you with an ‘early ring’ and a
special display message (see page 26).
To answer the call, you must immediately extend the antenna and move
the mobile phone into a position that has a clear ‘line of sight’ to the
satellite. When this has occurred the mobile phone display will change,
prompting you to answer the call and proceed with the conversation.
If the call is not answered promptly after the High-Penetration Alerting
signal is received, the calling party will be diverted to voice mail and/or
an announcement stating that you are not available to answer.
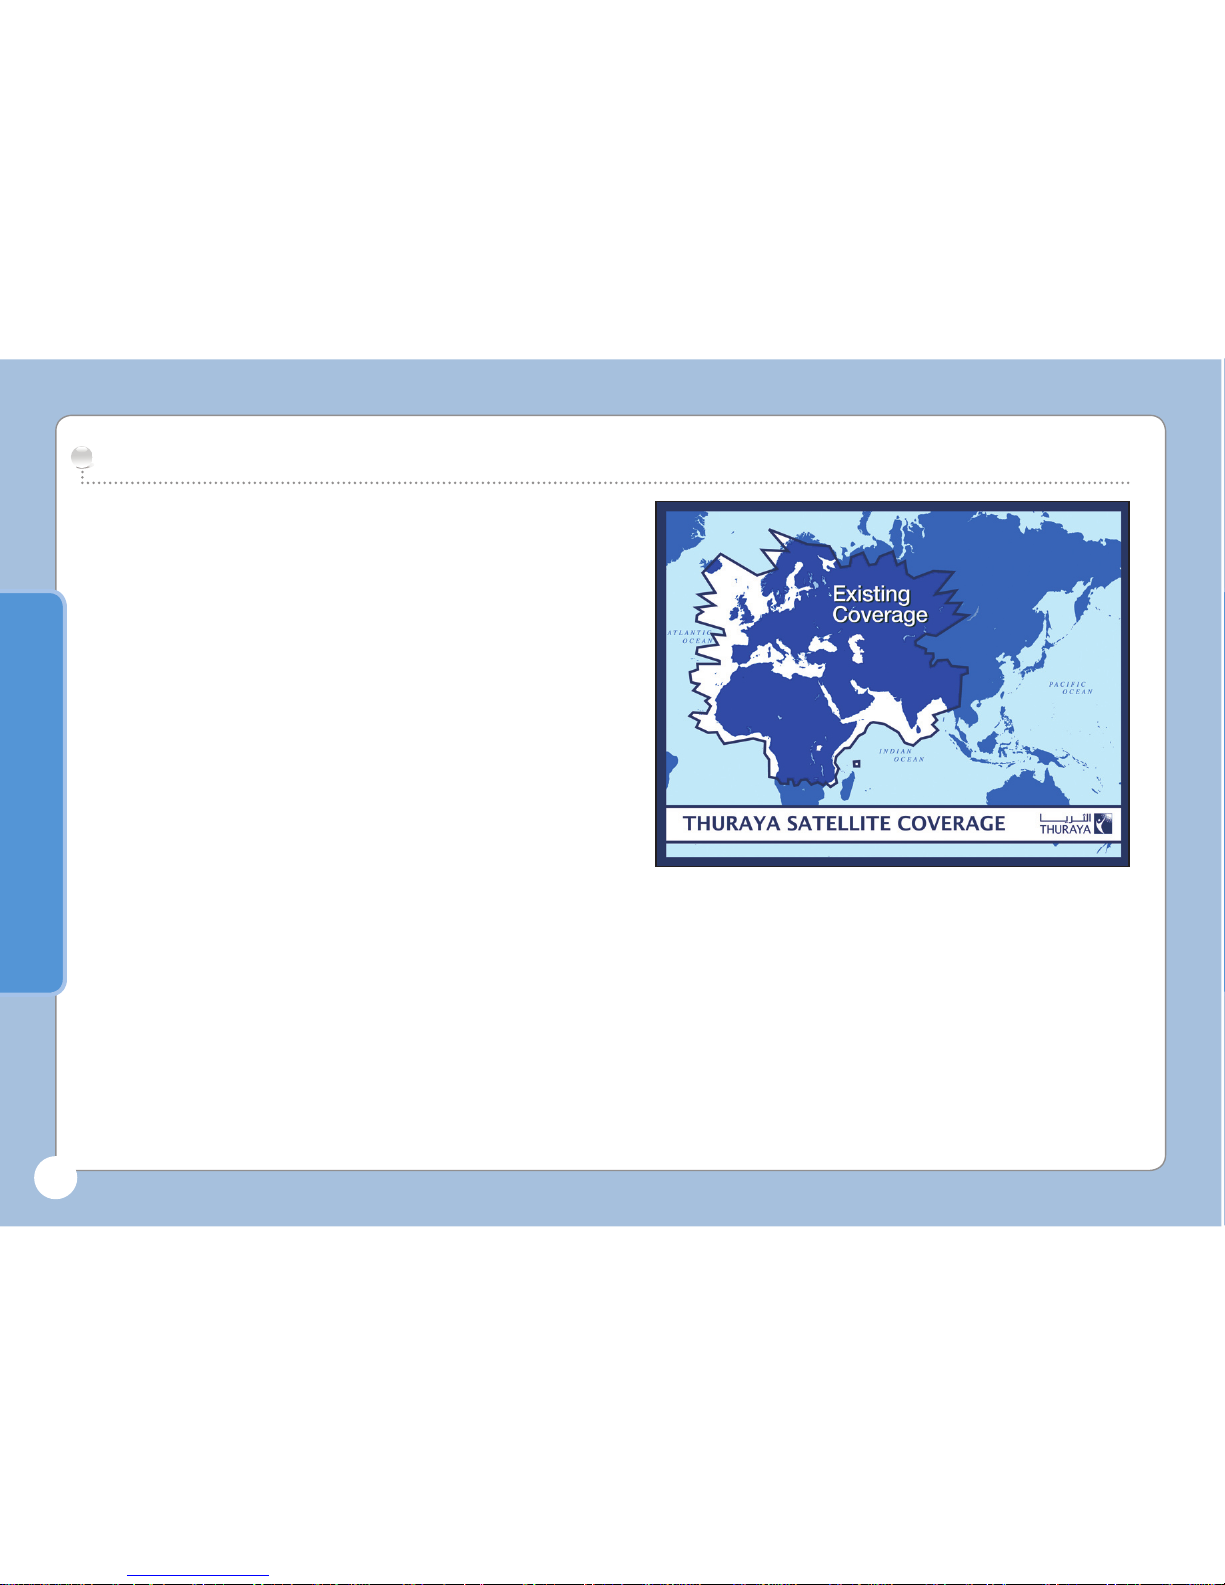
Just like GSM, the satellite coverage area is divided into many different
regions. The phone searches the network automatically (see page 110)
and determines which service region is active by registering its presence
with the Thuraya system. If the mobile phone has not been able to
update this registration due to a weak signal, the registration information
will become out of date or ‘stale’. This is indicated on the display by a
blinking SAT icon in the left of the signal strength indicator. This condition
will clear automatically once signal conditions improve and a call is
made or a period of time elapses. You also have the option to speed up
that procedure by manually having the mobile phone register with the
Thuraya system.
This is accomplished with the function SAT Registration in the mobile
phone’s menu (see page 110). Make sure you have good SAT signal
strength before using this function.
Page 17
Getting started
02
12
Initial steps
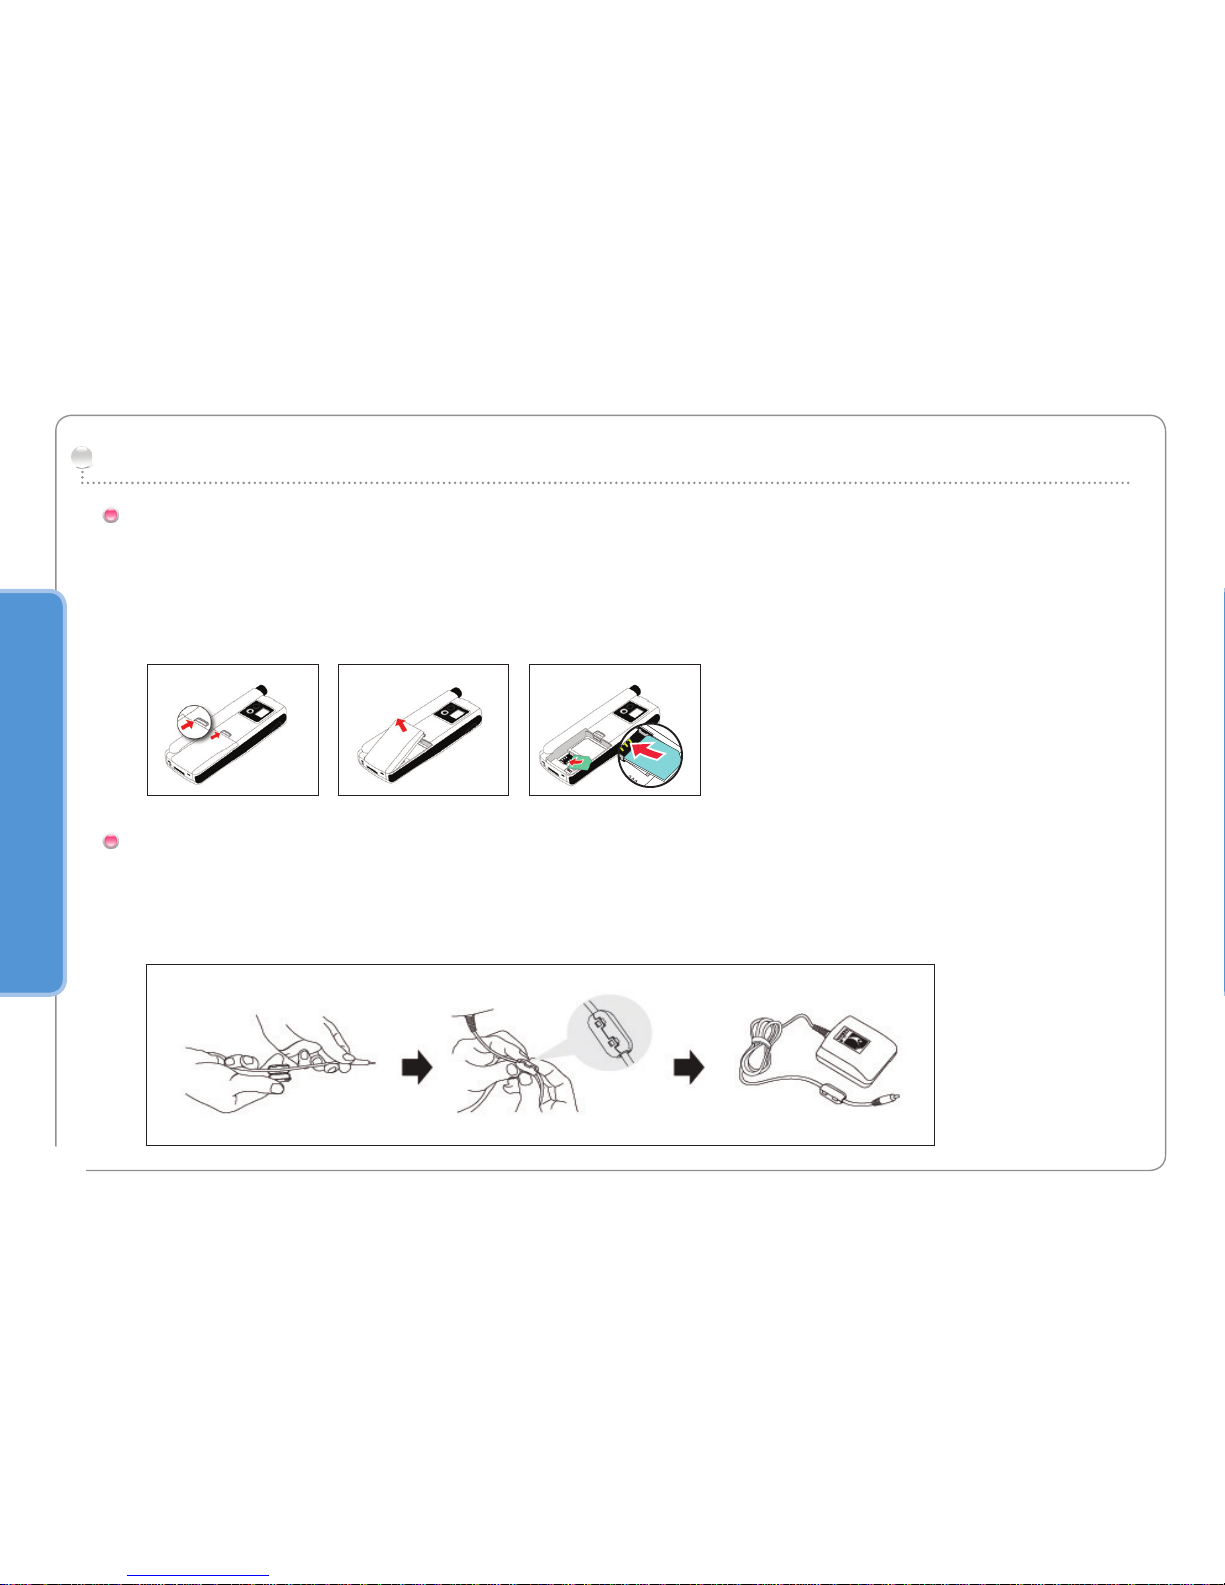
To insert the SIM card:
1. Switch off the mobile phone before removing the battery
2. Lift the battery from the back of the mobile phone
3. Insert the SIM card as shown in the pictures below.
Inserting SIM card
To attach the ferrite core:
1. Place it on the 5cm apart from the plug.
2. Attach it on the cable as shown in the pictures below.
Attaching the ferrite core
Page 18
02
13
Getting started
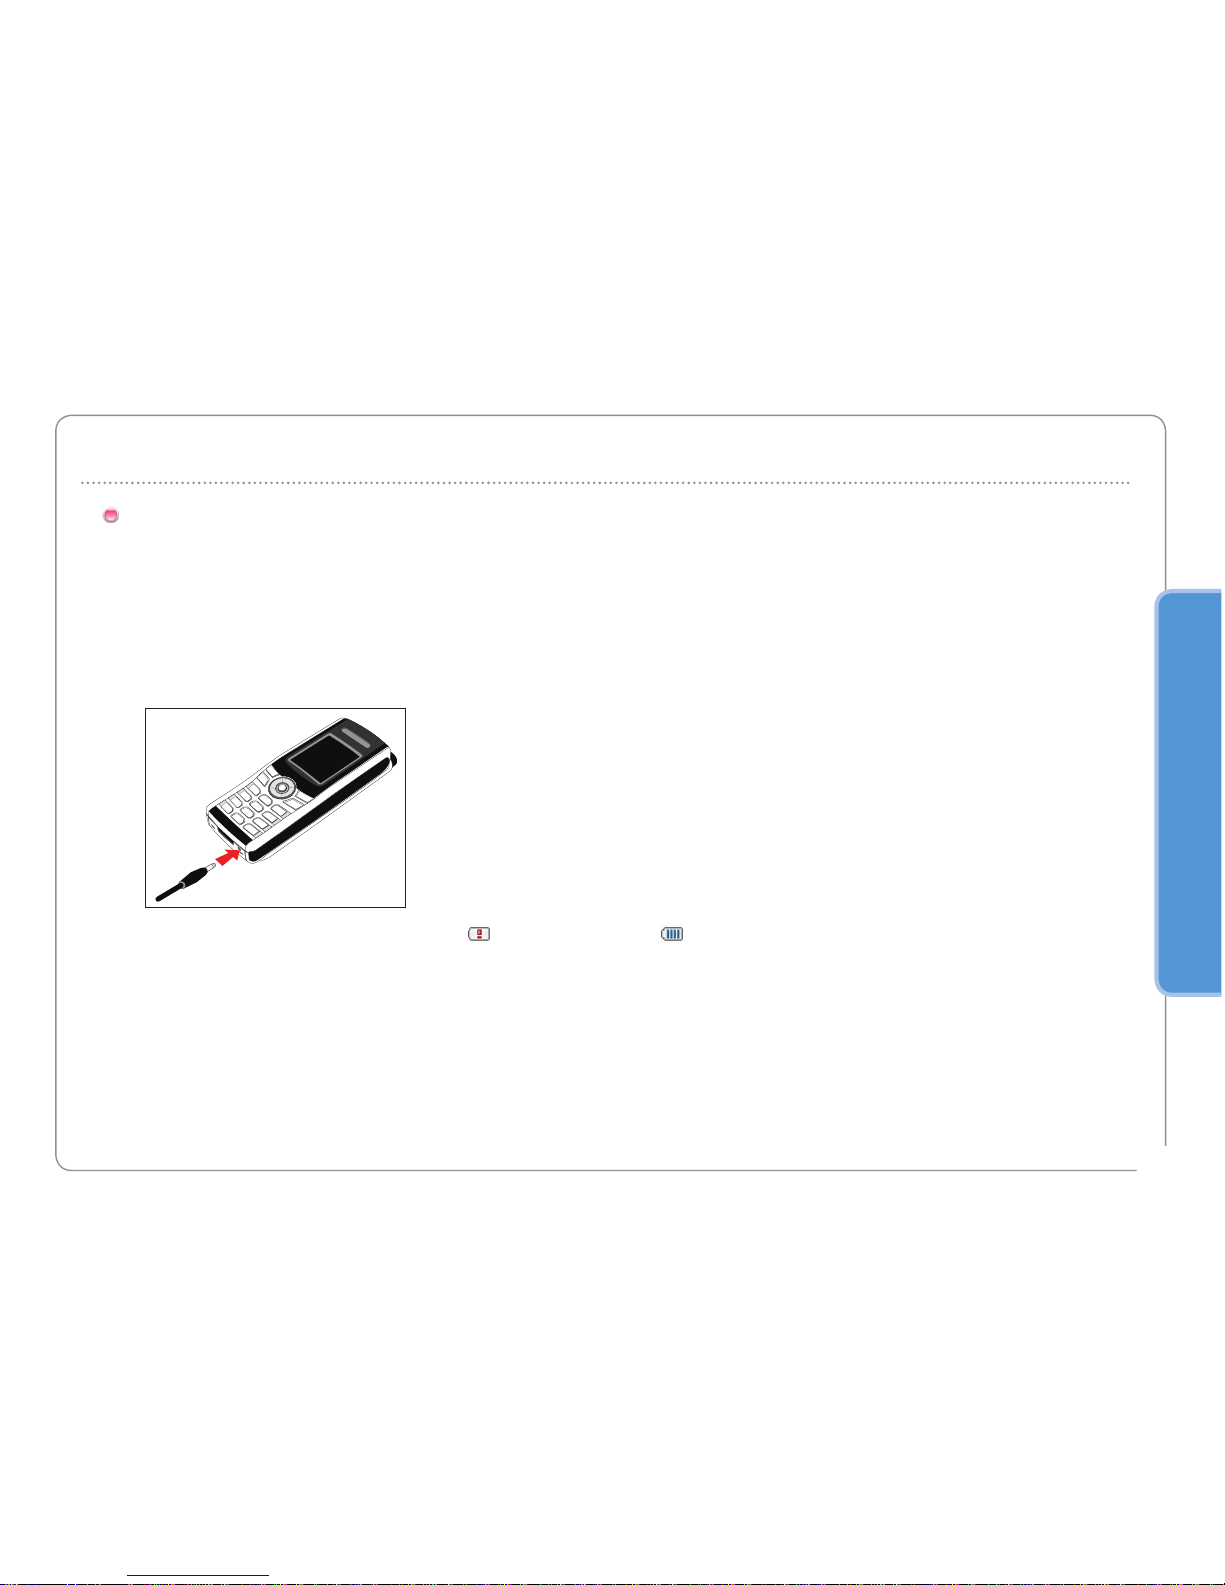
You should charge the battery supplied with the mobile phone as soon as possible to obtain full battery charge.
To charge the battery:
1. Fit the correct country specific adapter into the charger.
2. Connect the charger plug into the charger socket.
3. Connect the charger to an AC source.
Connect the charger and charge the battery
While the battery is charging you see the symbol changing to cyclically.
The battery is fully charged after 2 hours and 30 minutes.
The charger stops charging automatically when the battery is full.
As long as the charger is not disconnected it restarts charging after a while to keep the battery fully charged.
You may still use the mobile phone while charging the battery.
The internal clock for time, date (see page 168) and alarms (see page 73) will still keep running for about two hours if
neither the battery nor the charger is connected, but no alarm will sound unless a charged battery is connected.
Page 19
02
14
Getting started
Press for 3 seconds to switch the mobile phone on.
Press for 3 seconds again to switch the mobile phone off.
Switch the mobile phone ON / OFF
The PIN (Personal Identification Number : 4 to 8 digits) is initially supplied together with the SIM card by your service
provider and can be changed later. (see page 195)
Enter your PIN
1
Enter PIN using keys on keypad.
Each digit entered is displayed as an *.
2
Press to confirm PIN.
NOTE
If more than 3 errors are made when entering PIN code, PUK code must be entered.
•
Page 20
02
15
Getting started
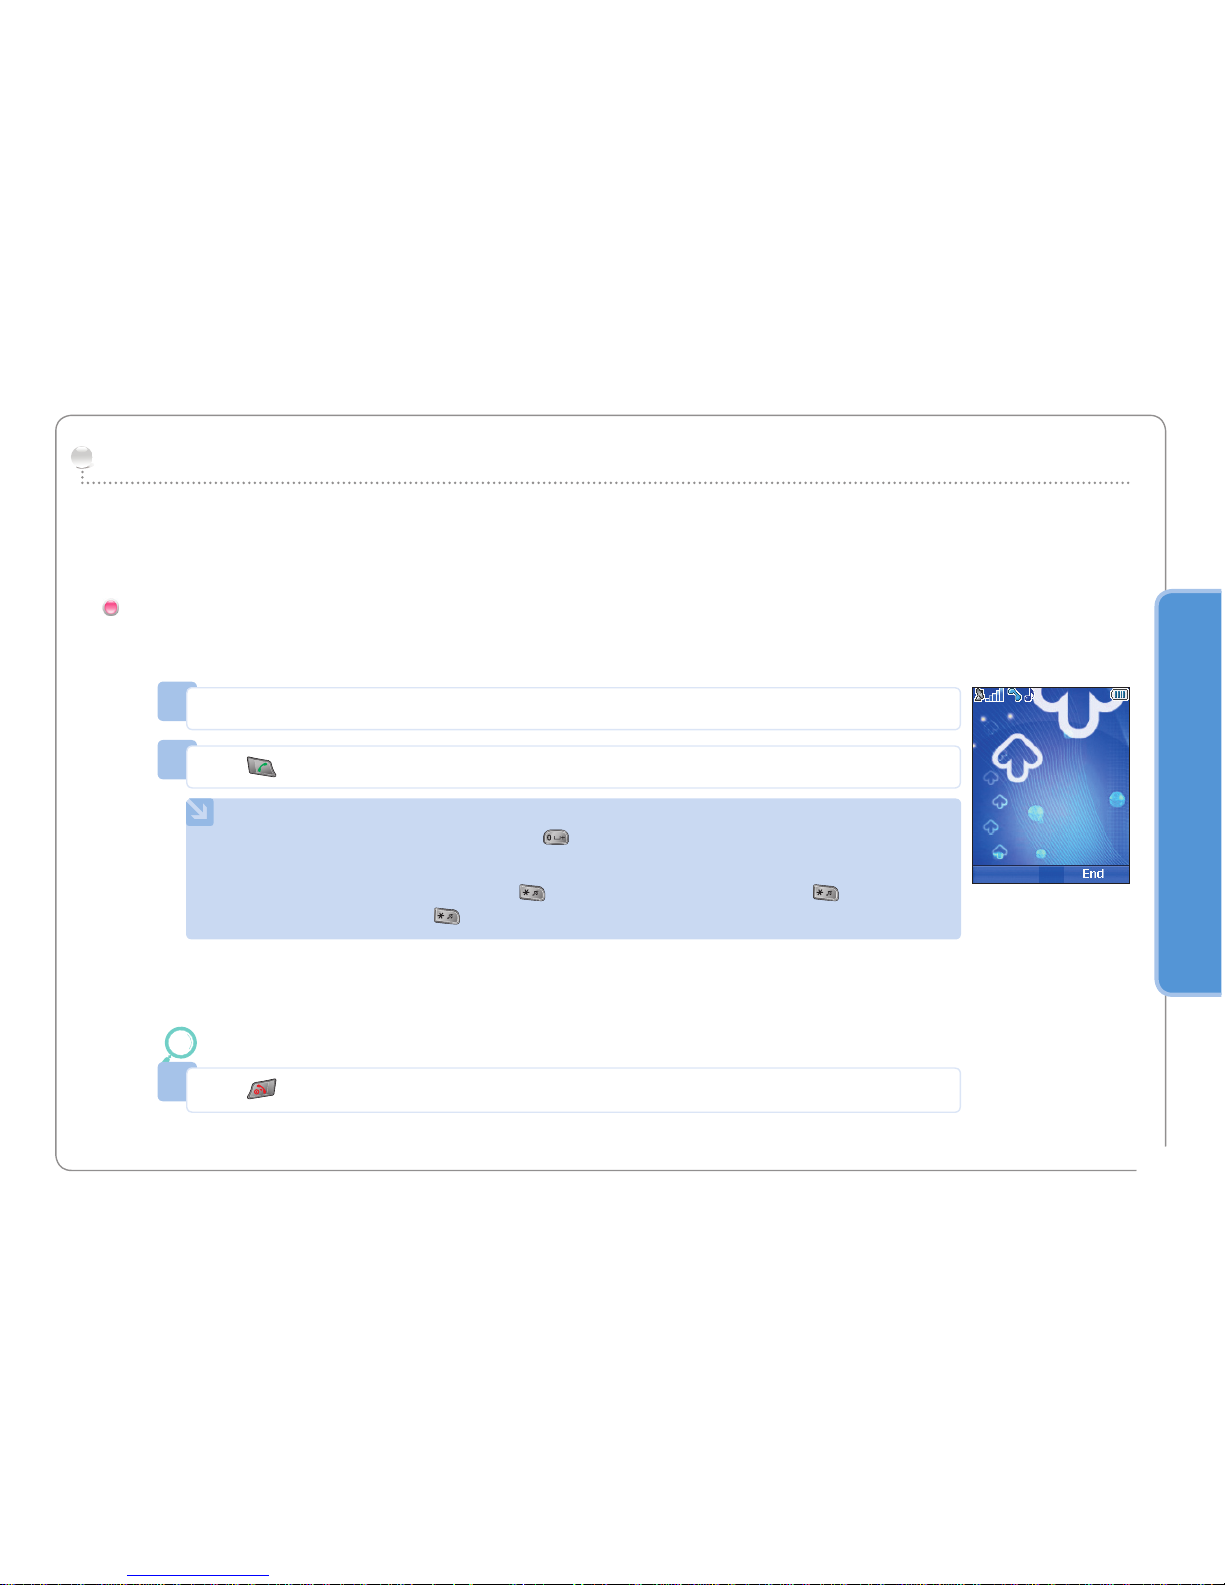
Until you have entered the correct PIN, you can make only emergency calls.
To make an emergency call before having entered the PIN.
In screen Press (SOS).
Emergency call (SOS)
1
Enter a specific emergency number.
2
Press .
The softkey SOS is available even:
When the SIM card in your mobile phone is not valid.
When you have a valid SIM card but no roaming with the selected service provider is possible.
After the PIN is accepted, you have to make an emergency call in the same way as you make a ‘normal’ call.
•
•
Or.
NOTE
Emergency calls may not be possible on all cellular telephone networks or when certain network service is in use.
In uneven terrain or close to large buildings, the operating range can be limited, which affects the connection.
•
•
Emergency numbers normally are : 112, 118, 119, 911, 999
Check with your network service provider for local emergency numbers in your area.
Page 21
02
16
Getting started
Use this to set the basic details of the phone when booting initially.
You can either use or skip this function.
To change settings, use the applicable menu or Setup Wizard Menu in Settings.
For more details, refer to Setup Wizard Menu in Settings.
Setup Wizard
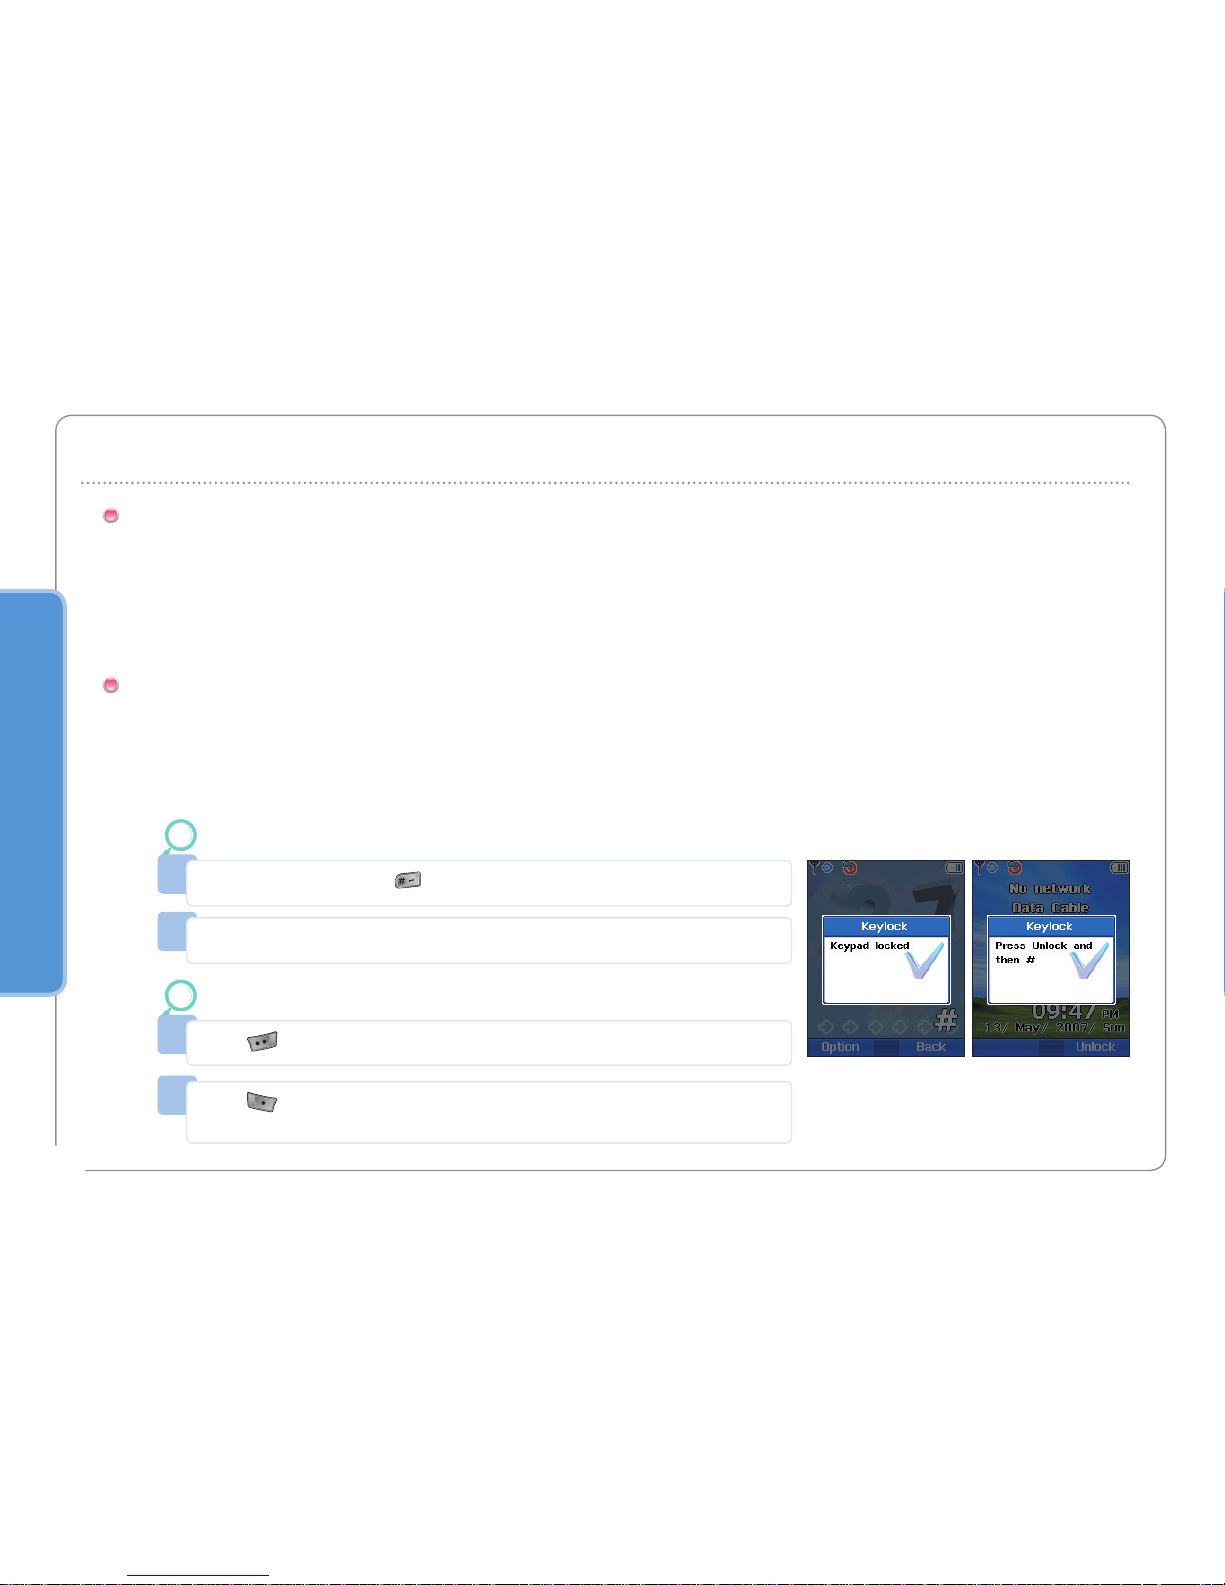
The keypad may be locked so that a number can not be accidentally dialed e.g. while the mobile is in your pocket or
handbag. (e.g. It is to protect your personal information while you have left the phone in a pocket, bag or some other place
for a while, or from the person who might have picked up your lost phone.)
Calls can be received while the phone is locked.
Lock/Unlock in Idle Screen
1
In idle screen, long press (#) key.
To Lock :
2
Press key within 3 seconds.
If key is not pressed within 3 seconds, the keypad will remain locked.
1
Press key.
To Unlock :
2
Locked.
<To Lock> <To Unlock>
Page 22
Getting started
02
17
Display
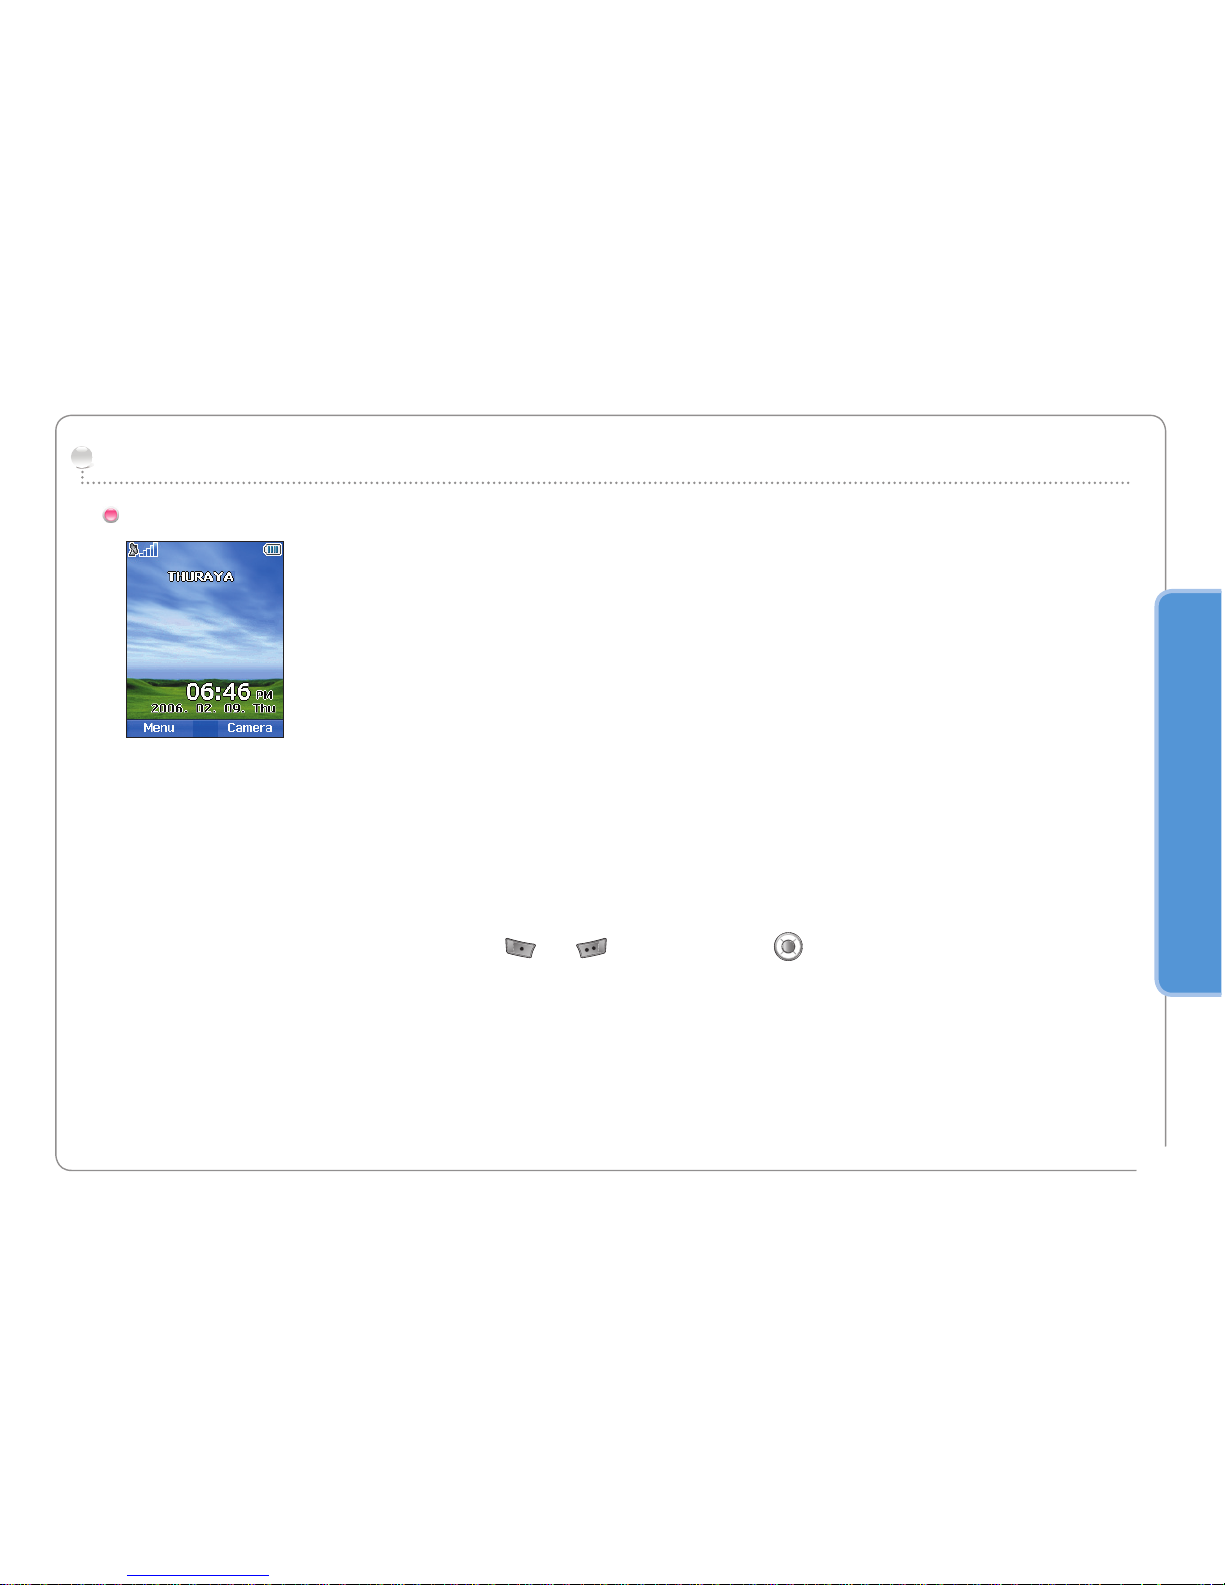
Display layout
The pattern of the display areas is as follows:
The indicator line shows mainly symbols which inform you about the operating conditions of the mobile phone.
The main area shows data relating to calls, menu and their submenus, and displays the editors for the Contacts
and SMS messages. In idle mode (standby), the network name, time and date are displayed.
The softkey line operates together with the and softkey and the OK key beneath this line.
It provides access to menus and controls. (see ‘Using softkey and menu’ on page 19)
1.
2.
3.
Indicator menuline
Area information
Date line
Phone status
Time
Page 23
02
18
Getting started
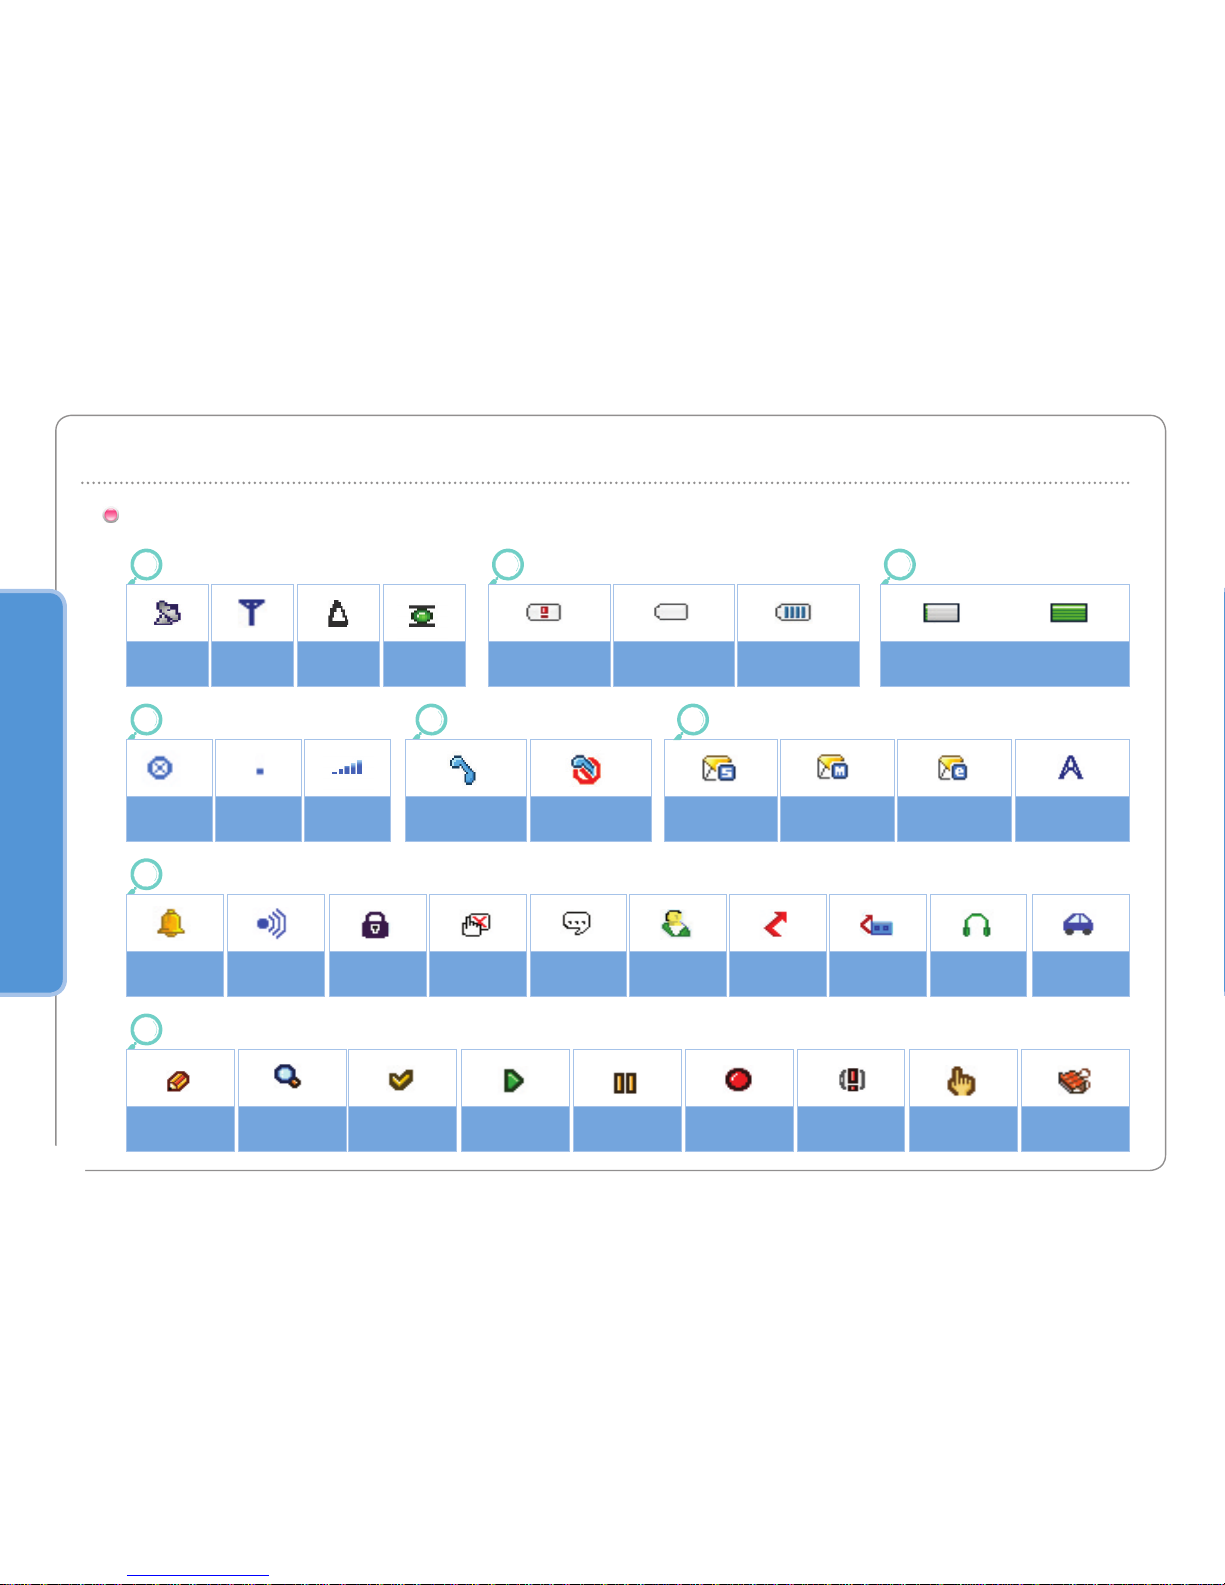
Display symbols
HPA strengthBattery strengthSignal type
Call statusSignal strength
Softkey command
Edit enabled
Search
enabled
Mark On Play enabled Pause
enabled
Capture
enabled
Low battery Done/Confirm Grip enabled
Timer
running
IrDA On Lock Key Lock
Silent Special only Divert all Devert to
vioce mail
Headset Carkit
No signal Weak signal Full signal On call Mute SMS MMS E-mail CB
Battery almost
discharged
Low battery
Battery full
HPA Low signal ~ HPA High signal
~
SAT
Roaming
GSM
HPA
Message
Phone status
Page 24

02
19
Getting started
In idle mode your mobile phone offers functions and settings, which allows you to adapt the mobile phone to your needs.
You access these functions through menus and submenus by scrolling or by using the appropriate shortcut.
During a call or while you are editing a number or text, the menu system changes and gives access to various functions,
depending on the context.
The following section describes the principles of using the menu.
Using softkey and menu
Softkey actions for, menu navigating and lists are performed through entries in the softkey line in conjunction with the
corresponding keys below this line.
Depending on the number of softkey actions offered, the two softkeys beneath the softkey line and the okay key can be
used:
Softkey action
NOTE
Command of is in the form of Icon.
Refer to page 20 where each icon and corresponding command are shown.
•
•
Done
Edit
Close
Option Close
Page 25
02
20
Getting started
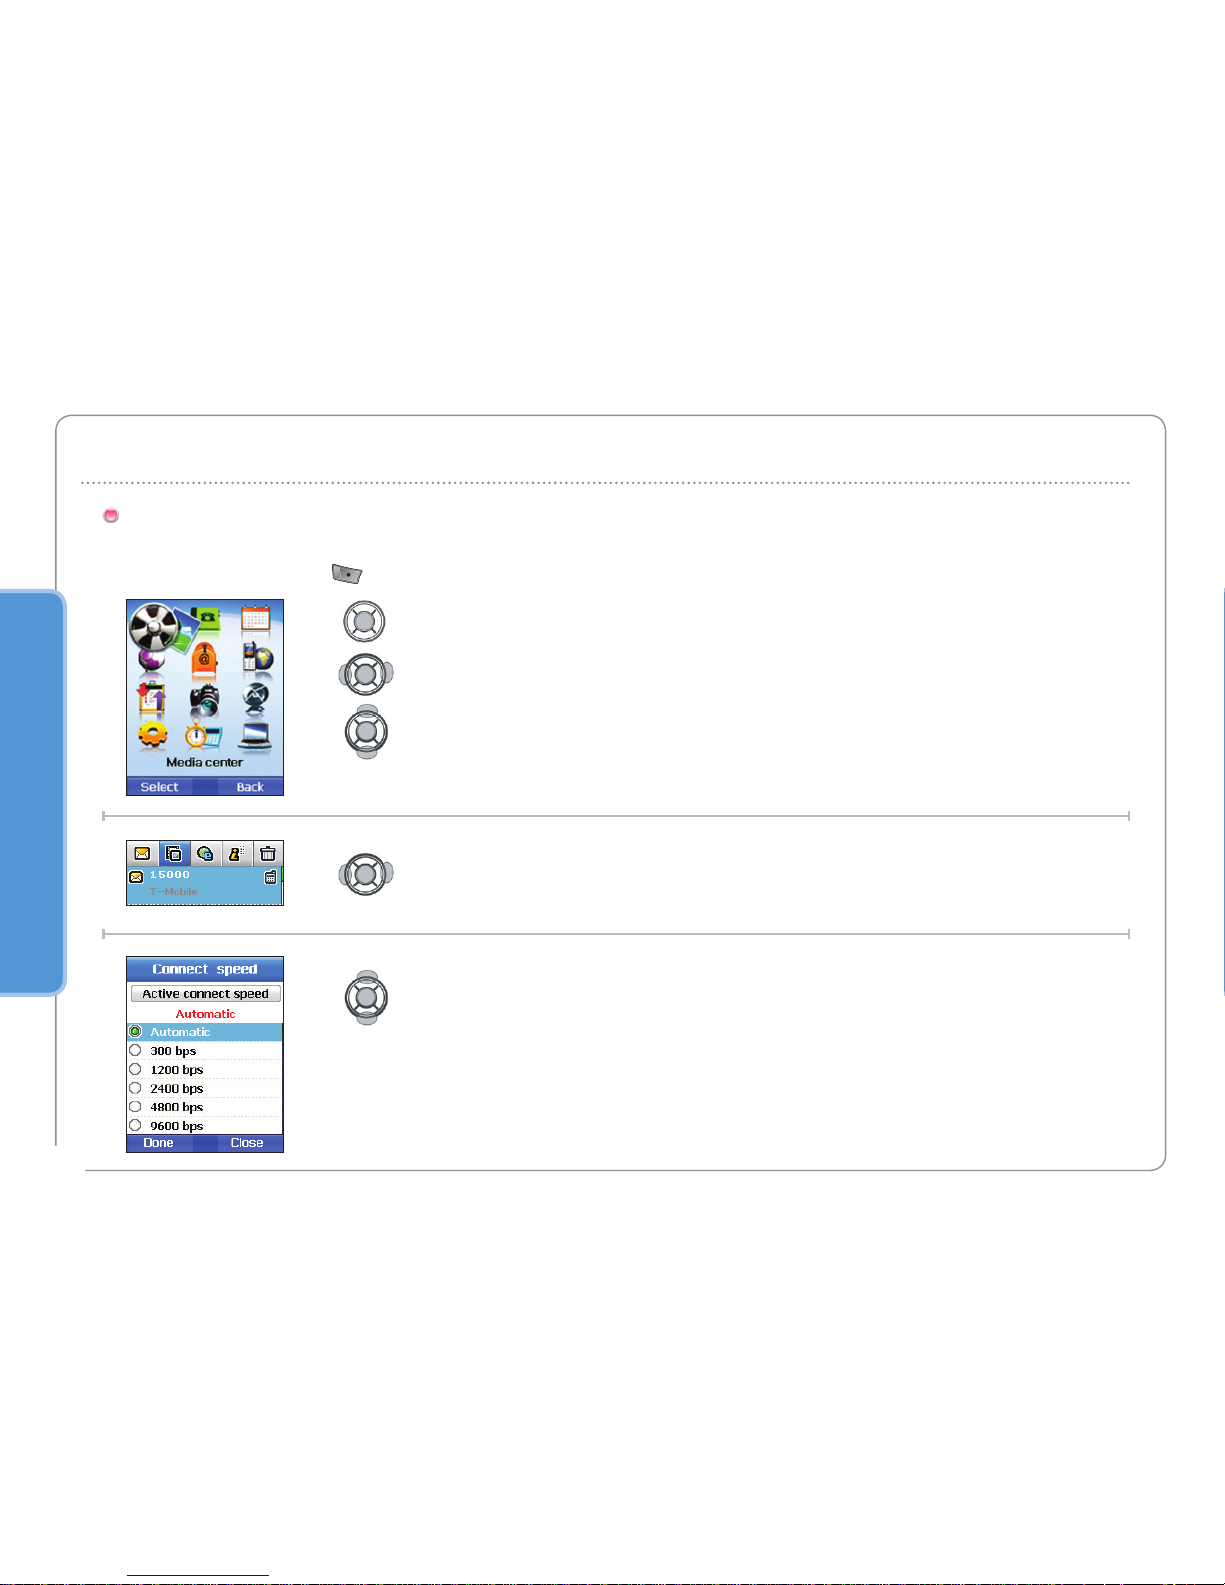
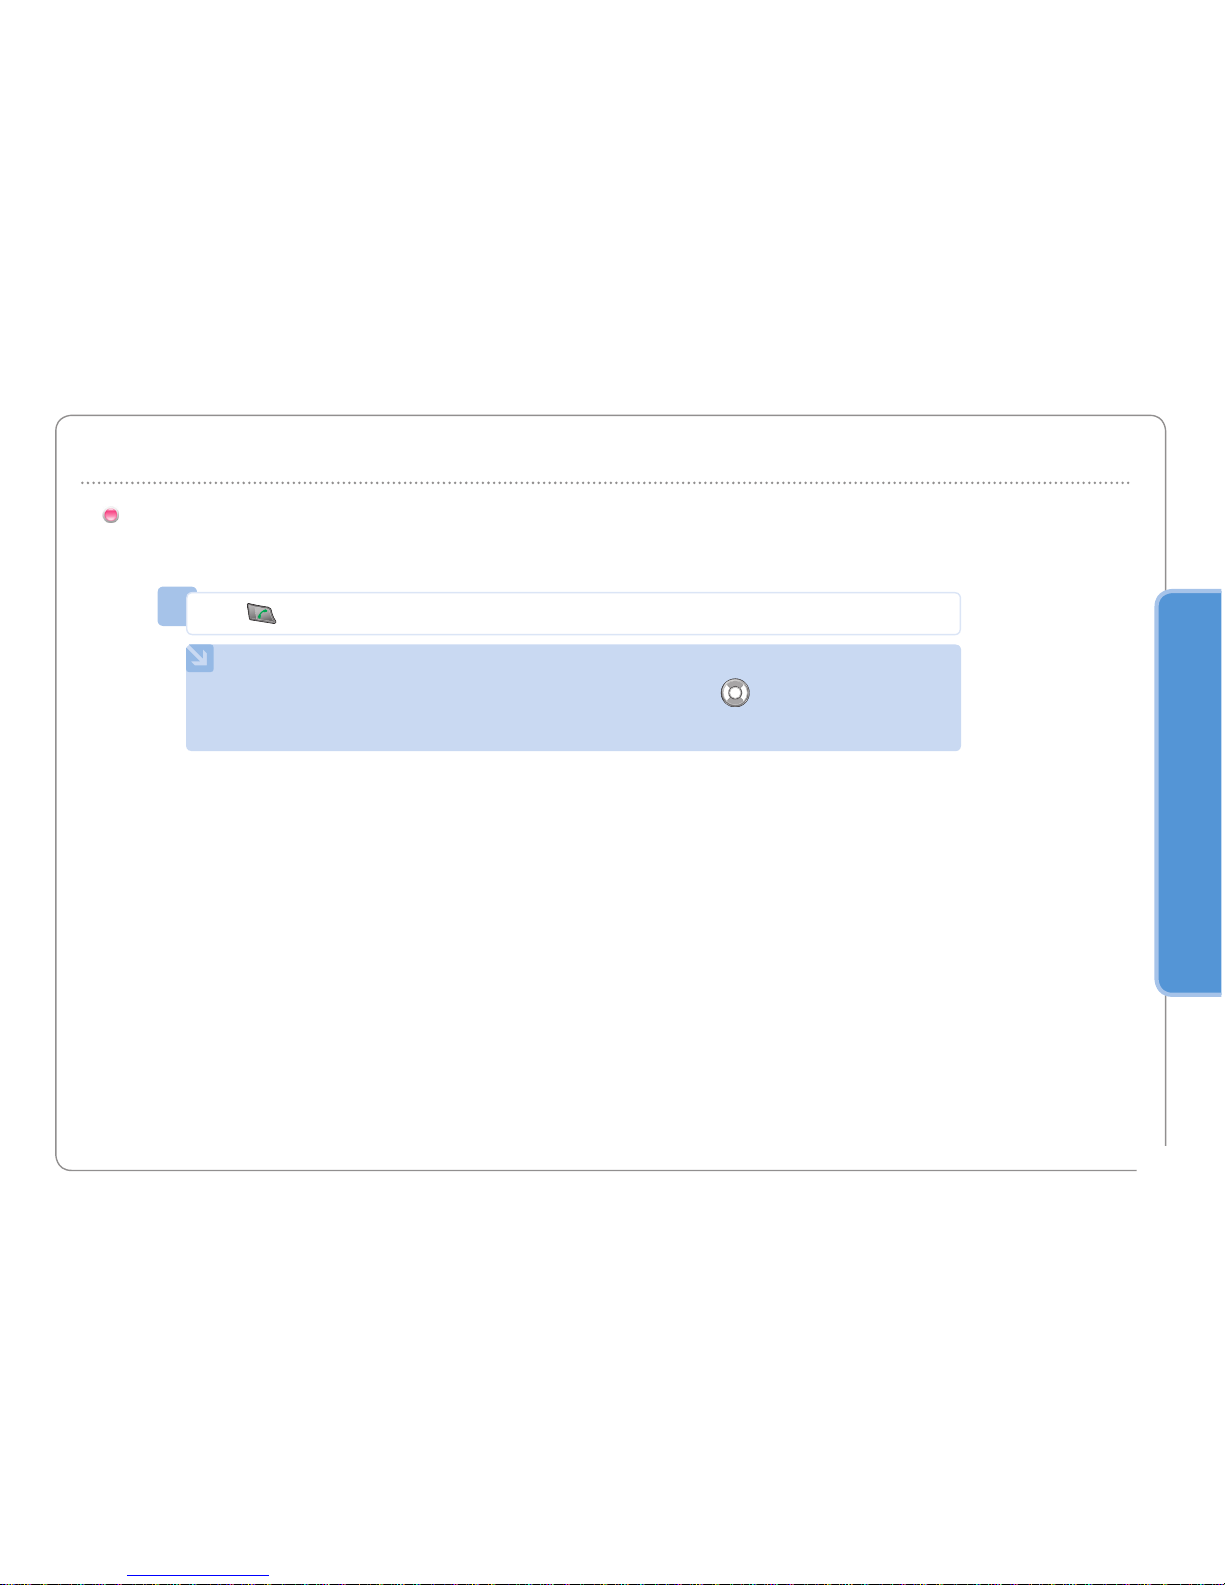
Menu screen is composed of 12 menus. Use the navigation key to move the focus to the desired menu icon,
and execute by pressing .
Menu navigation
4 ways navigation key
Up / Down direction
Left / Right direction
Left / Right direction
Up / Down direction
Page 26
02
21
Getting started
Menu items can be executed by using the key pad as well as by using the navigation key and softkey as in menu
navigation.
In the following example, Speed Dial is described using both methods.
Quick access
1
In idle screen press Menu.
2
Scroll to [Contacts] and select.
3
Scroll to Speed Dial and select.
Or. (Quick access)
1
In idle screen press Menu.
2
Press .
3
Press .
Page 27
02
22
Getting started
If you need to go back to a previous window or to move to higher menu during menu execution:
Step back one menu level
1
Press .
To go to idle screen during menu execution:
Exit the menu
1
Press .
Page 28
Getting started
02
23
Making and receiving call
In order to make a call, you must be connected to a network and have an adequate SAT signal.
Telephone numbers can be dialed using traditional method.
Dial using the keypad
1
Enter phone number using keypad.
2
Press .
NOTE
To make an international call, long press for + is displayed and then enter country
code without the leading 0’s. “+” can be replaced “00” in dialing and sending message.
When entering a number, short press button once to input *, short press button twice
to input P, and short press button three times to input W.
•
•
1
Press key.
How to end a call :
Page 29
02
24
Getting started
When there is an incoming call, it is indicated as follows.
Ringtone (according to melody and volume of current setting) can be heard.
A flashing is displayed.
The caller’s number will be displayed on the screen.
If the number is stored in the contacts, the corresponding name of contact will be displayed.
Receiving a call
NOTE
While engaged in an existing call, press to reject an incoming call.
•
1
Press key.
Accept a call :
1
Press or .
Reject a call :
Page 30
02
25
Getting started
In situations where incoming call is disturbing, it can be turned off by using the Silence Softkey.
Silent a call
1
Press .
NOTE
Sound volume during call can be increased/decreased by using and other sound
volumes can be changed by using the sound setting menu.
•
Page 31

02
26
Getting started
You cannot receive an incoming call if the SAT signal to your mobile phone is not good enough.
In this situation, a message box with “SAT Call Find Improved Reception” and a special ringtone will be displayed on the
screen, and signal on indicator line changes to HPA signal.
High-Penetration Alerting
You cannot receive calls in High-Penetration Alerting mode.
You must move to a place of better SAT signal to receive calls.
Otherwise, you can use reject or ringtone off.
•
•
To receive calls in HPA mode:
Move to a place with an improved signal.
Fully extend the antenna of SG-2520.
Point SG-2520 roughly towards satellites.
While watching signal on indicator, as soon as signal strength is strong enough the warning indicator will disappear
from the display.
Now you can accept the call as usual by using the key.
1.
2.
3.
4.
5.
Page 32

02
27
Getting started
Options during call
Incoming Call:
When Party1 is receiving a call from Party3, while talking with Party2, Party1 can ‘accept; or ‘reject’ the call from Party3.
If the call is rejected, the conversation between Party1 and Party2 is not affected.
If the call is accepted, Party2 is put on hold and Party1 is connected to the call from Party3.
Using the option menu, Party1 can swap over Party2 and Party3, or operate a multi-party call up to 6 users including Party1.
Outgoing call:
If Party1 wants to make a call to Party3, while talking with Party2, using the option menu puts Party2 on hold and enters
Party3’s phone number. To include Party2 in the conversation with Party3, select a Conference call on the option menu.
Party2 and Party3 can be swapped over. Up to 6 users including Party1 can have a conversation simultaneously.
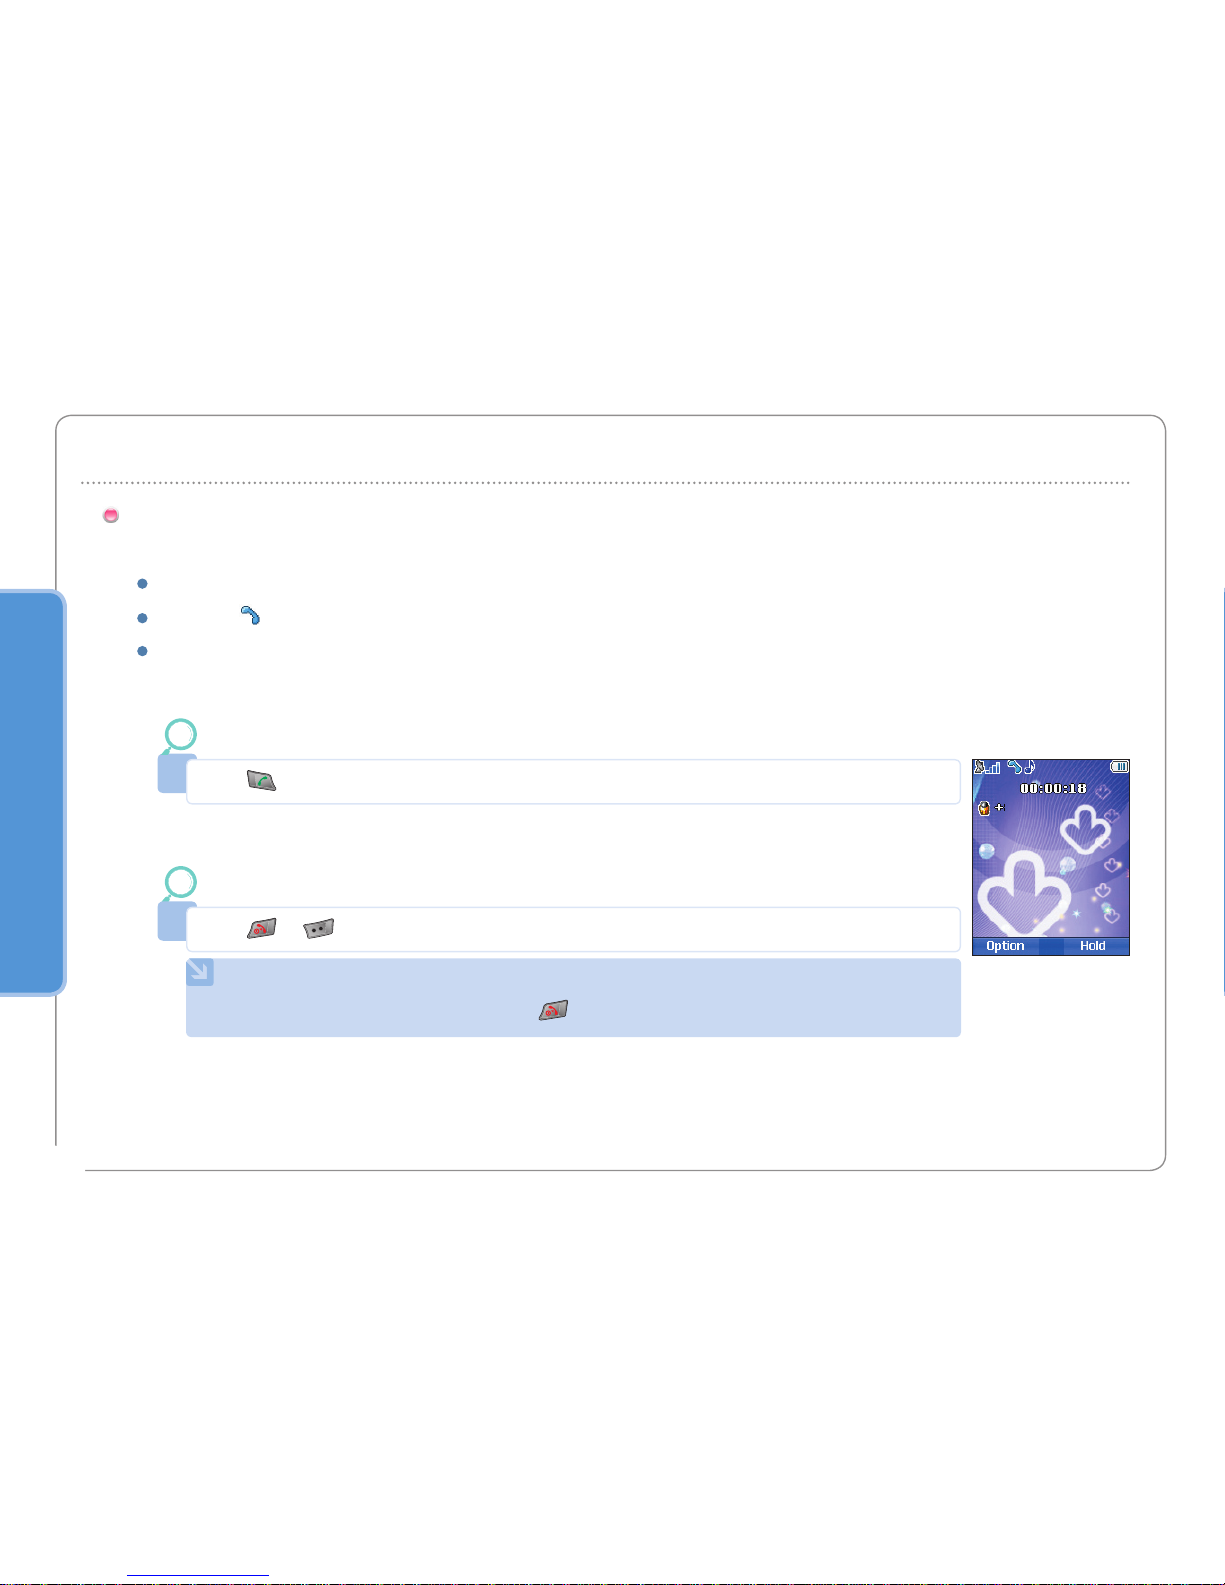
Your mobile phone offers a number of options, which are only available during a call.
You cannot use all of these features at all times, because they vary depending on current circumstances.
Put a call on hold:
This function allows you to interrupt a call temporarily without shutting down the connection.
(For more detail please visit www.thuraya.com)
Muting / Unmuting the microphone:
You can switch off the microphone so that other person is not able to hear what is being said at your end of the line.
Handling more than one call simultaneously
Page 33

02
28
Getting started
Connect a private call :
You can isolate a party from the multiparty call and talk exclusively with this ’private call’. The other parties of the conference
will be put on hold and will not hear what you are speaking with the ’private’ party. You can only have up to two active calls at
one time. Therefore you can select Private only if your second line is not busy with another call.
End one call :
You can switch off the microphone so that the caller is not able to hear what is being said at your end of the line
End all calls in one step :
Ending all calls in one step terminates the multiparty call.
All parties will be disconnected from each other and they will hear the tone for ’line busy’.
Page 34

Getting started
02
29
New Message
To enter Name, Message and Memo, follow the below procedures.
In order to facilitate fast operation, the Select mode and Enter mode are separated with SG-2520.
In the Select mode, entry cannot be made with keypad but can be made by using the Edit mode.
Select message type
Focus can be moved using navigation key and can select ‘message’ & ‘type’ (SMS, MMS & E-mail).
•
Edit mode
Desired characters can be entered. In edit mode, navigation key can be used to put space at the end
of text row, as well as to move cursor.
Text composition is restricted for each item; the number of characters for names and numbers vary
depending on the memory and the input language.
When storing characters in Phone memory, user can input up to 30 characters for name and
32 characters for number.
When storing characters in SIM memory, user can input up to 14 characters in Latin-related languages
for name and 11 characters for Unicode languages. As for number, user can input up to 20 characters.
•
•
•
•
Page 35

02
30
Getting started
Entry status is displayed with .
Among these, change of capital/small characters can be done by pressing (sharp key).
To change to , Option should be used.
Change Input mode
NOTE
In eZitxt status, capital/small character status is not shown.
However, pressing lets you know that capital/small character entry is still operating.
To switch on or off eZitxt, press (for a few seconds).
Additionally, press shortly and a symbol input pop-up window will be shown.
Once text is input, the status will change to Tap mode.
•
•
shows whether current entry status is capital or small characters.
Differentiating capital and small character is supported only with Latin language and supported entry
forms in Text entry are as below.
: Capital : Small : Capital + Small
: Number : eZitxt On
: Arabic, Farsi, Urdu, Hindi Number
indicates number of current entered characters and available characters for entry.
•
•
•
Page 36

02
31
Getting started
There are two ways to enter symbols.
One is in symbol pop-up by changing entry status with “Symbol” and the other is to obtain desired symbol by pressing .
To close the window without entering symbol, press key (Close).
Input symbol
1
Press (option).
To insert a symbol : In text editor
2
Scroll to Symbol and select.
3
Use to move through pages.
4
Press desired symbols or numbers.
Page 37

02
32
Getting started
NOTE
Special characters can be simply entered by pressing when it is not for symbol or numbers.
•
The details of special characters are below.
Page 38

02
33
Getting started
There are two ways to enter numbers in text entry window.
One is to change entry status to numeric and the other is to press desired number on keypad for 2 seconds.
1
NOTE
It is easier to change entry status to numeric when entering a series of numbers.
•
Press desired numbers on the keypad for a few seconds.
Or.
1
Press (option).
To enter Number mode : In text editor
2
Scroll to Mode and press .
3
Scroll to ‘123’.
4
Press desired numbers on the keypad.
Input number
Page 39

02
34
Getting started
SG-2520 supports 12 languages.
Change language
Supported languages are:
The language is divided into the System language and the Input language, The System language is for menu settings
shown on screen and the Input language is for entering messages or name.
When composing a message, the user can use English and another additional language which the user can choose.
English is supplied as basic, and the other language should be set up by the user in <Settings - Language>. (see page 81)
1
Press (option).
To change entry language : In text editor
2
Scroll to Language and Ok.
3
Scroll to desire language and press Ok.
1. English 2. French 3. German 4. Italian
5. Spanish 6. Portuguese 7. Turkish 8. Russian
9. Farsi 10. Arabic 11. Hindi 12. Urdu
Page 40

02
35
Getting started
eZitxt is built in for faster entry of words. With eZitxt, you don’t have to type in the whole word.
With few initial letters entered by user the font will recommend the nearest words.
eZitxt ON / OFF
1
Press (option).
To switch eZitxt ON / OFF : In text editor
2
Scroll to “Auto text” and select.
3
Press desired numbers on the keypad.
Results obtained through - - - are two
recommended words including “Believe”.
•
To enter the recommended word from eZitxt, repeatedly press keypad of the word until desired word is found, and press
to enter, and in case desired word is not shown, move focus using to the desired word and press .
Use to search more words.
To enter a new word which is used frequently, register it in Dictionary located in Option for easy future use.
Page 41

02
36
Getting started
In eZitxt only the words registered in eZi engine are recommended, when new words or names are not recommended,
the user has the ability to insert a new word in the eZitxt dictionary.
Dictionary
1
Press (option).
To register a new word : In text editor
2
Scroll to Dictionary and select a word.
3
Dictionary List Move.
4
Press (Add).
5
Input new word.
Page 42

02
37
Getting started
1
Press (option).
To change the registered word : In text editor
2
Scroll to Dictionary and select a word.
3
Dictionary List Move.
4
Press (Edit).
5
Change word.
1
Press (option).
To delete the registered word :
2
Scroll to Dictionary and select a word.
3
Dictionary list Move
4
Press (Delete).
Page 43

02
38
Getting started
NOTE
Using Dictionary ‘Add’ and ‘Edit’ functions may affect the Input language.
Particularly, when editing a word in the Dictionary, the Input language in which a word is already saved,
and the Input language currently set up must be the same.
•
To clear already entered text, a short press of the key clears one character at a time and a long press of the key
clears the whole entry.
To clear text
Page 44

SG-2520
www.thuraya.com
Page 45

Using the menu
03
40
SG-2520 supports various types of files.
Image, video, sound, MP3, and text files can be easily and quickly sorted out and managed separately.
Especially, Image, Video, Sound, and Mp3 that are frequently used are readily accessible through the Media center.
Files registered in Image, Video, Sound, Mp3 boxes are organized from the most recent file, making viewing and managing
files easier and more convenient.
1. Media center
Media center supports the following functions.
Multi-select
You can select several files with Center key ( ).
When several files are selected, the following functions are available.
Move
Copy
Send - MMS, Email, Bluetooth, IrDA
Delete
●
●
●
●
View, Play
The View function is applicable to the Image box to view photographs.
Use Left or Right key ( ) to view next or previous photos.
The Play function in Sound box, Video box, and MP3 box plays back the selected file.
The playback of multi-selected files is also possible. Use Left or Right key ( ) to play back next or previous files.
When only one file is selected, press Left or Right key ( ) to play back the file repeatedly.
Page 46

03
41
Using the menu
New
The New function has various features appropriate for each box such as still capture for the Image Box, video capture for the
Video Box, and recorder for the Sound Box. However, the MP3 box does not support the new function.
Command
You can use this menu to manage files that you frequently use.
‘Command’ performs functions such as file name change, file transfer and file copy.
According to the file type, you can choose either Wallpaper or Ringing tone.
Select wallpaper for: Image
Select a ringing tone for: Sound, MP3
●
●
Page 47

03
42
Using the menu
Rename
You can change the existing file name. However, when multiple files are selected you cannot change the names. File names can be
made in the language that you selected. However, some symbols (e.g , /, :, ", <, >, |) cannot be used for a file name.
Exceptions to the instruction above are Waypoint names that consist of English and numbers only.
Up to 20 characters can be used to rename a file. When entering more than 20 characters, you will see a pop-up window.
1
Select a file (only one).
To Rename :
2
Press .
3
Scroll to "Command" and press .
4
Scroll to "Rename" and press .
5
Input file name.
6
Press .
7
Scroll to "Done" and press .
Page 48

03
43
Using the menu
Move
Use this to move a file to a different location.
For example, you can move a file stored in the Phone Image Box to the Image Box or the User Folder in the SD card.
1
Select a (multi-select : ).
To Move :
2
Press .
3
Scroll to "Command" and press .
4
Scroll to "Move" and press .
5
Select the location.
Page 49

03
44
Using the menu
Copy
Use this to copy a file to a different location.
For example, you can copy a file stored in the Phone Image Box to the Image Box or the User Folder in the SD card.
1
Select a (multi-select : ).
To Copy :
2
Press .
3
Scroll to "Command" and press .
4
Scroll to "Copy" and press .
5
Select the location.
Page 50

03
45
Using the menu
Wallpaper
Select an image file and use the selected file as the background of the idle screen.
1
Select a file.
To save as Wallpaper :
2
Press .
3
Scroll to "Command" and press .
4
Scroll to "Wallpaper" and press .
Page 51

03
46
Using the menu
Ringing tone
Select a sound file or a MP3 file, and set it as a default Ringing tone.
1
Select a file.
To set as a Ringing tone :
2
Press .
3
Scroll to "Command" and press .
4
Scroll to "Ringing tone" and press .
Page 52

03
47
Using the menu
Send
With the following functions, you can send files to others.
MMS
Attach a file in a Multi-media Message format to an outgoing message.
The size of the attached file is limited by the volume of the transmission specified in the MMS settings.
Refer to Creating MMS for details (page 87).
4
5
Refer to Creating MMS (page 87).
Scroll to "MMS" and press .
1
Select a file (multi-select : ).
To send as MMS :
2
Press .
3
Scroll to "Send" and press .
Page 53

03
48
Using the menu
Email
Like an ordinary Email, you can attach a file to an outgoing message.
There is no restriction on the size of the attached file. However, some network providers may limit the transmission volume.
1
Select a file (multi-select : ).
To send as Email :
2
Press .
3
Scroll to "Send" and press .
4
Scroll to "Email" and press .
5
Refer to Composing Email (page 89).
Page 54

03
49
Using the menu
Bluetooth
Bluetooth is a wireless communication means that enables transmitting files to other Bluetooth devices within 10 meters.
(The same applies for page 127).
1
Select a file (multi-select : ).
To send as Bluetooth :
2
Press .
3
Scroll to "Send" and press .
4
Scroll to "Bluetooth" and press .
5
Select Device.
Page 55

03
50
Using the menu
IrDA
There is an infrared port for IrDA communication at the top of SG-2520 and you can send files with this feature (See page126).
1
Select a file (multi-select : ).
To send as IrDA :
2
Press .
3
Scroll to "Send" and press .
4
Scroll to "IrDA" and press .
5
Select Device.
Page 56

03
51
Using the menu
Sort by
To search and manage files more easily, you can sort files by file name, size and creation date.
You can organize files in the descending order of the file names.
Name
Arrange file names by name alphabeticaly.
1
Press .
To sort by Name :
2
Scroll to "Sort by" and press .
3
Scroll to "Name" and press .
Page 57

03
52
Using the menu
Size
Arrange files in the order of the file size, starting from the smallest one.
1
Press .
To sort by Size :
2
Scroll to "Sort by" and press .
3
Scroll to "Size" and press .
Date & time
Arrange files in the order of the creation date, starting from the latest one.
1
Press .
To sort by Date & Time :
2
Scroll to "Sort by" and press .
3
Scroll to "Date" and press .
Page 58

03
53
Using the menu
Delete
Delete the selected files.
Page 59

03
54
Using the menu
Image box displays all photos saved in the built-in and external memories of
SG-2520 after processing the photos into thumbnails, and arranging them in
a grid type. Thumbnail photos can be shown in a full-viewer type.
1.1. Image Box
Option (See 1. Media center)
Sound box shows all sound files that are saved in the built-in and external
memories of SG-2520.
1.2. Sound Box
Option (See 1. Media center)
Page 60

03
55
Using the menu
Video box shows all video files, which are saved in the built-in and external memories of SG-2520.
1.3. Video Box
Option (See 1. Media center)
MP3 box shows all MP3 files that are saved in the built-in and external
memories of SG-2520.
1.4. MP3 Box
Page 61

03
56
Using the menu
Group list
You can manage MP3 files stored in the Phone by group.
You can listen to songs by creating a group, and simply adding and editing MP3 files
within the Group.
Option (See 1. Media center)
Play
Play back the selected song.
View
View the list of the selected group.
Rename
Change the selected group name.
Play mode
Once : Play back songs in the Group in order once.
Loop : Play back songs in the Group in order repeatedly.
Shuffle : Play back songs in the Group in shuffled order once.
Loop & Shuffle : Play back songs in the Group in shuffled order repeatedly.
Delete
Delete the selected group.
Page 62

03
57
Using the menu
The memory capacity of Image, Sound, Video, MP3, and Download, which are
being used in the Phone and the SD card, is displayed in Kb. Each folder can
also be viewed separately. The used and unused memory capacity of the Phone
and SD card are categorized into Total, Free and Used, and presented in a bar
graph form so that you can view the memory status easily.
1.5. Memory status
Option
View folder
View and edit files in the selected folder. (See 12.3. File browser)
Page 63

Using the menu
03
58
SG-2520 manages 6 different Lists.
You can make calls using numbers from each List.
Contact list (Name, Group, Message group)
Special list
Speed dial
SIM list
My info
Helper
Among these, the most important number list is contacts list. The numbers registered with contacts list have corresponding
names, and the names are displayed in call logs instead of the numbers. The menu, Contacts, includes those contacts
stored in your SIM card. If you already have contacts stored in SIM card, Contacts in the memory and SIM card contacts
will be shown together. In the SG-2520 contacts in the phone’s memory and contacts in SIM card are managed separately.
Therefore, to add a new contact, you should decide whether to store it in the mobile phone or SIM card.
When stored in the SIM card, the maximum number of names and numbers varies depending on Service Provider.
When stored in mobile phone, a single contact may have a name, 6 different contact numbers, Email, Caller Group, memo
and address. The maximum possible number of contacts is 999 with up to 26 numbers for each contact number,
20 characters for name and 256 characters for memo and address.
Also, when making a call to a name in the contact list by pressing . it tries to connect to the primary number.
The numbers which are stored in contacts are displayed in the all the lists with their respective names.
•
•
•
•
•
•
2. Contacts
Page 64

03
59
Using the menu
SG-2520’s Contact List provides 3 different groups such as Name, Group and Message Group.
2.1. Contact List
2.1.1. Contacts List
You can create, edit and view general contacts. Contacts can be added up to 999. To add a new contact name one telephone number is at least required. If Group is not selected, the new contact will be saved into None. A new contact name
may have up to six telephone numbers (three standard telephone numbers and three fields). Standard field numbers remain
blank. Address and Memo fields can be also added and used.
Select "Search" in Picture to use existing photos in Contact image box, and "New" to go to Still Capture to take a new photo
and add it to Contact list.
Details of available functions are as follows.
Page 65

03
60
Using the menu
New
Add a new contact.
Option
Add field (Number)
Add a phone number field. Three more fields can be
added.
Add field (Address)
Add an address field.
Add field (Memo)
Add a memo field.
Delete field
Delete added field.
Address, Memo, Number (except Standard field) fields can
be deleted.
Edit
Edit the selected phone number.
Delete
Delete the selected phone number.
Delete all
Delete all phone numbers.
Page 66

03
61
Using the menu
Copy to
Add to group
Add the selected contact to a Contact list or a Message group list that the user chooses.
Send Msg.
Send SMS, MMS, or Email to the selected contact. (See 5. Messaging on page 84)
Send Contact
Send Contact in a SMS, MMS, Email, IrDA, or Bluetooth format to the selected contact.
Get Contact
Bring the contact list saved in the SD card. (In this case, the list will not exist in the SD card.)
SIM
Copy the selected contact to the SIM card.
SD card
Copy the selected contact to the SD card.
Page 67

03
62
Using the menu
2.1.2. Contact group list
Contact group list displays groups that you created. It helps to easily manage contacts. The maximum possible number of
groups on the Contact group list is twenty. Each Contact Group list can store up to 999 contacts. Additionally, a group bell
can be set for each group.
The details of available functions are as follows.
View
View the contents of the selected Contact Group list.
New
Add a new Group list.
Edit
Edit the selected Group list.
Member (Add)
Add a contact to the selected group.
Member (Remove)
Remove a contact from the selected group.
Delete
Delete the selected group.
Send msg.
Send a group message (SMS, MMS, Email) to the selected
group.
See 5.1.1 for detailed instructions
Order
Organize Contact group lists in the order of frequency usage.
Group bell
Set a Group bell using the Left, Right key.
Option
Page 68

03
63
Using the menu
2.1.3. Message group list
Message group list sets groups which you frequently send a group message to. While Group message in the Contact
group list more focuses on grouping contacts, Message group list aims to group contacts with emphasis on group
messages. The difference helps to easily use and manage Phone book for your convenience.
The details of available functions are as follows.
New
Add a new Message group list.
Rename
Change the name of the selected Message group.
Member (Add)
Add a new contact to the selected Message group.
Member (Remove)
Delete a contact from the selected Message group.
Send msg.
Send a group message (SMS, MMS, or Email) to the
selected Message group.
(See page 84)
Delete
Delete the selected Message group.
Option
Page 69

03
64
Using the menu
Special list sets a Ringing tone that is specifically for a certain person. The user can either answer or reject an
incoming call after listening to its ringing tone. The phone will not have a ringing tone, when ‘None’ is selected for
the Ringing tone. Special list takes priority over Group.
To add a contact in the Contact list to the Special list select Option > Member > Add > Search.
2.2. Special List
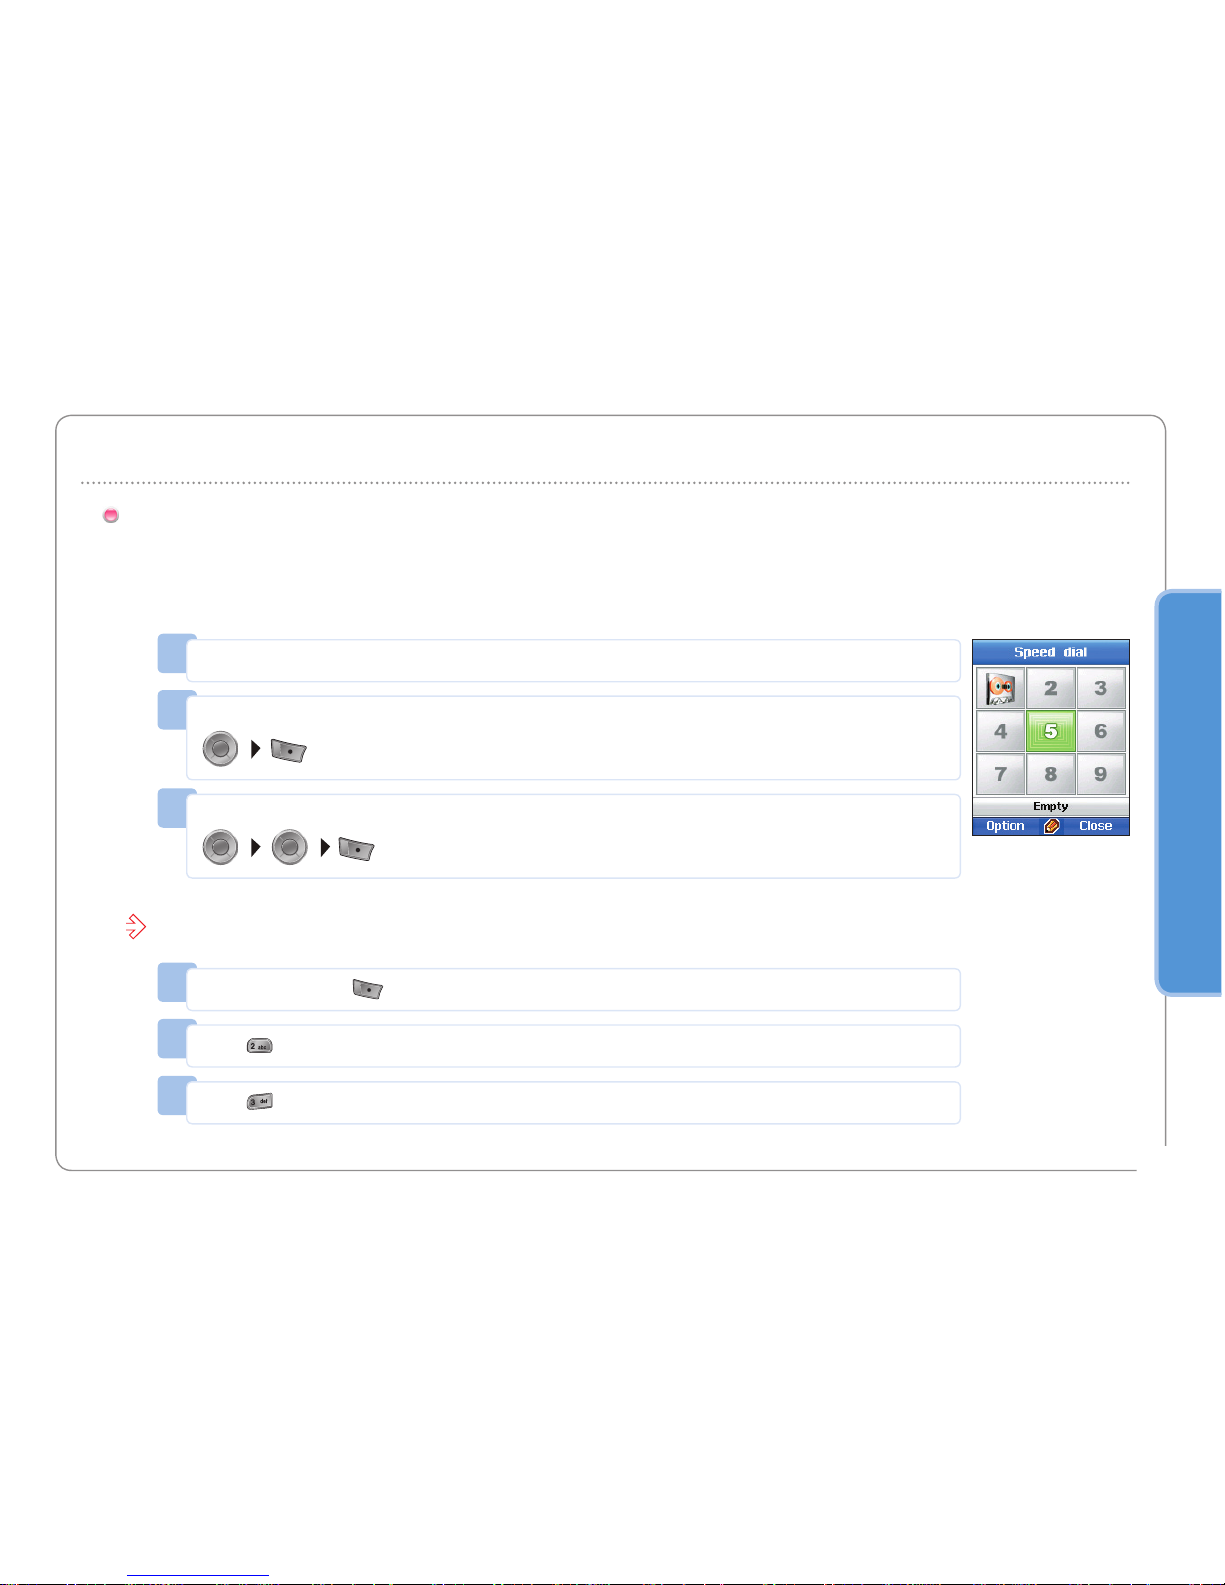
Using the numbers from 1 to 9 on the phone the user can make a call with great
speed. Select a number in Speed Dial; enter a phone number in Assign, and
select Done to save. Once saved, the number changes to a symbol of lightning.
The number 1, unless being set for a speed dial, functions as a voice mail box.
To set more numbers for speed dials move the Focus to a specific number and
take the following steps; Option > Assign > Input number > Option > Done.
2.3. Speed Dial
Page 70

03
65
Using the menu
2.4. SIM list
You manage the SIM Phone book the same way as the Contact list.
You can also copy information between the phone and the SIM card.
Register your contact details (such as name, phone number, address and
Memo) which will be useful when you lose the mobile phone, or give the phone
number to other people.
2.5. My Info.
Done
Save the entered information.
Add field
Add Number, Address, Memo fields.
Three more number fields can be added.
Delete field
Delete the added field in the Add field.
Option
Page 71

03
66
Using the menu
In emergencies Helper sends a SMS message containing
a message asking for help, and the location to the
pre-registered number. Some service providers may not
support this function. Please contact your service provider
regarding the Helper function.
2.6. Helper
Reg. Helper
Use Search mode searching a contact to register in the Helper.
Remove entry
Delete the registered Helper.
Helper setup
Option
Emergency SMS
Set up for an emergency SMS to be made when using Helper.
Message
Enter the text of a message to be sent. If you do not enter a text, a default text, “help me!! I’m in emergency!!”,
will be sent to the set number in the helper registry.
Page 72

Using the menu
03
67
Organizer creates and manages Schedule, Alarm, Plan, and Note.
Organizer can also set up Alarm when necessary.
3. Organizer
View schedules in various forms.
Schedule presented in Monthly, Weekly and Daily forms has a separate interface that is designed to make the most of
each form’s features. To set Schedule alarm sound take, the following steps;
Settings > Profiles > Option > Detail > Alarms > Schedule alarm.
Scheduler
Monthly
Displays schedule on monthly basis.
Functions of View, New (Normal, Anniversary), Go to date,
Delete are available in the Option.
Weekly
Displays schedule on weekly basis.
Functions of View, New (Normal, Anniversary), Go to date,
Delete are available in the Option.
Daily
Displays schedule on daily basis.
Functions of View, New (Normal, Anniversary), Go to date,
Delete are available in the Option.
Page 73

03
68
Using the menu
Alarm can be set to Normal or Anniversary according to the user’s preference.
Alarm
Normal
Register schedule on a specific date unlike anniversary.
To register Normal :
Press .
Scroll to “New” and press .
Write the contents.
Enter the schedule title.
Select the date to register. The default is set to today’s date.
To set Alarm, select Yes
Once the Alarm is set, pre-alarm can be set prior to the scheduled date.
You can also enter detailed notes on activities prior to Schedule
(Now, 5min before, 30 min before, 1 hour before, 1day before).
Press .
Once a schedule is registered, you can view the schedule in a Daily Schedule form.
1.
2.
3.
4.
5.
Page 74

03
69
Using the menu
Anniversary
To set an Anniversary :
Press .
Scroll to “New” and press .
Write the contents.
Enter the schedule title.
Select the date to register. The default is set to today’s date.
To set Alarm, select On.
Once the Alarm is set, pre-alarm can be set prior to the scheduled date.
You can also enter detailed notes on activities prior to Schedule
(Now, 5min before, 30 min before, 1 hour before, 1day before).
Press .
Once a schedule is registered, you can view the schedule in a Daily Schedule form.
1.
2.
3.
4.
5.
6.
Page 75

03
70
Using the menu
Monthly schedule in a calendar form organizes and displays schedules by month.
3.1. Monthly Schedule
View
View the schedule of the selected date in View Daily
schedule.
New
New schedule (Anniversary) can be created as Normal or
Anniversary.
Go to date
Quickly move to a specific date.
Delete
Delete the entire schedule on the selected date.
Option
: Weekday
: Weekend
: Today
: Date currently selected
: Day with the morning scheduled
: Day with the afternoon scheduled
: Day with both morning and afternoon
scheduled
: Anniversary
Page 76

03
71
Using the menu
Setting
Display message during alarm
Set the message display function when Schedule Alarm is ON
Alarm with sound
Set the sound when Alarm goes ON.
Although Alarm sound is set to ON, if Profile is set to Silent, there will be no sound.
Start day
Set the starting day of the week on the calendar.
Delete schedule After
Set a period of time from the time when schedule alarm goes off until schedule is automatically deleted.
NOTE
To move easily to different dates, follow the instructions below.
For easy searches, use the number pad to move Focus.
Numbers 2, 4, 6, and 8 work as the Navigation Key, and number 5 functions as the Ok key.
Press number 1 to go to ‘previous month’, 3 to ‘next month’.
Press number 7 for ‘previous year’, and 9 for ‘next year’.
•
Page 77

03
72
Using the menu
This option displays the calendar in a weekly format.
3.2. Weekly schedule
Option (See 3. and 3.1 for further details of available functions.)
Daily schedule shows your schedules on daily basis.
3.3. Daily schedule
Option (See 3. and 3.1.for further details of available functions.)
Page 78

03
73
Using the menu
Different from Schedule, Alarm does not have dates to set. Therefore, once the alarm time is set, unless Alarm status is
switched to Off, Alarm goes on at the time and a day initially set. Alarm can be set at different time on different days of
the week, making the management of schedules convenient and flexible.
To set Alarm, take the following steps; Setting > Profiles > Option > Detail > Alarms > Clock alarm.
3.4. Alarm
Every day
Set Alarm at the specific time every day of the week.
Check ‘Every Day’ check box at the bottom of the screen.
Once
Alarm goes on once at the time set and the setting will be automatically cancelled.
Check the ‘Once’ check box.
Page 79

03
74
Using the menu
Using Planner, you can register and manage plans such as a project with a certain period of time.
Up to 30 plans can be registered in Planner. Planner helps to sort plans into Plan types such as Business, Personal,
Family, and Others, Alarm Set, and making a timetable for daily tasks.
To set Planner sound, take the following steps; Setting > Profiles > Option > Detail > Alarms > Planner alarm.
3.5. Planner
View
Show the period, status (importance, alarm, plan type, and up-to-date progress) and detailed contents of the selected plan.
New
Register a new plan.
Option
Title
Enter the plan’s title.
Priority
Give priority to plans (High, Normal, or Low).
Start date
Enter the plan start date.
Due date
Enter the plan due date.
Alarm set
Set alarm on or off.
Alarm time
Enter the plan completion time.
Sort
Arrange all registered plans by Due date, Priority or Title.
Edit
Edit the selected plan.
Delete
Delete the selected plan.
Page 80

03
75
Using the menu
Use the Note function as a memo pad. The contents of all notes are organized in the List.
3.6. Notes
View
View the contents of a note with the entry date.
New
Write a new note.
Option
To write note :
Press .
Scroll to "New" and press .
Write the contents (See page 75 ).
Press .
1.
2.
3.
4.
Scroll to "Save" and press .
Enter the file name.
Press .
Scroll to "Save" and press .
5.
6.
7.
8.
Sort
Arrange the Note List by Name and Date.
Edit
Edit an already written note.
Delete
Delete the selected note.
Rename
Change the note title.
Page 81

03
76
Using the menu
You can store information about a current location, and send/receive the location information by using
SMS service. The transmission is possible via IrDA, B/T, and USB. Navigation also guides to destinations, and performs functions of Route, Tracking, Prayer Time service, and Qiblah direction. It provides
UTM, MGRS, WGS84 map coordinate systems.
4. Navigation
Receiving information about a current location from the available GPS satellites, Current position displays the information in numbers. As well as latitude and longitude coordinates and Altitude correspond to the Format in Settings. The
GMT is shown on the screen. Location information is sent as SMS, and transmitted using IrDA, B/T, and USB.
4.1. Current position
Save
Save the current location as Waypoint. Unless there are any
particular changes, the information will be saved as default
name. To save the information as another name, press Clear
on the Name entry screen to delete the default name, and
enter a new name.
Send (SMS)
Send a SMS message containing the current location
information. The screen will display a space that you can
enter a phone number. Select Option>Send to send SMS.
Send (IrDA)
The current location information sent via IrDA, or same GEN2
will be saved immediately as Waypoint.
Send (B/T)
Transmit the current location information via B/T.
Send (USB)
Transmit the current location information via USB cable.
USB cable must be connected, and a connection for GPS
signals must also be set.
Option
Page 82

03
77
Using the menu
Position displays and stores information about current locations and the status of the satellite.
It sends location information as SMS, and transmits the information via IrDA, B/T, and USB.
4.2. Continuous Position
Direction
Show information about the location that you are currently
moving to.
Satellite Information
Display the information of the GPS satellite, and signal
intensity.
Trip
Show information about a current location (latitude/longitude, date, time, speed, altitude). It performs a function that
changes units or location information display through Setting.
Save
Save information about current locations as Waypoint.
Unless there are any particular changes, the information is
saved as Default name. To save the information as a name
that the user chooses, press Clear on the Name entry screen
to delete the Default name, and enter a new name.
Send (SMS)
Send a SMS message containing current location
information. The screen will display a space that you can
enter a phone number. Select Option>Send to send SMS.
Send (IrDA)
The current location information sent via IrDA, or same GEN2
will be saved immediately as Waypoint.
Send (B/T)
Transmit the current location information every second
via B/T.
Send(USB)
Transmit the current location information every second via
USB cable.
USB cable must be connected, and a connection for GPS
signals must also be set.
Option
Page 83

03
78
Using the menu
Waypoint edits and stores waypoint information and guides to a destination by providing direction information.
Waypoint has the availability to send location information as SMS, and transmits the information via IrDA, B/T, and USB.
4.3. Waypoint
View
Display the selected waypoint information.
New
You can create Waypoint by entering information on latitude
and longitude.
Send (SMS)
Send a SMS message containing current location
information. The screen will display a space that you can
enter a phone number. Select Option>Send to send SMS.
Send (IrDA)
The current location information sent via IrDA, or same GEN2
will be saved immediately as waypoint.
Send (B/T)
Send the current location information via B/T.
Send (USB)
Send the current location information via USB cable.
USB cable must be connected, and a connection for GPS
signals must also be set.
Rename
Change the name of the selected waypoint.
Search
Search waypoints.
Delete
Delete the selected waypoint.
Start Navigation
Guide the selected waypoint to a destination.
Relative position
When one waypoint is selected, it compares its information
with current location information.
When two waypoints are selected, the information of the two
Waypoints is compared.
Save
Save the current location.
Option
Page 84

03
79
Using the menu
Route edits and stores Route information, and guides direction information to a destination.
It can add, delete, and change the order of Route’s Waypoint list. It also has a ‘Save as’ function.
4.4. Route
View
Show the Waypoint list included in Route.
New
Add a new Route that the user plans to use.
Navigation
Show Waypoint in the order set in Start - Route.
Show Waypoint in the reverse order set in Back Start - Route.
Rename
Change the name of the Route.
Delete
Delete the selected Waypoint.
Zoom In
Enlarge one scale up.
Zoom Out
Reduce one scale down.
Pause, Continue
Pause for a short while, and re-starting in the course of
Tracking.
Skip next point
Change the direction of the destination to the next
destination.
Add
Add a waypoint to Route.
Remove
Delete the selected waypoints from Route.
Order
Change the order of the waypoints in Route.
Option
Page 85

03
80
Using the menu
Location track saves the path that the user has moved, and transmits current location information via B/T or USB.
Location track shows information about your path.
4.5. Location Track
Start
Start to save information about the trace of wheels that you
have moved by Time and Distance of Setting.
The saved information can be viewed and used in Route.
B/T
Transmit the current location information every second via
B/T.
USB
Transmit the current location information every second via
USB cable. USB cable must be connected, and a connection
for sending GPS signals must also be set.
Option
Page 86

03
81
Using the menu
Set GPS functions of Format, speed, Distance & Altitude, GPS fix, Track by, Muslim faith, and waypoint naming.
4.6. Settings
Format
Set the coordinates display system.
Option
DD° MM ‘SS” ss (degrees, minutes, seconds. seconds)
DD° MM ‘SS” (degrees, minutes. seconds)
DD°MM.MM’(degrees, minutes. minutes)
DD.DDDDD (degrees. degrees)
MGRS (Military Grid Reference System)
UTM (Universal Transverse Mercator)
Km/h Mile/h Knotes
Speed
Set a speed display system.
Distance & Altitude
Set a distance and altitude display system.
GPS fix
Set a GPS receiving mode.
Auto 2D 3D
Kilometer Feet MileMeter
Page 87

03
82
Using the menu
Track by
Set a location track saving standards.
Distance
1, 10, 20, 50, 100, 200, 500, 1000
Time
3s, 10s, 30s, 1min, 3min, 5min, 10min, 15min, 30min, 1hour
Sunnites Shiites
Waypoint naming
When entering a name to save Waypoint, set a default name.
Muslim number
Number Sunnites and Shiites, and save them.
Muslim faith
Set a Prayer time service request.
Page 88

03
83
Using the menu
Initially Qiblah & Prayer is not shown on the menu. Qiblah & Prayer starts to function after the user sends a SMS
message as instructed below, receives a SMS message containing Qiblah & Prayer information, and accepts ‘Receive’.
Send the GPS coordinates as an SMS to:
Current position > send > SMS
Continues position > send > SMS
Update Time Option > Update Time
Send a SMS message requesting information about Prayer time and directions.
1.
2.
4.7. Qiblah & Prayer
Prayer Time
Show the Prayer Time.
Qiblah Drection
Display the Qiblah direction from your location.
Information
Show the current location (latitude/longitude, date, time,
speed, altitude). It performs a function that changes units or
location information display through Setting.
Update Time
Request the information about the Prayer time.
Azan
Set the Prayer time alarm to on/off.
Option
NOTE
1400 for Sunni Muslims
1411 for Shia Muslims
Page 89

Using the menu
03
84
SMS allows you to send and receive short text messages, Enhanced Messaging Service (EMS), which allows user to insert
simple pictures, melodies (i-Melody) and animated image with text. If new message is received, you can see the message icon
( , , , ) on top of screen. Select the New menu to compose the SMS, MMS and Email messages.
5. Messaging
Create and send a new SMS(including EMS), MMS and Email message.
5.1. New
5.1.1. New (SMS)
Compose
The SMS can have a message with text, basic picture (black and white), animations and audio file.
While composing the message, you can see the numbers of characters are left in this SMS. Also you
can see the total number of messages that will be sent as short messages. The message is saved
to the drafts folder if some composed message is there. If nothing is composed, then press "Close"
Softkey to close the compose screen. If you want to delete all the contents, long press .
Send
When you finish compose the message, press options Softkey ( ) to view the options. Select
Option > Send if you want to send the message. In next step, you should enter the recipients
address.
To cancel the sending of the composed message, click on Option > Exit or press .
Page 90

03
85
Using the menu
Mode
You can key in text by various modes.
ABC, Abc, and abc indicate the selected case. ABC means all the letters in the message will be upper case.
Abc means that the first letter in the message, or the first letter of the next word, is written in upper case and all the other
letters are in lower case. abc means all the written letters are in lower case.
123 indicates number mode. Symbol indicates the special characters like (eg, @, -, *).
Insert - Emoticons / Templates / Image / Tune / Audio / Animation
You can insert smiles, templates, images, and tunes, audios and animation in your EMS using the Insert feature.
You can add, edit or delete a template.
Enter the new template text and click on Option>Done.
The image, the audio and animation files can be inserted into your message by scrolling through the files to select and
clicking on Select Softkey.
Language
Change the composing language.
Select the Option->Language to view the available languages for setting.
Dictionay
You can set your own word in dictionary so that it will be easy for you to type when the auto text is on.
Auto-Text
You can set this to On or Off for the text to predictive display while typing.
Page 91

03
86
Using the menu
Sending option
You can see the sending option and can change the sending option for the current message to be
sent. You can choose a SMS format of “Text”, “Fax”, “Paging” or “E-mail”
Recipient
Recipients of a message can be added.
It has option menu as follows.
Send
To send the message.
Edit message Edit the message.
Search
You can search recipients in the Contacts List
Mode
(See page 85)
Delivery report
Using the Delivery Report feature can set a
report about the message been delivered or not
to the recipient.
Help
You can the information aoubt this option menu.
Exit
Exit to idle screen directly.
Save
Save a message composed in “Drafts”. A pop-up message will be shown for successfully saved.
Hep
Shows the information about this menu and its actions.
Exit
Exit to idle screen directly.
Page 92

03
87
Using the menu
When you finish composing the message, press options Softkey ( ) to view the options. Select Option > Send if you
want to send the message. In next step, you should enter the recipients address.
Object - Video / Picture / Sound
The respective picker screens are displayed on selecting the Option > Object > Video / Picture / Sound.
Select the video file and the video is inserted inline to your MMS.
Preview
To view the composed message before sending, use this feature.
You can send the previewed message by selecting Option->Send.
The message can be edited by selecting the Option > Edit feature.
To add the recipients of this message press Option >Recipient. The recipient’s can be added to To, Cc or Bcc fields.
Slide – Add/Remove/Background/Timer
You can have a MMS with more than 1 slide. To add a slide, select Option > Slide > Add.
To remove the current slide, select Option > Slide > Remove. You can change the background color of your MMS by
selecting Option > Slide > Background. A color palette is displayed from where you can choose the color by pressing
on . Also you can set the duration for the slide. The duration can be set as slow, moderate and fast.
5.1.2. New (MMS)
The network setting has to be done before proceeding with the sending and receiving of MMS.
The profiles, connections and downloading settings can be customized according to your requirements.
See page 151 for Menu > Setting > Acces points for more detail and contact your network Service Provider.
Page 93

03
88
Using the menu
Recipient – To/ CC / BCC
A list of recipients is added to receive this MMS. You can still edit the message by selecting
the Edit Message option.
Sending Options
The options screen for the message is shown below. You can set the Priority, Message Class Validity
period (Maximum, 12 hours, 1 day, 1 week, 1 month) of the message and check for the option shown
in the screen below. The maximum expiry time is the time of the message as per the server configured.
If you want the Delivery report and the read report, check the corresponding check boxes.
Recipient
Recipients of a message can be added. Recipients can be added to Receiver, CC or BBC.
Save
Save a message composed in “Drafts”.
A pop-up message will be shown for successfully saved. “Dictionary(see page 36)
Help
You can get the information about this menu.
Exit
Exit to idle screen directly.
Page 94

03
89
Using the menu
New
On selecting the Email option a screen to create a new Email is displayed.
Click Options Softkey to view the options for the compose screen.
Send
When you finish compose the message, press options Softkey( ) to view the options.
Select Option > Send if you want to send the message. In next step, you should enter the recipients address.
Insert - Emoticons / Templates (See page 85)
Mode (see page 85)
File Attach
An email message can have attachment. Select the file attach option where a screen with the attachments if any is
displayed. Click on Option > Browse to browse for the required file to be attached. The file name will be displayed in the
File Attach screen.
Click on Option > Delete File to delete the selected attached file.
5.1.3. New (Email)
Set the network details first before sending/receiving Email. The profiles, connections and downloading settings can be
customized according to your requirements.
See page 151 for Menu > Setting > Acces points for more detail and contact your network Service Provider for E-mail
account.
NOTE
The profile needs to be configured to send and receive the Email.
•
Page 95

03
90
Using the menu
Language (see page 85)
Auto-text (see page 85)
Recipient – To / CC / BCC (See page86)
To add the recipients of this message press Option > Recipient.
The recipient’s can be added to To (Receiver), CC or BCC fields.
Sending Options
The sending options screen for the message is shown below.
Subject
The subject of the message.
Signature
Check if you want to attach the signature to
your Email. Signature is a text, which is added
to your mail like the Designation, Name,
address etc.
Read Report
Select this checkbox to get the report of the
message read.
Message Priority
The priority of the message can be set as
Normal, High and low. Messages that are not
important can be set as low priority.
Email Account
The configured email account, which you want
to use to send the mail.
Page 96

03
91
Using the menu
Inbox contains received messages. Inbox displays a list of messages received most recently first. As it also
shows part of the messages, you can easily find a message that you are looking for, without having to open
each message.
5.2. Inbox
Inbox tab icons:
SMS (Short Message Service) messages are text
messages received via the network operator’s
message center. When a text message has pictures,
sounds, melodies and animations inserted, it becomes
an EMS (Enhanced Message Service).
MMS (Multimedia Message Service) messages. A
multimedia message can contain text, graphics,
animations, photographic images, audio clips and ring
melodies.
E-mail messages. your SG-2520’s mail client supports
POP3 and IMAP4 mail servers.
Cell broadcast message
Spam message
Page 97

03
92
Using the menu
View
You can open a message form the inbox.
Reply
On selecting this option you are taken to the compose message page where you can compose a message to be sent as
a reply.
Forward
Forward allows you to edit the contents of a message received on the screen. If you do not need to edit the message,
select Option > Receiver number, enter the recipient’s phone number, and select Option > Send.
Save as contact
To save the address of the recipient in the address book. You can save the selected contact as new one or edit the
details of the existing contact for this number by using the Used option.
5.2.1. Inbox (SMS)
Use details
Use details will display any links such as phone numbers, email
address, URLs if anything is present in the message.
You can use and save the selected link.
Chat
You can begin a chat session with the selected sender.
New
Composing a new message.
Move – SIM box / Spam
You can move the selected message to SIM box or spam
folder. Upon selecting, a confirmation is requested from you.
Page 98

03
93
Using the menu
Message info
The message details can be obtained by selecting this feature as followings.
Sender
The sender of the message.
Receive Date/Time
The date, time and the day of the message received are
displayed.
Message Size
The size of the received message in Kb.
Delete
Delete the selected message.
Delete all
Delete all messages stored in "Inbox".
Help
You can get the information about this menu.
Exit
Exit to idle screen directly.
Page 99

03
94
Using the menu
View
The message displays the recipient’s name, Sent date and time, Size of the message, sender’s Name and the subject of
the message along with the MM (image or audio or text depending on what is present in the message).
Reply
On selecting this option you are taken to the compose message page where you can compose a message to be sent as
a reply. The subject of this MMS will be <RE: original subject>. You can change the subject and the other fields also.
Reply All
On selecting this option you are taken to the new page where you can compose a message to be sent as a reply.
Reply all sends the reply to the mail Ids present in Cc field. The subject of this MMS will be <RE: original subject>.
You can change the subject and the other fields also.
Save as contacts
To save the address of the recipient in the address book.
5.2.2. Inbox (MMS)
If the message is set for manual download then a notification to download the message is displayed.
Click on Download to download the message to view.
You can click on pause and stop the message during the view.
Page 100

03
95
Using the menu
Save Object
On selecting Save Object option you get a screen, which shows the media present in your MM. Tap on Save button to
save the selected media contents to the local memory of the device.
New
To create a new MMS.
Move to spam
The received message can be marked as Spam and moved to the Spam folder.
A confirmation is displayed before moving the message. Click on Yes to move it to Spam else click on No.
Message info
The message details can be obtained by selecting this feature as like sender, receive date/time, message size in Kb.
Delete
To delete the selected message select this option.
Delete all
To delete all the messages in Inbox.
 Loading...