

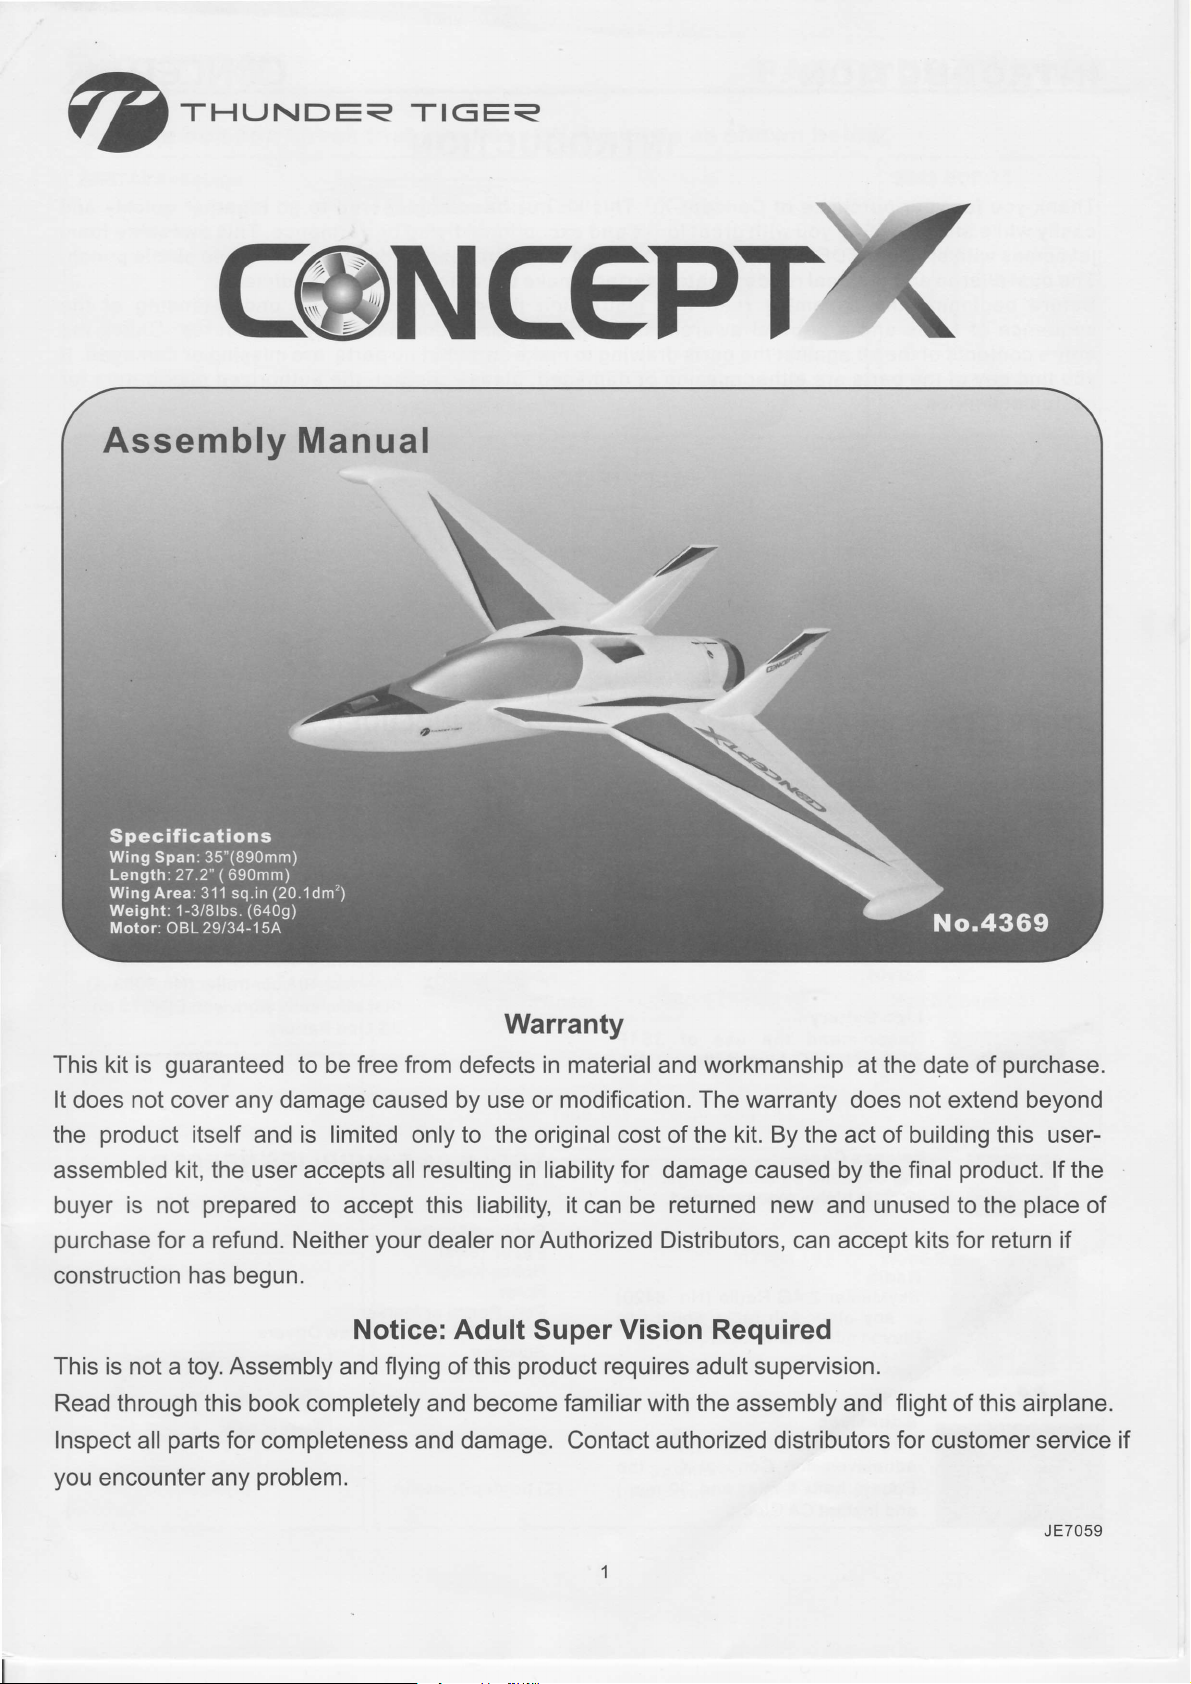
Page 1
THLJNDEA TIGE<
www.MR-Modellbaushop.eu
c@NcePx
Warranty
This kit is
It does not cover any damage caused by use or modification. The warranty does not extend beyond
product
the
assembled
buyer
purchase
construction
This is not a toy. Assembly and flying of this
Read through this book completely and become familiar
Inspect
you
encounter any
guaranteed
itself and is limited only to the original cost of the kit. By the act of building this user-
kit, the user accepts
is not
all
prepared
for a refund. Neither
has begun.
parts
for completeness and damage. Contact authorized distributors for customer service if
to be free from defects in material
to accept
problem.
resulting in liability for damage
all
this liability, it
your
dealer
nor Authorized Distributors, can accept kits for return if
Notice: Adult
product
can be
Super
Vision Required
requires adult supervision.
workmanship at the
and
caused
returned new and unused to the
with
the assembly and
by the final
date of
flight
purchase.
product.
of this airplane.
lf the
place
JE7059
of
Page 2
INTRODUGTION
www.MR-Modellbaushop.eu
(@NCePT<
INTRODUCTION
Thank
you
easily while
jet
comes with efficient EDF-75
The dual aileron and
Before beginning
sequence of steps and a
entirecontentsofthekitagainstthepartsdrawingtomakesurethatnoparts
you
find
any of the
customer
your purchase
for
providing
still
the assembly read this instruction thoroughly
parts
service.
of
Concept-X.
you
with
ducted
optional
rudder
general
are either missing
This
kit has been engineered to
great
looks
and exceptional flying
fan
unit and
40A
controller that delivers strong
control surface make the aerobatic flight
performance.
predictable.
gain
to
an understanding of the
awareness of the recommended assembly
aremissingordamaged.lf
or damaged,
TABLE
OF CONTENTS
please
contact the authorized distributors for
lntroduction
Balance.
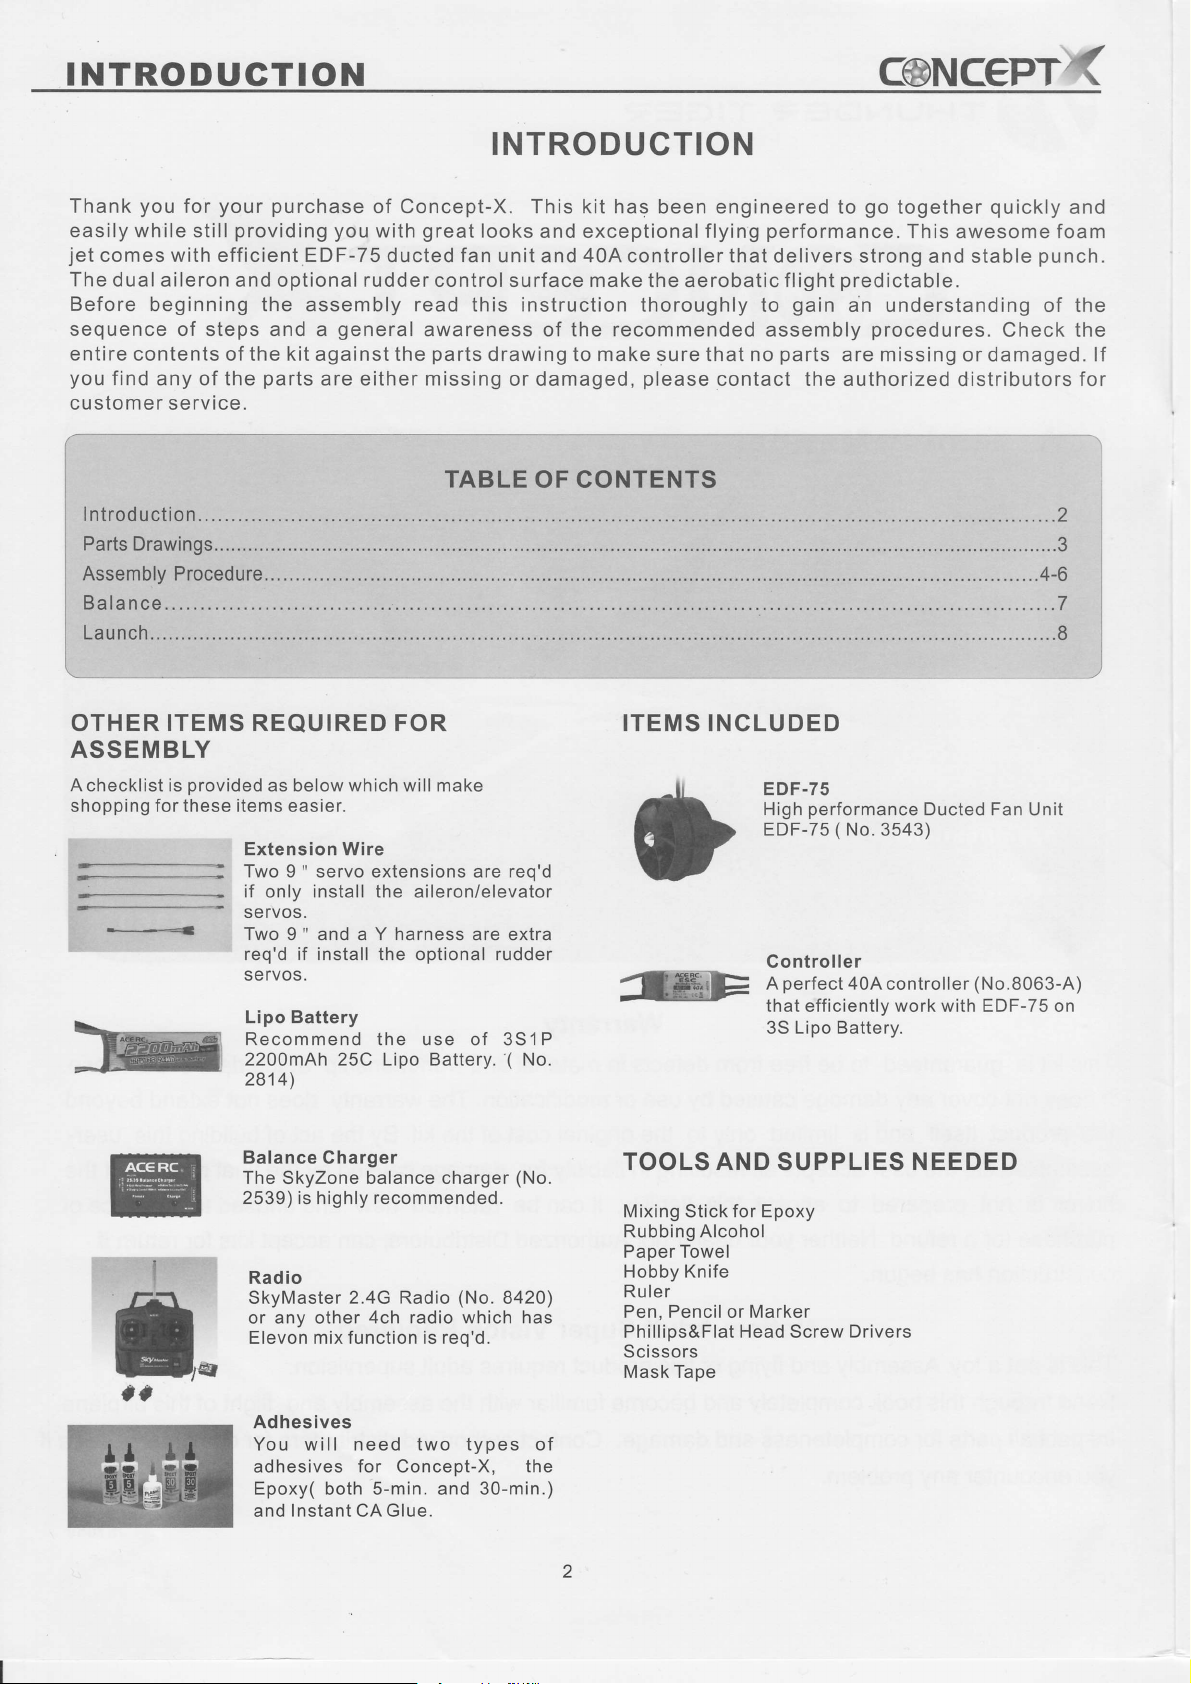
OTHER ITEMS REQUIRED FOR
ITEMS INCLUDED
ASSEMBLY
A checklist is
shopping for these items easier.
provided
as below which will make
Extension Wire
Two 9 " servo extensions are req'd
if onlv install the aileron/elevator
SC TVOS.
Two9"anda
req'd if install
SCTVOS.
Lipo Battery
Recommend
2200mAh 25C
2814)
Y harness
the
optional
the
use of 3S1P
Lipo Battery. ( No.
are extra
rudder
EDF-75
performance
High
EDF-75 ( No. 3543)
Controller
perfect
A
that
35
404
efficiently work with EDF-75 on
Lipo Battery.
go
together
This
awesome
and stable
procedures.
...........7
Ducted Fan
controller
(No.8063-A)
quickly
and
foam
punch.
Check the
........2
Unit
@
m
-r
,-l-
-
Balance Charger
The SkyZone balance charger
2539) is highly recommended.
Radio
SkyMaster
or any other 4ch radio which has
Elevon mix function is reo'd.
lErq
öö
Adhesives
You will need two types of
adhesives for Concept-X, the
Epoxy(
and
2.4G Radio
both
Instant
CA
5-min.
Glue.
(No.
and
(No.
8420)
30-min.)
TOOLS AND
Mixing Stick for Epoxy
Rubbing Alcohol
Paper Towel
Hobby Knife
Ruler
Pen, Pencil or Marker
Phillips&Flat Head
Scissors
Mask Taoe
SUPPLIES
Screw
NEEDED
Drivers
Page 3
Q-*'^DE=
www.MR-Modellbaushop.eu
-rrGE=
PARTS DRAWINGS
Open the box and check that
A.56742 Fuselage
Plywood Sheet
Fuselage Half
A56743 Main Wing
you
have all the
(L/1
(1))
Ri 1)
parts
as shown below.
EDF-75
3543
EDF-75 ( 1 )
A56744 Tail
Main Wing
A56745 Upper Deck
(1
Deck
Upper
456746
A56749 Decal
Ganopy
Canopy
(1
)
(11/R1)
)
SparCover
456747
Control Horn Sheet ( 1 )
(11/R1
Control
Horn
n
TwoTouch FoamTape
A56748 Hardware
F
EZ Connector
(2)
)
CarbonTube
Servo Fairing
(4)
FoamTape
Rudder Pushrod
E
M2 Nut
(1)
(4)
@7
(2)
(2)
(4)
Hatch Cover
n
Velcro
Wood
Wood Screw
VerticalTail
"ra
:
(1)
Clevis
g
3x8mm
Screw
2
3x6mm
(2)
(4)
(2)
(2)
(2)
Decal(1)
Aileron Pushrod
(2)
g
3x3mm
Set Screw
(2)
a)
Magnet ( 1 ) Magnet
(1
)
Page 4

ASSEMBLY
www.MR-Modellbaushop.eu
PROGEDURE
(@NCEPTX
1. Locate the olastic control horn sheet then remove
the
control horns and bottom olates from the sheet.
Trim the
thread the
on to
control horn and make sure it is
each
need to accommodate to the hinoe line. One for left
and one
2.The rudder control surface is an optional function.
User may skip doing this step for saving the weight.
lnstall the EZ connector on the control horn with two
M2 nuts. Temporally secure the rudder
EZ connector with 3x3mm setscrew. Same wav to
CAthe bottom
edges and
clevis on
the
control
other.
for right.
Note the
plate
remove
the
horn.
bottom
to the control horn.
any
aileron
CA the bottom
pushrod
plate
flashing. Next
then
plate
perpendicular
is not
snap
to the
symmetric,
pushrod
on
to
4.lnstall the
adjust the clevis to decide the control horn
Make sure the
Make mark at the
installthe
pushrod
pushrod
control
rod to the servo horn and
parallel
place
horn
is
as shown.
t'
with the wing root.
where
you
J}
are
position.
going
to
"*r
5. Use hobby knife and carefully cut a slot for control
hor.n. lnsert the control horn so the bottom olate
exactly contact the surface of aileron then apply
CA
glue
to secure the control
horn in
place.
is
the
I
t
3.Trial
installed. Make
Next remove the servo
to secure the servo in the servo well.
fit
the servo
in the well with the servo horn
servo is in the neutral
sure
then
thin two touch tape
use
position.
6. Well route the servo
or CA the carbon tube
cover in
and
Remove
inside area where contact the carbon tube then
it in
cover so
same orocedure the other
place.
Note the orientation of the spar
make sure it can fit
the
spar
place.
Next seep some CA around the spar
it will
secured
wires in
in
cover then apply epoxy at the
the spar
place.
perfectly
in the wing firmly. Do the
wino half.
well. Epoxy
Trial fit the spar
cover
in
the
well.
glue
Page 5

@'*.,,.uDEa
www.MR-Modellbaushop.eu
rrGE<
ASSEMBLY
PROGEDURE
7. Locate the
the sheet.
fuselage
in
olace as
S.Trial
to keep it in
in
tape the fuselage
halves match each
fit the other
place
plywood
Trial fit these
half first, CA or epoxy
shown.
place.
firmly or apply
sheet,
fuselage half and use
Apply CA and secure
place.
in
other.
remove all
plywood parts
plywood parts
these
the epoxy before
Make sure
parts
from
right
on
mask tape
the fuselage
you
mask
two fuselage
10.Locate the
gently
wires
four 3x6mm
before
firmly and
Remember always
fan face to any
serious
installation. Make sure the
injury if fan is not secured
EDF-75
to the front and secure it
wood screws. Check
motor runs without
step after the EDF.
person
----*S
11.Thread the
attach two
then CA the
and make sure
wires to the fuselage
wing halves all the
wing root where contact
the wing
oower
when testing. lt
halves
unit then
Fan is
problem.
tightly and coming
then carefully
way to the fuselage
are secured
route the
place
in
the EDF-75
Never let the
the fuselage
secured
Note:
will
cause
firmly.
with
plywood pieces;
9. CAthe
and
these mounts
rest
EDF mount in
before
place.
you glue
the upper deck
Note the orientation
them in
place.
mount
of
l2.Connect
EDF and make sure
the
direction.
place
in
Connect
the front compartment
to
the EDF
Route the wires
enclosed two
with
the extension
the
controller
Test run
wires to the controller.
the fan
and secure
wire and
as
rotates at correct
touch foam
well route the
photo
shown.
tape.
wires
Page 6

ASSEMBLY PROGEDURE
www.MR-Modellbaushop.eu
C@NC€PT{
't
3.Locate the upper deck and its
Glue the
it can fit to the notch of the
fusblage. Next
holes at the front two side of
assembled upper deck in
with two 3x8mm wood screws in
l4.lnstall the rudders in
perpendicular
other and fuselage. Carefully install the control horn
as the same way
trim the servo fairing then apply the foam tape inside
the fairing so it will help to secure the servo in the
well
plywood piece
glue
to the wing and
firmly. Next CAthe fairing in
at the rear of upper deck
the two
place,
place,
you
did on the aileron. Once
parts
as shown.
plywood piece
plastic
upper deck.
washers in
Trail fit
secure the deck
place.
make sure they are
parallel
place
with
as shown.
so
in
the
the
the
each
done,
l6.Attached
battery tray as shown.
receiver
canopy with two touch foam tape.
17. Refer to above
decal neatly.
the Velcro to the lipo battery and
properly
Next
connect all wires to the
then secure the receiver under the
photo
or color box to
apply
the
15.Secure
Locate
glue
rectangle magnet in
pole
the
them under the canopy. Finally
is correct so it can attach to the fuselage.
magnet with
the
plywood parts
rest
place,
in
CA
then
make sure the magnet
place
as shown.
assemble and
glue
the
Gongratulations
you
Now
control
We
looking EDF Jet and
and
Thanks for
forward to
products
complete the
throw set-up
feel
that
get
many
purchasing
in
the
assembly
balance
you
providing you
and
will have a very
hope
hours
future.
flying
of
this Concept-X and
you
with
please
before
capable and
will
enjoy this
pleasure
other
do
you go
model
from its
we look
great
the
to fly.
good
use.
R/C
Page 7

OTHUNDE<
www.MR-Modellbaushop.eu
T'GE<
BALANGE
You will
Please check the manual for
servo movement is
need to set up the Elevon function in
your
properly
radio. Make sure the
then adjust the
throws as following suggestion.
Aileron-Low Rate
Aileron-High Rate
Elevator-Low Rate
------.-!.
ElevatotrHigh Rate
c
Ruddet
,
IMPORTANT-Do
(-
€,-
.,_-_
not fly
completing this very important
that
is not
properly
balanced
a
N I
t:
-
":19132
\9132".7mm
--z'15132
_.-Jr,
your
-'/13116"
N3/16.smm
. 9/32".7mm
-
-'
!
9t32".7mm
'7mm
I
'-r
7/16",11 mm
+
.7
t16" .11mm
'4mn
32,.,4mm
modal
section.
will
be unstable
could cause serious damage and/or injury.
1.Turn the wing(and
down and measure about 7"
Leading Edge of the wing
your
with
2. With
upright and
balance
properly
felt-pen. This is the balance
your
model fully assembled turn the model
pick
marks
plane
the
adjust the battery
reach
the right CG.
plane
if necessary)
('l
80mm) from the
root
then make a mark
it
up with one finger at each of the
you
made
will hang
pack
earlier.
horizontally. You can
forward or backward to
your
'smm
before
A model
up side
point.
lf
balanced
radio.
control
3.Range check
from
the manufacturer.
4.Double
in front
your
radio
check all the
the EDF. Avoid
of
system
linkages
the duct before the fan or it will
5.Do not
the EDF.
if needed.
oarts
attempt to fly
Check the EDF carefully, replace the
if
there is unusual noise from
per
the instruction
and wires, specially
anything unsecured in
damage the fan.
THE FIRST FLIGHT
Use the first few flights to
plane
new
model
altitude before
and its flying
upwind and climb to
you
surfaces and make sure it flies straightly.
You will need
plane.
an assistant to help
See next
page
successful launch.
Always be careful with the
Basically the
plane
can fly
recommended lipo battery is
2200mAh
351P 25C).
You do not have much time
trimmed
set up the
landing
your plane properly
landing
immediately. Try to familiar the
course before
landing speed of Concept-X is fast, keep
approaching distance
Do not cut
half
may
off the
speed or
stall. Cut off the
power
less will help
almost touching the
you
Once
then
familiar with the landing and launching
you
can take the flight time in
Suggest to apply rudder
possible
or
plane
may cause
This is due to the delta wino
yawing
in the air.
get
accustomed to
characteristics. Keep the
good
make
a
a turn.
comfortable
Trim
you
to launch the
of the illustration for
power
of the
about 4 minute only if
used(
in the
then
run
out the battery. Note: the
flight.
you
will need to
is needed.
when
landing, keep around
land successfully or it
power
ground
when the Concept is
about
1-2m height.
aerobatics.
control throw as small as
spin or
stall
not have much
can
all control
No.2814
your
a
battery.
Once
enough
suddenly.
Pick
up
model
at CG
PRE-FLIGHT CHECK
Before
perform
l.Fully charge
2.Check
you
attempt to fly
final
some
your
following the instruction from
the direction of
surfaces and
per
the instruction
the
position
your
checks:
radio
travel
operation of
from
the manufacturer
model
and
you
flight
should
batteries
the manufacturer .
your
of
the motor
control
controller
.
You as the
responsible
pilot
of this radio
for
any accidents that may occur
controlled
during its use. We recommend that
model at a model
for model flying. But always
operate the model in a
read the Safety
following.
as
*=*--
o:
field which is
club
safe and careful
Cautions
which
specially set up
be sure
enclosed
*/" Moctet Airptane
q*;
GtE A@
model
you
fly
that
manner
in the kit
are
your
you
and
 Loading...