

Thunder Soft IPC8053 Quick Start Manual
IPC8053 Quick Starter Guide
1/ 7
Wired/Wireless IP Camera
IPC8053 Quick Start Guide
Installation Prerequisites
1. IP Camera Device with full package
2. Wireless Router (optional)
3. Android Smart Phone (Recommend Snapdragon 820 and Android 6.0 or higher)
4. Computer compatible with Chrome browser
Hardware Installation Steps
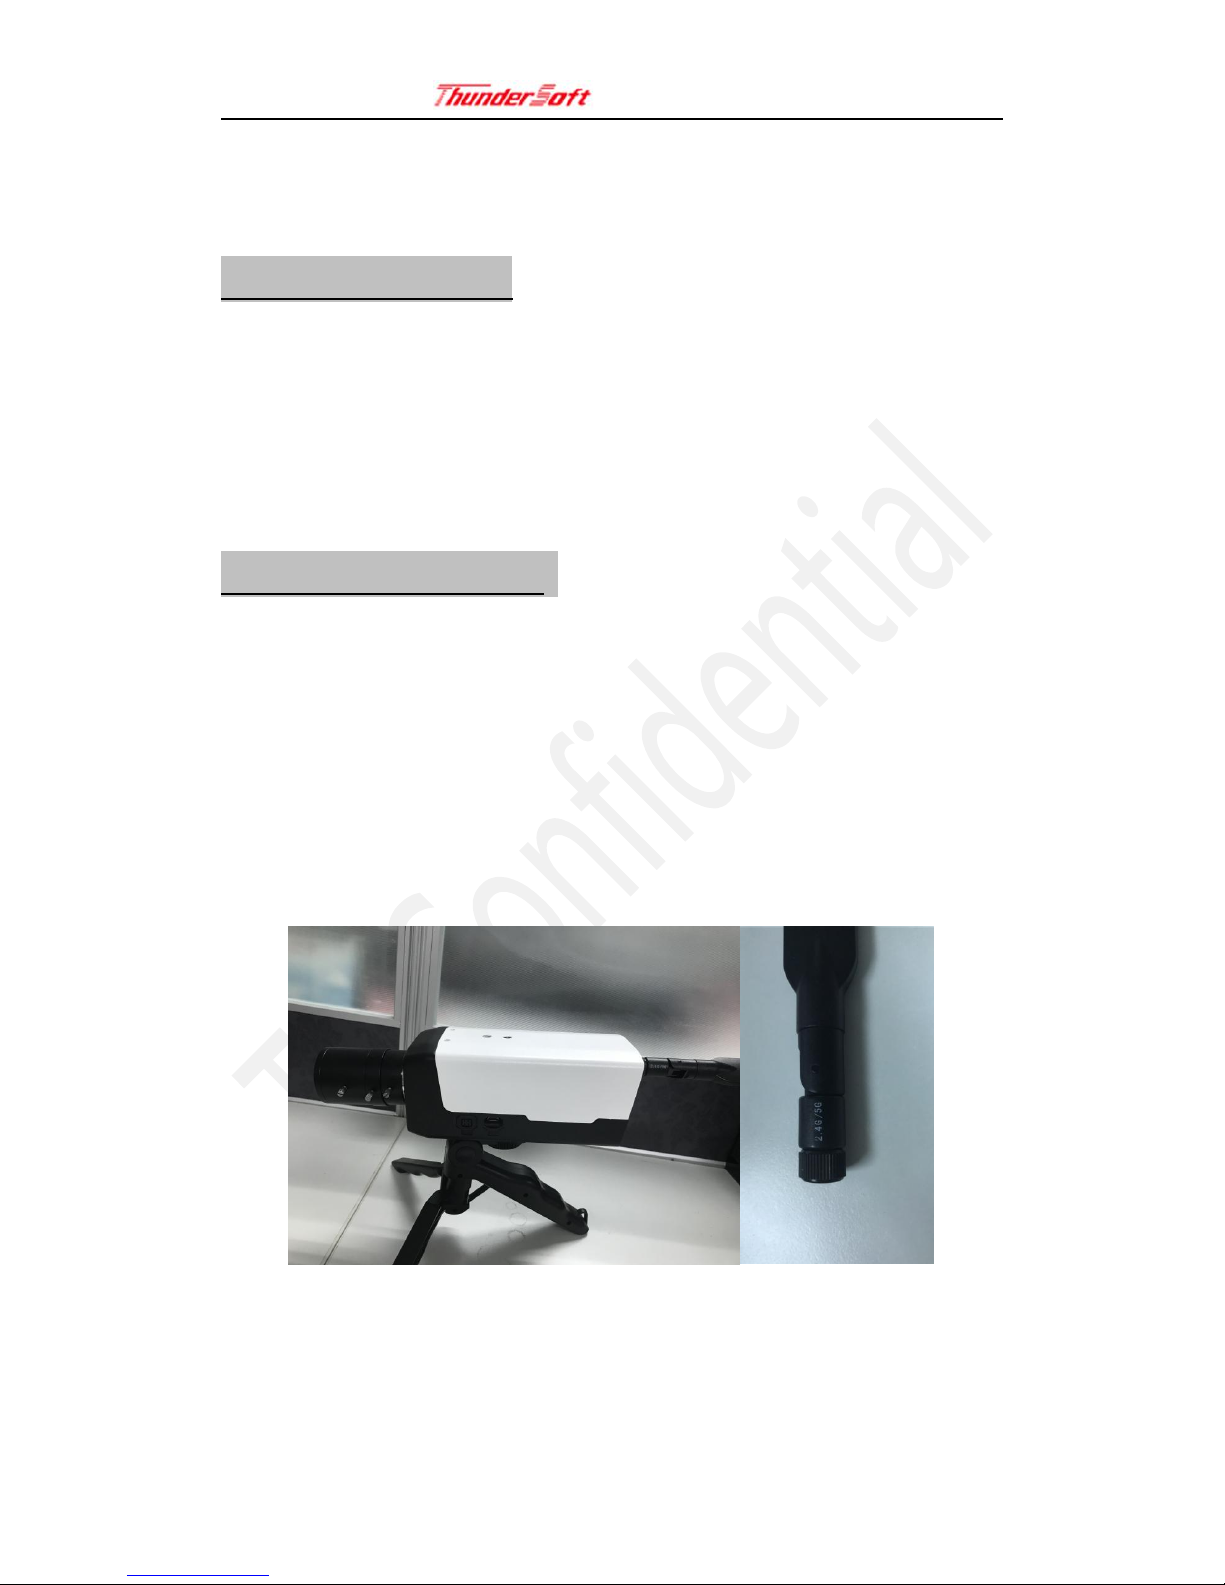
1. Hardware Connection
a) Install Wi-Fi antenna in left hand side SMA connector marked with WIFI.
b) Connect Camera Lens clockwise.
2. IP Camera on tripod stand as shown in Figure 1.
Note: WIFI Antenna as shown below.
Figure 1. Stand Connected
3. Connection Instructions
There are 2 methods to connect (Static mode and DHCP mode). IPC8053 default connection mode
IPC8053 Quick Starter Guide
2/ 7
is static mode.
Static IP Connection Mode
i. In this mode, Android app will connect with the camera directly via Wi-Fi.
ii. Plug 12V DC adapter into “DC/IN” jack on the camera as shown in Figure3. When plugged,
IP Camera will boot up automatically.
iii. Open the Smart Phone’s Wi-Fi setting, select the IP Camera AP and enter password to
connect.
(Camera SSID: IPC8053_XXXXX , Default Password: password
)
iv. Now Static IP connection is completed successfully.
DHCP Connection Mode
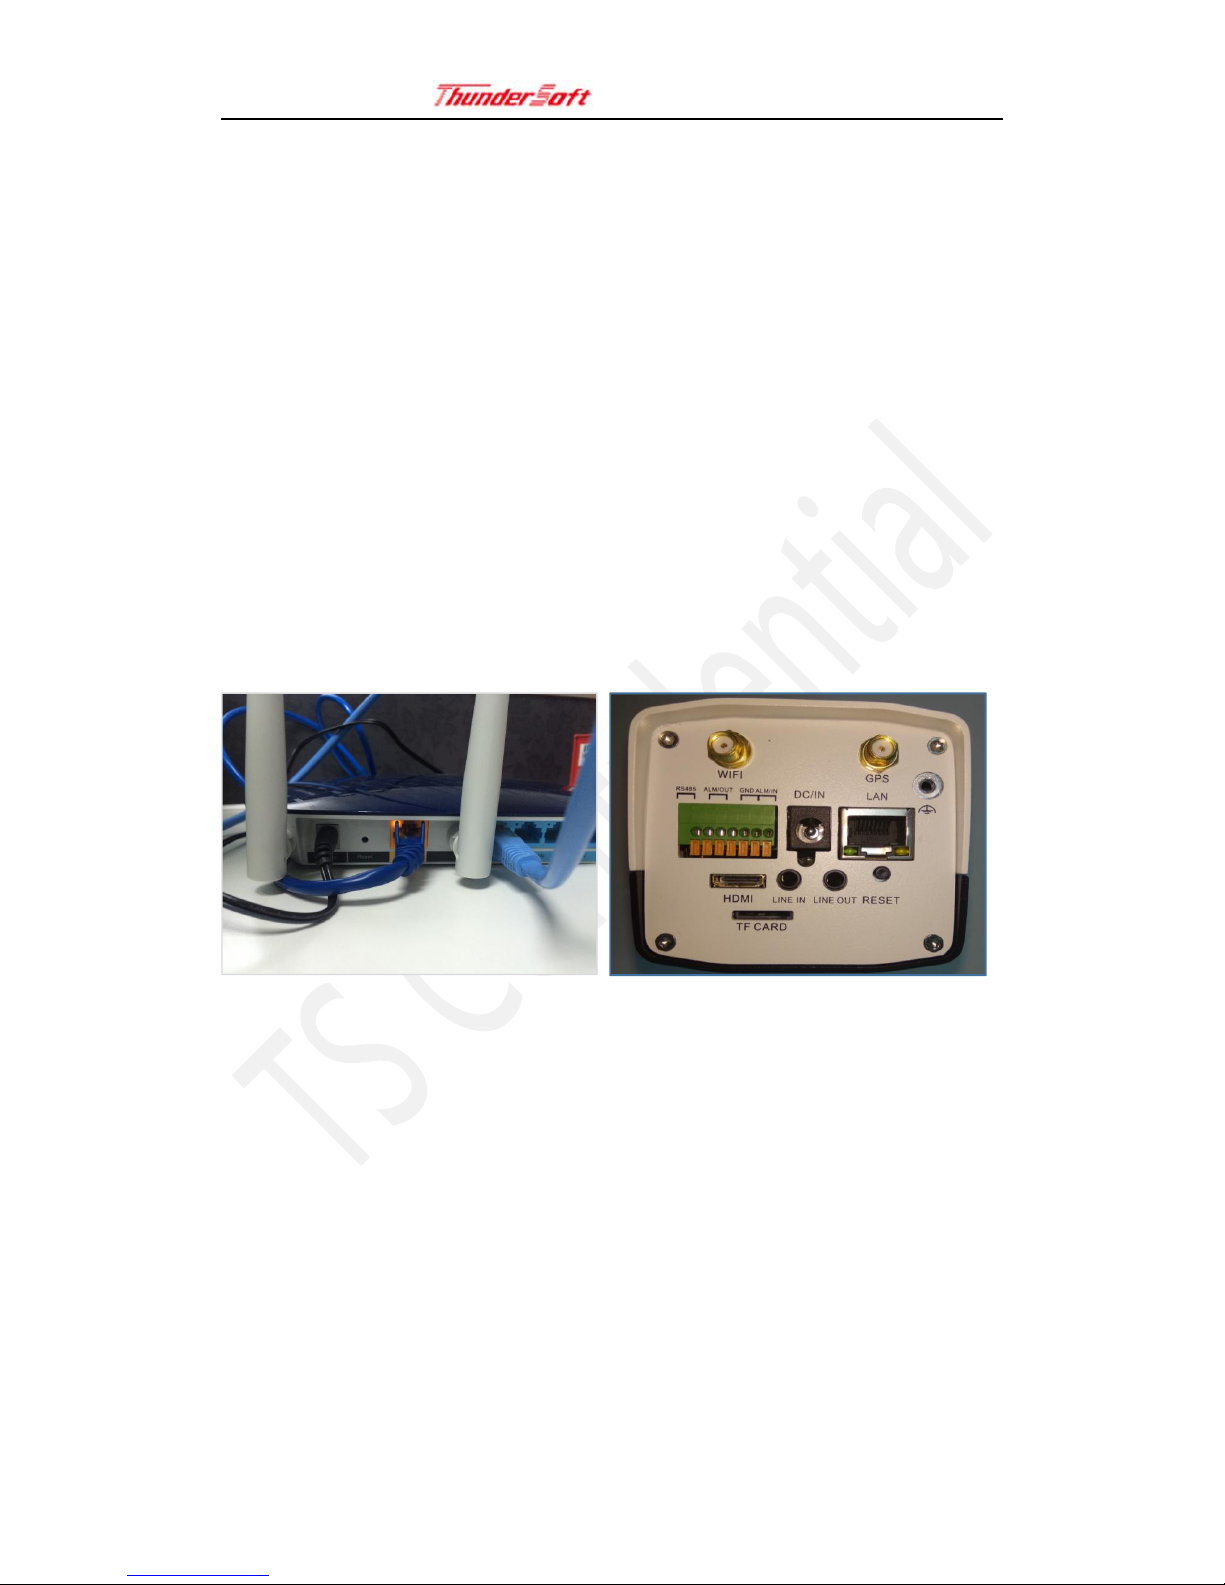
i. Connect the IP Camera to a Router via an Ethernet calbe. (IPC8053 connect with Lan port)
ii. Plug 12V DC adapter into “DC/IN” jack on the cameraWhen plugged, IP Camera will
boot up automatically.
Figure 2. IPC Network Cabling Schematic Figure 3. I/O Connector Layout
iii. Open the smart phone’s WIFI settingSelect the router AP and enter password to connect
to it.
iv. When step iii) completes, Open the IP Camera AppWhen open IP Camera app, "Devices
Found" screen will display automatically.
v. Select the camera ID you wish to connect toLogin screen appears, Enter the User ID and
password to login (hint: User ID: admin Password: admin)
vi. Once logged in, the Camera Preview will display normally.
Note: To enter DHCP Mode, user needs to change the Network Setting to DHCP mode on Android app or

IPC8053 Quick Starter Guide
3/ 7
Web app while in static mode. Then reboot. For details please check User Manual.
4. Trouble Shooting Section
a) Follow step 3, IP camera shall start normally, Ethernet port shall flash green/orange light.
b) If your Ethernet port does not flash after trying several power cycles, please contact our
customer service. (https://store.thundercomm.com/ipc)
Setup Instructions Using Android App
1. Download and install IP Camera APK (Android 6.0 or higher)
a) Open the browser on the smart phone
b) Download the APK from https://store.thundercomm.com/en/download and Install the APK
Note: Download Android APK needs to register an account and enter the Serial Number on the
box to be able to download. SN can be found on the IP Camera’s packing box shown as Figure 12.
To allow the Android phone to install a 3rd party app, please enable “Allow unknown sources
installation” on security setting
2. Choose the device and obtain IP address
a) Open the Smart Phone’ s Wi-Fi settingselect the Camera AP (static mode) or Router AP
(DHCP mode) and enter password to connect.
(Camera SSID: IPC8053_XXXXX , Default
Password: password
)
b) When step a) completes, open the IP Camera App"Devices Found" screen will display
automatically. Screen displays as shown in Figure 4.
 Loading...