

THUMBS UP TWSBLUTHSPKR User Manual
SW-06DUETB
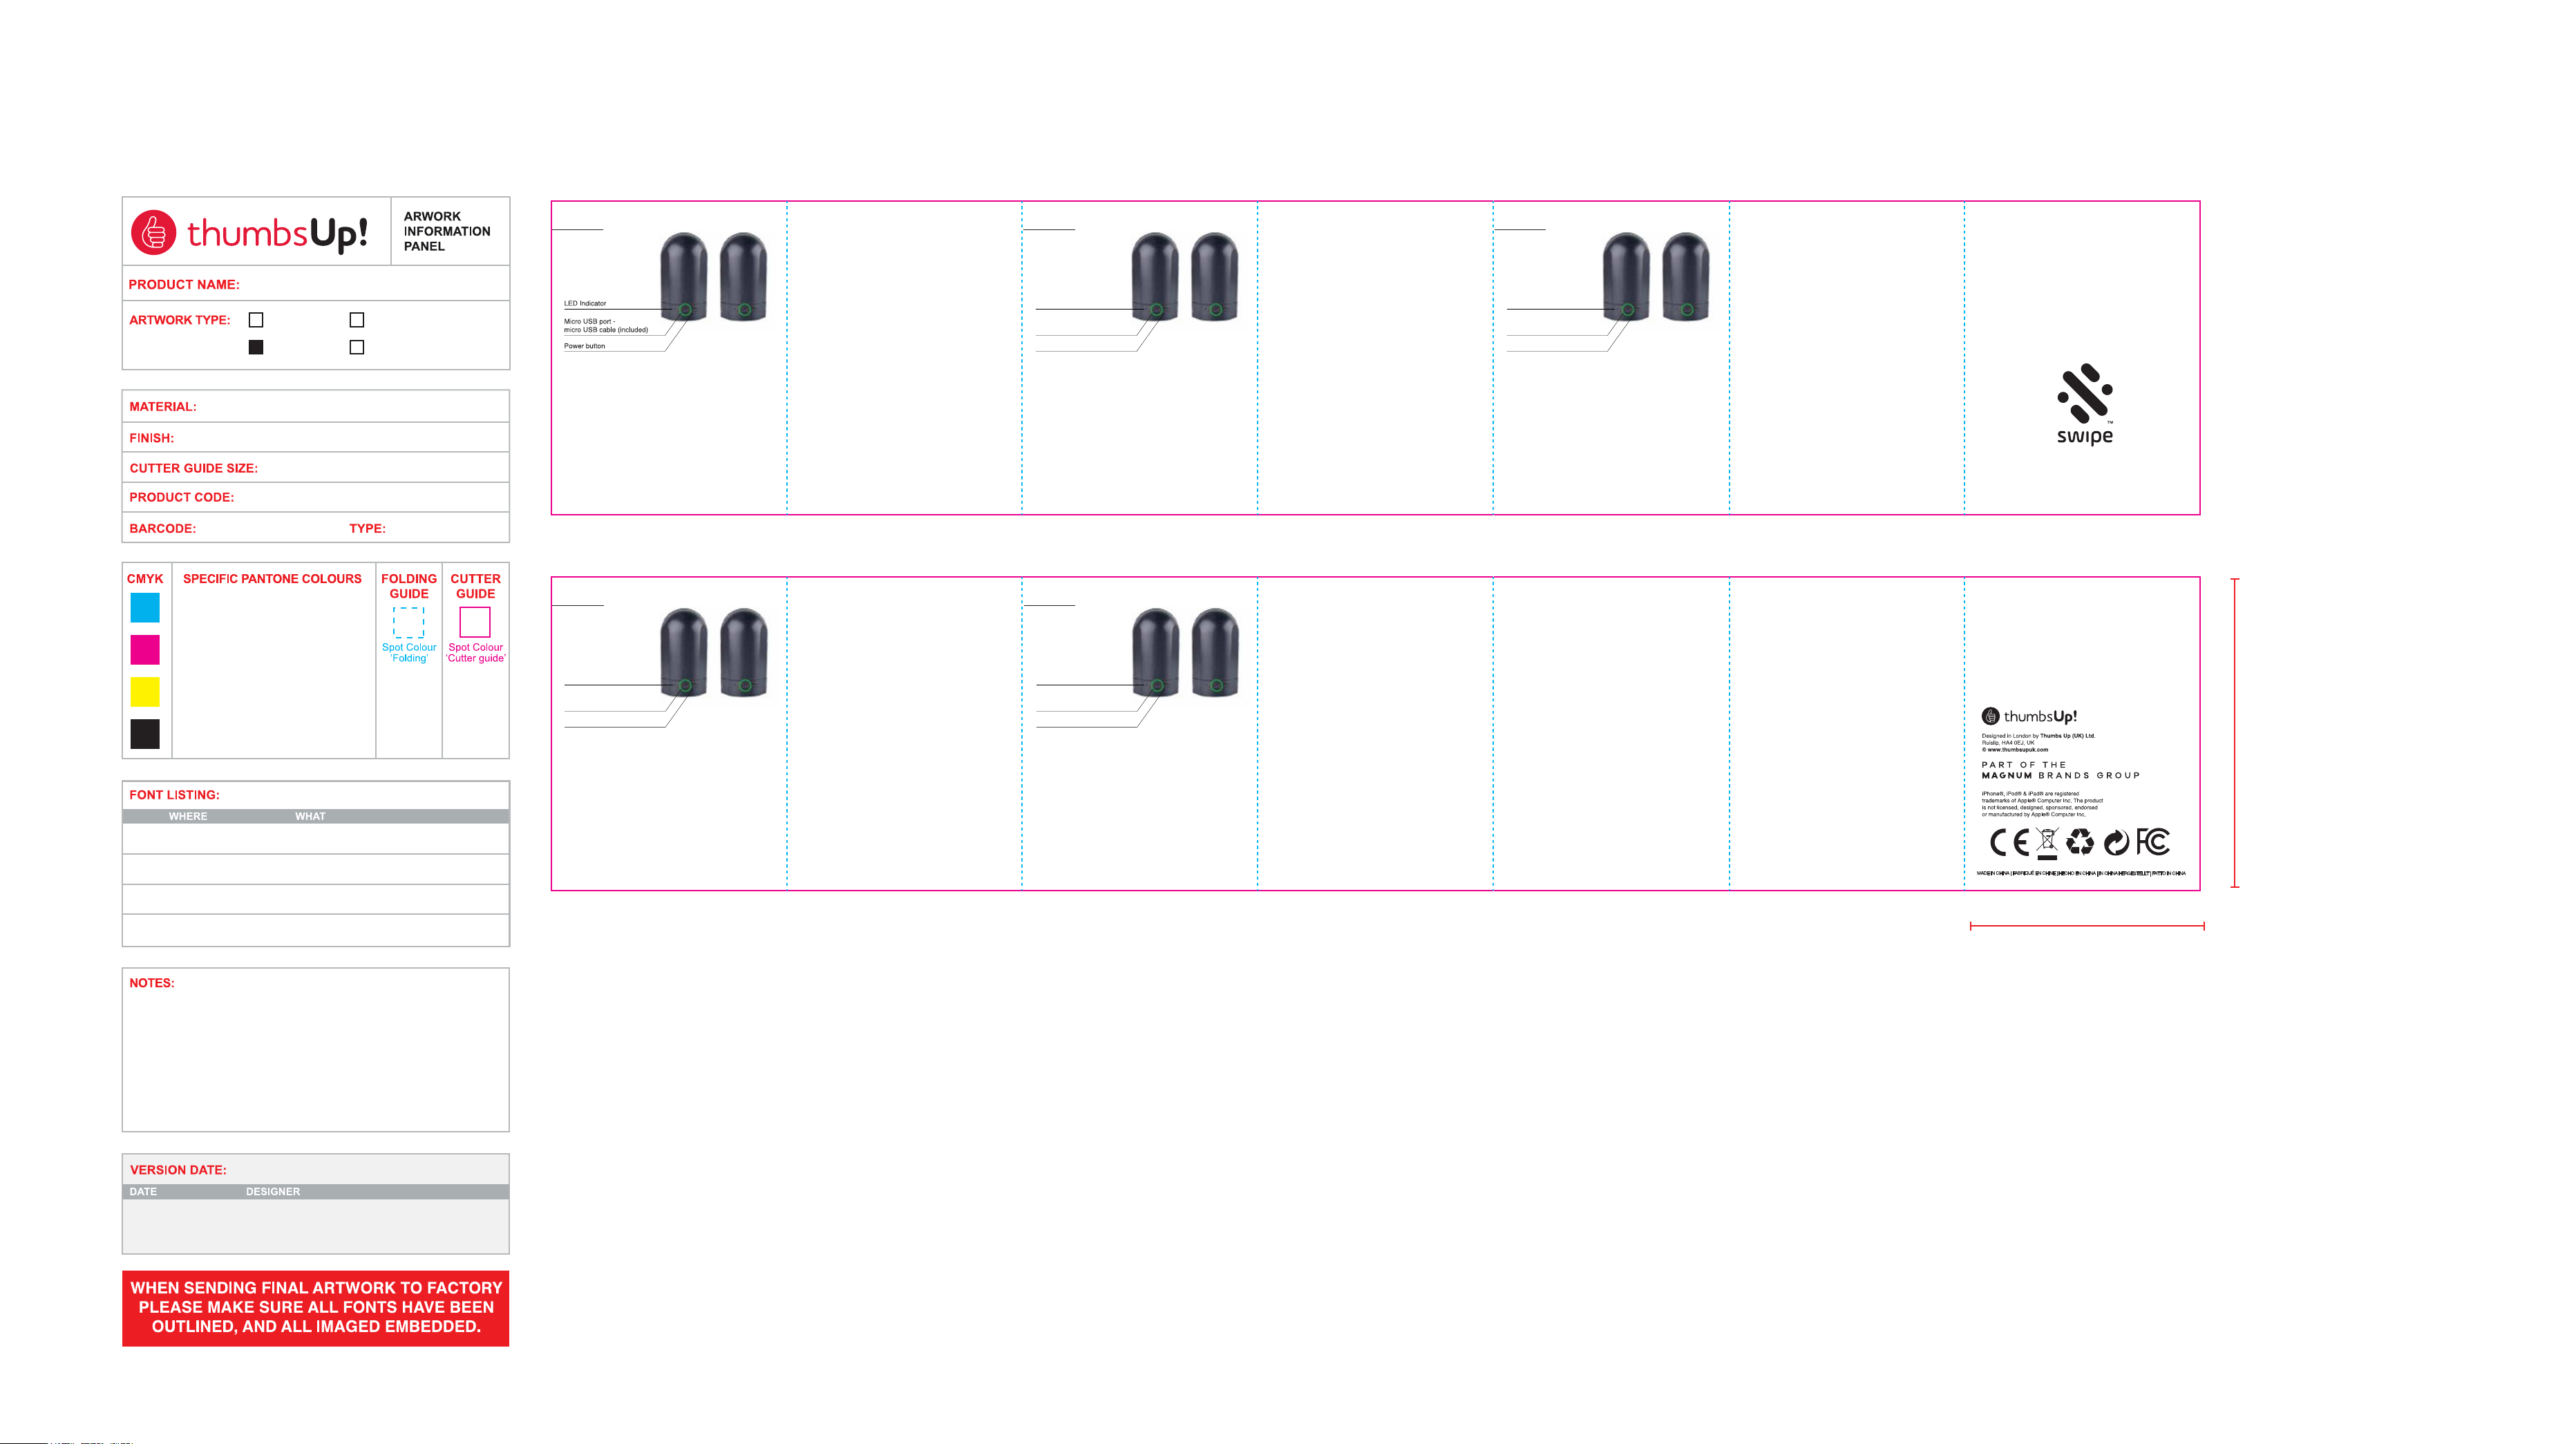
PRODUCT PACKAGING
MANUAL STICKER
80gsm PAPER
matt laminate
H80mm x W60mm (per page)
SW-06DUETB
EAN 13, 80%
EN
Duet Wireless Speakers
Turning ON
Hold the power button down on each speaker for 3 seconds
to turn them ON. The speakers will say ‘Power On,
disconnected’ and a blue LED indicator will constantly ash.
Turning OFF
Hold the power button down again for 3 seconds to turn the
speakers OFF. The speakers will say ‘Power OFF’ and the LED
indicator will switch o.
Charging the Speakers
1. Switch OFF the speakers before charging.
2. Plug the Micro USB cable (supplied) into the speaker and
connect to a USB charging port.
3. A red LED indicator with illuminate to indicate charging.
4. Once charging is complete, the red LED light will turn o.
Note: Charge the speakers fully before using for the rst time.
Wireless Connection
Note: the speakers can be paired to two dierent devices. For
example, you can connect one of the speakers with your
phone and the other with your tablet.
1. Turn the speakers ON.
2. Turn on your device or devices and make sure the wireless
function is activated.
3. Search for “SWIPEDUET” and select it to pair. The speaker
will say ‘connected’ and the LED indicator will appear blue.
4. You can now play music from your device and it will play
through the speaker.
5. Once you turn your devices wireless function o, the
speaker will say ‘disconnected’.
Note: the speakers will automatically turn o if they are not
paired with a device after 5 minutes.
DE
Duet Wireless-Lautsprecher
• LED-Anzeige
• Micro-USB-Anschluss
• Ein/Aus-Taste
Einschalten
Halten Sie an jedem Lautsprecher die Ein/Aus-Taste 3
Sekunden lang gedrückt, um ihn einzuschalten. Die
Lautsprecher sagen ‚Power On, disconnected‘ an und eine
blaue LED-Anzeige blinkt kontinuierlich.
Ausschalten
Halten Sie die Ein/Aus-Taste wieder 3 Sekunden lang
gedrückt, um die Lautsprecher auszuschalten. Die
Lautsprecher sagen ‚Power OFF’ an und die LED-Anzeige
erlischt.
Laden der Lautsprecher
1. Schalten Sie die Lautsprecher vor dem Laden aus.
2. Schließen Sie das beiliegende Micro-USB-Kabel am
Lautsprecher und an einem USB-Ladeanschluss an.
3. Eine rote LED-Anzeige leuchtet, um anzuzeigen, dass der
Ladevorgang läuft.
4. Die rote LED erlischt, wenn der Ladevorgang abgeschlossen
ist.
Hinweis: Laden Sie die Lautsprecher vor der erstmaligen
Verwendung vollständig.
Kabellose Verbindung
Hinweis: Die Lautsprecher können mit zwei unterschiedlichen
Geräten gekoppelt werden. Zum Beispiel können Sie einen
der Lautsprecher mit Ihrem Smartphone und den anderen
mit Ihrem Tablet verbinden.
1. Schalten Sie die Lautsprecher ein.
2. Schalten Sie Ihr Gerät bzw. Ihre Geräte ein und
vergewissern Sie sich, dass die Wireless-Funktion
eingeschaltet ist.
3. Suchen und wählen Sie „SWIPEDUET“ zur Koppelung. Der
Lautsprecher sagt ‚connected‘ an und die LED-Anzeige
leuchtet blau.
4. Sie können jetzt Musik auf Ihrem Gerät abspielen und mit
dem Lautsprecher hören.
5. Nachdem Sie die Wireless-Funktion Ihres Geräts
ausgeschaltet haben, sagt der Lautsprecher ‚disconnected‘ an.
Hinweis: Die Lautsprecher schalten automatisch ab, wenn sie
nach 5 Minuten nicht mit einem Gerät gekoppelt sind.
FR
Deux haut-parleurs sans l
• Témoin lumineux
• Port micro-USB
• Bouton d'alimentation
Mise en marche
Maintenez le bouton d'alimentation de chaque haut-parleur
enfoncé pendant 3 secondes pour les activer. Les
haut-parleurs annoncent « Power On, disconnected » et un
voyant bleu clignote constamment.
Arrêt
Maintenir à nouveau le bouton d'alimentation pendant 3
secondes pour arrêter les haut-parleurs. Les haut-parleurs
annoncent « Power O » et le voyant bleu s'éteint.
Chargement des haut-parleurs
1. Arrêtez les haut-parleurs avant de les charger.
2. Branchez le câble micro-USB inclus sur l'enceinte et
connectez-le à un port de chargement USB.
3. Un voyant rouge s’allume pour indiquer que le chargement
est en cours.
4. Une fois le chargement terminé, le voyant rouge s'éteint.
Remarque : Chargez complètement les haut-parleurs avant de
les utiliser pour la première fois.
Connexion sans l
Remarque : les haut-parleurs peuvent être associés à deux
appareils diérents. Par exemple, vous pouvez en connecter
un à votre téléphone et l'autre à votre tablette.
1. Mettez les haut-parleurs en marche.
2. Mettez en marche votre ou vos appareils et assurez-vous
que sa fonction sans l est activée.
3. Recherchez « SWIPEDUET » et sélectionnez-le pour
l'associer. Le haut-parleur annonce « connected » (Connecté)
et son témoin devient bleu.
4. Vous pouvez désormais écouter de la musique sur votre
appareil et l'écouter avec le haut-parleur.
5. Une fois la fonction sans l de vos appareils déconnectée, le
haut-parleur annonce « disconnected » (déconnecté).
Remarque : les haut-parleurs s'arrêtent automatiquement s'ils
ne sont pas associés à un appareil au bout de 5 minutes.
wireless
speakers
2.
3.
4.
Product Title1.
General Text
TU Details
Warnings
XXXX
XXXX
XXXX
XXXX
ES
Dueto de altavoces inalámbricos
• Indicador LED
• Puerto Micro USB
• Botón de alimentación
Encendido
Pulsa el botón de alimentación durante 3 segundos en cada
altavoz para encenderlo. A través de los altavoces sonará
«Power On, disconnected» (encendido, desconectado) y un
indicador LED azul parpadeará de forma continua.
Apagado
Pulsa el botón de alimentación de nuevo durante 3 segundos
para apagar los altavoces. A través de los altavoces se oirá
«Power OFF» (apagado) y el indicador LED se apagará.
Carga de los altavoces
1. Apaga los altavoces antes de cargarlos.
2. Conecta el cable Micro USB (suministrado) al altavoz y a un
puerto de carga USB.
3. Un indicador LED rojo se iluminará para indicar que se está
cargando.
4. Una vez nalizada la carga, la luz LED roja se apagará.
Nota: carga los altavoces por completo antes de utilizarlos por
primera vez.
Conexión inalámbrica
Nota: los altavoces pueden emparejarse con dos dispositivos
diferentes. Por ejemplo, puedes conectar uno de los altavoces
a tu teléfono y el otro, a tu tableta.
1. Enciende los altavoces.
2. Enciende tu dispositivo o dispositivos y asegúrate de que la
función inalámbrica está activada.
3. Busca «SWIPEDUET» y selecciónalo para emparejar. A través
del altavoz se oirá «connected» (conectado) y el indicador LED
se iluminará en azul.
4. Ahora puedes reproducir música desde tu dispositivo y
escucharla a través del altavoz.
5. Cuando desactives la función inalámbrica de tus
dispositivos, a través del altavoz sonará «disconnected»
(desconectado).
Nota: los altavoces se apagarán automáticamente a los 5
minutos si no se emparejan con ningún dispositivo.
IT
Coppia di altoparlanti
wireless
• Indicatore LED
• Porta micro USB
• Pulsante di accensione
Accensione
Tenere premuto il pulsante di accensione su ciascun
altoparlante per 3 secondi per accenderli. Gli altoparlanti
pronunceranno le parole ‘Power On, disconnected’ e un LED
blu inizierà a lampeggiare costantemente.
Spegnimento
Tenere premuto di nuovo il pulsante di accensione per 3
secondi per spegnere gli altoparlanti. Gli altoparlanti
pronunceranno le parole ‘Power OFF’ e il LED blu si spegnerà.
Carica degli altoparlanti
1. Spegnere gli altoparlanti prima di caricarli.
2. Collegare il cavo micro-USB (fornito) all'altoparlante e
inserire l'altra estremità in una porta USB alimentata.
3. Un LED rosso si accenderà per indicare che è in corso la
carica.
4. A carica completa, il LED rosso si spegne.
Nota: caricare completamente gli altoparlanti prima di
utilizzarli per la prima volta.
Connessione wireless
Nota: gli altoparlanti possono essere connessi a due
dispositivi diversi. Ad esempio, è possibile collegarne uno al
telefono e l'altro al tablet.
1. Accendere gli altoparlanti.
2. Accendere il dispositivo (o i dispositivi) e vericare che la
funzionalità wireless sia attivata.
3. Cercare “SWIPEDUET” e selezionarlo per eseguire
l'accoppiamento. L'altoparlante pronuncerà ‘connected’ e
l'indicatore LED si accenderà con luce blu.
4. Ora è possibile riprodurre la musica sul dispositivo e
ascoltarla dall'altoparlante.
5. Quando si disattiva la funzione wireless del dispositivo,
l'altoparlante pronuncerà ‘disconnected’.
Nota: gli altoparlanti si disattivano automaticamente se non
vengono connessi a un dispositivo entro 5 minuti.
NOTE: This equipment has been tested and found to comply with the
limits for a Class B digital device, pursuant to part 15 of the FCC Rules.
These limits are designed to provide reasonable protection against
harmful interference in a residential installation. This equipment
generates uses and can radiate radio frequency energy and, if not
installed and used in accordance with the instructions, may cause harmful
interference to radio communications.
However, there is no guarantee that interference will not occur in a
particular installation. If this equipment does cause harmful interference
to radio or television reception, which can be determined by turning the
equipment o and on, the user is encouraged to try to correct the
interference by one or more of the following measures:
- Reorient or relocate the receiving antenna.
- Increase the separation between the equipment and receiver.
-Connect the equipment into an outlet on a circuit dierent from that to
which the receiver is connected.
-Consult the dealer or an experienced radio/TV technician for help
Changes or modications not expressly approved by the party
responsible for compliance could void the user's authority to operate the
equipment. This device complies with Part 15 of the FCC Rules. Operation
is subject to the following two conditions:
(1) this device may not cause harmful interference, and
(2) this device must accept any interference received, including
interference that may cause undesired operation.
Head Office - Thumbs Up (UK) Ltd, Unit L, Braintree
Industrial Estate, Ruislip, Middlesex, HA4 0EJ, UK.
T: 0845 466 8880. info@thumbsupuk.com.
www.thumbsupuk.com.
Germany - Thumbs Up GmBh, Rudolf-Diesel-Str.14,
D-53859 Niederkassel.
T: +49(0)228 555 236-0. info@thumbsup.de.
www.thumbsup.de
USA - Thumbs Up USA, Unit L, Braintree Industrial
Estate, Ruislip, Middlesex, HA4 0EJ, UK. T: 0845 466
8880. info@thumbsupusa.com. www.thumbsupusa.com
SW-06DUETB SW-06DUETBK
FCC ID - 2AHHETWSBLUTHSPKR
80mm
60mm
28/08/2018 FRANKIE ALBION
 Loading...