

ThumbsUp A93TN Instructions Manual

IMPORTANT SAFETY INFORMATION FEATURES AND SPECIFICATIONS
1
Please follow all the precautions listed below for safety and to •
reduce the risk of re, injury or electrical shock.
Read all the instructions and retain them.•
Do not expose the camera to extreme temperatures, humid-•
ity, dust or water.
Do not aim the camera at the sun or strong light as the lens •
may be damaged.
Protect the camera lens and avoid scratching it.•
Use only the supplied accessories. Use of any other accesso-•
ries could damage the appliance and will void the warranty.
Clean the camera with a cloth designed to clean spectacles •
or camera lenses.
WARNING: This appliance uses a Lithium Ion Battery. Do not
expose the battery. There is a risk of leakage, explosion, re or
burns if the camera is opened, or immersed in water or if the
battery terminals are short-circuited with a metal object.
LEAKAGE: If the battery is punctured or mishandled the battery
contents may leak. If battery contents come into contact with
skin or eyes, rinse the aected area continuously for 15 minutes
in clean cold water and seek medical help immediately.
Manual or Sound-activated recording function•
Can be used as a webcam whEn connected to a suitable PC.•
AVI video format•
HD image recording in low light•
Supports 30 fps for 720 x 480 and 320 x 240 output•
Supports USB1.1 and USB2.0•
Supports up to 16GB Micro SD card (not included)•
Build-in lithium battery for 2hrs lming and up to 250 hours •
standby
WARRANTY
Your appliance is warranted for 12 months from the date of purchase. If a fault develops during this period, please return the unit
to your nearest Maplin store with the original receipt as proof of
purchase, or contact www.maplin.co.uk. This warranty does not
aect your consumer rights.
Disposal: Waste electrical products should not be disposed of with household waste. TIn the EU this means
that the camera can only be disposed of at a site with
special facilities for receiving used batteries. For your
nearest facilities visit your local authority website.
Mini DV Camera Instructions
2
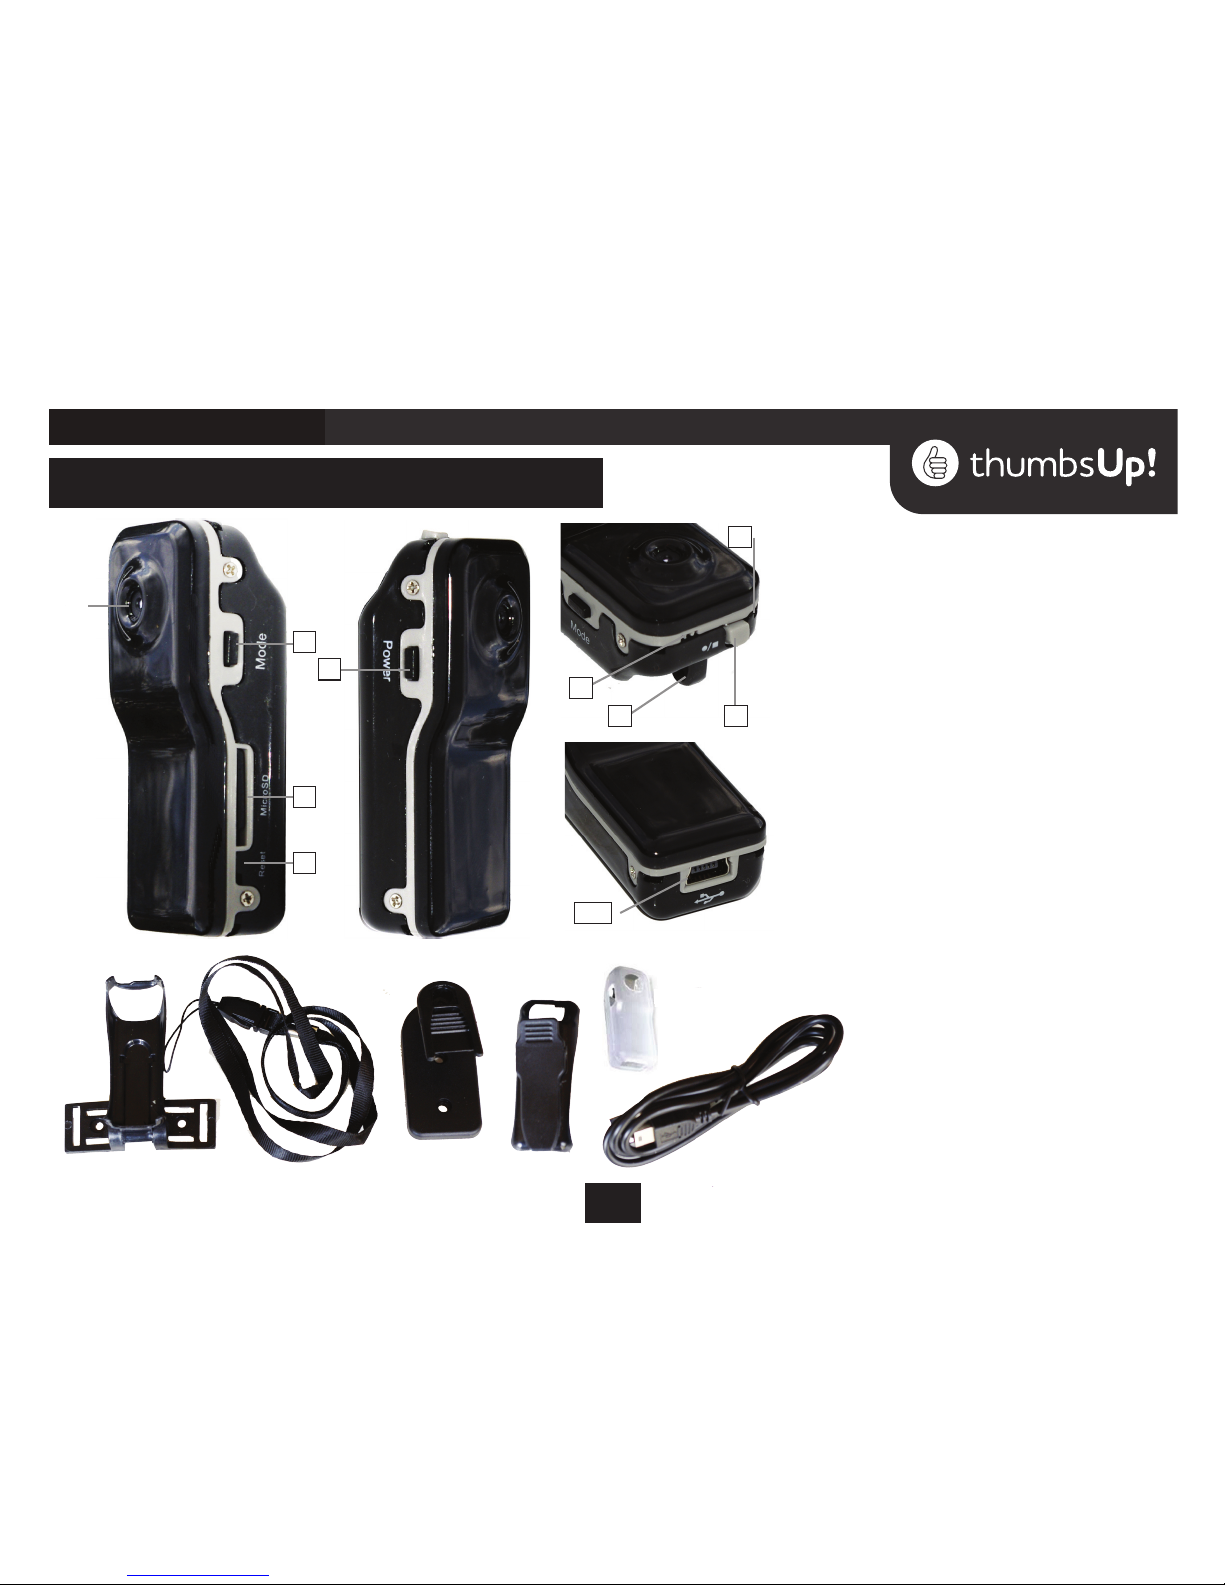
Features and Controls
Camera lens1.
Mode Switch2.
Micro SD card slot3.
Reset button4.
Power hole5.
Microphone6.
Lanyard mounting hole7.
Record/Stop button8.
Mode Light9.
USB connector10.
ACCESSORIES
Bracket Mount11.
Lanyard12.
Desk mount13.
Spring Clip14.
Soft Case15.
USB cable16.
1
2
6
7 8
9
10
11
12 13 14
15
16
5
3
4

3
Preliminaries
INTRODUCTION
This tiny but powerful camera is only thumb-sized but capable of
recording great video. The included accessory pack gives you lots of
mounting options for a variety of situations. Its size and light weight
make it perfect for carrying everywhere - just in case.
The camera may be used stand-alone or as a webcam when connected to a suitable PC
The carton contains:
The camera•
Three clip-on accessories•
USB cable•
When not in use the camera and the accessories should always be •
left in the box for safe storage.
UNPACKING
Remove the camera carefully from packing. The camera is in a •
protective see-through plastic wrap. We suggest you do not attempt to remove the wrap as all camera features are accessible
with the case on. Unwrap and uncoil the USB cable.
CONNECTING THE MICRO SD CARD
You will need to purchase a micro SD card. The camera will not operate
without the card installed. The camera supports cards up to 32 GB.
Insert the micro SD card into the SD card
slot as shown. Press it gently home using your thumb nail on the outer edge.
To remove the card place your thumb
nail on the edge and push inwards gently. The card will now release and can be
easily removed.
If you operate the camera without an SD
card it will power o after 30 seconds.
CHARGING THE CAMERA BATTERY
Fully charge the built-in battery before using the camera
Connect the camera to a USB port on your PC using the USB cable
provided. You may also use a Mains- USB adaptor.
While charging, a solid red light will glow and a blue light will ash.
Once fully charged, both lights will remain lit indicating the camera
is ready for use.
Note: when the battery power is low, the camera will enter protec-
tion mode and will not turn on until recharged.
 Loading...