

Page 1
PARKWAY (4 BIKE / 2 BIKE) 956/957/958
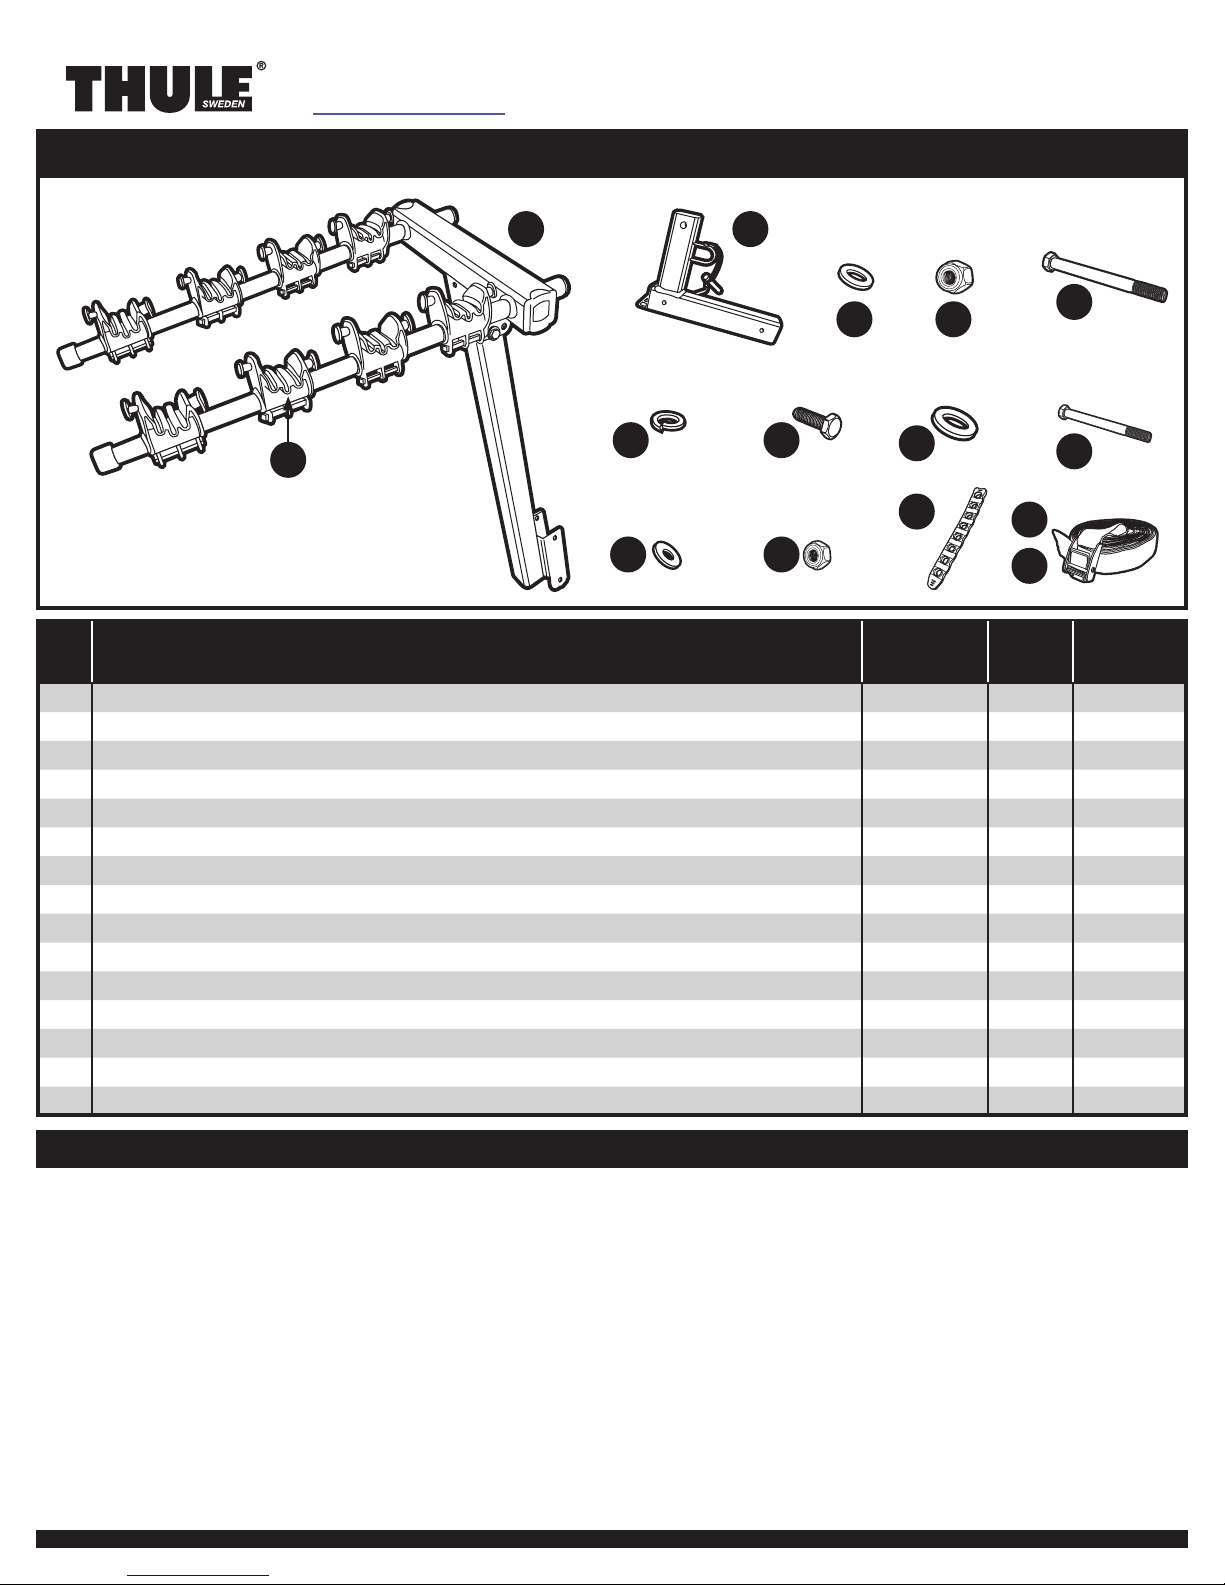
PARTS INCLUDED
BA
DC
L
J
pa
rt description
upright/bike arm assembly – 1 –
A
B stinger – 1 –
M10 washer 951-1122-54 2 2
C
D
3/8" lock nut 853-5779 1 1
E 3/8" hex screw 853-5778 1 1
F M12 lock washer 956-1221-59 1 1
G M12 x 40 receiver bolt 908-1240-54 1 1
M12 washer 951-1224-54 1 1
H
I
M8 hex bolt 908-0870-54 1 1
J M8 washer 951-0816-54 2 2
K M8 lock nut 938-0800-54 1 1
L cradle 853-7887 8 4
cradle strap 852-3006-001 8 4
M
N
(4 bike) strap 753-2030-07 1 –
O (2 bike) strap 753-2030-08 – 1
GF
K
H
M
part nu
956 qty. 957 / 958 qty.
mber
E
I
N
O
TOOLS REQUIRED
• Socket wrench with 13mm (1/2"), 14mm (9/16"),
19mm (3/4") sockets and an adjustable wrench (6" or
larger) or 13mm (1/2"), 14mm (9/16"), 19mm (3/4")
wrench and an adjustable wrench (6" or larger)
• No more than 4 bicyc
4 bike model Parkway.
• No more than 2 bicycles should be carried on the 2
bike model Parkway.
• Check tightness of all bolts and knobs periodically.
• Not intended for off-road use.
• Check straps for wear and replace if worn.
• Not intended for tandems or recumbents.
• Your vehicle must be equipped with a 2" or 1 1/4"
receiver hitch.
• Do not install on a trailer or other towed vehicle.
501550902_02
les should be carried on the
Page 2
1
2
•
A
•
•
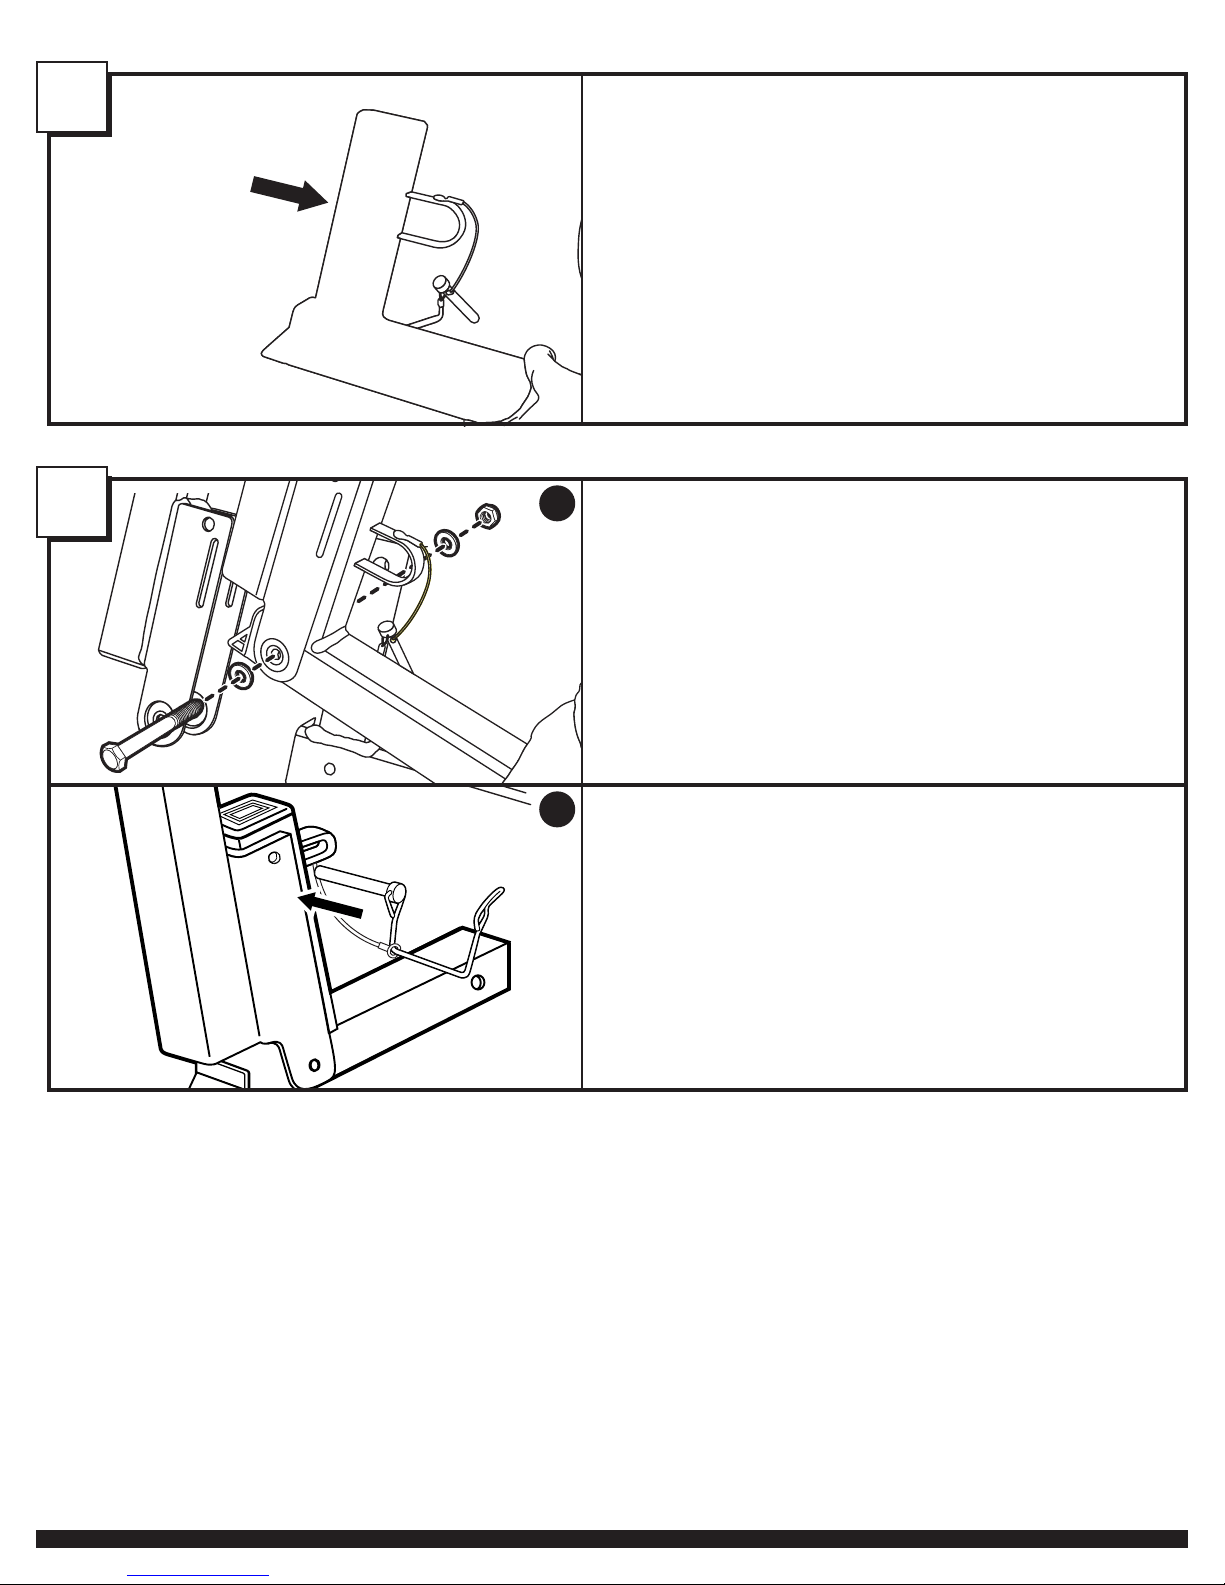
stinger into cradle of upper assembly as shown.
Position
Assemble
Tighten firmly with 13mm wrench and adjustable wrench.
M8 hex bolt (I), M8 washers (J) and M8 locking nut (K) as illustrated.
B
Insert
•
safety pin through holes of hitch and upper assembly as illustrated.
501550902_02
Page 3

3
• Slide hitch into hitch receiver until hole in horizontal tube aligns with receiver hole.
Secure in position with M12 x 40 receiver bolt (G), M12 lock washer (F), and
M12 washer (H) as illustrated. Tighten firmly with 19mm or (3/4") socket wrench.
NOTE: Illustrations show 956 /957 (2" receiver) application. Follow the same instructions for 958 (1 1/4" receiver).
4
A
Position
•
bike arm assembly in upright position as illustrated.
501550902_02
B
• Assemble 3/8" hex screw (E), M10 washers (C), and 3/8" lock (D) nut as illustrated.
• Tighten firmly.
Page 4

5
•
straps on hooks of cradles as shown.
Install
• Load heaviest bike first onto the inner most cradles.
Use accessory Frame Adapter (# 982 XT sold separately) for bikes without traditional
•
top tubes.
Cradles can be either rotated or shifted on bars to accommodate different bike
•
geometries.
Alternate direction of bikes when loading.
•
6
7
• Ensure straps are tightened securely around bike frame.
•
load strap provided, secure all bikes to main post.
Using
501550902_02
Page 5
8
9
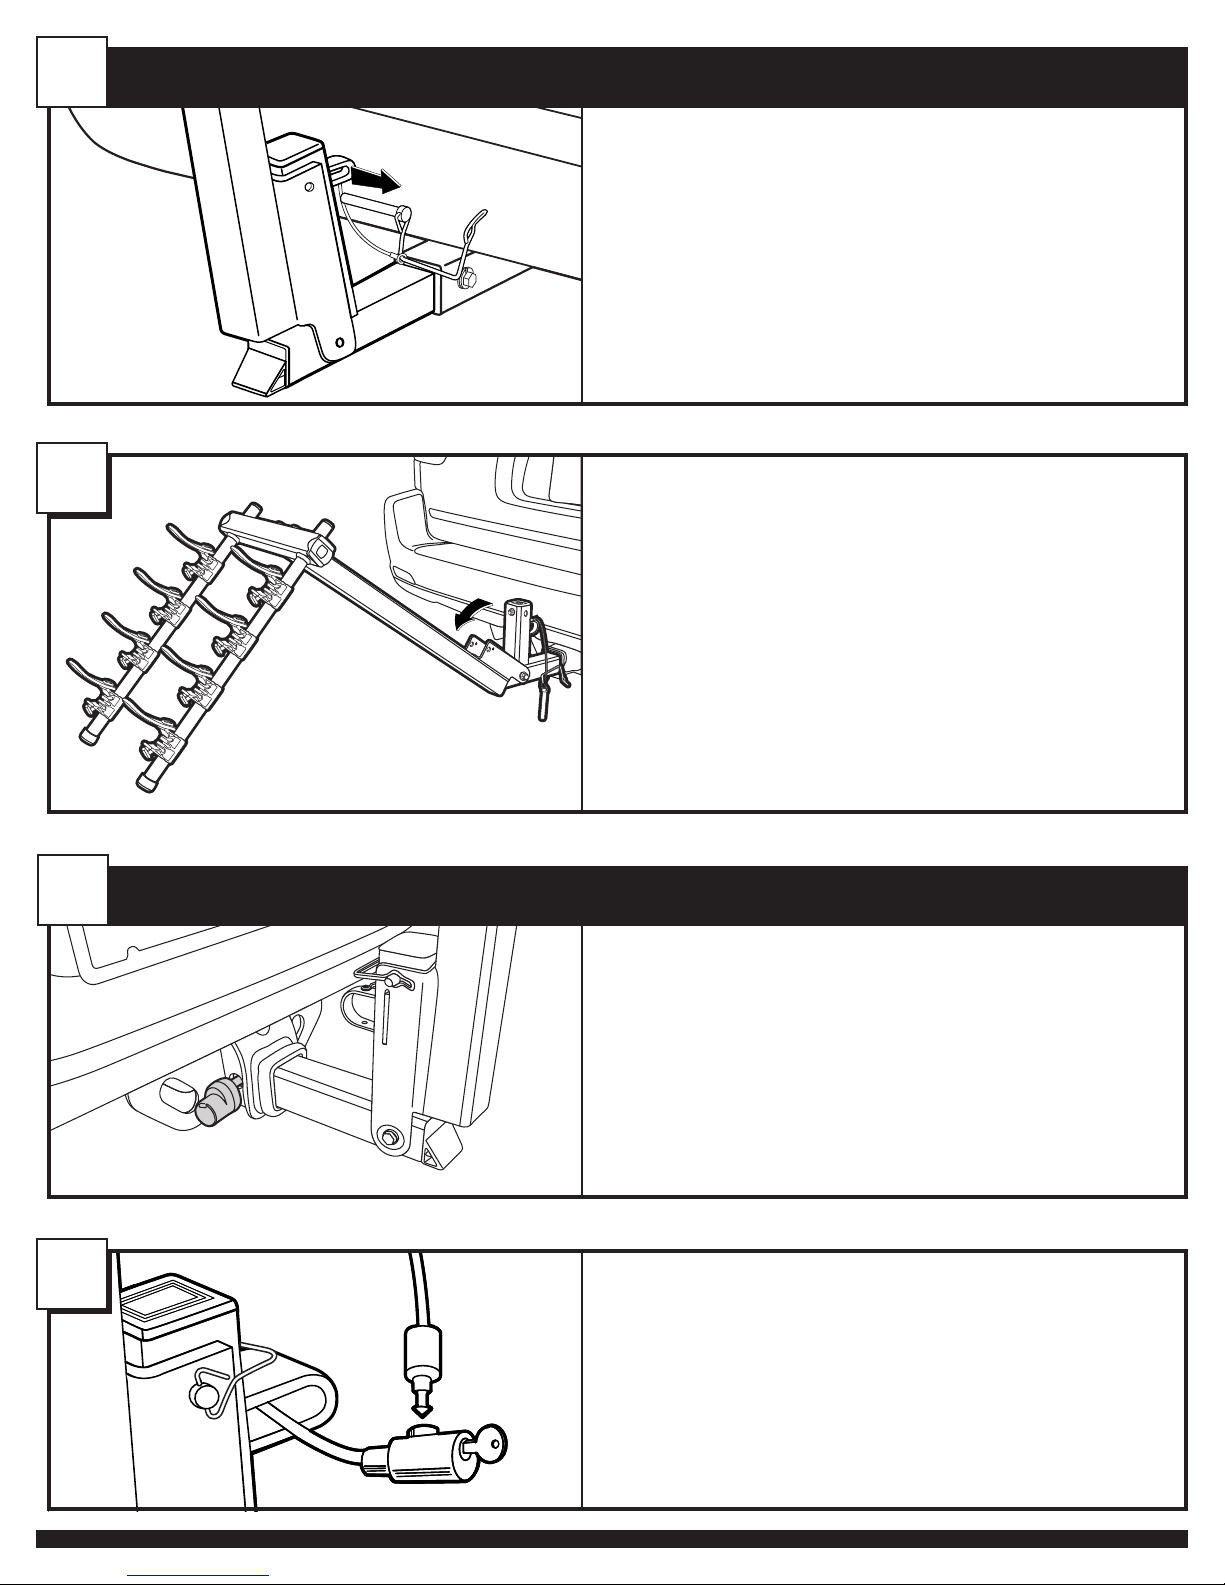
REAR COMPARTMENT ACCESS
• Bikes must be removed to lower carrier! Firmly hold the upright assembly with
one hand. Release the safety hook by pulling outward on the untethered end.
Slide pin out while supporting upright assembly.
•
lower carrier to the built-in stop position.
Gently
10
11
SECURITY
Using
•
Snug Tight Lock (# STL2 sold separately) carrier can be locked to vehicle hitch.
Using
•
Thule’s cable lock (# 538 XT sold separately) or your own cable lock, bikes
can
be locked to the carrier using the built-in Locking Eye.
501550902_02
 Loading...