

Page 1
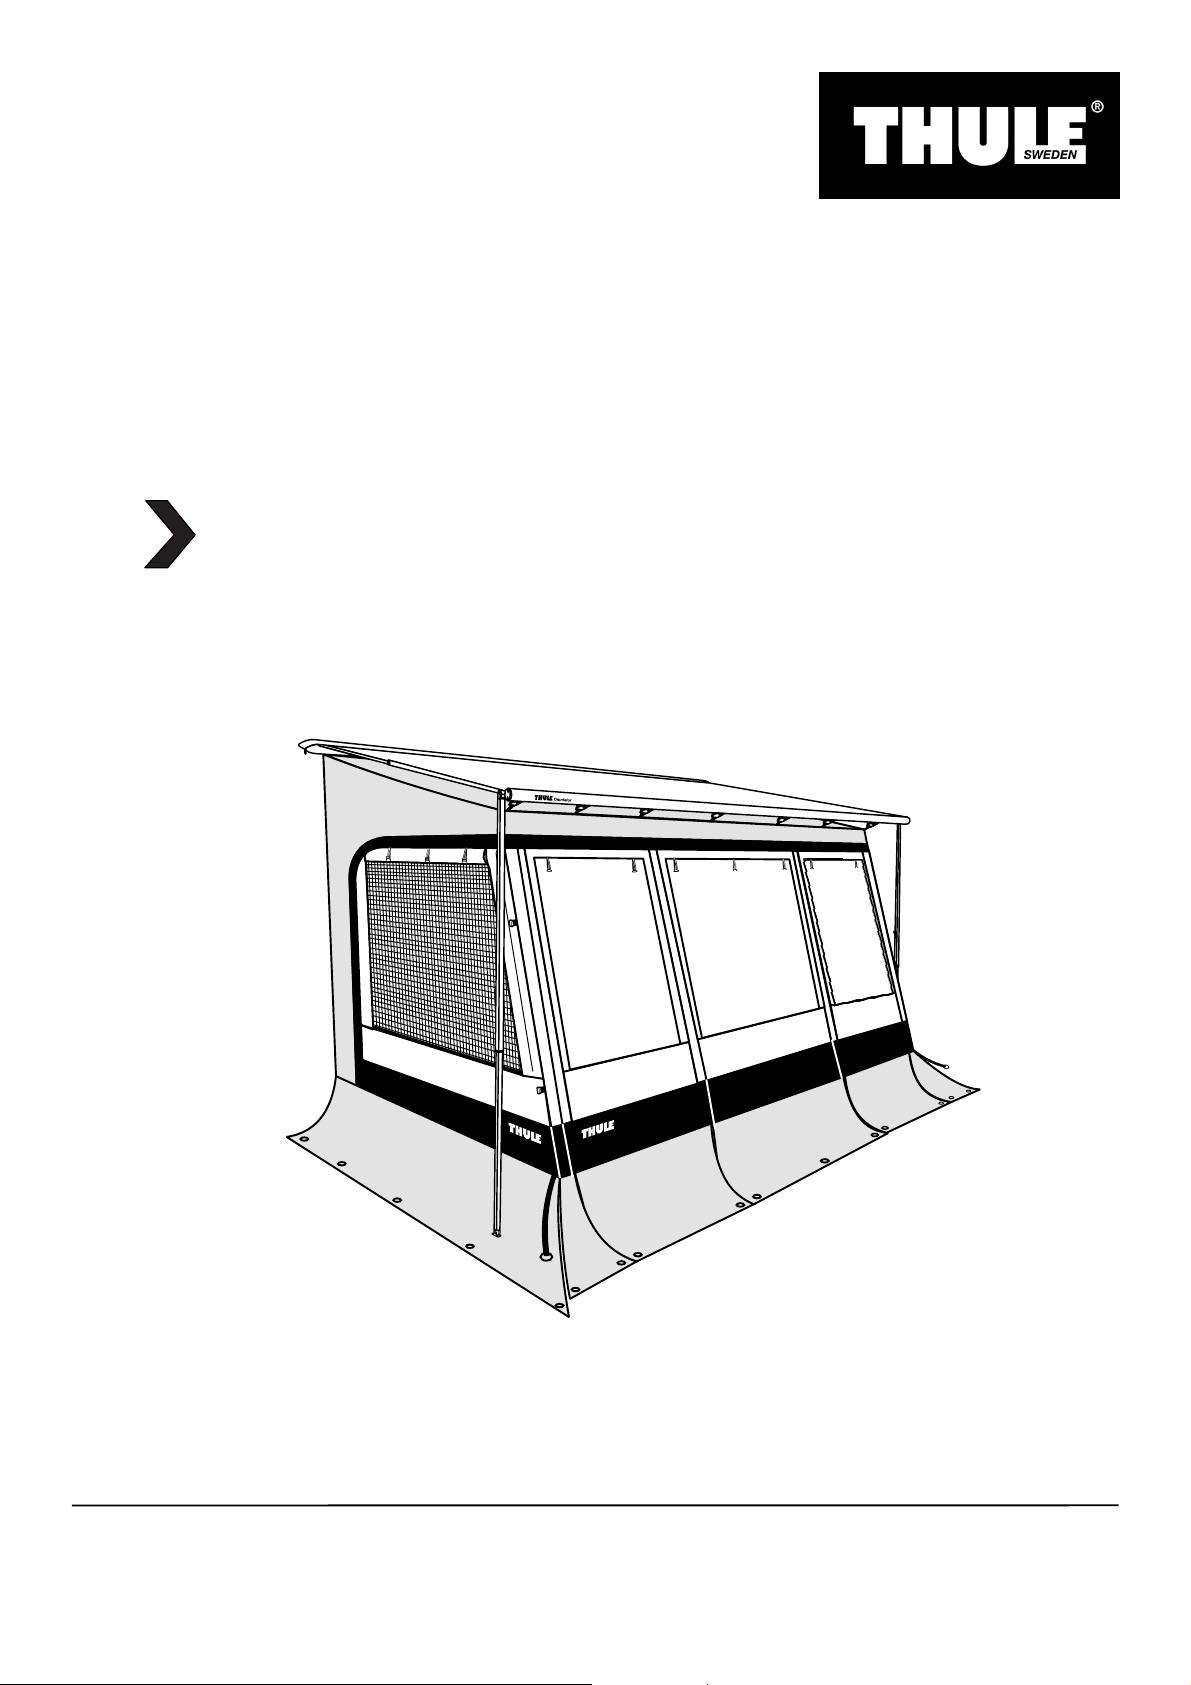
Thule EasyLink
Instructions
Prod no.: 309933 - 309935
Document: EYL900-01
Date: 11/06/2015
Bring your life
thule.com
Page 2
Thule EasyLink
Instructions
Prod no.: 309933 - 309935
Document: EYL900-00
Date: 12/12/2014
Bring your life
thule.com
12,2 - 14,3 Kg
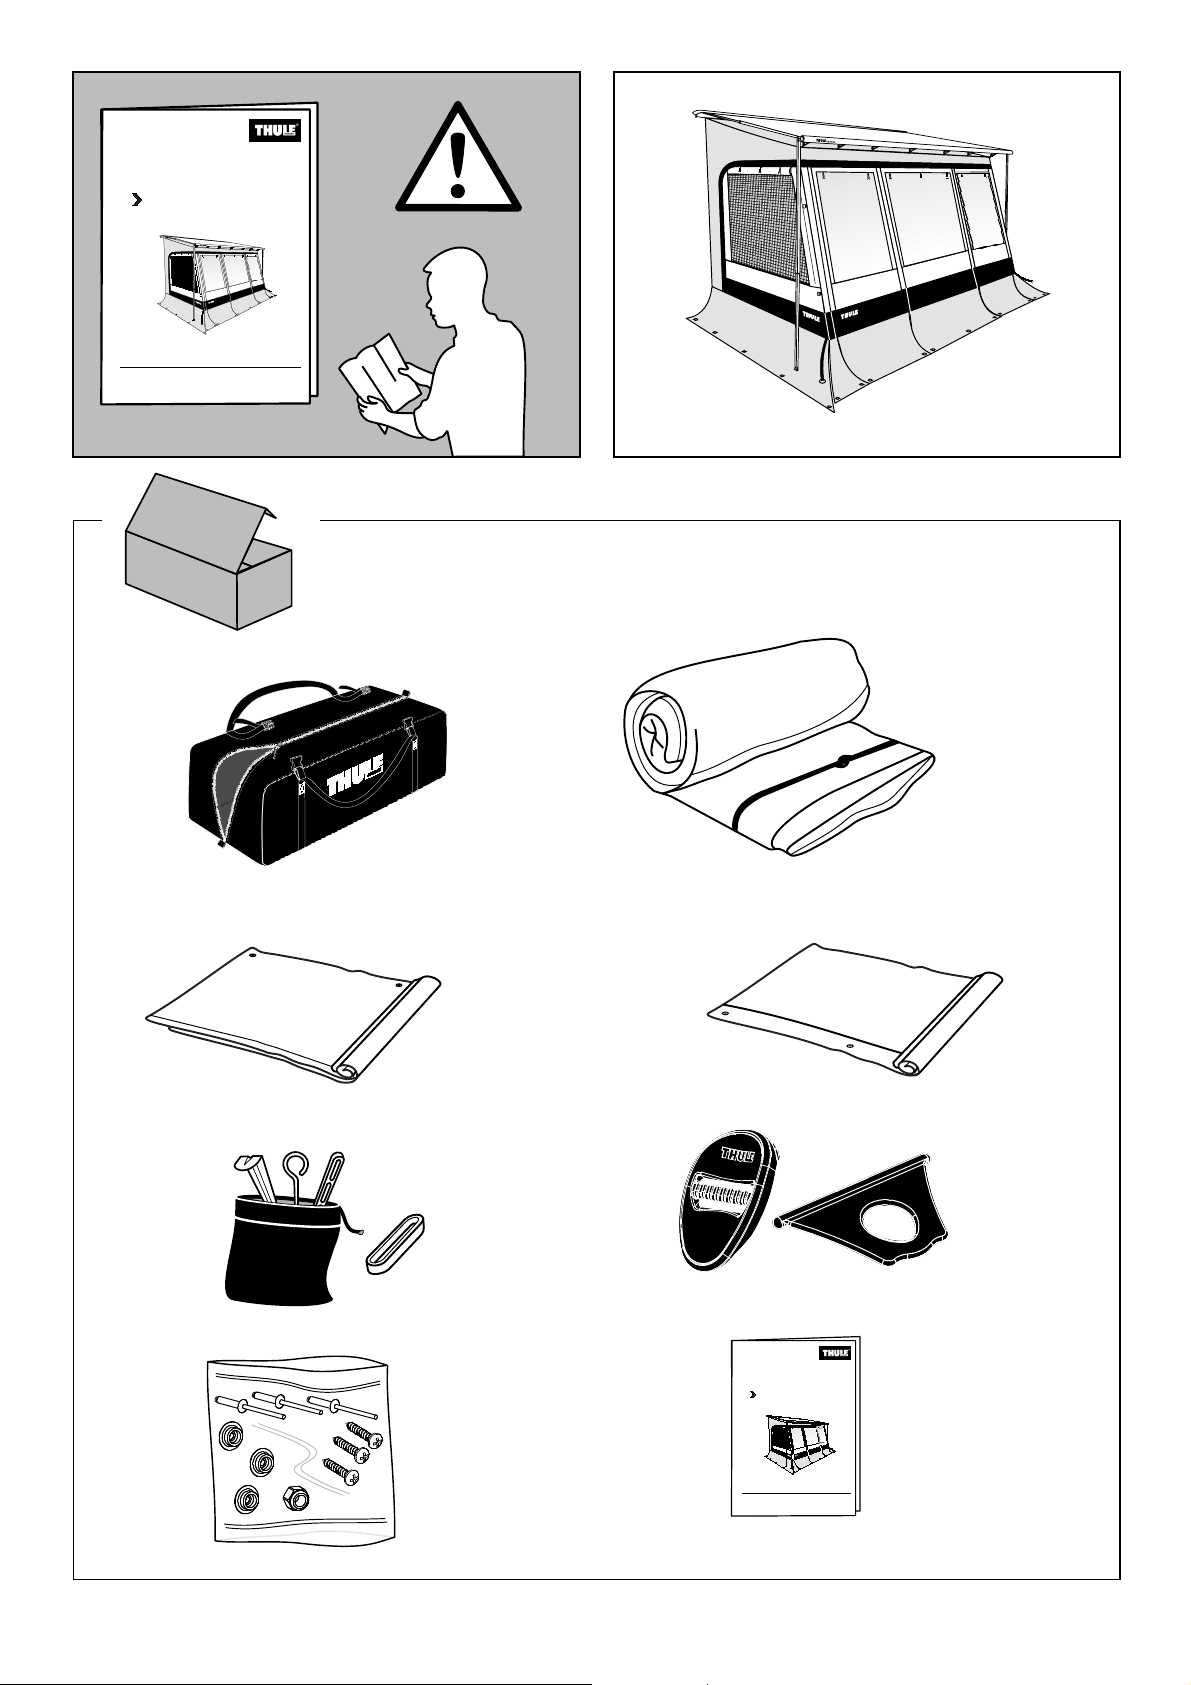
x1
x1
x1
x1
x8
x1
Thule EasyLink
Instruction s
Prod no.: 309933 - 309 935
Document: EYL900-0 0
Date: 12/12/2014
x1
2
Bring your life
thule.com
x1
EYL900-01
Page 3
1111
MAX.
!!!!
Thule Rafters
OOOOPPPPTTTTIIIIOOOONNNNAAAALLLL
OOOOPPPPTTTTIIIIOOOONNNNEEEEEEEELLLL
OOOOPPPPTTTTIIIIOOOONNNN
EYL900-01
Thule Hold Down
Side Strap Kit
307916
OOOOPPPPTTTTIIIIOOOONNNNAAAALLLL
OOOOPPPPTTTTIIIIOOOONNNNEEEEEEEELLLL
OOOOPPPPTTTTIIIIOOOONNNN
3
Page 4
2222
2222
1111
4444
3333
Original caravanrail
1111
SSSSTTTTAAAANNNNDDDDAAAARRRRDDDD
3333
EasyLink Mounting Kit TO 6200/9200
2222
EasyLink Mounting Kit TO 1200
OOOOPPPPTTTTIIIIOOOONNNNAAAALLLL
307063
4444
EasyLink Universal Mounting Kit
OOOOPPPPTTTTIIIIOOOONNNNAAAALLLL
307050
4
OOOOPPPPTTTTIIIIOOOONNNNAAAALLLL
307205 - 307206
EYL900-01
Page 5
3333
i
A
X8
X8
B
i
OOOOPPPPTTTTIIIIOOOONNNNAAAALLLL
iiii
oooo
EasyLink Kit Fiamma
OOOOPPPPTTTTIIIIOOOONNNNEEEEEEEELLLL
OOOOPPPPTTTTIIIIOOOONNNN
5555 mmmmmmmm
307061
OOOOPPPPTTTTIIIIOOOONNNNAAAALLLL
OOOOPPPPTTTTIIIIOOOONNNNEEEEEEEELLLL
OOOOPPPPTTTTIIIIOOOONNNN
EYL900-01
Thule Tension Rafters
5
Page 6

4444
*
P.10-13
5555
AAAA
BBBB
CCCC
6
EYL900-01
Page 7

6666
!!!!
AAAA
AAAA
CCCC
BBBB
BBBB
AAAA
CCCC
CCCC
BBBB
AAAA
CCCC
BBBB
CCCC
EYL900-01
7
Page 8

7
A
B
C D
x3
Foam, Schaum, Schuim, Mousse
C
Neu
t
x1
B
D
ilico
n
tral
S
Neu
4mm
Wood, Holz, Hout, Bois
con
e
ral Sil
i
x3
A
e
A
x3
i
i
A
C
3mm
i
i
i
i
D
B
E
i
8
EYL900-01
Page 9

i
!
!
i
!
EYL900-01
!
9
Page 10

EN
Warranty
- Read the installation instructions carefully. Wrong installation, use or repair voided warranty. If recovery is needed, consult a
dealer.
General remarks
- Check if the supplied EasyLink suits the type, length, and the projection of the canopy. Check that the height of the tent
matches the mounting height of the caravan rail (height between the ground and the rail where the tent slides in).
- Make sure the vehicle is leveled.
- The sun can affect colors depending on usage.
Steps 1 to 7
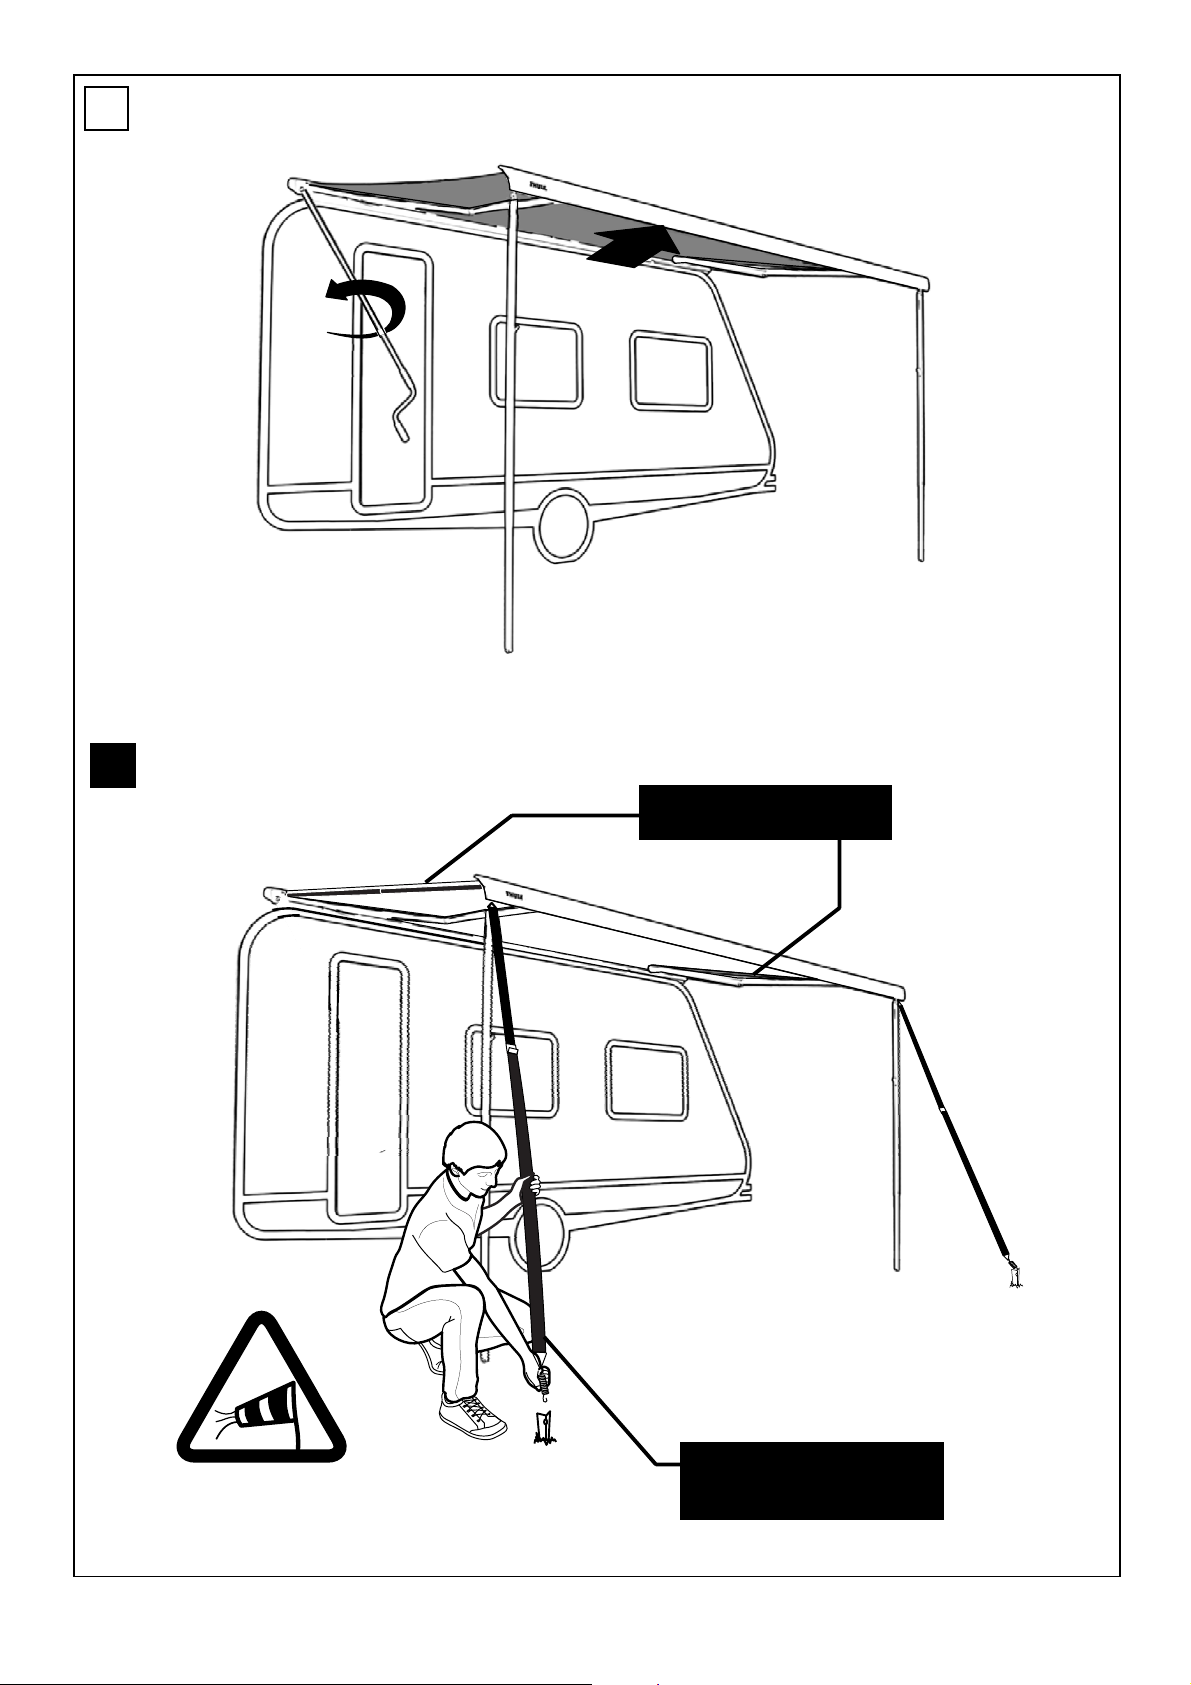
1. Open the awning maximal.
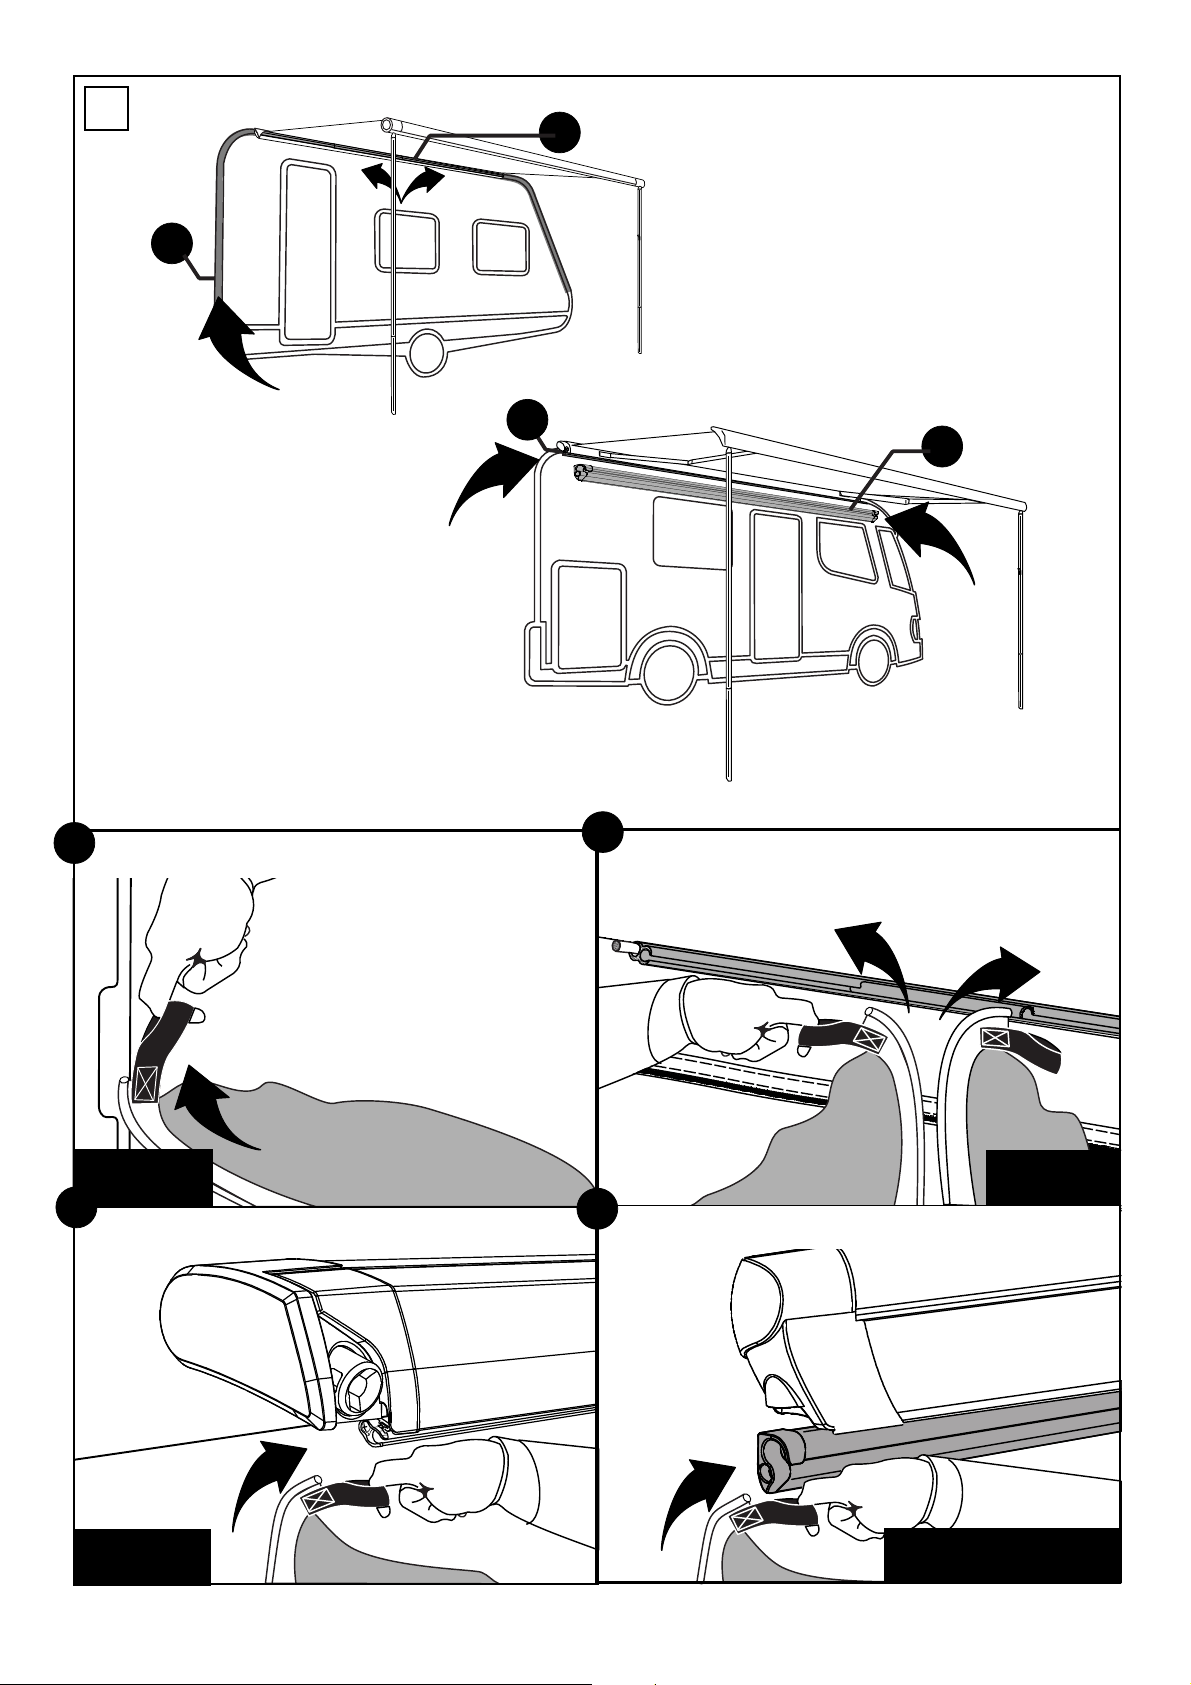
2. Slide the tendon of the tent trough the rail that is located under your awning. Use the pull-tab. For easy installation, do this
with two people.
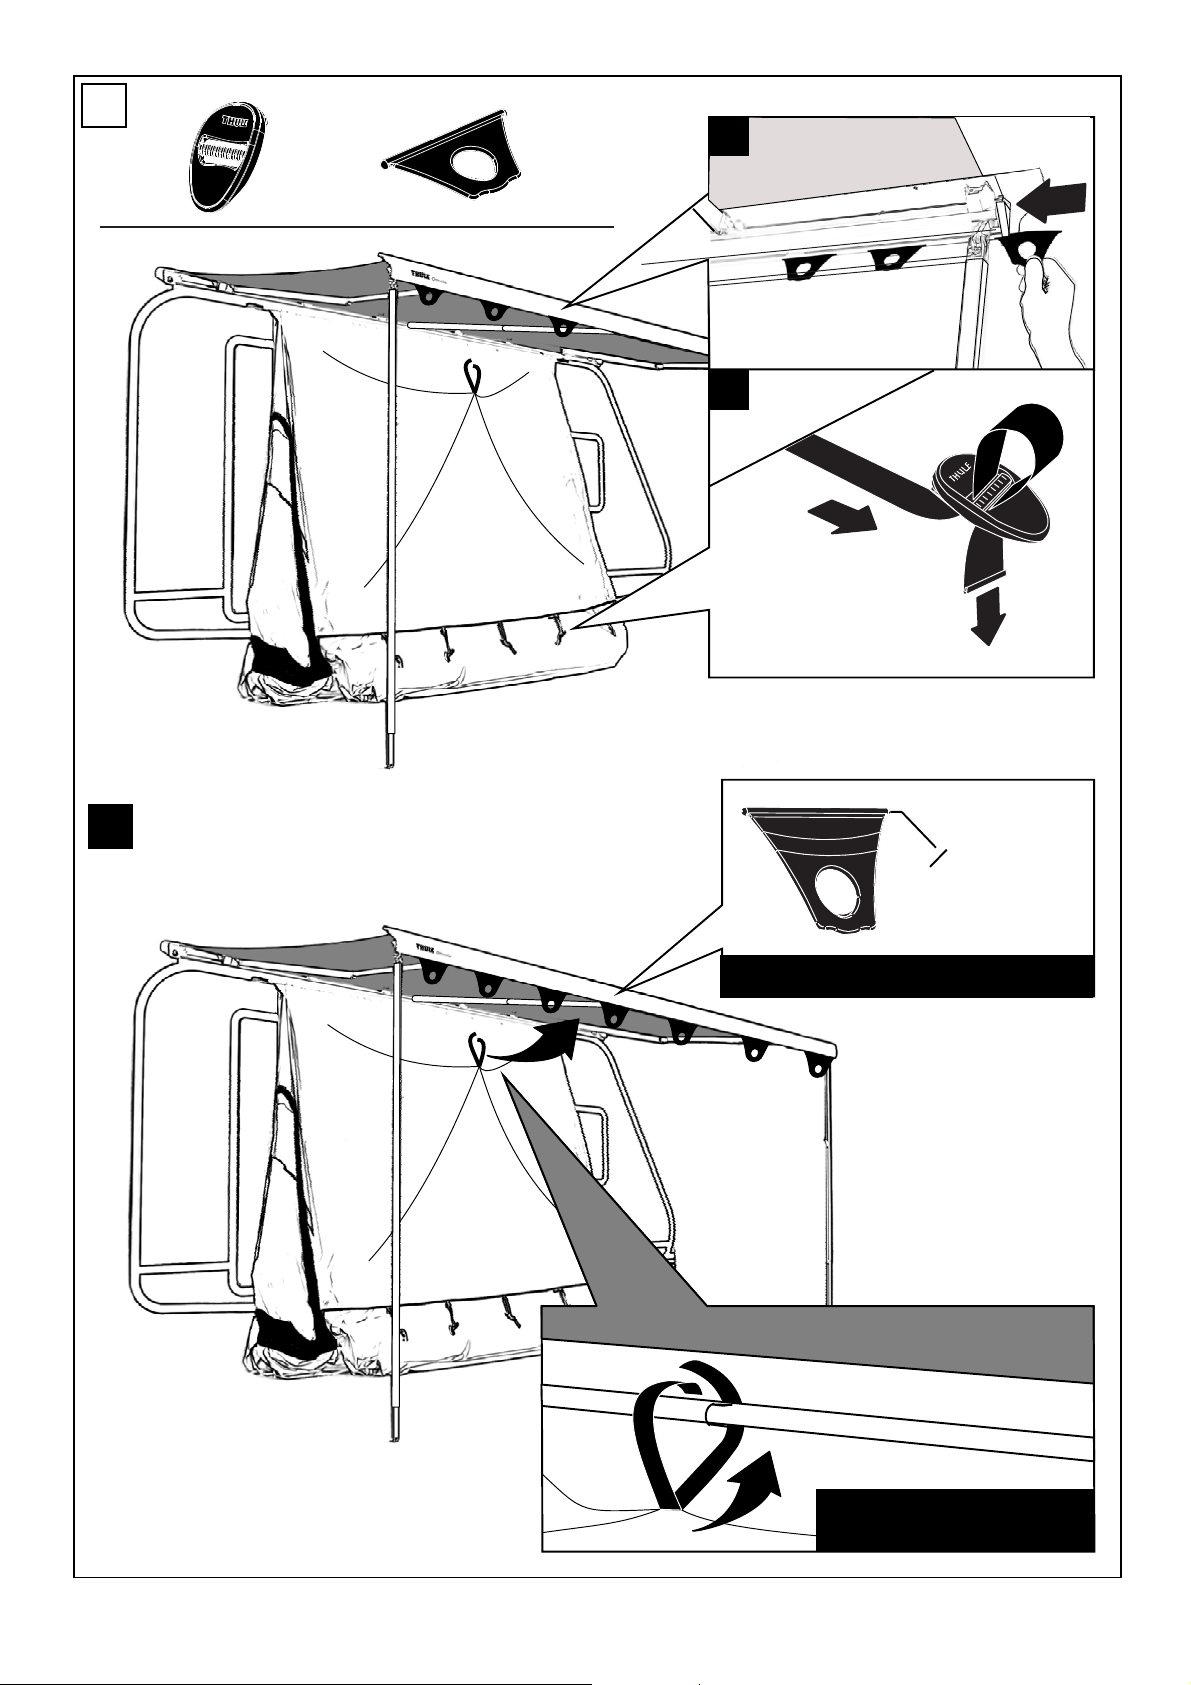
3. Slide the pieces with the eye in the lead rail of the awning and the pieces with a hook on the straps of the tent. Bind the
velcro on the roof around the tension rafter if you want to hang a lamp inside the tent.
4. Hook the tent to the front profile using the mounting pieces. Use both hands to clamp the tent. * If the support leg of the
awning is standing on the windslip, make sure you add proper support under it to prevent damaging the tent.
5. Put the tent leveled, but the awning under a slight angle for proper water drainage.
6. Fix the EasyLink with pegs and pins, but always with closed zippers. Start at the back of the vehicle and hook the strap to the
vehicle. [A] Proceed with the front and tension the 2 straps with rings on the corners. Make sure all walls are straight and well
tensioned. [B] Finally use proper pegs depending on the type of soil to fix the tent to the ground. [C]
7. Assemble the windslip through the caravan rail. Attach the wheel cover using the screws ( for walls with wood base ) or
rivets ( for walls with foam base ). Close the holes with silicone to avoid water infiltration.
Safety
- Put one side of the awning lower so that when it rains the water can drain.
- When wind reaches 6 Bft. please store the tent and close the awning.
- Don’t place heat sources near the walls or the roof.
- Avoid covering the refrigerator grille with the tent.
- Use a Strap kit and a tension rafter on the awning before tightening the tent completely.
Maintenance
- Make sure that before installing the tent, the connections to the vehicle are sufficiently clean. Sand, dust or dirt could cause
damage to your vehicle. When you stay for a long period, clean the tent a few times.
- Ensure that there are no hard objects on the windows of the tent during folding. This is to prevent impressions on the window.
- Let the tent dry thoroughly before storing.
- Use pure water or a dry brush to clean the tent.
- Condensation inside the tent is normal. Ventilate the tent adequately.
10 EYL900-01
Page 11

NL
Garantie
- Lees deze montage instructies aandachtig. Bij verkeerde montage, gebruik of eigenhandig herstel vervalt elke aanspraak op
garantie. Indien herstel nodig is, raadpleeg een Dealer.
Algemene opmerkingen
- Controleer vooraf of de geleverde EasyLink past bij het type, de lengte en de uitval van de luifel. Kijk na of de hoogte van de
tent overeenkomt met de montagehoogte van de caravanrail (hoogte tussen de grond en de rail waar de tent zal inschuiven).
- Zorg ervoor dat het voertuig horizontaal staat.
- De zon kan kleuren aantasten afhankelijk van het gebruik.
Stappen 1 tot 7
1. Draai de luifel maximaal open.
2. Schuif de pees van de tent door de rail die zich onder uw luifel bevindt. Gebruik hiervoor de treklus. Doe dit bij voorkeur met
twee personen.
3. Schuif de stukken met het oog in de voorlat en de stukken met een haak op de riemen van de tent. Bind de velcro, die zich
aan het dak van de tent bevindt, rond een tension rafter als u een lamp aan de binnenkant van de tent wil bevestigen.
4. Haak de tent aan de voorlat met behulp van de bevestigingsstukken. Gebruik beide handen voor het opspannen van de tent.
* Als de steunpoot van de luifel op de slijkrand staat, zorg er dan voor dat de steunpoot voldoende ondersteund is om schade
aan de tent te voorkomen.
5. Zet de tent waterpas en de luifel aan één zijde lager voor een goede waterafloop.
6. Span de EasyLink op en dit steeds met gesloten ritsen. Begin achteraan het voertuig en haak de riem aan het voertuig [A] Ga
door met de voorkant en span de 2 riemen met ring aan. Zorg ervoor dat de wanden strak staan.[B] Als laatste, gebruik de
juiste haring naargelang de soort van ondergrond om de tent aan de grond te bevestigen [C]
7. Monteer de windslip door de caravanrail. Bevestig de wielflap, met behulp van de meegeleverde schroeven (voor wanden
met basis hout) of klinknagels (voor wanden met basis schuim). Dicht gaten altijd af met silicone om insijpelen te vermijden.
Veiligheidsinstructies
- Zet één kant van de luifel wat lager zodat bij regen het water kan aflopen.
- Vanaf windkracht 6 Bft. gelieve de tent op te bergen en uw luifel te sluiten.
- Geen warmtebronnen in de buurt van de wanden of het dak plaatsen.
- Vermijd bedekking van het koelkastrooster.
- Gebruik altijd een Strap kit en een tension rafter om de luifel volledig af te spannen alvorens de tent op te spannen.
Onderhoud
- Kijk vóór het plaatsen of de tent langs de connecties met het voertuig voldoende proper zijn. Zand, stof of vuil zou schade
kunnen veroorzaken aan uw voertuig. Bij langdurige opstelling ook tussentijds reinigen.
- Zorg ervoor dat er geen harde voorwerpen op de ruiten van de tent liggen tijdens het opvouwen. Dit om afdrukken in de ruit
te voorkomen.
- Laat de tent goed drogen alvorens op te bergen.
- Gebruik zuiver water of een droge borstel om de tent te reinigen.
- Condens in de tent is normaal. Verlucht de tent op voldoende wijze.
EYL900-01 11
Page 12

DE
Garantie
- Bitte lesen Sie die Montagevorschriften gründlich durch. Bei verkehrter Montage oder Änderung des Produkts entfallen alles
Garantieansprüche. Im Falle von Reparaturen wenden Sie sich bitte an Ihren Fachhändler.
Allgemeine Bemerkungen
- Überprüfen Sie dass das gelieferte EasyLink korrespondiert mit dem Markisentyp, Länge und Auszug. Überprüfen Sie die Anbauhöhe
der Markise (Die gemessene Höhe zwischen der Caravan Rail und dem Boden).
- Sorgen Sie dafür dass Ihr Fahrzeug Waagerecht steht.
- Die Sonne kann Farben beeinflussen je nach Gebrauch
Schritte 1 bis 7
1. Drehen Sie die Markise offen.
2. Schieben Sie das Keder vom Zelt in die Caravan Rail. Verwenden Sie das Pull-Loop (Zugschlaufe). Am besten mit 2 Personen.
3. Schieben Sie die dreieckige Halterungen mit Loch in der Frontleiste, die Halterung mit haken schieben Sie auf die Riemen vom Zelt.
Montieren Sie die Klettband am eine Spannstange wenn Sie eine Lampe auf die Innenseite des Zeltes anhängen wollen.
4. Haken Sie das Zelt fest an den dreieckigen Halterungen. Benützen Sie beide Hände um das Zelt an zu spannen. * Wenn die Stützbeine
auf der windslip stehen, stellen Sie sicher das ein Unterstützung darunter ist, um Beschädigung des Zeltes zu verhindern.
5. Setzen Sie das Zelt parallel mit dem Markise. Stellen Sie die Markise schräg für einen besseren Wasserablauf.
6. Spannen Sie das EasyLink an mit geschlossenen Reisverschlüsse. Fangen Sie mit den abspannen von der Riemen an am Fahrzeug. [A]
Und dann können Sie der 2 Riemen von die Vorderseite abspannen. [B] Zu Letzt spannen sie das Zelt ab. [C]
7. Montieren Sie die Wagenschürze und die Wagenschürze über den Radkasten.
Sicherheit
- Stellen Sie die Markise schräg für einen besseren Wasserablauf.
- Ab Windstärke 6 : das Zelt abbauen und die Markise einfahren.
- Keine Wärmequellen in der Nähe der Wände oder das Dach setzen.
- Vermeiden Sie die Abdeckung vom der Kühlschranklüftung oder andere Belüftungsgitter.
- Verwenden Sie immer einen Side Strap Kit zur Abspannung der Markise und eine Spannstange für die optimale Tuchspannung.
Unterhalt
- Vor der Montage des Zeltes, überprüfen Sie dass die Andrucks Fläche vom Zelt an dem Fahrzeug gesäubert ist. Sand, Stoff oder
Schmutz können an Ihren Fahrzeug Schaden verursachen. Über einen längeren Zeitraum sollen die Flächen regelmäßig gesäubert
werden.
- Vermeiden Sie beim Falten des Zeltes dass sich keine harten Gegenstände oder Schmutz mit einrollen. Es kann abdrücke verursachen
auf die Fensterfolie.
- Lassen Sie das Zelt gut austrocknen vor dem zusammenfalten.
- Benützen Sie nur sauberes Wasser und eine trockene weiche Bürste um das Zelt zu reinigen.
- Kondenswasser im Inneren des Zeltes ist normal. Lüften Sie das Zelt ausreichend.
12 EYL900-01
Page 13

FR
Garantie
- Lisez attentivement les notices d’installation. Une mauvaise installation, utilisation ou propre réparation annule toute garantie.
Si la réparation est nécessaire veuillez consulter votre revendeur.
Remarques générales
- Vérifiez si le EasyLink fourni correspond au type, longueur et avancé du store. Vérifiez que la hauteur de l’auvent correspond à
la hauteur de montage du rail d’auvent de la caravane ( la hauteur entre le sol et le rail d’auvent ) .
- Assurez-vous que le véhicule soit à niveau horizontale.
- Dépendant de l’utilisation le soleil peut affecter le coloris de la toile
Étapes 1 à 7
1. Ouvre le store à fond.
2. Glissez le jonc de l’auvent dans le rail qui se trouve sous votre store. Utilisez la tirez-onglet. De préférence à faire à deux.
3. Glissez les fixations noires avec l'œil dans le profil avant du store et attachez les pièces avec un crochet sur les sangles de
l’auvent. Attache le velcro au toile au tendeur si vous voulez attacher une lampe à l'intérieure du tente.
4. Accrochez l’auvent sur les fixations de la barre de charge. Utilisez vos deux mains pour serrer les sangles. * Si les pieds de
support est sur le windslip, assurez-vous d'ajouter un support approprié en dessous pour éviter d'endommager la tente.
5. Mettez l’auvent horizontal et abaissez un pied du store pour obtenir un meilleur écoulement de l’eau en cas de pluie
6. Serrez le EasyLink toujours avec des fermetures éclair fermées. Commencez à l'arrière du véhicule et attache le crochet au
véhicule.[A] Continuez à l'avant et tirez sur les 2 sangle avec œil pour mettre la tensions sur les parois.[B] Ensuite utilisez les
piquettes en fonction du type de sol et attache la tente au sol.
7. Glissez la bande anti-courant d'air dans le rail de la caravane. Fixez le cache- roue à l'aide des vis ( pour les murs en bois ) ou
des rivets ( pour les murs en mousse). Remplissez les trous avec du silicone pour éviter tout infiltration de l’eau.
Sécurité
-Abaissez un pied de store pour obtenir un meilleur écoulement de l’eau en cas de pluie.
- À partir d’une force de vent de 6 Bft démontez l’auvent et fermez le store.
- Ne placez aucune source de chaleur près des murs ou du toit.
- Ne pas couvrir la grille du réfrigérateur.
- Utilisez toujours une sangle anti-tempête ainsi qu’un tendeur avant de tendre l’auvent
Maintenance
- Vérifiez bien avant le montage que les connexions entre l’auvent et la paroi du véhicule soient suffisamment propres . Le
sable, la poussière ou la saleté peuvent endommager votre véhicule. Nettoyer régulièrement en cas d’un long séjour.
- Assurez-vous qu'il n'y a pas d'objets extérieurs sur la fenêtre du tente lors du repliage. Ceci afin d’éviter des encoches dans la
toile.
- Laissez sécher la toile complètement avant de la ranger .
- Utilisez de l'eau claire ou une brosse sèche pour nettoyer.
- De la condensation à l'intérieur de l’auvent est normal. Aérez suffisamment.
EYL900-01 13
Page 14

NOTES
14
EYL900-01
Page 15

NOTES
EYL900-01
15
Page 16

307053
Thule Side Tensionning Kit
307052
Thule Projection Kit
2m75 - 3m00
 Loading...