

THRUSTME CRUISER Instruction Manual
INSTRUCTION MANUAL
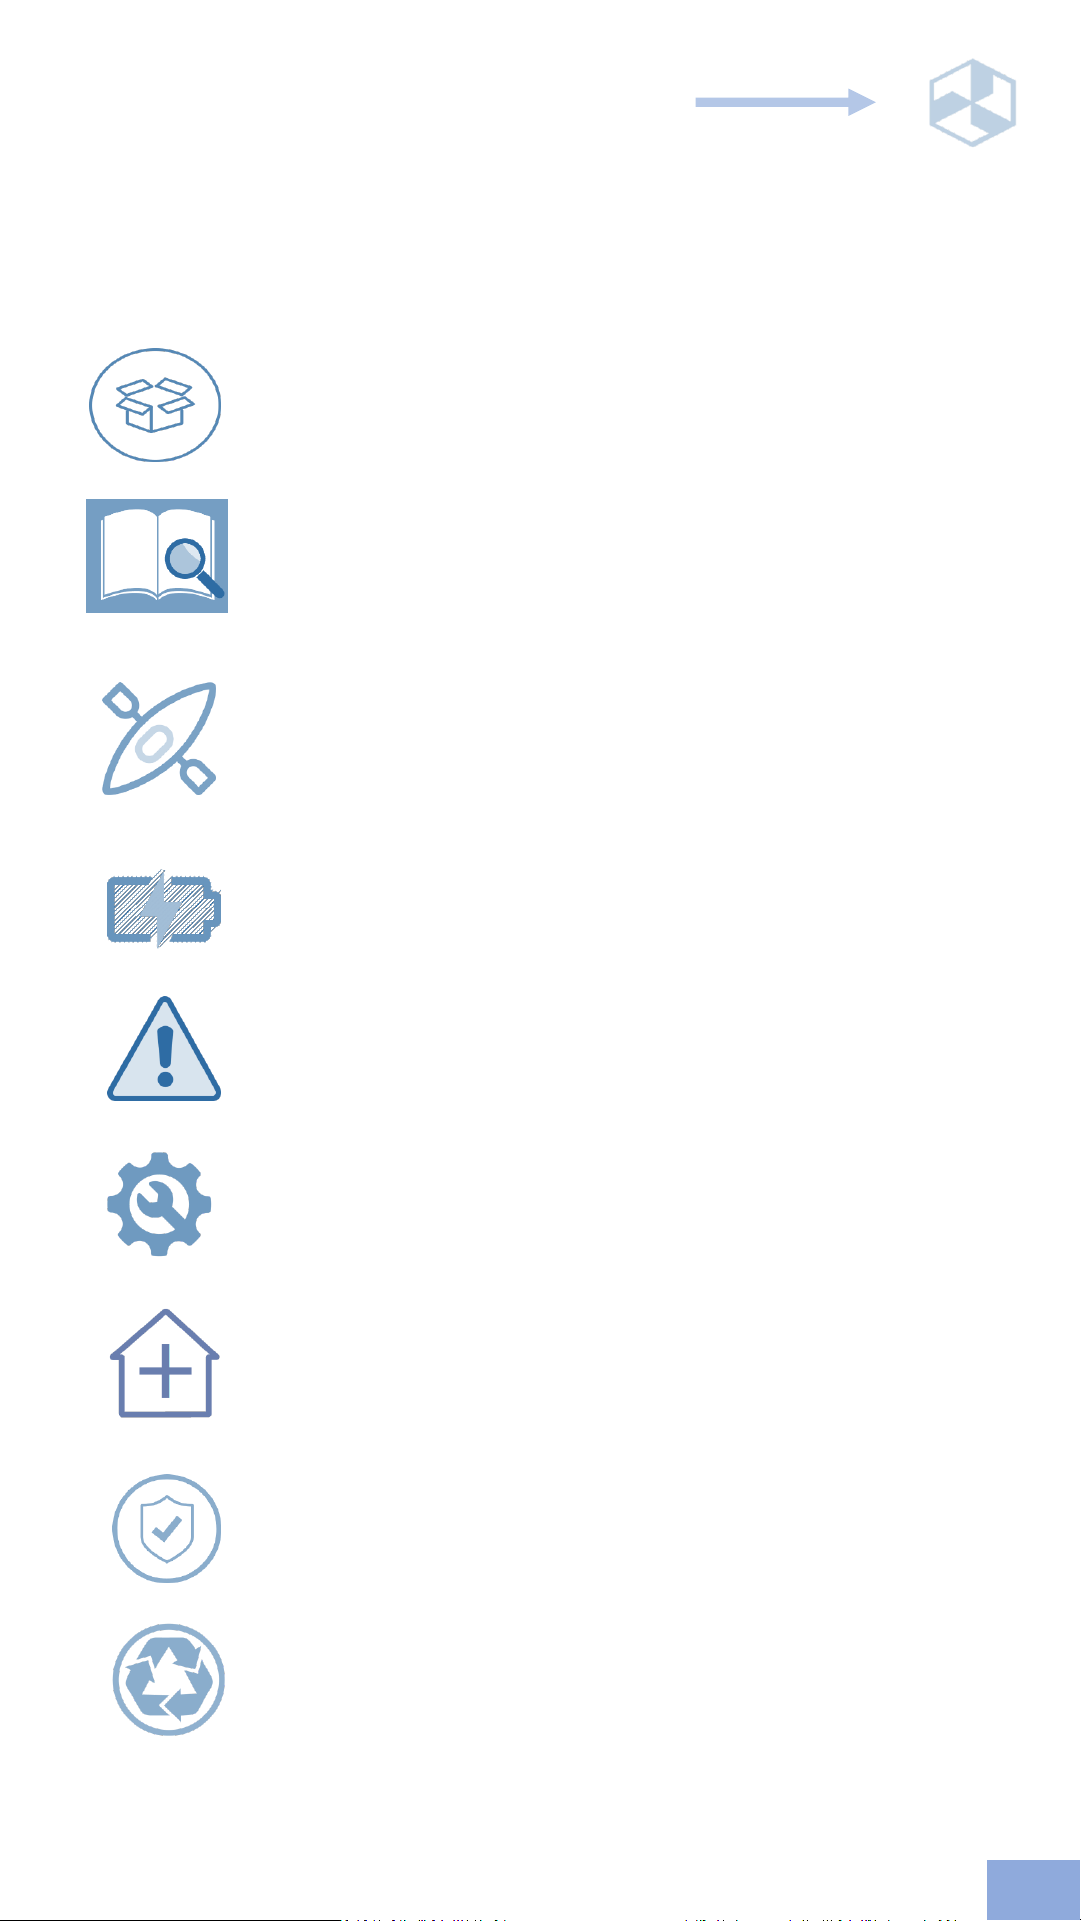
TABLE OF CONTENTS
What's in the box
How things work
How to fit on a kayak, canoe, SUP etc.
How to charge and store the batteries
Maintenance and service
Recycle and disposal
Spare parts and extras
Find your icon on the pages to learn more
Warranty
Warnings
EN
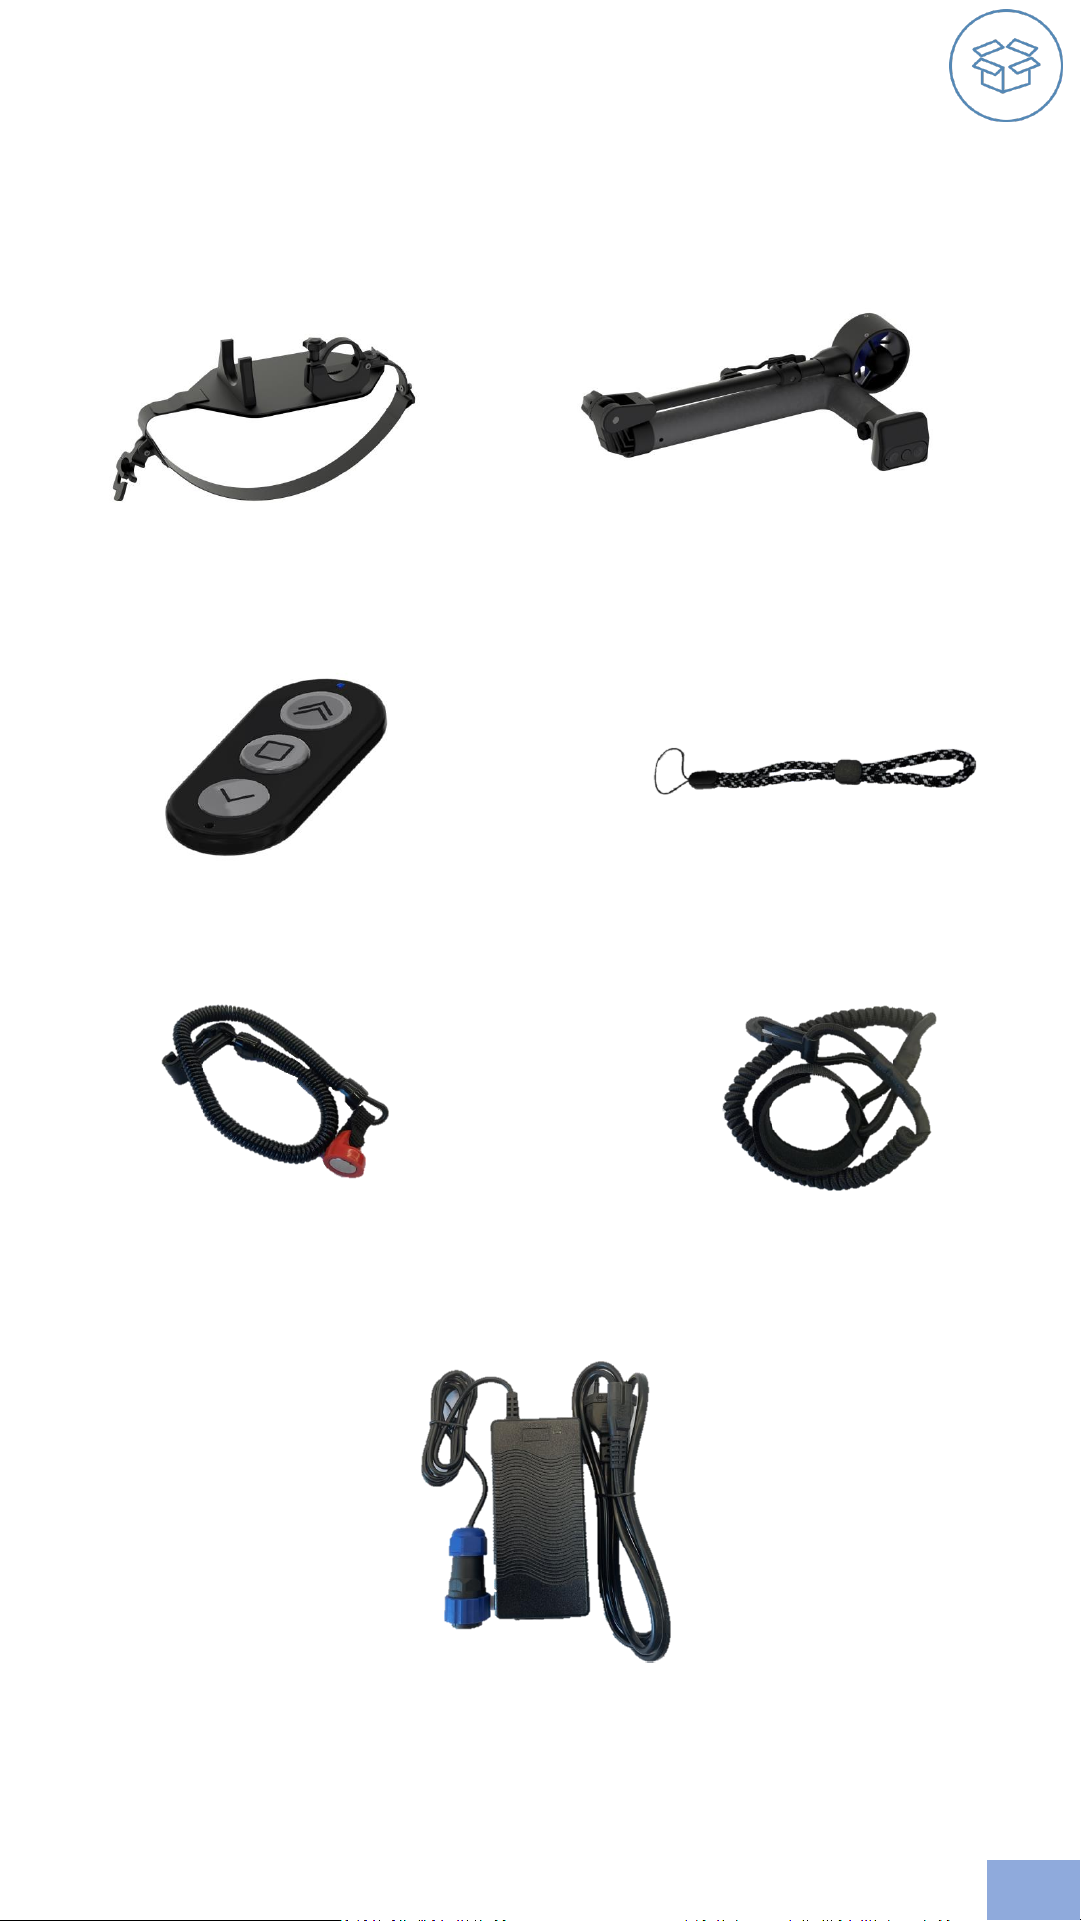
INCLUDED IN THE BOX
Mounting harness for kayak, canoe and SUP x1
CRUISER motor X1
Wrist band for remote X1
CRUISER safety cord X1Magnetic kill switch X1
CRUISER charger 230V X1
CRUISER remote X1
EN
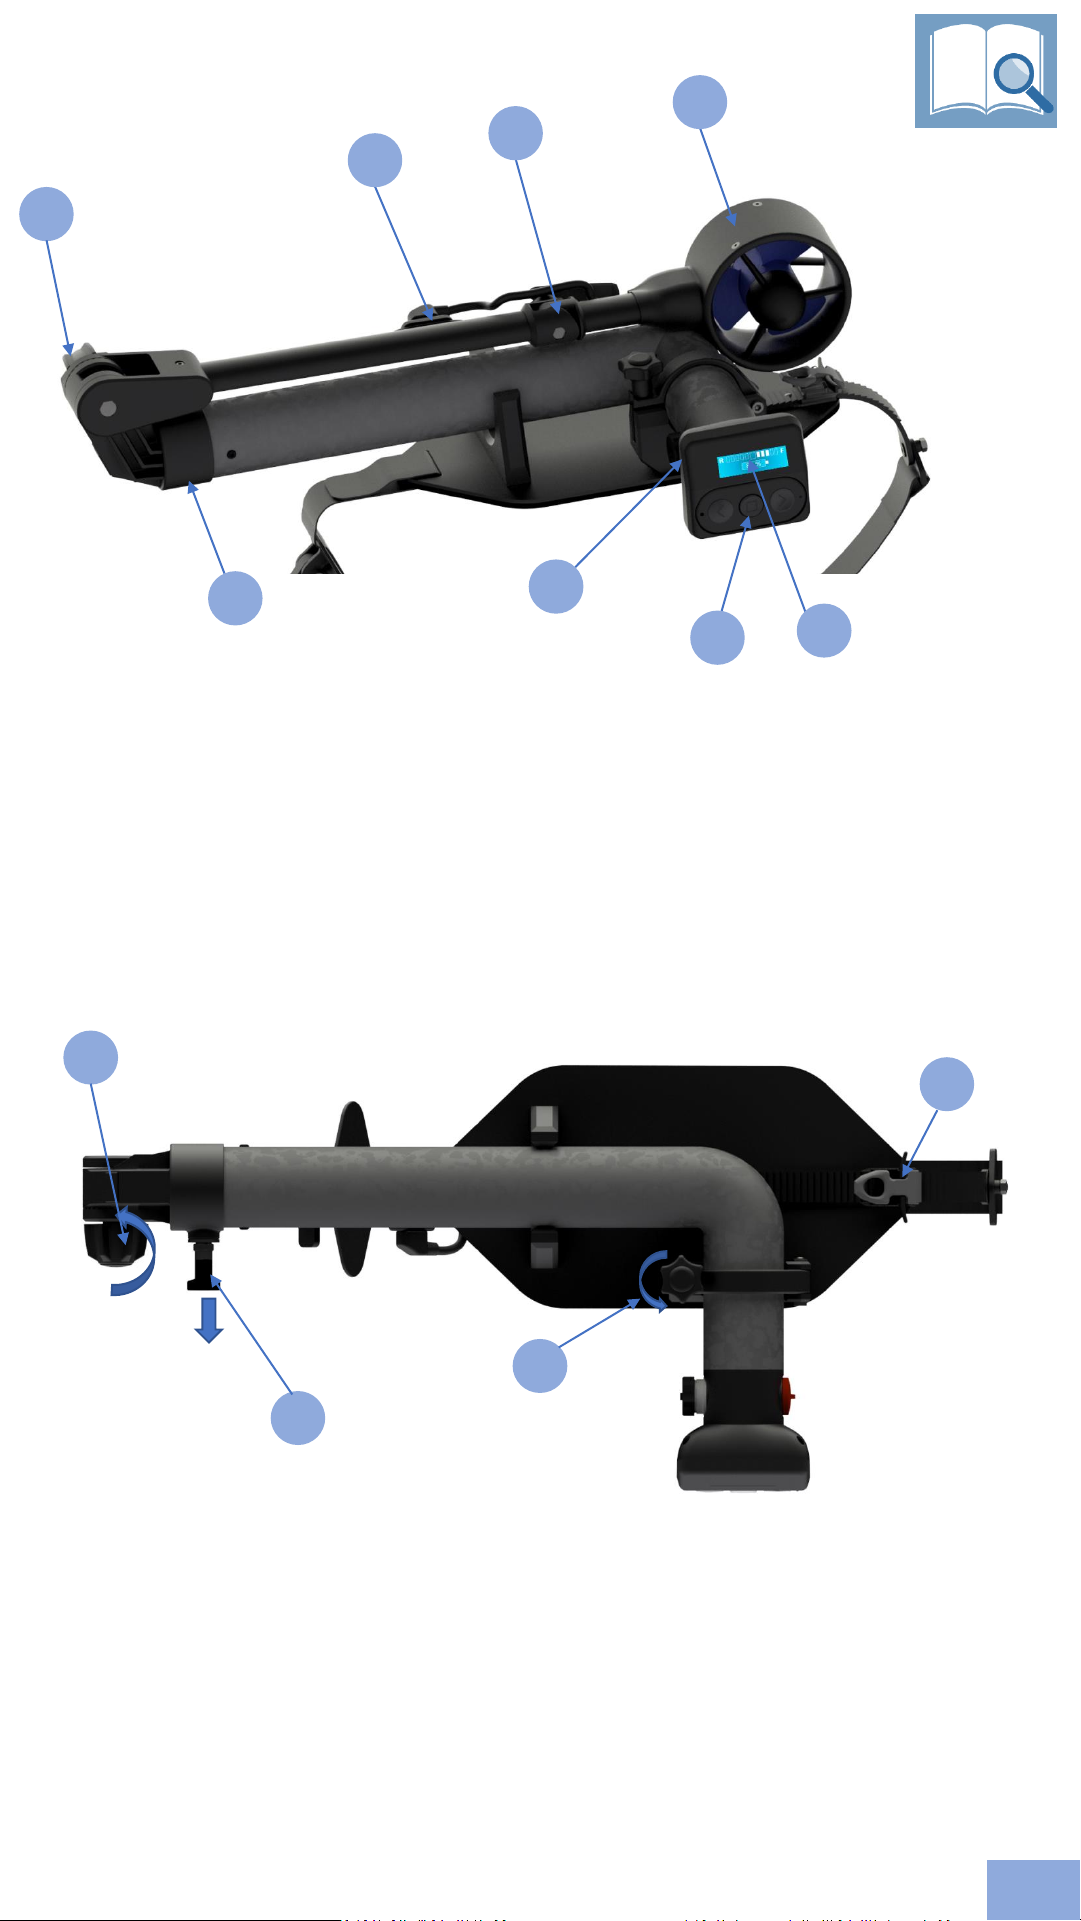
MAIN FUNCTIONS
7
8
1
1. Upper pivot point.
2. 3-pin motor connector
3. Lower pivot point
4. Motor
5. Display
6. Wireless remote
7. Charge and external battery connection
8. Rotating swivel
2
3
4
5
6
1
3
4
1. Pivot screw (Loosen screw before rotating)
2. Jack for fastening the main bracket to the floating device
3. Attachment screw
4. Spring pin (Pull and set in rest position before rotating)
2
EN
2
4
3
5
1
6
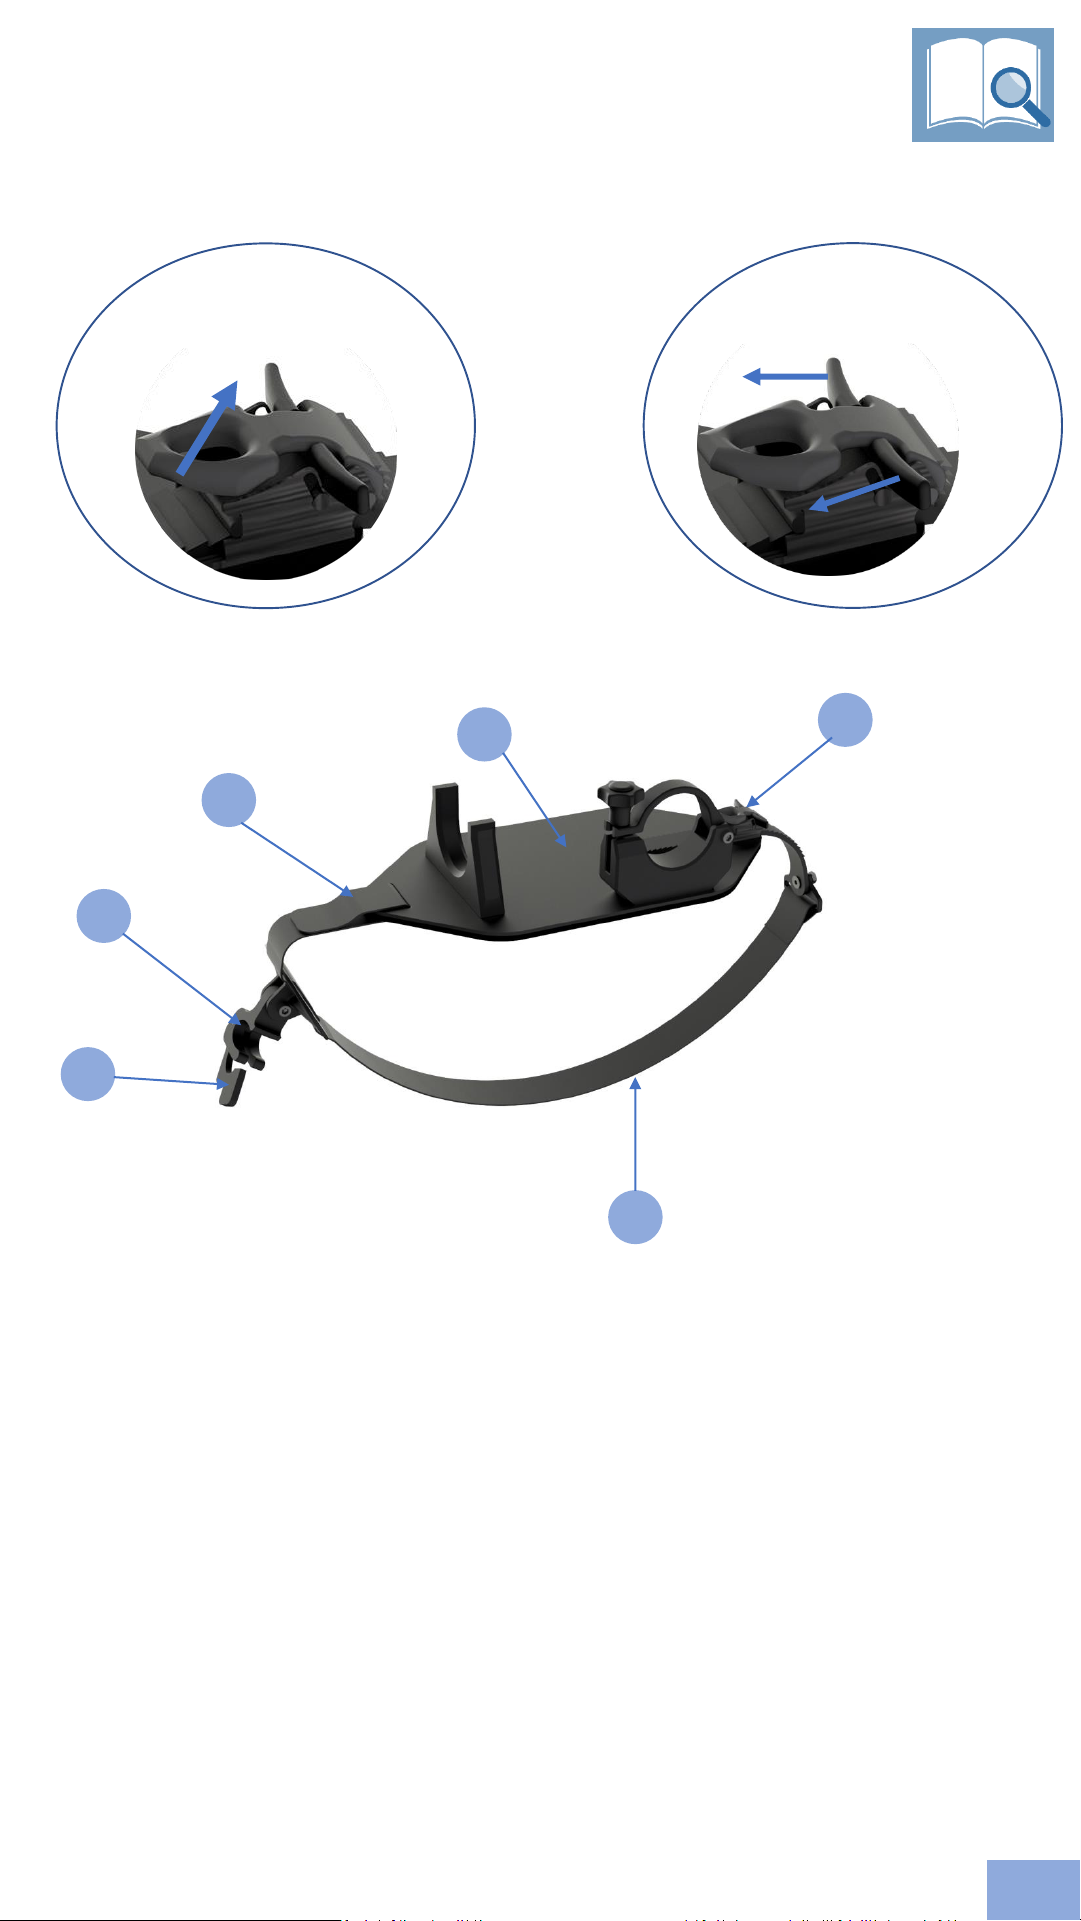
1. Moment clip/ lock
2. Moment bracket, this prevents the CRUISER to move and keeps the CRUISER steady.
(Note: place the moment bracket above water level to prevent drag)
3. Velcro for belt length adjustment
4. Attachment plate for kayak, canoe, SUP , float plane, etc…
5. Jack for adjustment and fastener for main plate (jacking system)
6. Harness for kayak, canoe, SUP, float plane, etc…
Pull to release
Lift & Jack for fastening
HARNESS (jacking system )
EN

DISPLAY FUNCTIONS
2
3
1. External battery status when connected
2. Indicator for reverse thrust
3. Indicator for stop ( the motor is not running )
4. Indicator for forward thrust (ex. showing motor running in STEP 5)
5. Battery indicator (ex. showing 66% remaining of the battery)
6. Remote connected
7. Internal battery charging
1
4
The CRUISER is protected with an automatic circuit breaker and temperature sensors.
If the motor stops while running, it needs to be reset. Before resetting check that the
propeller is free for seaweed or other objects. If the battery temperature is too high,
the CRUISER needs time to cool down.
Remove kill switch and re-connect for system reset.
5
6
7
ENDURANCE CHART
NOTE: This endurance chart is only a guideline; endurance may vary depending on
weather, temperature and type of watercraft used.
STEP 6 is a «Boost mode». When this is engaged endurance time will decrease
rapidly
EN
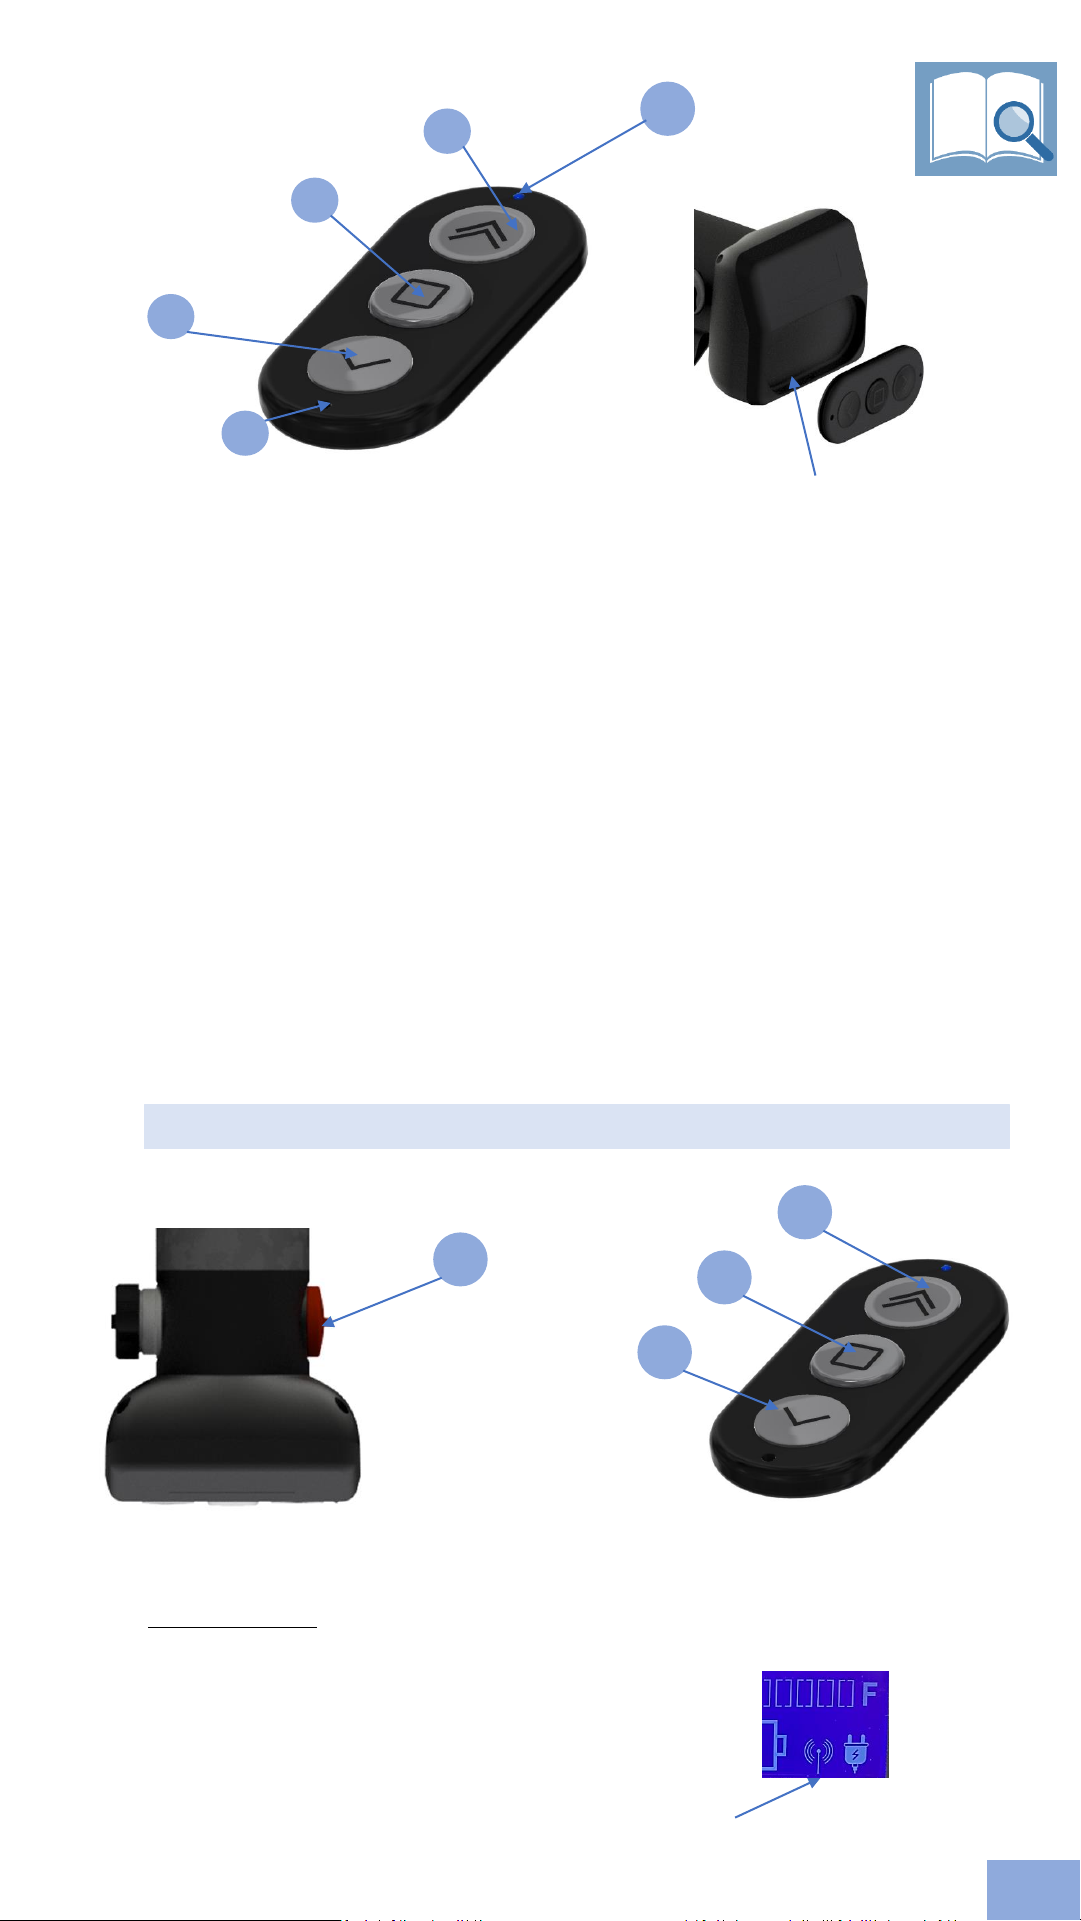
2
3
4
5
1. Hole for wrist band
2. Reverse thrust (one push = one step)
3. Stop
4. Forward thrust (one push = one step)
5. Charging and indicator light, pulses while charging
NOTE: The remote vibrates when a button is pushed
NOTE: Remote is equipped with 2,4 GHz system transmitting with only 1mV, so the
range is limited to approx. 75m
REMOTE FUNCTIONS
Remote (removable)
To pair the remote control you need to follow these steps within 3 seconds
REMOTE PAIRING
1
2
3
4
1
Turn power ON by attaching the magnetic kill switch (1), and then immediately
within 3 seconds, press the buttons below in the following order:
1. Forward (2)
2. Stop (3)
3. Reverse (4)
Remote connected indicator
When new, the remote is paired from the factory.
The remote has a unique address and only one remote can control one system. If
the remote is lost or not connected to the system,
pairing is needed. See instructions below.
EN
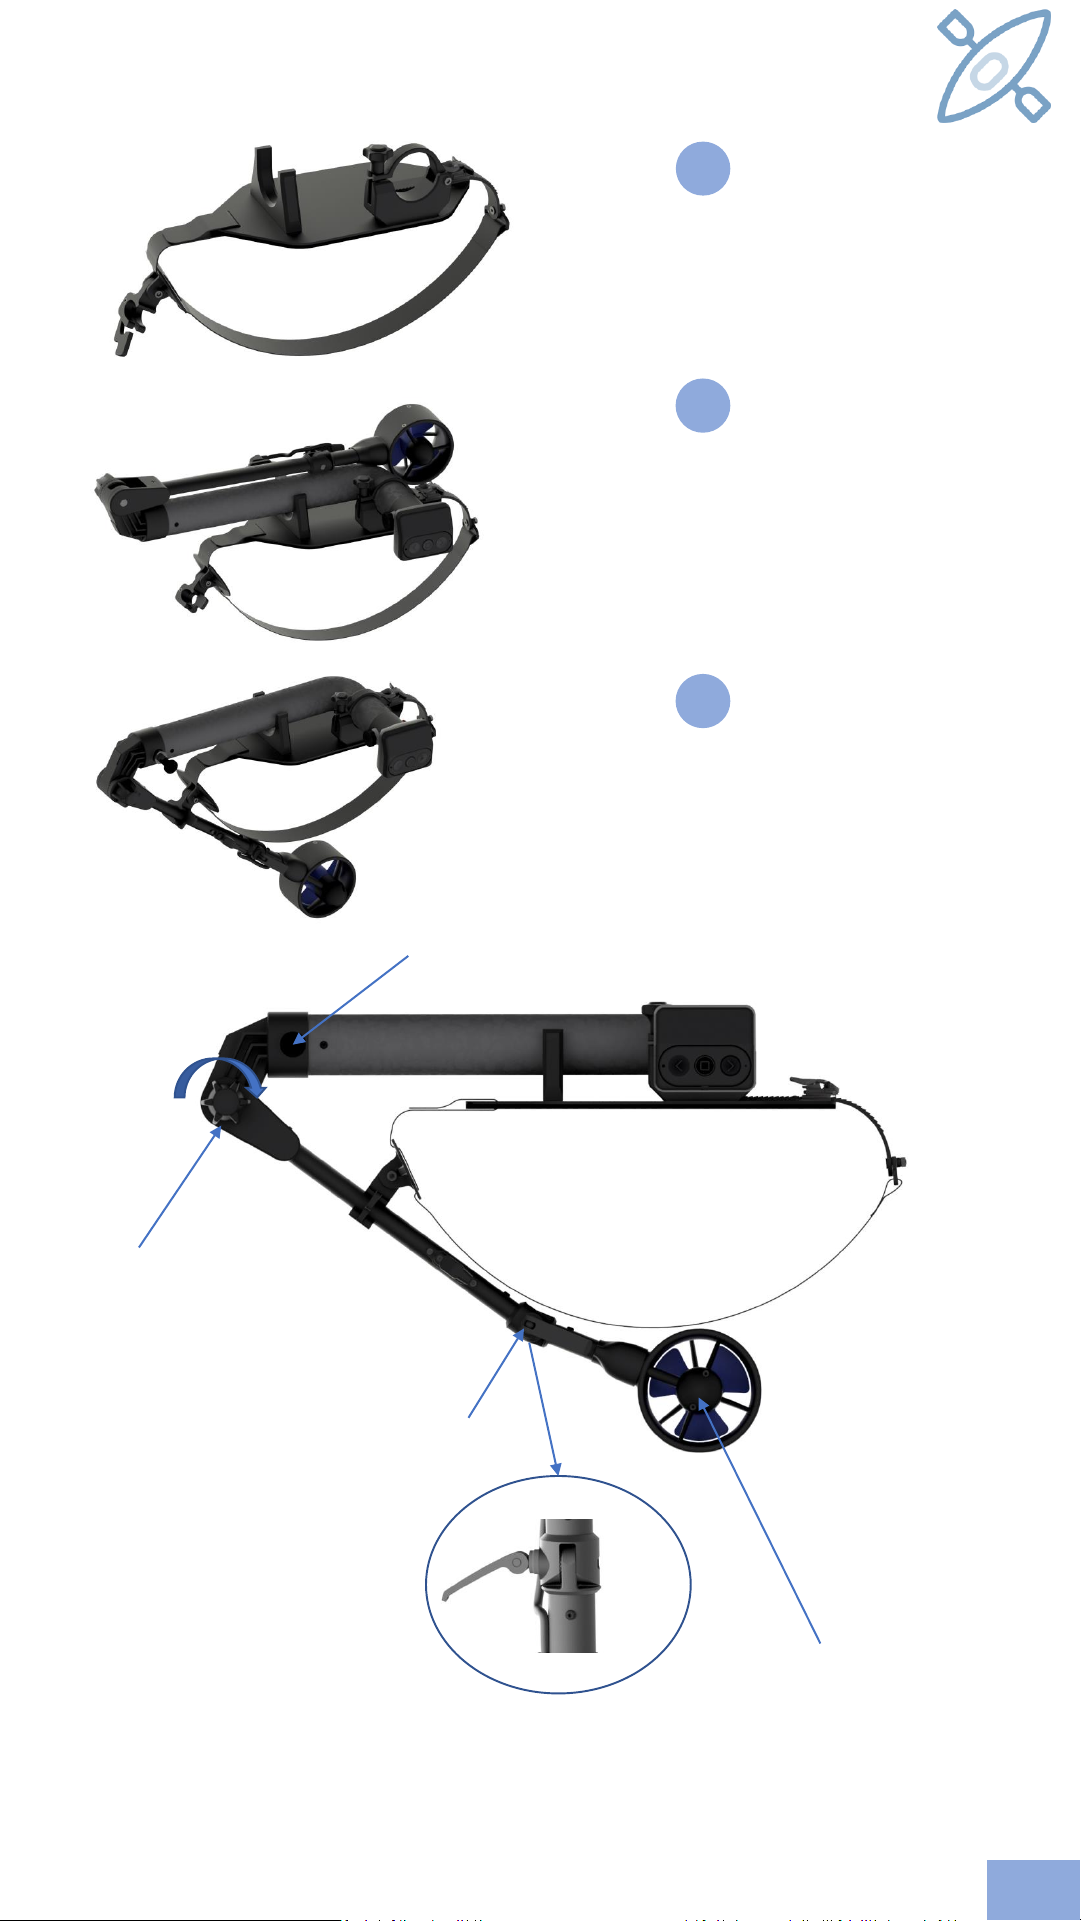
1
2
Step
Adjust the harness to fit your floating
device.
Step
Attach the harness and CRUISER on your
floating device, and adjust.
Please make sure that the harness is tight
around the floating device.
3
Step
Install the propeller in the most centre of
your floating device as possible.
Fastner
Important to fasten before CRUISER is running
Lower pivot point
Important to fasten before CRUISER is running
Place motor in the most centre
of the floating device as possible
Lock the spring pin before use
HOW TO FIT ON A KAYAK, CANOE, SUP, Etc.
EN
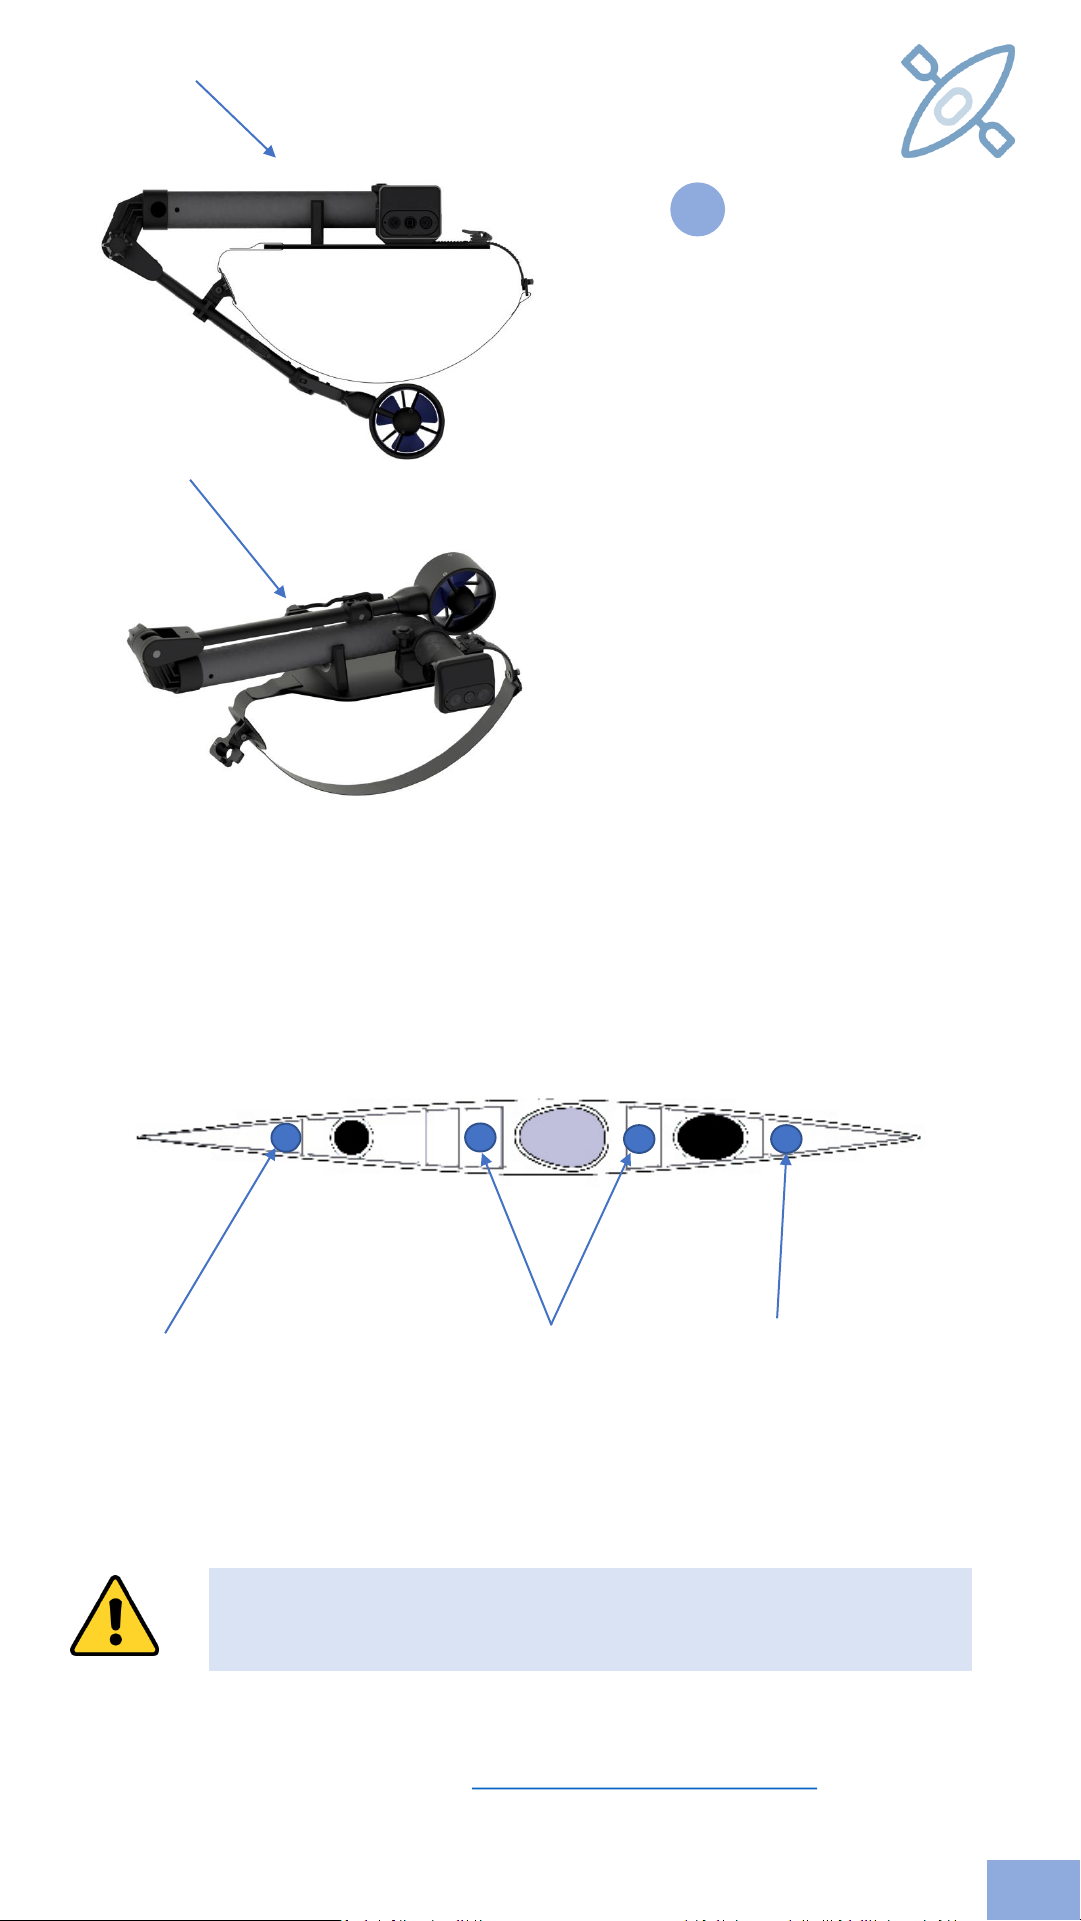
Step
4
After all adjustments are done you are
now ready to use the CRUISER .
Before you put your floating device on the
water, place the CRUISER in the «rest»
position or remove the CRUISER from the
attachment plate.
Attach CRUISER to attachment plate when
needed.
Please also visit www.thrustme.no/instructionvideo
3
2
1
Place the CRUISER on the most suitable place before use.
(May vary between different types of kayaks, canoes and SUP )
1. Front
Operator is not able to adjust
the CRUISER configuration in
the water. Use of handheld
wireless remote is necessary
3. Back
Operator is not able to adjust
the CRUISER configuration
while in the water. Use of
handheld wireless remote is
necessary
2. Centre - front/back
(in front/back within
reach)
Operator is able to adjust
the CRUISER put in rest
position.
Make sure before starting your journey that there is no risk of running out
of battery.
Watch the battery status while operating the CRUISER
2
Rest position
Running position
EN

CHARGING OF MAIN BATTERY AND REMOTE
Charging time 0-100%: Approx. 4 hours
Only use charger provided by THRUSTME. Other chargers may damage the
system or the battery.
Do not recharge the battery if the CRUISER frame feels warm
and do not use the battery in temperatures above 60°C as excessive offgassing may occur. Keep the CRUISER in the shadow when not in use and
do not store in areas with temperatures above 40°C
Recharge the battery after use within 24 hours and recharge the battery at
least every 2 months, this also applies to the remote control.
Charge light
Red light: Charging
Green light : Charging complete
Your CRUISER works with a Li-Ion battery that needs to be handled with
care.
Always fully charge your battery before using your CRUISER.
Always make sure the charging connectors are dry before use.
Always fasten the protection cap to the charging connector after charging,
water ingress may result in short circuit and damage of the CRUISER.
Charge and External battery
connector
Wireless remote charging dock
The CRUISER remote is charged by wireless charging (induction).
Place the remote in the slot in the CRUISER display and the remote will be charged.
Charging time: 0-100% approx. 30min
Note: Magnetic kill switch needs to be connected to charge the remote.
EN
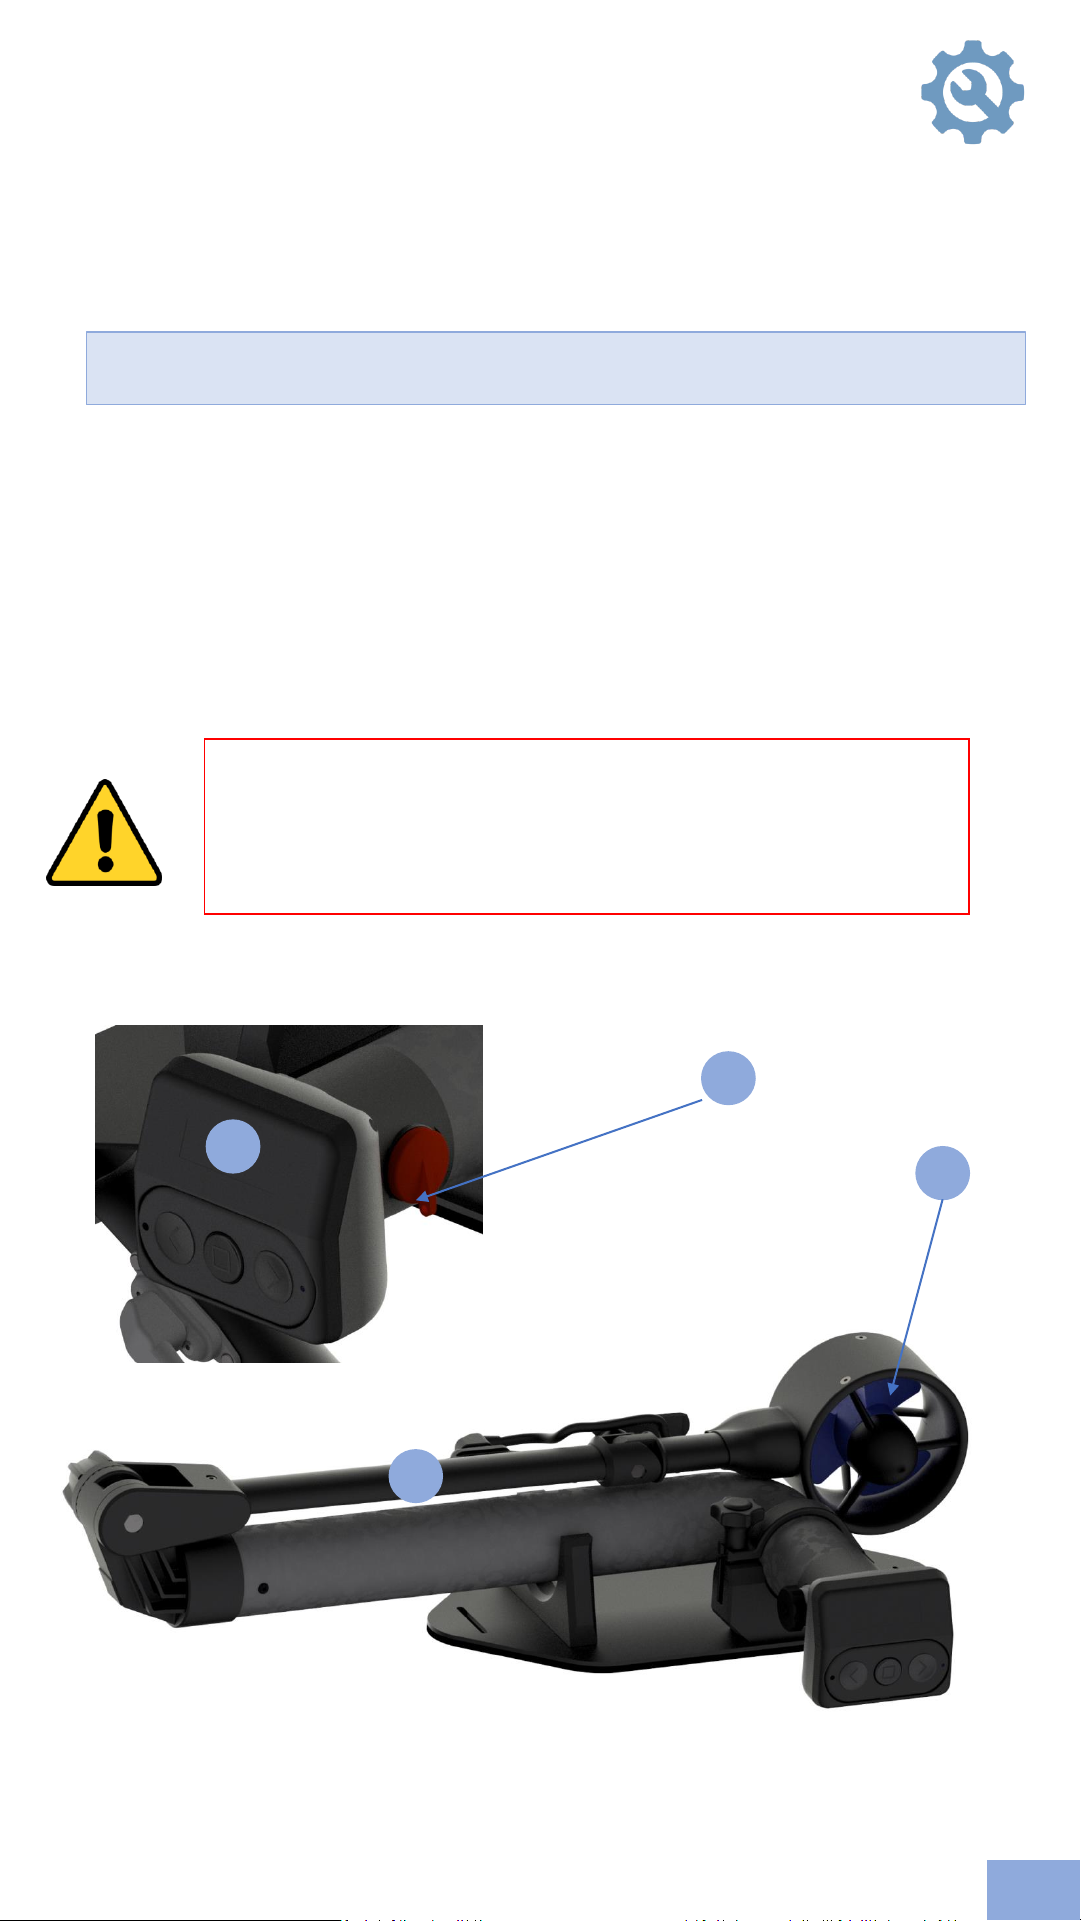
MAINTENANCE
CRUISER is designed for minimum maintenance work and we have made great efforts
to provide you with a product with a little maintenance as possible
The product will last longer and give you a better experience if you do the following :
In the waters
You may experience that you get seaweed or other objects in the propeller while using
the CRUISER.
If you experience change in sound or vibration please do the following steps:
1. Remove the Magnetic kill switch to stop the motor.
2. Verify that the display is off and motor is NOT running.
3. Tilt the CRUISER up in to rest position.
4. Remove seaweed or other objects from the propeller.
1
2
3
4
After use in salt water, run the thruster in fresh water and clean all parts with fresh water
to prolong the life of the components.
EN
 Loading...