

Page 1
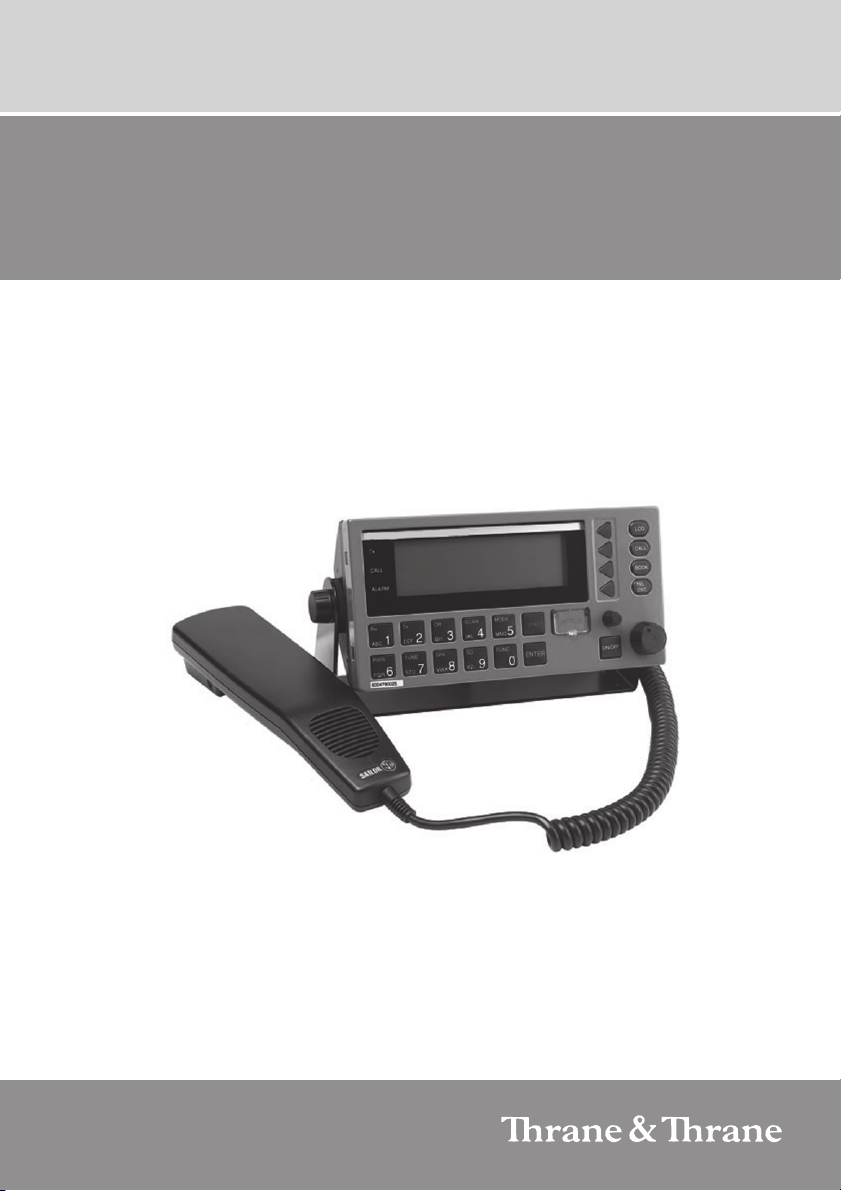
SERVICE & IDENTITY GUIDE
HC4601 150W MF/HF Radio Class E
Page 2

HC4601 Service & Identity
Contents
1. Scope........................................................................................................ 3
2. Description of the 150Watt MF/HF Radio MMI simulator....................... 3
2.1 installation................................................................................ 3
2.2 Run.......................................................................................... 3
2.2.2 System..................................................................................... 4
2.2.3 CU............................................................................................ 4
2.2.4 TU............................................................................................ 4
2.2.5 Log........................................................................................... 4
2.2.6 Test.......................................................................................... 4
2.2.7 Design...................................................................................... 4
2.2.8 Window.................................................................................... 4
2.2.9 Help.......................................................................................... 4
2.3 File........................................................................................... 4
2.3.1 Load......................................................................................... 4
2.3.2 Save......................................................................................... 4
2.3.3 Exit........................................................................................... 4
2.4 Save......................................................................................... 5
2.4.1 Address book........................................................................... 5
2.4.2 Configuration............................................................................ 5
2.4.3 Scan Tables............................................................................. 5
2.4.4 Station Table............................................................................ 5
2.4.5 User Channels......................................................................... 5
2.4.6 Mixture..................................................................................... 5
3. Example of creating a Channel upload file from the MMI simulator..... 5
3.1 HC4601B Telephony Display and Keypad Functions............... 6
3.2 Store a Channel....................................................................... 7
3.3 Save a channel setup............................................................... 7
3.4 Making corrections to previously saved upload files................ 7
4. Upload file to HC4601 Control Unit........................................................ 8
4.1 Software update....................................................................... 8
5. Select Language version after upload................................................... 9
Doc. No.: SI4601COM Issue:A/0531
2
0531
Page 3
HC4601 Service & Identity
1 Scope
This document covers a description of how to generate upload files of configuration data and
other settings using the 150W MF/HF Radio MMI simulator, for the subsequent upload to an
actual radio.
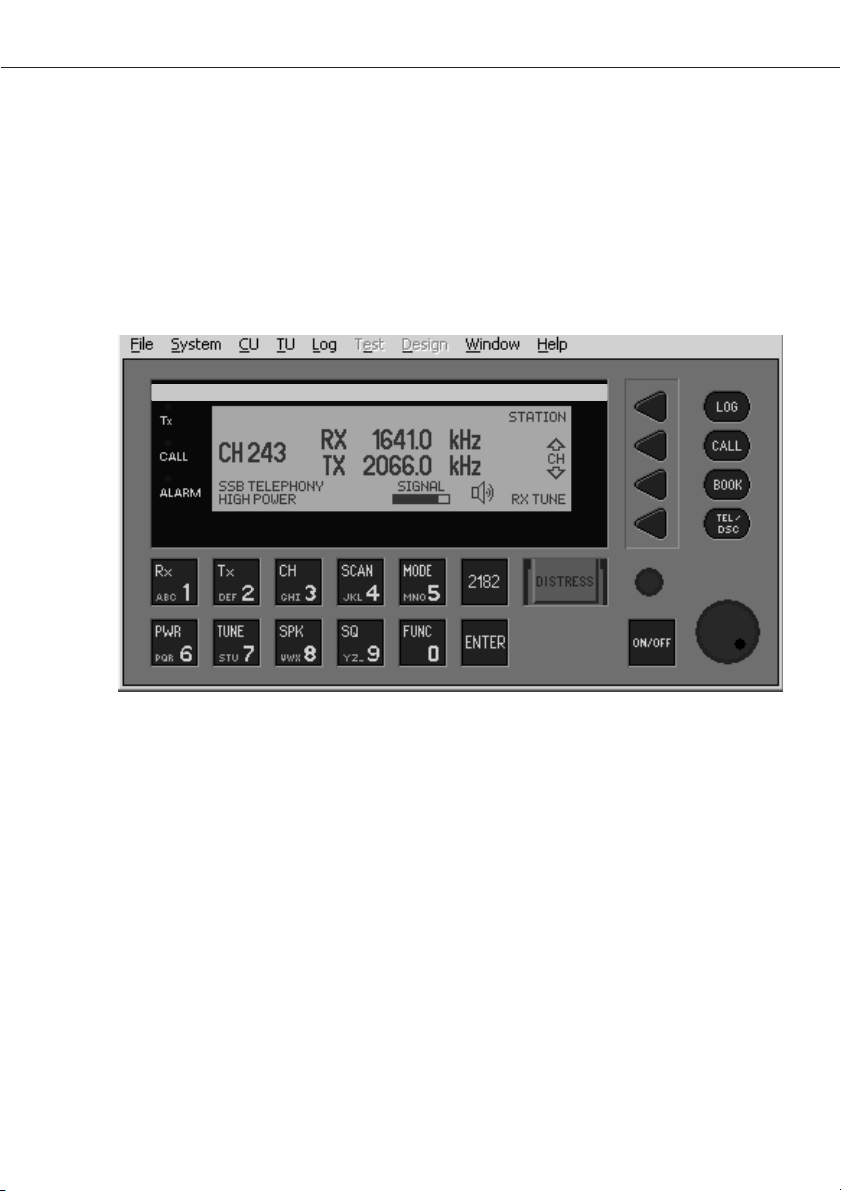
The MMI simulator is a Windows-based program which closely matches both the software
behavior and the display response of the actual radio equipment.
The MMI simulator requires Windows 3.1 or later and the monitor/display must provide a
resolution of 800x600 as a minimum and a 16 bits color depth or better.
.
The Control Unit (CU) HC4601 Class E has been designed for preprogrammed TX frequencies only. The Sailor distributor is responsible for the task of programming the relevant
frequencies in the actul radio, using this simulator for preparing the upload file containing
these frequencies.
2 Description of the 150Watt MF/HF Radio MMI
simulator
2.1 Installation
The MMI Simulator is delivered as one single executable file. As the simulator suggests file
operations in the same directory as the simulator itself, it’s a good idea to make a directory,
somewhere on your hard-disc, and move the executable file there, before running it.
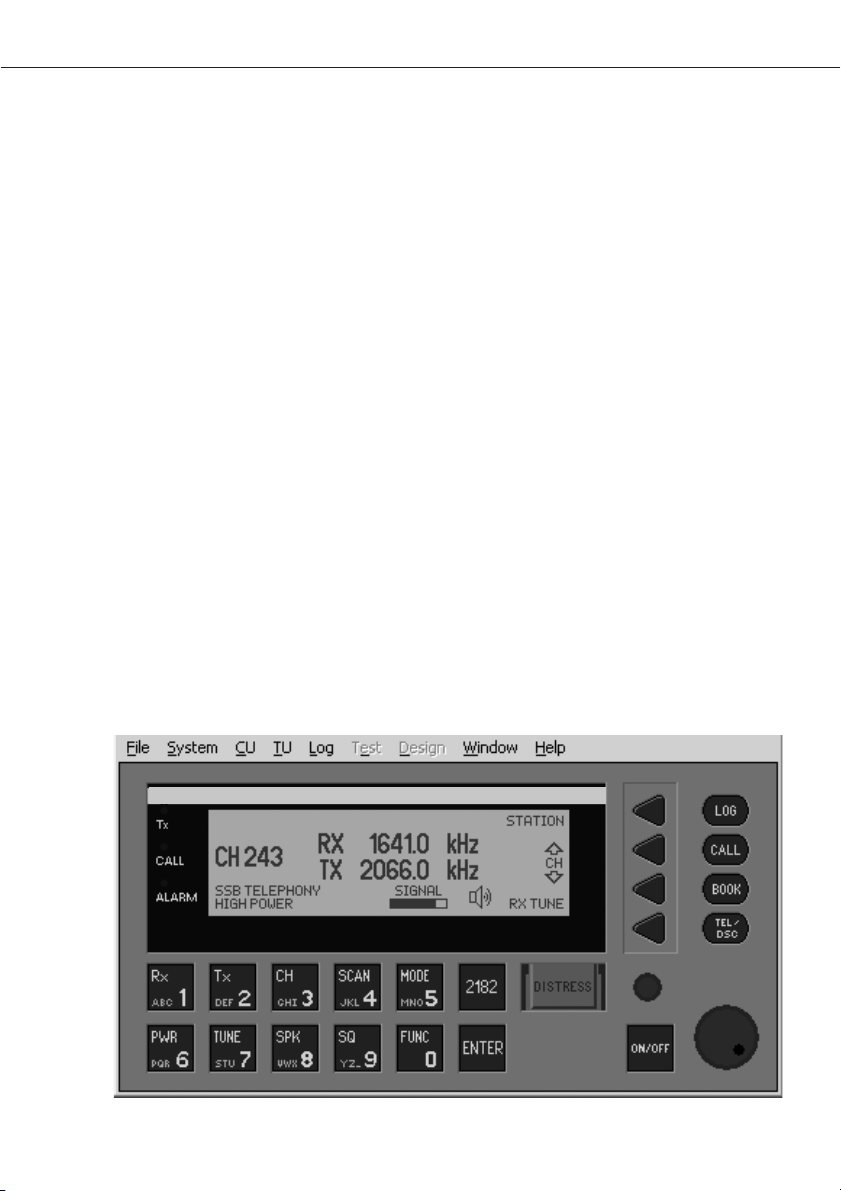
2.2 Run
To run the MMI simulator double click on the program file. This will open the main window.
Next time the program is started, it will open in the same status in which it was closed down.
The following sub-paragraphs describe the menu system in brief.
0531
3
Page 4

HC4601 Service & Identity
2.2.1 File
This menu covers the handling of upload files and provides an Exit of the MMI Simulator
programme. Upload files are files which may be transferred to the radio, such as e.g.
scanning tables.
2.2.2 System
The System menu covers functions involving the entire system including control of external
equipment connected to radio.
2.2.3 CU
The CU-menu covers Control Unit related functions. Selection of live windows to what
happens within the software.
2.2.4 TU
The TU-menu covers Transceiver Unit related functions.
2.2.5 Log
Enabling/Disabling of logging function and control of which parameters are logged while the
simulator is running.
2.2.6 Test
This function is disabled in this version of the simulator.
2.2.7 Design
This function is disabled in this version of the simulator.
2.2.8 Window
The Window-menu provides the selection of different main window sizes.
2.2.9 Help
The MMI simulator does not provide a genuine help file. This menu item simply contains the
‘About’ box with version information and a list of PC keyboard shortcuts substituting the CU
keypad.
2.3 File
2.3.1 Load
Commands the upload of the created files to the actual radio CU HC4601
2.3.2 Save
Having selected the required settings valid for the actual radio using this MMI simulator it’s
possible to save different parts of these settings in files which may later be uploaded to the
actual radio - or loaded back into the MMI simulator, if so required.
2.3.3 Exit
Exits the MMI simulator programme.
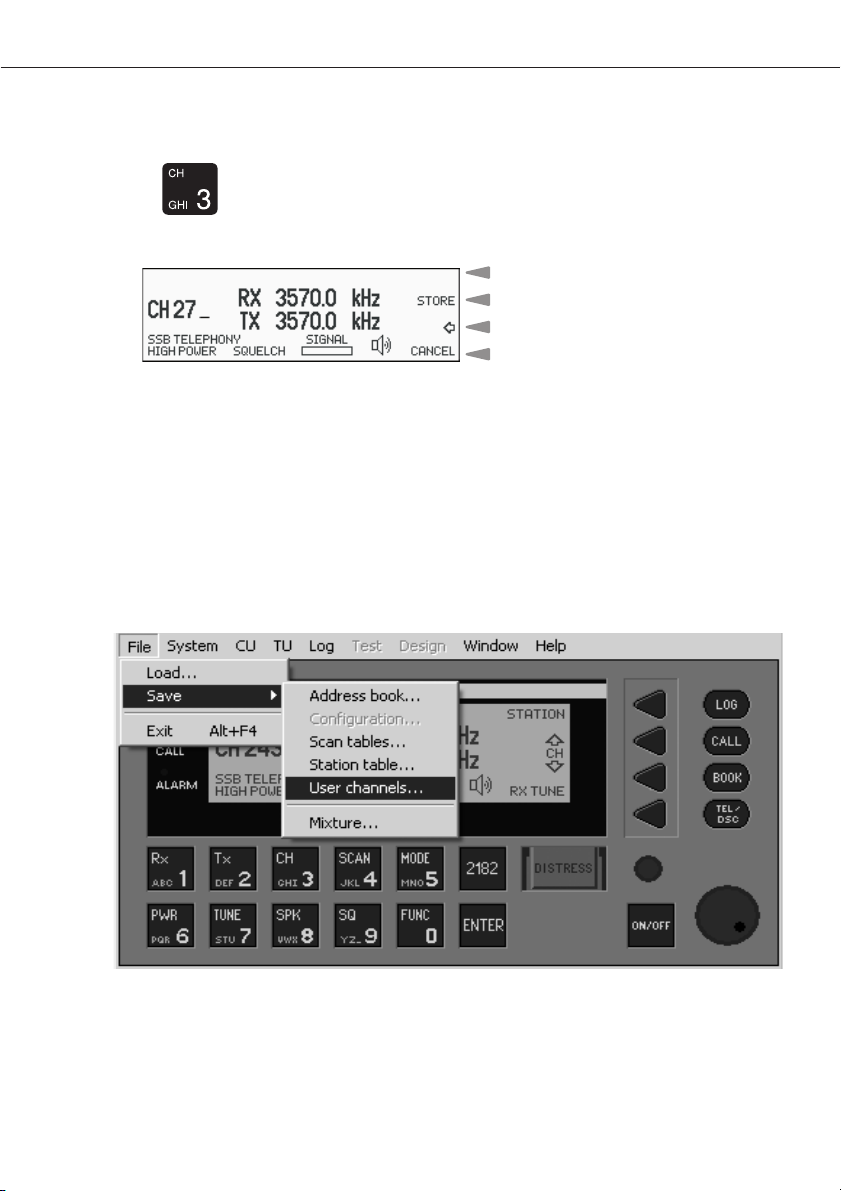
2.4 Save
Use the menu entry
4
File
,then
Save
, and then one of the following entries
0531
Page 5
HC4601 Service & Identity
2.4.1 Address book
Selecting this function will save the predefined DSC calls after prompting for a file name. The
default file name extension is .OAF.
2.4.2 Configuration
This function is disabled in the MMI simulator.
2.4.3 Scan Tables
Selecting this function will save the scan tables after prompting for a file name. The default
file name extension is .ONF.
2.4.4 Station Table
Selecting this function item will save the table of radio stations after prompting for a file
name. The default file name extension is .OSF.
2.4.5 User Channels
This function will save the user programmable channels after prompting for a file name. The
default file name extension is .OUF.
2.4.6 Mixture
Selecting this menu item will open a dialog box which allows the selection of any combination of the above items. Press the associated buttons to select and disable items. Items with
a blue coloured button will be saved. When pressing OK a file name will be prompted for.
The default file name extension is .OXF.
3 Example of creating a Channel upload file
from the MMI simulator
0531
5
Page 6
HC4601 Service & Identity
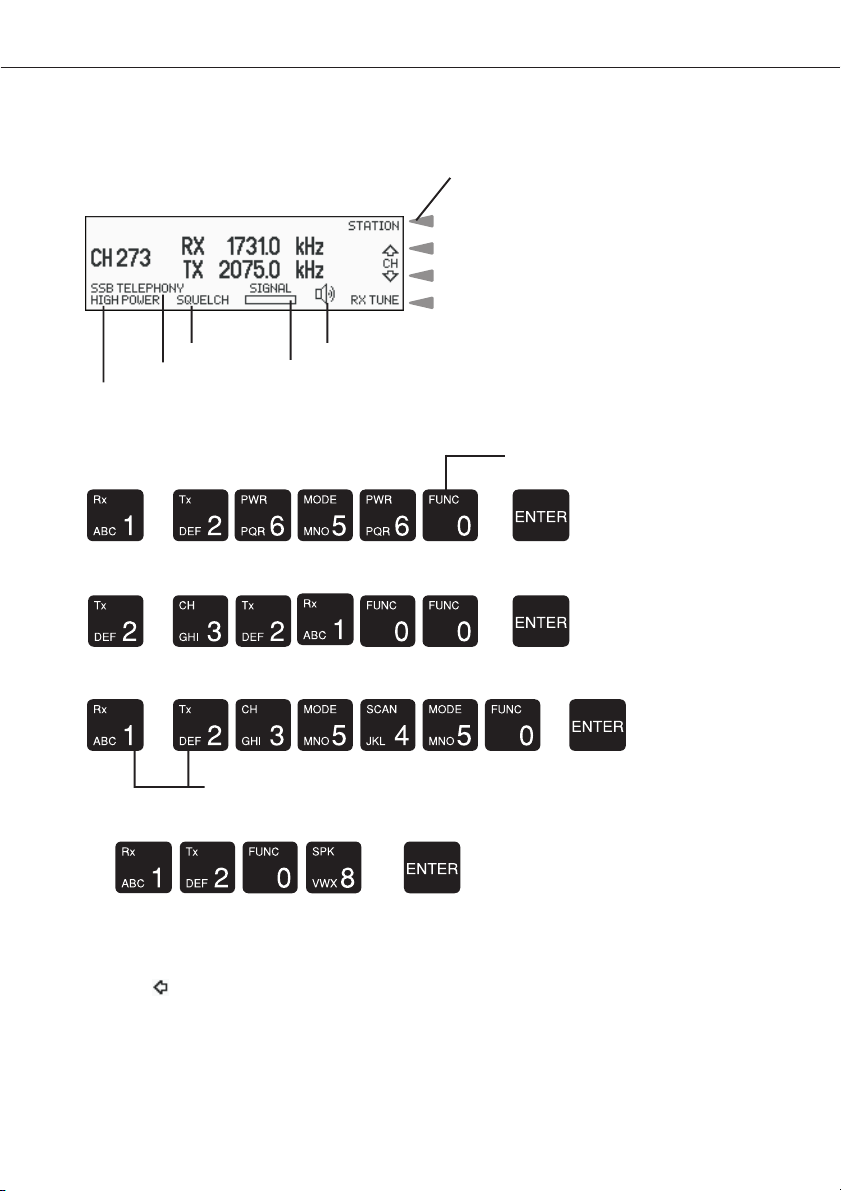
3.1 HC4601 Telephony Display and Keypad Functions
Soft keys
Switches to the Station List for selection of
a station channel
Steps to the next higher channel /
frequency
Steps to the next lower channel /
frequency
Selects tune rate (1kHz, 100Hz, 10Hz, CH)
Squelch setting Speaker setting
Mode setting Receive: Signal strength
Output power setting Transmit: Output power level
last digit always interprated
Select RX frequency, e.g. 2656.0 kHz:
Select TX frequency, e.g. 3210.0 kHz:
as “100Hz”-digit
Select RX + TX frequency, e.g. 3545.0 kHz, simplex:
Press simultaneously
Select channel, e.g. 1208:
Pressing the ENTER softkey is equal to pressing Enter.
Pressing the TX softkey copies TX frequency to RX.
Pressing the RX softkey copies RX frequency to TX.
Pressing the SWAP softkey interchanges RX and TX frequencies.
Pressing the softkey deletes last entry.
Pressing the CANCEL softkey resets the display.
6
0531
Page 7
HC4601 Service & Identity
3.2 Store a Channel
Select the desired RX frequency, TX frequency and mode setting.
Press and key in a channel number between 1and 199.
If the channel number is free, the STORE softkey is available:
Stores the channel
Backspace, deletes the previous entry
Selects the previous display
If the channel number is already used, the REPLACE softkey is available.
Select REPLACE and confirm by pressing OK in the warning display that follows.
To delete a channel select the same channel number again. The DELETE softkey isvailable.
Select DELETE and confirm by pressing OK in the warning display that follows.
3.3 Save a channel setup
When the correct channel setup has been created activating the File / Save / User Channels
selections will save the channel file to a *.ouf file which may subsequently be transferred to
the actual radio CU.
3.4 Making corrections to previously saved upload files
If e.g. a user channel file named Trawlers.ouf has been created and saved this file may be
loaded back into the HC4500B simulator and corrections like adding one or more channels or
deleting one or more channels may be carried out.
0531
7
Page 8

HC4601 Service & Identity
Select the menu File followed by Load and then select the file using the standard Windows
file selection method. Drag-n-drop method may also be used.
After modifying the channels setup as required save the file using a new file name.
4 Upload file to HC4601 Control Unit
The channel/frequency files that have been created and saved may now be uploaded to the
CU. Each file carries a header specifying the content and hence no special action is required
before performing the upload.
4.1 Software update
Code and configuration software are placed in flash memory. Consequently it is not necessary to dismantle the units in order to update the software; a PC link must be used.
4.1.1 Setup
In order to perform a software update, a PC with a communication program (e.g. Procomm
Plus or HyperTerminal) and a communication cable are required.
If the Hyper Terminal program is used it is recommended to close and re-start the program if
more than one file has to be downloaded. This should be done between each file download.
4.1.2 PC
In the specific communication program, the Com port must be set to
Item Value
Baudrate 38400
Parity None
Data bits 8
Stop bits 1
Flow control must be set to: None
The communication protocol must be set to: X-Modem.
4.1.3 Cable
The cable must be a 3-wire cable. Supplying more than 3-wire may damage the PC. The PC
side of the cable must be a 9-pin (or 25-pin) female D-sub connector; the CU/TU side must
be a 9-pin male D-sub connector. The cable may be supplied as accessory.
Designation PC CU TU Designation
‘Com port’ ‘Aux’ ‘Sys’
9-pin 25-pin 9-pin 9-pin
Received Data 2 3 CABLE 2 2 Data Out
Transmitted Data 3 2 3 3 Data In
Ground 5 7 5 5 Ground
8
0531
Page 9

HC4601 Service & Identity
4.1.4 Procedure
The PC with the communication program and cabling must be ready before the CU/TU is
switched on. The procedure is as follows.
• Download software from the web site or receive it from your distributor if necessary.
• Switch off PC and CU/TU
• Connect cable to unit to be updated
• Switch on PC
• Enter the communcation program. Setup the Com port and select X-Modem protocol.
Select the upload file (the new software version) and begin uploading.
• Switch on the CU/TU.
Upload will now begin. The result of the upload will be written on the PC when the upload is
finished. If the upload was successful the CU/TU reboots automatically.
5 Select Language version after upload
A Language file may be part of the approved equipment setup in which case this file (named
Lanxx.olf where xx denotes the telephony country code of the country for which the language
file covers) must be uploaded to the HC4601 Control Unit also. This is done in the same way
as described in para. 4 – Upload file to HC4601.
Use the following menu activations to select between the language files stored in the
HC4500B / HC4500E / HC4601:
FUNC
SETTINGS
OPTIONS
1234 (Password)
ENTER
DSC
LANGUAGE
“Language option”
OK
0531
Switch the CU off/on to activate changes.
9
Page 10

HC4601 Service & Identity
10
Page 11

HC4601 Service & Identity
11
Page 12

Thrane & Thrane A/S • info@thrane.com • www.thrane.com
12
 Loading...