

Thorn SENSA MSF SEND DSI, SENSA MSF SEND DALI Installation And Commissioning Instructions
Electrical Connections
T
Push-to-Make
Mains-Rated
Retractive Switch
Input
(see overleaf)
L
N
230V 50Hz
Mains Supply
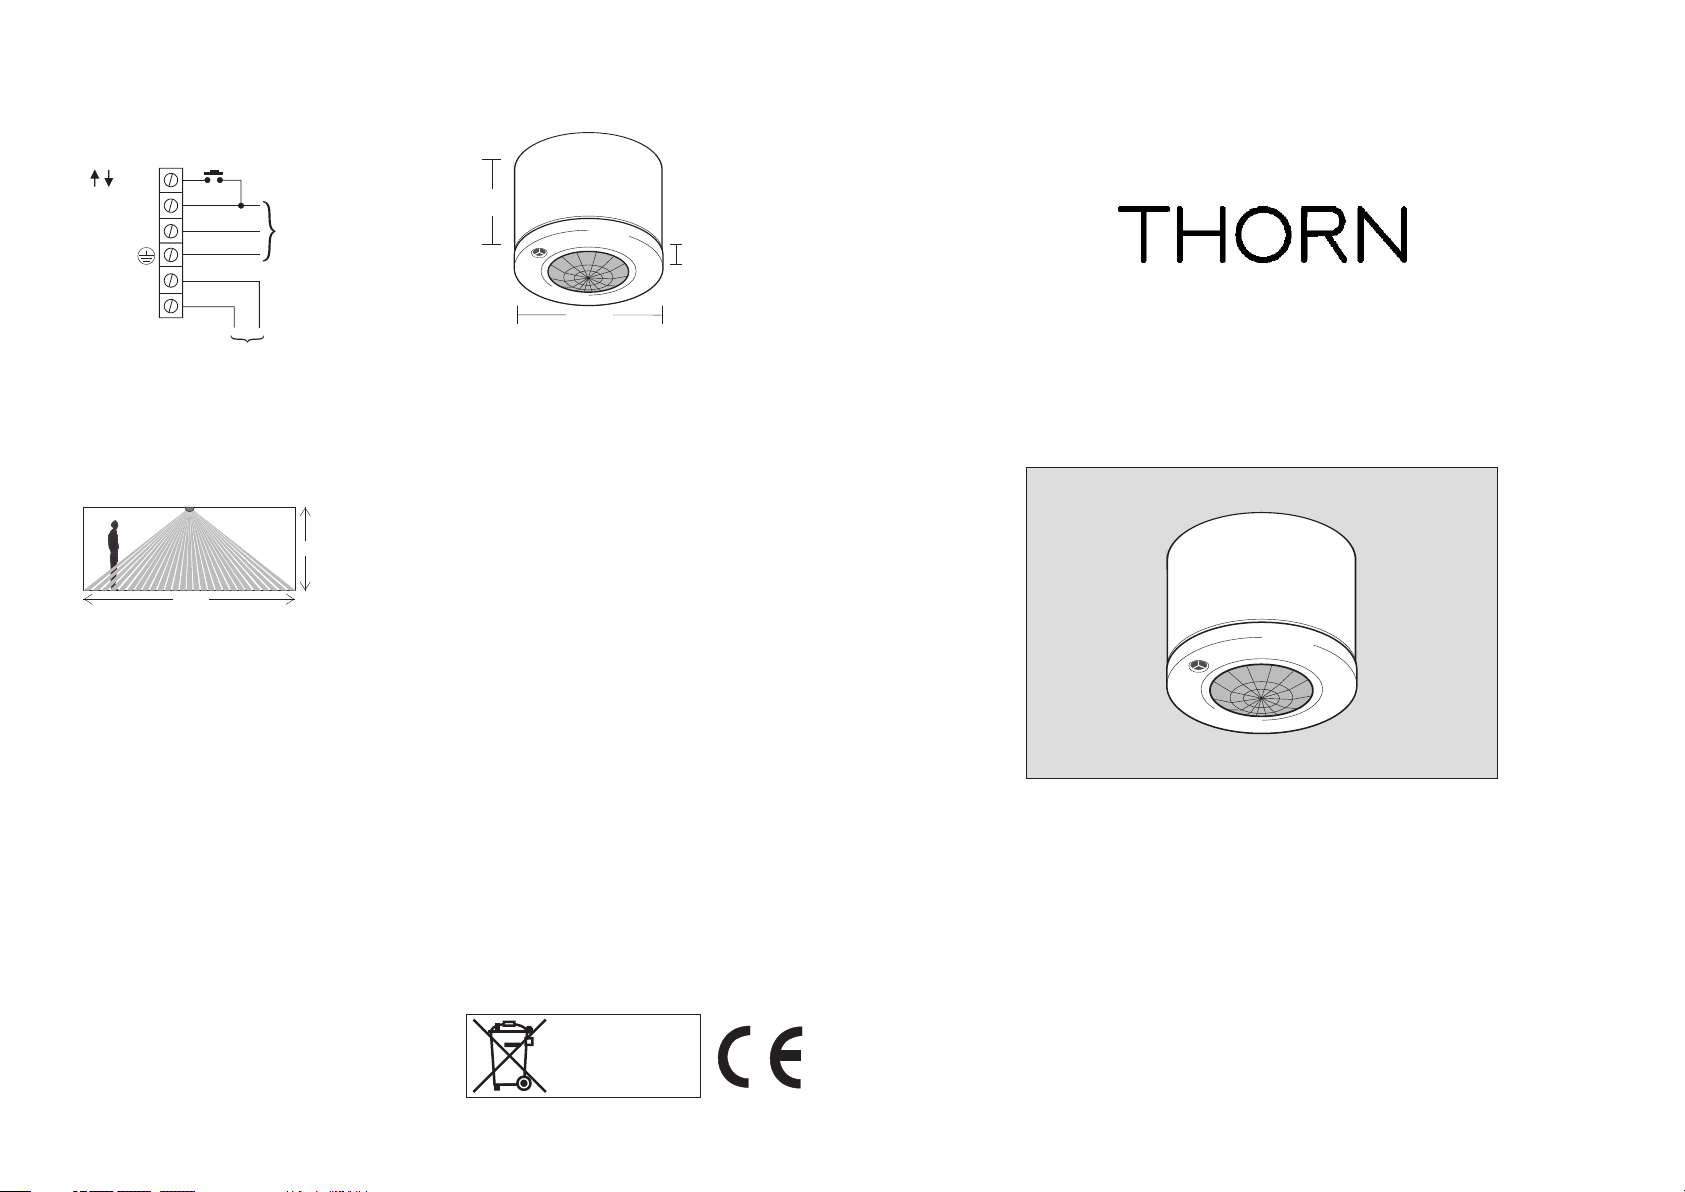
Dimensions
62mm
deep
Flange: 10mm deep
100mm
DSI out (96013491)
DALI out (96238878)
Polarity-free; do not connect to other detectors.
Technical Data
RECOMMENDED MAXIMUM MOUNTING HEIGHT: 3.0m
RANGE: Cone-shaped detection pattern, diameter (at floor level) = 2.4 x mounting height
2.5m
6.0m
OPERATING VOLTAGE: 230V 50Hz
PRODUCT RATING & RECOMMENDED CIRCUIT PROTECTION: 10 Amps
CAPACITY: 8 ballasts
OUTPUT: 2-wire digital polarity free
PHOTOCELL: Regulating
OFF DELAY: 5-35 minutes
WEIGHT: 200g approx
COLOUR: White
MATERIAL: Flame retardant PC/ABS
IP RATING: IP 40
SensaDigital Detector,
ceiling mounted, surface
SENSA MSF SEND DSI (96013491)
SENSA MSF SEND DALI (96238878)
Installation and Commissioning
Instructions
Thorn Lighting Limited
www.thornlighting.com
At the end of their useful life
the packaging and product
should be disposed of via a
suitable recycling centre.
Do not dispose of with normal
household waste.
Do not burn.
Note: SENSA SENP required for commissioning
W4335C

SENSA MSF SEND DSI (96013491) & SENSA MSF SEND DALI (96238878)
T
T
Only suitably qualified personnel should install this equipment.
Fixing
The housing may be secured to a hard surface or a BESA box. The unit fits into the housing with a simple
bayonet action.
NOTE: Do not position within 25cm of a luminaire.
Connection
A 10A type C MCB is recommended for the supply. A means for disconnection must be incorporated in
the fixed wiring according to the wiring regulations.
Control of a group of luminaires is achieved via the detector’s two-wire digital control circuit. Each luminaire to be
controlled must contain a digital regulating type ballast with the appropriate DSI input (for use with 96013491) or
DALI input (for use with 96238878). Ballast types must not be mixed. Connect all ballasts in the control group
(max 8) in parallel and also to the polarity-free digital output of the detector.
Each luminaire is controlled completely by its digital input and therefore would normally have a permanent power
supply. If, however, it is desired to have manual wall switches, any or all of the fittings in a controlled group may
also be controlled in the traditional way - by turning off the power. The control circuit will continue to operate
properly even if some of the luminaires in the group have had mains power removed.
Dimming
dimming affords local control to the end-user whereby a simple, momentary, push-to-make wallswitch can
be used to raise or lower the lighting level or to toggle the output ON/OFF. A short press of the switch (less than
1 second) will toggle the output status while a longer press will raise or lower the output. Each time the switch is
pressed, the direction of dimming reverses. If the switch has not been pressed for 5 seconds, the direction will
be up (brighter) - unless the output is already above 90% in which case the direction is down. If the switch is held
continuously, and the output reaches maximum, the light output will remain at this level until the switch is
released - a latching switch may be connected in parallel allowing the occupancy detection to be overridden on
(Note: If the initial direction was down, when the output reaches minimum it will ramp back up automatically).
Commissioning
The factory default settings will be appropriate for most applications. However, the installer does have the facility
to re-programme a wide range of parameters and to set the regulating light level using the infrared programming
tool, SENSA SENP (96004189).
Please read carefully the operating instructions that accompany the SENSA SENP (96004189) prior to
performing a programming operation.
Below is a table showing the pre-set factory settings and a brief explanation of each parameter. These parameters
may be re-programmed any number of times and all settings will be retained in the event of a power loss.
Parameter Options Pre-set Notes
Power up on/off on Sets the luminaire state at power up irrespective of occupancy. Useful in
Response auto/semi-auto auto If set to auto, the presence detector switches the luminaire on and off
Off delay 5 - 35 mins 20 mins The time for which the luminaire will stay on following the last detected
Start lamps max/min max Sets the level at which the lamps strike when turning on.
Bright out yes/no no If set to yes, movement fails to refresh the off delay if the ambient light level
Fade to off yes/no no When no presence is detected, and after the off delay period, the lamps can
When vacant low/off / reg <25% off These are the options for a vacant area after it has timed out. Luminairescan
reducing start-up load following power cut. Power-Up off - responds to
occupancy after 30 seconds.
automatically. If set to semi-auto, the luminaire will not turn on automatically
when a person enters the area. It can be turned on using the hand-held
controller or by toggling the power switch. When the area is vacated, the light
will turn off automatically.
movement. Also 10 second setting for walk-testing.
exceeds 125% of the set level, and the luminaire will switch off when the
the off delay has elapsed. (Note Dimming must be set to 100%)
fade out instead of switching off (approx 80 seconds to fade from100% to 0%).
turn off, remain at minimum output, or regulate with a 25% output limit, until
the next periodof occupancy. If programmed to remain at minimum or regulate
below 25%, there is a programmable option to switch off after 3 times the Off
delay.
Setting the regulating photocell
This product is intended for use with high frequency regulating ballasts with DSI or DALI control inputs. An
infrared programming tool SENSA SENP (96004189) is required for programming the regulating light level set
point. The setting is preserved in the event of a power failure and can be re-programmed any number of times.
Use the ‘up’ and ‘down’ buttons to manually adjust the light output from the luminaire(s) and when at the required
level press and hold the ‘store’ button. The luminaire(s) will blink to acknowledge a successful store operation.
Important Additional Notes
1. All terminals on this product are provided for final connections. It is not intended that the product be used as a junction box
for looping cables.
2. A means for disconnection must be incorporated in the fixed wiring in accordance with the current wiring regulations.
3. Although nominally 12V, the dimming output is not ELV and therefore should be treated with the same respect as mains with
regard to wiring practice. The 0V line of the dimming output is almost at Neutral potential.
4. The dimming control output should be connected only to the control input of the ballasts - never to other detectors.
5. This equipment should be used to control only those ballasts powered from the same phase as the detector.
6. Due to the fact that the photocell is on the ceiling looking down, it is not possible for measurements made with a lux meter on
the working plane to remain constant when daylight illuminates the ceiling and the working plane to a differing extent.
Therefore, products of this type should be regarded as capable of maintaining an APPROXIMATE light level only.
W4335C
 Loading...