

THORENS TD 146, TD 166 MKII Owner's Manual
THORENS TD 146 and TD 166 MKII Owner's Manual
Contents
Introduction
I. Unpacking
II.
Assembling
the turntable
III. Electrical
connections
and
installation
IV. Tracking
force
adjustment
V. Antiskating
adjustment
VI. Operation of
the TD 146
VII. Operation of
the TD 166
MkII
VIII. Mounting
and
adjustment
of the
pickup
cartridge
IX.
Technical
specifications
X. THORENS
factory
warranty
Please send any questions, comments, or corrections to:
Ron Stewart (
rgs@hiwaay.net)

Links
Here are links to some other pages with information about Thorens turntables and other vintage
equipment.
The Analog Dept. is a very comprehensive site about Thorens (and other) turntables. In particular, if
you own a TD-160, you need to visit this site.
Vinyl Asylum is also a great source of information about turntables, old and new, including Thorens.
Just search the archives.
Retro Hi-fi is a nice site about vintage audio equipment in general.
The Tuner Information Center is a wonderful source of information about vintage tuners. It's great for
researching tuners that show up at eBay and other auction sites.
If you own a Tandberg 3011 or 3011A, or are just curious about these tuners, I also have a
manual online.
3011

Congratulations!
You are now the proud owner of a THORENS turntable.
You have purchased a high-quality component that has been designed to afford many hours of
listening pleasure.
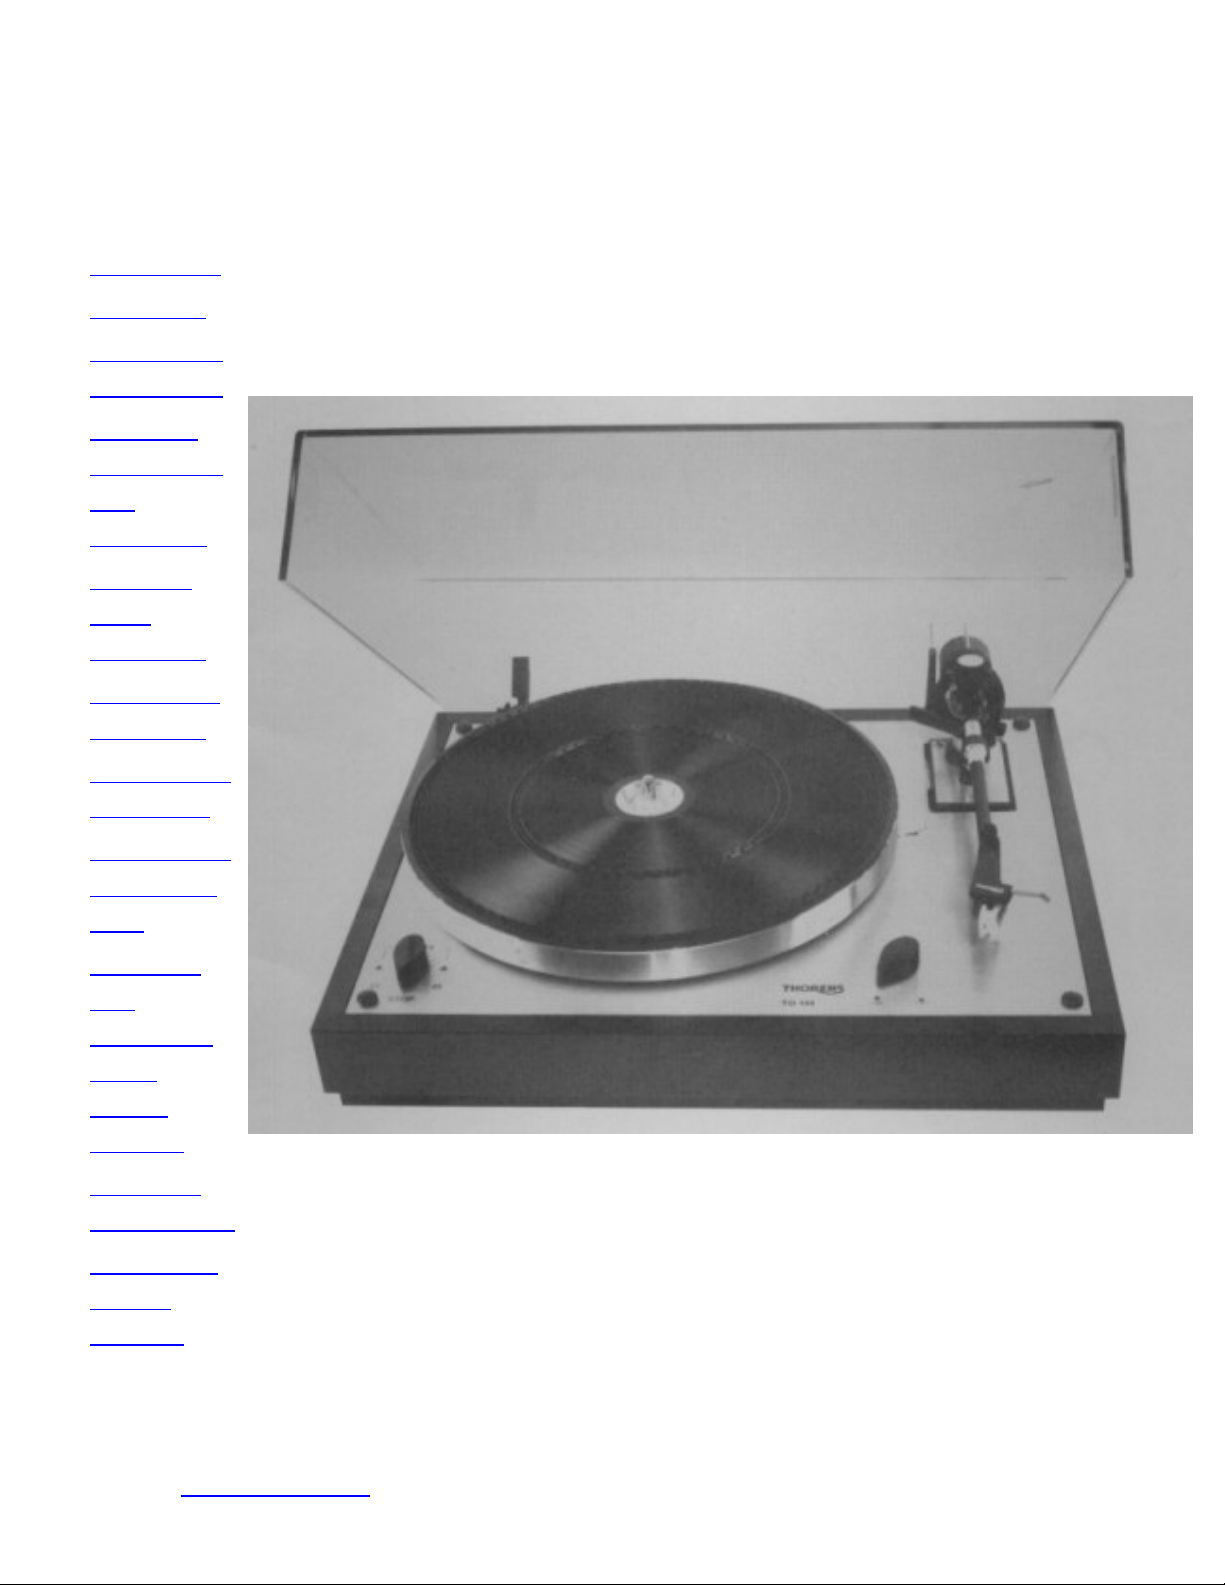
The THORENS TD 146 and TD 166 MkII Turntables are precision instruments which, with
reasonable care, will deliver optimum reproduction quality and protect your records for years to
come. The auto-stop feature and the lifting mechanism of the TD 146 enable faultless
reproduction to be combined with the convenience of automatic end-of-play shutoff.
In order to prevent improper operation, which could impair reproduction quality or lead to
damage of the turntable or of a valuable record, we with to advise you to read this instruction
manual completely before unpacking the turntable and putting it into operation.
This recommendation is of particular importance when the unit has been purchased with an
empty cartridge wand and a pickup cartridge must therefore be installed.
Next > Top
I. Unpacking
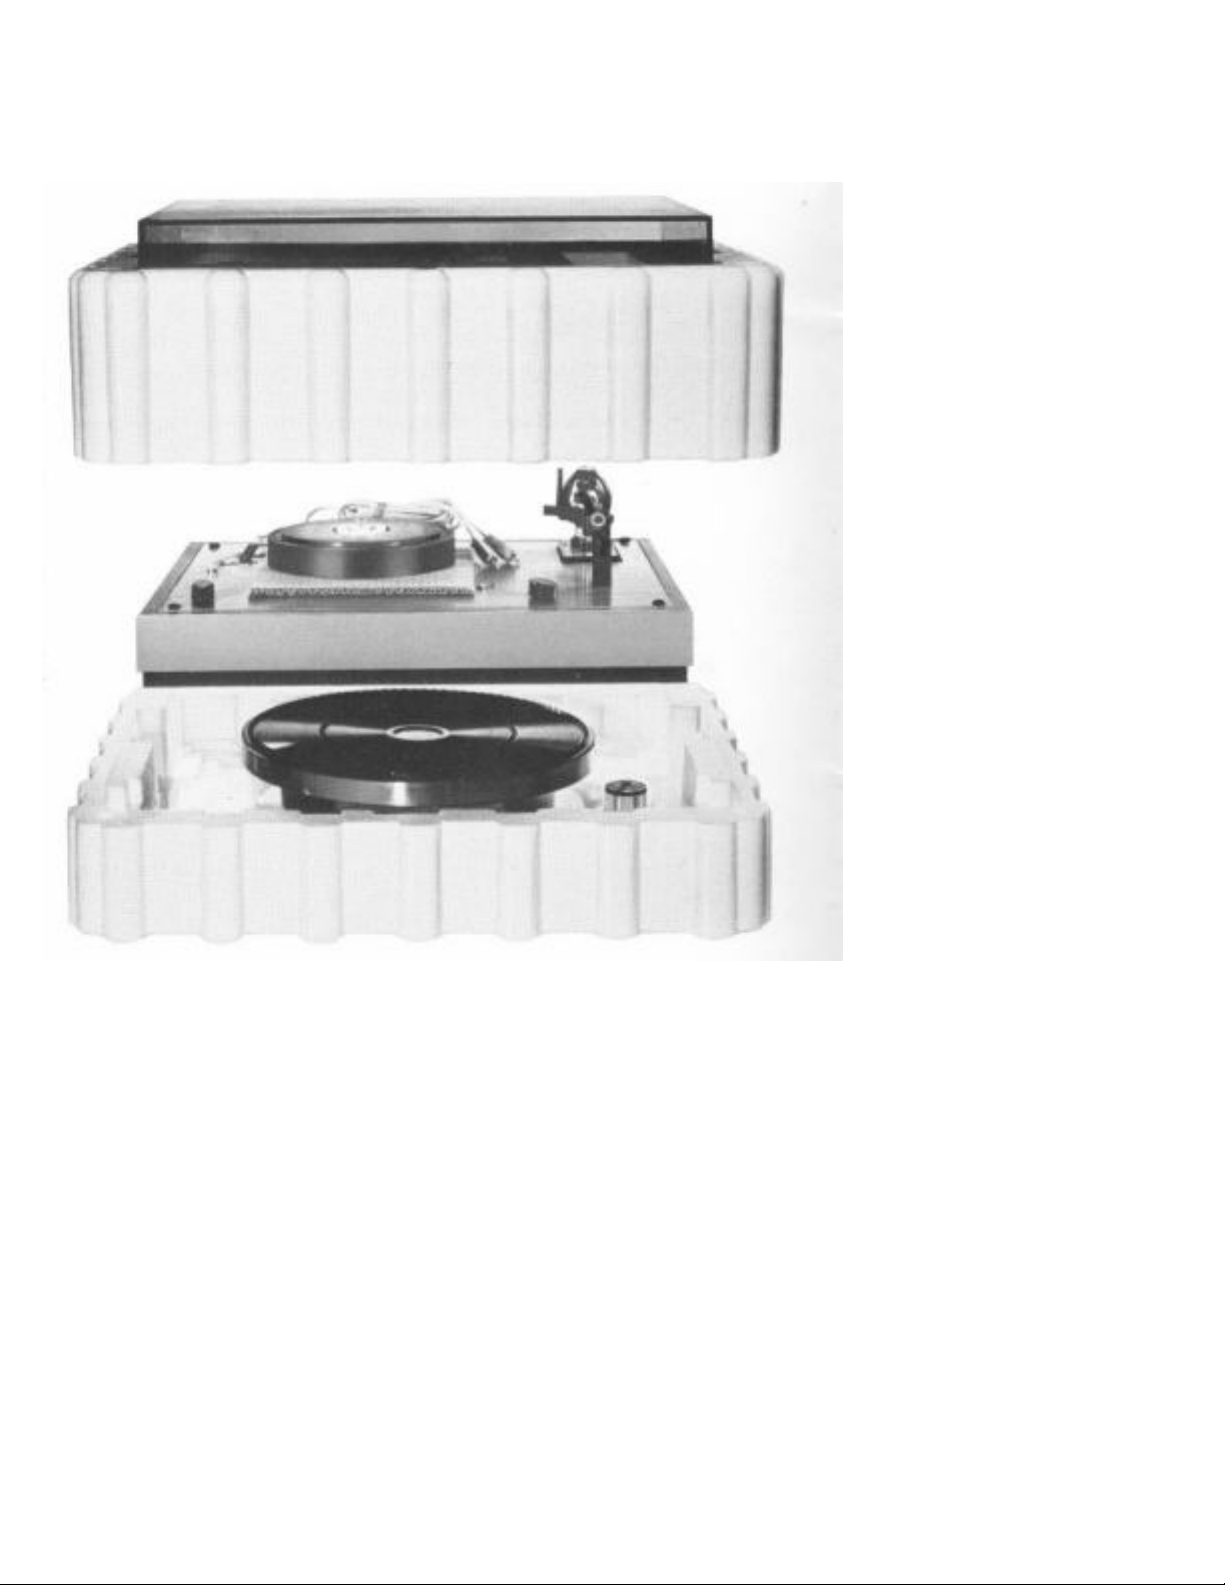
The arrangement of the
packed turntable is shown
in Figure 2. The upper
styrofoam packing may
easily be removed by
grasping the opening on
either side and lifting
straight up.
The turntable can now be
taken out of the lower
styrofoam packing.
Do not use the tone arm
assembly as a handle!
Figure 2
The top styrofoam
packing enclosure (Figure
3) contains the dust cover
and the following
turntable components:
● a hinged storage
case containing the
TP 63 cartridge
wand (5) with all
accessoriess
including (if
delivered with the
turntable) the
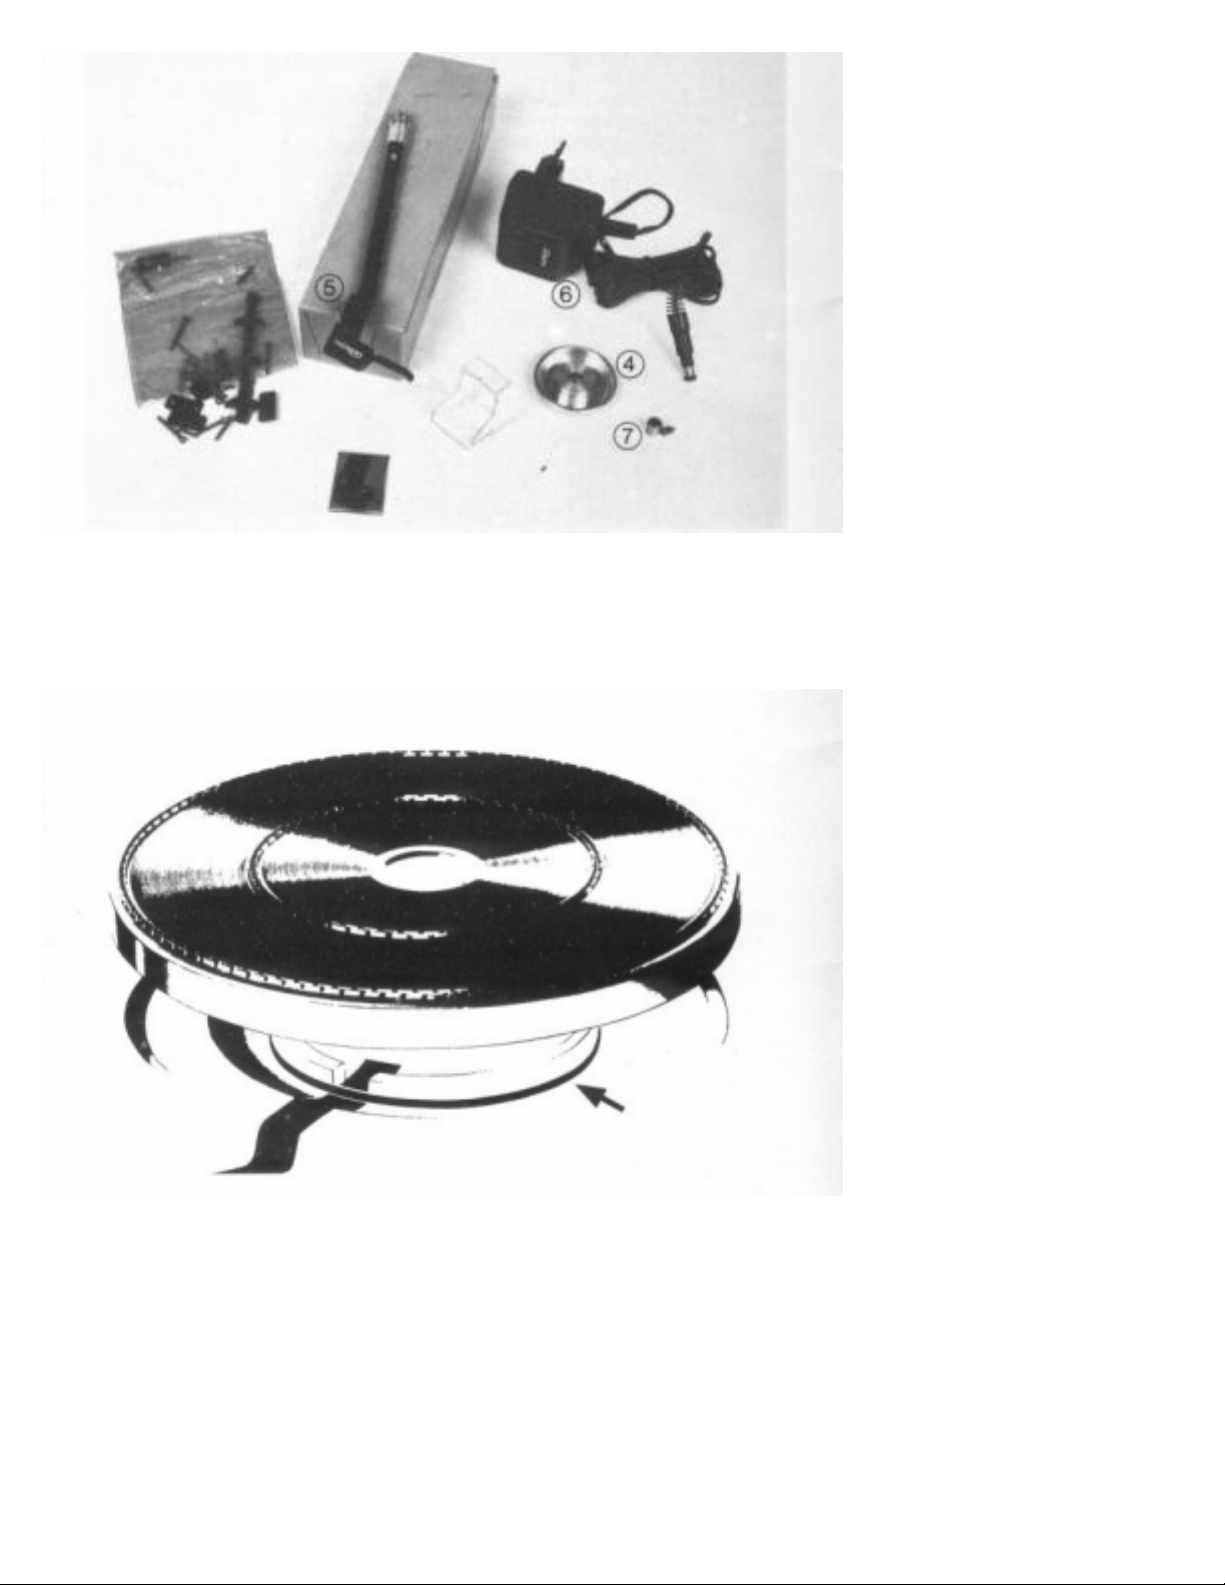
Figure 3
mounted cartridge
pickup.
● the AC mains
aapter (6)
● antiskating weight
The lower styrofoam
packing contains the outer
turntable platter with
rubber mat, the tone arm
counterweight, and the
center-hole adapter (4) for
45 RMP records. The
rubber drive belt is packed
underneath the turntable
platter (Figure 4). Since
the envelope of moisture
absorbing material loses
its effectiveness upon
contact with the open air,
it should be discarded.
Figure 4
Save all packing materials,
including the cardboard
spacers, for possible
reshipment or transport at
some later date.
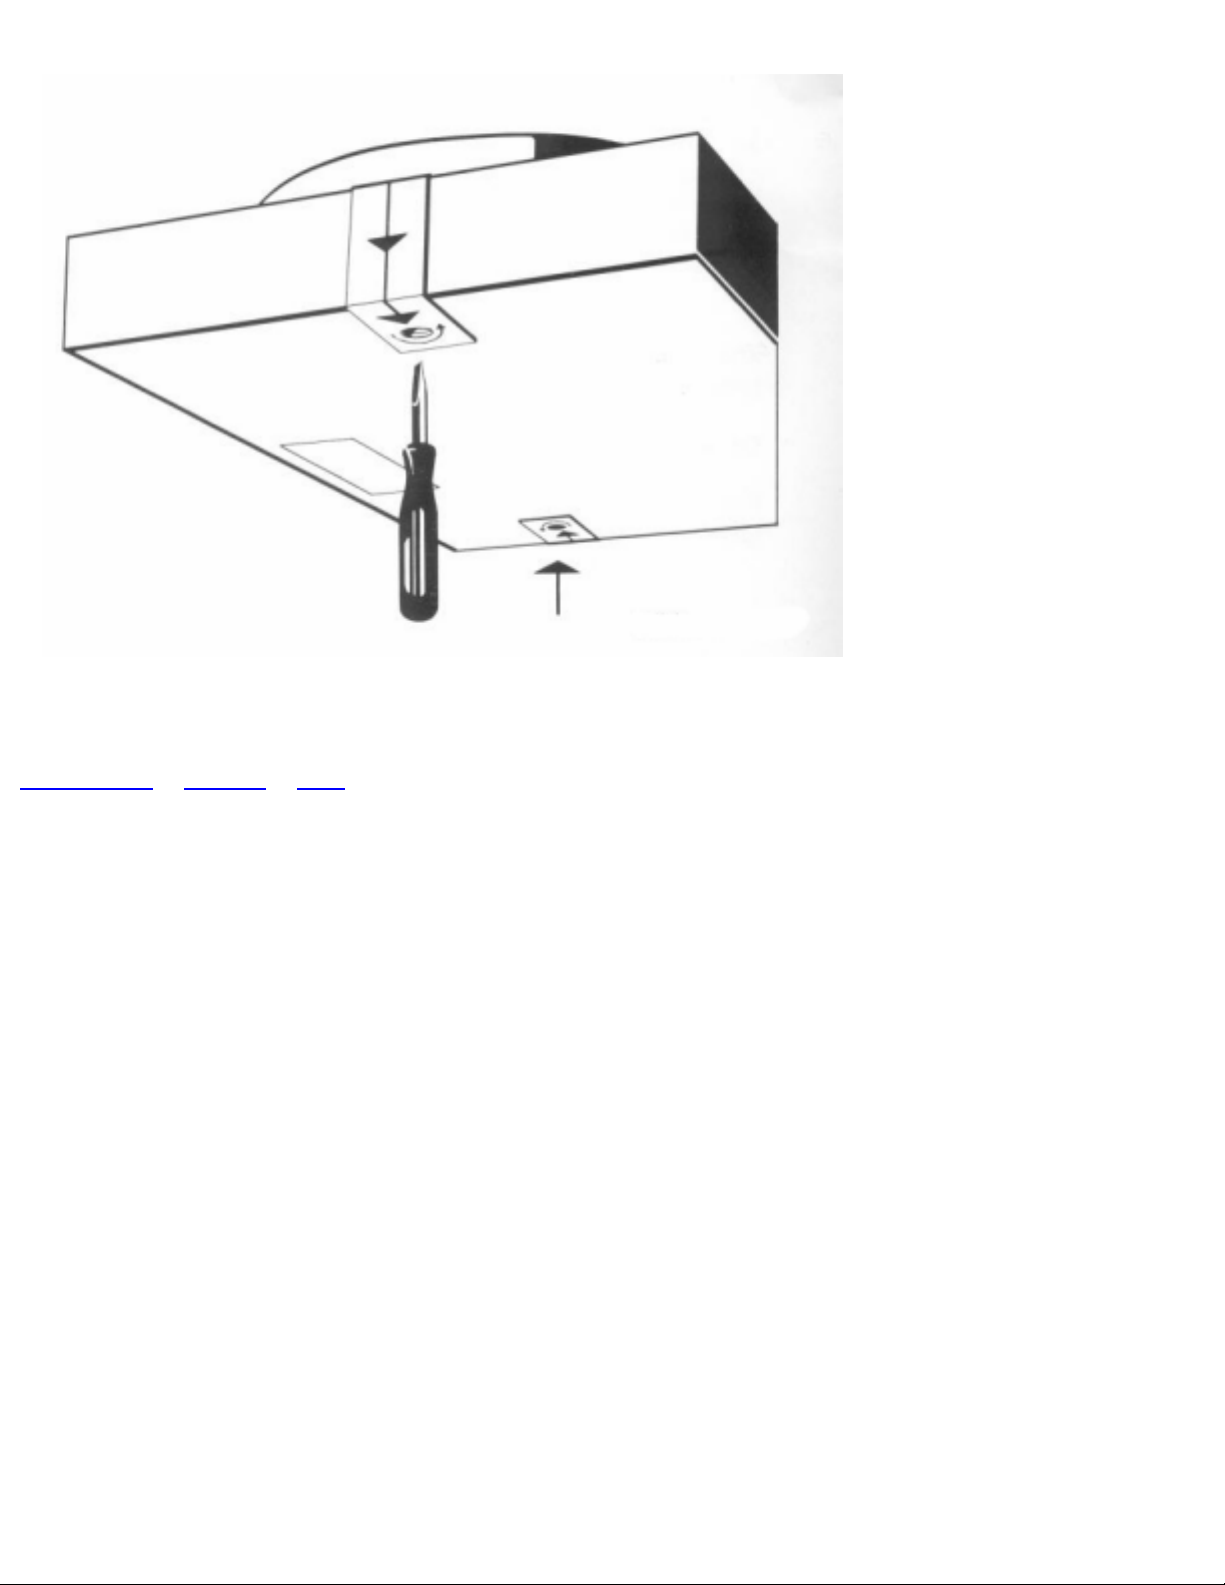
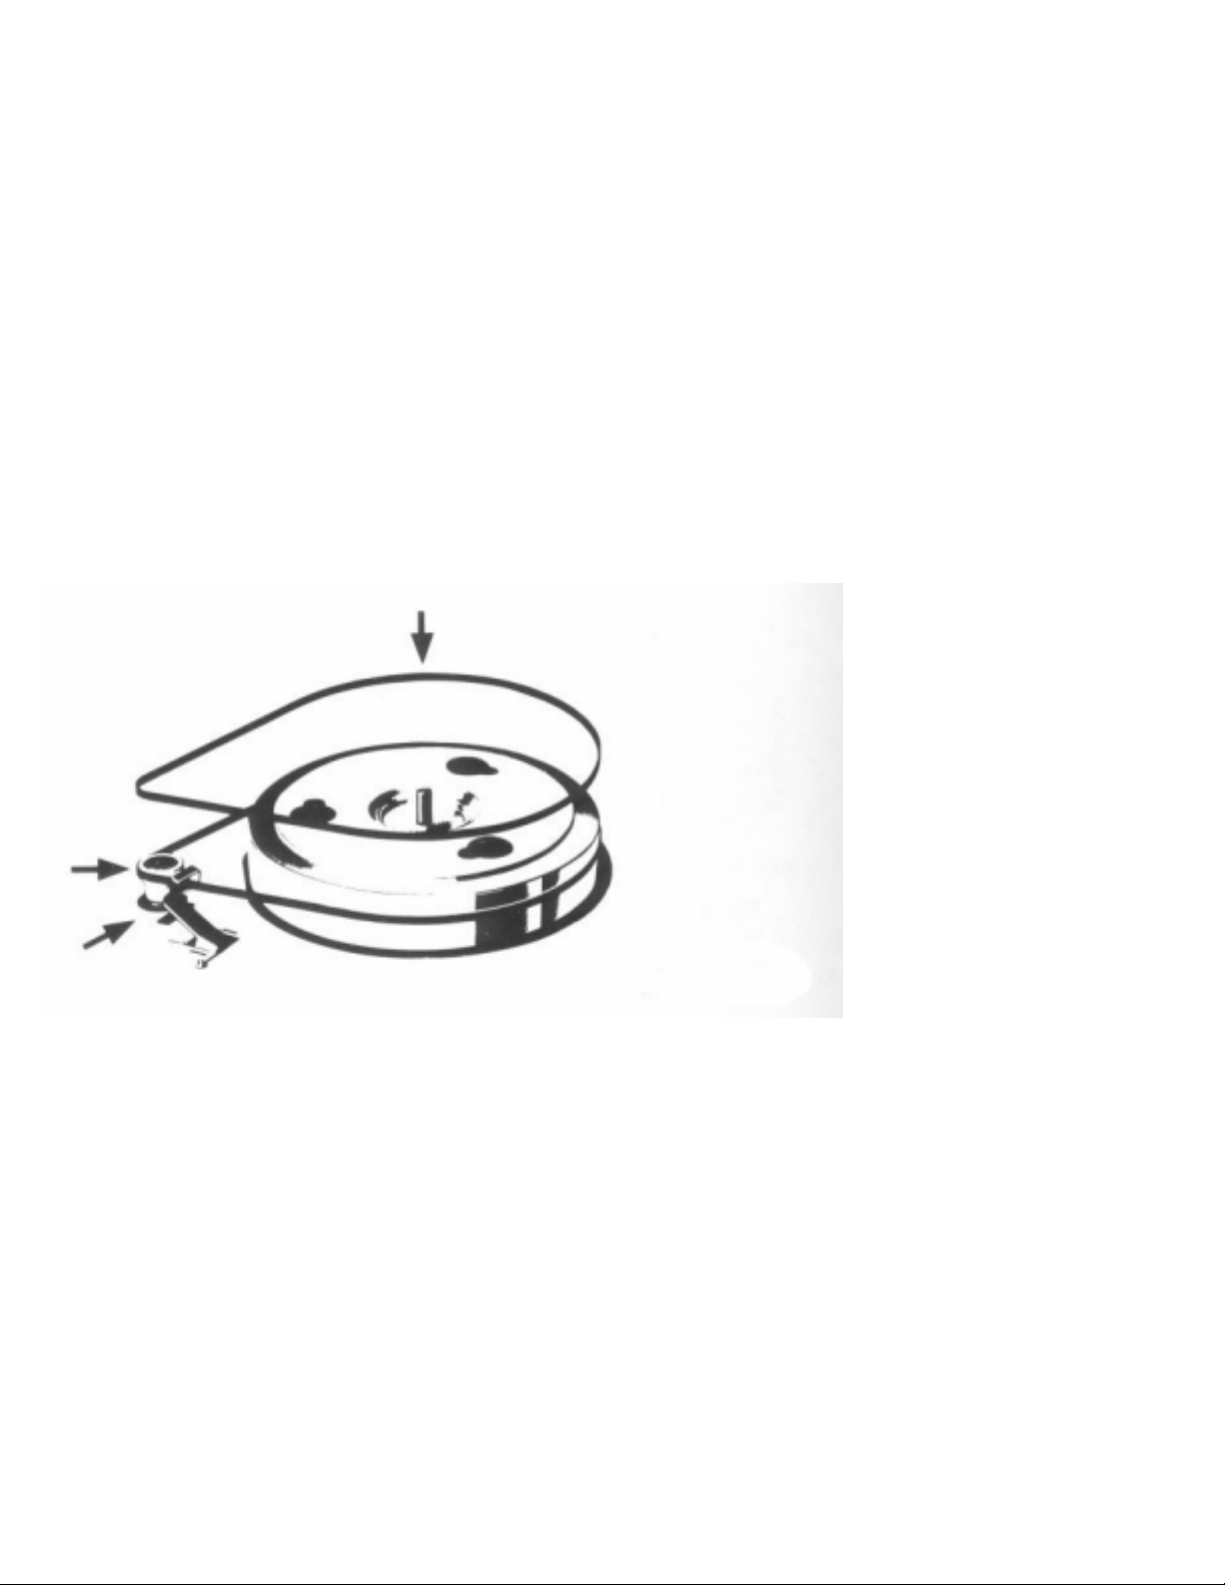
Figure 5
Important notice!
The apparatus
incorporates a transport
lock for the subchassis.
This must be unscrewed
before the turntable is
used (Figure 5). Unscrew
the two screws until the
subchassis is freely
suspended.
< Previous Next > Top
II. Assembling the turntable
The motor spindle, motor
pulley, turntable bearing
and tone arm assembly are
designed to very close
tolerances. As precision
parts, they should be
protected against shock
and strain. Exercise
particular care in fitting or
removing any part of the
turntable assembly.
For shipping or
transporting, always
remove the large outer
platter, the TP 63 cartridge
wand and the tone arm
counterweight from the
turntable.
Figure 6
Loop the drive belt around
the inner turntable platter
and motor pulley as shown
in Figure 6.
Center the outer turntable
platter on the inner one
and set the rubber mat in
place.
The belt, motor pulley and
the periphery of the inner
turntable should be
entirely free of any trace
of oil or grease. If
necessary clean them with
a lintfree cloth dampened
with denatured alcohol or
methylated spirits.
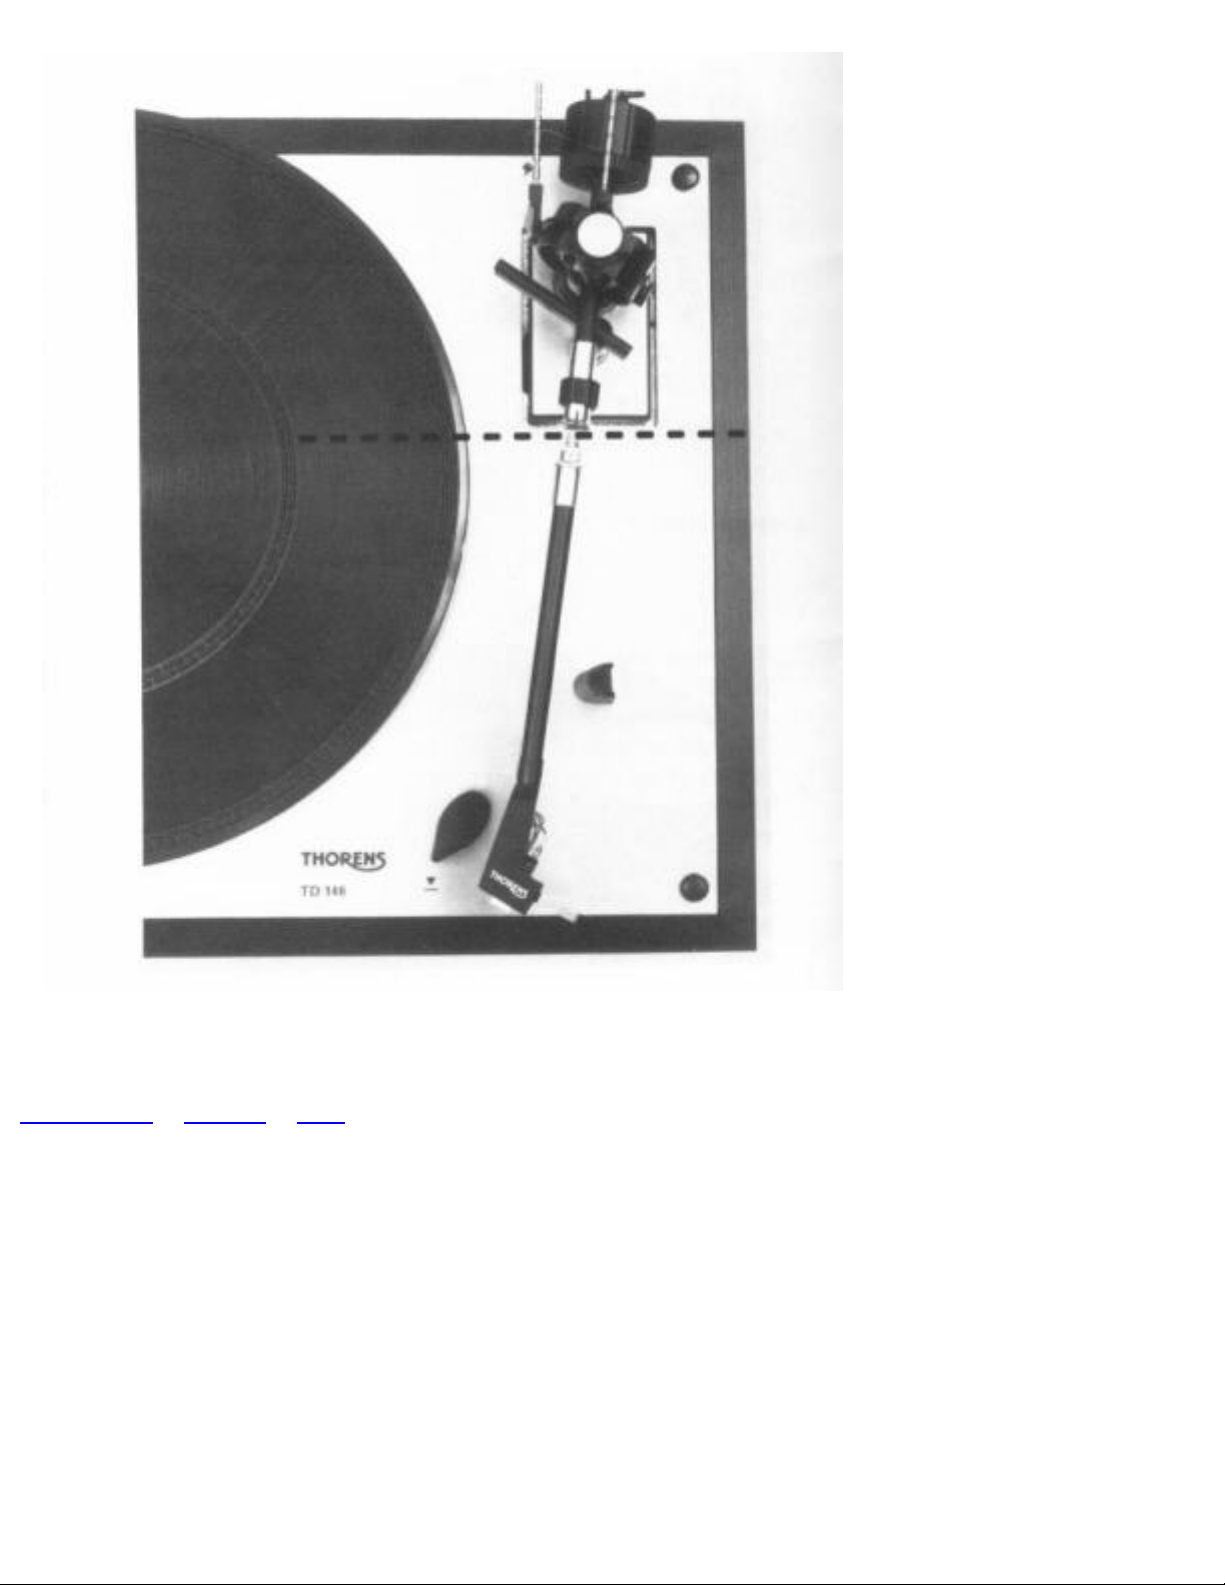
The TP 11 Mk III tone
arm consists of the bearing
assembly and the TP 63
cartridge wand, illustrated
in Figure 7. The cartridge
wand with pickup
cartridge is plugged into
the bearing assembly and
secured by tightening the
knurled collar.
Instructions for mounting
a pickup cartridge are
given in Section VIII.
Tighten the counterweight
temporarily into position
at the rear end of the tone
arm (see Figure 10 in
Section IV).
< Previous Next > Top
Remove the dust cover
from the upper packing
enclosure and fit it into the
hinges (3) of the turntable
base (Figure 1).
Figure 7

III. Electrical connections and installation
1. The turntable may
be powered from
any line voltage by
using the
appropriate
THORENS AC
Adapter (6).
Verify that the line
voltage of the
adapter delivered
with your turntable
corresponds to the
line voltage
intended for use.
2. The stereophonic
signal cable is
terminated with
RCA (Cinch)
phono plugs, coded
as follows: L for
left channel, and R
for right channel.
They are to be
connected to the
appropriate phono
input of an
amplifier or
receiver.
The separate wire
should be attached
to the grounding
screw at the chassis
of the amplifier. It
establishes a
common ground
and thus prevents
hum introduction
(Figure 8).
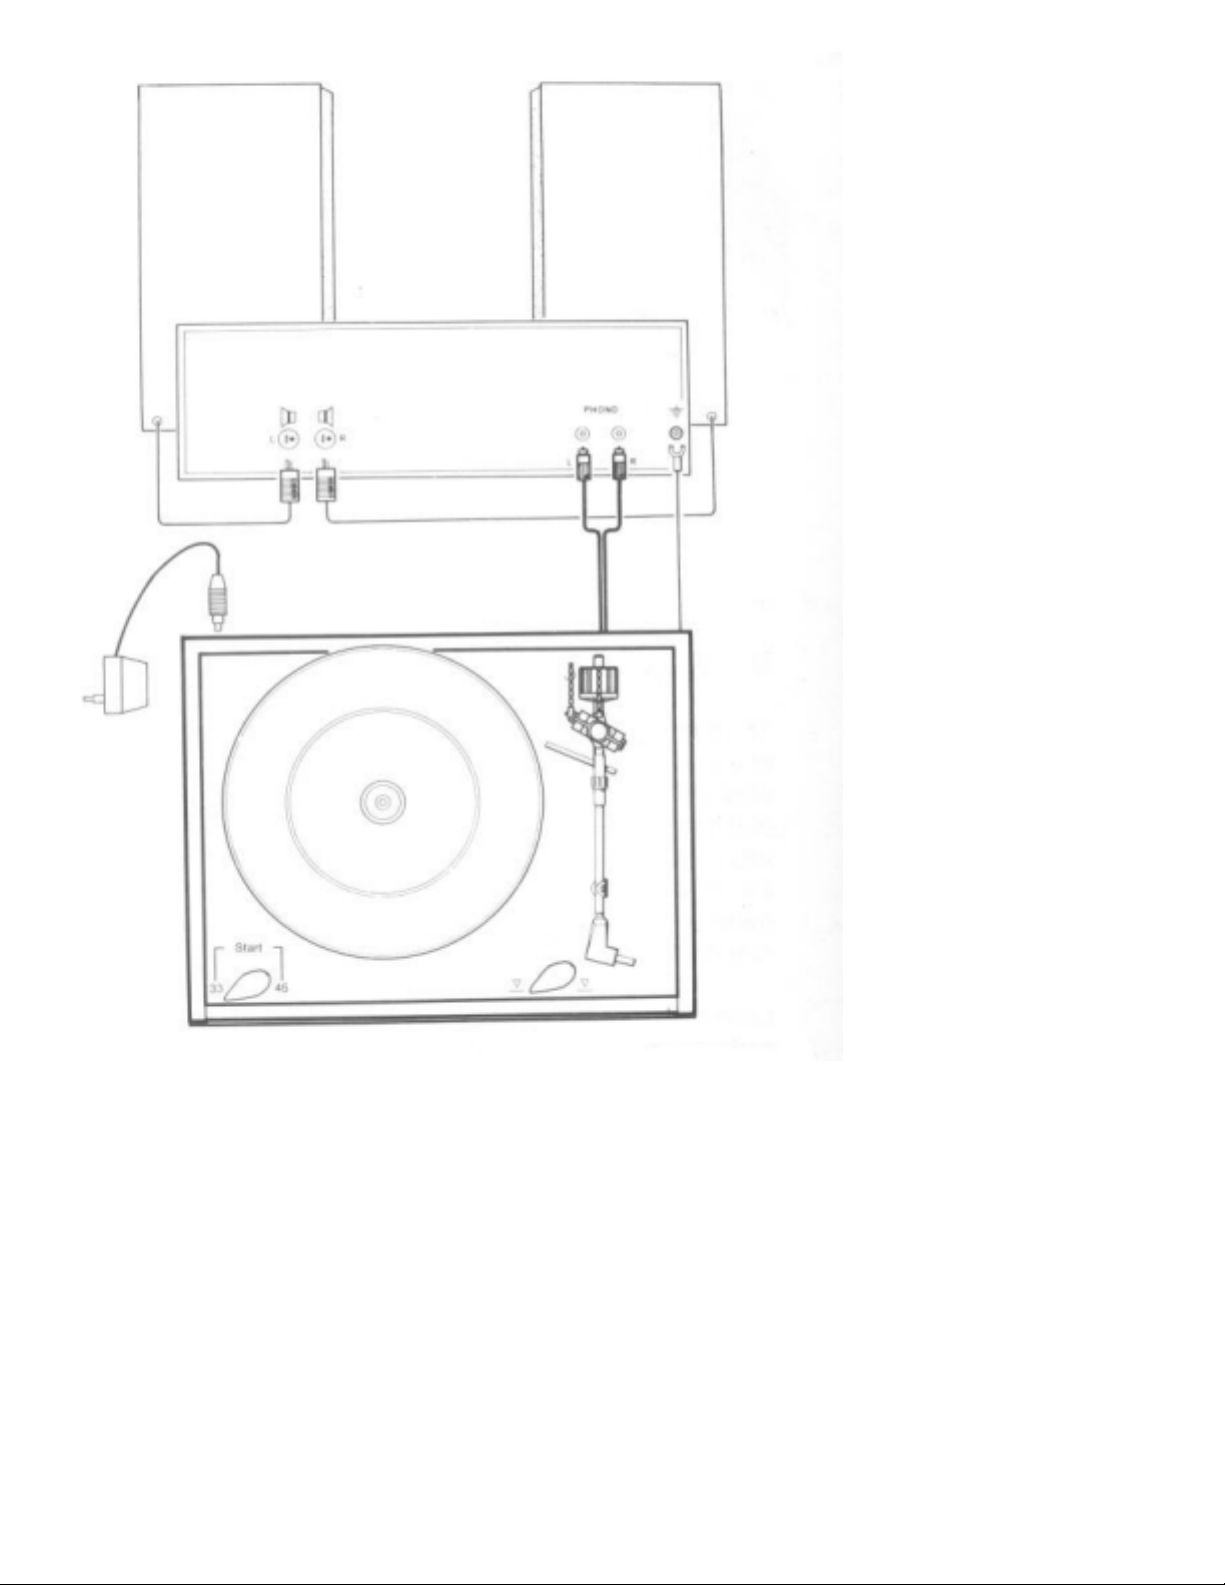
Figure 8
Amplifiers with a 5
pin DIN input
connector require
an adapter cable
(RCA female to
DIN male),
available at your
dealer.
If hum should be
heard in the
loudspeakers when
the turntable is in
use, check that the
cartridge wand is
firmly attached to
the bearing
assembly and that
the connections to
the pickup
cartridge are
secure. Hum may
also be produced
by the close
proximity of
amplifiers or other
appliances. Your
THORENS dealer
or service
representative
should be
consulted if humfree performance
cannot be achieved.
One should avoid a
position such as
shown in Figure 9.
When connecting
the turntable to
other hi-fi
equipment, care
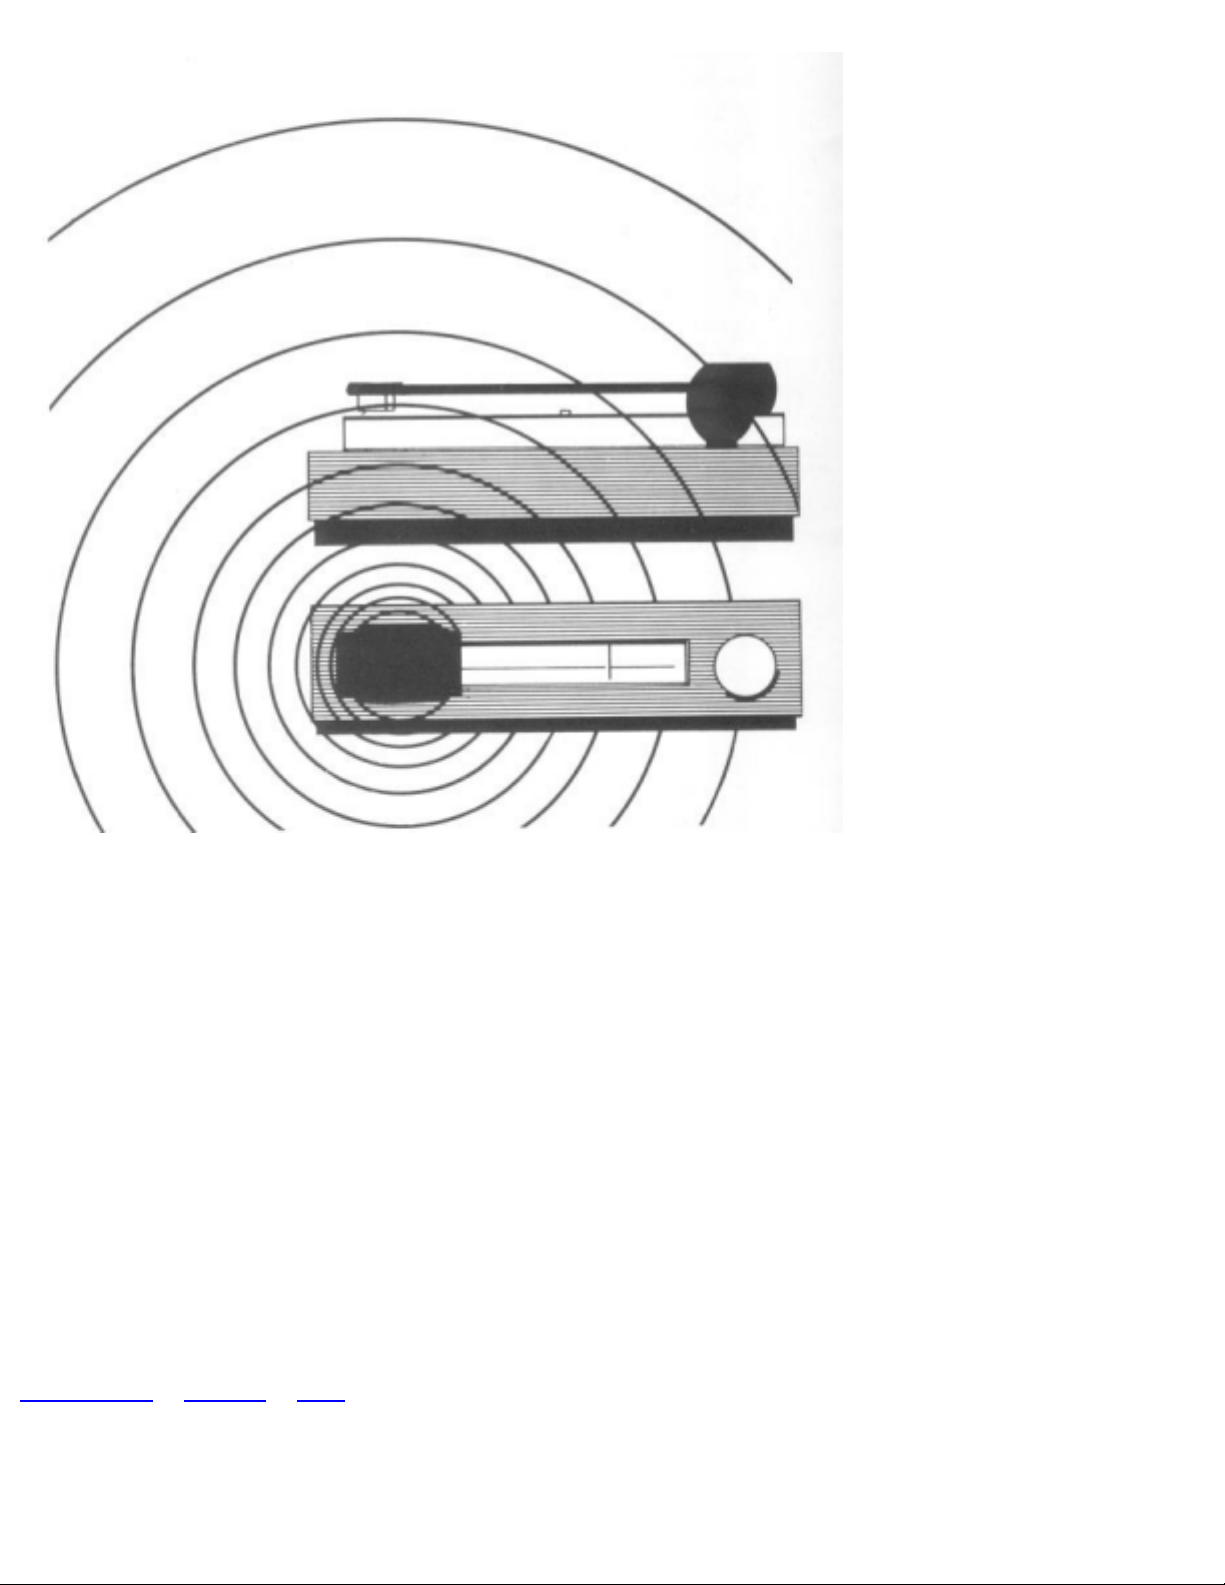
Figure 9
should be taken
that mains
transformers
incorporated within
any ancillary units
be not situated too
close to the pickup
cartridge. Magnetic
cartridges are
sensitive to the
influence of
magnetic fields of
mainns
transformers and
may produce hum
as a result.
The turntable
should be installed
in a location
allowing the dust
cover to be opened
freely. Avoid the
immediate vicinity
of heating units.
Placement of the
turntable on a solid
cabinet and out of
direct line with the
loudspeakers will
minimize the
possibility of
acoustic vibrations
impairing
reproduction
quality.
< Previous Next > Top
 Loading...