

Page 1
BEDIENUNGSANLEITUNGOPERATION MANUAL-
M6 STUDIO
™
flat, precise, professional
DEUTSCHE DESIGNTECHNIK
Page 2

Thonet & Vander® Germany GmbH. Königstorgraben 11, (90402) Nürnberg.
Page 3
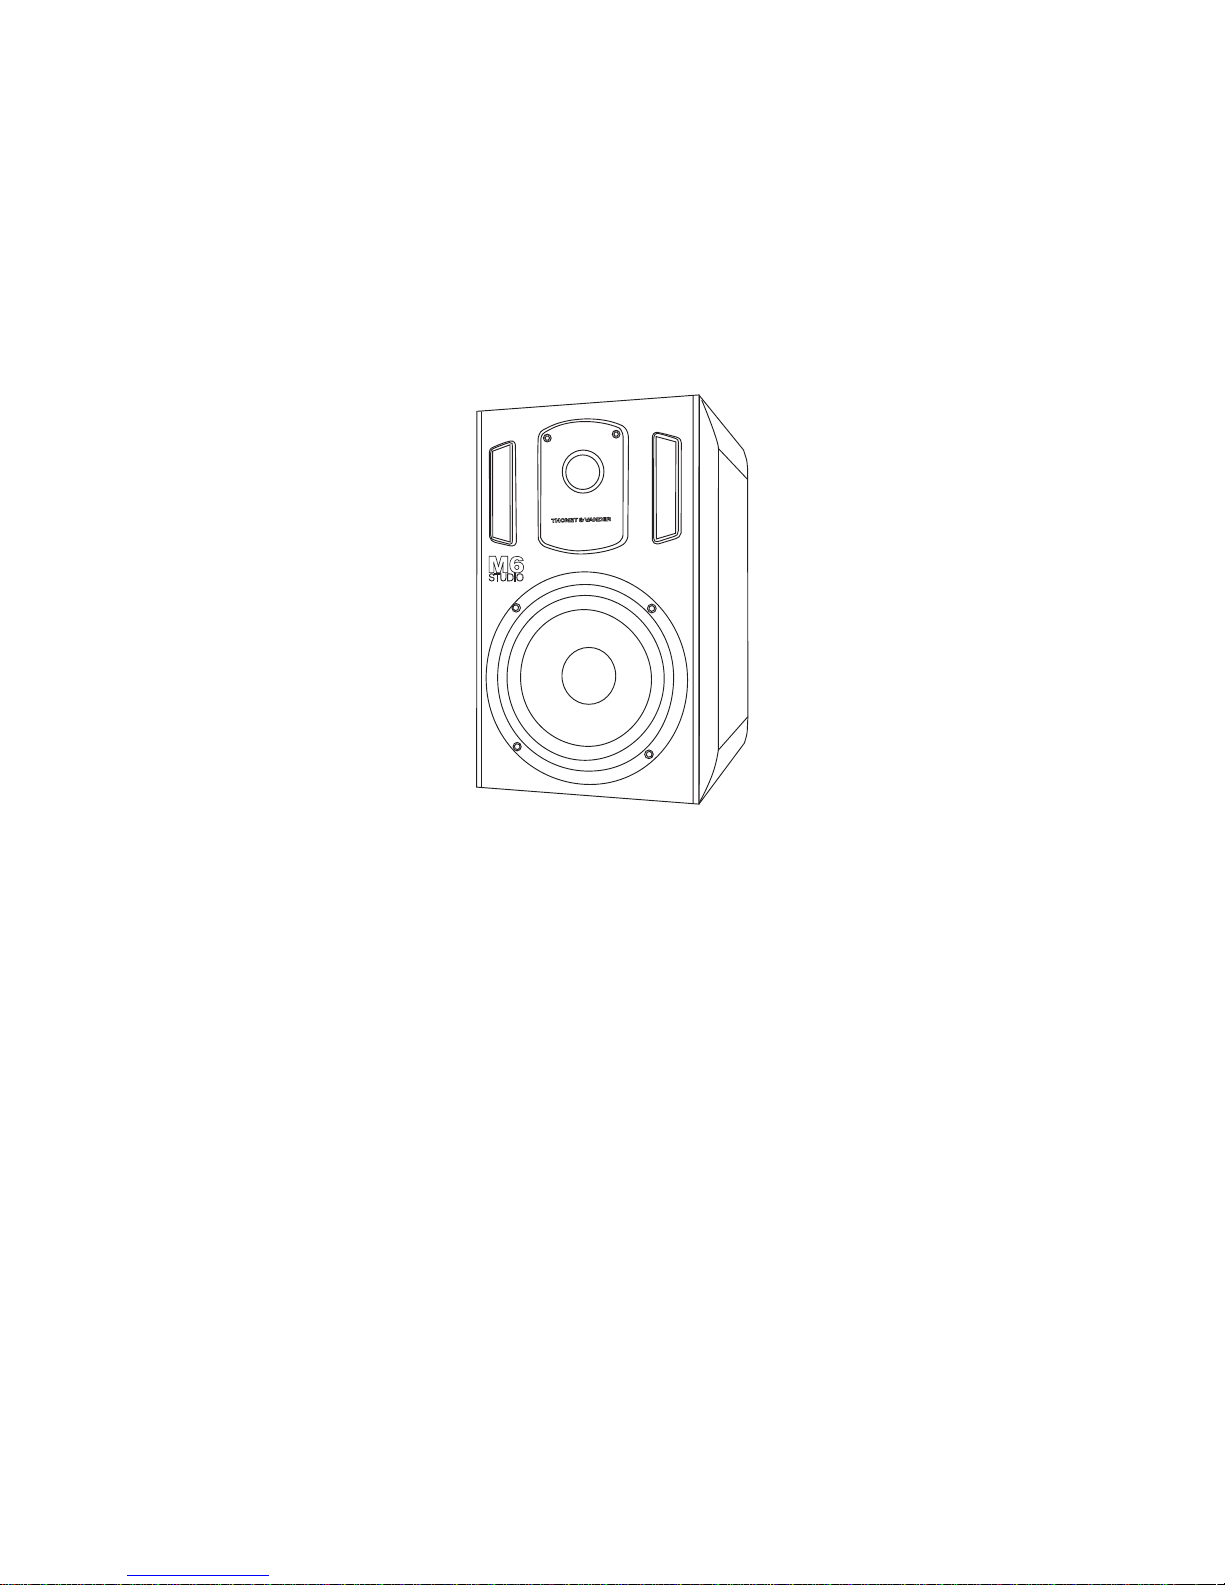
M6 STUDIO
™
flat, precise, professional
-
GLASS-ARAMID FIBER COMPOSITE / XRL AND TRS BALANCE
INPUT / HIGH FREQUENCIES SELECTOR / HDAA™ WOOD.-
Overcome your limits with M6 Studio™. The quality and
performance of the M6 Studio™ is a result of the highest level of
audio excellence, where we achieved a flat frequency response,
with a natural and professional sound. Its exquisite and elegant
design makes it the perfect fit for all professional recording and
rehearsal studios.
Congratulations on your purchase!
Page 4

Thank you for choosing us. Thonet & Vander is constantly focused
on providing the latest technology with the finest cutting-edge
design. Moreover, we look forward to extending your limits and
going beyond your senses. The speakers you’ve just acquired
have been designed, developed and produced under the most
rigorous German quality standards. All of our products will
provide the best performance according to your needs in order to
amplify your emotions, making them more real.
We hope you enjoy it!
Page 5

THONET
&VANDER
-
DEUTSCHE
DESIGNTECHNIK
Page 6
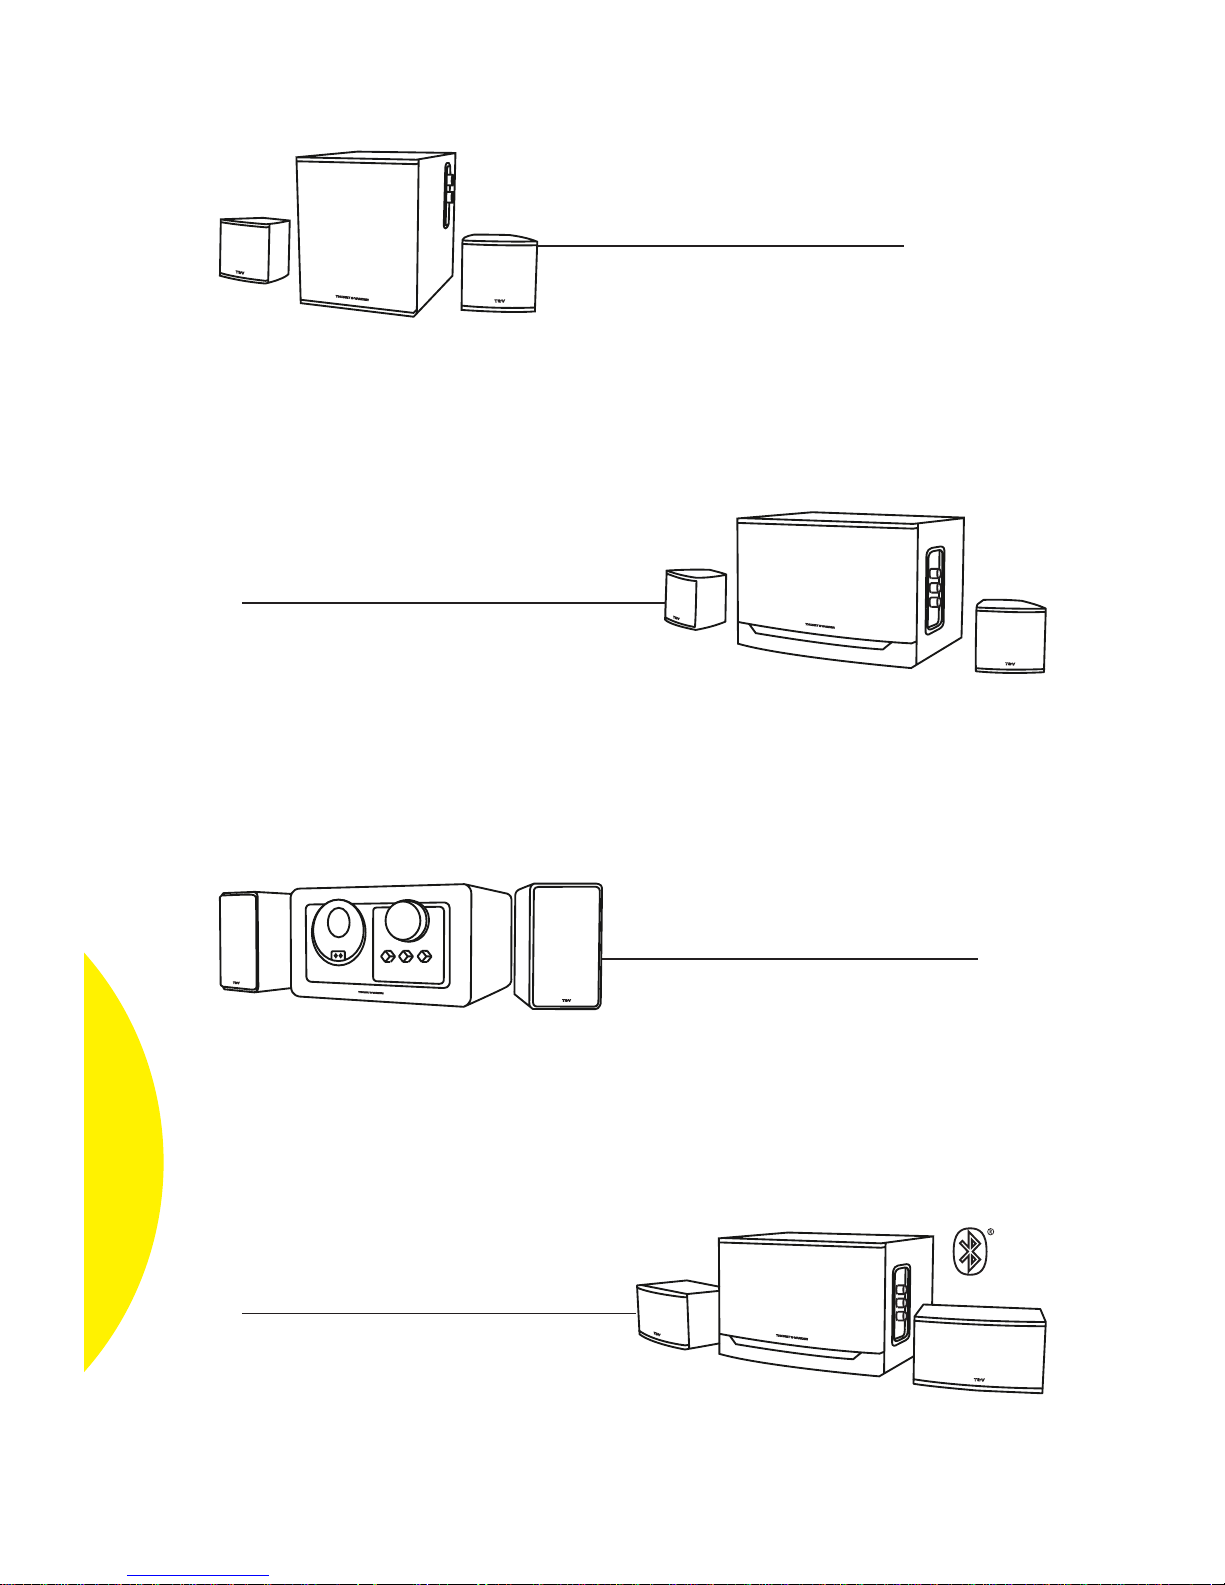
KIND
™
SOUND OF NEW BREED
25W RMS. Volume and bass
control. 3.5mm stereo
input/output. RCA stereo input.
HDAA™ wood.-
RISS
™
GREATNESS CAN BE REAL
32W RMS. Volume, treble and
bass control. Dual RCA stereo
input. HDAA™ wood. Howl
bass™. Wider fx™.-
GRUB™
RETRO STYLE, MODERN VIBES
48W RMS. 3.5mm stereo
input/output. RCA stereo input.
HDAA™ wood. Howl bass™.
Wider fx™.-
LAUT BT
™
SOUL OF PERFECTION
68W RMS. Bluetooth®, Volume,
treble and bass control. Dual
RCA stereo input. HDAA™ wood.
Rage bass™. Wider fx™.-
Page 7

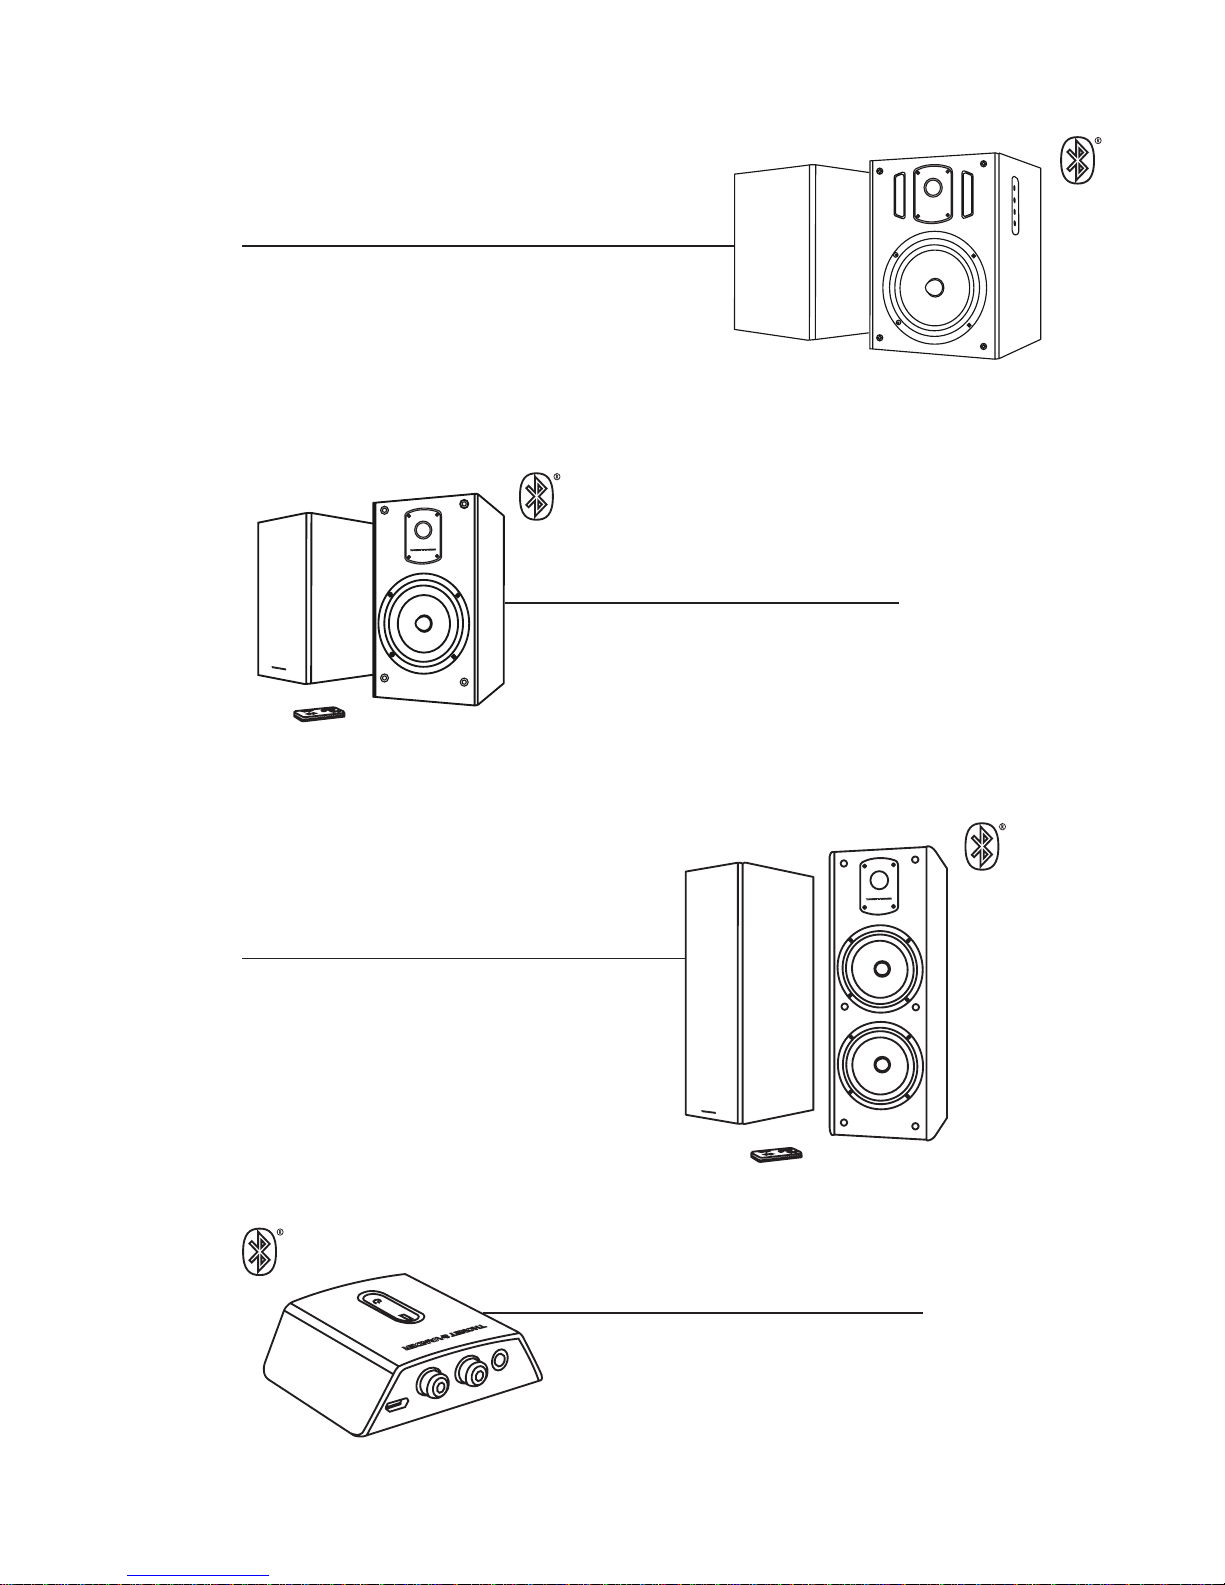
HOCH BT
™
SAME ELEGANCE,
TOMORROW´S TECHNOLOGY
70W RMS. Bluetooth® v4.0.
Remote Control. RCA Stereo
Input. 3.5mm Stereo Input.
HDAA™ wood. Hammer Bass™.
Drone Fx™.-
KÜRBIS BT
™
LET THE SOUND FLY
60W RMS. Bluetooth® v4.0.
RCA Stereo Input. 3.5mm
Stereo Input. HDAA™ wood.
Hammer Bass™. Drone Fx™.-
RÄTSEL BT™
POWER OF FREEDOM
72W RMS. Bluetooth® v2.1.
NFC technology. Remote control.
3.5mm stereo input-output. Dual
RCA stereo input. HDAA™ wood.
Hammer bass™. Wider fx™-
VERTRAG
™
COMPACT SHAPE, WIDE SOUND
32W RMS. Volume, treble, and
bass control. Dual RCA stereo
input. HDAA™ wood. Howl bass™.-
Page 8
KOLOSS
™
MAJESTIC SOUND
160W RMS. Bluetooth® v4.0
with aptX®. Remote Control.
RCA Stereo Input. S/P DIFF
Optical. Active Crossover. DSP.
HDAA™ wood. Rage Bass™.
Glow Fx™.-
KUGEL
™
HI-FI SOUND FOR YOU
140W RMS. Bluetooth® v4.0
with aptX®. Remote Control.
RCA Stereo Input. S/P DIFF
Optical. Active Crossover. DSP.
HDAA™ wood. Rage Bass™.
Glow Fx™.-
FLUG
™
BREAKING BOUNDARIES
Bluetooth® v2.1. Top range
32x. Smart connection.
Power/Pairing Button.-
TITAN
™
LISTEN TO THE BEAST
180W RMS. Bluetooth® v4.0
with aptX®. Remote Control.
DSP/S/P Diff optical. HDAA™
wood. Rage bass™. Glow fx™.-
Page 9

9
INDEX
_10
_10
_12
_14
_16
_17
_18
_20
_21
DE
EN
ES
CERTIFICATIONS
COPYRIGHT & TRADEMARKS
SAFETY PRECAUTIONS
AWARDS
WARRANTY
LANGUAGES
Page 10
10
FLAT, PRECISE, PROFESSIONAL
DE
INSTALLATION DES SYSTEMS
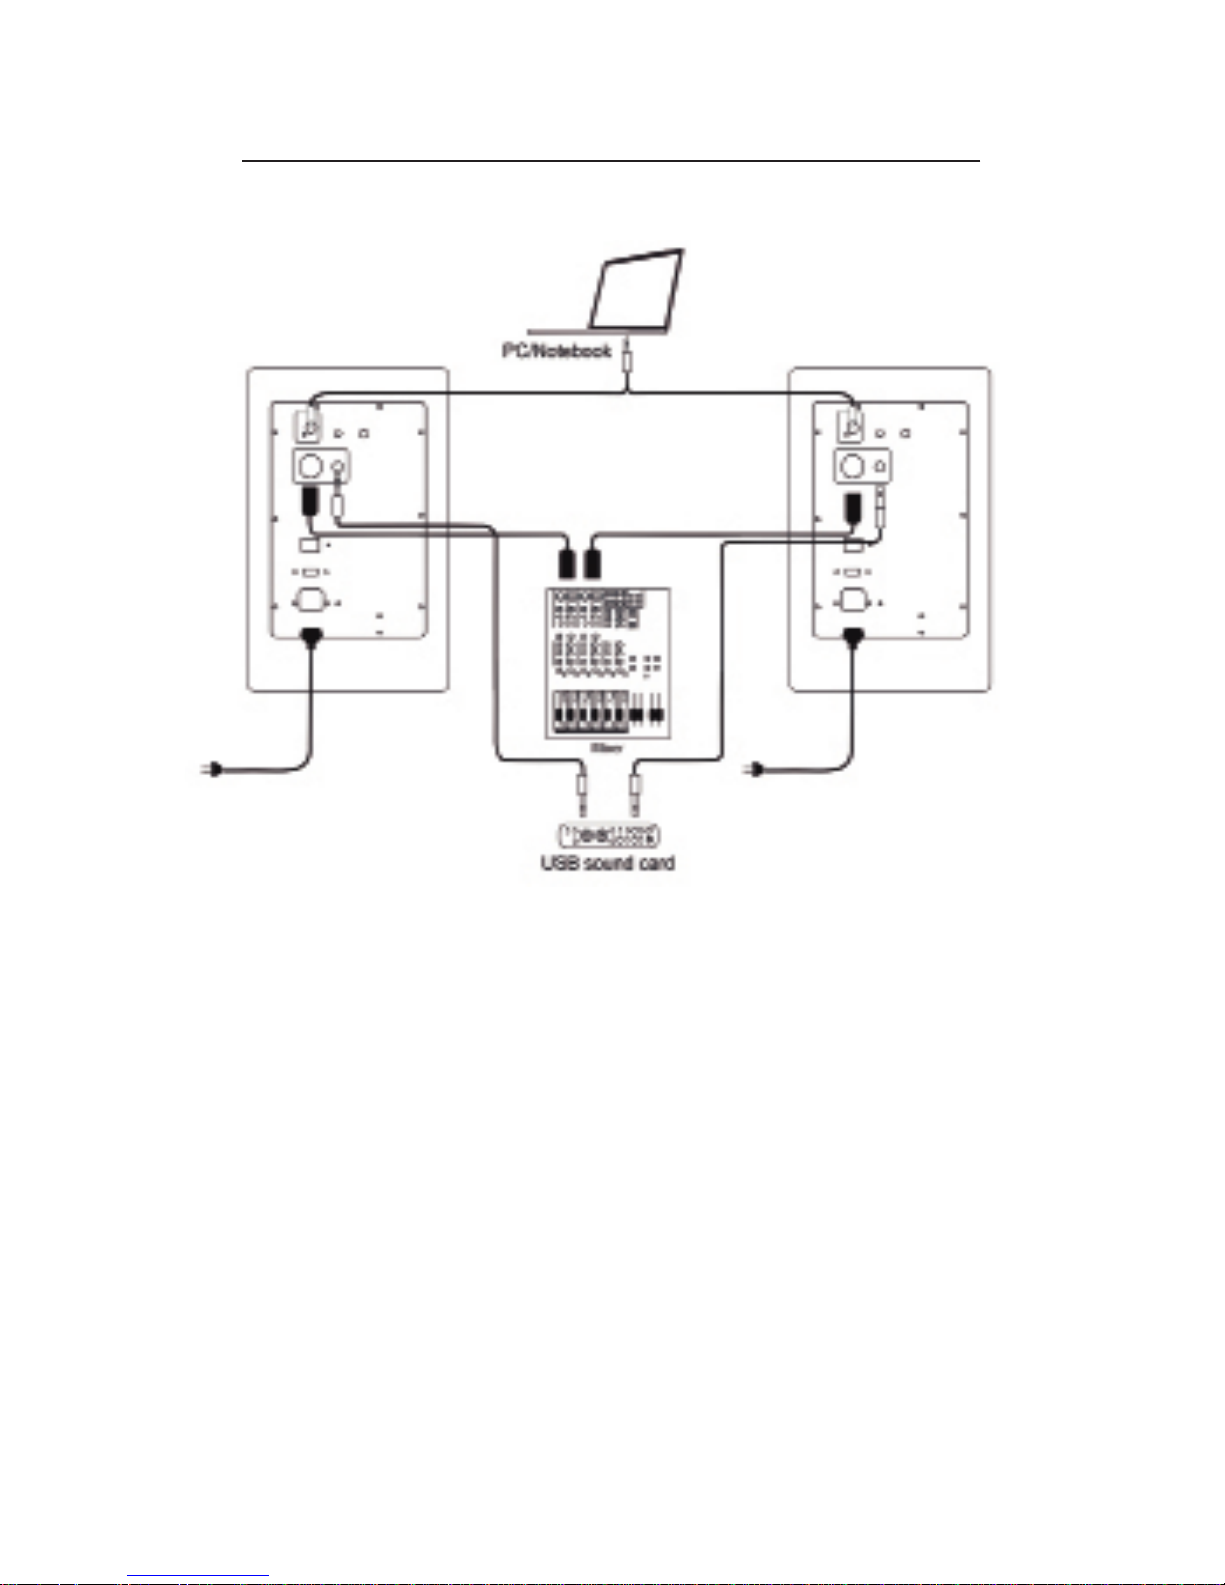
1. Das M6 Studio™ ist sowohl für symmetrische als auch für asymmetrische
Signalübertragung geeignet. Die symmetrische Signalübertragung erfolgt über den
Anschluss eines XLR- oder TRS-Steckers (Spitze, Ring, Buchse). Beide angeordnet
auf der Rückseite. Die Verkabelung derselben wird auf die folgende Art realisiert:
Pin 1 und Buchse = Erdung (Masse)
Pin 2 und Spitze = + Signal
Pin 3 und Ring = - Signal
Für die asymmetrische Signalübertragung muss die Quelle des Signals an
den Cinch-Stecker auf der Rückwand angeschlossen werden. Schließen Sie
den Ausgang des Gerätes, welches Sie benutzen wollen (PC, USB-Audiokarte,
Mischpult), an den entsprechenden Eingang an und verwenden Sie immer Kabel
höchster Qualität.
2.Überprüfen Sie, dass der Wahlschalter für die Spannung, entsprechend der
Spannung, die in dem Land verwendet wird, in der richtigen Position steht.
Stellen Sie sicher, dass der Netzschalter in der {Aus} Stellung ist. Stecken Sie das
Netzkabel in den Anschluss IEC 60320-C8, welcher sich auf der Rückseite des
Hauplautsprechers befindet und dann verbinden Sie das andere Ende mit einer
Steckdose.
Page 11

11
M6 STUDIO
DE
3. Stellen Sie sicher, dass die Lautstärke der Signalquelle auf Minimum
positioniert ist, und schalten Sie das Gerät ein.
4. Spielen Sie die gewünschte Musik und justieren Sie das Volumen und die Höhen
entsprechend Ihren Vorlieben.
Fussnote: Die Werkseinstellung des M6 Studios™ ist flach (Wahlschalter in der Position
0db). Wenn es die Akustik des Saales verlangt, kann der Wahlschalter in die Position +1dB
gestellt werden, um die hohen Frequenzen zu erhöhen (in sehr trockenen Räumen) oder
in Position -1dB oder -2dB um das Niveau der Hochtöne zu vermindern (in sehr halligen
Räumen).
TECHNISCHE DATEN
MUSIKLEISTUNG: 90 W RMS
FREQUENZGANG: 45 Hz - 25 kHz
KLIRRFAKTOR: 0,1% 90 dB / 1m> 100 Hz
S/N: 80 dB, + 4 dBu
MATERIAL AKUSTIKBOX: Holzgehäuse aus HDAA™
GRÖSSE AKUSTIKBOX: 330 x 222 x 266 mm
GRÖSSE TREIBER: 6.5”
MATERIAL TREIBER: Glas-Aramid-Faserverbund
WIDERSTAND/LEISTUNG: 4 Ω 80 W
GRÖSSE HOCHTÖNER: 1 Zoll
MATERIAL HOCHTÖNER: Seide
WIDERSTAND/LEISTUNG: 4 Ω 30 W
ALC (Automatic Level Control)
MAGNETISCHE ABSCHIRMUNG
STEUERUNG: Lautstärke, Frequenzwahl.
CINCH EINGÄNGE: Unsymmetrische / symmetrische XLR- TRS.
IMPEDANZ DER EINGÄNGE: 10 Ω unsymmetrisch / 22 Ω symmetrisch
EINGANGSEMPFINDLICHKEIT: 260 mV.
ACTIVE CROSSOVER
ÜBERTRAGUNGSFREQUENZ: 1,9 kHz
CROSSOVER FILTER: dritter Ordnung / 18 dB pro Oktave.
ZUBEHÖR
Stromkabel mit Stecker IEC 60320 C13
Page 12
12
FLAT, PRECISE, PROFESSIONAL
EN
SYSTEM INSTALLATION
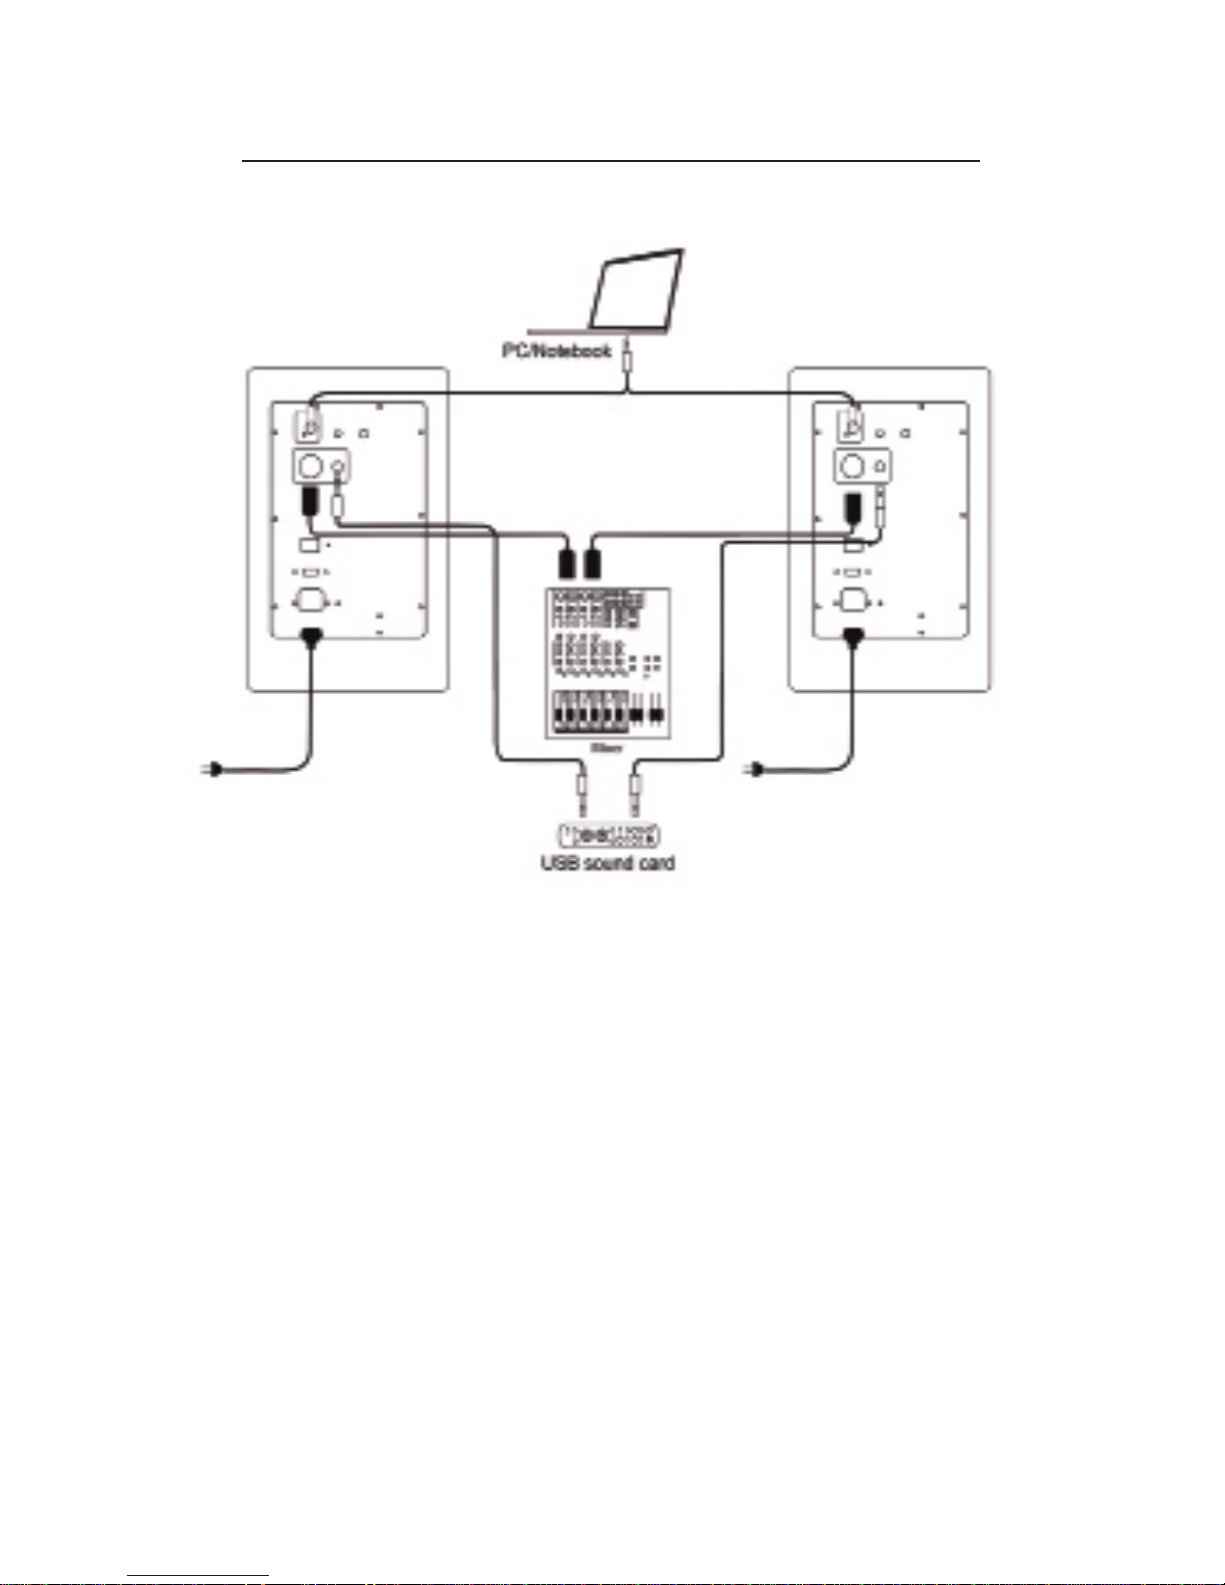
1. M6 Studio™ can be used either with balanced signals or unbalanced signals.
Balanced signals should be connected by XLR connector or TRS connector. Cable
connections must be made in the following way:
Pin 1 and sleeve = ground
Pin 2 and tip= signal +
Pin 3 and ring = signal –
Unbalanced signals must be connected to the RCA connector located on the back
panel. Connect your device output (PC, USB audio interface, mixer) to the matching
input, using good quality cables.
2. Verify voltage selector. It must be in the correct position according to your country
voltage. Make sure the power switch is powered off. Plug the power cable into
the IEC 60320 C14 connector located on the back panel and then plug it into an
electrical socket.
3. Verify that the signal source volume control position is at min and then turn on
the speaker.
4. Play the music you want and adjust volume and treble selector according to your
preference.
Page 13

13
M6 STUDIO
EN
Note: M6 Studio™ factory setting is flat (located at position selector 0dB). You can adjust
selector to +1 dB to increase the high frequencies (very dry rooms) or place it at -1dB
or-2dB to reduce treble level (highly reverberant rooms).
TECHNICAL FEATURES
POWER OUTPUT: 90W RMS
FREQUENCY RESPONSE: 45Hz - 25 kHz
THD: 0.1% 90dB/1m > 100Hz
S/N: 80dB, +4dBu
ACOUSTIC BOX MATERIAL: HDAA™ Wood
ACOUSTIC BOX SIZE: 330 x 222 x 266 mm
DRIVER SIZE: Woofer 6.5"
DRIVER MATERIAL: Glass-aramid fiber composite
IMPEDANCE / POWER: 4 Ω 80W
TWEETER SIZE: 1”
TWEETER MATERIAL: Silk
IMPEDANCE / POWER: 4 Ω 30W
AUTO LEVEL CONTROL
ANTIMAGNETIC SHIELD
CONTROLS: Volume, High frequency selector.
INPUTS RCA: Unbalanced / XLR-TRS balanced.
INPUTS IMPEDANCE: 10 Ω unbalanced / 22 Ω balanced
INPUTS SENSITIVITY: 260 mV.
ACTIVE CROSSOVER
CROSSOVER FREQUENCY: 1.9 kHz
CROSSOVER FILTER: Third order / 18dB per octave.
ACCESSORIES
Power cable of equipment with IEC 60320 C13 outlet
Page 14
14
FLAT, PRECISE, PROFESSIONAL
ES
INSTALACIÓN DEL SISTEMA
1. M6 Studio™ can be used either with balanced signals or unbalanced signals.
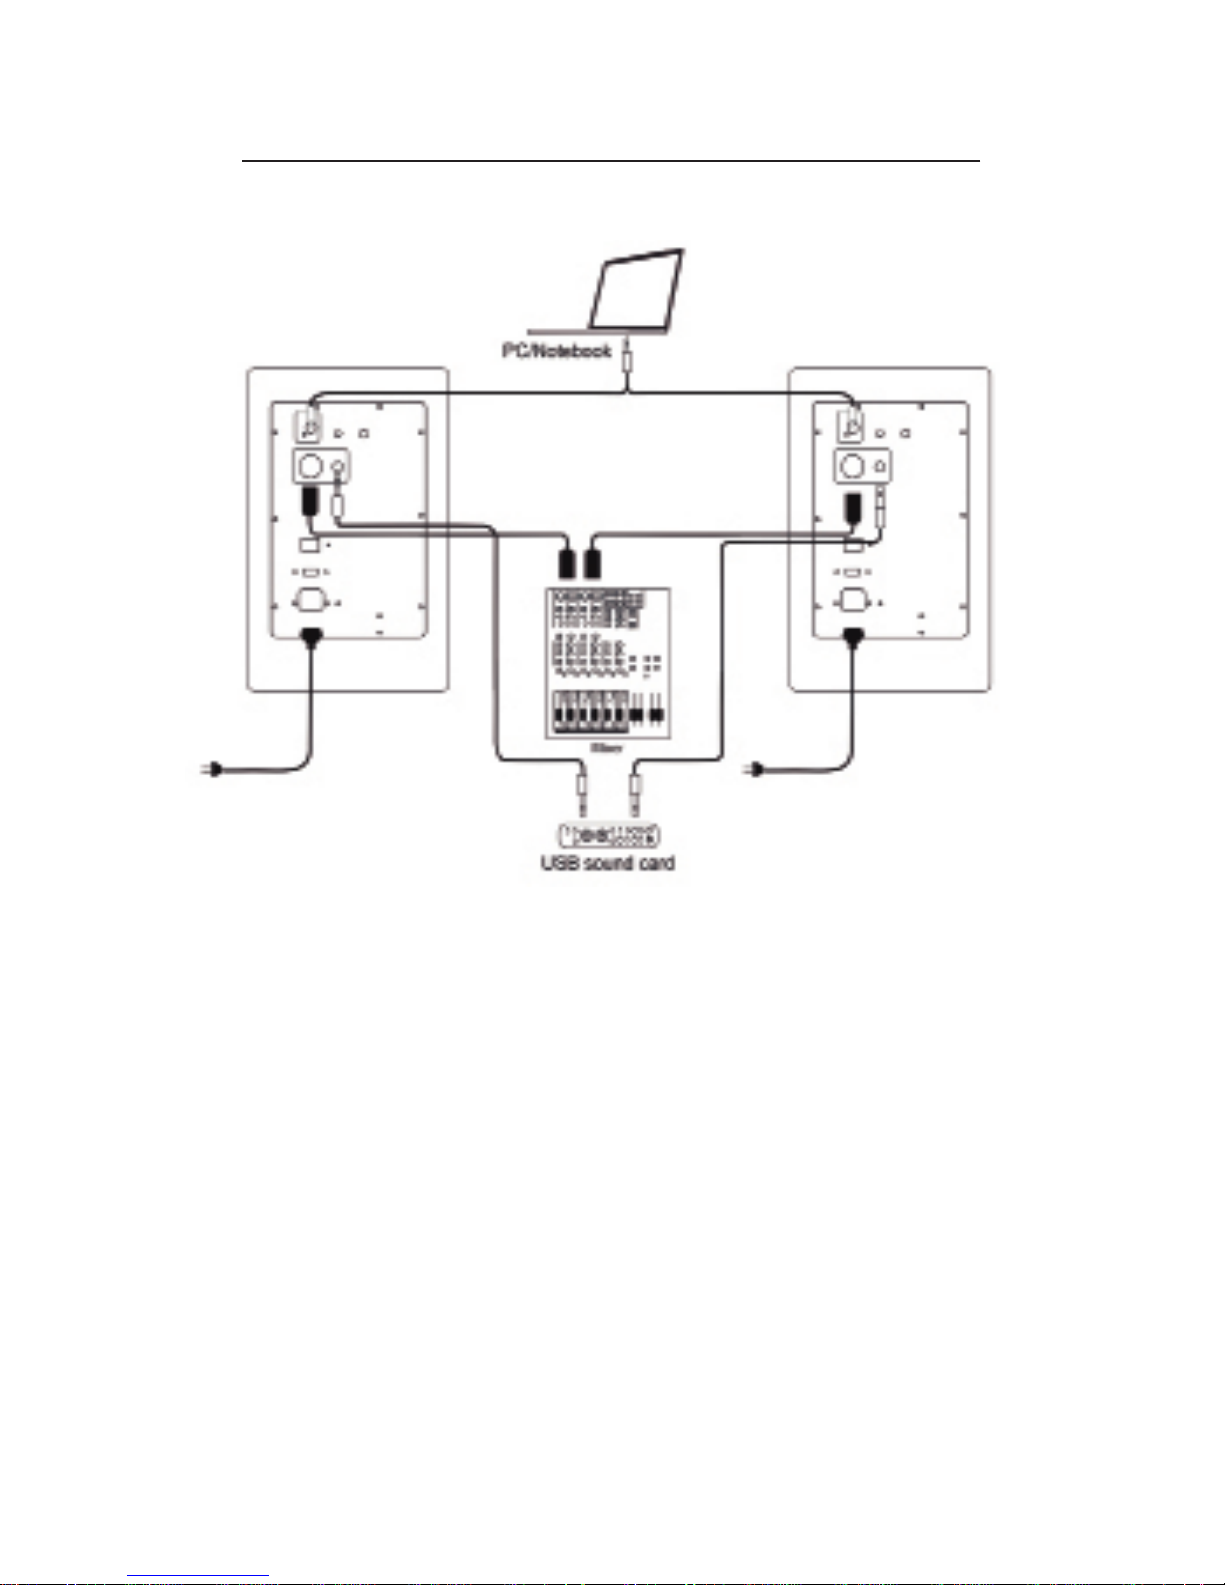
1. M6 Studio™ puede ser utilizado tanto con señales balanceadas como con señales
no balanceadas. Las señales balanceadas pueden conectarse utilizando el conector
XLR o el conector TRS (punta, anillo, manga), ambos ubicados en la parte trasera.
El cableado de los mismos se realiza de la siguiente manera:
Pin 1 y manga = Tierra (masa)
Pin 2 y punta = señal +
Pin 3 y anillo = señal -
Las señales no balanceadas deben conectarse en la ficha RCA ubicada en el panel
trasero. Conecte la salida del dispositivo que desea utilizar (PC, placa de audio
USB, consola mezcladora) a la entrada correspondiente, siempre utilizando cables
de alta calidad.
2. Verifique que el selector de voltaje esté ubicado en la posición correcta de
acuerdo al voltaje utilizado en su país. Verifique que la llave de encendido esté en
la posición de apagado y enchufe el cable de alimentación en el conector IEC 60320
C14 ubicado en la parte trasera del altavoz principal. Luego conecte el otro extremo
en un tomacorriente.
3. Verifique que el control de volumen de la fuente de señal a utilizar esté
posicionado al mínimo y encienda el equipo.
Page 15

15
M6 STUDIO
ES
4. Reproduzca la música deseada y ajuste el volumen y selector de agudos según
su preferencia.
Nota: El seteo de fábrica de M6 Studio™ es plano (selector ubicado en la posición 0dB).
Si la acústica de la sala lo requiere puede ajustar el selector en la posición +1dB para
incrementar las altas frecuencias (en salas muy secas) o colocarlo en -1dB o -2dB para
reducir el nivel de agudos (en salas muy reverberantes).
ESPECIFICACIONES TÉCNICAS
POTENCIA DE SALIDA: 90W RMS
RESPUESTA EN FRECUENCIA: 45Hz - 25 kHz
THD: 0.1% 90dB/1m > 100Hz
S/N: 80dB, +4dBu
MATERIAL DE LA CAJA ACÚSTICA: HDAA™ Wood
TAMAÑO DE LA CAJA ACÚSTICA: 330 x 222 x 266 mm
TAMAÑO DEL WOOFER: 6.5"
MATERIAL DEL WOOFER: Compuesto de fibra de vidrio y aramida
IMPEDANCIA / POTENCIA: 4 Ω 80W
TAMAÑO DEL TWEETER: 1”
MATERIAL DEL TWEETER: Silk
IMPEDANCIA / POTENCIA: 4 Ω 30W
ALC (AUTO LEVEL CONTROL)
BLINDAJE ANTIMAGNÉTICO
CONTROLES: Volumen, Selector de Frecuencias.
ENTRADAS RCA: Unbalanced / XLR-TRS balanced.
IMPEDANCIA DE LAS ENTRADAS: 10 Ω unbalanced / 22 Ω balanced
SENSIBILIDAD DE LA ENTRADA: 260 mV.
ACTIVE CROSSOVER
FRECUENCIA DEL CROSSOVER: 1.9 kHz
FILTRO DEL CROSSOVER: Tercer orden / 18dB por octavo.
ACCESORIOS
Cable de alimentación del equipo con ficha IEC 60320 C13
Page 16
16
CERTIFICATIONS
Page 17

17
COPYRIGHT AND TRADEMARKS
Thonet & Vander hereby declares that this speaker is in compliance with the essential
requirements and other relevant provisions of Directive 1999/5/EC.
Thonet & Vander Germany GmbH. All rights reserved. Thonet & Vander®, state.of.the.
art.sound®, Deutsche Designtechnik and related trademarks, names and logos are the
property of Thonet & Vander® GmbH, and are registered and/or used in Germany and
countries around the world.
All other names of systems, products, and services are trademarks of their respective
owners. In the manual, the ™ or ® marks may not be specified.
Features and specifications are subject to change without notice.
All other trademarks are trademarks of their respective owners.
Not all the software listed above may be delivered with your model.
Page 18
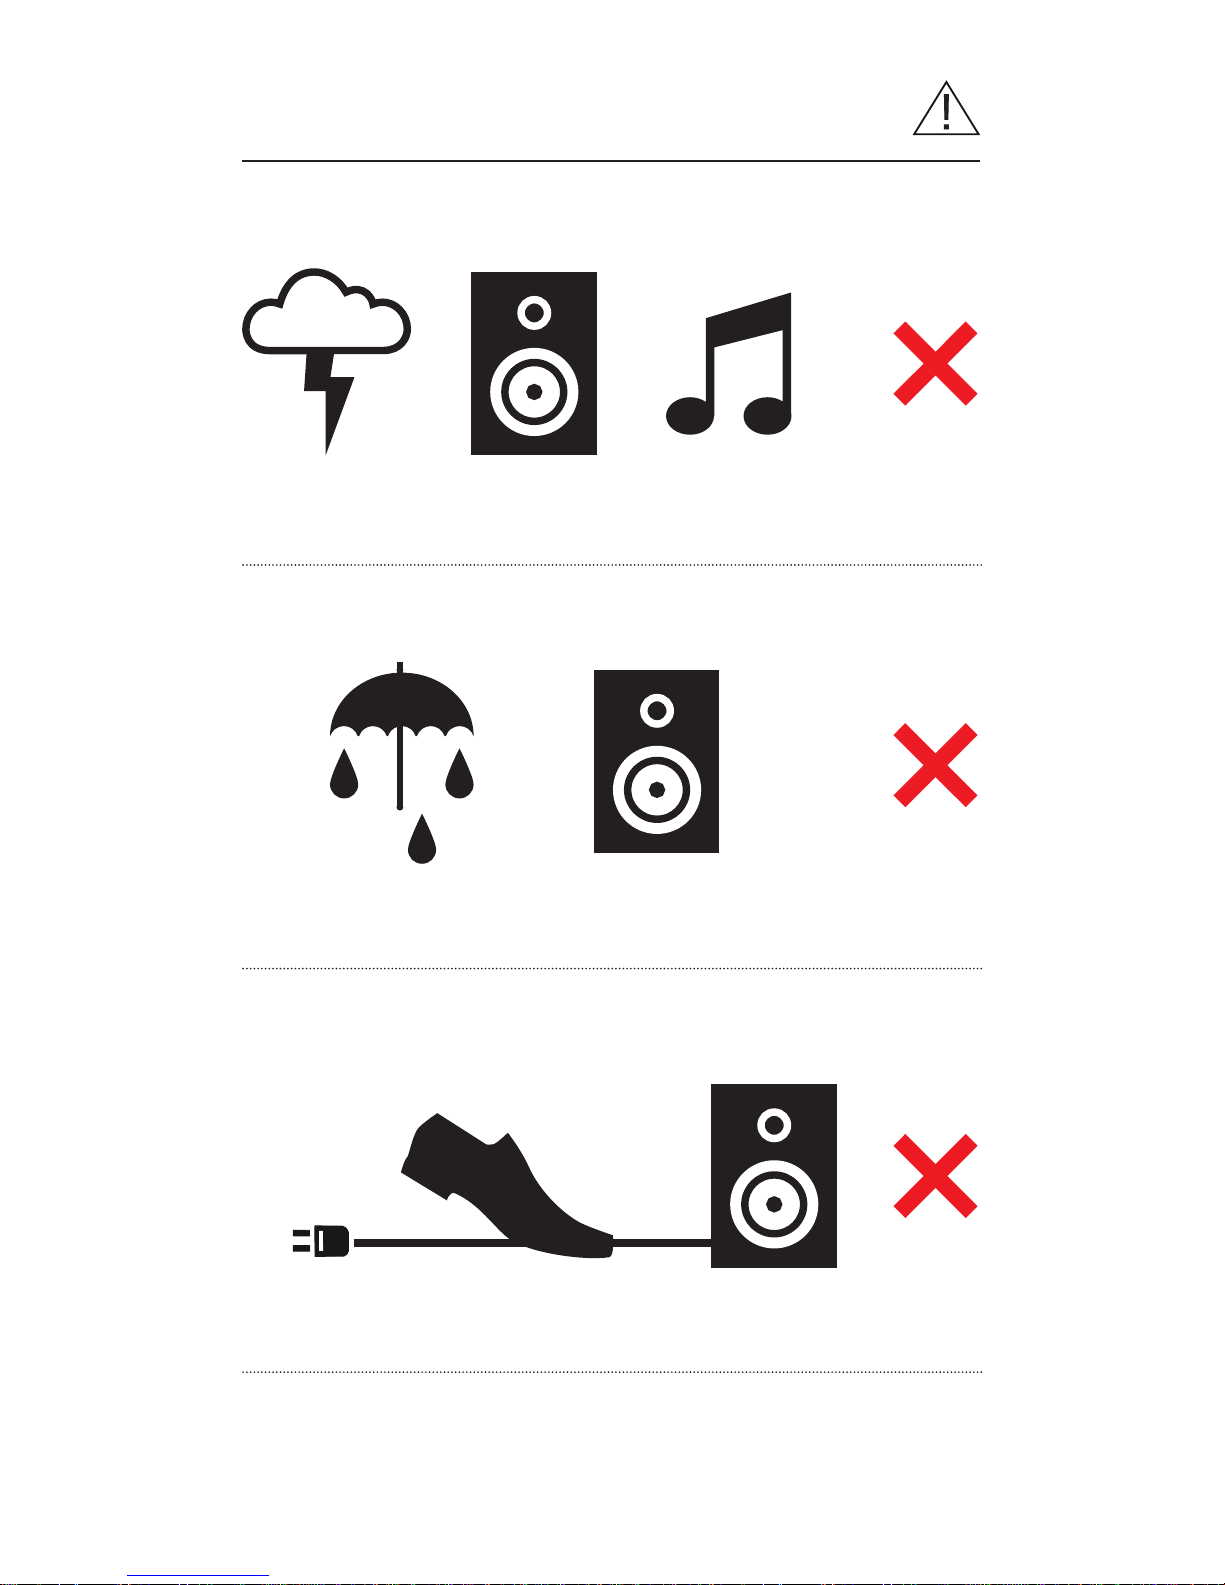
18
SAFETY PRECAUTIONS
Page 19
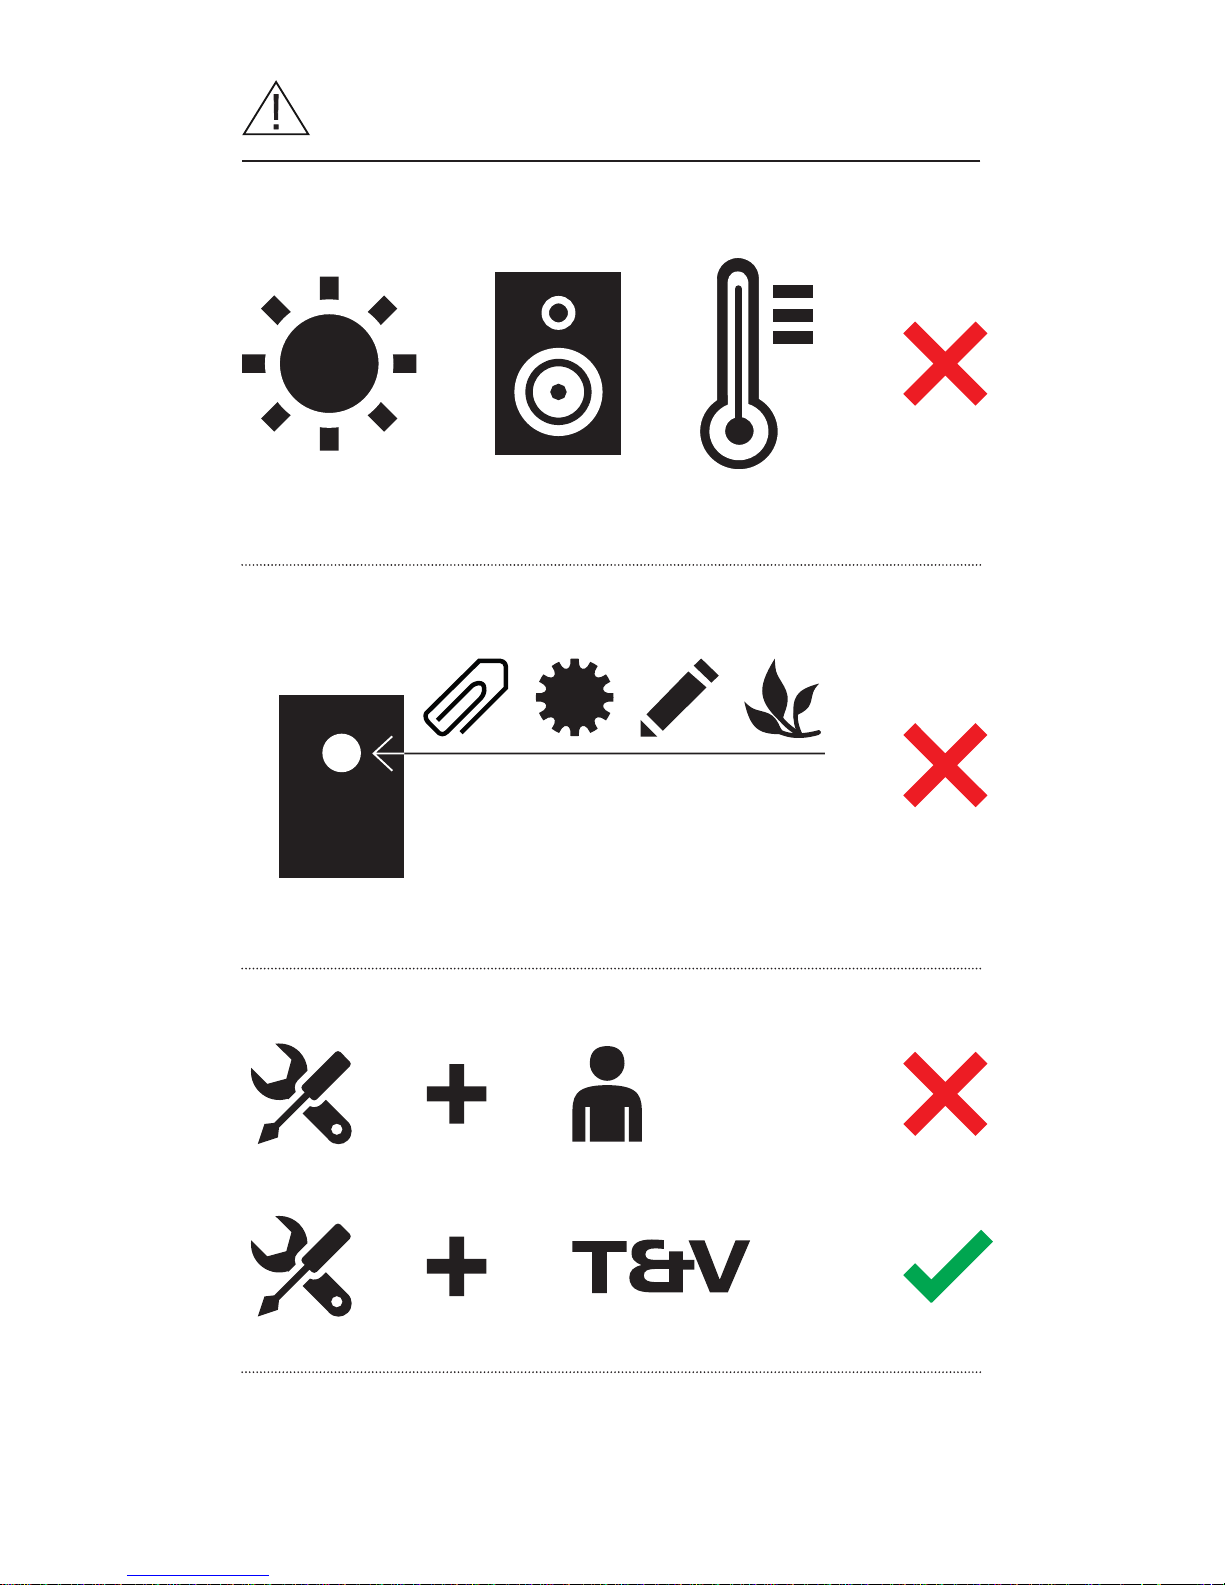
19
SAFETY PRECAUTIONS
Page 20

20
OMNQ
AWARDS
Page 21

Before contacting our official
service please verify the
following:
Read the manual carefully;
follow the instructions to verify
that the product works well.
To have a better support, we
suggest you register your product
on our website
www.thonet-vander.com
DEUTSCHE
DESIGNTECHNIK
WARRANTY
Page 22

1. THONET & VANDER (hereinafter T&V) undertakes to satisfactorily take action respect to
any defect of its product’s material or manufacturing as long as its warranty is valid. If your
product presents problems during such term of validity, you will have to contact the point of
sale where you acquired such product. Your product shall be examined there to verify whether
it is in condition to be accepted and if it has all of its parts. The purchase invoice shall also be
requested together with the warranty certificate in case it has been extended on our website
www.thonet-vander.com.
2. The warranty granted by T&V is valid for all official distributors.
3. The international WARRANTY for T&V Speakers is 1 (one) YEAR from the purchase date. Such
warranty may be extended for 2 (two) more years, provided you have registered your product
in www.thonet-vander.com within 30 days from your product’s purchase date.
4. The product’s serial number shall be perfectly legible to execute the warranty in the event
of making a claim.
5. Non fulfillment of these terms and conditions shall entail the cancellation of any rights deriving from T&V’s international warranty system.
6. Products have been designed to operate with each country’s power regulations.
7. Warranty exclusions:
7.1 Defects in the residence’s electrical installations, such as overvoltage, low voltage and
power surge.
7.2 Incorrect connection, installation and use of this device, failing to comply with the use
manual specifications.
7.3 Knocks, mishandlings, accidents of any nature and origin and/or unauthorized modifications that may damage its functioning, at T&V’s discretion.
7.4 Repair or attempt to repair by a T&V non-authorized person.
8. This warranty does not cover transport costs.
9. This warranty does not include modifications required to adapt the product to different vol-
tages.
10. Should the device and/or components fail to operate according to the specifications during
any time within the warranty period, T&V, at is sole discretion, shall repair or replace such
device with no additional charge whatsoever.
11. T&V shall make this warranty effective within 30 (thirty) days from the date of delivery of the
device or components to our laboratory. Since these products are manufactured with imported
components, the time of repair will depend on the regulations in force on the import of parts.
12. T&V shall not be held liable for any damage and/or injury ocassionally suffered by third
parties; in no event shall T&V be held liable with respect to the purchaser or any other party
that may be damaged, including loss of profit, lost savings or any other direct or indirect action
related to the use or inability to use the device or component. In no event shall the liability to
the purchaser or any other part (arising out of a claim under a contract or non-contractual
obligations) exceed the aggregate amount of the device or component price.
TERMS AND CONDITIONS
Thonet & Vander Germany GmbH
Page 23
to find out more about us visit
thonet-vander.de
/thonetandvander
/thonetandvander
/ThonetVander
/thonetandvander
@ThonetVander
+ThonetVander
Page 24
Thonet & Vander® Germany GmbH. Königstorgraben 11, (90402) Nürnberg.
D
D
H
H
E
E
E
U T S
S I
I K
C
CG N
N
T
 Loading...