

Page 1
Safety Information
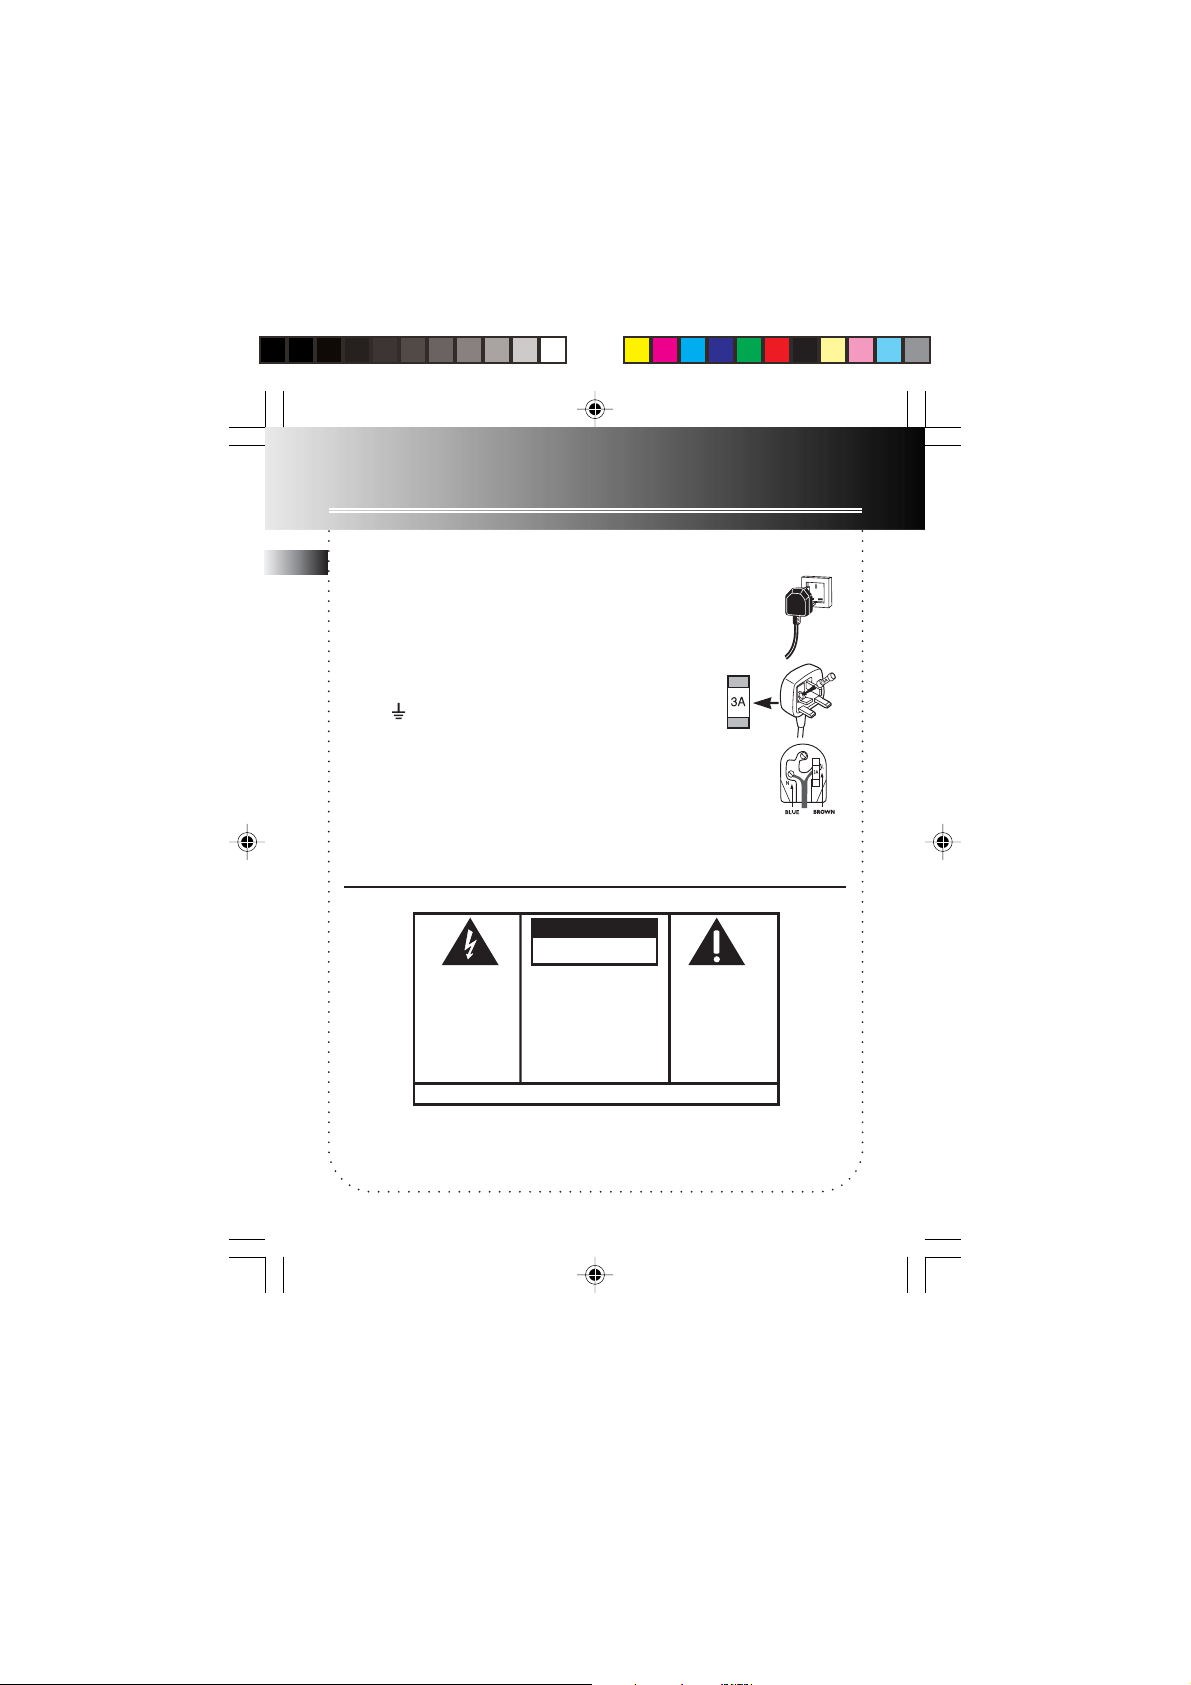
MAINS CONNECTIONS (FOR UNITED KINGDOM ONLY)
EN
CAUTION:
Do NOT under any circumstances plug the severed plug
into any mains socket as this could result in electric
shock.
Do NOT make any connection to the terminal in the
plug which is marked by the letter E or by the earth
symbol or coloured green and yellow.
A fuse plug must be fitted with a 3A fuse approved by
ASTA or BSI to BS 1362 and fuse covers must always be
securely replaced. If your unit does not work, the fuse
may be blown.
CAUTION
RISK OF ELECTRIC SHOCK
THE LIGHTNING
FLASH AND ARROWHEAD WITHIN THE
TRIANGLE IS A
WARNING SIGN
ALERTING YOU OF
"DANGEROUS
VOLTAGE" INSIDE
THE PRODUCT.
SEE MARKING ON BOTTOM / BACK OF PRODUCT
DO NOT OPEN
CAUTION: TO REDUCE THE
RISK OF ELECTRIC SHOCK,
DO NOT REMOVE COVER
(OR BACK). NO USERSERVICEABLE PARTS INSIDE. REFER SERVICING
TO QUALIFIED SERVICE
PERSONNEL.
power cord into
a mains power
THE EXCLAMATION
POINT WITHIN THE
TRIANGLE IS A
WARNING SIGN
ALERTING YOU OF
IMPORTANT
INSTRUCTIONS
ACCOMPANYING
THE PRODUCT.
Connect the
socket
WARNING:
SHOCK HAZARD,
TO RAIN OR MOISTURE.
C_RR520CD EN 5/20/04, 1:06 PM1
TO PREVENT FIRE
DO NOT EXPOSE THIS PRODUCT
OR ELECTRICAL
Page 2
Safety Information
CAUTION!
Invisible laser radiation when open. Avoid
exposure to beam. Class 1 laser product.
This system must be opened only by
qualified technicians to prevent accidents
caused by the laser beam.
LASER λ = 780nm, P max=5 mW
Rating Information : At the bottom of the
unit.
This unit complies with the existing
requirements.
In accordance with the rating
plate of the unit, this unit current
standards concerning electrical
safety and electromagnetic
compatibility.
Please respect the environment
Before throwing any batteries
away, consult your distributor
who may be able to take them
back for specific recycling.
Have a Blast-Just Not in your
eardrums
Make sure you turn down the
volume on the unit before you
put on headphones. Increase the
volume to the desired level only
after headphone are in place.
ADVARSEL!
USYNLIG LASERSTRÅLNING VED ÅBNING NAR
YDERE ER UDE AF FUNKTION.
SIKKERHEDSAFBR
UNGDÅ UDSAETTELSE FOR STRÅLNING.
VORSICHT!
UNSICHTBARE LASERSTRALUNG
WENN ABDECKUNG GEÖFFNET UND SICHERHEITS–
VERRIEGELUNG ÜBERBRÜCKT.
NICHT DEM LASERSTRAHL AUSSETZEN!
CAUTION – INVISIBLE LASER RADIATION
WHEN OPEN AND INTERLOCKS FAILED OR
DEFEATED. AVOID EXPOSURE TO BEAM.
ATTENTION –
RAYONNEMENT LASER INVISIBLE
DANGEREUX EN CAS D'OUVERTURE ET LORSQUE
LA SECURITE EST NEUTRALISEE.
EXPOSITION DANGEREUSE AU FAISCEAU.
VARNING–
OSYNLIG LASERSTRÅLNING NÄR DENNA DEL
ÄR ÖPPNAD OCH SPÄRRAN ÄR URKOPPLADE.
BETRAKTA EJ STRÅLEN.
VARO!
AVAT TAESSA JA SOUJALUKITUS OHITETT
OLET AL
TTIINA NÄKYMÄTTÖMÄLLE.
LASERSÄTEIL YLLE ÄLÄ KA TSO SÄTEESEEN.
CLASS 1 LASER PRODUCT
LASER KLASSE 1
APP
AREIL A LASER DE CLASSE 1
LUOKAN 1 LASERLAITE
KLASS 1 LASERAPP
AESSA
T
ARA
EN
C_RR520CD EN 5/20/04, 1:06 PM2
Page 3
Safety Information
EN
• Do not use your set
immediately after transport
from a cold place to a warm
place: there may be
condensation problems.
• This set uses a laser beam. To prevent
any accident due to this type of beam,
the set should only be opened by
properly trained personnel.
• Make sure that you keep your set
away from water and high
temperatures.
• Do not expose your set to water and
excessively high temperatures.
• To prevent personal injury, do not
reverse any battery and do not
mix battery types.
Ecology
Help protect the environment we recommend that you
dispose of used batteries by
putting them into specially
designed receptacles.
Maintenance
Clean the unit with a soft
cloth, or a damp chamois
leather. Never use solvents.
C_RR520CD EN 5/20/04, 1:06 PM3
Page 4
Table of Content
Safety Information
Before Your Begin ............................ 2
1. Before Plug-In .............................. 2
Automatic Time Set ............................ 2
Setting Time Zone ...............................2
Time Zone (Table 1) ............................ 2
2. Plugging In for Power ................ 3
3. Daylight Saving Time .................. 3
General Controls .............................. 4
Front View ................................................ 4
Top View ...................................................4
Side Views .................................................5
Display .............................................. 6
Setting the Clock ............................. 7
Weekday Setting ...................................... 7
Setting Clock ............................................. 7
Operating the Radio ........................ 8
Built-In AFC ............................................... 8
Antennas ................................................... 8
Turning on/off the Radio ........................ 8
Selecting Bands ........................................ 8
Tuning to Stations .................................... 8
Radio Frequency Memory ....................... 9
CD Player .......................................... 9
Play and Pause CD ................................... 9
Stop ........................................................... 9
Skip/Search Tracks .................................... 9
Playback Options ...................................... 9
Alarm Settings ............................... 10
Setting Alarm Time ................................ 10
Selecting Alarm Source .......................... 10
Alarm Tone ............................................. 10
Radio Alarm ............................................ 10
CD Alarm ................................................. 11
Cancel Alarm Setting ............................. 11
Turning off Alarm .................................. 11
Operating the Clock ....................... 12
Sleep Mode ............................................. 12
Nap Mode ............................................... 12
Snooze Alarm Operation ....................... 13
Weekend Cancel ..................................... 13
Seconds Time Display ............................. 13
Display Brightness .................................. 13
Installing Back-Up Batteries .......... 14
Battery Back-Up ................................ 14
Installing Batteries ............................14
Power Failure Indicator .................... 14
Care and Maintenance .................. 15
EN
C_RR520CD EN 5/20/04, 1:06 PM4
1
Page 5
Before You Begin
1. Before Plug-In
EN
Automatic Time Set
You do not have to set the clock time
as a built-in automatic time set system
is equipped in this clock powered by 3V
(2 x “AA” batteries (included)). All you
have to do is to plug this clock for
power and current time will be shown
automatically.
Before plugging in for power, follow
the steps below to select time zone.
TIME ZONE (Table 1)
1
Ireland
Portugal
UK (London)
Austria
Czech republic
France (Paris)
Germany
Holland
Poland
Sweden
2
Italy
Spain
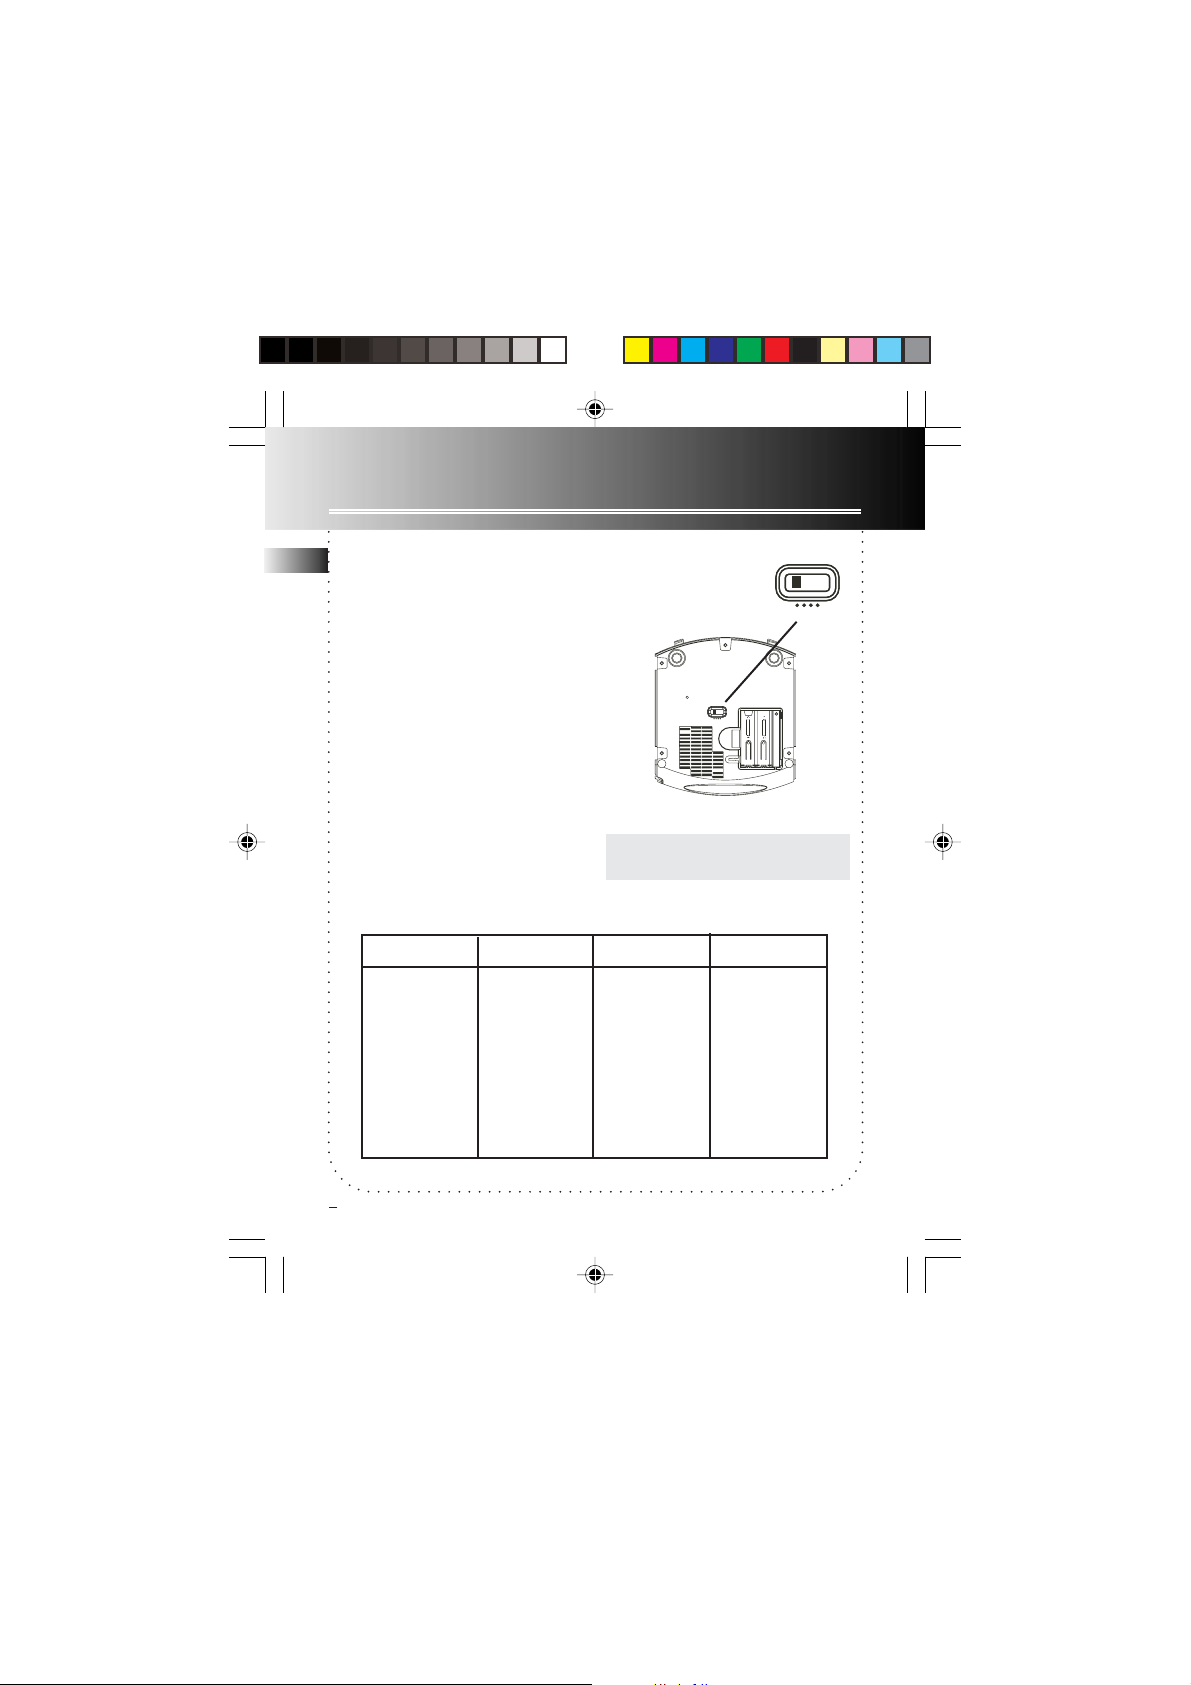
Setting Time Zone
You may slide the time
zone selector at the
bottom of the clock to
1,2,3 or 4.
1
3
2
4
Refer to the Time Zone table below
for corresponding regions.
3
Eastern Europe
Finland
Greece (Athens)
Russia (Moscow)
1
4
3
2
UM3/AA/LR6
UM3/AA/LR6
4
2
C_RR520CD EN 5/20/04, 1:06 PM5
Page 6
Before Your Begin
e
2. Plugging In For Power
POWER SUPPLY: 230V~50Hz
NoteNote
Note:
NoteNote
Power is fed to the unit even when it
is not functioning. To cut the power
supply off, the power cable must be
unplugged.
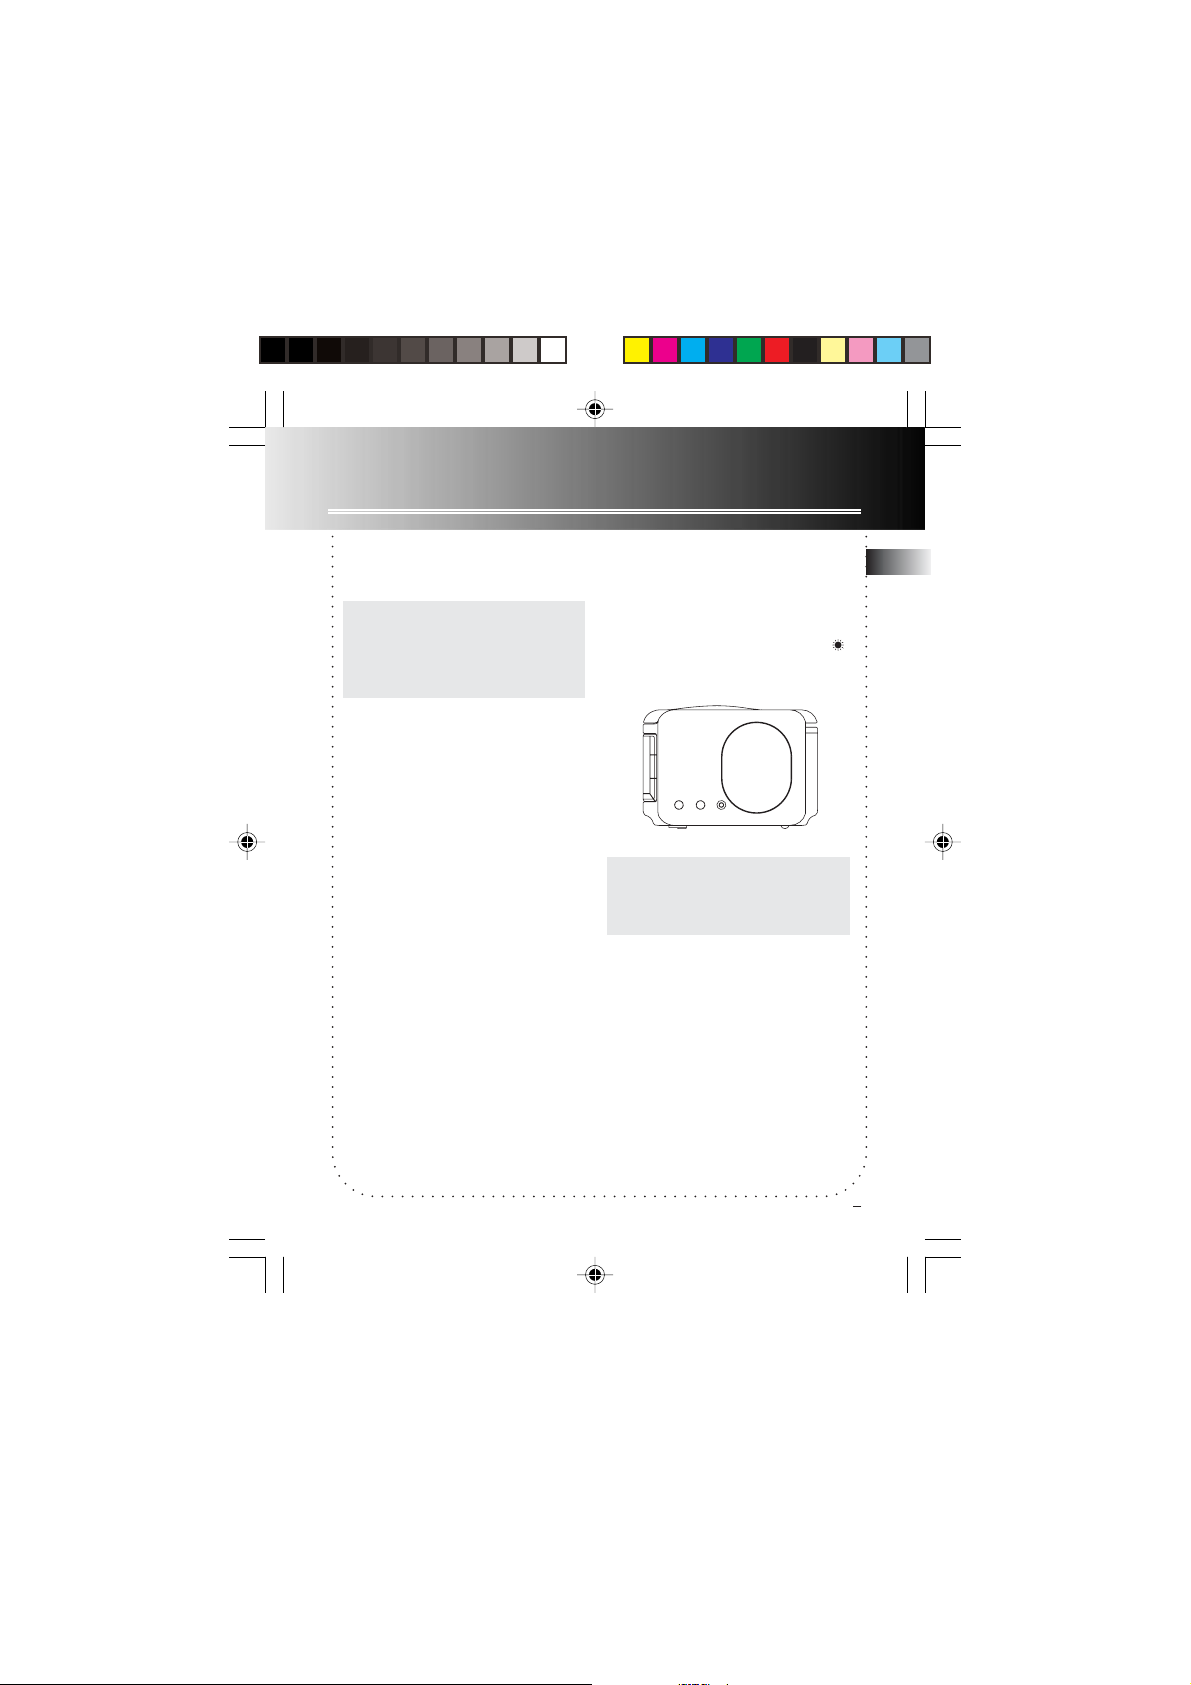
3. Daylight Saving Time
Press and hold DAYLIGHT SAVING
button at the side of the unit to turn on/
off daylight saving time in areas
observing/ not observing such time
change. The daylight saving time icon
will be displayed when the feature is
activated.
DAYLIGHT
WEEKEND
NAP
SAVING
CANCEL
WARNING:WARNING:
WARNING: Please avoid playing with
WARNING:WARNING:
the DAYLIGHT SAVING button and
TIME ZONE switch after entering
the Clock/Wake set mode.
EN
3
C_RR520CD EN 5/20/04, 1:06 PM6
Page 7

General Controls
Front View
EN
RADIO ON
BAND
MEMO
RECALL
MEMO
SET
REV
FWD
TIME
ALARM
OFF
SLEEP
ALARM
CANCEL
WAKEFWDREW SET
ALARM SET
SET
1
2
RADIO ON / BAND - Turns radio on.
Selects between FM and MW radio band.
OFF - Turns power off.
MEMO RECALL - In radio mode, access
memory location.
MEMO SET - In radio mode, stores preset
memory.
SLEEP - Activates sleep function.
ALARM CANCEL - Cancels alarm
settings.
REV - In clock and alarm setting
mode, counts backwards for clock time.
In radio mode, tunes down radio
frequency.
FWD - In clock and alarm setting
mode, moves forward for clock time.
In radio mode, tunes up radio frequency.
SET TIME / ALARM - Enters clock,
weekday and alarm setting mode.
ALARM SET 1 - Activates Alarm 1
settings and change alarm 1 mode.
ALARM SET 2 - Activates Alarm 2
settings and change alarm 2 mode.
Top View
Track
MODE
Station
W
p
a
k
U
e
PLAY/PAUSE - Starts and pauses CD
playback.
STOP - Stops CD playback.
SKIP FORWARD - Skips to the next
track.
SKIP BACKWARD - Skips to the
previous track.
WAKE UP TRACK / STATION - Selects
Wake to CD mode track number and
saves selected radio station as wake up
station.
MODE - Selects among playback
options: random playback, repeat all,
and repeat all with random playback.
SNOOZE - Enters snooze mode where
the alarm will quiet but will sound again
once the snooze period is over.
Note: Note:
Note: REV / FWD and SKIP
Note: Note:
FORWARD / SKIP BACKWARD
buttons have the same function.
4
C_RR520CD EN 5/20/04, 1:06 PM7
Page 8

General Controls
Side Views
DAYLIGHT
WEEKEND
NAP
SAVING
CANCEL
NAP - Activates nap function.
WEEKEND CANCEL - Deactivates Wake
function on weekends (SAT and SUN).
DAYLIGHT SAVING - Enable and
disable Daylight Saving Time in areas
observing/not observing such time
change.
DISPLAY
BRIGHTNESS
VOLUME
DISPLAY BRIGHTNESS - Adjusts display
light brightness.
VOLUME - Adjusts volume level.
Headphones - Insert headphones
here.
Note:Note:
Note: Speakers will still sound when
Note:Note:
any wake mode is activated even if
headphone is plugged in.
EN
C_RR520CD EN 5/20/04, 1:06 PM8
5
Page 9

Display
e
e
EN
Clock Display
Alarm 1 Display
WEEKEND
CANCEL
MON
Clock Display Section
- In clock setting mode.
- Daylight Saving Time activated.
WEEKEND CANCEL - Weekend cancel
is activated. Wake settings are
cancelled on Sat and Sun.
- Nap activated.
- Sleep activated.
MW - In MW radio band.
FM - In FM radio band.
CD - In CD mode.
- random playback
- repeat disc.
- repeat disc and random
playback.
- In CD mode, displays track
number.
- In radio mode, displays memory
location.
TUE
SAT
FRI
THU
WED
MHz / kHz - Radio frequency unit.
MON TUE WED THU FRI SAT SUN -
Weekday indicator
SUN
Alarm 2 Display
Alarm 1 and Alarm 2 Display
1 - Alarm 1 settings.
2 - Alarm 2 settings.
- Alarm to CD.
- Alarm to tone.
- Alarm to radio.
- Alarm time.
6
C_RR520CD EN 5/20/04, 1:06 PM9
Page 10

Setting the Clock
This unit has a built-in automatic time
set system that automatically generates
the correct clock time once the unit is
plugged in. You are not required to set
the clock manually, however, in case
the memory holding batteries are
accidentally removed, you may reset
the clock as follow:
Be sure Time Zone and Daylight Saving
Time is adjusted before operating the
clock.
Weekday Setting
1. Press SET TIME / ALARM button
repeatedly until the weekday icon is
blinking.
2. Press REV or FWD to select the day.
3. The setting will automatically be save
if no buttons are pressed after a few
seconds.
You can also press SET TIME /
ALARM once to save you setting and
return to standby mode.
Setting Clock
1. Press the SET TIME / ALARM button
repeatedly until the clock setting icon
is displayed.
2. Press REV or FWD to set the time.
Press and hold the respective buttons
to fast forward or fast reverse clock
time.
3. Clock time will automatically be
saved if no buttons are pressed after
a few seconds.
You can also press SET TIME /
ALARM twice to save your setting
and return to standby mode.
EN
C_RR520CD EN 5/20/04, 1:06 PM10
7
Page 11

Operating the Radio
Built-In AFC
EN
The Built-In Automatic Frequency
Control (AFC) works only on FM. It
helps to reduce drift on FM reception
and to keep the radio locked in on the
FM station to which it is tuned.
Antennas
MW Antenna - A built-in ferrite rod
antenna eliminates the need for an
outside antenna for MW reception.
Rotating the unit slightly may improve
reception of distant MW stations.
FM Aerial Antenna - Uncoil the FM
aerial antenna and make sure it is fully
extended. Changing the position of the
antenna may improve reception. You
may even want to tape it to the wall
behind the unit if possible. The higher
the better.
Turning on/off the Radio
Press RADIO ON/BAND to turn on the
radio.
Press OFF to turn off the radio.
Selecting Bands
Press RADIO ON/BAND repeatedly to
select between FM and MW band.
Tuning to Stations
Press REV to search down radio
frequency.
Press FWD to search up radio
frequency.
Press and hold REV or FWD to
automatically search for the next
station in the respective direction.
8
C_RR520CD EN 5/20/04, 1:06 PM11
Page 12

Operating the Radio
Radio Frequency Memory
1. Refer to “Selecting Bands” and
“Tuning to Stations” to select the
station to be stored into memory.
2. Press MEMO SET and the next
available memory location will be
displayed with the memory icon
flashing.
3. To select another memory location,
press MEMO RECALL.
4. Once the desired memory location is
selected, press MEMO SET to save
setting.
CD Player
Play and Pause CD
Press PLAY/PAUSE to begin CD
playback.
Press PLAY/PAUSE during playback
to pause CD. Press again to resume.
Note:Note:
Note: nd will blink on the display if
Note:Note:
the disc compartment is empty.
STOP
Press STOP to end playback.
Skip/Search Tracks
Press SKIP FORWARD to skip to the
next track.
Memory Recall
1. Press MEMO RECALL repeatedly to
recall preset stations when radio is
on.
Cancel Memory
1. Press MEMO RECALL to select the
memory location you want to cancel.
2. Press and hold MEMO SET to cancel
memory setting.
Press SKIP BACKWARD to skip to
the previous track.
Press and hold SKIP FORWARD or SKIP
BACKWARD to search fast forward or
backward for the current track in the
respective direction.
Playback Options
Press MODE repeatedly to toggle
playback options.
The corresponding indicator for each
option will light when selected.
- Random playback.
- Repeat All.
- Random playback and Repeat
all.
EN
C_RR520CD EN 5/20/04, 1:07 PM12
9
Page 13

Alarm Settings
Setting Alarm Time
EN
1. Press SET TIME / ALARM button
repeatedly until alarm 1 or alarm 2
icon is blinking.
2. Press REV or FWD to set the alarm
time.
Press and hold REV or FWD to fast
search reverse or forward clock time.
Selecting Alarm Source
Press ALARM SET 1 or ALARM SET 2
repeatedly to select alarm source for
the respective alarm setting.
You may be woken up by TONE ,
RADIO or CD .
The corresponding icon will show on
the display.
Alarm Tone
When alarm tone is selected, the
icon will be displayed.
The unit is equipped with GRAD-U-
WAKE feature, the alarm tone volume
will increase gradually to its maximum
in about 30 to 45 seconds.
Tip:Tip:
Tip: If you set SLEEP function with
Tip:Tip:
low volume level before going to bed,
we advise using Alarm tone mode to
wake you up since its volume will
automatically increase.
Radio Alarm
When radio alarm is selected, the
icon will be displayed.
Setting Alarm Station
1. Select radio band.
2. Select desired station.
3. Press WAKE UP TRACK / STATION to
save the selected station as the wake
up station. The “AL” indicator lights
on the display.
4. Adjust the volume by turning
VOLUME.
Note:Note:
Note: When you turn off the alarm by
Note:Note:
OFFOFF
pressing
OFF, the alarm will turn on at
OFFOFF
the same time tomorrow.
10
C_RR520CD EN 5/20/04, 1:07 PM13
Page 14

Alarm Settings
CD Alarm
The CD alarm is selected, the icon
will be displayed.
1. Insert a disc into the CD
compartment.
2. Press and hold WAKE UP TRACK /
STATION then press REV or FWD to
select the track to wake up to.
3. Press PLAY/PAUSE to listen to the
wake up volume.
4. Adjust the volume until the desired
volume is reached.
5. Press OFF to turn off the unit.
Note:Note:
Note: If the CD compartment is
Note:Note:
empty, the alarm tone will sound
instead.
Cancel Alarm Setting
1. Press ALARM CANCEL.
2. Press ALARM SET 1 or ALARM SET 2
button to cancel the corresponding
wake function permanently.
OFF will be displayed as the Wake
setting.
Turning off Alarm
Silence the alarm momentarily
Press SNOOZE. The alarm will sound
again when the snooze period is over.
(see “Snooze Alarm Operation”).
Stop the alarm
Press OFF. Then, the alarm will be on
the following day at the same time.
Tip:Tip:
Tip: You can activate the previously
Tip:Tip:
set alarm time by pressing
SET 1 SET 1
SET 1 or
SET 1 SET 1
Note:Note:
Note: Speakers will still sound when
Note:Note:
any wake mode is activated even if
headphone is plugged in.
Note: Note:
Note: When AC power is interrupted
Note: Note:
and the unit is operating through the
DC backup batteries, all wake mode
will work with buzzer instead.
ALARM SET 2ALARM SET 2
ALARM SET 2 button.
ALARM SET 2ALARM SET 2
ALARMALARM
ALARM
ALARMALARM
EN
C_RR520CD EN 5/20/04, 1:07 PM14
11
Page 15

Operating the Clock
Sleep Mode
EN
In sleep mode, the unit will turn off
automatically after a specified time.
Setting Sleep Time
1. Press SLEEP then the time display will
exhibit 0:59 and the radio will turn
on.
2. While holding SLEEP, press REV or
FWD to set the sleep time.
The time range is from 1 minute to 2
hours.
3. Release SLEEP and the current time
will be shown again.
The sleep icon is displayed when
it is activated.
Sleep to Radio
The radio is turned on after step 3 in
Setting Sleep Time and you may
select the station as usual. The radio
will turn off when the preset time
elapses.
If you decide to turn off the radio
sooner, press SNOOZE or OFF.
Sleep to CD
Press PLAY/PAUSE after step 3 in
Setting Sleep Time to begin CD playback.
The unit will turn off automatically once
sleep time is reached.
View Remaining Time
Press SLEEP to read the remaining
sleep time.
Note: Note:
Note: When
Note: Note:
the sleep time will be the same as the
one you have set before.
SLEEP SLEEP
SLEEP is activated again,
SLEEP SLEEP
Nap Mode
This function wakes you up after a short
period of time. Only alarm sound can be
selected for Nap.
1. Press NAP and release. The
indicator will flash. During this
period, adjust NAP time by pressing
REV or FWD. The range is from 10
minutes to 2 hours.
2. The clock will be shown after 5
seconds if no button is pressed. The
NAP indicator will lit up.
View NAP time
Press NAP once to show time left.
Cancel NAP
Press and hold NAP to cancel the nap
setting.
Stop the Nap alarm
Press NAP or follow “Turning off Alarm”.
Note:Note:
Note: Nap will not be activated again
Note:Note:
the following day at the same time.
Nap alarm is equipped with
WAKEWAKE
WAKE feature.
WAKEWAKE
GRAD-U-GRAD-U-
GRAD-U-
GRAD-U-GRAD-U-
12
C_RR520CD EN 5/20/04, 1:07 PM15
Page 16

Operating the Clock
Snooze Alarm Operation
This operation allows extra sleep time
after the alarm is on. The alarm will
be off by pressing SNOOZE until the
snooze period is over. Snooze function
can be used repeatedly up to 2 hours.
After this, the alarm will turn off until
the next alarm conditions are met. Set
the “quiet” period as follow:
1. Press and hold SNOOZE.
2. Press REV or FWD to set the “quiet”
period (the default time is 9 minutes)
from 1 minute to 30 minutes.
Release button, then, the “quiet”
period is set.
Weekend cancel
If the weekend cancel function is
activated, the alarm will be active
during MON to FRI, and inactive during
SAT and SUN.
Activate Weekend Cancel Function
• Press and hold the WEEKEND
CANCEL button until the WEEKEND
CANCEL icon remains lit on the display.
Deactivate Weekend Cancel Function
• Press and hold the WEEKEND
CANCEL button to cancel this function
(the icon “Weekend Cancel” will
disappear.)
Seconds Time Display
The unit may display in seconds.
1. Press and hold REV or FWD to show
seconds display.
2. Release REV or FWD to return to
the hour and minute display.
Display Brightness
You can adjust the backlight of the
display with the DISPLAY BRIGHTNESS
button. There are three levels you may
select from:
Observe the change when you press
DISPLAY BRIGHTNESS repeatedly.
EN
C_RR520CD EN 5/20/04, 1:07 PM16
13
Page 17

Back-up Batteries
EN
1
3
2
4
UM3/AA/LR6
UM3/AA/LR6
Battery Back-Up
The power failure protection circuit
will not operate unless battery is
installed.
When the battery backup functions,
the digital display will not light,
however, the function of alarm still
occurs during the power interruption if
remaining battery power is adequate.
Normal operation will resume after AC
power is restored so you will not have
to reset the time or the alarm.
Installing batteries
1. Unlock the battery compartment
door (located at the bottom of
the radio) by sliding the tab away
from the door.
UM3/AA/LR6
UM3/AA/LR6
2. Remove battery compartment door
(located at the bottom of the radio)
by applying thumb pressure to the
tab on battery door and then lift the
door out and off the cabinet.
UM3/AA/LR6
UM3/AA/LR6
3. Before inserting the batteries,
observe the polarities (That is, + and
-) of the battery, then relate the
polarities to the engraved diagram
inside the battery compartment.
Connect 2 “AA” battery to the
connector plug.
4. Replace the compartment door and
lock the door in place by pushing the
tab towards the compartment door.
NOTE:NOTE:
NOTE:
NOTE:NOTE:
We recommend that you replace the
batteries every year.
Power Failure Indicator
When AC power is interrupted
(disconnected) for a short period of
time, both time and alarm settings will
change (unless batteries are installed).
After AC power is restored
(reconnected), the Digital Display will
blink to indicate that power was
interrupted and you should readjust the
time and alarm settings.
14
C_RR520CD EN 5/20/04, 1:07 PM17
Page 18

Care and Maintenance
Handling Compact Discs
• Do not touch the signal surfaces. Hold
by the edges, or by one edge and the
hole.
• Do not affix labels or adhesive tape to
the label surfaces. Also, do not scratch
or damage the label.
• Discs rotate at high speeds inside the
player. Do not use damaged (cracked
or warped) discs.
Cleaning Compact Discs
• Dirty discs can cause poor sound
quality. Always keep discs clean by
wiping them gently with a soft cloth
from the inner edge toward the outer
perimeter.
• If a disc becomes dirty, wet a soft
cloth in water, wring it out well, wipe
the dirt away gently, and then remove
any water drops with a dry cloth.
• Do not use record cleaning sprays or
anti-static agents on discs. Also, never
clean discs with benzene, thinner, or
other volatile solvents which may
cause damage to the disc surface.
CD Lens Care
When your CD lens gets dirty it can also
cause the unit to output poor sound
quality. To clean the lens you will need to
purchase a CD lens cleaner which can
maintain the output sound quality. For
instructions on cleaning the CD lens,
refer to the ones accompanying the lens
care.
Cleaning the Exterior
Prior to cleaning the exterior, be sure to
unplug the power cord from the AC
power outlet. Wipe the exterior with a
soft, clean, and slightly waterdampened cloth.
Precautions
• Never open the cabinet under any
circumstances. Any repairs or
internal adjustments should be
made only by a trained technician.
•Warning: Never operate this product
with the cabinet removed.
• The CD player of this unit uses a
laser to read the music on the disc.
The laser mechanism corresponds to
the cartridge and stylus of a record
player. Although this product
incorporates a laser pick-up lens, it is
completely safe when operated
according to directions.
• Discs rotate at high speed inside the
player. Do not use damaged, warped
or cracked discs.
• Do not touch the pick-up lens which
is located inside the disc
compartment. Also, to keep dust
from collecting on the pick-up lens,
do not leave the compartment door
open for an extended period of
time.
EN
C_RR520CD EN 5/20/04, 1:07 PM18
15
 Loading...